- AJAX Tutorial
- AJAX - Home
- AJAX - What is AJAX?
- AJAX - History
- AJAX - Dynamic Versus Static Sites
- AJAX - Technologies
- AJAX - Action
- AJAX - XMLHttpRequest
- AJAX - Sending Request
- AJAX - Types of requests
- AJAX - Handling Responses
- AJAX - Handling Binary Data
- AJAX - Submitting Forms
- AJAX - File Uploading
- AJAX - FormData Object
- AJAX - Send POST Requests
- AJAX - Send PUT Requests
- AJAX - Send JSON Data
- AJAX - Send Data Objects
- AJAX - Monitoring Progress
- AJAX - Status Codes
- AJAX - Applications
- AJAX - Browser Compatibility
- AJAX - Examples
- AJAX - Browser Support
- AJAX - XMLHttpRequest
- AJAX - Database Operations
- AJAX - Security
- AJAX - Issues
- Fetch API Basics
- Fetch API - Basics
- Fetch API Vs XMLHttpRequest
- Fetch API - Browser Compatibility
- Fetch API - Headers
- Fetch API - Request
- Fetch API - Response
- Fetch API - Body Data
- Fetch API - Credentials
- Fetch API - Send GET Requests
- Fetch API - Send POST Requests
- Fetch API - Send PUT Requests
- Fetch API - Send JSON Data
- Fetch API - Send Data Objects
- Fetch API - Custom Request Object
- Fetch API - Uploading Files
- Fetch API - Handling Binary Data
- Fetch API - Status Codes
- Stream API Basics
- Stream API - Basics
- Stream API - Readable Streams
- Stream API - Writeable Streams
- Stream API - Transform Streams
- Stream API - Request Object
- Stream API - Response Body
- Stream API - Error Handling
- AJAX Useful Resources
- AJAX - Quick Guide
- AJAX - Useful Resources
- AJAX - Discussion
AJAX - Quick Guide
What is AJAX?
AJAX stands for asynchronous Javascript and XML. AJAX is not a programming language or technology, but it is a combination of multiple web-related technologies like HTML, XHTML, CSS, JavaScript, DOM, XML, XSLT and XMLHttpRequest object. The AJAX model allows web developers to create web applications that are able to dynamically interact with the user. It will also be able to quickly make a background call to web servers to retrieve the required application data. Then update the small portion of the web page without refreshing the whole web page.
AJAX applications are much more faster and responsive as compared to traditional web applications. It creates a great balance between the client and the server by allowing them to communicate in the background while the user is working in the foreground.
In the AJAX applications, the exchange of data between a web browser and the server is asynchronous means AJAX applications submit requests to the web server without pausing the execution of the application and can also process the requested data whenever it is returned. For example, Facebook uses the AJAX model so whenever we like any post the count of the like button increase instead of refreshing the whole page.
Working of AJAX
Traditional web applications are created by adding loosely web pages through links in a predefined order. Where the user can move from one page to another page to interact with the different portions of the applications. Also, HTTP requests are used to submit the web server in response to the user action. After receiving the request the web server fulfills the request by returning a new webpage which, then displays on the web browser. This process includes lots of pages refreshing and waiting.

AJAX change this whole working model by sharing the minimum amount of data between the web browser and server asynchronously. It speedup up the working of the web applications. It provides a desktop-like feel by passing the data on the web pages or by allowing the data to be displayed inside the existing web application. It will replace loosely integrated web pages with tightly integrated web pages. AJAX application uses the resources very well. It creates an additional layer known as AJAX engine in between the web application and web server due to which we can make background server calls using JavaScript and retrieve the required data, can update the requested portion of a web page without casing full reload of the page. It reduces the page refresh timing and provides a fast and responsive experience to the user. Asynchronous processes reduce the workload of the web server by dividing the work with the client computer. Due to the reduced workload web servers become more responsive and fast.

AJAX Technologies
The technologies that are used by AJAX are already implemented in all the Morden browsers. So the client does not require any extra module to run the AJAX application.The technologies used by AJAX are −
Javascript − It is an important part of AJAX. It allows you to create client-side functionality. Or we can say that it is used to create AJAX applications.
XML − It is used to exchange data between web server and client.
The XMLHttpRequest − It is used to perform asynchronous data exchange between a web browser and a web server.
HTML and CSS − It is used to provide markup and style to the webpage text.
DOM − It is used to interact with and alter the webpage layout and content dynamically.
Advantages of AJAX
The following are the advantages of AJAX −
It creates responsive and interactive web applications.
It supports the development of patterns and frameworks that decrease the development time.
It makes the best use of existing technology and feature instead of using some new technology.
It makes an asynchronous call to the web server which means the client doesn't have to wait for the data to arrive before starting rendering.
Disadvantages of AJAX
The following are the disadvantages of AJAX −
AJAX is fully dependent on Javascript. So if anything happens with javascript in the browser AJAX will not support.
The debugging of AJAX applications is difficult.
Bookmarking of AJAX-enabled pages required pre-planning.
If one request can fail then it can fail the load of the whole webpage.
If JavaScript is disabled in your web browser then you are not able to run the AJAX webpage.
Conclusion
So to create dynamic web pages or applications AJAX is the best choice. It is faster and more responsive and provides asynchronous interaction between the client and server without refreshing the whole page. Now in the next article, we will see the history of AJAX.
Ajax - History
Before the introduction of AJAX, websites are developed by adding multiple loose web pages together, which are further displayed in a predefined order with the help of links embedded inside the HTML pages. So to use these web application user needs to move from one web page to another web page. So whenever the user clicks on a link to the next page he/she should wait for some seconds for a page to be loaded. Traditional web applications use HTTP requests to submit user action to the server. After receiving the request from the user the web server completes the request by returning a new web page which will further display on the web browser. Hence traditional web applications required lots of page refreshes and waiting.
Due to this, it is very hard to develop new-generation applications like google maps, real-time chatting environment, Gmail, etc. So on 18 February 2005 for the first time, Jesse James Garrett introduce AJAX to the world by writing an AJAX article named "A New Approach to Web Application". And on 5th April 2006, the W3C(world wide web consortium) release the first draft which contains the specifications for the XMLHttpRequest object. After that AJAX will be popular among web developers.
The applications developed by using AJAX are faster and more responsive as compared to traditional web applications. It improves the performance of web applications by exchanging a small amount of data to the web servers. As a result, there is no need for the servers to refresh the entire web page for every request of the user. That means using AJAX the web browser and the web server can exchange data asynchronously in the background without pausing the execution of the application and can process the returned data. To submit requests AJAX application uses a special object known as XMLHttpRequest object. It is the main object due to which AJAX can able to create asynchronous communication. And the technologies used in implementing AJAX are JavaScript, XMLHttpRequest, XML/JSON, and Document Object Model(DOM). Here Javascript handles client-side logic, XHR provides asynchronous communication with the server, XML provides a format for data interchange between the server and the client, and DOM allows manipulation and updation of the content of the web pages.
Conclusion
So this is how the introduction of AJAX creates a new revolution in the web development industry. It helps developers to create rich and interactive web applications. Now in the next article, we will learn how dynamic websites are different from static websites.
Ajax - Dynamic Versus Static Sites
Website is a collection of multiple but related web pages that contains multimedia content like text, images, videos, and audio. Each website present on the internet has their own separate URL through which we can access using web browsers. For example − https://www.tutorialspoint.com/.
Website of two types −
Static Website
Dynamic Website
Static Website
A static website is a website in which the web pages returned by the server are prebuilt source code files that are written in simple HTML and CSS. The content of the static website is fixed, which means the content of the website can only be changed by the owner(manually) of the website, are allowed to change the content of the static website on the server side. Or we can say that static websites are those websites in which the content of the website can't be manipulated or changed from the server's side.. A static website does not require any scripting languages. For example,
Dynamic Website
A dynamic website is a website in which the content of the web pages is dynamic, which means the information on the website can change automatically according to the input given by the user. Dynamic websites required back-end databases and scripting languages like PHP, Node.js, etc. To get good flexibility dynamic website require a more complex back end. Examples of dynamic websites are Netflix, Facebook, Twitter, etc.

Dynamic Versus Static Website
Following are the difference between dynamic and static websites −
| Static Website | Dynamic Website |
|---|---|
| The content of the website can not be changed at runtime. | The content of the website can be changed at runtime. |
| There is no interaction with the database. | It interacts with the database very efficiently. |
| It loads faster on the web browser as compared to a dynamic website. | It loads slower on the web browser as compared to a static website. |
| Development cost is cheap. | Development cost is high. |
| It does not require a content management system. | It required a content management system. |
| It doesn't require scripting languages. | It required scripting languages. |
| To develop a static website we required HTML, CSS, and Javascript. | To develop a dynamic website we required web languages like HTML, CSS, and Javascript along with server-side languages like PHP, Node.js, etc. |
| It delivers the same data/content every time the page loads. | It can deliver different content/data every time the page loads. |
| It has poor scalability. | It has good scalability. |
Conclusion
So these are the major differences between dynamic and static websites. Hence developers and users prefer dynamic websites over static websites. Now in the next article, we will learn about AJAX technologies.
AJAX - Technologies
The full form of AJAX is asynchronous Javascript and XML. It is a combination of web technologies that allows to establish asynchronous communication between the web server and the web browser. It creates a dynamic application that updates the content of the webpage dynamically without reloading the whole page.
AJAX is not a programming language or script language, but it combines multiple web-related technologies like HTML, XHTML, CSS, JavaScript, DOM, XML, XSLT and XMLHttpRequest object. Due to the combination of these technologies, the AJAX model allows web developers to create web applications that can dynamically interact with the user and can able to quickly make a background call to web servers to retrieve the required application data and then update the small portion of the web page without refreshing the whole web page.
AJAX does not use any new language to create dynamic web applications, it uses the technologies that are already present in the market. So makes it easier for the developers to create a dynamic web application without learning or installing new technologies. Hence the web technologies used by the AJAX model are −
Javascript − It is a scripting language for HTML and the web application. It creates a connection between HTML, CSS, and XML. It is used to create client-side functionality. It also plays an important role in AJAX. It is also used to create AJAX applications or join all the AJAX operations together.
<script src = "myexample.js"></script>
XML or JSON − XML stands for extensible markup language whereas JSON stands for JavaScript Object Notation. Both JSON and XML are used on the client side to exchange data between the web server and the client.
<?xml version = "1.0">
<root>
   <child>
      //Statements
   </child>
</root>
XMLHttpRequest − It is used to perform asynchronous data exchange between a web browser and a web server. It is a javascript object that performs asynchronous operations.
variableName = new XMLHttpRequest();
HTML and CSS − HTML stands for hypertext markup language whereas CSS stands for cascading style sheets. HTML provides markup and style to the webpage text. Or we can say it provides a structure to the web page whereas CSS is used to create more interactive web pages. It provides various styling components that define the look of the web page. CSS is independent of HTML and can be used with any XML-based markup language.
<!DOCTYPE html>
<html>
<head>
   // Header of the web page
</head>
<body>
   // Body of the web page
</body>
</html>
DOM − AJAX also has a powerful tool known as DOM(Document Object Model). It is used to interact with and alter the webpage layout and content dynamically. Or we can say that DOM is used to create a logical representation of the elements that are used to markup HTML pages. It is provided by the web browser. It is not a part of JavaScript, but using javaScript we can access the methods and the properties of DOM objects. Using DOM methods and properties we can create or modify HTML pages.
<!DOCTYPE html>
<html>
<head>
   // Header of the web page
</head>
<body>
   <p></p>
   <script></script>
</body>
</html>
Conclusion
So these are the technologies using which AJAX can able to create a dynamic web page. While using these technologies, AJAX has to keep updated its external libraries and frameworks. Now in the next article, we see the Action performed by the AJAX.
AJAX - Action
This chapter gives you a clear picture of the exact steps of AJAX operation.
Steps of AJAX Operation
- A client event occurs.
- An XMLHttpRequest object is created.
- The XMLHttpRequest object is configured.
- The XMLHttpRequest object makes an asynchronous request to the Webserver.
- The Webserver returns the result containing XML document.
- The XMLHttpRequest object calls the callback() function and processes the result.
- The HTML DOM is updated.
Let us take these steps one by one.
A Client Event Occurs
A JavaScript function is called as the result of an event.
Example − validateUserId() JavaScript function is mapped as an event handler to an onkeyup event on input form field whose id is set to "userid"
<input type = "text" size = "20" id = "userid" name = "id" onkeyup = "validateUserId();">.
The XMLHttpRequest Object is Created
var ajaxRequest;  // The variable that makes Ajax possible!
function ajaxFunction() {
   try {
      // Opera 8.0+, Firefox, Safari
      ajaxRequest = new XMLHttpRequest();
   } catch (e) {
      // Internet Explorer Browsers
      try {
         ajaxRequest = new ActiveXObject("Msxml2.XMLHTTP");
      } catch (e) {
         try {
            ajaxRequest = new ActiveXObject("Microsoft.XMLHTTP");
         } catch (e) {
            // Something went wrong
            alert("Your browser broke!");
            return false;
         }
      }
   }
}
The XMLHttpRequest Object is Configured
In this step, we will write a function that will be triggered by the client event and a callback function processRequest() will be registered.
function validateUserId() {
   ajaxFunction();

   // Here processRequest() is the callback function.
   ajaxRequest.onreadystatechange = processRequest;

   if (!target) target = document.getElementById("userid");
   var url = "validate?id=" + escape(target.value);

   ajaxRequest.open("GET", url, true);
   ajaxRequest.send(null);
}
Making Asynchronous Request to the Webserver
Source code is available in the above piece of code. Code written in bold typeface is responsible to make a request to the webserver. This is all being done using the XMLHttpRequest object ajaxRequest.
function validateUserId() {
   ajaxFunction();

   // Here processRequest() is the callback function.
   ajaxRequest.onreadystatechange = processRequest;

   <b>if (!target) target = document.getElementById("userid");
   var url = "validate?id = " + escape(target.value);

   ajaxRequest.open("GET", url, true);
   ajaxRequest.send(null);</b>
}
Assume you enter Zara in the userid box, then in the above request, the URL is set to "validate?id = Zara".
Webserver Returns the Result Containing XML Document
You can implement your server-side script in any language, however its logic should be as follows.
- Get a request from the client.
- Parse the input from the client.
- Do required processing.
- Send the output to the client.
If we assume that you are going to write a servlet, then here is the piece of code.
public void doGet(HttpServletRequest request,
   HttpServletResponse response) throws IOException, ServletException {
   String targetId = request.getParameter("id");

   if ((targetId != null) && !accounts.containsKey(targetId.trim())) {
      response.setContentType("text/xml");
      response.setHeader("Cache-Control", "no-cache");
      response.getWriter().write("<valid>true</valid>");
   } else {
      response.setContentType("text/xml");
      response.setHeader("Cache-Control", "no-cache");
      response.getWriter().write("<valid>false</valid>");
   }
}
Callback Function processRequest() is Called
The XMLHttpRequest object was configured to call the processRequest() function when there is a state change to the readyState of the XMLHttpRequest object. Now this function will receive the result from the server and will do the required processing. As in the following example, it sets a variable message on true or false based on the returned value from the Webserver.
function processRequest() {
   if (req.readyState == 4) {
      if (req.status == 200) {
         var message = ...;
...
}
The HTML DOM is Updated
This is the final step and in this step, your HTML page will be updated. It happens in the following way −
- JavaScript gets a reference to any element in a page using DOM API.
- The recommended way to gain a reference to an element is to call.
document.getElementById("userIdMessage"),
// where "userIdMessage" is the ID attribute
// of an element appearing in the HTML document
JavaScript may now be used to modify the element's attributes; modify the element's style properties; or add, remove, or modify the child elements. Here is an example −
<script type = "text/javascript">
   <!--
   function setMessageUsingDOM(message) {
      var userMessageElement = document.getElementById("userIdMessage");
      var messageText;

      if (message == "false") {
         userMessageElement.style.color = "red";
         messageText = "Invalid User Id";
      } else {
         userMessageElement.style.color = "green";
         messageText = "Valid User Id";
      }

      var messageBody = document.createTextNode(messageText);

      // if the messageBody element has been created simple
      // replace it otherwise append the new element
      if (userMessageElement.childNodes[0]) {
         userMessageElement.replaceChild(messageBody, userMessageElement.childNodes[0]);
      } else {
         userMessageElement.appendChild(messageBody);
      }
   }
   -->
</script>
<body>
   <div id = "userIdMessage"><div>
</body>
If you have understood the above-mentioned seven steps, then you are almost done with AJAX. In the next chapter, we will see XMLHttpRequest object in more detail.
AJAX - XMLHttpRequest
In AJAX, XMLHttpRequest plays a very important role. XMLHttpRequest is used to exchange data to or from the web server in the background while the user/client working in the foreground and then update the part of the web page with the received data without reloading the whole page.
We can also say that XMLHttpRequest (XHR) can be used by various web browser scripting languages like JavaScript, JScript, VBScript, etc., to exchange XML data to or from the web server with the help of HTTP. Apart from XML, XMLHttpRequest can also fetch data in various formats like JSON, etc. It creates an asynchronous connection between the client side and the server side.
Syntax
variableName = new XMLHttpRequest()
Where using a new keyword along with XMLHttpRequest() constructor we can be able to create a new XMLHttpRequest object. This object must be created before calling the open() function to initialise it before calling send() function to send the request to the web server.
XMLHttpRequest Object Methods
XMLHttpRequest object has the following methods −
| Sr.No. | Method Name & Description |
|---|---|
| 1 | new XMLHttpRequest() It is used to create an XMLHttpRequest() object |
| 2 | getAllResponseHeaders() It is used to get the header information |
| 3 | getResponseHeader() It is used to get the specific header information |
| 4 | open(method, url, async, user, psw) It is used to initialise the request parameters. Here, method: request type GET or POST or Other types url: file location async: for the asynchronous set to true or for synchronous set to false user: for optional user name psw: for optional password |
| 5 | send() It is used to send requests to the web server. It is generally used for GET requests. |
| 6 | send(string) It is used to send requests to the server. It is generally used for POST requests. |
| 7 | setRequestHeader() It is used to add key/value pair to the header |
XMLHttpRequest Object Properties
XMLHttpRequest object has the following properties −
| Sr.No. | Property Name & Description |
|---|---|
| 1 | onreadystatechange Set the callback function which handles request state changes. |
| 2 | readyState It is used to hold the status of XMLHttpRequest. It has the following values −
|
| 3 | responseText It is used to return the response data as a string |
| 4 | responseXML It is used to return the response data as XML data |
| 5 | Status It is used to return the status number of a request. For example −
|
| 6 | StatusText It is used to return the status text. For example, OK, Not Found, etc. |
Usage of XMLHttpRequest
After understanding the basic syntax, methods, and properties of XMLHttpRequest now we learn how to use XMLHttpRequest in real life. So to use XMLHttpRequest in your program first we need to follow the following major steps −
Step 1 − Create an object of XMLHttpRequest
var variableName = new XMLHttpRequest()
Step 2 − After creating XMLHttpRequest an object, we now have to define a callback function which will trigger after getting a response from the web server.
XMLHttpRequestObjectName.onreadystatechange = function(){
   // Callback function body
}
XMLHttpRequestObjectName.open(method, url, async)
XMLHttpRequestObjectName.send()
Step 3 − Now we use open() and send() functions to send a request to the web server.
Now lets us understand the working of XMLHttpRequest with the help of the following example−
Example
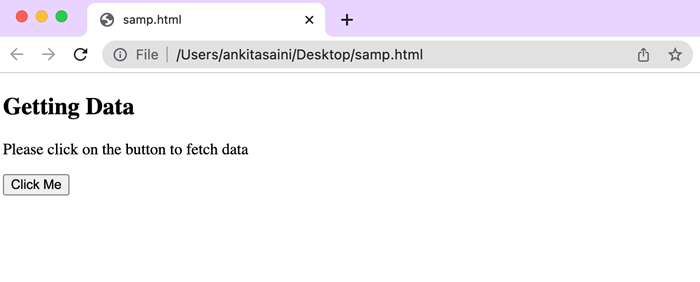
In the below example, we are going to fetch data from the server. To fetch the data from the server we will click on the "Click Me" button. So when we click on the "Click Me" button, the displayDoc() function is called. Inside the displayDoc() function, we create an XMLHttpRequest object. Then we create a call-back function to handle the server response. Then we call the open() method of the XHR object to initialise the request with HTTP GET method and the server URL which is "https://jsonplaceholder.typicode.com/todos". Then we call send() function to send the request.
So when the server responds to the request, the "onreadystatechange" property calls the callback function with the current state of XMLHttpRequest object. If the "ready state" property is set to 4(that means the request is completed) and the "status" property is set to 200(that means the successful response), then the response data is extracted from the "responseText" property and display the HTML document with the help of "innerHTML" property of the sample element.
If we error is found during the request then the else statement present in the callback function will execute. So this is how we can fetch data from the server.
<!DOCTYPE html>
<html>
<body>
<script>
   function displayDoc() {
      // Creating XMLHttpRequest object
      var myObj = new XMLHttpRequest();

      // Creating a callback function
      myObj.onreadystatechange = function() {
         if (this.readyState == 4 && this.status == 200) {
            document.getElementById("sample").innerHTML = this.responseText;
         }else{
            console.log("Error Found")
         }
      };
      // Open the given file
      myObj.open("GET", "https://jsonplaceholder.typicode.com/todos", true);

      // Sending the request to the server
      myObj.send();
   }
</script>
<div id="sample">
   <h2>Getting Data</h2>
   <p>Please click on the button to fetch data</p>
   <button type="button" onclick="displayDoc()">Click Me</button>
</div>
</body>
</html>
Output
Conclusion
XMLHttpRequest is the main object of AJAX through which AJAX create asynchronous communication between a web browser and the web server. So now in the next article, we will learn how to send a request using an XMLHttpRequest object.
AJAX - Sending Request
AJAX applications use XMLHttpRequest objects to initiate or manage data requests sent to the web servers and handle or monitor the data sent by the web servers in a very effective manner. AJAX support the following types of requests −
GET request
POST request
PUT request
DELETE request
To create a connection and send a request to the web server XMLHttpRequest object provide the following two methods:
open() − It is used to create a connection between a web browser and the web server.
send() − It is used to send a request to a web server.
open() Method
The open() method is used to establish an asynchronous connection to the web server. Once the secure connection is established now you are ready to use various properties of XMLHttpRequest, or you can send requests, or handle the responses.
Syntax
open(method, url, async)
Where, the open() method takes three parameters −
method − It represents the HTTP method that is used to establish a connection with the web server(Either GET or POST).
url − It represents the file URL which will be opened on the web server. Or we can say server(file) location.
async − For asynchronous connection set the value to true. Or for synchronous connection set the value to false. The default value of this parameter is true.
To use the open() method first we create an instance of the XMLHttpRequest object. Then we call the open() method to initialise the request with HTTP GET or POST method and the URL of the server.
The GET option is used to retrieve a moderate amount of information from the web server whereas the POST option is used to retrieve a larger amount of information. So both GET and POST options can configure the XMLHttpRequest object to work with the given file.
In the open() method, the filename or location or path of an AJAX application can be specified by either using an absolute path or a relative path. Where the absolute path is a path which specifies the exact location of the file, for example −
Myrequest.open("GET", "http://www.tutorialspoint.com/source.txt")
Here "source.txt" is the name of the file and "http://www.tutorialspoint.com" is the place where the source.txt file is stored.
The relative path is used to specify the location of a file according to the location on the web server in relation to the web application file, for example −
Myrequest.open("GET", "my file.txt")
Syntax
Myrequest.send()
send() Method
The send() method is used to send the request to the server. You can also pass an argument to the send() method.
Sending Request
To send a request to the server first we need to create an instance of XMLHttpRequest object then we create a callback function which will come into action after getting a response from the web server. Then we use the open() method to establish an asynchronous connection between the web browser and the web server then using send() function we send the request to the server.
Example
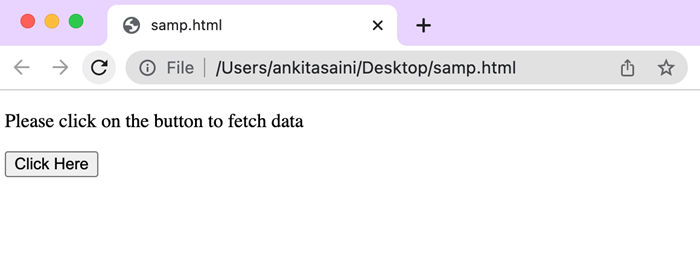
Here in the following code, we are fetching a specified record from the server. To fetch the data from the server we click on the "Click Here" button. So when we click on the "Click Here" button, the showDoc() function is called. Inside the displayDoc() function, first, an object of XMLHttpRequest is created. Then we create a call-back function to handle the server response. Then we call the open() method of the XHR object to initialise the request with HTTP GET method and the URL of the server that is "https://jsonplaceholder.typicode.com/todos/3" which fetches a single to-do list whose id = 3 from the JSONPlaceholder API. Then we call send() function to send the request.
<!DOCTYPE html>
<html>
<body>
<script>
   function ShowDoc() {
   // Creating XMLHttpRequest object
   var myhttp = new XMLHttpRequest();
   // Creating call back function
   myhttp.onreadystatechange = function() {
      if (this.readyState == 4 && this.status == 200) {
         document.getElementById("example").innerHTML = this.responseText;
      }
   };
  // Open the given file
  myhttp.open("GET", "https://jsonplaceholder.typicode.com/todos/3", true);
  // Sending the request to the server
  myhttp.send();
}
</script>

<div id="example">
  <p>Please click on the button to fetch data</p>
  <button type="button" onclick="ShowDoc()">Click Here</button>
</div>
</body>
</html>
Output
After clicking on "Click Here" button we will get the following record from the server.
So when the server responds to the request, the "onreadystatechange" property calls the callback function with the current state of the XMLHttpRequest object. If the "ready state" property is set to 4(that means the request is completed) and the "status" property is set to 200(that means the successful response), then the response data is extracted from the "responseText" property and display the HTML document with the help of "innerHTML" property of the example element.
Conclusion
So this is how we can send requests using XMLHttpRequest. Among all these requests GET and POST are the most commonly used request for fetching and sending data to/from the server. Now in the next article, we will see the type of request supported by AJAX.
AJAX - Types of Requests
AJAX is a web technology that is used to create dynamic web pages. It allows web pages to update their content without reloading the whole page. Generally, AJAX supports four types of requests and they are −
GET request
POST request
PUT request
DELETE request
GET Request
The GET request is used to retrieve data from a server. In this request, the data is sent as a part of the URL that is appended at the end of the request. We can use this request with the open() method.
Syntax
open(GET, url, true)
Where, the open() method takes three parameters −
GET − It is used to retrieve data from the server.
url − url represents the file that will be opened on the web server.
true − For asynchronous connection set the value to true. Or for synchronous connection set the value to false. The default value of this parameter is true.
Example
<!DOCTYPE html>
<html>
<body>
<script>
   function displayRecords() {
      // Creating XMLHttpRequest object
      var zhttp = new XMLHttpRequest();
      // Creating call back function
      zhttp.onreadystatechange = function() {
         if (this.readyState == 4 && this.status == 200) {
            document.getElementById("example").innerHTML = this.responseText;
         }
      };
      // Open the given file
      zhttp.open("GET", "https://jsonplaceholder.typicode.com/todos/6", true);
      // Sending the request to the server
      zhttp.send();
   }
</script>
<div id="example">
   <p>Please click on the button to fetch 6th record from the server</p>
   <button type="button" onclick="displayRecords()">Click Here</button>
</div>
</body>
</html>
Output
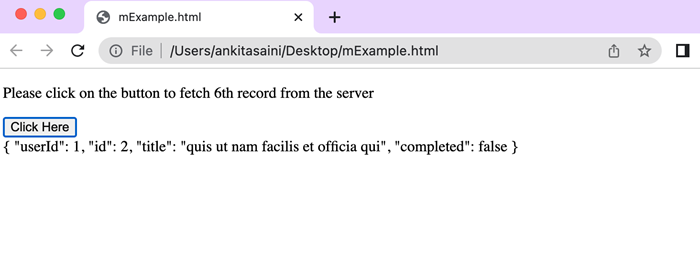
In the above example, we are fetching the 6th record from the server using the GET request "https://jsonplaceholder.typicode.com/todos/6" API in XMLHttpRequest. So after clicking on the button, we will get the 6th record from the server.
POST Request
The POST request is used to send data from a web page to a web server. In this request, the data is sent in the request body that is separated from the URL. We can use this request with the open() method.
Syntax
open('POST', url, true)
Where, the open() method takes three parameters −
POST − It is used to send data to the web server.
url − url represents the server(file) location.
true − For asynchronous connection set the value to true. Or for synchronous connection set the value to false. The default value of this parameter is true.
Example
<!DOCTYPE html>
<html>
<body>
<script>
   function sendDoc() {
      // Creating XMLHttpRequest object
      var qhttp = new XMLHttpRequest();
      // Creating call back function
      qhttp.onreadystatechange = function() {
         if (this.readyState == 4 && this.status == 201) {
            document.getElementById("sample").innerHTML = this.responseText;
            console.log("Data Send Successfully")
         }
      };
      // Open the given file
      qhttp.open("POST", "https://jsonplaceholder.typicode.com/todos", true);
      // Setting HTTP request header
      qhttp.setRequestHeader('Content-type', 'application/json')
      // Sending the JSON document to the server
      qhttp.send(JSON.stringify({
         "title": "MONGO",
         "userId": 11,
         "id": 21,
         "body": "est rerum tempore"
      }));
   }
</script>
<h2>Example of POST Request</h2>
<button type="button" onclick="sendDoc()">Post Data</button>
<div id="sample"></div>
</body>
</html>
Output

Here in the above example, we are updating the record with the below-given data using the PUT request.
"https://jsonplaceholder.typicode.com/todos/21" API:
{
   "title": "MONGO",
   "userId": 11,
   "id": 21,
   "body": "est rerum tempore"
}
DELETE Request
The DELETE request is used to delete data from the web server. In this request, the data to be deleted is sent in the request body and the web server will delete that data from its storage.
Syntax
open('DELETE', url, true)
Where, the open() method takes three parameters −
DELETE − It is used to delete data from the web server.
url − It represents the file url which will be opened on the web server. Or we can say server(file) location.
true − For asynchronous connection set the value to true. Or for synchronous connection set the value to false. The default value of this parameter is true.
Example
<!DOCTYPE html>
<html>
<body>
<script>
   function delDoc() {
      // Creating XMLHttpRequest object
      var qhttp = new XMLHttpRequest();
      // Creating call back function
      qhttp.onreadystatechange = function() {
         if (this.readyState == 4 && this.status == 200) {
            document.getElementById("sample").innerHTML = this.responseText;
            console.log("Record Deleted Successfully")
         }
      };
      // Deleting given file
      qhttp.open("DELETE", "https://jsonplaceholder.typicode.com/todos/2", true);
      // Sending the request to the server
      qhttp.send();
   }
</script>
<div id="sample">
   <h2>Example of DELETE Request</h2>
   <button type="button" onclick="delDoc()">Deleteing Data</button>
</div>
</body>
</html>
Output

Here in the above example, we delete the record present on Id = 2 using the DELETE request "https://jsonplaceholder.typicode.com/todos/2" API.
AJAX also support some other request like OPTIONS, HEAD, and TRACE but they are the least commonly used requests by the AJAX applications. Now in the next article, we will see how AJAX handle responses.
AJAX - Handling Responses
AJAX is a technique which is used to send and receive data to and from the web server asynchronously without reloading or refreshing the whole page. When an AJAX application made an asynchronous request to the server from a web page, then the server responds to the request and returns the requested data, so the receiving and handling of the server's response are known as handling responses. Or we can say that handling responses is a process that deals with the returned data from the server, performs appropriate operations on it, and updates the web page accordingly.
Handling responses covers the following points −
Receiving Response − Once the AJAX send the request to the server, then the client-side JS code waits for the server response. When the server responds to the request, the response is returned to the client.
Process Response − After getting the response from the server, now the client-side JS process the data in the expected format because the data returned by the server is in various formats like JSON, XML, etc., and also extracts only related information from the response.
Updateding Web application/ web page − After processing the response AJAX callback function updates the web page or web application dynamically according to the response. It includes modifying HTML content, displaying error messages, updating the values, etc.
Handle Error − If the request meets an error, then the server may respond with an error status due to any request failure, network issue, etc. So the Handling response process handles the error very efficiently and takes proper action against the error.
How to handle responses works
Follow the following steps to handle the responses using XMLHttpRequest −
Step 1 − Create an XMLHttpRequest object using XMLHttpRequest() constructor. Using this object you can easily do HTTP requests and can handle their responses asynchronously.
var qhttp = new XMLHttpRequest();
Step 2 − Define an event handler for the readystatechange event. This event trigger whenever the value of the readyState property of the XHR object changes.
qhttp.onreadystatechange = function() {
   if (qhttp.readyState == 4){
      if(qhttp.status == 200){
         // Display the response
      }else{
         // Handle the error if occure
      }
    }
  };
Step 3 − Open the request by using the HTTP method(like GET, POST, etc) and the URL which we want to request.
qhttp.open("HTTP Method","your-URL", true);
Step 4 − Set any header if required.
qhttp.setRequestHeader('Authorization', 'Your-Token');
Step 5 − Send the request to the server.
qhttp.send()
Example
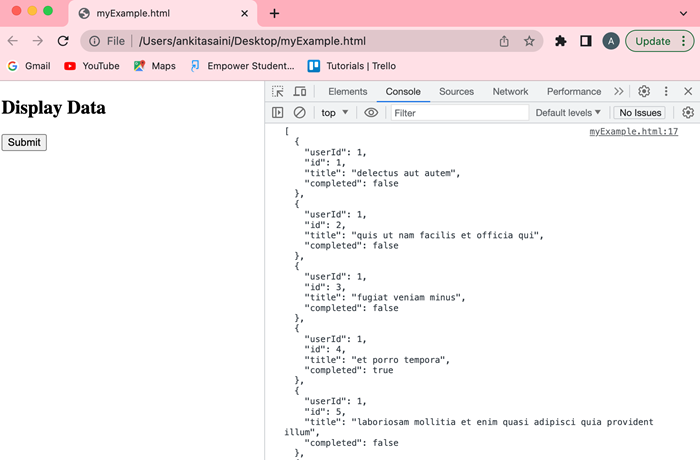
In the following program, we will handle the response returned by the server on the given request. So for that, we will create a Javascript function named as handleResponse() which handles the response returned by the server and display the result accordingly. This function first creates an XMLHttpRequest object, and then it defines an "onreadystatechange" event handler to handle the request state. When the request state changes, then the function checks if the request is complete(readyState = 4). If the request is complete, then the function checks the status code = 200. If the status code is 200, then display the response. Otherwise, display the error message.
<!DOCTYPE html>
<html>
<body>
<script>
   function handleResponse() {
   // Creating XMLHttpRequest object
   var qhttp = new XMLHttpRequest();
   // Creating call back function
   qhttp.onreadystatechange = function() {
      if (qhttp.readyState == 4){
         if(qhttp.status == 200){
            // Display the response
            console.log(qhttp.responseText)
         }else{
            console.log("Found Error: ", qhttp.status)
         }
      }
   };
   // Open the given file
   qhttp.open("GET", "https://jsonplaceholder.typicode.com/todos", true);
   // Sending request to the server
   qhttp.send()
}
</script>
<h2>Display Data</h2>
<button type="button" onclick="handleResponse()">Submit</button>
<div id="sample"></div>
</body>
</html>
Output
Conclusion
So this is how an AJAX can handle the response returned by the server due to which web pages can easily communicate with the server in the background asynchronously without refreshing the whole page. Now in the next article, we will learn how to handle binary data in the AJAX.
AJAX - Handling Binary Data
Binary data is data that is in the binary format not in the text format. It includes images, audio, videos, and other file that are not in plain text. We can send and receive binary data in AJAX using an XMLHttpRequest object. While working with binary data in AJAX it is important to set a proper content type and response type headers. Hence for setting the header, we use the "Content-Type" header, here we set the proper MIME type to send binary data and set the "responseType" property to "arraybuffer" or "blob" which indicates that binary data is received.
Sending Binary Data
To send binary data we use send() method of XMLHttpRequest which can easily transmit binary data using ArrayBuffer, Blob or File object.
Example
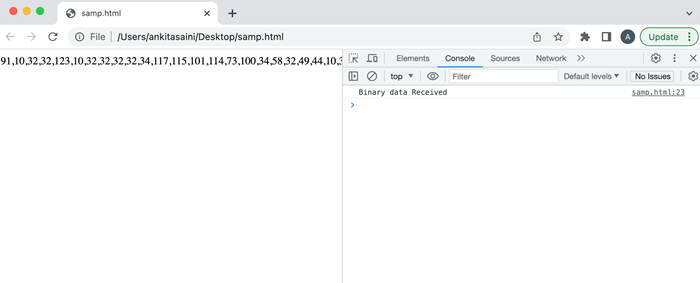
In the following program, we create a program which will receive binary data from the server. So when we click on the button getBinaryData() function trigger. It uses an XMLHttpRequest object to get the data using the GET method from the given URL. In this function, we set the responseType property to arraybuffer which tells the browser that we have to only accept binary data in the response. When the request is completed an onload() function is called and inside this function, we check the status of the request if the response is successful, then the response is accessed as arraybuffer. Then convert arraybuffer into Uint8array using Unit8Array() function. It accesses the individual bytes of the binary data. After that, we will display the data on the HTML page.
<!DOCTYPE html>
<html>
<body>
<script>
   function getBinaryData() {
      // Creating XMLHttpRequest object
      var myhttp = new XMLHttpRequest();
      // Getting binary data
      myhttp.open("GET", "https://jsonplaceholder.typicode.com/posts", true);
      // Set responseType to arraybuffer.
      myhttp.responseType = "arraybuffer";
      // Creating call back function
      myhttp.onload = (event) => {
         // IF the request is successful
         if (myhttp.status === 200){
            var arraybuffer = myhttp.response;
            // Convert the arraybuffer into array
            var data =  new Uint8Array(arraybuffer);
            // Display the binary data
            document.getElementById("example").innerHTML = data;
            console.log("Binary data Received");
         }else{
            console.log("Found error");
         }
      };
      // Sending the request to the server
      myhttp.send();
   }
</script>
<div id="example">
   <p>AJAX Example</p>
   <button type="button" onclick="getBinaryData()">Click Here</button>
</div>
</body>
</html>
Output
Conclusion
So this is how we can handle binary data. To handle binary data we need to convert binary data to an appropriate data format. We can also send binary data in the file, string, ArrayBuffer, and Blob. Now in the next article, we will learn how to submit forms using AJAX.
AJAX - Submitting Forms
AJAX is the most popular web technique which is used by almost all web developers to create dynamic web applications. It uses web browsers' in-built XMLHttpRequest object to send and receive data asynchronously to or from the web server in the background without refreshing or affecting the web page. We can also use AJAX to submit forms very easily.
So to submit the form using AJAX we need to follow the following steps −
Step 1 − Create an XMLHttpRequest object using XMLHttpRequest () constructor −
var zhttp = new XMLHttpRequest();
Step 2 − Create a variable(also known as form element) which contains all the keys and value pairs present in the form with the help of the document.querySelector() method.
const FormElement = document.querySelector("mForm")
Here if you have multiple forms, then you can define forms with their ids.
Step 3 − FormData object using FormData constructor and pass the above created FormElement into it. It means that the FormData object is initialised with the key-value pairs.
const myForm = new FormData(FormElement)
Step 4 − Create a call-back function which will be executed when the server responds to the request. This function is defined inside the onreadystatechange property of the XHR object.
zhttp.onreadystatechange = function() {
   // Body
}
Here the responseText property will return the response of the server as a JavaScript string which we will further use in our web page to display the message.
document.getElementById("responseElement").innerHTML = this.responseText;
Step 5 − Now we use the open() function. Inside the open() function we pass a POST request along with the URL to which we have to post our form data.
zhttp.open("POST", url, async)
Step 6 − Finally we use send() function to send a request to the server along with the FormData object.
zhttp.send(myForm);
So the complete example is as follows −
Example
Here in the above code, we create a simple HTML form to collect data from the user and then submit the form data using JavaScript with XMLHttpRequest.
So when the user clicks on the "Submit Record" button sendFormData() function is called. The sendFormData() function first creates a new XHR object. Then create a form element which stores all the key-value pairs from the HTML form. Then it is a new FormData object and passes the form element into the object. Next, it set up a call-back function which handles the response from the server. This function is triggered when the value of the readyState property = 4 and the value of the Status property = 201. Finally, it calls the open() method and initialises it with the HTTP POST method with the URL of the server and at last it calls send() method to send the FormData request to the server.
So when the response comes from the server the call-back function shows the result and prints the message on the console log.
<!DOCTYPE html>
<html>
<body>
<script>
   function sendFormData() {
      // Creating XMLHttpRequest object
      var zhttp = new XMLHttpRequest();
      const mFormEle = document.querySelector("#mForm")
      // Creating FormData object
      const myForm = new FormData(mFormEle);
      // Creating call back function to handle the response
      zhttp.onreadystatechange = function() {
         if (this.readyState == 4 && this.status == 201) {
            document.getElementById("example").innerHTML = this.responseText;
            console.log("Form Data Posted Successfully")
         }
      };
      // Post/Add form data on the server
      zhttp.open("POST", "https://jsonplaceholder.typicode.com/todos", true);
      // Sending the request to the server
      zhttp.send(new FormData(mFormEle));
   }
</script>
<!--Creating simple form-->
<form id = "mForm">
   <h2>Enter the requested Data</h2>
   <label for="Utitle">Title</label>
   <input id="Utitle" type="text" name="title"><br>

   <label for="UId">UserId</label>
   <input id="UId" type="number" name="UserID"><br>

   <label for="Ubody">Body</label>
   <input id="Ubody" type="text" name="body"><br>

   <label for="Uage">Age</label>
   <input id="Uage" type="number" name="age"><br>

   <button type="button" onclick="sendFormData()">Submit Record</button>
</form>
<div id="example"></div>
</body>
</html>
Output
Conclusion
So this is how AJAX submit form using XMLHttpRequest. It is the most commonly used feature of AJAX. Now in the next article, we will see how AJAX upload files to the server.
AJAX - File Uploading
AJAX provides a flexible way to create an HTTP request which will upload files to the server. We can use the FormData object to send single or multiple files in the request. Let us discuss this concept with the help of the following examples −
Example − Uploading a Single File
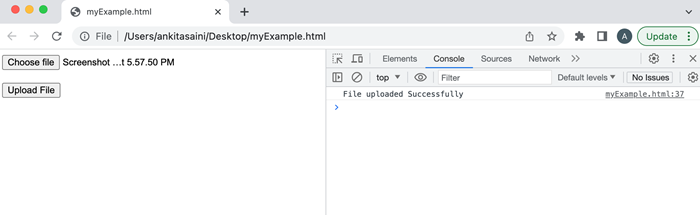
In the following example, we will upload a single file using XMLHttpRequest. So for that first we create a simple form which has a file upload button and the submit button. Now we write JavaScript in which we get the form element and create an event which triggers when we click on the upload file button. In this event, we add the uploaded file to the FormData object and then create an XMLHttpRequest object which will send the file using the FormData object to the server and handle the response returned by the server.
<!DOCTYPE html>
<html>
<body>
<!-- Creating a form to upload a file-->
<form id = "myForm">
   <input type="file" id="file"><br><br>
   <button type="submit">Upload File</button>
</form>
<script>
   document.getElementById('myForm').addEventListener('submit', function(x){
      // Prevent from page refreshing
      x.preventDefault();

      // Select the file from the system
      // Here we are going to upload one file at a time
      const myFile = document.getElementById('file').files[0];

      // Create a FormData to store the file
      const myData = new FormData();
      // Add file in the FormData
      myData.append("newFiles", myFile);

      // Creating XMLHttpRequest object
      var myhttp = new XMLHttpRequest();

      // Callback function to handle the response
      myhttp.onreadystatechange = function(){
         if (myhttp.readyState == 4 && myhttp.status == 200) {
            console.log("File uploaded Successfully")
         }
      };

      // Open the connection with the web server
      myhttp.open("POST", "https://httpbin.org/post", true);

      // Setting headers
      myhttp.setRequestHeader("Content-Type", "multipart/form-data");

      // Sending file to the server
      myhttp.send(myData);
   })
</script>
</body>
</html>
Output
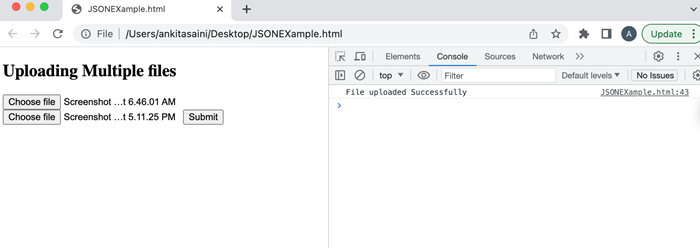
Example − Uploading Multiple Files
In the following example, we will upload multiple files using XMLHttpRequest. Here we select two files from the system in DOM with the attribute of file type. Then we add the input files in an array. Then we create a FormData object and append the input files to the object. Then we create an XMLHttpRequest object which will send the files using the FormData object to the server and handle the response returned by the server.
<!DOCTYPE html>
<html>
<body>
<!-- Creating a form to upload multiple files-->
<h2> Uploading Multiple files</h2>
<input type="file">
<input type="file">
<button>Submit</button>
<script>
   const myButton = document.querySelector('button');
   myButton.addEventListener('click', () => {
      // Get all the input files in DOM with attribute type "file":
      const inputFiles = document.querySelectorAll('input[type="file"]');

      // Add input files in the array
      const myfiles = [];
      inputFiles.forEach((inputFiles) => myfiles.push(inputFiles.files[0]));

      // Creating a FormData
      const myformdata = new FormData();

      // Append files in the FormData object
      for (const [index, file] of myfiles.entries()){
         // It contained reference name, file, set file name
         myformdata.append(`file${index}`, file, file.name);
      }
      // Creating an XMLHttpRequest object
      var myhttp = new XMLHttpRequest();

      // Callback function
      // To handle the response
      myhttp.onreadystatechange = function(){
         if (myhttp.readyState == 4 && myhttp.status == 200) {
            console.log("File uploaded Successfully")
         }
      };
      // Open the connection with the web server
      myhttp.open("POST", "https://httpbin.org/post", true);

      // Setting headers
      myhttp.setRequestHeader("Content-Type", "multipart/form-data");

      // Sending file to the server
      myhttp.send(myformdata);
   })
</script>
</body>
</html>
Output
Conclusion
So this is how we can upload files to the given URL with the help of XMLHttpRequest. Here we can upload any type of file such as jpg, pdf, word, etc and can upload any number of files like one file at a time or multiple files at a time. Now in the next article, we will learn how to create a FormData object using XMLHttpRequest.
AJAX - FormData Object
In AJAX, the FormData object allows you to create a set of key-value pairs which represent the form fields and their values, which can be sent using XMLHttpRequest. It is mainly used in sending form data but can also be used independently to send data. The data transmitted by the FormData object is in the same format as the data sent by the form's submit method.
To create a new FormData object AJAX provide FormData() constructor.
Syntax
const objectName = new FormData()
Or
const objectName = new FormData(form)
Or
const objectName = new FormData(form, mSubmit)
Where the FormData() can be used with or without parameters. The optional parameters used by the FormData() constructor are −
form − It represents an HTML <form> element. If the FormData object has this parameter, then the object will be populated with the current key-value pair of the form using the name property of each element for the key and their submitted value. It also encodes the input content of the file.
mSubmit − It represents the submit button the form. If mSubmit has a name attribute or an <input type = "image>, then its content will include in the FormData object. If the specified mSubmit is not a button, then it will throw a TypeError exception. If the mSubmit is not a member of the given form, then it will throw NotFoundError.
Methods
FormData object supports the following methods −
| Sr.No. | Method Name & Description |
|---|---|
| 1 | FormData.append() This method is used to append a new value into an existing key. Or can add a new key if it is not present. |
| 2 | FormData.delete() This method is used to delete key-value pairs. |
| 3 | FormData.entries() This method returns an iterator that iterates through key-value pair. |
| 4 | FormData.get() This method returns the first value related to the given key from the FormData object. |
| 5 | FormData.getAll() This method is used to return an array of all the values related to the given key in the FormData object. |
| 6 | FormData.has() This method checks whether a FormData object contains the specified key or not. |
| 7 | FormData.keys() This method returns an iterator which iterates through all the keys of the key-value pairs present in the FormData object. |
| 8 | FormData.set() This method sets a new value for the existing key in the FormData object. Or can add new key/value if not exists. |
| 9 | FormData.values() This method returns an iterator which iterates through all the values present in the FormData object. |
Creating FormData Object
To create and use FormData Object without using HTML form follow the following steps −
Step 1 − Create an XMLHttpRequest object using XMLHttpRequest () constructor −
var zhttp = new XMLHttpRequest();
Step 2 − Create a FormData object using FormData constructor −
const myForm = new FormData()
Step 3 − Use append() method to add key and value pairs −
myForm.append("KeyName", "keyValue")
Step 4 − Create a call back function to handle response
zhttp.onreadystatechange = function() {
   // Body
}
Step 5 − Now we use open() function. Inside open() function we pass a POST request along with the server URL we have to post our form data.
zhttp.open("POST", url, async)
Step 6 − So finally we use send() function to send requests to the server along with the FormData object.
zhttp.send(myForm);
Now let's discuss this with the help of the example −
Example 1
<!DOCTYPE html>
<html>
<body>
<script>
   function dataDoc() {
      // Creating XMLHttpRequest object
      var zhttp = new XMLHttpRequest();

      // Creating FormData object
      const myForm = new FormData();

      // Assigning the form data object with key/value pair
      myForm.append("title", "AJAX Tutorial")
      myForm.append("UserId", "232")
      myForm.append("Body", "It is for web development")
      myForm.append("Age", "33")

      // Creating call back function to handle the response
      zhttp.onreadystatechange = function() {
         if (this.readyState == 4 && this.status == 201) {
            document.getElementById("example").innerHTML = this.responseText;
            console.log("Form Data Posted Successfully")
         }
      };
      // Specify the method as POST, URL, and set async to true
      zhttp.open("POST", "https://jsonplaceholder.typicode.com/todos", true);

      // Sending the request to the server
      zhttp.send(myForm);
   }
</script>
<h2>Sending Form Data</h2>
<button type="button" onclick="dataDoc()">Submit</button>
<div id="example"></div>
</body>
</html>
Output

So when the user clicks on the "Submit" button dataDoc() function is called. Then dataDoc() function first creates a new XHR object and a new FormData object. Then add new key-value pairs in the FormData object using the append() method. Next, it set up a call-back function which handles the response from the server. This function is triggered when the value of the readyState property = 4 and the value of the Status property = 201. Finally, it calls the open() method and initialises it with the HTTP POST method with the URL of the server and at last it calls send() method to send the FormData request to the server.
So when the response comes from the server the call-back function displays the result and prints the "Form Data Posted Successfully" message on the console log.
Example 2
<!DOCTYPE html>
<html>
<body>
<script>
   function sendFormData() {
      // Creating XMLHttpRequest object
      var zhttp = new XMLHttpRequest();

      // Creating FormData object
      const myForm = new FormData();

      // Assigning the form data with key/value pair
      myForm.append("title", document.querySelector('#Utitle').value)
      myForm.append("UserId", document.querySelector('#UId').value)
      myForm.append("Body", document.querySelector('#Ubody').value)
      myForm.append("Age", document.querySelector('#Uage').value)

      // Creating call back function to handle the response
      zhttp.onreadystatechange = function() {
         if (this.readyState == 4 && this.status == 201) {
            document.getElementById("example").innerHTML = this.responseText;
            console.log("Form Data Posted Successfully")
         }
      };
      // Post/Add form data on the server
      zhttp.open("POST", "https://jsonplaceholder.typicode.com/todos", true);

      // Sending the request to the server
      zhttp.send(myForm);
   }
</script>
   <!--Creating simple form-->
   <h2>Enter the requested Data</h2>
   <label for="Utitle">Title</label>
   <input id="Utitle" type="text" name="title"><br>

   <label for="UId">UserId</label>
   <input id="UId" type="number" name="UserID"><br>

   <label for="Ubody">Body</label>
   <input id="Ubody" type="text" name="body"><br>

   <label for="Uage">Age</label>
   <input id="Uage" type="number" name="age"><br>

   <button type="button" onclick="sendFormData()">Submit Record</button>
   <div id="example"></div>
</body>
</html>
Output
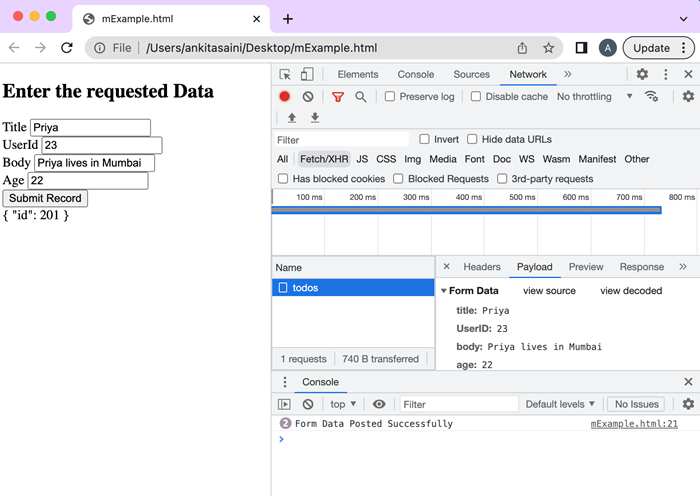
Here in the below image after entering details when we click on the submit button the data will send to the server and the server returns the id and display message in the console.
Here in the above code, we collect data from the user and submit the data using JavaScript with XMLHttpRequest.
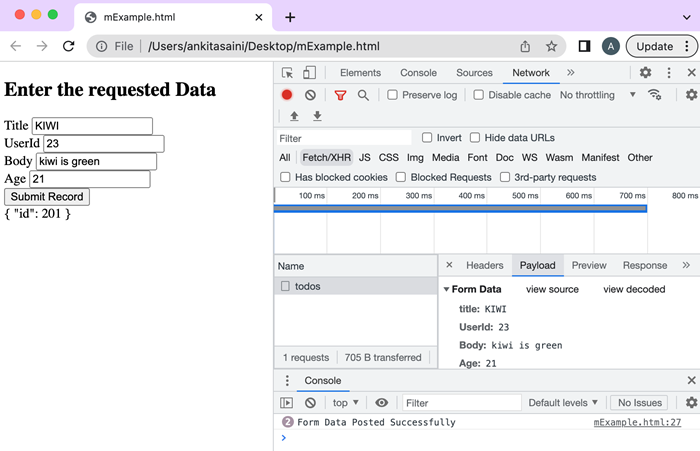
So when the user clicks on the "Submit Record" button sendFormData() function is called. The sendFormData() function first creates a new XHR object and a new FormData object. It appends the form data that was keys and its values are input by the user using the append() method. Next, it set up a call-back function which handles the response from the server. This function is triggered when the value of the readyState property = 4 and the value of the Status property = 201. Finally, it calls the open() method and initialises it with the HTTP POST method with the URL of the server and at last it calls send() method to send the FormData request to the server.
The response from the server the callback function shows the result and prints the message on the console log.
Conclusion
So this is how we can use the FormData object. It is also an important object for storing various types of data like files, plain text, JSON documents, etc. Now in the next article, we will learn how to send POST requests using XMLHttpRequest.
AJAX - Send POST Requests
The POST request sends data from a web page to a web server. In this request, the data is sent in the request body that is separated from the URL. You cannot cache and bookmark Post requests. Also using POST request you can data of any length.
Syntax
open('POST', url, true)
Where this method takes three parameters and they are −
POST − It is used to send data to the web server.
url − It represents the file url which will be opened on the web server.
true − For asynchronous connection set this parameter's value to true. Or for synchronous connection set the value to false. The default value of this parameter is true.
How to use POST Request
To use the POST request we need to follow the following steps −
Step 1 − Create an object of XMLHttpRequest.
var variableName = new XMLHttpRequest()
Step 2 − After creating XMLHttpRequest an object, now we have to define a callback function which will trigger after getting a response from the web server.
XMLHttpRequestObjectName.onreadystatechange = function(){
   // Callback function body
}
Step 3 − Now we use open() functions. Inside the open() function we pass a POST request along with the URL to which we have to send data.
XMLHttpRequestObjectName.open("POST", url, async)
XMLHttpRequestObjectName.setRequestHeader('Content-type', 'application/json')
Step 4 − Set the HTTP header request using setRequestHeader(). It always calls after the open() method but before send() method. Here the content-type header is set to "application/json" which indicates that the data is going to send in JSON format.
Step 5 − At last, we convert the JSON data into the string using stringify() method and then send it to the web server using send() method.
XMLHttpRequestObjectName.send(JSON.stringify(JSONdata))
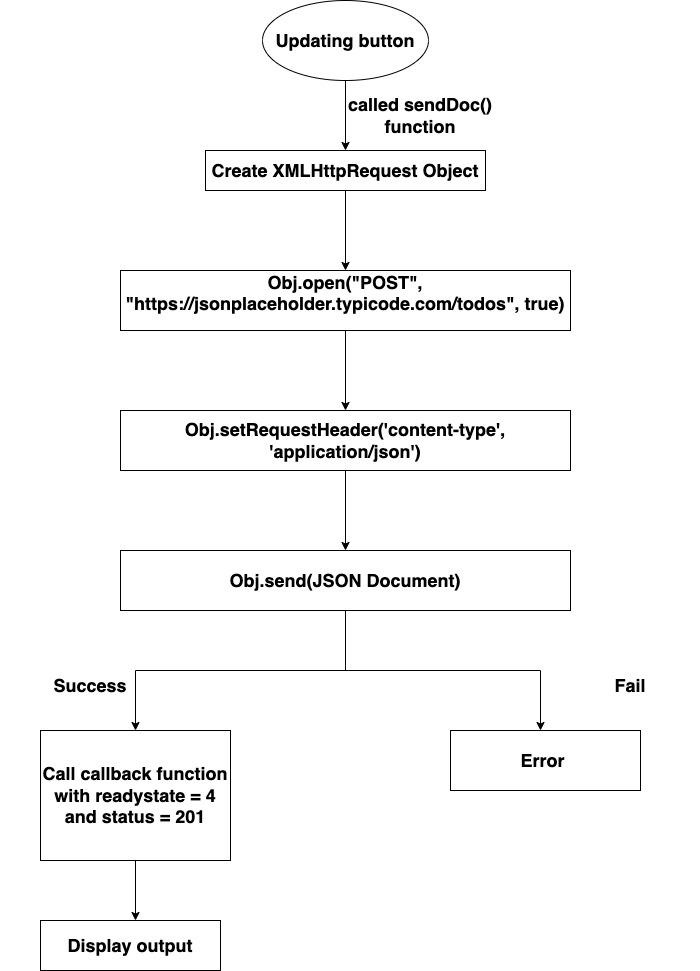
The following flow chart will show the working of the below code −

Example
<!DOCTYPE html>
<html>
<body>
<script>
   function sendRecords() {
      // Creating XMLHttpRequest object
      var zhttp = new XMLHttpRequest();

      // JSON document
      const mParameters = {
         title: document.querySelector('#Utitle').value,
         userid: document.querySelector('#UId').value,
         body: document.querySelector('#Ubody').value
      }
      // Creating call back function
      zhttp.onreadystatechange = function() {
         if (this.readyState == 4 && this.status == 201) {
            document.getElementById("example").innerHTML = this.responseText;
            console.log("Data Posted Successfully")
         }
         console.log("Error found")
      };
      // Post/Add JSON document on the given API
      zhttp.open("POST", "https://jsonplaceholder.typicode.com/todos", true);

      // Setting HTTP request header
      zhttp.setRequestHeader('Content-type', 'application/json')

      // Sending the request to the server
      zhttp.send(JSON.stringify(mParameters));
   }
</script>

   <!--Creating simple form-->
   <h2>Enter data</h2>
   <label for="Utitle">Title</label>
   <input id="Utitle" type="text" name="title"><br>

   <label for="UId">UserId</label>
   <input id="UId" type="number" name="UserID"><br>

   <label for="Ubody">Body</label>
   <input id="Ubody" type="text" name="body"><br>

   <button type="button" onclick="sendRecords()">Submit</button>
   <div id="example"></div>
</body>
</html>

initialise the request with the HTTP POST method and the URL of the server which is "https://jsonplaceholder.typicode.com/todos". Then we call the setRequestHeader() method to set the content type of the request as JSON. After that, we call send() function to send the request along with a JSON document in the form of a string to the server.
So when the server responds to the request, the "onreadystatechange" property calls the callback function with the current state of the XMLHttpRequest object. If the "ready state" property is set to 4(that means the request is completed) and the "status" property is set to 201(that means the server is successfully created a new resource), then the response data is extracted from the "responseText" property and display the HTML document with the help of "innerHTML" property of the example element.
Here is the JSON.stringify() method is used to convert JSON documents into a string. It is necessary because XHR requests can only send text data.
Difference between PUT and POST request
Following is the difference between the PUT and the POST request −
| PUT Request | POST Request |
|---|---|
| It is used to update the existing record. | It is used to create a new record. |
| It sends the entire resource as a payload. | It only sends the part to be updated. |
| It can be cached | It cannot be cached |
| It is idempotent | It is non-idempotent |
| If we send this request multiple times then multiple URLs will be created on the specified server. | If we send this request multiple times then multiple URLs will be created on the specified server If we send this request multiple times, still it counted as a single modification request by the server. |
Conclusion
So this is how a POST request is sent by the XMLHttpRequest. It is the most commonly used method to send or post data to the server. Now in the next article, we will learn how to send a PUT request.
AJAX - Send PUT Requests
The PUT request is used to update data on the web server. In this request, the data is sent in the request body and the web server will replace the existing data with the new data. If the specified data does not exist, then it will add the replacement data as a new record in the server.
PUT request is quite different from the POST request in terms of the following points −
PUT is used to update existing records whereas POST is used to add new records in the server.
PUT request can be cached whereas POST request cannot be cached.
PUT request is idempotent whereas POST request is non-idempotent.
PUT request works as a specific whereas POST request works as an abstract.
Syntax
open('PUT', url, true)
Where, the open() method takes three parameters −
PUT − It is used to update data on the web server.
url − url represents the file url or location which will be opened on the web server.
true − For asynchronous connection set the value to true. Or for synchronous connection set the value to false. The default value of this parameter is true.
How to send PUT Request
To send the PUT request we need to follow the following steps −
Step 1 − Create an object of XMLHttpRequest.
var variableName = new XMLHttpRequest()
Step 2 − After creating XMLHttpRequest an object, now we have to define a callback function which will trigger after getting a response from the web server.
XMLHttpRequestObjectName.onreadystatechange = function(){
   // Callback function body
}
XMLHttpRequestObjectName.setRequestHeader('Content-type', 'application/json')
Step 4 − Set the HTTP header request using setRequestHeader(). It always calls after the open() method but before send() method. Here the content-type header is set to "application/json" which indicates that the data is going to be sent in JSON format.
Step 5 − At last, we convert the JSON data into the string using stringify() method and then send it to the web server using send() method to update the data present on the server.
XMLHttpRequestObjectName.send(JSON.stringify(JSONdata))
The following flow chart will show the working of the example −

Example
<!DOCTYPE html>
<html>
<body>
<script>
   function updateDoc() {
      // Creating XMLHttpRequest object
      var uhttp = new XMLHttpRequest();

      // Creating call back function
      uhttp.onreadystatechange = function() {
         if (this.readyState == 4 && this.status == 200) {
            document.getElementById("sample").innerHTML = this.responseText;
            console.log("Data update Successfully")
         }
      };
      // Updating the given file
      uhttp.open("PUT", "https://jsonplaceholder.typicode.com/todos/21", true);

      // Setting HTTP request header
      uhttp.setRequestHeader('Content-type', 'application/json')

      // Sending the JSON document to the server
      uhttp.send(JSON.stringify({
         "title": "ApplePie",
         "userId": 12,
         "id": 32,
         "body": "ApplePie is made up of Apple"
      }));
   }
</script>
<h2>PUT Request</h2>
<button type="button" onclick="updateDoc()">Updating Record</button>
<div id="sample"></div>
</body>
</html>
Output
The output returned by the server after clicking on the updating button.
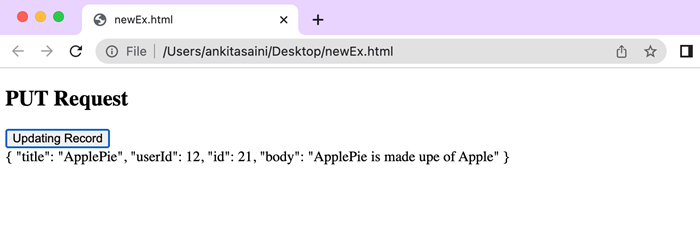
Here in the above code, we are updating an existing record, so for updating we create a JSON document. To update the data we click on the "Updating Record" button. So when we click on the "Submit" button, the updateDoc() function is called. This function creates an XMLHttpRequest object. Then call the open() method of the XHR object to initialise the request with the HTTP PUT method and the URL of the server which is "https://jsonplaceholder.typicode.com/todos/21". Then call the setRequestHeader() method to set the content type of the request as JSON. After that calls send() function to send the request along with the JSON document. When the server receives the request, it updates the specified record with the new data.
If the update is successful, then the callback function is called with "ready state = 4 (that means the request is completed)" and "status = 200(that means the successful response)" Then updated data will display on the screen. It also prints a message to the console representing that the data was updated successfully.
Here is the JSON.stringify() method is used to convert JSON documents into a string. It is necessary because XHR requests can only send text data.
NOTE − While you are working with the PUT method it is necessary to mention the record id in the URL like that "https://jsonplaceholder.typicode.com/todos/21". Here we are updating a record whose id is 21.
Conclusion
So this is how we can send PUT requests using XMLHttpRequest. It is generally used to update or modify the data present on the server. Now in the next article, we will learn how to send JSON data.
AJAX - Send JSON Data
AJAX is asynchronous Javascript and XML. It is a combination of web technologies that are used to develop a dynamic web application that sends and retrieves data from the server in the background without reloading the whole page.
JSON(JavaScript Object Notation) is a format in which we store data and can transfer data from one system to another computer system. It is easy to understand and language-independent. AJAX can transport any kind of data either in JSON or any plain text. So in this article, we will learn how to send JSON Data using AJAX.
Send JSON Data
To send JSON data using AJAX follow the following steps −
Step 1 − Create a new XMLHttpRequest instance.
Step 2 − Set the request method that is open() method and URL.
Step 3 − Set the request header to specify the data format. Here the content-type header is set to "application/json" which indicates that the data is going to send in JSON format.
Step 4 − Create a call-back function that handles the response.
Step 5 − Write JSON data.
Step 6 − Convert the JSON data into strings using JSON.stringify() method.
Step 7 − Now send the request using send() method along with the JSON data as the request body.
Following is the flow chart which shows the working of the below code −
Example
<!DOCTYPE html>
<html>
<body>
<script>
function sendDoc() {
   // Creating XMLHttpRequest object
   var qhttp = new XMLHttpRequest();

   // Creating call back function
   qhttp.onreadystatechange = function() {
      if (this.readyState == 4 && this.status == 201) {
         document.getElementById("sample").innerHTML = this.responseText;
         console.log("JSON Data Send Successfully")
      }
   };
   // Open the given file
   qhttp.open("POST", "https://jsonplaceholder.typicode.com/todos", true);

   // Setting HTTP request header
   qhttp.setRequestHeader('Content-type', 'application/json')

   // Sending the JSON data to the server
   qhttp.send(JSON.stringify({
      "title": "Mickey",
      "userId": 11,
      "id": 21,
      "body": "Mickey lives in london"
   }));
}
</script>
<h2>Sending JSON Data</h2>
<button type="button" onclick="sendDoc()">Uplodaing Data</button>
<div id="sample"></div>
</body>
</html>
Output
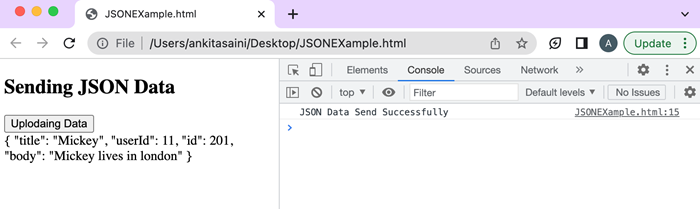
Here in the above example, we send the following JSON document to the server at the given URL using the POST method −
{
   "title": "Mickey",
   "userId": 11,
   "id": 21,
   "body": "Mickey lives in london"
}
So when we click on the "Updating Data" button, the sendDoc() function is called. This function creates an XMLHttpRequest object. Then call the open() method of the XHR object to initialise the request with the HTTP POST method and the URL of the server which is "https://jsonplaceholder.typicode.com/todos". Then call the setRequestHeader() method to set the content type of the request as JSON. After that calls send() function to send the request along with the JSON document. When the server receives the request, it adds the document.
If the update is successful, then the callback function is called with "ready state = 4 (that means the request is completed)" and "status = 201(that means the server is successfully created a new resource)" Then the response from the server is displayed in the HTML file with the help of innerHTML property of the sample element. It also prints a message to the console representing that the JSON data was successfully sent.
Here is the JSON.stringify() method is used to convert JSON documents into a string. It is necessary because XHR requests can only send text data.
Conclusion
So this is how we can send JSON data using XMLHttpRequest. It is the most commonly used data transmission format because it is light in weight and easy to understand. Now in the next article, we will learn how to parse XML objects.
AJAX - Send Data Objects
In AJAX, we are allowed to send data objects as a part of an HTTP request from a client to a web server. A data object is an object which contains data in the key-value pair. They are generally represented in JavaScript objects. So in AJAX sending data objects means we are passing structured data to the server for further processing. It can contain form inputs, user inputs, user information or any other information. Not only data objects, but we can also upload and send files from the system using AJAX along with XMLHttpRequest.
Following is the format of the data object −
var myDataObject = {
   "name": "Pinky",
   "City": "Pune",
   "Age": 23
}
Now to send this data object using XMLHttpRequest we need to convert the object into a JSON string using stringify() method because most of the frameworks support JSON format very easily without any extra effort. The stringify() method is a JavaScript in-built function which is used to convert the object or value into JSON string.
Syntax
var myData = JSON.stringify(myDataObject)
Here myDataObject is the data object which we want to convert into JSON String.
Example
In the following program, we will send data objects using XMLHttpRequest. So for that, we will create an XMLHttpRequest object then we create a data object which contains the data we want to send. Then we convert the data object into a JSON string using stringify() function and set a header to "application/json" to tell the server that the request contains JSON data. Then we send the data object using send() function and the response is handled by the callback function.
<!DOCTYPE html>
<html>
<body>
<script>
   function sendDataObject() {
      // Creating XMLHttpRequest object
      var qhttp = new XMLHttpRequest();

      // Creating data object
      var myDataObject = {
         "name": "Monika",
         "City": "Delhi",
         "Age": 32,
         "Contact Number": 33333333
      }
      // Creating call back function
      qhttp.onreadystatechange = function() {
         if (this.readyState == 4 && this.status == 201) {
            document.getElementById("sample").innerHTML = this.responseText;
            console.log("Data object Send Successfully")
         }
      };
      // Open the given file
      qhttp.open("POST",
      "https://jsonplaceholder.typicode.com/todos", true);

      // Setting HTTP request header
      qhttp.setRequestHeader('Content-type', 'application/json')

      // Converting data object to a string
      var myData = JSON.stringify(myDataObject)

      // Sending the data object to the server
      qhttp.send(myData)
   }
</script>
   <h2>Sending Data object</h2>
   <button type="button" onclick="sendDataObject()">Submit</button>
   <div id="sample"></div>
</body>
</html>
Output
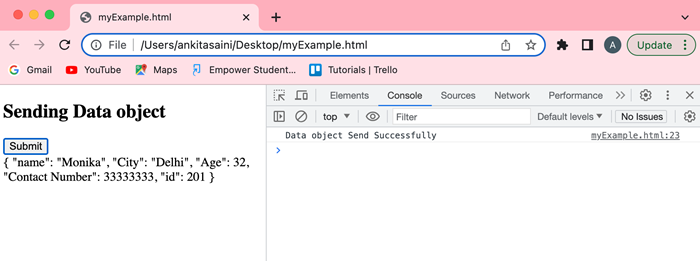
Conclusion
So this is how we can send data objects to the server and update the response accordingly. It allows us to share information and update data without refreshing the whole page. So in the next article, we will learn how to parse XML Object.
AJAX - Monitoring Progress
AJAX provides a special feature named Monitoring Progress. Using this feature we can able to track the progress of the asynchronous request made by the AJAX from the web browser to the web server. Or we can say that using a progress monitor we can also monitor how much amount of data is uploaded or downloaded from the server to the user. With the help of monitoring progress, we can send feedback to the user which contains the following points −
Data Transfer Progress − We can monitor the progress of the data transferred from the server to the client. Or we can also track how much data is transferred or received as compared to the total size of the given file.
Request Status − Wan can also monitor the overall status (like whether the request is still in progress or it is complete or pending) of the request we made. It helps the programmer to provide proper feedback to the user of the current request.
Error Handling − Apart from tracking the current status it is also important to handle if any error occurs while requesting data like server-side errors, network issues, etc. So using error handling we can easily send a notification to the user so that he/she can take proper action to the occurred error.
How to Monitor Progress
To monitor the progress of the AJAX request we can use the following methods −
Using onprogress event − To monitor the progress of the request we can define an "onprogress" event which triggers periodically while the data transfer is processed. It is generally used to monitor the progress of file downloads or large data/file transfers. It monitors the progress of the information like how much data is loaded, the total size of the transferred data, etc.
Example
In the following program, we will monitor the current status of the request with the help of the onprogress event. Here we create a Javascript function named as displayStatus() which shows the states of how much data is being transferred. This function makes an AJAX request to send data to the given URL. So it uses an XMLHttpRequest object to create a request and then defines a callback function to handle the response provided by the server. Inside the callback function. The onprogress event checks the current progress of the transferred data. Inside the onprogress event handler, we can check if the progress data is computable to avoid dividing zero errors. If it is computable, then we can calculate the percentage of data transferred to the server.
<script>
function displayStatus() {
   // Creating XMLHttpRequest object
   var myObj = new XMLHttpRequest();

   // Creating call back function
   // Here onprogress return the percentage of transferred data
   myObj.onprogress = function(myEvent) {
      if (myEvent.lengthComputable){
         var dataTarnsferPercentage = (myEvent.loaded/myEvent.total)*100;
         console.log("Current progress of the data transfer:", dataTarnsferPercentage);
      }
   };
   // Open the given file
   myObj.open("GET", "https://jsonplaceholder.typicode.com/todos", true);

   // Sending the request to the server
   myObj.send();
}
</script>
Using onreadystatechange event − We can monitor the progress of the request by creating an onreadystatechnage event. This event triggers whenever the readyState property of the XMLHttpRequest changes. The readyState property returns the current state of the request.
Example
In the following program, we will monitor the current status of the request with the help of the onreadystatechange event. Here we create a Javascript function named as displayStatus() which shows the states of the current status of the request. This function makes an AJAX request to retrieve data from the given URL. So it uses an XMLHttpRequest object to create a request and then defines a callback function to handle the response provided by the server. Inside the callback function. The onreadystatechange event checks the current status of the request with the help of the readyState property. If the readyState is XMLHttpRequest.DONE, that means the request is completed and print "Request is completed". Otherwise print "Request is in-progress".
<script>
function displayStatus() {
   // Creating XMLHttpRequest object
   var myObj = new XMLHttpRequest();

   // Creating call back function
   // Here onreadystatechange return the current state of the resuest
   myObj.onreadystatechange = function() {
      if (this.readyState == XMLHttpRequest.DONE){
         console.log("Request is completed")
      }else{
         console.log("Request is in-progress")
      }
   };
   // Open the given file
   myObj.open("GET", "https://jsonplaceholder.typicode.com/todos", true);

   // Sending the request to the server
   myObj.send();
}
</script>
Conclusion
So this is how we can monitor the progress of the requests. So that we can easily track down how much data is being transferred, how much data is handled successfully, errors, etc. Now in the next article, we will see the status codes supported by the AJAX.
AJAX - Status Codes
In AJAX, XMLHttpRequest supports various properties and methods to perform different types of operations. Among these properties and methods status property/attribute is a status code that specifies the overall status of the data request sent by the XMLHttpRequest object. Or we can say that the status code is a three-digit number which represent the result of the request sent by the XMLHttpRequest object like the request was successful, run into an error, or redirected, etc.
So the syntax of the status property is −
Format
if(XMLHttpRequestObjectName.status == 200){
   // Body
}
Here we can access a status property or attribute using the XMLHttpRequest object. If the status code is equal to 200, then the code inside the body will execute.
Status Codes
The status codes that HTTP status returned are as follows −
Successful
| Status | Message | Description |
|---|---|---|
| 200 | OK | If the request is OK. |
| 201 | Created | When the request is complete and a new resource is created. |
| 202 | Accepted | When the request is accepted by the server. |
| 204 | No Content | When there is no data in the response body. |
| 205 | Reset Content | For additional inputs the browser clears the form used for transaction. |
| 206 | Partial Content | When the server returns the partial data of the specified size. |
Redirection
| Status | Message | Description |
|---|---|---|
| 300 | Multiple Choices | It is used to represent a link list. So that user can select any one link and go to that location. It allows only five locations. |
| 301 | Moved Permanently | When the requested page is moved to the new URL. |
| 302 | Found | When the requested page is found in a different URL. |
| 304 | Not modified | URL is not modified. |
Client Error
| Status | Message | Description |
|---|---|---|
| 400 | Bad Request | The server cannot fulfil the request because the request was malformed or has invalid syntax. |
| 401 | Unauthorised | The request needs authentication and the user does not provide valid credentials. |
| 403 | Forbidden | The server understood the request but does not fulfil it. |
| 404 | Not Found | The requested page is not found. |
| 405 | Method Not Allowed | The method through which the request is made is not supported by the page. |
| 406 | Not Acceptable | The response generated by the server cannot be accepted by the client. |
| 408 | Request Timeout | Server timeout |
| 409 | Conflict | The request does not fulfil due to a conflict in the request. |
| 410 | Gone | The requested page is not available. |
| 417 | Exception Failed | The server does not match the requirement of the Expect request header field. |
Server Error
| Status | Message | Description |
|---|---|---|
| 500 | Internal Server Error | When the server encounter error while processing the request |
| 501 | Not Implemented | When the server does not recognise the request method or lacks of ability to fulfil the request |
| 502 | Bad Gateway | When the server acts like a gateway and recovers an invalid response from another server(upstream) |
| 503 | Service Unavailable | When the server is not available or down |
| 504 | Gateway Timeout | When the server acts like a gateway and does not receive a response from the other server(upstream) on time. |
| 505 | HTTP Version Not Supported | When the server does not support the version of the HTTP protocol. |
| 511 | Network Authentication Required | When the client needs to authenticate to gain access to the network. |
Flow Chart
In the below code, we retrieve the data from the server. So we create a function named as showDoc(). Now we call this function by clicking on the "Click Here" button. This function will create a new XHR object using XMLHttpRequest() constructor. Then it creates a call-back function which will handle the request. Then it calls the open() function of the XHR object to initialise the request with HTTP GET method and the URL of the server. Finally, it calls send() function to send the request to the server.
So when the server responds to the request the "onreadystatechange" property calls the callback function with the current state of XMLHttpRequest object. If the status is 200 then that means the request is successful, so it displays the result on the screen and writes a message in the console log. If the status is 404, then that means the server encountered an error. So we got an error message in the console log.
Example
<!DOCTYPE html>
<html>
<body>
<script>
   function ShowDoc() {
      // Creating XMLHttpRequest object
      var myhttp = new XMLHttpRequest();

      // Creating call back function
      myhttp.onreadystatechange = function() {
         // Checking the status of the response
         // This will proceed when the response is successful
         if (this.status == 200){
            console.log("Found the requested data")
            document.getElementById("example").innerHTML = this.responseText;
         }
         // This will proceed when the error is found
         else if(this.status == 404){
            console.log("Found error");
         }
      };
      // Open the given file
      myhttp.open("GET", "https://jsonplaceholder.typicode.com/todos/3", true);

      // Sending the request to the server
      myhttp.send();
   }
</script>
<p>Please click on the button to fetch data</p>
<button type="button" onclick="ShowDoc()">Click Here</button>
<div id="example"></div>
</body>
</html>
Output

Conclusion
So these are the status codes used by the XMLHttpRequest. These status codes represent the status of the request. According to these status codes, we can perform actions on the request. Now in the next article, we will learn about how errors are handled by the XMLHttpRequest.
AJAX - Applications
AJAX is the commonly used web technology to send and receive data to and from the web server asynchronously without reloading all the components of the web page. It is effortless to understand and use because it doesn't use any new technology instead it is a combination of existing web technologies like JavaScript, XML, HTML, etc. It makes web applications more responsive and interactive so that they can fetch and show data in real-time without refreshing the full page. Due to its tremendous functionality, it is used by almost all web application creators including small or large firms.
AJAX is generally used by almost all the applications present on the internet. Some of the popular applications are −
Google Maps − It is a great example of an AJAX application. It uses AJAX to dynamically update the maps and show only the requested data without reloading the whole page.
Facebook − It is also a good example of an AJAX application. It uses AJAX to update the feeds, notifications, news, and other features. Ajax is also used for update the Facebook content of the web page according to the action of the user.
Gmail − Gmail also uses AJAX to provide a seamless and interactive environment to the user. With the help of AJAX Gmail can update the inbox, delete emails, or mark emails as read without reloading the page.
Twitter − Twitter is also one of the great examples of an AJAX application. Using AJAX provide a real-time environment to the user. Whenever a new tweet is posted it will add to the timeline without refreshing the whole page. The same goes for the notification.
Online shopping websites − AJAX is also used by online shopping websites to show product details and their real-time prices without requiring users to navigate to a new webpage.
Google − Google also uses AJAX for its auto-complete feature. The auto-complete feature comes in the picture when the user enters something in the Google search bar and then this feature provides real-time suggestions in the drop-down list without reloading the original web page. This feature is used in various forms also.
Chats and instant messages − Nowadays most websites use customer support chat facilities through which they can communicate with their customers without reloading the entire webpage. AJAX also achieves this facility.
Form submission and validations − Various websites use AJAX for the submission and validation of forms. It provides an auto-filling feature in some fields of the form and can give suggestions(like autocomplete feature) for the possible entries for the specified field. AJAX is also used to validate the credentials of the user.
Voting and rating systems − Various websites use rating and voting systems, allowing users to customise the data according to the votes and ratings. Also, users can allow to vote or rate the content present on the given website and then the site updates its content accordingly. Such type of sites uses AJAX to manage user votes and rating.
Conclusion
So overall AJAX is a very powerful technique which allows web developers to create interactive and dynamic web applications. Using this technique application can communicate with the server asynchronously without refreshing the whole page for each request. Dynamic applications provide a smooth browser experience to their users. Now in the next article, we will see database operations.
AJAX - Browser Compatibility
AJAX creates dynamic webpages in which the communication between the user and the server takes place in the background without loading the whole page. So it is important to know the browser compatibility because different browsers can implement XMLHttpRequest object and its related properties and methods differently.
The following are the key points that are used to check the compatibility of the browser −
Support XMLHttpRequest's object − A browser must support the XMLHttpRequest object. Some of the old browser(like internet explorer 6 or earlier versions) does not keep the XMLHttpRequest object. To make them compatible with other browsers you will need to use the fallback approach using iframe or form elements to run all the AJAX functionalities.
Cross-origin request − Some browsers don't support cross-origin requests made using XMLHttpRequest. So to prevent these vulnerabilities we use JSONP(JSON with padding), CORS(Cross-Origin Resource Sharing) or proxy server to do cross-origin requests.
Response Type − Distinct browsers may support different response types like text, JSON, XML, binary data, etc, for XMLHttpRequest. So if you want your application to support a wide range of web browsers, you need to find the supported response type and handle it wisely.
Error handling − Different browsers handle XMLHttpRequest errors differently. So you need to check your error handling code to ensure that it works well for all browsers.
Event Handling − Different browsers may have their own ways of handling events for XMLHttpRequest like onload, etc. So you need to test and then adjust your code to ensure that it works well for all browsers.
Although most modern browsers like Google Chrome, Mozilla Firefox, Microsoft Edge, Safari, and Opera fully support AJAX. But some of the older browsers like internet explorer 6 and 7 have limited support of AJAX. So in that, never forget browser compatibility because it will affect the working of the AJAX web application.
Conclusion
To ensure the compatibility of your AJAX application among all the browsers, you need to use a JavaScript library or framework which provides cross-browser support to AJAX. Also, these libraries help you to remove away the browser-specific differences while handling XMLHttpRequest and give a consistent API for the AJAX request. Now in the next article, we will see the security features provided by AJAX.
AJAX - Examples
Here is a list of some famous web applications that make use of AJAX.
Google Maps
A user can drag an entire map by using the mouse, rather than clicking on a button.
Google Suggest
As you type, Google offers suggestions. Use the arrow keys to navigate the results.
Gmail
Gmail is a webmail built on the idea that emails can be more intuitive, efficient, and useful.
Yahoo Maps (new)
Now it's even easier and more fun to get where you're going!
Difference between AJAX and Conventional CGI Program
Try these two examples one by one and you will feel the difference. While trying AJAX example, there is no discontinuity and you get the response very quickly, but when you try the standard GCI example, you would have to wait for the response and your page also gets refreshed.
AJAX Example
Standard Example
NOTE − We have given a more complex example in AJAX Database.
AJAX - Browser Support
All the available browsers cannot support AJAX. Here is a list of major browsers that support AJAX.
- Mozilla Firefox 1.0 and above.
- Netscape version 7.1 and above.
- Apple Safari 1.2 and above.
- Microsoft Internet Explorer 5 and above.
- Konqueror.
- Opera 7.6 and above.
When you write your next application, do consider the browsers that do not support AJAX.
NOTE − When we say that a browser does not support AJAX, it simply means that the browser does not support the creation of Javascript object − XMLHttpRequest object.
Writing Browser Specific Code
The simplest way to make your source code compatible with a browser is to use try...catch blocks in your JavaScript.
Example
<html>
<body>
<script language = "javascript" type = "text/javascript">
   <!--
   //Browser Support Code
   function ajaxFunction() {
      var ajaxRequest;  // The variable that makes Ajax possible!
      try {
         // Opera 8.0+, Firefox, Safari
         ajaxRequest = new XMLHttpRequest();
      } catch (e) {
         // Internet Explorer Browsers
         try {
            ajaxRequest = new ActiveXObject("Msxml2.XMLHTTP");
         } catch (e) {
            try {
               ajaxRequest = new ActiveXObject("Microsoft.XMLHTTP");
            } catch (e) {
               // Something went wrong
               alert("Your browser broke!");
               return false;
            }
         }
      }
   }
   //-->
</script>
<form name = 'myForm'>
   Name: <input type = 'text' name = 'username' /> <br />
   Time: <input type = 'text' name = 'time' />
</form>
</body>
</html>
Output

In the above JavaScript code, we try three times to make our XMLHttpRequest object. Our first attempt −
- ajaxRequest = new XMLHttpRequest();
It is for Opera 8.0+, Firefox, and Safari browsers. If it fails, we try two more times to make the correct object for an Internet Explorer browser with −
- ajaxRequest = new ActiveXObject("Msxml2.XMLHTTP");
- ajaxRequest = new ActiveXObject("Microsoft.XMLHTTP");
If it doesn't work, then we can use a very outdated browser that doesn't support XMLHttpRequest, which also means it doesn't support AJAX.
Most likely though, our variable ajaxRequest will now be set to whatever XMLHttpRequest standard the browser uses and we can start sending data to the server. The step-wise AJAX workflow is explained in the next chapter.
AJAX - XMLHttpRequest
In AJAX, XMLHttpRequest plays a very important role. XMLHttpRequest is used to exchange data to or from the web server in the background while the user/client working in the foreground and then update the part of the web page with the received data without reloading the whole page.
We can also say that XMLHttpRequest (XHR) can be used by various web browser scripting languages like JavaScript, JScript, VBScript, etc., to exchange XML data to or from the web server with the help of HTTP. Apart from XML, XMLHttpRequest can also fetch data in various formats like JSON, etc. It creates an asynchronous connection between the client side and the server side.
Syntax
variableName = new XMLHttpRequest()
Where using a new keyword along with XMLHttpRequest() constructor we can be able to create a new XMLHttpRequest object. This object must be created before calling the open() function to initialise it before calling send() function to send the request to the web server.
XMLHttpRequest Object Methods
XMLHttpRequest object has the following methods −
| Sr.No. | Method & Description |
|---|---|
| 1 | new XMLHttpRequest() It is used to create an XMLHttpRequest() object |
| 2 | abort() It is used to cancel the current request. |
| 3 | getAllResponseHeaders() It is used to get the header information |
| 4 | getResponseHeader() It is used to get the specific header information |
| 5 | open(method, url, async, user, psw) open(method, url, async, user, psw) It is used to initialise the request parameters. Here, method: request type GET or POST or Other types url: file location async: for the asynchronous set to true or for synchronous set to false user: for optional user name psw: for optional password |
| 6 | send() It is used to send requests to the web server. It is generally used for GET requests. |
| 7 | send(string) It is used to send requests to the server. It is generally used for POST requests. |
| 8 | setRequestHeader() It is used to add key/value pair to the header. |
XMLHttpRequest Object Properties
XMLHttpRequest object has the following properties −
| Sr.No. | Property & Description |
|---|---|
| 1 | onreadystatechange Set the callback function which handles request state changes. |
| 2 | readyState It is used to hold the status of XMLHttpRequest. It has the following values −
|
| 3 | responseText It is used to return the response data as a string. |
| 4 | responseXML It is used to return the response data as XML data |
| 5 | Status It is used to return the status number of a request. For example − 200: for OK 403: for Forbidden 404: for Not Found |
| 6 | StatusText It is used to return the status text. For example, OK, Not Found, etc. |
Usage of XMLHttpRequest
After understanding the basic syntax, methods, and properties of XMLHttpRequest now we learn how to use XMLHttpRequest in real life. So to use XMLHttpRequest in your program first we need to follow the following major steps −
Step 1 − Create an object of XMLHttpRequest.
var variableName = new XMLHttpRequest()
Step 2 − After creating XMLHttpRequest an object, we now have to define a callback function which will trigger after getting a response from the web server.
XMLHttpRequestObjectName.onreadystatechange = function(){
   // Callback function body
}
XMLHttpRequestObjectName.open(method, url, async)
XMLHttpRequestObjectName.send()
Step 3 − Now we use open() and send() functions to send a request to the web server.
Now lets us understand the working of XMLHttpRequest with the help of the following example:
Example
In the below example, we are going to fetch data from the server. To fetch the data from the server we will click on the "Click Me" button. So when we click on the "Click Me" button, the displayDoc() function is called. Inside the displayDoc() function, we create an XMLHttpRequest object. Then we create a call-back function to handle the server response. Then we call the open() method of the XHR object to initialise the request with HTTP GET method and the server URL which is "https://jsonplaceholder.typicode.com/todos". Then we call send() function to send the request.
So when the server responds to the request, the "onreadystatechange" property calls the callback function with the current state of XMLHttpRequest object. If the "ready state" property is set to 4(that means the request is completed) and the "status" property is set to 200(that means the successful response), then the response data is extracted from the "responseText" property and display the HTML document with the help of "innerHTML" property of the sample element.
If we error is found during the request then the else statement present in the callback function will execute. So this is how we can fetch data from the server.
<!DOCTYPE html>
<html>
<body>
<script>
function displayDoc() {
   // Creating XMLHttpRequest object
   var myObj = new XMLHttpRequest();

   // Creating a callback function
   myObj.onreadystatechange = function() {
      if (this.readyState == 4 && this.status == 200) {
         document.getElementById("sample").innerHTML = this.responseText;
      } else {
         console.log("Error Found")
      }
   };
   // Open the given file
   myObj.open("GET", "https://jsonplaceholder.typicode.com/todos", true);

   // Sending the request to the server
   myObj.send();
}
</script>
<div id="sample">
   <h2>Getting Data</h2>
   <p>Please click on the button to fetch data</p>
   <button type="button" onclick="displayDoc()">Click Me</button>
</div>
</body>
</html>
Output

Conclusion
XMLHttpRequest is the main object of AJAX through which AJAX create asynchronous communication between a web browser and the web server. So now in the next article, we will learn how to send a request using an XMLHttpRequest object.
AJAX - Database Operations
To clearly illustrate how easy it is to access information from a database using AJAX, we are going to build MySQL queries on the fly and display the results on "ajax.html". But before we proceed, let us do the ground work. Create a table using the following command.
NOTE − We are assuming you have sufficient privilege to perform the following MySQL operations.
CREATE TABLE 'ajax_example' (
   'name' varchar(50) NOT NULL,
   'age' int(11) NOT NULL,
   'sex' varchar(1) NOT NULL,
   'wpm' int(11) NOT NULL,
   PRIMARY KEY  ('name')
)
Now dump the following data into this table using the following SQL statements −
INSERT INTO 'ajax_example' VALUES ('Jerry', 120, 'm', 20);
INSERT INTO 'ajax_example' VALUES ('Regis', 75, 'm', 44);
INSERT INTO 'ajax_example' VALUES ('Frank', 45, 'm', 87);
INSERT INTO 'ajax_example' VALUES ('Jill', 22, 'f', 72);
INSERT INTO 'ajax_example' VALUES ('Tracy', 27, 'f', 0);
INSERT INTO 'ajax_example' VALUES ('Julie', 35, 'f', 90);
Client Side HTML File
Now let us have our client side HTML file, which is ajax.html, and it will have the following code −
Example
<html>
<body>
<script language = "javascript" type = "text/javascript">
   <!--
   //Browser Support Code
   function ajaxFunction() {
      var ajaxRequest; // The variable that makes Ajax possible!
      try {
         // Opera 8.0+, Firefox, Safari
         ajaxRequest = new XMLHttpRequest();
      } catch (e) {
         // Internet Explorer Browsers
         try {
            ajaxRequest = new ActiveXObject("Msxml2.XMLHTTP");
         } catch (e) {
            try {
               ajaxRequest = new ActiveXObject("Microsoft.XMLHTTP");
            } catch (e) {
               // Something went wrong
               alert("Your browser broke!");
               return false;
            }
         }
      }
      // Create a function that will receive data
      // sent from the server and will update
      // div section in the same page.
      ajaxRequest.onreadystatechange = function() {
         if(ajaxRequest.readyState == 4) {
            var ajaxDisplay = document.getElementById('ajaxDiv');
            ajaxDisplay.innerHTML = ajaxRequest.responseText;
         }
      }
      // Now get the value from user and pass it to
      // server script.
      var age = document.getElementById('age').value;
      var wpm = document.getElementById('wpm').value;
      var sex = document.getElementById('sex').value;
      var queryString = "?age = " + age ;
      queryString +=  "&wpm = " + wpm + "&sex = " + sex;
      ajaxRequest.open("GET", "ajax-example.php" + queryString, true);
      ajaxRequest.send(null);
   }
   //-->
</script>
<form name = 'myForm'>
   Max Age: <input type = 'text' id = 'age' /> <br />
   Max WPM: <input type = 'text' id = 'wpm' /> <br />
   Sex:
   <select id = 'sex'>
   <option value = "m">m</option>
   <option value = "f">f</option>
   </select>
   <input type = 'button' onclick = 'ajaxFunction()' value = 'Query MySQL'/>
</form>
<div id = 'ajaxDiv'>Your result will display here</div>
</body>
</html>
NOTE − The way of passing variables in the Query is according to HTTP standard and have formA.
URL?variable1 = value1;&variable2 = value2;
The above code will give you a screen as given below −
Output
Your result will display here in this section after you have made your entry.

NOTE − This is a dummy screen.
Server Side PHP File
Your client-side script is ready. Now, we have to write our server-side script, which will fetch age, wpm, and sex from the database and will send it back to the client. Put the following code into the file "ajax-example.php".
<?php
$dbhost = "localhost";
$dbuser = "dbusername";
$dbpass = "dbpassword";
$dbname = "dbname";

//Connect to MySQL Server
mysql_connect($dbhost, $dbuser, $dbpass);

//Select Database
mysql_select_db($dbname) or die(mysql_error());

// Retrieve data from Query String
$age = $_GET['age'];
$sex = $_GET['sex'];
$wpm = $_GET['wpm'];

// Escape User Input to help prevent SQL Injection
$age = mysql_real_escape_string($age);
$sex = mysql_real_escape_string($sex);
$wpm = mysql_real_escape_string($wpm);

//build query
$query = "SELECT * FROM ajax_example WHERE sex = '$sex'";

if(is_numeric($age))
   $query .= " AND age <= $age";

if(is_numeric($wpm))
   $query .= " AND wpm <= $wpm";

//Execute query
$qry_result = mysql_query($query) or die(mysql_error());

//Build Result String
$display_string = "<table>";
$display_string .= "<tr>";
$display_string .= "<th>Name</th>";
$display_string .= "<th>Age</th>";
$display_string .= "<th>Sex</th>";
$display_string .= "<th>WPM</th>";
$display_string .= "</tr>";

// Insert a new row in the table for each person returned
while($row = mysql_fetch_array($qry_result)) {
   $display_string .= "<tr>";
   $display_string .= "<td>$row[name]</td>";
   $display_string .= "<td>$row[age]</td>";
   $display_string .= "<td>$row[sex]</td>";
   $display_string .= "<td>$row[wpm]</td>";
   $display_string .= "</tr>";
}

echo "Query: " . $query . "<br />";
$display_string .= "</table>";

echo $display_string;
?>
Now try by entering a valid value (e.g., 120) in Max Age or any other box and then click Query MySQL button.
Your result will display here in this section after you have made your entry.
If you have successfully completed this lesson, then you know how to use MySQL, PHP, HTML, and Javascript in tandem to write AJAX applications.
AJAX - Security
AJAX is the most commonly used web technique to send and receive data to and from the web server asynchronously without disturbing the functionality of the other components of the client-side application. Although AJAX itself does not provide any security vulnerabilities, still we have to keep some security measurements while implementing AJAX. The security measurements are −
Cross-Site Scripting(XSS) − AJAX applications should be vulnerable to XSS attacks. If proper input validation and output encoding are not implemented, then a hacker can easily inject malicious scripts inside the AJAX response. These malicious scripts are used to steal sensitive data from the system or can manipulate the content. So always create an AJAX application which is safe from this attack using proper validation and sanitization before displaying data on the web page.
Cross-Site Request Forgery(CSRF) − In this attack, the attacker tricks the browser by doing unwanted actions with the help of an authentication session. It can exploit the AJAX request and can perform unauthorized actions. So to prevent this attack we have to implement CSRF protection techniques like generation and validating random tokens Or can use the same origin policy.
Insecure Direct Object References(IDOR) − The request generally accesses the specified resource from the server with the help of a unique identifier. But if the attacker gets this identifier then it can easily manipulate or can access unauthorized resources. So to prevent this avoid exposing sensitive information. Also, check the user authorization for the specified resource of the developers, in the server side.
Content Security Policies(CSP) − It is a policy which helps users/developers to save themselves from malicious activities or unauthorized access. It provides a permitted source for secure scripts and other resources.
Server-Side validation − Server-side validation is very important because it ensures that the submitted data meets the specified criteria and it is safe for further process. We can not bypass or manipulate server-side validation but we can bypass client-side validation.
Secure Session Management − The AJAX application should properly maintain user sessions and session tokens to save the session from attacks. Always check that the session tokes are generated properly, and securely transmitted and can logout if the invalidation or session expiration happens.
Input Validation and Sanitization − Server should perform validation and sanitization of the data received from the client side to prevent attacks.
Regular Update and Security − As we know that AJAX uses external libraries or frameworks. So keeping them up to date is an important task. To avoid various vulnerabilities and improve the security of the application.
Conclusion
So while creating an AJAX application always remember these points for security purposes to save your application from attacks. Now in the next article, we will the major issues faced by AJAX.
AJAX - Issues
Every technology in this world has its bright side and its dark side similarly AJAX is a powerful technique which is used to develop dynamic and interactive web applications but it also has some challenges and issues. So, some of the common issues related to AJAX are −
Cross-Domain Requests − In AJAX, the requests generally work with the same-origin policy. This policy restricts requests to the same domain for security purposes which means if you try to make an AJAX request in a different domain you will get a CORS error. So to overcome this error you need to reconfigure your system and allow cross-domain requests with the help of JSONP or proxy servers.
Security Vulnerability − In AJAX, the requests can be attacked using XSS(cross-site scripting) or CSRF(cross-site request forgery). So to avoid such types of vulnerabilities we have to use input validation, output encoding, and CSRF protect tokens.
Browser Support − Some of the browser's versions do not support AJAX functionalities due to which the browser compatibility issue arises. So while using AJAX please check your browser if they can make or support AJAX requests or not.
Performance Impact − If we do not optimize the AJAX request properly then it will affect the performance. If we transfer excessive data, unnecessary requests, frequent requests, or inefficient server-side processing these activities are responsible for slowing down the page loading time and can increase the load of the server. So always make a proper and optimized request.
Search Engine Optimization(SEO) − Search engines often face challenges in indexing AJAX-driven content because old web crawlers do not execute JavaScript. It will affect the ranking and discovery of the web page in the search engines.
Testing and Debugging − Due to the asynchronous behaviour of the request it is hard to debug AJAX codes. So to overcome this issue we have to use good debugging tools that can identify the issues and resolve them correctly.
JavaScript Dependency − AJAX is generally dependent upon JavaScript. So if JavaScript is disabled in the web browser, we will not be able to use AJAX functionalities. So always enable JavaScript in the web browser for a better experience.
Code complexity − AJAX codes are complex especially when handling asynchronous flow and managing responses. So to overcome this issue always create organized, maintainable, and clear code in which each concern is maintained in separate code so that developers can easily understand.
Dependency Management − As we know that AJAX is implemented using various web technologies due to which it has to rely on external libraries or frameworks. So managing dependencies and updating them in a timely is the biggest challenge for AJAX especially when we are working with multiple components or plugins.
Conclusion
So these are the major issues faced by the AJAX applications. So understanding these issues we can make better use of AJAX in our application for optimal functionality, security and smooth user experience. So this is how we wrap up our AJAX tutorial.
Fetch API - Basics
Fetch is a promise-based API which provides a JavaScript interface to access or manipulate requests and responses asynchronously. It is more powerful as compared to XMLHttpRequest using Fetch API we can send data to the server or can request data from the server asynchronously. It also uses Request and Response objects along with CORS and HTTP origin header concepts.
The following are the key components of Fetch API −
fetch() function − To fetch the resources or to create a request Fetch API uses a global method named fetch(). It returns a promise which further resolves to a Response object.
Request and Response Object − The Request object is used to represent a request being sent with all the pieces of information like URL, header, etc. Whereas the Response object is used to represent the response returned by the server including the status code, body and response header.
Promises − Fetch API is based on promises because they handle operations and manage response flow asynchronously. Using promises we can create a chain of operations and can handle successes and errors using .then() and.catch() functions.
Customization − Using Fetch API we can customize the request by specifying the methods, adding a body to the request, setting a header, handling different formats of data, etc.
CROS − Fetch API provide good support to CROS(Cross-Origin Resource Sharing) which allows users to make a request to different domains.
Working of Fetch API
Fetch API is used to create HTTP requests from Javascript code in web browsers. So using the following steps we will learn how Fetch API works from sending requests to accepting responses −
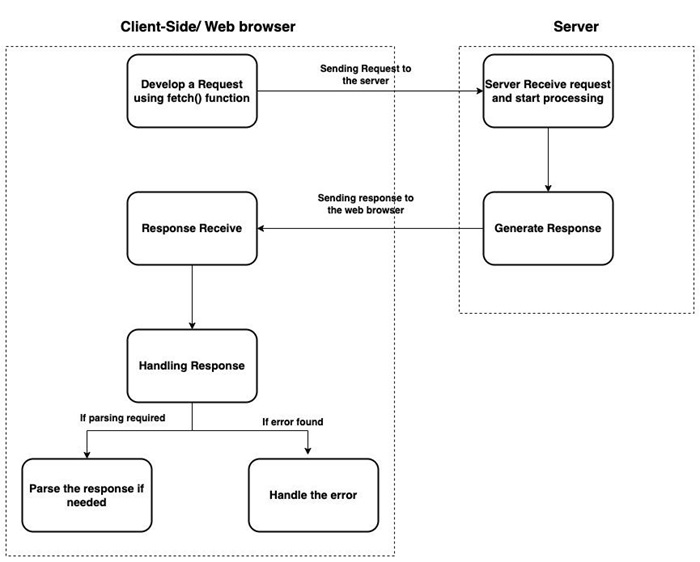
Following is the step by step explanation of the above flow diagram −
Step 1 − Request initialization: On the client side, a JavaScript program uses the fetch() function to create a request object. In this fetch() function, we pass the resource URL from where we fetch and other optional controls like header, method, body, etc.
Step 2 − Sending request: After initializing the request Fetch API sends the request to the server using the given URL. If the request is a GET request, then the browser sends the request directly to the server. If the request is other than a GET request, then the browser sends a preflight OPTIONS request to check if the server allows the request.
Step 3 − Server Processing: After receiving the request the server processes the request. It can perform various operations on the request like handling requests, retrieving data, etc.
Step 4 − Generating response: Now the server generates the response to the given request. The server response generally contains a status code(e.g 200 for success, 404 for request not found, etc.), response header, and optional body.
Step 5 − Receive Response: The web browser receives the response from the server. Now the Fetch API uses promises to resolve the response object send by the server.
Step 6 − Handling response: Fetch API uses promise-based syntax to handle the responses returned by the server. Using this we can access the response status, body, and header, and can perform an action on the received data.
Step 7 − Parse the Response: If the server response contains textual data, then the JavaScript program uses inbuilt methods like .json(), .text(), .blob(), etc to parse and extract data from the response.
Step 8 − Error Handling: If the server returns an error, then the error is handled by the catch() function.
These are the basic steps to understand the workflow of the fetch API. These steps can vary according to the complexity of the real-time usage. Also as we know that Fetch API is asynchronous so it does not block the execution of other Javascript code while waiting for the response from the server.
Advantages
The following are the advantages of Fetch API −
Easy to use − Fetch API provides simple and straightforward syntax to create asynchronous requests.
Promise − Fetch API uses promises due to which it can easily handle asynchronous operations. Promises provide a precise method to easily handle responses and errors.
Modern and browser support − Fetch API is the modern web standard and it is in-built in web browsers due to which it is supported by almost all modern web browsers and platforms. This makes Fetch API more consistent and predictable as compared to XMLHttpRequest.
Streaming and progressive loading − Fetch API supports streaming responses means we can start processing the response before it is fully loaded. It is generally useful for large files.
In-built JSON support − Fetch API supports JSON data very efficiently. It can parse JSON responses and convert them into the JavaScript object automatically.
Integrate with other APIs − Due to the behaviour of the Fetch API, it can easily integrate with other APIs like Service Worker API, Cache API, etc.
More Controls − Using Fetch API we can easily customize the request with the help of additional parameters like header, method, body, etc.
Disadvantages
The following are the disadvantages of Fetch API −
Limited web browser support − Fetch API is supported by almost all the modern web browsers but it is not supported by the older web browsers. If you are working with an older web browser, then you have to use older methods like XMLHttpRequest, etc.
Request Cancellation − Fetch API does not provide any in-built method to cancel the initiated request.
Timeouts − Fetch API does not provide any specified or in-built method to timeout a request. If you want to enforce a timeout for a request then you have to do it manually.
Error Handling − Fetch API provides limited error-handling methods. It treats any HTTP status code other than 2xx as an error. This behaviour generally works for some specified cases but not for all cases.
Progress event for file load − Fetch API does not provide any in-built event for the file upload. If you want to monitor the progress of file upload then you required extra libraries.
Cross-origin Limitation − As we know that Fetch API follows the browser's same-origin policy so due to this cross-origin request required extra CORS headers on the server side or is subject to CORS preflight checks, which add-on extra complexity to the development.
Conclusion
Hence Fetch API is more powerful and flexible as compared to traditional approaches like XMLHttpRequest. It can easily integrate with other APIs and platforms. It is the commonly used method while working with HTTP requests in web applications. Now in the next article, we will learn about the differences between fetch API and XMLHttpRequest.
Fetch API Vs XMLHttpRequest
An XMLHttpRequest object is used to communicate with the server asynchronously, which means we can exchange data to or from the server in the background without refreshing the whole page. XMLHttpRequest is the most commonly used technique that's why it is used by most of the mainstream browsers like Google Chrome, Safari, Mozilla Firefox, or Opera. It also supports plain text, JSON data, and many more data formats. It is very easy to use and provides various methods and properties to perform operations. We can create an XMLHttpRequest object using XMLHttpRequest() constructor.
Syntax
variableName = new XMLHttpRequest()
Where using a new keyword along with the XMLHttpRequest() constructor we are able to create a new XMLHttpRequest object. This object must be created before calling the open() function to initialize it before calling send() function to send the request to the web server.
Fetch API provides an interface that is used to fetch/retrieve resources from the server. It is a modern alternative to XMLHttpRequest. It supports the generic definition of Request, and Response due to which we can access them in the future if required for Cache API, Service work, handling or modifying requests and responses, etc. It is very easy, simple and consistent. Or we can say that it provides a modern and flexible approach for creating HTTP requests and handling responses as compared to XMLHttpRequest. It is based on the Promise API which provides clear syntax and better error handling.
Syntax
fetch(res)
Where fetch() takes one mandatory parameter which is res. The res parameter defines the resource that you want to fetch, it can be either a string or any other object or can be a request object. Apart from mandatory parameters, it can also take one optional parameter that can be either method, headers, body, mode cache, same-origin, etc.
Fetch API VS XMLHttpRequest
Following are the difference between the Fetch API and XMLHttpRequest −
| Difference | Fetch API | XMLHttpRequest |
|---|---|---|
Syntax |
As we know Fetch API is a promise-based API so it provides more clear syntax and better error-handling methods. |
XHR is based on a callback approach and its syntax is not as good as Fetch API. |
Cross-Origin Resource Sharing(CROS) |
Fetch API handle CROS request wisely without any additional configuration. |
XMLHttpRequest requires a special configuration to handle or make cross-origin requests. |
Request and Response Header |
Fetch API provides more flexible ways to work with request and response headers. |
XMLHttpRequest provides a limited number of methods to work with request and response headers. |
Streaming and Parsing |
Fetch API provides good support for streaming and parsing large responses, so it improves performance and reduces memory usage. |
XMLHttpRequest requires a custom program to get this functionality. |
Browser Compatibilities |
Fetch API is new so it may not be supported by older versions of the browsers. |
XMLHttpRequest has been used for many years so it is supported by almost all browsers. |
Cookies and Credential Control |
Fetch API provides good control over cookies and credentials due to which we can easily do authentication and authorisation as compared to XMLHttpRequest. |
XMLHttpRequest provide less support to cookies and credentials. |
Timeouts |
Fetch API does not support timeouts so the request will continue till the browser selects the request. |
XMLHttpRequest supports timeouts. |
Conclusion
So these are the major difference between Fetch API and XMLHttpRequest. Fetch API is more powerful and easier to understand as compared to XMLHttpRequest. It is also supported by all modern browsers but XMLHttpRequest is only supported by old browsers. Now in the next article, we will learn about fetch() function.
Fetch API - Browser Compatibility
Fetch API provides a modern JavaScript interface that is used to send requests to the server and handle the response from the server asynchronously. It is more powerful and flexible as compared to the XMLHttpRequest object.
Compatible Browsers
The Fetch API is supported by almost all modern web browsers. The following list shows the browsers named and their versions that support Fetch API −
| Browser Name | Versions |
|---|---|
Chrome |
42-117 |
Edge |
14-114 |
Firefox |
39-117 |
Safari |
10.1-16.6 |
Opera |
29-100 |
Chrome Android |
101 |
Firefox for Android |
111 |
Opera Android |
70 |
Safari on IOS |
10.3-16.6 |
Samsung Internet |
4-19 |
Compatibility Check
The browser compatibility can change over time due to new versions. So, it is a good practice to check the current browser compatibility of Fetch API. The following are the key points that are used to check the compatibility of the web browser −
Versions of web browser − While using Fetch API, please make sure that you are fully aware of what version of the browser you will require for using Fetch API because different versions of web browsers have their level of support for Fetch API.
Support of Fetch API − While using a web browser always verifies that the web browser you are using supports Fetch API. Although almost all modern web browsers support Fetch API, in case you are using an older browser then it will not support Fetch API.
Feature Detection − It is a technique which is used to check if the current web browser supports Fetch API or not. It creates a code which checks the presence of the specified Fetch API method or property or it can also provide alternate functionality if they are not supported by the current web browser.
Cross-Origin Requests − While using Fetch API always check if the current browser supports cross-origin requests. Cross-origin resource sharing (CORS)policy can put a direct effect on making requests to different domains. So always make sure that the browser you are using must contain necessary CORS headers and can handle cross-origin requests properly.
HTTPS requirement − Some web browsers apply some restrictions on creating Fetch API requests from HTTP origin to HTTPS origin. So always check such types of restrictions and make the necessary changes in the application so that it will meet all the security requirements.
Handling errors − The browser you are using must handle the error and HTTP status codes correctly. Make sure that the web browser provides the necessary error information for proper error handling.
So using these points we can check the compatibility of the web browser by using Fetch API.
Conclusion
So this is how we can check the browser compatibility. Fetch API is generally supported by all modern browsers. It does not support older web browsers. So if you are working with old web browsers, then you have to use XMLHttpRequest. Now in the next article, we will learn about Fetch API Headers.
Fetch API - Headers
Fetch API provides a special interface known as the Headers interface to perform various operations like setting, adding, retrieving and removing headers from the request and response's headers list. The Headers objects are initially empty or may contain zero or more name-value pairs. You can add header names in the headers object using the append() method. This interface provides various methods to perform actions on the Headers object.
Constructor
To create a headers object we can use the Headers() constructor along with a new keyword. This constructor may or may not contain parameters.
Syntax
const newHeader = New Headers()
Or
const newHeader = New Headers(init)
The Headers() constructor contains only one optional parameter that is init. It is an object which contains HTTP headers that you want to pre-populate your headers object. The value of this parameter is a string value or an array of name-value pairs.
Example 1
In the following program, we are sending data to the server. So for that, we create a new headers object using the Header() constructor and then add name-value pairs using the append() function. After that, we make a fetch() request with the fetch() function which includes the POST method, the headers object that we created earlier to add headers to the request, and the body of the request. Now, after sending the request to the server now we use the then() function to handle the response. If we encounter an error, then that error is handled by the catch() function.
<!DOCTYPE html>
<html>
<body>
<script>
   // Creating Headers object
   const myheaders = new Headers();

   // Adding headers to the Headers object
   myheaders.append('Content-Type', 'application/json');
   myheaders.append('Authorization', 'Bearer token123');

   // Sending data using POST request
   fetch("https://jsonplaceholder.typicode.com/todos", {
      // Adding POST request
      method: "POST",

      // Adding headers
      headers:myheaders,

      // Adding body which we want to send
      body: JSON.stringify({
         id: 32,
         title: "Hello! How are you?",
      })
   })

   // Converting received information into JSON
   .then(response => response.json())
   .then(myData => {
      // Display the sent data
      console.log("Data Sent Successfully");

      // Display output
      document.getElementById("manager").innerHTML = JSON.stringify(myData);
   });
</script>
   <h2>Display Data</h2>
   <div>
      <!-- Displaying retrevie data-->
      <p id = "manager"></p>
   </div>
</body>
</html>
Output
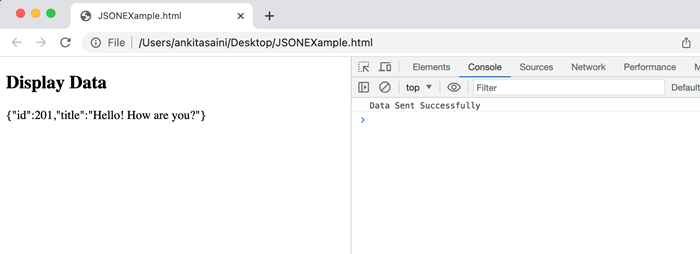
Methods
The following are the commonly used method of Header interface −
| Sr.No. | Method Name & Description |
|---|---|
| 1 | Headers.append() This method is used to append a new value inside the existing headers object. Or it can add a header if it does not exist. |
| 2 | Headers.delete() This method is used to delete a header from the Headers object. |
| 3 | Headers.enteries() This method provides an iterator which allows us to iterate through all the key/value pairs present in the given object. |
| 4 | Headers.forEach() This method executes once for each key/value pair present in the Headers object. |
| 5 | Headers.get() This method is used to find all the string sequence of all the values of the header present inside the Header object. |
| 6 | Headers.getSetCookie() This method returns an array which contains all the values of Set-Cookie headers related to the response. |
| 7 | Headers.has() This method returns a boolean value which checks if the current Headers object contains the specified header or not. |
| 8 | Headers.keys() This method is used to iterate through all the keys of the key-value pairs present in the given object. |
| 9 | Headers.set() This method is used to set a new value for the existing Headers object. Or can add a header if it doesn't exist. |
| 10 | Headers.values() This method is used to iterate through all the values of the key-value pairs present in the given object. |
Example 2
In the following program, we use the methods such as append(), get(), keys() and values() provided by the Headers interface.
<!DOCTYPE html>
<html>
<body>
<script>
   // Creating Headers object
   const myheaders = new Headers();

   // Adding headers to the Headers object
   myheaders.append('Content-Type', 'application/json');
   myheaders.append('Authorization', 'Bearer token123');

   // Sending data using POST request
   fetch("https://jsonplaceholder.typicode.com/todos", {
      // Adding POST request
      method: "POST",

      // Adding headers
      headers:myheaders,

      // Adding body which we want to send
      body: JSON.stringify({
         id: 32,
         title: "Hello! How are you?",
      })
   })
   // Converting received information into JSON
   .then(response => {
      // Header also returned in response
      // Accessing response header
      const resHeader = response.headers;

      // Getting content type value of the response header
      // Using get() function
      const contentTypeValue = resHeader.get("Content-Type");
      console.log("Content-Type:", contentTypeValue);

      // Getting all the keys present in the
      //  key-value pairs in response header
      // Using keys() function
      const headerKeys = resHeader.keys();
      for(const res of headerKeys){
      console.log("Keys:", res);
      }
      // Getting all the values present in the
      //  key-value pairs in response header
      // Using Values() function
      const headerValues = resHeader.values();
         for(const resVal of headerValues){
         console.log("Values:", resVal);
      }
   });
</script>
   <h2>Fetch API Examples</h2>
</body>
</html>
Output
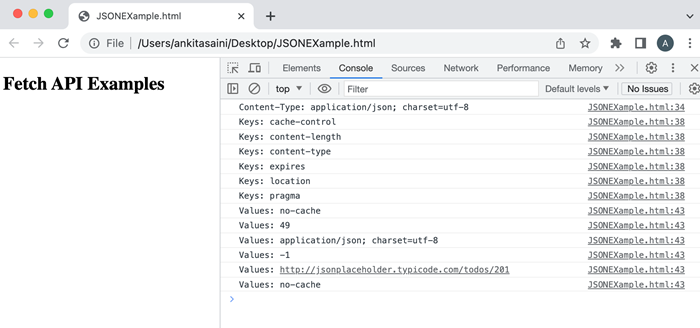
Conclusion
So this is how we use the Header interface in Fetch API. It provides various methods to manipulate, access and iterate over the headers. We can also retrieve Header objects from the Request and response using Request.headers and Response.headers properties. Now in the next article, we will learn about the Request interface.
Fetch API - Request
In Fetch API, Request interface is used to create a resource request. It is an alternative way of creating requests other than the fetch() function. It also provides various properties and methods which we can apply to the request. So, first, we will learn about Request() constructor, then how to send requests and then the method and properties provided by the Request interface.
Constructor
To create a request object we can use Request() constructor along with a new keyword. This constructor contains one mandatory parameter which is the URL of the resource and the other parameter is optional.
Syntax
const newRequest = new Request(resourceURL)
Or
const newRequest = new Request(resourceURL, optional)
The Request() constructor has the following parameters −
resourceURL − The resource which we want to fetch. Its value can be either a resource URL or the Request object.
Options − Object which provides additional settings for the request and the customized options are as follows −
method − Represents the request methods like GET, POST, PUT and DELETE.
headers − Set a header to the request.
body − Adding data to the request. This parameter is not used by GET or HEAD methods.
mode − Set the mode for the request such as cors, same-origin, no-cors or navigate. By default the value of the mode parameter is cors.
credentials − It sets the credentials which you want to use for the request such as omit, same-origin, or include. The default value of this parameter is same-origin.
cache − Set the cache mode you want for your request.
redirect − Used for redirect mode such as follow, error, or manual. By default, the parameter is set for follow value.
referrer − A string which represents the referrer of the request such as client, URL, or no-referrer. The default value of this parameter is about the client.
referrerPolicy − Used to set the referrer policy.
integrity − Used to set the subresource integrity value of the given request.
keepalive − Used to check whether to create a persistent connection for multiple requests/response or not.
signal − Represent an AbortSignal object which is used to communicate with or abort a request.
priority − Used to set the priority of the request as compared to other requests. The possible value of this parameter is:
high − Set the priority of the current fetch request to high as compared to others.
low − Set the priority of the current fetch request to low as compared to others.
auto − Automatically find the priority of the current fetch request.
Send Request
To send a request, we must first create a Request object using the Request constructor with additional parameters like header, body, method, resource URL, etc. Then pass this object in the fetch() function to send the request to the server. Now the fetch() function returns a promise which will resolve with the response object. If we encounter an error, then we execute the catch block.
Example
In the following program, we create a script to send data using the Request object. So for that, we create a request object using Request() constructor along with parameters like −
URL − Represent the resource URL.
method − Here we use the POST method which represents we are sending data to the server.
body − Contains the data which we want to send.
header − It tells that the data is JSON data.
Now we pass the request object in the fetch() function to send the request and handle the response returned by the server and handle the error if it occurs.
<!DOCTYPE html>
<html>
<body>
<script>
   // Creating request object
   const myRequest = new Request("https://jsonplaceholder.typicode.com/todos", {
      // Setting POST request
      method: "POST",

      // Add body which contains data
      body: JSON.stringify({
      id: 321,
      title: "Kirti is a good girl",
      }),

      // Setting header
      headers:{"Content-type": "application/json; charset=UTF-8"}
   });
   fetch(myRequest)

   // Handling response
   .then(response => response.json())
   .then(myData => {
      console.log("Data Sent Successfully");
      // Display output
      document.getElementById("sendData").innerHTML = JSON.stringify(myData);
   })

   // Handling error
   .catch(err=>{
      console.error("We get an error:", err);
   });
</script>
   <h2>Fetch API Example</h2>
   <div>
      <!-- Displaying retrieved data-->
      <p id="sendData"></p>
   </div>
</body>
</html>
Output
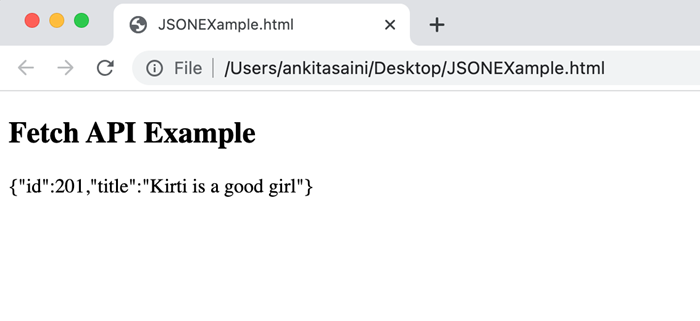
Instance Properties
The properties provided by the request interface are the read-only properties. So the commonly used properties are −
| Sr.No. | Property & Description |
|---|---|
| 1 | Request.url This property contains the URL of the given request. |
| 2 | Request.body This property contains the body of the given request. |
| 3 | Request.bodyUsed This property is used to tell whether the body present in the request is used or not. Its value is boolean. |
| 4 | Request.destination This property is used to tell the destination of the request. |
| 5 | Request.method This property contains the request methods such as GET, POST, PUT, and DELETE. |
| 6 | Request.headers This property contains the header object of the request. |
| 7 | Request.cache This property contains the cache mode of the given request. |
| 8 | Request.credentials This property contains the credentials of the given request. |
| 9 | Request.mode This property contains the mode of the given request. |
Example
In the following program, we use the properties (such as url, method, headers, and mode)provided by the Request interface.
<!DOCTYPE html>
<html>
<head>
   <title>Fetch API Example</title>
</head>
<body>
   <h1>Example of Fetch API</h1>
<script>
   // Creating request object
   const myRequest = new Request("https://jsonplaceholder.typicode.com/todos", {
      // Setting POST request
      method: "POST",

      // Add body which contains data
      body: JSON.stringify({
         id: 321,
         title: "Kirti is a good girl",
      }),
      // Setting header
      headers:{"Content-type": "application/json; charset=UTF-8"},
      mode: "cors"
   });
   // Display url of the request
   console.log(myRequest.url);

   // Display request method
   console.log(myRequest.method);

   // Display header of the request
   console.log(myRequest.headers.get('content-Type'));

   // Display mode of the request
   console.log(myRequest.mode);
</script>
</body>
</html>
Output
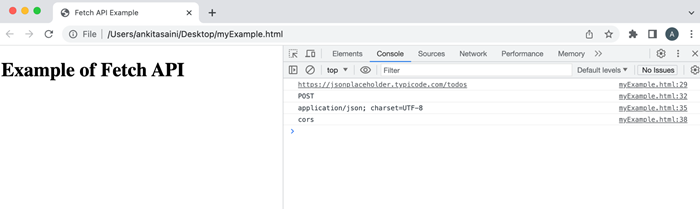
Methods
The following are the commonly used method of Request interface −
| Sr.No. | Method & Description |
|---|---|
| 1 | Request.arrayBuffer() This method is used to resolve a promise with ArrayBuffer representation of the request body. |
| 2 | Request.blob() This method is used to resolve a promise with a blob representation of the request body. |
| 3 | Request.clone() This method is used to create a copy of the current request. |
| 4 | Request.json() This method is used to parse the request body as JSON and resolve a promise with the result of parsing. |
| 5 | Request.text() This method is used to resolve a promise with a text representation of the request body. |
| 6 | Request.formData() This method is used to resolve a promise with formData representation of the request body. |
Example
In the following program, we use the methods(such as blob, clone, etc) provided by the Request interface.
<!DOCTYPE html>
<html>
<head>
   <title>Fetch API Example</title>
</head>
<body>
   <h1>Example of Fetch API</h1>
<script>
   // Creating request object
   const myRequest = new Request("https://jsonplaceholder.typicode.com/todos");

   // Using blob() method
   myRequest.blob()
   .then(data =>{
      console.log(data)
   });

   // Creating a copy of the request using the clone() method
   const duplicate = myRequest.clone();
   console.log(duplicate);
</script>
</body>
</html>
Output
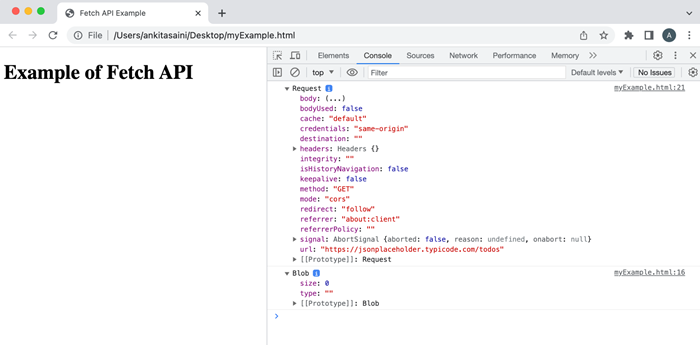
Conclusion
So this is how the Request interface works in Fetch API. It provides various ways to construct and customize the request. Or we can say that it provides flexibility and more control over the request. Now in the next article, we will see how the Response interface is used in the Fetch API.
Fetch API - Response
Fetch API provides a special interface to create a response to a request and the name of that interface is Response. This interface provides a Response() constructor to create a response object. It provides various methods and properties to access and handle response data.
Constructor
To create a response object we can use the Response() constructor along with a new keyword. This constructor may or may not contain parameters.
Syntax
const newResponse = New Response()
Or
const newResponse = New Response(rBody)
Or
const newResponse = New Response(rBody, rOption)
The Response() constructor has the following parameters −
rBody − It represents an object which defines a body for the response. Its value can be null(default value) or blob, ArrayBuffer, TypedArray, DataView, FormData, String, URLSearchParams, a string literal, or ReadableStream.
Options − It is an object which is used to provide customised settings which we want to apply to the response and the options are:
headers − It is used to add a header to your response. By default the value of this parameter is empty. Its value can be a Header object or an object literal of string.
status − This parameter represents the status code for the response. Its default value is 200.
statusText − This parameter represent a status message related to the status code like "Not Found". Its default value is "".
Example
In the following program, we fetch the data from the given URL using the fetch() function and then display the response data in JSON format.
<!DOCTYPE html>
<html>
<body>
<script>
   // Data
   const option = {message: "Hello Tom. How are you?"};

   // creating header object
   const newResponse = new Response(JSON.stringify(option), {
      status: 200,
      statusText:" Receive data successfully"
   });
   // Displaying response
   console.log(newResponse)
</script>
   <h2>Fetch API Example</h2>
   <div>
      <!-- Displaying retrieved data-->
      <p id="sendData"></p>
   </div>
</body>
</html>
Output

Instance Properties
The properties provided by the Response interface are the read-only properties. So the commonly used properties are −
| Sr.No. | Property & Description |
|---|---|
| 1 | Response.body This property contains a ReadableStream body content. |
| 2 | Response.ok This property checks whether the response was successful or not. The value of this property is in boolean. |
| 3 | Response.bodyUsed This property is used to check whether the body is used in the response or not. Its value is boolean. |
| 4 | Response.redirected This property is used to check whether the response is the result of the redirect or not. Its value is in boolean. |
| 5 | Response.status This property contains the status code of the response. |
| 6 | Response.statusText This property provides the status message according to the status code. |
| 7 | Response.type This property provides the type of response. |
| 8 | Response.url This peoperty provides the url of the response. |
| 9 | Response.header This property provides the Header object of the given response. |
Example
In the following program, we use the properties provided by the Response interface.
<!DOCTYPE html>
<html>
<body>
   <h2>Fetch API Example</h2>
<script>
   // GET request using fetch()function
   fetch("https://jsonplaceholder.typicode.com/todos")
   .then(response => {
   // Finding response URL
   console.log("URL is: ", response.url);

   // Getting response text
   console.log("Status Text: ", response.statusText);

   // Getting response status
   console.log("Status Code: ", response.status);
   }).catch(err =>{
      // Handling error
      console.log("Found Error:", err);
   });
</script>
</body>
</html>
Output
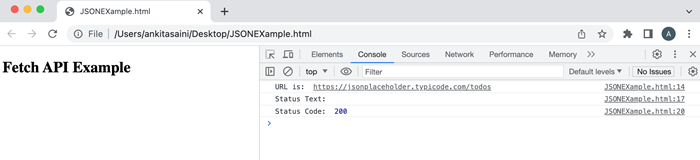
Methods
The following are the commonly used method of Response interface −
| Sr.No. | Method & Description |
|---|---|
| 1 | Request.arrayBuffer() This method is used to return a promise which will resolve with the ArrayBuffer representation of the response body. |
| 2 | Request.blob() This method is used to return a promise which will resolve with Blob representation of the response body. |
| 3 | Request.clone() This method is used to create a copy of the current response object. |
| 4 | Request.json() This method is used to parse the response body as JSON and return a promise that will resolve with the result of parsing. |
| 5 | Request.text() This method is used to return a promise which will resolve with a text representation of the response body. |
| 6 | Request.formData() This method is used to return a promise which will resolve with a FormData representation of the response body. |
| 7 | Response.error() This method returns a new Response object related to a network error. It is a static method. |
| 8 | Response.redirect This method returns a new Response object with a different URL. It is a static method. |
| 9 | Response.json() This method returns a new Response object for the returning JSON encoded data. It is a static method. |
Example
In the following program, we use the methods provided by the Response interface. So here we are going to use the json() function to parse the response in the JSON format.
<!DOCTYPE html>
<html>
<body>
<script>
   // GET request using fetch()function
   fetch("https://jsonplaceholder.typicode.com/todos/2", {
   // Method Type
   method: "GET"})

   // Parsing the response data into JSON
   // Using json() function
   .then(response => response.json())
   .then(myData => {
      // Display output
      document.getElementById("manager").innerHTML = JSON.stringify(myData);
   }).catch(newError =>{
      // Handling error
      console.log("Found Error:", newError)
   });
</script>
   <h2>Display Data</h2>
   <div>
      <!-- Displaying retrevie data-->
      <table id = "manager"></table>
   </div>
</body>
</html>
Output
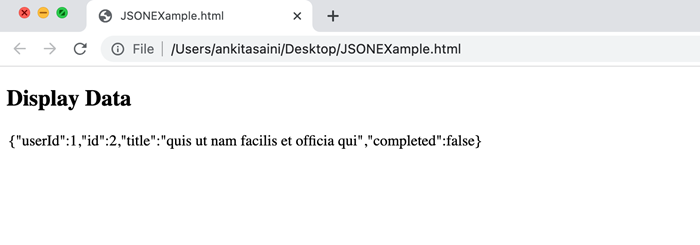
Conclusion
So this is how the Response interface works with fetch API. Using the Response interface we can extract and process the response provided by the server. It also provides various methods and properties for extracting and processing the response. Now in the next article, we will learn about body data in the fetch API.
Fetch API - Body Data
Fetch API is modern technology to send or receive data asynchronously without refreshing a web page. It provides an interface to create HTTP requests in the web browser. It is supported by almost all modern web browsers. We can also say that, by using the Fetch API we can fetch resources like JSON data, HTML pages, etc from the web server and can send data to the server using different HTTP requests like PUT, POST, etc. So in this article, we will learn what is body data, and how we are we are going to use body data.
Body Data
In Fetch API, both request and response contain body data. Body data in the request is an instance which contains the data which we want to send to the server whereas body data in the response is an instance which contains the data requested by the user. It is generally used by PUT or POST requests to send data to the server. It can be an instance of ArrayBuffer, TypedArray, DataView, Blob, File, String, URLSearchParams, or FormData. While sending body data you also need to set a header in the request so that the server will know what type of the data is.
The Request and Response interface provides various methods to extract the body and they are −
Request. arrayBuffer() − This method is used to resolve a promise with ArrayBuffer representation of the request body.
Request.blob() − This method is used to resolve a promise with a blob representation of the request body.
Request.formData() − This method is used to resolve a promise with formData representation of the request body.
Request.json() − This method is used to parse the request body as JSON and resolve a promise with the result of parsing.
Request.text() − This method is used to resolve a promise with a text representation of the request body.
Response.arrayBuffer() − This method is used to return a promise which will resolve with an ArrayBuffer representation of the response body.
Response.blob() − This method is used to return a promise which will resolve with a Blob representation of the response body.
Response.formData() − This method is used to return a promise which will resolve with a FormData representation of the response body.
Response.json() − This method is used to parse the response body as JSON and return a promise that will resolve with the result of parsing.
Response.text() − This method is used to return a promise which will resolve with a text representation of the response body.
All these methods return a promise which will resolve with the actual content of the body.
Body data is generally used with the fetch() function. Here it is optional you can only use the body parameter when you want to send data to the server.
Syntax
fetch(resourceURL,{
   Method: 'POST',
   body:{
      Name: "Monika",
      Age: 34,
      City: "Pune"
   },
   headers: {'content-Type':'application/json'}
})
The parameters of the fetch() function −
resourceURL − It represents the resource which we want to fetch. It can be a string, a request object, or a URL of the resource.
method − It represents the request method such as GET, POST, PUT and DELETE.
headers − It is used to add a header to your request.
body − It is used to add data to your request. It is not used by GET or HEAD methods.
In the following program, we send body data using the POST method. So we create an HTML code in which we send data using JavaScript script to the server. In the script, we define a fetch() function which sends the data present in the body parameter to the given URL using the POST request method. Here the header is set to "application/json" which indicates that we are sending data. Before sending the request to the server we convert the data into JSON string with the help of JSON.stringify() function. After receiving the response from the server, we check if the response is ok or not. If yes, then we parse the response body into JSON using the response.json() function and then display the result on the output screen. If we get any error, then the error is handled by the catch() block.
Example
<!DOCTYPE html>
<html>
<body>
<script>
   // Retrieving data from the URL using the POST request
   fetch("https://jsonplaceholder.typicode.com/todos", {
      // Adding POST request
      method: "POST",

      // Adding body which we want to send
      body: JSON.stringify({
         id: 45,
         title: "Tom like finger chips",
         age: 34
      }),
      // Adding header
      headers:{"Content-type": "application/json; charset=UTF-8"}
   })
   // Converting received information into JSON
   .then(response =>{
      if (response.ok){
         return response.json()
      }
   })
   .then(myData => {
      // Display the retrieve Data
      console.log("Data Sent Successfully");

      // Display output
      document.getElementById("sendData").innerHTML = JSON.stringify(myData);
   }).catch(err=>{
      console.log("Found error:", err)
   });
</script>
   <h2>Sent Data</h2>
   <div>
      <!-- Displaying retrevie data-->
      <p id = "sendData"></p>
   </div>
</body>
</html>
Output
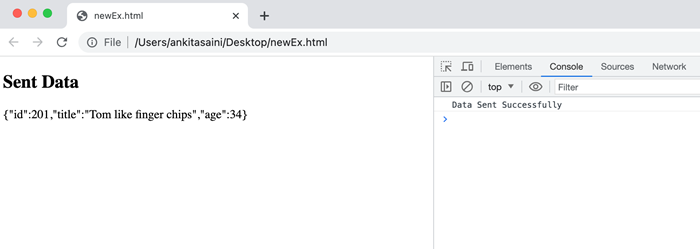
Conclusion
So, this is how we can use Body Data in Fetch API. Using the data body we can send data from the web browser to the web server or vice versa. In the request body, body data is only used with PUT and POST request methods because using this request we can send data to the server. It is not used with GET request because GET request is used to fetch data from the server. Now in the next article, we will learn Credentials in Fetch API.
Fetch API - Credentials
In Fetch API the cookies, authorization headers and TLS client certificates are known as the credentials. We can also say as credentials are the digital documents(like passwords, usernames, certificates, etc) that confirm the identity of the user or client while making a request to the server.
Let's understand these credentials in more detail below −
Cookies − They are the small chunks of data stored by the web browser and sent with all the same origin requests. It is used to store session information, frequently used data, etc. They also control their session, scope and accessibility. Cookies are also sent by the server with the help of the Set-Cookie header.
Authorization Headers − These include those HTTP headers that contain authentication information like password, username, key, etc. Authorization headers are used to implement various authentication schemas and are also validated by the server using various methods like hashing, encryption, etc.
TLS Client Certificates − They are digital certificates that are provided by certified authorities and also installed on the client's device. They are used to provide identity proof of the client while creating a secure connection with the server with the help of Transport layer security.
Credentials Property
The credentials property controls whether the cookies and other credential certificates will be sent in the cross-origin request or not. It is an optional property in the fetch() function.
Syntax
fetch(resourceURL, {credentials:"include"})
This property can have one value out of the following three values −
omit − When the value of the credentials property is set to omit that means the browser will remove all the credentials from the request and also ignore the credentials sent in the response.
same-origin − When the value of the credentials property is set to same-origin that means the browser will include credentials in those requests that are made to the same origin as the requesting page. And use only those credentials that are from the same origin URLs. It is the default value of this property.
include − When the value of the credentials property is set to include that means the browser will include credentials in both same-origin and cross-origin requests and always use those credentials that are sent in the response.
Example 1
In the following program, we use the fetch() function to make a request to the given URL. Here we set the credentials property to "include" value which represents both the cross-origin and same-origin credentials included in the request. After sending the request to the server now we use the then() function to handle the response. If we encounter an error, then that error is handled by the catch() function.
<!DOCTYPE html>
<html>
<body>
<script>
   // Retrieving data from the URL using a GET request
   fetch("https://jsonplaceholder.typicode.com/todos/21", {
      // Sending both same-origin and
      // cross-origin credentials
      credentials: "include"
   })
   // Converting received data into text
   .then(response => response.text())
   .then(myData => {
      // Display the retrieve Data
      console.log(myData);
   })
   .catch(err=>{
      // Cach error if occur
      console.log("Found Error:", err)
   });
</script>
<h2>Fetch API Example</h2>
</body>
</html>
Output

Example 2
In the following program, we use the fetch() function to make a request to the given URL. Here we set the credentials property to the "same-oigin" value which means the credentials are only included in those requests that are made to the same origin or domain. After sending the request to the server now we use the then() function to handle the response. If we encounter an error, then that error is handled by the catch() function.
<!DOCTYPE html>
<html>
<body>
<script>
   // Retrieving data from the URL using a GET request
   fetch("https://jsonplaceholder.typicode.com/todos/21", {
      // Sending credentials only for the same domain request
      credentials: "same-origin"
   })

   // Converting received data into text
   .then(response => response.text())
   .then(myData => {
      // Display the retrieve Data
      console.log(myData);
   })
   .catch(err=>{
      // Cach error if occur
      console.log("Found Error:", err)
   });
</script>
<h2>Fetch API Example</h2>
</body>
</html>
Output
Conclusion
Hence using credentials we can control how the credentials are sent in the request or how to handle the credentials sent back in the response. The credentials property only affects cross-origin requests and for the same-origin request, the browser will automatically add credentials to the request. Now in the next article, we will learn how to send a GET request in Fetch API.
Fetch API - Send GET Requests
Fetch API provides an interface to manage requests and responses to and from the web server asynchronously. It provides a fetch() method to fetch resources or send the requests to the server asynchronously without refreshing the web page. Using the fetch() method we can perform various requests like POST, GET, PUT, and DELETE. In this article, we will learn how to send GET requests using Fetch API.
Send GET Request
The GET request is an HTTP request used to retrieve data from the given resource or the web server. In Fetch API, we can use GET requests either by specifying the method type in the fetch() function or without specifying any method type in the fetch() function.
Syntax
fetch(URL, {method: "GET"})
.then(info =>{
   // Code
})
.catch(error =>{
   // catch error
});
Here in the fetch() function, we specify the GET request in the method type.
Or
fetch(URL)
.then(info =>{
   // Code
})
.catch(error =>{
   // catch error
});
Here, in the fetch() function, we do not specify any method type because by default fetch() function uses a GET request.
Example
In the following program, we will retrieve id and titles from the given URL and display them in the table. So for that, we define a fetch() function with a URL from where we retrieve data and a GET request. This function will retrieve data from the given URL and then convert the data into JSON format using the response.json() function. After that, we will display the retrieved data that is id and title in the table.
<!DOCTYPE html>
<html>
<body>
<script>
   // GET request using fetch()function
   fetch("https://jsonplaceholder.typicode.com/todos", {
      // Method Type
      method: "GET"})

   // Converting received data to JSON
   .then(response => response.json())
   .then(myData => {
      // Create a variable to store data
      let item = `<tr><th>Id</th><th>Title</th></tr>`;

      // Iterate through each entry and add them to the table
      myData.forEach(users => {
         item += `<tr>
         <td>${users.id} </td>
         <td>${users.title}</td>
         </tr>`;
      });
      // Display output
      document.getElementById("manager").innerHTML = item;
   });
</script>
<h2>Display Data</h2>
<div>
   <!-- Displaying retrevie data-->
   <table id = "manager"></table>
</div>
</body>
</html>
Output
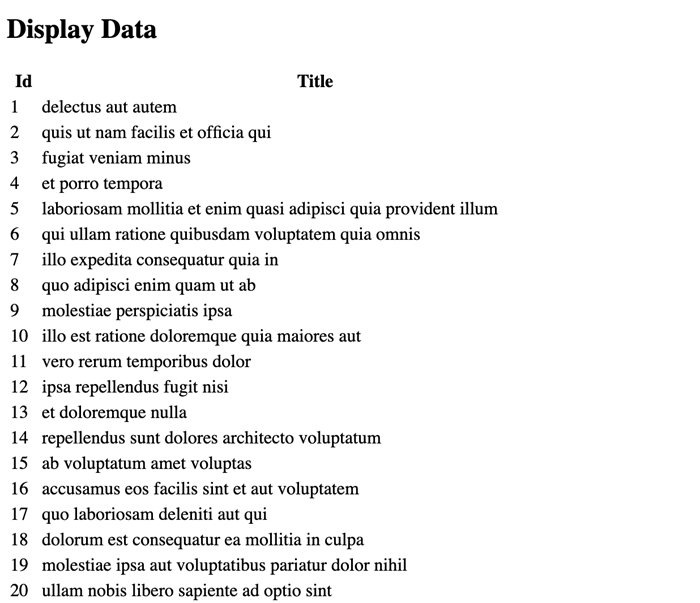
Conclusion
So this is how we can send the GET request using Fetch API so that we can request a specific resource or document from the given URL. Using the fetch() function we can also customise the GET request according to our requirements. Now in the next article, we will learn how to send a POST request.
Fetch API - Send POST Requests
Just like XMLHttpRequest, Fetch API also provides a JavaScript interface to manage requests and responses to and from the web server asynchronously. It provides a fetch() method to fetch resources or send the requests to the server asynchronously without reloading the web page. With the help of the fetch() method, we can perform various requests like POST, GET, PUT, and DELETE. So in this article, we will learn how to send POST requests with the help of Fetch API.
Send POST Request
Fetch API also support POST request. The POST request is an HTTP request which is used to send data or form to the given resource or the web server. In Fetch API, we can use POST requests by specifying the additional parameters like method, body headers, etc.
Syntax
fetch(URL, {
   method: "POST",
   body: {//JSON Data},
   headers:{"content-type": "application/json; charset=UTF-8"}
})
.then(info =>{
   // Code
})
.catch(error =>{
   // catch error
});
Here the fetch() function contains the following parameters −
URL − It represents the resource which we want to fetch.
method − It is an optional parameter. It is used to represent the request like, GET, POST, DELETE, and PUT.
body − It is also an optional parameter. You can use this parameter when you want to add a body to your request.
header − It is also an optional parameter. It is used to specify the header.
Example
In the following program, we will send a JSON document to the given URL. So for that, we define a fetch() function along with a URL, a POST request, a body(that is JSON document) and a header. So when the fetch() function executes it sends the given body to the specified URL and converts response data into JSON format using the response.json() function. After that, we will display the response.
<!DOCTYPE html>
<html>
<body>
<script>
   // Retrieving data from the URL using POST request
   fetch("https://jsonplaceholder.typicode.com/todos", {
      // Adding POST request
      method: "POST",

      // Adding body which we want to send
      body: JSON.stringify({
      id: 32,
      title: "Hello! How are you?",
      }),
      // Adding headers
      headers:{"Content-type": "application/json; charset=UTF-8"}
   })
   // Converting received information into JSON
   .then(response => response.json())
   .then(myData => {
      // Display the retrieve Data
      console.log("Data Sent Successfully");

      // Display output
      document.getElementById("manager").innerHTML = myData;
   });
</script>
<h2>Display Data</h2>
<div>
   <!-- Displaying retrevie data-->
   <table id = "manager"></table>
</div>
</body>
</html>
Output
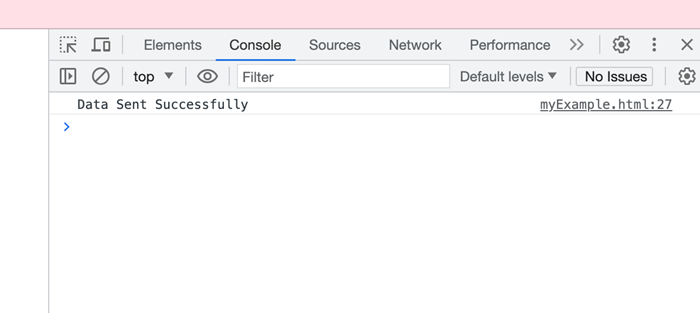
Conclusion
So this is how we can send the POST request using Fetch API. Using this request we can easily send data to the specified URL or server. Also using the fetch() function you can modify your request according to your requirements. Now in the next article, we will learn how to send a PUT request.
Fetch API - Send PUT Requests
In the Fetch API, a PUT request is used to update or replace the existing resource or data present on the server. Using the PUT request generally contains the data which you want to update in the body of the request. When the request is received by the server, the server uses that data to update the existing resource present in the given URL. If the server does not contain the resource then it creates a new resource using the given data.
Syntax
fetch(URL, {
   method: "PUT",
   body: {//JSON Data},
   headers:{"content-type": "application/json; charset=UTF-8"}})
.then(info =>{
   // Code
})
.catch(error =>{
   // catch error
});
Here the fetch() function contains the following parameters −
URL − It represents the resource which we want to fetch.
method − It is an optional parameter. It is used to represent the request like, GET, POST, DELETE, and PUT.
body − It is also an optional parameter. You can use this parameter when you want to add a body to your request.
headers − It is also an optional parameter. It is used to specify the header.
Example 1: Sending PUT Request Using fetch()
In the following program, we create a simple script to update existing data in the given URL using the PUT request using the fetch() function. Here we send a JSON document in the given URL along with the header. So after receiving the response, check the status of the response. If the response status is 200, then that means the data is updated successfully. If an error occurred, then the catch function handles that error.
<!DOCTYPE html>
<html>
<head>
<title>Fetch API Example</title>
</head>
<body>
<h1>Example of Fetch API</h1>
<script>
   // Update data in the URL using the PUT request
   fetch("https://jsonplaceholder.typicode.com/todos/21", {
      // Using PUT request
      method: "PUT",

      // Body contains replacement data
      body: JSON.stringify({
         id: 22,
         title: "Hello! Mohina what are you doing?",
      }),
      // Setting headers
      headers:{"Content-type": "application/json; charset=UTF-8"}
   })
   .then(response => {
      // Handle response
      if (response.status == 200){
         console.log("Data updated successfully")
      } else {
         throw new error("Error Found:", response.status)
      }
   })
   // Handle error
   .catch(err=>{
      console.error(err)
   });
</script>
</body>
</html>
Output
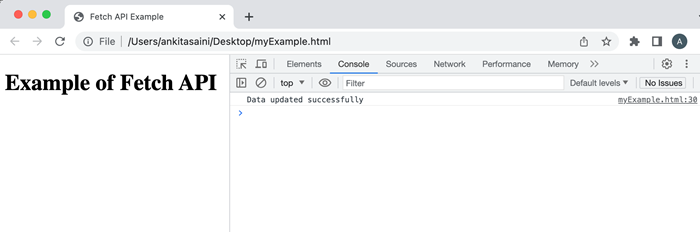
Example 2: Sending PUT Request Using fetch() with async/await
In the following program, we create a script to update existing data in the given URL using the PUT request with the fetch() function and async/await. Here we send a JSON document in the given URL along with the header. So we create an async function named modifyData(). Here we use await keyword with the fetch() function to pause the execution of the function until the returned promise is resolved. After receiving the response, check the status of the response if the response status is 200, then that means the data is updated successfully. If an error occurred, then the catch function handles that error.
Note − Here async/ await is used together to handle asynchronous operations in a synchronous way.
<!DOCTYPE html>
<html>
<head>
<title>Fetch API Example</title>
</head>
<body>
<h1>Example of Fetch API</h1>
<script>
   async function modifyData(){
      try{
         const myRes = await fetch("https://jsonplaceholder.typicode.com/todos/21", {
            // Using PUT request
            method: "PUT",

            // Body contains replacement data
            body: JSON.stringify({
               id: 24,
               title: "Mina leaves in Delhi",
            })
         });
         // Handling response
         if (myRes.status == 200){
            console.log("Data updated successfully")
         } else {
            throw new error("Error Found:", myRess.status)
         }
      } catch(err){
         console.error(err)
      }
   }
   // Calling the function
   modifyData();
</script>
</body>
</html>
Output
Conclusion
So this is how we can use PUT requests to update the existing data in the given resource. Using this you can also add extra properties to the request with the help of the parameters provided by the fetch() function. Now in the next chapter, we will see how we will send JSON data.
Fetch API - Send JSON Data
Fetch API is used to send or receive data asynchronously without refreshing the web page. In the Fetch API, we can send data in various formats like JSON, URL-encoded form, Text, FormData, Blob or ArrayBuffer. Among all these forms JSON (JavaScript Object Notation) data is the most commonly used format to send data using Fetch because it is simple, lightweight, and compatible with most of the programming languages. JSON data is generally created in the following format −
Const JSONData = {
   name: "Monika",
   Id: 293,
   Age: 32,
   City: "Pune"
};
Where name, id, Age, and City are the properties and Monika, 293, 32, and Pune are their values.
Fetch API generally sends JSON data as a payload in the request body or can be received in the response body. And the data is serialized as a string because it is easy to transmit data from one system to another.
While working with JSON data, Fetch API perform two main operations on JSON data −
Serializing − While sending JSON data in a request we need to convert the value into JSON string format using the "JSON.stringify()" function. This function takes an object or value as an input parameter and returns a string which represents JSON format. Due to serializing data, we can easily transmit data over the network.
Syntax
JSON.stringify()
Parsing − Parsing is a process in which we convert the JSON string received in the response back into the JavaScript object or value. This parsing of JSON data can be done by using the response.json() function. This function takes the response object as an argument and returns a promise which is resolved in the parsed JSON data or JavaScript object.
Syntax
response.json()
Send JSON Data
To send JSON data Fetch API uses the following ways −
Using fetch() function
Using the fetch() function with async/await
Using request object
Method 1 − Using the fetch() function
We can send data using the fetch() function. In this function, we create JSON data in the body parameter and use the POST request method to send data on the specified URL.
Example
In the following program, we will send JSON data using the fetch() function. The fetch() function is used to create a request. The request contains the POST method which tells us that we want to send data, a body which contains JSON data which is converted into a string using stringify() and the header which specifies that we are sending JSON data. After sending the request the server returns a promise which will resolve to a Response object and using .json() we parse the JSON data and display the result in the console log. If we encounter an error, then the error is handled by the catch block.
<!DOCTYPE html>
<html>
<body>
<script>
   // Sending JSON data using a POST request
   fetch("https://jsonplaceholder.typicode.com/todos", {
      // Setting POST request
      method: "POST",

      // Add a body which contains JSON data
      body: JSON.stringify({
         id: 290,
         title: "Today is the rainy day",
      }),
      // Setting headers
      headers:{"Content-type": "application/json; charset=UTF-8"}
   })
   // Converting response to JSON
   .then(response => response.json())
   .then(myData => {
      console.log("Data Sent Successfully");
      // Display output in HTML page
      document.getElementById("sendData").innerHTML = JSON.stringify(myData);
   })
   .catch(err=>{
      console.error("We get an error:", err);
   });
</script>
<h2>Sent Data</h2>
<div>
   <!-- Displaying data-->
   <p id = "sendData"></p>
</div>
</body>
</html>
Output

Method 2 − Using fetch() function with async/await
We can also send JSON data using the fetch() function with async/await. Async/await allows you to create an asynchronous program which behaves more like a synchronous program which makes it easier to learn and understand.
Example
In the following program, we will send JSON data using the fetch() function with async/await. So for that, we create an async function. In the function, we use try block which uses the fetch() function along with the resource URL, the POST request method, header, and body(JSON data in string format) parameters to send JSON data to the given URL. It also uses await keyword with the fetch() function which is used to wait for the response from the server. If the response is a success, then we parse the response return by the server using the .json() function. If the status code of the response contains an unsuccessful code the else block runs. If we encounter an error during the fetch operation, then that error is handled by the catch block.
<!DOCTYPE html>
<html>
<body>
<script>
   async function sendingJSONData(){
      try{
         const retrunResponse = await fetch("https://jsonplaceholder.typicode.com/todos", {
            // Setting POST request to send data
            method: "POST",

            // Add body which contains JSON data
            body: JSON.stringify({
               id: 290,
               title: "Today is the rainy day",
            }),
            // Setting headers
            headers:{"Content-type": "application/json; charset=UTF-8"}
         });
         if (retrunResponse.ok){
            // Handling response
            const returnData = await retrunResponse.json();
            console.log("Data send Successfully");

            // Display output in HTML page
            document.getElementById("sendData").innerHTML = JSON.stringify(returnData);
         } else {
            console.log("We found error", retrunResponse.status);
         }
      } catch(err) {
         // Handling error if occur
         console.error("Error is:", err)
      }
   }
   sendingJSONData();
</script>
<h2>Sent Data</h2>
<div>
   <!-- Displaying data-->
   <p id = "sendData"></p>
</div>
</body>
</html>
Output
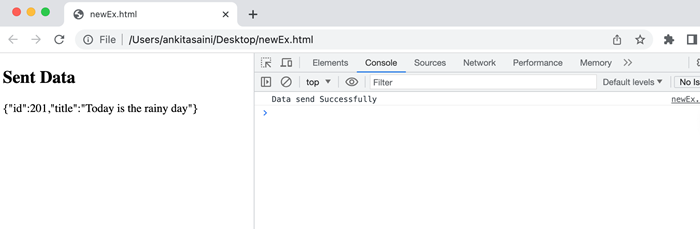
Method 3 − Using request object
We can also send JSON data using a request object. It is an alternative to the fetch() function to send requests to the server. The request object also uses the POST method to send JSON data on the specified URL. The request object is created by using the Request() constructor of the Request interface. The request object provides more flexibility in creating or configuring the request before sending it by the fetch() function. It also allows us to add additional options like header, caching, request method, etc.
Example
In the following program, we will send JSON data using a request object. So using Request() constructor we create a request object along with parameters like resource URL, POST request method, body(JSON data in string format using stringify()), and header. Now we pass the newRequest object in the fetch function to send a request and handle the response using .then() function and parse the response using.json(). If we encounter an error during the fetch operation, then that error is handled by the catch block.
<!DOCTYPE html>
<html>
<body>
<script>
   // Creating request object
   const newRequest = new Request("https://jsonplaceholder.typicode.com/todos", {
      // Setting POST request
      method: "POST",

      // Add body which contains JSON data
      body: JSON.stringify({
         id: 290,
         title: "Today is the rainy day. I like rain",
      }),
      // Setting headers
      headers:{"Content-type": "application/json; charset=UTF-8"}
   });
   fetch(newRequest)
   // Handling response
   .then(response => response.json())
   .then(myData => {
      console.log("Data Sent Successfully");

      // Display output in HTML page
      document.getElementById("sendData").innerHTML = JSON.stringify(myData);
   })
   // Handling error
   .catch(err=>{
      console.error("We get an error:", err);
   });
</script>
<h2>Sent Data</h2>
<div>
   <!-- Displaying data-->
   <p id = "sendData"></p>
</div>
</body>
</html>
Output
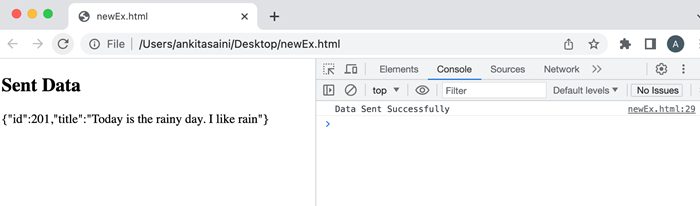
Conclusion
So this is how we can send JSON data in Fetch API. It is a very popular data structure in web APIs to send or receive data. It is lightweight and much more flexible as compared to other data formats. Now in the next article, we will learn how to send data objects.
Fetch API - Send Data Objects
In Fetch API, we can send data objects from a web browser to a web server. A data object is an object which contains data in the key-value or property-value pair. Or we can say that a data object is data which we add in the request body while creating an HTTP request using Fetch API.
Fetch API supports various data formats; you can choose them according to the content type header you set or the server's requirement. Some of the commonly used data formats are −
JSON
JSON is known as JavaScript Object Notation. It is the most commonly used data format to exchange data between the web browser and the server. In JSON format, the data is stored in the form of key-value pairs and provide full support to nested objects or arrays. To send data in the JSON format we need to convert JavaScript objects into JSON strings with the help of the "JSON.stringfy()" function.
Following is the JSON format of data −
const newData = {
    empName: "Pooja",
    empID: 2344,
    departmentName: "HR"
};
Where "empName", "empID", and "department" are the keys and "Pooja", "2344", and "HR" are their values.
The following headers are used for JSON format −
headers:{"Content-type": "application/json; charset=UTF-8"}
It tells the server that the received data is in JSON format.
Example
In the following program, we create a script to send data in JSON format. So for that, we create a data object with key-value pairs. Now we use the fetch() function to send a request to the server. In this fetch function, we include the request method that is "POST", set the header to "application/json" which tells the server that the send data is in JSON, and include the data object in the body of the request by converting into JSON string using "JSON.stringify()" function. After sending the request to the server now we use the then() function to handle the response. If we encounter an error, then that error is handled by the catch() function.
<!DOCTYPE html>
<html>
<body>
<script>
   // Data object
   const newData = {
      id: 45,
      title: "Tom like finger chips",
      age: 34
   };
   fetch("https://jsonplaceholder.typicode.com/todos", {
      // Adding POST request to send data
      method: "POST",

      // Adding header
      headers:{"Content-type": "application/json; charset=UTF-8"},

      // Adding body which we want to send
      // Here we convert data object into JSON string
      body: JSON.stringify(newData)
   })
   // Converting received information into JSON
   .then(response =>{
      if (response.ok){
         return response.json()
      }
   })
   .then(myData => {
      // Display result
      console.log("Data Sent Successfully");

      // Display output
      document.getElementById("sendData").innerHTML = JSON.stringify(myData);
   }).catch(err=>{
      console.log("Found error:", err)
   });
</script>
   <h2>Sent Data</h2>
   <div>
      <!-- Displaying data-->
      <p id = "sendData"></p>
   </div>
</body>
</html>
Output
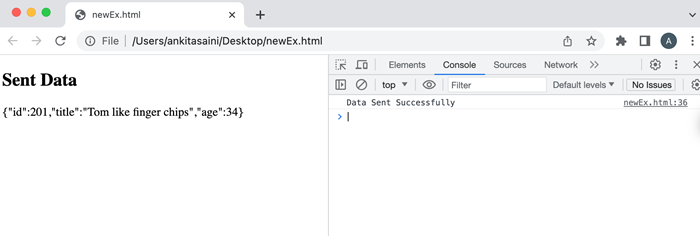
FormData
FormData is an in-built JavaScript object. It is used to send data in the HTML form format. In FormData, we can store data in the form of key-value pairs where the key represents the field of the form and the value represents the value of that field. It can handle binary data, files, and other form types. To create a new form object we need to use FormData() constructor along with a new keyword.
Syntax
const newform = new FormData()
The append() function is used to add new key-value pair in the FormData object.
Syntax
newform.append("name", "Mohina");
Where "name" is the key or field of the form and "Mohina" is the value of the field. While working with FormData objects in Fetch API we do not need to set a header because Fetch API will automatically set headers for the FormData object.
Example
In the following program, we create a script to send data in FormData. So for that, we create a FormData object using FormData() constructor and then add key-value pairs in the FormData object using the append() function. Now we use the fetch() function to send a request to the server. In this fetch function, we include the request method that is "POST" and include the FormData object in the body parameter. After sending the request to the server now we use the then() function to handle the response. If we encounter an error, then that error is handled by the catch() function.
<!DOCTYPE html>
<html>
<body>
<script>
   // FormData object
   const newform = new FormData();

   // Adding key-value pairs in FormData object
   newform.append("id", 4532);
   newform.append("title", "Today is raining");

   fetch("https://jsonplaceholder.typicode.com/todos", {
      // Adding POST request to send data
      method: "POST",

      // Adding body which we want to send
      // Here we add FormData object
      body: newform
   })
   // Converting received information into JSON
   .then(response =>{
      if (response.ok){
         return response.json()
      }
   })
   .then(myData => {
      // Display result
      console.log("Data Sent Successfully");

      // Display output in HTML page
      document.getElementById("sendData").innerHTML = JSON.stringify(myData);
   }).catch(err=>{
      console.log("Found error:", err)
   });
</script>
   <h2>Sent Data</h2>
   <div>
      <!-- Displaying data-->
      <p id = "sendData"></p>
   </div>
</body>
</html>
Output
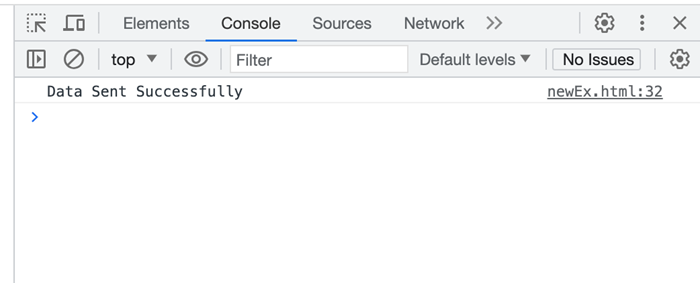
Plain Text
In Fetch API, we can also send data in simple plain text. If we want to send raw text or non-standard data formats, then we send data using Plain text. To send plain text we need to simply add the text in the form of string in the body of the request.
Following is the plain text object −
const newData = "My car is running very fast"
The following headers are used for plain text −
headers:{"Content-type": "text/plain"}
It indicates to the server that the received data is in plain text.
Example
In the following program, we create a script to send data in plain text. So for that, we create a data object and assign a string value to it in simple text. Now we use the fetch() function to send a request to the server. In this fetch function, we include the request method that is "POST", set the header to "text/plain" which tells the server that the sent data is in plain text, and includes the data object in the body of the request. After sending the request to the server now we use the then() function to handle the response. If we encounter an error, then that error is handled by the catch() function.
<!DOCTYPE html>
<html>
<body>
<script>
   // FormData object
   const newform = new FormData();

   // Adding key-value pairs in FormData object
   newform.append("id", 4532);
   newform.append("title", "Today is raining");

   fetch("https://jsonplaceholder.typicode.com/todos", {
      // Adding POST request to send data
      method: "POST",

      // Adding body which we want to send
      // Here we add the FormData object
      body: newform
   })
   // Converting received information into JSON
   .then(response =>{
      if (response.ok){
         return response.json()
      }
   })
   .then(myData => {
      // Display result
      console.log("Data Sent Successfully");

      // Display output in HTML page
      document.getElementById("sendData").innerHTML = JSON.stringify(myData);
   }).catch(err=>{
      console.log("Found error:", err)
   });
</script>
   <h2>Sent Data</h2>
   <div>
      <!-- Displaying data-->
      <p id = "sendData"></p>
   </div>
</body>
</html>
Output
URL-encoded Data
The URL-encoded data is the most commonly used data format to send form data in URL parameters or the body of the POST request. It represents data in the form of key-value pairs where the values are encoded with the help of percent-encoding. We can create URL-encoded data objects with the help of URLSearchParams class.
Syntax
const newData = new URLSearchParams()
The append() function is used to add new key-value pair in the URL-encoded data object.
Syntax
newform.append("name", "Mohina");
Where "name" is the key or field of the form and "Mohina" is the value of the field.
The following headers are used for URL-encoded data −
headers:{"Content-type": "text/plain"}
It indicates to the server that the received data is URL-encoded data.
Example
In the following program, we create a script to send data in plain URL-encoded. So for that, we create a data object using URLSearchParams() and assign key-value pairs using the append() function. Now we use the fetch() function to send a request to the server. In this fetch function, we include the request method that is "POST", set the header to "application/x-www-form-urlencoded" which tells the server that the send data is in URL-encoded format, and includes the data object in the body of the request. After sending the request to the server now we use the then() function to handle the response. If we encounter an error, then that error is handled by the catch() function.
<!DOCTYPE html>
<html>
<body>
<script>
   // FormData object
   const newform = new FormData();

   // Adding key-value pairs in FormData object
   newform.append("id", 4532);
   newform.append("title", "Today is raining");

   fetch("https://jsonplaceholder.typicode.com/todos", {
      // Adding POST request to send data
      method: "POST",

      // Adding body which we want to send
      // Here we add FormData object
      body: newform
   })

   // Converting received information into JSON
   .then(response =>{
      if (response.ok){
         return response.json()
      }
   })
   .then(myData => {
      // Display result
      console.log("Data Sent Successfully");

      // Display output in HTML page
      document.getElementById("sendData").innerHTML = JSON.stringify(myData);
   }).catch(err=>{
      console.log("Found error:", err)
   });
   </script>
<h2>Sent Data</h2>
<div>
   <!-- Displaying data-->
   <p id = "sendData"></p>
</div>
</body>
</html>
Output
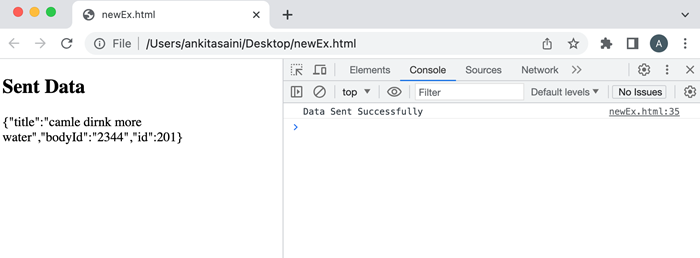
Conclusion
So this is how we can send different types of data objects using Fetch API. Out of all these formats, the most commonly used formats are JSON and FormData. Also, the choice of choosing data object formats is dependent upon the requirement of the server or the type of data we want to send. So now in the next article, we will learn Cross-Origin Requests.
Fetch API - Custom Request Object
In Fetch API, we can also create a custom Request object with the help Request() constructor of the Request interface. The Request interface provides us with more control and flexibility over the HTTP request. It provides various options like URL, method, body, headers, etc. which help us to create the customized HTTP request. Before creating a custom request object we first understand the Request() constructor using which we can able to create a Request object.
Request() Constructor
To create a request object we can use Request() constructor along with a new keyword. This constructor contains one mandatory parameter which is the URL of the resource and the other parameter is optional.
Syntax
const newRequest = New Request(resourceURL)
Or
const newRequest = New Request(resourceURL, optional)
The Request() constructor has the following parameters −
resourceURL − It represents the resource which we want to fetch. It can be a URL of the resource or the Request object.
Options − It is an object which is used to provide customized settings which we want to apply on the request and the options are −
method − It represents the request method such as GET, POST, PUT and DELETE.
headers − It is used to add a header to your request.
body − It is used to add data to your request. It is not used by GET or HEAD methods.
mode − It represents the mode which you want to use for the request. The value of this parameter can be cors, same-origin, no-cors or navigate. By default the value of the mode parameter is cors.
credentials − It represents the credentials which you want to use for the request. The default value of this parameter is same-origin but you can also use values like omit, same-origin, or include according to your need.
cache − It represents the cache mode you want for your request.
redirect − It is used for redirect mode. The value of this parameter can be: follow, error, or manual. By default is parameter is set for follow value.
referrer − It represents a string which specifies the referrer of the request. The possible values of this parameter are client, URL, or no-referrer. The default value of this parameter is about the client.
referrerPolicy − It is used to specify the referrer policy.
integrity − It is used to represent the subresource integrity value of the given request.
keepalive − It contains a boolean value to determine whether to create a persistent connection for the multiple requests/response or not.
signal − It contains an AbortSignal object which is used to communicate with or abort a request.
priority − It is used to specify the priority of the request as compared to other requests. This parameter can have any one of the following values −
high − If we want to set the priority of the current fetch request to high as compared to others.
low − If we want to set the priority of the current fetch request to low as compared to others.
auto − To automatically find the priority of the current fetch request as compared to others.
Custom Request object
To create a custom request object we need to follow the following steps −
Step 1 − Customize the Request option
optional ={
   method: "POST",
   headers: {"Content-Type": "application/json"},
   body = {
      Name: "Tom",
   Age: 23}
};
Step 2 − Create a custom request object using the Request() constructor.
const newRequest = new Request(resourceURL, optional
Step 3 − Fetch the request object using the fetch() function.
fetch(newRequest)
.then(response =>{
   // Handling the response
}).catch(err => {
   // Handle error
})
Example
In the following program, we create a script to send data using the custom Request object. So for that, we create a custom request object using the Request() constructor which takes two parameters: the URL(resource URL) and optional. Where the optional parameter contains the customized setting for the request and they are −
method − Here we use the POST method which represents that we are sending data to the server.
body − Contains the data which we want to send.
headers − It tells that the data is JSON data.
Now we pass the request object in the fetch() function to send the request and handle the response returned by the server and handle the error if it occurs.
<!DOCTYPE html>
<html>
<body>
<script>
   // Customize setting of the request
   const optional = {
      // Setting POST request
      method: "POST",

      // Add body which contains data
      body: JSON.stringify({
         id: 311,
         title: "Tom like Oranges",
         age: 37
      }),
      // Setting header
      headers:{"Content-type": "application/json; charset=UTF-8"}
   };
   // Creating request object
   const newRequest = new Request("https://jsonplaceholder.typicode.com/todos", optional);

   fetch(newRequest)

   // Handling response
   .then(response => response.json())
   .then(returnData => {
      console.log("Data Sent Successfully");

      // Display output
      document.getElementById("sendData").innerHTML = JSON.stringify(returnData);
   })
   // Handling error
   .catch(err=>{
      console.error("We get an error:", err);
   });
</script>
   <h2>Fetch API Example</h2>
   <div>
      <!-- Displaying retrieved data-->
      <p id="sendData"></p>
   </div>
</body>
</html>
Output
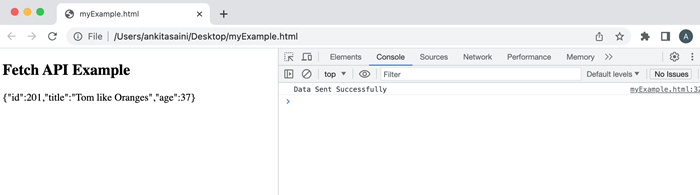
Conclusion
So this is how we can create a custom request object with the help of the Request interface. This interface provides various properties and methods to modify the request body according to our needs. Now in the next article, we will learn how to upload files using fetch API.
Fetch API - Uploading Files
Fetch API provides a flexible way to create an HTTP request which will upload files to the server. We can use the fetch() function along with the FormData object to send single or multiple files in the request. Let us discuss this concept with the help of the following examples −
Example − Uploading a Single File
In the following program, we upload one file at a time using fetch API. Here we use the FormData object to store the file and then send it using the fetch() function to the given URL including the POST request method and the FormData object. After sending the request to the server now we use the then() function to handle the response. If we encounter an error, then that error is handled by the catch() function.
<!DOCTYPE html>
<html>
<body>
<!-- Creating a form to upload a file-->
<form id = "myForm">
   <input type="file" id="file"><br><br>
   <button type="submit">Upload File</button>
</form>
<script>
   document.getElementById('myForm').addEventListener('submit', function(x){
      // Prevent from page refreshing
      x.preventDefault();

      // Select the file from the system
      // Here we are going to upload one file at a time
      const myFile = document.getElementById('file').files[0];

      // Create a FormData to store the file
      const myData = new FormData();

      // Add file in the FormData
      myData.append("newFiles", myFile);

      // Send the file to the given URL
      fetch("https://httpbin.org/post", {
         // POST request with Fetch API
         method: "POST",

         // Adding FormData to the request
         body: myData
      })
      // Converting the response in JSON
      // using response.json() function
      .then(response => response.json())
      .then(finalData => {
         // Handling the response
         console.log("File has been uploaded successfully");
      })
      .catch(err=>{
         // Handling the error
         console.log("Error Found:", err)
      });
   })
</script>
</body>
</html>
Output
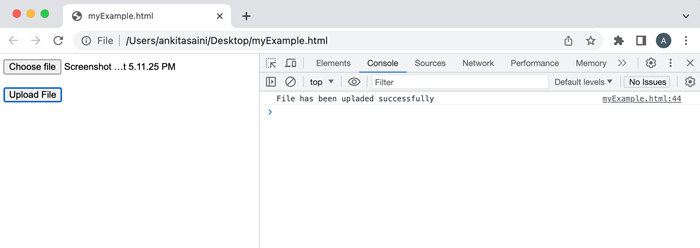
Example − Uploading Multiple Files for Single Input
In the following program, we will upload multiple files from the single input using fetch API. Here we add a "multiple" property in the <input> tag to add multiple files. Then we use the FormData object to store multiple files and then send them using the fetch() function to the given URL including the POST request method and the FormData object. After sending the request to the server now we use the then() function to handle the response. If we encounter an error, then that error is handled by the catch() function.
<!DOCTYPE html>
<html>
<body>
   <!-- Creating a form to upload a file-->
   <h2> Uploading Multiple files</h2>
   <form id = "myForm">
      <p>Maximum number of files should be 2</p>
      <input type="file" id="file" multiple><br><br>
      <button type="submit">Upload File</button>
   </form>
<script>
   document.getElementById('myForm').addEventListener('submit', function(x){
      // Prevent from page refreshing
      x.preventDefault();

      // Select the file from the system
      // Here we are going to upload multiple files at a time
      const myFile = document.getElementById('file').files[0];

      // Create a FormData to store the file
      const myData = new FormData();

      // Add file in the FormData
      myData.append("newFiles", myFile);

      // Send the file to the given URL
      fetch("https://httpbin.org/post", {
         // POST request with Fetch API
         method: "POST",

         // Adding FormData to the request
         body: myData
      })
      // Converting the response in JSON
      // using response.json() function
      .then(response => response.json())
      .then(finalData => {
         // Handling the response
         console.log("Files has been uploaded successfully");
      })
      .catch(err=>{
         // Handling the error
         console.log("Error Found:", err)
      });
   })
</script>
</body>
</html>
Output
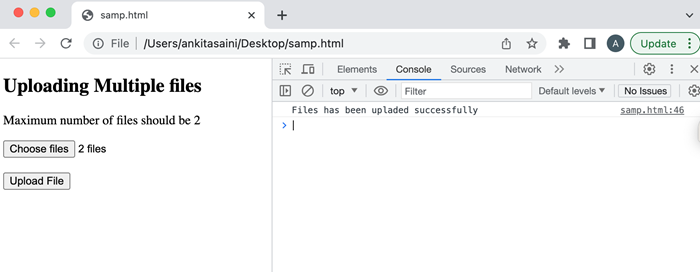
Example − Uploading Multiple Files
In the following program, we will upload multiple files using fetch API. Here we select two files from the system in DOM with the attribute of file type. Then we add the input files in an array. Then we create a FormData object and append the input files to the object. Then we send them using the fetch() function to the given URL including the POST request method and the FormData object. After sending the request to the server now we use the then() function to handle the response. If we encounter an error, then that error is handled by the catch() function.
<!DOCTYPE html>
<html>
<body>
   <!-- Creating a form to upload multiple files-->
   <h2> Uploading Multiple files</h2>
   <input type="file">
   <input type="file">
   <button>Submit</button>
<script>
   const myButton = document.querySelector('button');
   myButton.addEventListener('click', () => {
      // Get all the input files in DOM with attribute type "file":
      const inputFiles = document.querySelectorAll('input[type="file"]');

      // Add input files in the array
      const myfiles = [];
      inputFiles.forEach((inputFiles) => myfiles.push(inputFiles.files[0]));

      // Creating a FormData
      const myformdata = new FormData();

      // Append files in the FormData object
      for (const [index, file] of myfiles.entries()){
         // It contained reference name, file, set file name
         myformdata.append(`file${index}`, file, file.name);
      }
      // Upload the FormData object
      fetch('https://httpbin.org/post', {
         method: "POST",
         body: myformdata,
      })
      // Handle the response
      .then(response => response.json())
      .then(response => console.log(response))

      // Handle the error
      .catch(err => console.log("Error Found:", err))
   })
</script>
</body>
</html>
Output
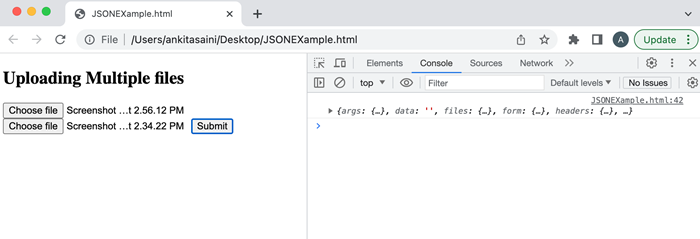
Conclusion
So this is how we can upload files to the given URL with the help of fetch() API. Here we can upload any type of file like jpg, pdf, word, etc and upload any number of files like one file at a time or multiple files at a time. Now in the next article, we will learn how the Fetch API handles responses.
Fetch API - Handling Binary Data
Binary data is data that is in the binary format not in the text format e.g. new Uint8Array([0x43, 0x21]). It includes images, audio, videos, and other files that are not in plain text. We can send and receive binary data in the Fetch API. While working with binary data in Fetch API it is important to set proper headers and response types. For binary data, we use "Content-Type": "application/octet-stream" and the "responseType" property to "arraybuffer" or "blob" which indicates that binary data is received.
Let us understand how to Send and Receive Binary Data in Fetch API using the following examples.
Sending Binary Data
To send binary data we use send() method of XMLHttpRequest which can easily transmit binary data using ArrayBuffer, Blob or File object.
Example
In the following program, we create a program which will send binary data to the server. So first we create binary data, and then we convert the binary data into Blob using Blob() constructor. Here this constructor takes two arguments: binary data and headers for the binary data. Then we create a FormData object and add Blob to the FormData object. Then we use the fetch() function to send the request to the server and then handle the response returned by the server and handle the error if occurs.
<!DOCTYPE html>
<html>
<body>
<script>
   // Binary data
   var BinaryData = new Uint8Array([0x32, 0x21, 0x45, 0x67]);

   // Converting binary data into Blob
   var blobObj = new Blob([BinaryData], {type: 'application/octet-stream'});

   // Creating FormData object
   var obj = new FormData();

   // Add data to the object
   // Here myfile is the name of the form field
   obj.append("myfile", blobObj);

   // Sending data using POST request
   fetch("https://jsonplaceholder.typicode.com/todos", {
      // Adding POST request
      method: "POST",

      // Adding body which we want to send
      body: obj
   })
   // Handling the response
   .then(response =>{
      if (response.ok){
         console.log("Binary data send Successfully");
      }
   })
   // Handling the error
   .catch(err=>{
      console.log("Found error:", err)
   });
</script>
   <h2>Sent Binary Data</h2>
</body>
</html>
Output
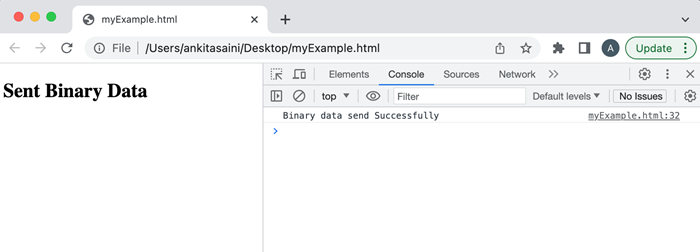
Receiving Binary Data
In Fetch API, receiving binary data means retrieving the response data from the server after making the request. To receive binary data we have set the correct value of the responseType either ArrayBuffer(), or Blob().
Example
In the following program, we create a program which will receive binary data from the server. So we use the fetch() function to get binary data from the given URL. In the fetch() we define headers which tell the browser we are expecting a binary response and set responseType to arraybuffer so that it tells the browser that you are receiving a response as an ArrayBuffer. Then we receive the promise in the.then() block and check the status is OK. If the status is OK, then convert the response to ArrayBuffer with the help of the arrayBuffer() function. The next .then() processes the return binary data and displays the data accordingly. The .catch() function handles the error if occurs.
<!DOCTYPE html>
<html>
<body>
<script>
   // Receiving data using GET request
   fetch("https://jsonplaceholder.typicode.com/todos", {
      // Adding Get request
      method: "GET",

      // Setting headers
      headers: {
         'Content-Type': 'application/octet-stream',
      },
      // Setting response type to arraybuffer
      responseType: "arraybuffer"
   })

   // Handling the received binary data
   .then(response =>{
      if (response.ok){
         return response.arrayBuffer();
      }
      console.log("Binary data send Successfully");
   })
   .then(arraybuffer => console.log("Binary data received Successfully"))

   // Handling the error
   .catch(err=>{
      console.log("Found error:", err)
   });
</script>
   <h2>Binary Data Example</h2>
</body>
</html>
Output
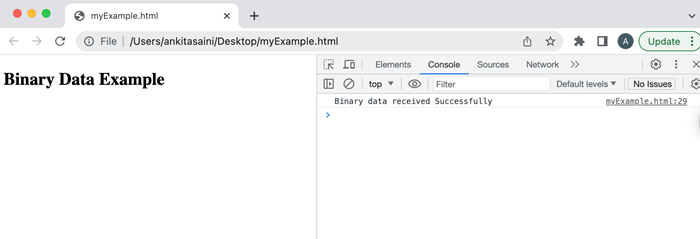
Conclusion
So this is how we can handle binary data using Fetch API. To handle binary data we need to convert binary data to an appropriate data format. We can also send binary data in the file, string, ArrayBuffer, and Blob. Now in the next chapter, we will learn how to find status codes using Fetch API.
Fetch API - Status Codes
Fetch API provide a special property which is used to find the status of the request and the name of this property is the status property. It is a read-only property of the Response interface which return the HTTP status code of the response sent by the server of the given request. For example, 404 - resource were not found, 200 - success, 400 - bad request, etc. It is supported by all modern web browsers.
Syntax
response.status
The value returned by the status property is an unsigned short number which represents the status of the current request.
Status Codes
The status codes that HTTP status returned are as follows −
Successful
The successful status codes are those status codes which will return by the server when the request is fulfilled successfully. Some of the commonly used successful status codes with their meanings are as follows −
| Status | Message | Description |
|---|---|---|
| 200 | OK | If the request is OK. |
| 201 | Created | When the request is complete and a new resource is created. |
| 202 | Accepted | When the request is accepted by the server. |
| 204 | No Content | When there is no data in the response body. |
| 205 | Reset Content | For additional inputs, the browser clears the form used for the transaction. |
| 206 | Partial Content | When the server returns the partial data of the specified size. |
Redirection
The redirection status codes are those status codes which represent the status of a redirect response. Some of the commonly used redirection status codes with their descriptions are as follows −
| Status | Message | Description |
|---|---|---|
| 300 | Multiple Choices | It is used to represent a link list. So that user can select any one link and go to that location. It allows only five locations. |
| 301 | Moved Permanently | When the requested page is moved to the new URL. |
| 302 | Found | When the requested page is found in a different URL. |
| 304 | Not modified | URL is not modified. |
Client Error
The Client error status codes represent an error that occurs on the client side during the request. Or we can say that they inform the client that due to an error, the request was unsuccessful. Some of the commonly used client error status codes with their descriptions are as follows −
| Status | Message | Description |
|---|---|---|
| 400 | Bad Request | The server cannot fulfil the request because the request was malformed or has an invalid syntax. |
| 401 | Unauthorised | The request needs authentication and the user does not provide valid credentials. |
| 403 | Forbidden | The server understood the request but does not fulfil it. |
| 404 | Not Found | The requested page is not found. |
| 405 | Method Not Allowed | The method through which the request is made is not supported by the page. |
| 406 | Not Acceptable | The response generated by the server cannot be accepted by the client. |
| 408 | Request Timeout | Server timeout |
| 409 | Conflict | The request does not fulfil due to a conflict in the request. |
| 410 | Gone | The requested page is not available. |
| 417 | Exception Failed | The server does not match the requirement of the Expect request header field. |
Server Error
The server error status codes represent an error that occurs on the server side during the request. Or we can say that they inform the client that due to an error with the server, the request was unsuccessful. Some of the commonly used server error status codes with their descriptions are as follows −
| Status | Message | Description |
|---|---|---|
| 500 | Internal Server Error | When the server encounter error while processing the request. |
| 501 | Not Implemented | When the server does not recognise the request method or lacks the ability to fulfil the request. |
| 502 | Bad Gateway | When the server acts like a gateway and recovers an invalid response from another server(upstream). |
| 503 | Service Unavailable | When the server is not available or down. |
| 504 | Gateway Timeout | When the server acts like a gateway and does not receive a response from the other server(upstream) on time. |
| 505 | HTTP Version Not Supported | When the server does not support the version of the HTTP protocol. |
| 511 | Network Authentication Required | When the client needs to authenticate to gain access to the network. |
Example 1: Finding status code using fetch() function
In the following program, we find the status code of the current request. So for that, we fetch the data from the given URL. If the response returned by the server is OK, then display the status code. If not, then display the request failed status. If we get an error, then this code uses the catch() function to handle the error.
<!DOCTYPE html>
<html>
<body>
<script>
   fetch("https://jsonplaceholder.typicode.com/todos")
   .then(response=>{
      if (response.ok){

      const mystatus = response.status;

      // Display output in HTML page
      document.getElementById("sendData").innerHTML = JSON.stringify(mystatus);
      }else{
         console.log("Request Fail:", mystatus);
      }
   })
   // Handling error
   .catch(err =>{
      console.log("Error is:", err)
   });
</script>
<h2>Status code of request</h2>
<div>
   <p>Status of the current request is </p>
   <!-- Displaying data-->
   <p id = "sendData"></p>
</div>
</body>
</html>
Output
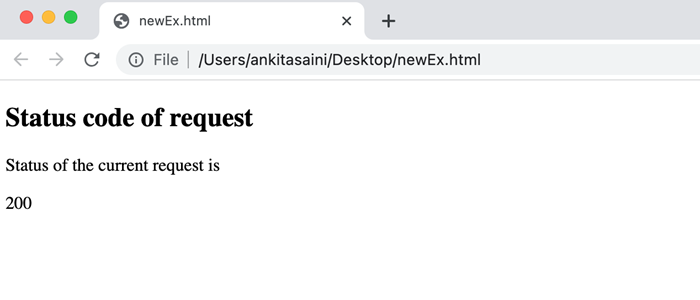
Example 2: Finding status code using fetch() function with async/await
In the following program, we find the status code of the current request. So for that, we create an async function. In this function, we fetch the data from the given URL using the fetch() function. If the response returned by the server is OK, then display the status code in the console log. If not, then display the request failed status. If we get an error, then this code uses the catch() function to handle that error.
<!DOCTYPE html>
<html>
<head>
<title>Fetch API Example</title>
</head>
<body>
<h1>Example of Fetch API</h1>
<script>
   async function getStatus() {
      try {
         const myResponse = await fetch("https://jsonplaceholder.typicode.com/todos");

         // Finding the status of the request
         console.log("Status of the request:", myResponse.status);
         console.log(myResponse);
      } catch (err) {
         console.log("Error is:", err);
      }
   }
   getStatus();
</script>
</body>
</html>
Output
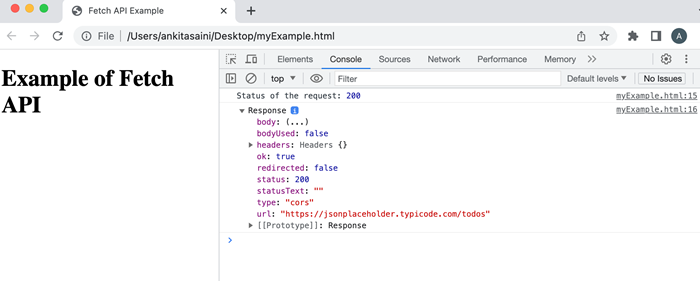
Conclusion
So this is how we can find the status code of the current request returned by the server. Using these status codes we can perform various operations such as checking if the request is successful or not, handling the specified error, or performing the appropriate action on the response returned by the server. Now in the next article, we will see how Fetch API handles errors.
Stream API - Basics
Stream API allows developers to access the streams of data received over the network and process them bit-by-bit according to their needs with the help of JavaScript programming language. Where the streams are the sequence of data that we want to receive over the network in small chunks and then we process that small chunks in bit-by-bit.
Before streaming, if we want to process a video, audio, or text file we need to download that complete file from the network and wait for it to be deserialized into a specified format and then process the complete downloaded file.
After the introduction of streams, the whole working culture is changed now we can start processing data bit-by-bit as soon as the data is received on the client side using JavaScript without creating any extra buffer or blob. Using streams we can perform various tasks like can find the start and end of the stream or can chain streams together or can easily handle errors, can cancel the streams, and much more.
Streaming is used to create real-world applications like video streaming applications like Netflix, Amazon Prime Videos, Zee5, Voot, YouTube, etc. So that users can easily watch movies, TV shows, etc. online without downloading them. Stream API provides various features like ReadableStream, Teeing, WritableStream, Pipe Chains, Backpressure, internal queue, and queueing strategies. Let's discuss them one by one in detail.
Readable Stream
The readable stream allows you to read data/chunks from the source in JavaScript using the ReadableStream object. The chunks are small pieces of data that are going to be read by the reader sequentially. It can be of a single bit or can be of a large size like a typed array, etc. To read a readable stream API provide a reader. It reads chunks from the stream and then processes the data of the chunk. Only one reader can read a stream at a time, no other reader is allowed to read that stream.
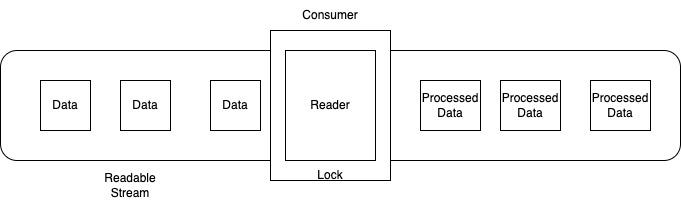
Writable Stream
The writable stream allows you to write data in JavaScript using the Writable Stream object. The data is written by the writer to the stream. The writer writes data in the form of chunks(one chunk at a time). When the writer is created and starts writing to the stream for that time the stream is locked for that writer, and no other writer is allowed to access that stream and an inter queue is used to keep track of the chunks written by the writer.
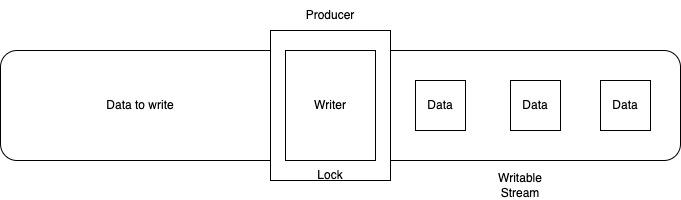
Teeing
Teeing is a process in which a stream is split into two identical copies of the stream so that two separate readers can read the stream at the same time. We can achieve teeing with the help of the ReableStream.tee() method. This method returns an array that contains two identical copies of the specified stream and can be read by two readers.
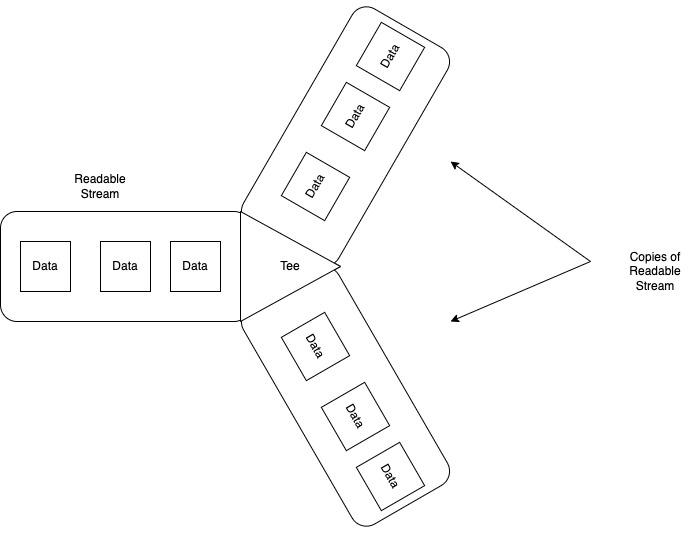
Pipe Chains
Pipe Chain is a process in which multiple streams are connected together to create a data processing flow. In Stream API, we can pipe one stream into another with the help of a pipe chain structure. The starting point of the pipe chain is known as the original source and the last point of the pipe chain is known as the ultimate sink.
To pipe streams we can use the following methods −
ReadableStream.pipeThrough() − This method is used to pipe the current stream through a transform stream. Transform stream contains a pair of readable and writable streams.
ReadableStream.pipeTo() − This method is used to pipe the current ReadableStream to the specified WritableStream and will return a promise which resolves when the piping process is successfully completed or rejected due to some error.
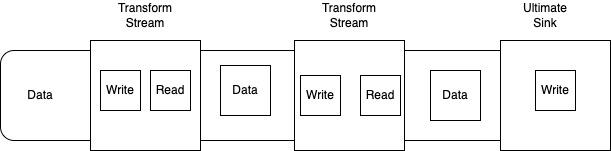
Backpressure
Backpressure is a special concept in Stream API. In this process, a single stream or pipe chain controls the speed of read/write. Suppose we have a stream, this stream is busy and does not able to take new chunks of data, so it sends a backward message through the chain to tell the transform stream to slow down the delivery of chunks so that we can save from bottleneck.
We can use backpressure in the ReadableStream, so we need to find the chunk size required by the consumer with the help of the ReadableStreamDefaultContriller.desiredSize property. If the chunk size is very low, then the ReadableStream can indicate it's an underlying source so stop sending more data and send backpressure along with the stream chain.
When the consumer again wants the received data then we use the pull method to tell the underlying source to send data to the stream.
Internal queues and queuing Strategies
Internal queues are the queues that keep track of those chunks that have not been processed or finished. For example, in a readable stream, the internal queue keeps track of those chunks that are present on the enqueue but not read yet. Internal queues use a queueing strategy representing how the backpressure signal sends according to the internal queue state.
Conclusion
So these are the basic concept of Stream API. It is generally used in online streaming. When you watch a video online the browser or the application receives continuous streams of data chunks in the background and then they are processed by that browser or the application to display the video. Now in the next article, we will learn about the Readable stream of Stream API.
Stream API - Readable Streams
In Stream API, a readable stream is a data source from where we can read data in a sequential and asynchronous way. It is a standardized way to get data from the underlying sources. Underlying sources is the resource which present on the network. They are of following two types −
Push source − In which the data is pushed to you when you access them. You can have control of the stream like when to start or when to pause or even when to terminate the current stream. For example, video game streaming.
Pull source − In which you need to explicitly request the data from them. For example access files with the help of Fetch or XHR call.
In a Readable Stream, the data is in the form of small chunks so it is read sequentially, one chunk at a time. A chunk can be a single byte or can be of a larger size. Hence the size of the chunks can be different in a stream. Now lets us understand how readable stream works.
Working of Readable Stream
The working of the Readable stream is quite straightforward. In a readable stream, the chunks of data are placed in enqueue. It means the chunks are waiting in the queue to read. Here we have another queue that is an internal queue which keeps track of unread chunks. The chunks are read by the reader. It processes the data of one chunk at a time and allows you to perform operations on the data. One reader can read only a single stream at a time. When the reader starts reading the stream at that time the stream is locked for that reader means no other reader is allowed to read that stream. If you want another reader to read that stream, then you have to terminate the first reader or can create a tee stream. Also, each reader has its own controller which allows you to control the stream such as start, close, or pause.
It also has a consumer who is responsible for handling the received data from the readable stream and processing it and can able to perform operations on it.

Readable Stream Interfaces
Stream API supports three types of readable stream interfaces −
ReableStream Interface
ReableStreamDefaultReader Interface
ReadableStreamDefaultController Interface
ReadableStream Interface
The ReadableStream Interface is used to represent a readable stream of data. It is generally used with Fetch API to handle the response stream. It can also handle the response stream of developer-defined streams.
Constructor
To create a readable stream object for the given handlers ReadableStream interface provides a ReadableStream() constructor.
Syntax
const newRead = new ReadableStream()
Or
const newRead = new ReadableStream(UnderlyingSource)
Or
const newRead = new ReadableStream(UnderlyingSource, QueuingStrategy)
Following are the optional parameters of the ReadableStream() constructor −
UnderlyingSource − This object provide various methods and properties that define the behaviour of the stream instance. The methods are: start(), pull(), and cancel() whereas the properties are: type and autoAllocateChunkSize.
QueuingStrategy − This object is used to define the queuing strategy for the given streams. It takes two parameters: highWaterMark, and size(chunk).
Instance Properties
The properties provided by the ReadableStream interface are read-only properties. So the properties provided by ReadableStream are −
| Sr.No. | Property & Description |
|---|---|
| 1 | ReadableStream.locked This property is used to check whether the readable stream is locked to a reader or not. |
Methods
The following are the commonly used method of the ReadableStream interface −
| Sr.No. | Method & Description |
|---|---|
| 1 | ReadableStream.cancel() This method returns a promise which will resolve when the stream is cancelled. |
| 2 | ReadableStream.getReader() This method is used to create a reader and locks the stream to it. No other reader is allowed until this reader is released. |
| 3 | ReadableStream.pipeThrough() This method is used to create a chainable way of piping the current stream through a transform stream. |
| 4 | ReadableStream.pipeTo() This method is used to pipe the current ReadableStream to the given WriteableStream. It will return a promise when the piping process completes successfully or reject due to some error. |
| 5 | ReadableStream.tee() This method is used to get a two-element array which includes two resulting branches as new ReadableStream objects. |
ReadableStreamDefaultReader Interface
The ReadableStreamDefaultReader interface is used to represent a default reader which will read stream data from the network. It can also be read from ReadableStream.
Constructor
To create a readableStreamDefualtReader object ReadableStreamDefaultReader interface provides a ReadableStreamDefaultReader() constructor.
Syntax
const newRead = new ReadableStreamDefaultReader(myStream)
This constructor contains only one parameter which is myStream. It will read ReadableStream.
Instance Properties
The properties provided by the ReadableStreamDefaultReader interface are read-only properties. So the properties provided by ReadableStreamDefaultReader are −
| Sr.No. | Property & Description |
|---|---|
| 1 | ReadableStreamDefaultReader.closed This property returns a promise which will resolve when the stream is closed or rejected due to some error. It allows you to write a program which will respond at the end of the streaming process. |
Methods
The following are the commonly used method of the ReadableStream interface −
| Sr.No. | Method & Description |
|---|---|
| 1 | ReadableStreamDefaultReader.cancel() This method returns a promise which will resolve when the stream is cancelled. |
| 2 | ReadableStreamDefaultReader.read() This method returns a promise which will give access to the next chunk or piece in the stream's queue. |
| 3 | ReadableStreamDefaultReader.releaseLock() This method is used to remove the lock of the reader on the stream. |
ReadableStreamDefaultController Interface
The ReadableStreamDefaultController interface represents a controller which allows us to control the ReadableStream State or internal queue. It does not provide any controller and the instance is created automatically while constructing ReadableStream.
Instance Properties
| Sr.No. | Property & Description |
|---|---|
| 1 | ReadableStreamDefaultController.desiredSize This property is used to find the desired size to fill the internal queue of the stream. |
The properties provided by the ReadableStreamDefaultController interface are read-only properties. So the properties provided by ReadableStreamDefaultController are −
Methods
The following are the commonly used method of the ReadableStreamDefaultController interface −
| Sr.No. | Property & Description |
|---|---|
| 1 | ReadableStreamDefaultController.close() This method is used to close the related stream. |
| 2 | ReadableStreamDefaultController.enqueue() This method is used to enqueue the specified chunks or pieces in the related stream. |
| 3 | ReadableStreamDefaultController.error() This method will cause any future interaction with the related stream to the error. |
Example - Creating ReadableStream
In the following program, we will create a custom readable stream using the ReadableStream constructor. So first we create a function which generates data in chunks. Then we create a readable stream using ReadableStream() constructor containing the start() function. This start() function uses pData() recursive function which pushes data from myData() function to the consumer with the help of a controller, where a timeout is set of 1 sec between each push operation. Now we create a reader to consume the data from the stream using the getReader() function. Then we create a readMyData() function to recursively read the data from the stream with the help of the reader. When the stream ends, then the done flag is set to true and we exit from the recursive loop.
<!DOCTYPE html>
<html>
<body>
<script>
   // Function that produces data for the stream
   function* myData() {
      yield 'pink';
      yield 'blue';
      yield 'yellow';
      yield 'green';
   }
   // Create a readable stream using ReadableStream() function
   const readStream = new ReadableStream({
      start(controller) {
         const data = myData();

         // Adding data to the stream
         function pData() {
            const { done, value } = data.next();

            if (done) {
               // Close the stream if no more data is available
               controller.close();
               return;
            }
            // Pushing the data to the consumer
            controller.enqueue(value);

            // Continue pushing data after 1 sec
            setTimeout(pData, 1000);
         }
         // Calling the pData function to start pushing data
         pData();
      }
   });
   // Create a reader for the readable stream
   const myreader = readStream.getReader();
   function readMyData() {
      myreader.read().then(({ done, value }) => {
         if (done) {
            // Stream is closed
            console.log('Stream is closed');
            return;
         }
         // Processing the received data
         console.log('Received data:', value);

         // Continue reading the data
         readMyData();
      });
   }
   // Calling readMyData() function to start
   // reading data from the readable stream
   readMyData();
</script>
</body>
</html>
Output
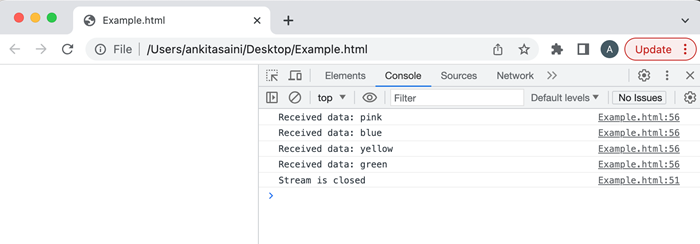
Conclusion
So this is the readable streams in Stream API. They are the most important and most commonly used streams of the Stream API. They are supported by almost all the web browsers like Chrome, Firefox, opera, edge, safari, etc. Now in the next article, we will learn about writable streams of Stream API.
Stream API - Writeable Streams
Writable Streams are those streams in which we can write data. They are generally represented in JavaScript by WritableStrem object. It creates an abstraction over the underlying sink. The underlying sink is a lower-level input/output sink where the raw data is written.
In the writable stream, a writer writes the data. It writes one chunk at a time, where a chunk is a piece of data. Also, you are allowed to use any code to produce the chunk for writing, and the writer and the related code together are known as the producer. On a single stream, only one writer is allowed to write data. At that time the stream is locked for that specified writer, no other writer is allowed to write. If you want another writer to write, then you have to terminate the first writer after that the other writer is allowed to write. Every writer has their own controller which controls the stream.
Also, the writable stream has an internal queue just like a readable stream. It also keeps track of chunks that are written but not processed by the underlying sink.

WritableStream Interfaces
Stream API supports three types of writable stream interfaces −
WritableStream Interface
WritableStreamDefaultWriter Interface
WritableStreamDefaultController Interface
WritableStream Interface
The WritableStream Interface is used to write streaming data to the sink. Its object comes with in-built backpressure and queuing.
Constructor
To create a WritableStream object, the WritableStream interface provides a WritableStream() constructor.
Syntax
const newWrite = new WritableStream(UnderlyingSink)
Or
const newWrite = new WritableStream(UnderlyingSink, QueuingStrategy)
The WritableStream() constructor has the following optional parameters −
UnderlyingSink − This object provides various methods and properties that show the behaviour of the write stream instance. It takes four parameters: start(controller), write(chunk, controller), close(controller), and abort(reason).
QueuingStrategy − This object is used to define the queuing strategy for the write streams. It takes two parameters: highWaterMark, and size(chunk).
Instance Properties
The properties provided by the WritableStream interface are read-only properties. So the properties provided by WritableStream are −
| Sr.No. | Property & Description |
|---|---|
| 1 | WritableStream.locked This property is used to check whether the WritableStream is locked to the writer or not. |
Methods
The following are the commonly used method of the WritableStream interface −
| Sr.No. | Property & Description |
|---|---|
| 1 | WritableStream.close() This method is used to close the stream. |
| 2 | WritableStream.abort() This method is used to abort the stream. |
| 3 | WritableStream.getWriter() This method is used to get a new object of WriteableStreamDefaultWriter and will lock the stream to that instance. When the stream is locked no other writer can able to get until the current object is released. |
WritableStreamDefaultWriter Interface
The WritableStreamDefaultWriter interface is used to represent a default writer which will write chunks of data to the stream.
Constructor
To create a WritableStreamDefaultWriter object, the WritableStreamDefaultWriter interface provides a WritableStreamDefaultWriter() constructor.
Syntax
const newWrite = new WritableStreamDefaultWriter(myStream)
This constructor contains only one parameter which is myStream. It will read ReadableStream.
Instance Properties
The properties provided by the WritableStreamDefaultWriter interface are read-only properties. So the properties provided by WritableStreamDefaultWriter are −
| Sr.No. | Property & Description |
|---|---|
| 1 | WritableStreamDefaultWriter.closed This property returns a promise which will resolve if the stream is closed or rejected due to some error. It allows you to create a program which will respond at the end of the stream process. |
| 2 | WritableStreamDefaultWriter.desiredSize This property is used to get the desired size that will fulfil the stream internal queue. |
| 3 | WritableStreamDefaultWriter.ready This property returns a promise which will resolve when the desired size of the stream internal queue transition from negative to positive. |
Methods
The following are the commonly used method of the WritableStreamDefaultWriter interface −
| Sr.No. | Method & Description |
|---|---|
| 1 | WritableStreamDefaultWriter.abort() This method is used to abort the stream. |
| 2 | WritableStreamDefaultWriter.close() This method is used to close the writable stream. |
| 3 | WritableStreamDefaultWriter.releaseLock() This method is used to remove the lock of the writer on the corresponding stream. |
| 4 | WritableStreamDefaultWriter.write() This method is used to write a passed piece of data to a WritableStream and its underlying sink. It will return a promise which resolves to determine whether the write operation is a failure or success. |
WritableStreamDefaultController Interface
The WritableStreamDefaultController interface represents a controller which allows us to control the WritableStream State. It does not provide any controller and the instance is created automatically while constructing WritableStream.
Instance Properties
The properties provided by the WritableStreamDefaultController interface are read-only properties. So the properties provided by WritableStreamDefaultController are −
| Sr.No. | Property & Description |
|---|---|
| 1 | WritableStreamDefaultController.signal This property will return an AbortSignal related to the specified controller. |
Methods
The following are the commonly used method of the WritableStreamDefaultController interface −
| Sr.No. | Method & Description |
|---|---|
| 1 | WritableStreamDefaultController.error() This method will cause any future interaction with the related write stream to the error. |
Example - Creating Writable Stream
In the following program, we create a custom writable stream. So to create a writable stream Stream API provide WritableStream() constructor with the write(), cancel() and abort() functions. The write() function is used to log the received chunks, the cancel() function is used to handle when a stream is cancelled, and the abort() function is used to handle when the stream is aborted. Now we create a write using the getWriter() method to write data in the stream. So the writer writes data in the chunks and after completing the write operation it closes the stream.
<!DOCTYPE html>
<html>
<body>
<script>
   // Creating a writable stream
   const writStream = new WritableStream({
      // processing the received chunks
      write(chunk) {
         console.log('Received chunk:', chunk);
      },
      // Closing the stream
      close(){
         console.log('Stream is closed');
      },
      // Handling the aborting stream
      abort(reason){
         console.log('Stream is aborted:', reason);
      }
   });
   // Create a writer to write in the stream
   const myWriter = writStream.getWriter();

   // Writing in the stream
   myWriter.write('Orange');
   myWriter.write('Blue');
   myWriter.write('Pink');
   myWriter.write('Red');

   // Close the stream
   myWriter.close();
</script>
</body>
</html>
Output
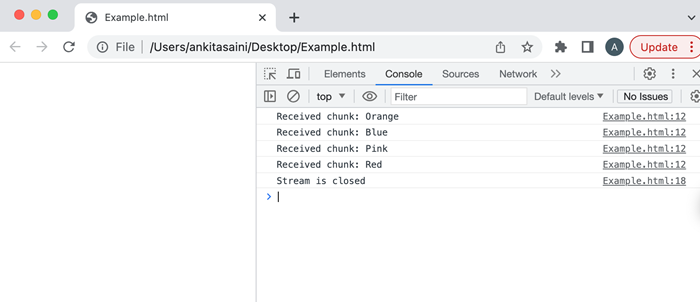
Conclusion
So this is a writable stream. With the help of writable, we can easily write data to the resources without loading the entire data in the memory. Now in the next article, we will discuss transform streams in Stream API.
Stream API - Transform Streams
In Stream API, transform streams are used to implement the pipe chain concept. The pipe chain is a process in which multiple streams are connected with each other. The original source is known as the starting point of the pipe chain whereas the ultimate sink is known as the ending point of the pipe chain.
TransformStream Interface
Stream API supports two types of transform stream interfaces −
TransformStream Interface
TransformStreamDefaultController
TransformStream Interface
The TransformStream Interface is used to implement the pipe chain transform stream method.
Constructor
To create a transform stream object, the TransformStream interface provides a TransformStream() constructor. This object represents the pair of streams that are WritableStream for the writable side and ReadableStream for the readable side.
Syntax
const newTrans = new TransformStream()
Or
const newTrans = new TransformStream(mtransform)
Or
const newTrans = new TransformStream(mtransform, writableStrategy)
Or
const newTrans = new TransformStream(mtransform, writableStrategy, readableStrategy)
Following are the optional parameters of the TransformStream() constructor −
mtransform − This object represent the transformer. start(controller), transform(chunk, controller) and flush(controller) are the method contain by the transformer object. Where the controller is the instance of TransformStreamDefaultController.
writableStrategy − This object is used to define the queuing strategy for the write streams. It takes two parameters: highWaterMark, and size(chunk).
readableStrategy − This object is used to define the queuing strategy for the read streams. It takes two parameters: highWaterMark, and size(chunk).
Instance Properties
The properties provided by the TransformStream interface are read-only properties. So the properties provided by TransformStream are −
| Sr.No. | Property & Description |
|---|---|
| 1 | TransformStream.readable This property returns a readable end of the TransformStream. |
| 2 | TransformStream.writable This property returns a writable end of the TransformStream. |
TransformStreamDefaultController Interface
The TransformStreamDefaultController interface provides various methods to manipulate the ReadableStream and WritableStream. When we create a TransformStream then the TransformStreamDefaultController is automatically created. So it does not require any separate constructor.
Instance Properties
The properties provided by the TransformStreamDefaultController interface are read-only properties. So the properties provided by TransformStreamDefaultController are −
| Sr.No. | Property & Description |
|---|---|
| 1 | TransformStreamDefaultController.desiredSize This property returns a size that will fill the readable side of the internal queue of a stream. |
Methods
The following are the commonly used method of the TransformStreamDefaultController interface −
| Sr.No. | Method & Description |
|---|---|
| 1 | TransformStreamDefaultController.enqueue() This method is used to enqueue a piece of data on the readable side of the given stream. |
| 2 | TransformStreamDefaultController.error() This method is used to find the error on both the readable and writable sides of the stream. |
| 3 | TransformStreamDefaultController.terminate() This method is used to close the readable side and errors of the writeable side of the transform stream. |
Example - Creating Transform Stream
In the following program, we create a custom transform stream. So to create a transform stream we use TransformStream() constructor with the transform(), flush(), start() and cancel() functions. The transform() function implement received chunks and then transform them in the uppercase and then enqueue the data using enqueue() method. The flush() method is to handle stream finalization, the start() method is used to handle initialization and the cancel() method is used to handle cancellation. Now we get the writer from the transform stream using the getWriter() method to read the data of the stream. Then we get the reader for the transform stream using the getReader() function. It reads and processes transformed data from the stream with the help of the myread() function.
<!DOCTYPE html>
<html>
<body>
<script>
   // Create a transform stream using TransformStream() constructor
   const newTransform = new TransformStream({
      transform(chunk, controller) {
         // Processing the received chunk in uppercase
         const tData = chunk.toString().toUpperCase();

         // Enqueue the transformed data and passed it to the downstream
         controller.enqueue(tData);
      },
      // Handling the finalized data, if required
      flush(controller) {
         console.log('Stream is flushing');
      },
      // Performing the initialization, if required
      start(controller) {
         console.log('Stream is started');
      },
      // Handling the stream if it is cancelled
      cancel(reason) {
         console.log('Stream got canceled:', reason);
      }
   });
   // Creating a writer for the transform stream
   const twriter = newTransform.writable.getWriter();

   // Writing the data into the transform stream
   twriter.write('pink');
   twriter.write('green');
   twriter.write('blue');

   // Closing the stream
   twriter.close();

   // Creating a reader for the transform stream
   const treader = newTransform.readable.getReader();

   // Read and process data from the transform stream
   function myread(){
      treader.read().then(({ done, value }) => {
         if (done) {
            console.log('Stream is ended');
            return;
         }
         // Processing the received transformed data
         console.log(value);

         // Continue reading data from the stream
         myread();
      });
   }
   // Calling the myread() to start reading from the transform stream
   myread();
</script>
</body>
</html>
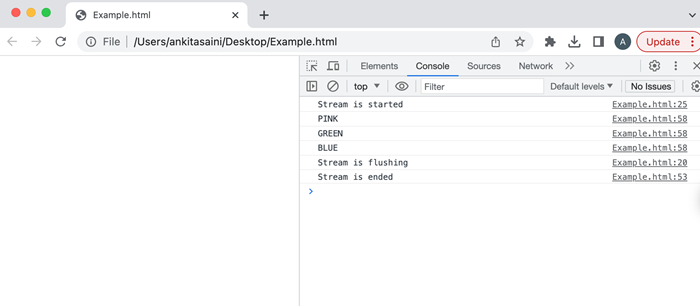
Conclusion
So this is how the transform stream works. It is generally used when we connect multiple streams together. Now in the next article, we will learn about object mode in Stream API.
Stream API - Request Object
The request object is used to fetch resources from the server. A request object is created by using Resquest() constructor provided by the Resquest interface. So when the new Request object is created we are allowed to pass a ReadableStream to the body of the Request object such types of requests are known as streaming requests. This request object is then passed to the fetch() function to fetch the resources.
Syntax
const myobject = new Request(URL, {
   method: 'POST',
   body: Stream,
   headers: {'Content-Type'},
   duplex: 'half',
});
Here the Request() constructor contains the following parameters −
URL − Address of the resource.
method − It represents the HTTP request method like GET, POST, etc.
body − Contains the ReadableStream object.
headers − Contains the suitable headers for the body.
duplex − Set to half to make duplex stream.
Example
In the following program, we create a streaming request. So for that first we create a readable stream with the help of the ReadableStream() constructor along with the start() function which implements the ReadableStream logic and other operations. Then we create a request object using the Request() constructor along with the options: the method option contains the POST request to send the request, the body option contains the stream, the headers option contains the appropriate header, and the duplex option is set to half to make it a duplex stream. After creating a request object now we pass the object in the fetch() function to make a request and this function handles the response using then() and an error(if occurs) using the catch() function. Here in place of https://exampleApi.com/, you can use a valid API/URL which sends/receive data in the form of chunks.
<script>
   // Create a readable stream using the ReadableStream constructor()
   const readStream = new ReadableStream({
      start(controller) {
         // Here implement your ReadableStream
         // Also with the help of controller, you can enqueue data and
         // signal the end of the stream
      },
   });

   // Create a request objecct using Request() constructor
   const request = new Request('https://exampleApi.com/', {
      // Set the method
      method: 'POST',

      // Passing the stream to the body of the request
      body: stream,

      // Setting suitable header
      headers: {'Content-Type': 'application/octet-stream'},
      duplex: 'half'
   });

   // After creating a request object pass the object
   // to fetch() function make a request or perform operations
   fetch(request)
   .then(response => {
      // Handling the response
   })
   .catch(error => {
      // Handling any errors if occur
   });
</script>
Restrictions
Streaming requests is a new feature so it has some restrictions and they are −
Half duplex − To execute a streaming request we have to set the duplex option to half. If you do not set this option in your streaming request, then you will get an error. This option tells that the request body is a duplex stream, where the duplex stream is a stream which receives data(writeable) and sends data(readable) simultaneously.
Required CORS and trigger a preflight − As we know that a streaming request contains a stream in the request body but does not have a "Content-Length" header. So for such type of request, CORS is required and they always trigger a preflight. Also, no-cors streaming requests are not allowed.
Does not work on HTTP/1.x − If the connection is HTTP/1.x, then based on the HTTP/1.x rules it will reject fetch. According to the HTTP/1.x rules, the request and response bodies should need to send a Content-Length headers. So that the other party can keep a record of how much data is received or can change the format to use chunked encoding. Chunked encoding is common but for the requests, it is very rare.
Server-side incompatibility − Some servers do not support streaming requests. So always use only those servers that support streaming requests like NodeJS, etc.
Conclusion
So this is how we can create a Request object for streams or we can say that this is how we can create a streaming request using the fetch() function. Streaming requests are useful for sending large files, real-time data processing, media streaming, continuous data feeds, etc. Now in the next article, we will learn about the response body in Stream API.
Stream API - Response Body
In Stream API, the body is a property of the Response interface. It is used to get the body content of ReableStream. It is a read-only property. The response body is not sent in a single body but it sends in small chunks and the client starts processing as soon as it receives data. It does not have to wait till the complete response.
Syntax
Response.body
This property return either ReadableStream or null for any Response object which is created with null body property.
Example
In the following program, we will see how to use Response Body in Stream API. So for that, we send a GET request using fetch() to the given URL. If the response is successful, then using the response body is obtained as a "ReadableStream" with the help of response.body.getReader(). Then we define a readMyStream() function to read the data chunks received from the stream. If any error occurs, then it is successfully handled by the catch() function.
<script>
   // fetch() function to send GET request
   fetch('http://example.com/')
   .then(response => {
      if (response.ok) {
      // Using body property we get the ReadableStream
      const myReader = response.body.getReader();

      // Using this function we read the chunks
      function readMyStream() {
         return myReader.read().then(({ done, value }) => {
            if (done) {
               // Stream is completed
               return;
            }
            // Process the data from the chunks
            const receivedData = new TextDecoder().decode(value);
            console.log(receivedData);

            // Continue reading
            return readMyStream();
         });
      }
      return readMyStream();
      }
   })
   .catch(error => {
      // Handling error
      console.log('Found Error:', error);
   });
</script>
Conclusion
So this is how the Response Body body works. Before using the Response body always check if the specified API supports streaming responses or not. Because not all the APIs support streaming responses. Now in the next article, we will learn about byte readers in Stream API.
Stream API - Error Handling
While working with streaming APIs they sometimes return errors due to network interruptions, server-side problems, data transmission, etc. So to handle these errors every API uses their own error-handling mechanisms during the streaming process. It makes the application robust and resilient. So the commonly used error-handling practices are −
Error Event Listeners − Almost all the streaming APIs support error event listeners. Error event listeners come into the picture when an error occurs and allow you to handle the error appropriately. It is can used with suitable objects like WebSocket, Fetch API, or ReadableStream.
Try-Catch Block − You are allowed to use a try-catch block to handle errors while working with synchronous code in a specific type of stream.
Promises and Async/Await − While using Promises or Async/Await with streaming APIs you can use a catch block to handle errors that occur during streaming.
Backoff and Retry Method − If your error is not temporary then you can use the backoff and retry method. In this method, the application waits for the data for a short period of time and if the data is not received in that time period then it retries from the failed operation.
User-friendly error message − If the error occurs, then provide a simple and user-friendly error message to the end user to avoid displaying technical details that may confuse users and can able to avoid security risks.
Data Validation − Always make sure that the incoming data from the streaming API is properly validated and sanitized to avoid data format errors or unexpected data tends to process issues.
Conclusion
Always thoroughly checks the error handling implementation to make sure that it works properly. Now in the next article, we will learn about body data in the fetch API.