- Splunk - Home
- Splunk - Overview
- Splunk - Environment
- Splunk - Interfaces
- Splunk - Data Ingestion
- Splunk - Source Types
- Splunk - Basic Searching
- Splunk - Field Searching
- Splunk - Time Range Search
- Splunk - Sharing and Exporting
- Splunk - Search Language
- Splunk - Search Optimization
- Splunk - Transforming commands
- Splunk - Reports
- Splunk - Dashboards
- Splunk - Pivot & Datasets
- Splunk - Lookups
- Splunk - Schedules and Alerts
- Splunk - Knowledge Management
- Splunk - Subseraching
- Splunk - Search Macros
- Splunk - Event Types
- Splunk - Basic Chart
- Splunk - Overlay chart
- Splunk - Sparklines
- Splunk - Managing Indexes
- Splunk - Calculated Fields
- Splunk - Tags
- Splunk - Apps
- Splunk - Removing Data
- Splunk - Custom Chart
- Splunk - Monitoring Files
- Splunk - Sort Command
- Splunk - Top Command
- Splunk - Stats Command
- Splunk Useful Resources
- Splunk - Quick Guide
- Splunk - Useful Resources
- Splunk - Discussion
Splunk - Reports
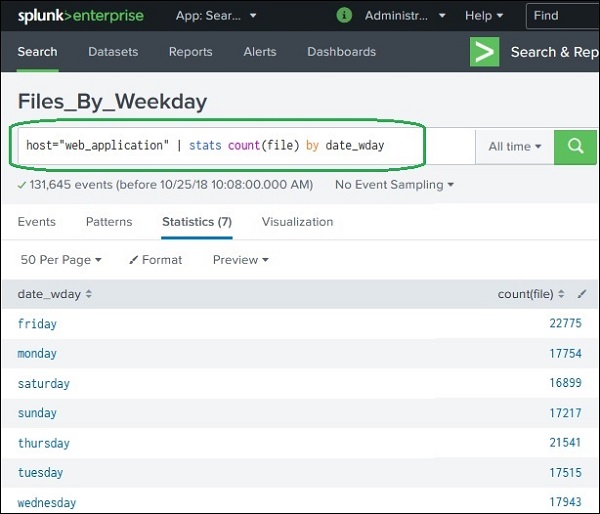
Splunk reports are results saved from a search action which can show statistics and visualizations of events. Reports can be run anytime, and they fetch fresh results each time they are run. The reports can be shared with other users and can be added to dashboards. More sophisticated reports can allow a drill down function to see underlying events which create the final statistics.
In this chapter, we will see how to create and edit a sample report.
Report Creation
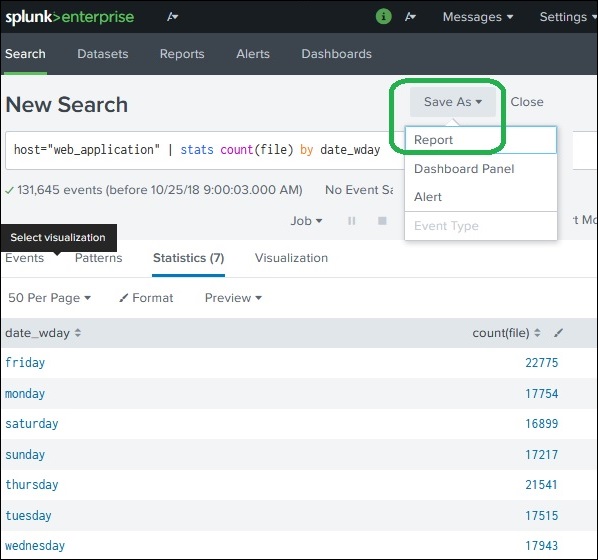
Report creation is a straight forward process where we use the Save As option to save the result of a search operation choosing the RepSave Asorts option. The below diagram shows the option.
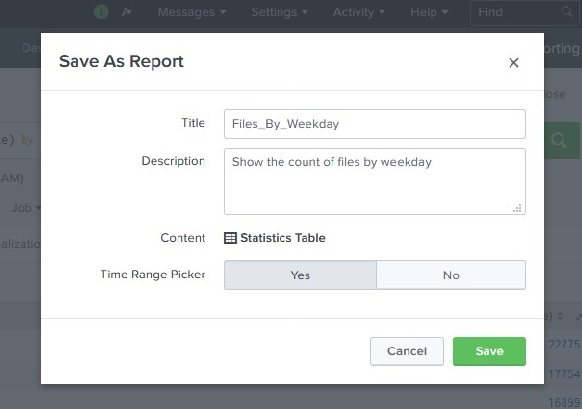
By clicking on the Reports option from the dropdown, we get the next window which asks for additional inputs like the name of the report, the description and choosing the time picker. If we choose the time picker, it allows the time range to be adjusted when we run the report. Below diagrams show how we fill the required details and then click save.
Report Configuration
After clicking save to create the report in the above step, we get the next screen asking for configuring the report as shown below. Here, we can configure the permissions, scheduling the report, etc. We also get an option to go to the next step and add the report to a dashboard.
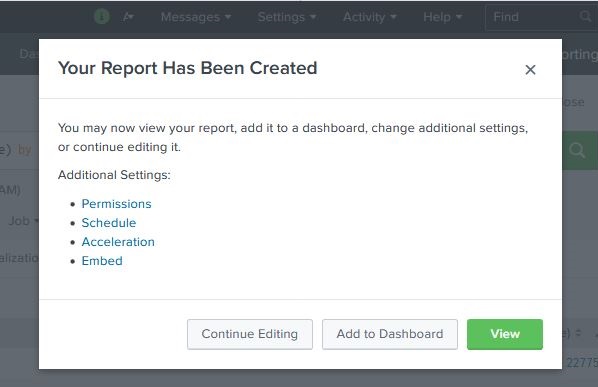
If we click on View in the above step, we can see the report. We also get configuration options after the report is created.
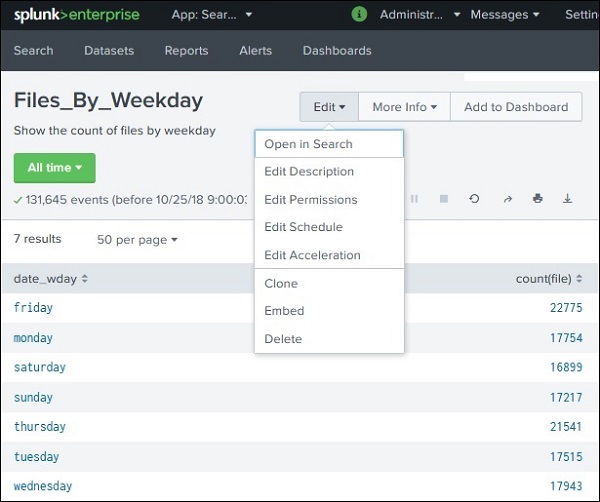
Modifying Report Search Option
While we can edit the permissions, schedule, etc., sometimes we need to modify the original search string. This can be done by choosing the Open in Search option as given in the above image. That will open the original search option again which we can be edited to a new search. Refer to the below image −