- Splunk - Home
- Splunk - Overview
- Splunk - Environment
- Splunk - Interfaces
- Splunk - Data Ingestion
- Splunk - Source Types
- Splunk - Basic Searching
- Splunk - Field Searching
- Splunk - Time Range Search
- Splunk - Sharing and Exporting
- Splunk - Search Language
- Splunk - Search Optimization
- Splunk - Transforming commands
- Splunk - Reports
- Splunk - Dashboards
- Splunk - Pivot & Datasets
- Splunk - Lookups
- Splunk - Schedules and Alerts
- Splunk - Knowledge Management
- Splunk - Subseraching
- Splunk - Search Macros
- Splunk - Event Types
- Splunk - Basic Chart
- Splunk - Overlay chart
- Splunk - Sparklines
- Splunk - Managing Indexes
- Splunk - Calculated Fields
- Splunk - Tags
- Splunk - Apps
- Splunk - Removing Data
- Splunk - Custom Chart
- Splunk - Monitoring Files
- Splunk - Sort Command
- Splunk - Top Command
- Splunk - Stats Command
- Splunk Useful Resources
- Splunk - Quick Guide
- Splunk - Useful Resources
- Splunk - Discussion
Splunk - Managing Indexes
Indexing is a mechanism to speed up the search process by giving numeric addresses to the piece of data being searched. Splunk indexing is similar to the concept of indexing in databases. The installation of Splunk creates three default indexes as follows.
main − This is Splunk's default index where all the processed data is stored.
Internal − This index is where Splunk's internal logs and processing metrics are stored.
audit − This index contains events related to the file system change monitor, auditing, and all user history.
The Splunk Indexers create and maintain the indexes. When you add data to Splunk, the indexer processes it and stores it in a designated index (either, by default, in the main index or in the one that you identify).
Checking Indexes
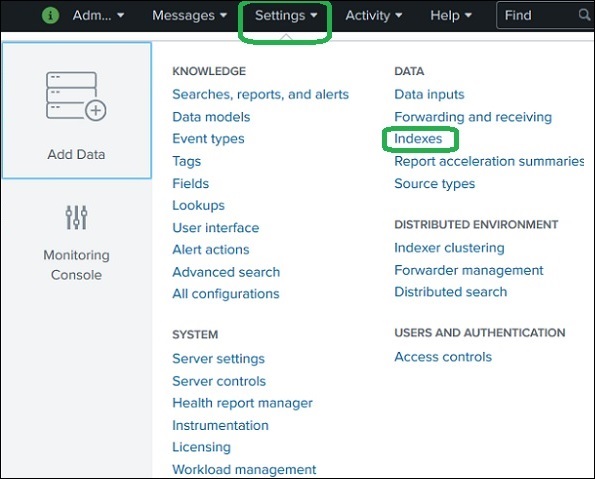
We can have a look at the existing indexes by going to Settings → Indexes after logging in to Splunk. The below image shows the option.
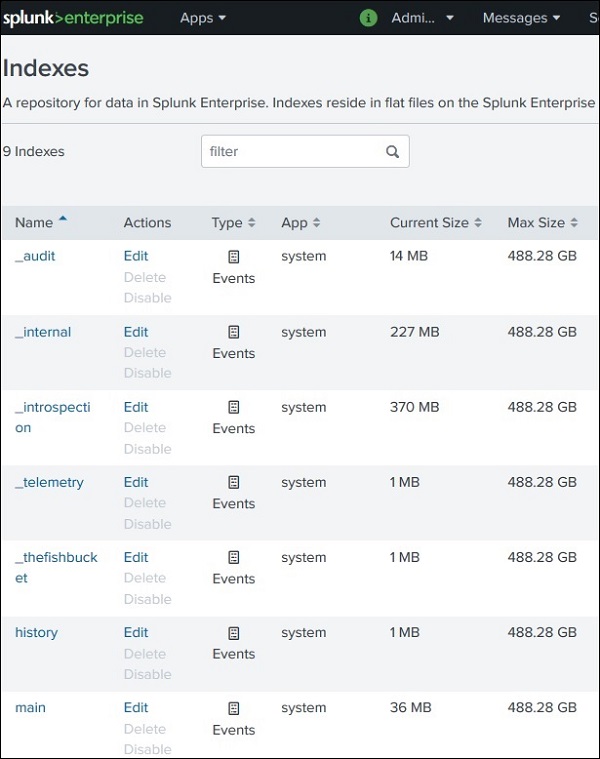
On further clicking on the indexes, we can see the list of indexes Splunk maintains for the data that is already captured in Splunk. The below image shows such a list.
Creating a New Index
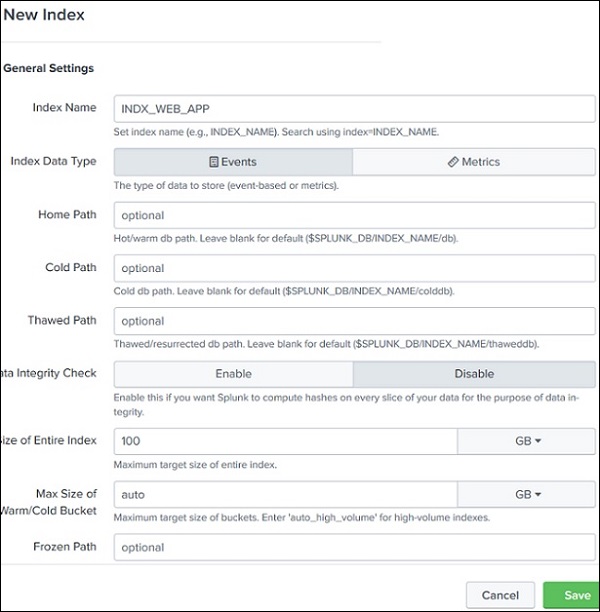
We can create a new index with desired size by the data that is stored in Splunk. The additional data that comes in can use this newly created index but better search functionality. The steps to create an index is Settings → Indexes → New Index. The below screen appears where we mention the name of the index and memory allocation etc.
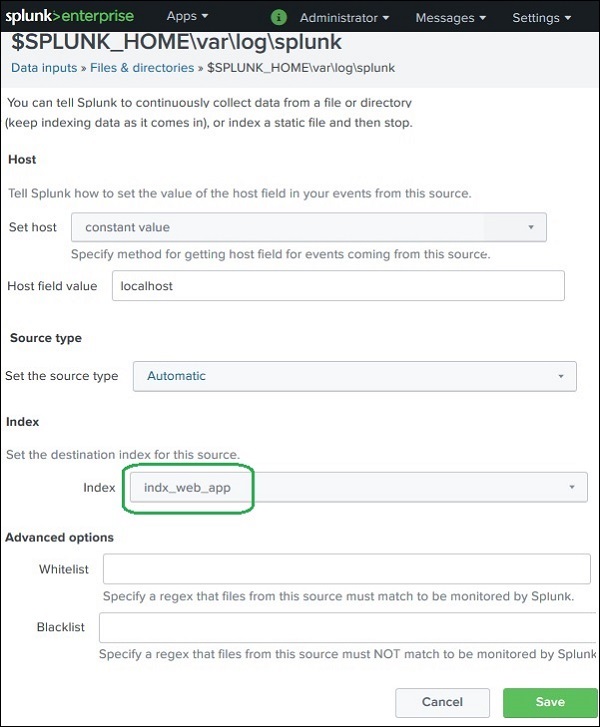
Indexing the Events
After creating the index above we can configure the events to be indexed by this specific index. We choose the event type. Use the path Settings → Data Inputs → Files & Directories. Then we choose the specific file of the events which we want to attach to the newly created event. As you can see in the below image, we have assigned the index named index_web_app to this specific file.