- Mantis - Home
- Mantis - Introduction
- Mantis - Features
- Mantis - Installation
- Mantis - Trial Setup
- Mantis - Login
- Mantis - My View
- Mantis - Project Management
- Mantis - Manage Categories
- Mantis - Versions
- Mantis - Issue Lifecycle
- Mantis - Report an Issue
- Mantis - Import Issues
- Mantis - View Issues
- Mantis - Edit Issues
- Mantis - Clone an Issue
- Mantis - Advanced Features
- Mantis - Change Status
- Mantis - Issues Relationships
- Mantis - Move an Issue
- Mantis - Issue History
- Miscellaneous Functionalities
- Mantis - Search Issues
- Mantis - Change Log
- Mantis - Roadmap
- Mantis - Summary
- Mantis - Add Custom Fields
Mantis - Installation
Mantis is a web application, provides a private website to individuals or set of requested users belonging to the same company/project.
Mantis can be run at the server side. It is a PHP-based application and supports all OS platforms such as Windows, Linux of different versions, MAC, etc. It supports mobile browsers as well in mobile views.
System Requirements
Since Mantis is a web-application, it follows the concept of client/server. This means, Mantis can be installed centrally on the server and users can interact with it through web-browsers using a website from any computer.
Web Server − Mantis is tested with Microsoft IIS and Apache. However, it can work with any latest web server software. Mantis only uses .php file. Configure the web server with .php extension only.
PHP − The web server should support PHP. It can be installed as CGI or any other integration technology.
Mandatory PHP Extensions − Extensions for RDBMS are mysqli, pgsql, oci8, sqlsrv mbstring is required for Unicode - UTF-8 support.
Optional Extensions − Curl, GD, Fileinfo.
Database − Mantis requires a database to store its data. MySQL and PostgreSQL are supported RDBMS.
Client Requirements − Firefox 45 and above, IE 10 and above, Chrome, Safari, and Opera.
Users can separately install all the requirements either manually or automatically to use Mantis.
Installation of System Requirements
If a user has adequate knowledge about the installation process, all the requirements can be installed one by one separately before proceeding to Mantis.
Alternatively, there are many all-in-one packages available, having all the requirements and can be automatically installed in the system by exe file. Here, we will take the help of XAMPP to install pre-requisites easily.
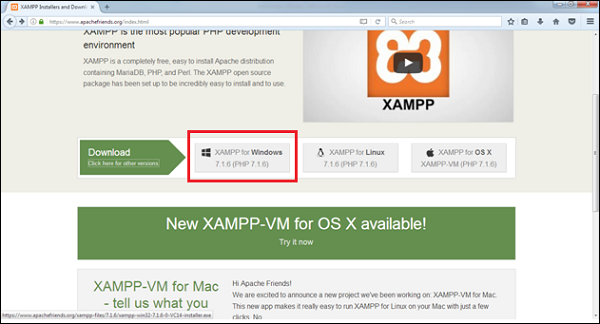
Step 1 − Go to https://www.apachefriends.org/index.html and click XAMPP for Windows as shown in the following screenshot.
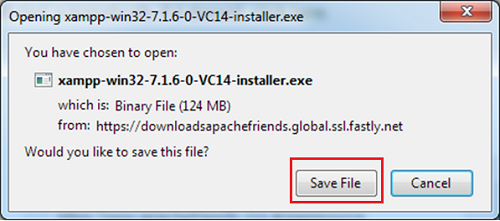
Step 2 − A pop-up will display to save the file. Click Save File. It will start downloading the file.
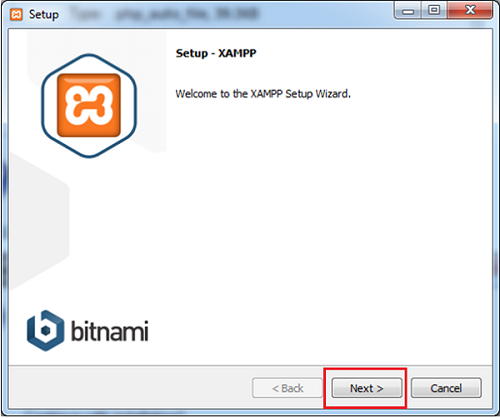
Step 3 − Run the .exe file to run the installation wizard. After clicking the .exe file, XAMPP Setup wizard displays. Click Next.
The following screenshot shows the XAMPP setup wizard.
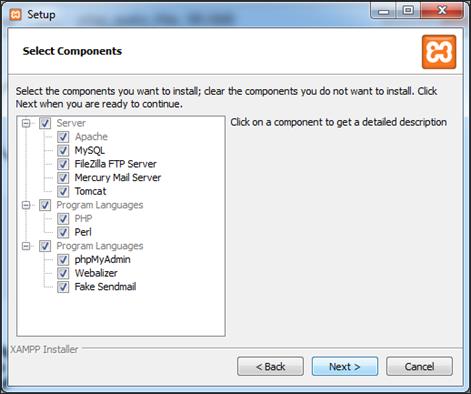
Step 4 − The next wizard displays all the component files that will install as shown in the following screenshot. Click Next after making a selection of components.
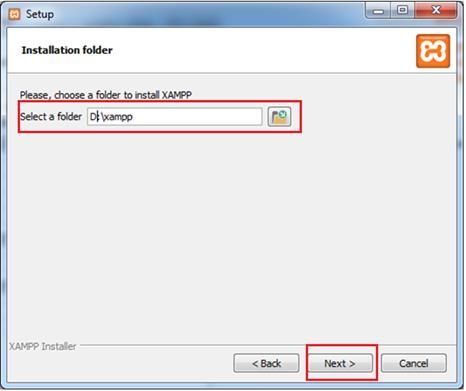
Step 5 − Provide a folder name where XAMPP will be installed and click Next.
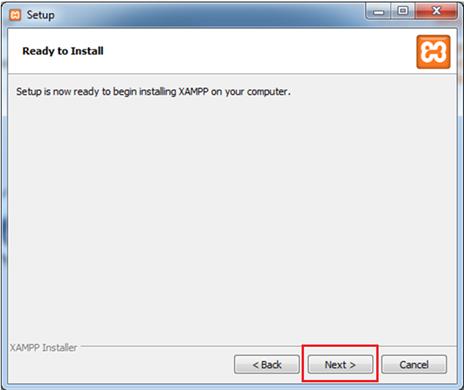
Ready to Install wizard is displayed.
Step 6 − Click Next to start the installation.
Step 7 − After successful installation, it will ask to start the control panel. Check the checkbox and click Finish. It will open the XAMPP control panel as displayed in the following screenshot.
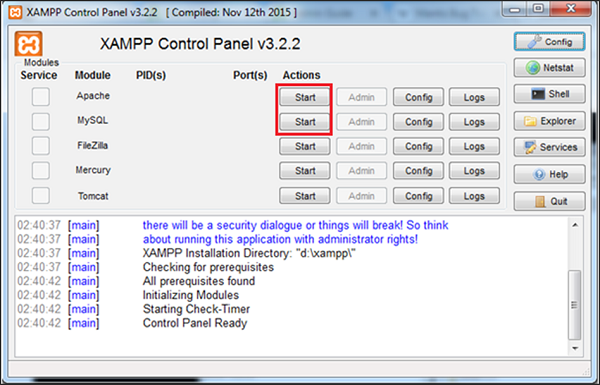
Step 8 − Click the Start button for Apache and MySQL, required for Mantis as shown in the above screenshot.
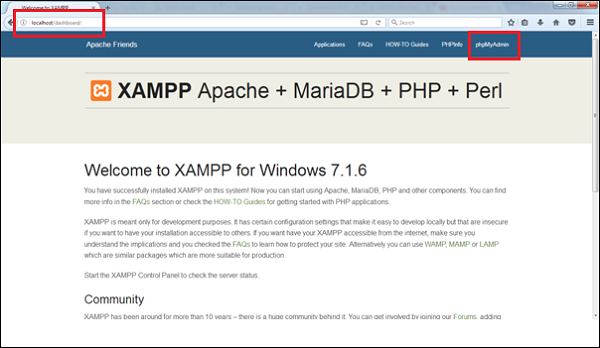
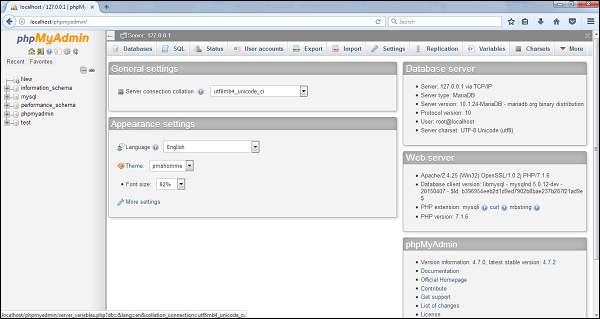
Step 9 − To verify whether all the pre-requisites such as Apache, PHP, and MySQL is installed properly, navigate to any of the browser, type http://localhost and press Enter. It will display the dashboard of XAMPP. Click phpAdmin at the right top corner as shown in the following screenshot.
The next screenshot will display General Settings, Application Settings, Details of Database, Web Server, and phpMyAdmin.
If the installation is not proper, this page wont be displayed. Till this point, all the pre-requisites are successfully installed in the system.
Install and Launch Mantis
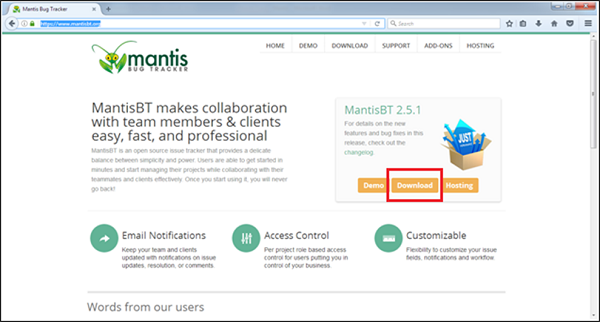
Step 1 − To download Mantis, go to https://www.mantisbt.org/ and click Download.
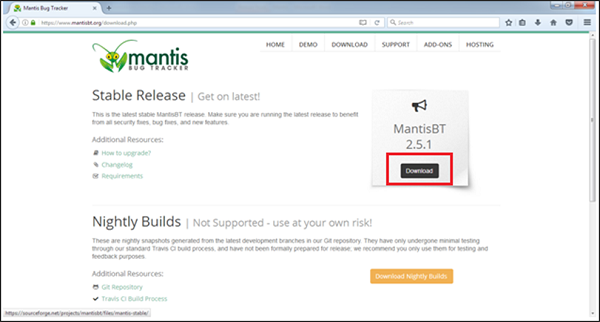
Step 2 − Click Download on the next page as shown in the following screenshot.
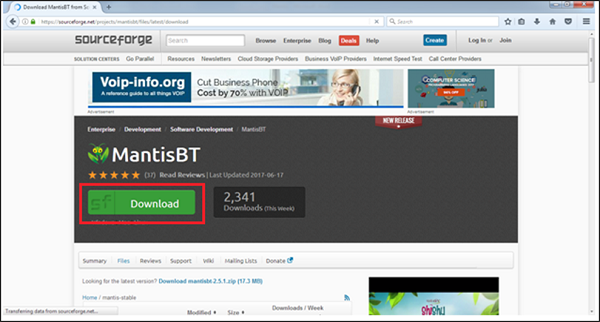
Step 3 − Again click Download as shown in the following screenshot and save the .zip file.
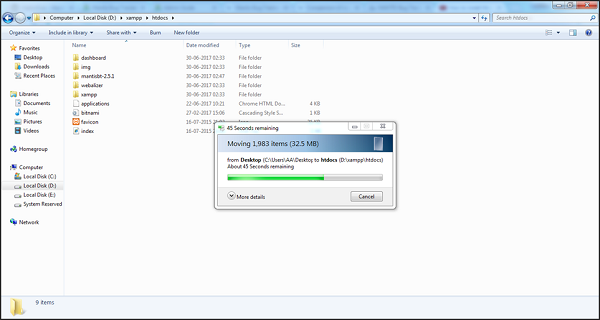
Step 4 − Go to XAMPP folder where it is installed and navigate to htdocs folder. Unzip the downloaded mantis and place it as shown in the following screenshot.
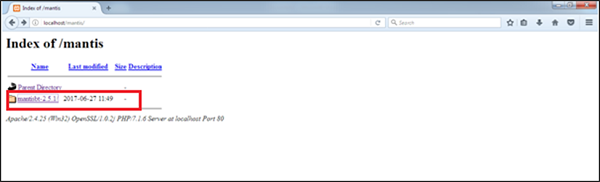
Step 5 − Rename the folder name mantis 2.5.1 as mantis for better URL.
Step 6 − Now open a browser and type http://localhost/mantis in the navigation bar and press Enter. It will display the index of mantis as shown in the following screenshot. Click mantis-2.5.1.
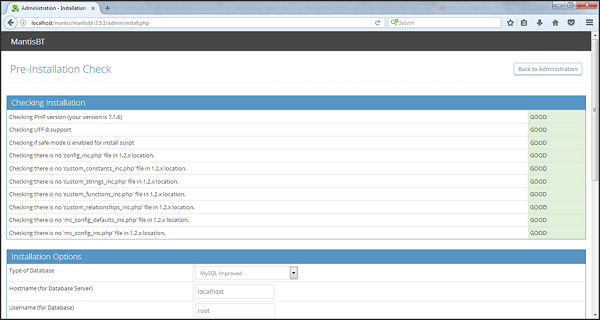
It will display the Pre-Installation page as shown in the following screenshot.
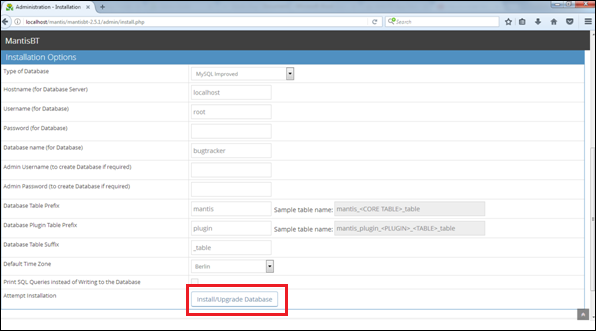
Step 7 − Go to the Installation section and make changes, if required. Then, click the Install/Upgrade Database button.
Once installation is complete, it will display the Check installation page and will be marked as Good, i.e. Mantis is installed properly.
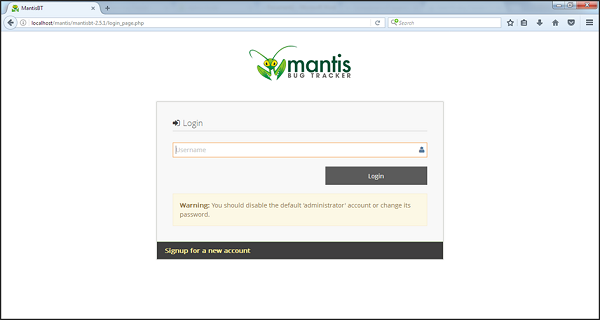
Step 8 − To launch mantis, use the URL http://localhost/mantis and click mantis-2.5.1. It will display the Login page of Mantis as shown in the following screenshot.
Note − Make sure the Web server and the Database, both are running before using the URL, otherwise Problem Loading Page error will be displayed.
Step 9 − Provide the username as Administrator and click Login. It will ask to enter the password. Use root as password and click Login.

After successful Login, it will display the Dashboard of Mantis.
