- Google Plus - Business Page Setting
- Creating a New Account
- Navigating Through Google Plus
- Adding Business Details
- Uploading Profile Picture
- Google Plus - Adding a Cover Picture
- Google Plus - Networking
- Google Plus - Circles
- Google Plus - Communities
- Google Plus - Hangouts
- Google Plus - Events
- Google Plus - Posting Content
- Google Plus - Uploading a Post
- Google Plus - Editing a Post
- Google Plus - Deleting a Post
- Google Plus - Resharing a Post
- Google Plus - Reporting a Post
- Foster User Engagement
- Google Plus - Checking Notifications
- Google Plus - Adding Managers
- Google Plus - Setting Settings
- Google Plus - Notification Settings
- Google Plus - Circle Settings
- Google Plus - Photo & Video Settings
- Google Plus - Profile Settings
- Google Plus - Deleting an Account
- Google Plus - Insights
- Google Plus - Optimization Process
- Google Plus - Optimizing a Page
- Google Plus - Claiming Vanity URL
- Google Plus - +Post Ads
- Google Plus - Integration Process
- Google Plus - Badges
- Google Plus - Creating a Badge
- Connecting With YouTube
- Google Plus - Social Linking
- Google Plus Useful Resources
- Google Plus - Quick Guide
- Google Plus - Useful Resources
- Google Plus - Discussion
Selected Reading
Google Plus - Deleting an Account
In case we delete your Google+ account, we can't get back our photos/videos, circles and communities again. They permanently get deleted.
Step 1 − Open the Google+ account.
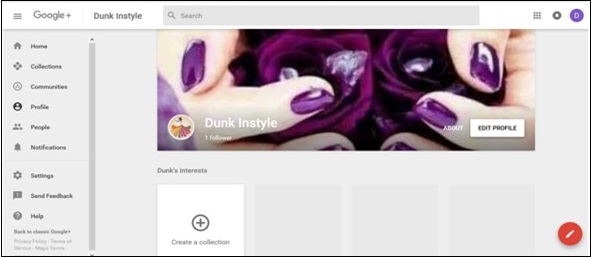
Step 2 − Click the hamburger ![]() icon on the left side of the page.
icon on the left side of the page.
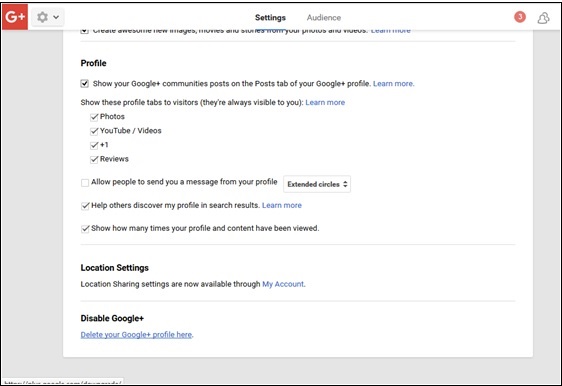
Step 3 − Scroll down to the option Settings.
Step 4 − Under the Account, there is an option Delete your Google+ profile.
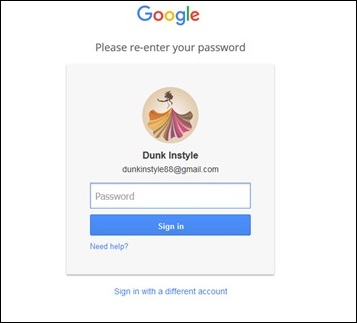
Step 5 − The page will again ask for Google+ password. Enter it.
The following screenshot pops up. It shows what will be deleted and what will remain.
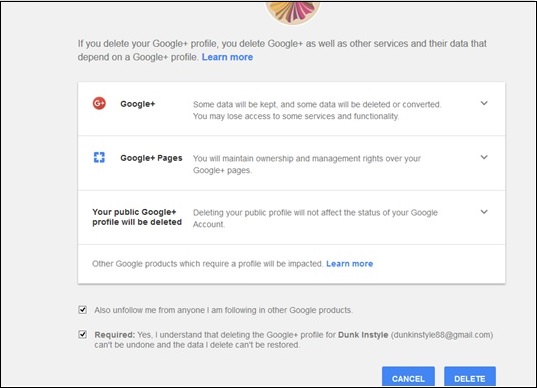
Step 6 − Read carefully and check the option as required.
Step 7 − Finally click Delete.

Advertisements