- Google Plus - Business Page Setting
- Creating a New Account
- Navigating Through Google Plus
- Adding Business Details
- Uploading Profile Picture
- Google Plus - Adding a Cover Picture
- Google Plus - Networking
- Google Plus - Circles
- Google Plus - Communities
- Google Plus - Hangouts
- Google Plus - Events
- Google Plus - Posting Content
- Google Plus - Uploading a Post
- Google Plus - Editing a Post
- Google Plus - Deleting a Post
- Google Plus - Resharing a Post
- Google Plus - Reporting a Post
- Foster User Engagement
- Google Plus - Checking Notifications
- Google Plus - Adding Managers
- Google Plus - Setting Settings
- Google Plus - Notification Settings
- Google Plus - Circle Settings
- Google Plus - Photo & Video Settings
- Google Plus - Profile Settings
- Google Plus - Deleting an Account
- Google Plus - Insights
- Google Plus - Optimization Process
- Google Plus - Optimizing a Page
- Google Plus - Claiming Vanity URL
- Google Plus - +Post Ads
- Google Plus - Integration Process
- Google Plus - Badges
- Google Plus - Creating a Badge
- Connecting With YouTube
- Google Plus - Social Linking
- Google Plus Useful Resources
- Google Plus - Quick Guide
- Google Plus - Useful Resources
- Google Plus - Discussion
Selected Reading
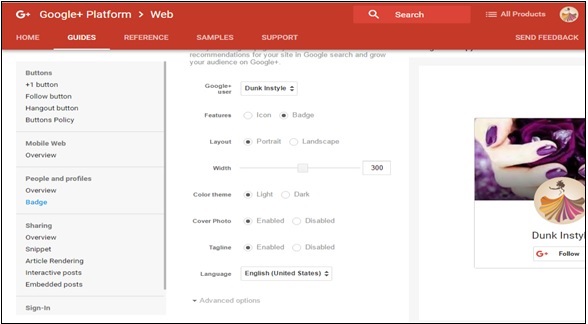
Google Plus - Creating a Badge
In this chapter, lets discuss how you can create a badge in Google+.
Step 1 − Log in to Google+ account.
Step 2 − Open developers.google.com.
Step 3 − Enter the required fields. Google+ offers options of adjusting the width (180-450 pixels), the layout (portrait or landscape), the theme (dark or light), cover photo, tagline, etc.
Step 4 − Once done with the editing process, we will receive a code. Copy the full code.
Step 5 − Go to the WordPress dashboard and select appearance → widgets.
Step 6 − Add the text widget to the sidebar where we want the follow option to appear.
Step 7 − Paste the copied code to the widget field. Now, automatically the badge starts appearing on the page.

Advertisements