- SAP IDM - Home
- SAP IDM - Introduction
- SAP IDM - Architecture
- SAP IDM - Installation
- SAP IDM - Developer Studio
- SAP IDM - Setting up the Framework
- SAP IDM - Repository Types
- SAP IDM - Using Identity Stores
- SAP IDM - Identity Center Properties
- SAP IDM - Maintaining Packages
- SAP IDM - Using Processes
- SAP IDM - Identity Store Forms
- SAP IDM - Maintaining Jobs
- SAP IDM - Self Service Password Reset
- SAP IDM - Setting Email Notifications
- Connecting SAP ABAP Systems
- Connecting non-SAP Systems
- Identity Reporting using SAP BW
- SAP IDM - Integration using GRC 10.0
- SAP IDM - Migration to New Version
- SAP IDM - Job Responsibilities
- SAP IDM Useful Resources
- SAP IDM - Quick Guide
- SAP IDM - Useful Resources
- SAP IDM - Discussion
SAP IDM - Developer Studio
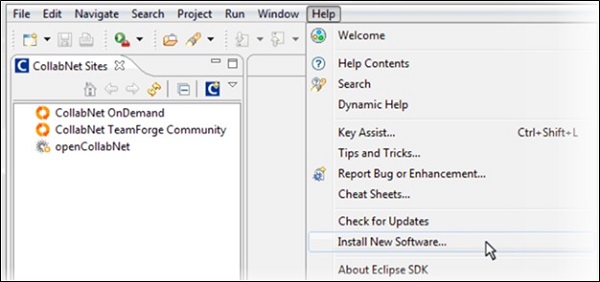
SAP IDM Developer Studio is an Eclipsed based plug in and used to configure Identity management solution. This is a client-based tool and has to be installed on each developer or administrator system. To enable Identity Management developer studio, From Eclipse User interface, navigate to Help -> Install New software.
Next is to provide the repository site where the plugin is available from. Click on Add as shown in below screenshot −
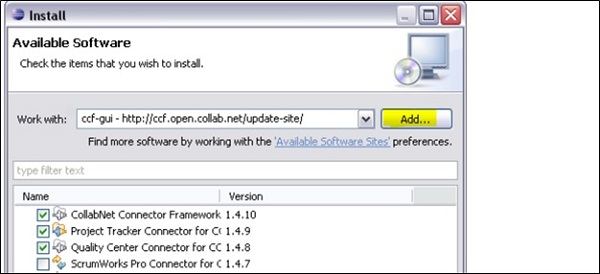
This will open Add Repository dialog box, pass the name like- SAP Identity Management Developer Studio: and under location field, pass URL of Identity Management Developer Studio plugin. Provide this URL https://tools.hana.ondemand.com/oxygen for Eclipse Oxygen (4.7) -> OK.
When you expand SAP Identity Management Tools, Select SAP Identity Management Developer Studio checkbox and click on Next.
Configuring SAP IdM Developer Studio
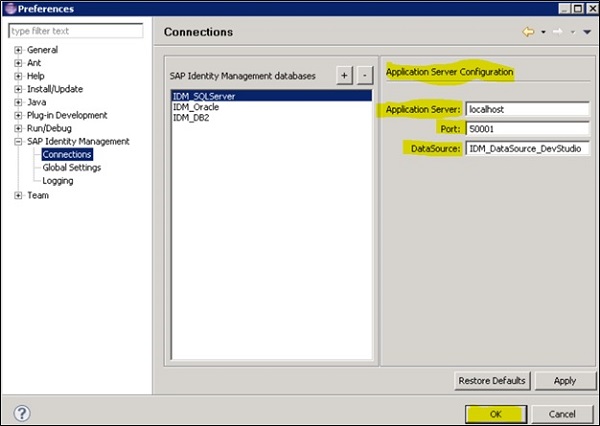
In SAP IDM Developer studio, you can add connection to IDM database. You need to pass the below details −
Application Server name
Port
Data Source
Under Preferences -> Connections -> click on + sign .
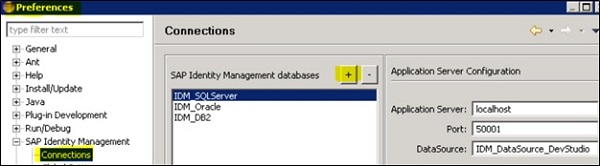
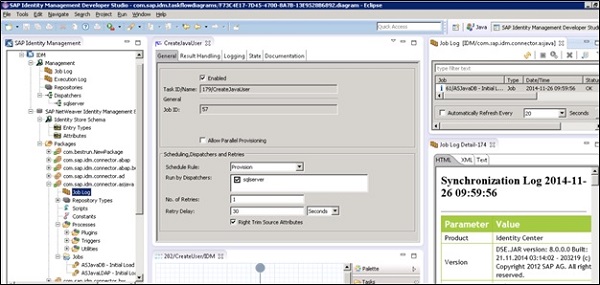
Provide the required information and click on OK to add the Database. Once you add the database, you can expand and see the tree view.