- Spring Data Tutorial - Home
- Spring Data Apache Solr
- Overview
- Prerequisites
- Introduction
- What is Apache Solr?
- Getting Started
- Querying
- Features
- Conclusion
- Spring Data Cassandra
- Overview
- Prerequisites
- Introduction
- What is Cassandra?
- Getting Started
- Annotation AllowFiltering with Query Methods
- Partition and Clustering
- Coding hands-on on Partitioning and Clustering
- Features
- Conclusion
- Spring Data Couchbase
- Overview
- Prerequisites
- Introduction
- What is Couchbase?
- Getting Started
- Views
- CouchbaseTemplate
- Hands-on using CouchbaseTemplate
- Features
- Conclusion
- Spring Data Elasticsearch
- Overview
- Prerequisites
- Introduction
- What is ElasticSearch?
- Getting Started
- Querying
- Configuring ElasticsearchOperations bean
- Features
- Conclusion
- Spring Data JDBC
- Introduction
- Need of Spring Data JDBC
- Features
- Domain-Driven Design
- Prerequisites
- Getting Started
- Conclusion
- Spring Data JPA
- Background
- Introduction
- Prerequisites
- Getting Started
- Features
- Conclusion
- Spring Data MongoDB
- Overview
- Prerequisites
- Introduction
- What is MongoDB?
- Getting Started
- Query Methods
- Annotations
- Exposing REST end points
- Relationship
- Conclusion
- Spring Data Redis
- Overview
- Prerequisites
- Introduction
- What is Redis?
- Redis Java Clients
- Getting Started
- Features
- Conclusion
- Spring Data REST
- Background
- Introduction to Spring Data REST
- Prerequisites
- Getting Started
- Features
- Conclusion
- Spring Data Tutorial Useful Resources
- Spring Data Tutorial - Quick Guide
- Spring Data Tutorial - Useful Resources
- Spring Data Tutorial - Discussion
Spring Data MongoDB - Getting Started
Like other Spring-based projects, you can start from scratch by creating a maven or Gradle based project from your favourite IDE. Follow below step by step process or you can bypass the basic setup steps that are already familiar with.
Adding Dependencies.
If you have created normal Maven or Gradle projects then add below dependencies to your pom.
For Maven
<dependency>
   <groupId>org.springframework.boot</groupId>
   <artifactId>spring-boot-starter-web</artifactId>
</dependency>
<dependency>
   <groupId>org.springframework.boot</groupId>
   <artifactId>spring-boot-starter-data-mongodb</artifactId>
</dependency>
Above are two Spring Web and Spring Data MongoDB dependences. If you have created your project as Spring Boot or Starting with Spring Initializr then your final list of dependencies will look like this −
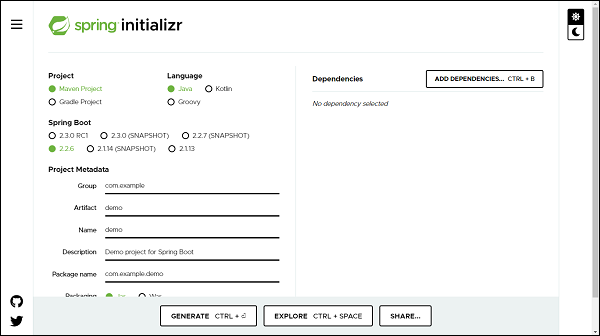
Note − The code sample and exapmles used in this tutorial has been created through Spring Initializr. The following is your final pom.xml file that is created when you choose Maven −
<?xml version="1.0" encoding="UTF-8"?>
<project xmlns="http://maven.apache.org/POM/4.0.0"
xmlns:xsi="http://www.w3.org/2001/XMLSchema-instance"
xsi:schemaLocation="http://maven.apache.org/POM/4.0.0 https://maven.apa
che.org/xsd/maven-4.0.0.xsd">
   <modelVersion>4.0.0</modelVersion>
   <parent>
      <groupId>org.springframework.boot</groupId>
      <artifactId>spring-boot-starter-parent</artifactId>
      <version>2.2.6.RELEASE</version>
      <relativePath /> <!-- lookup parent from repository -->
   </parent>
   <groupId>com.tutorialspoint</groupId>
   <artifactId>Spring-Data-MongoDB</artifactId>
   <version>0.0.1-SNAPSHOT</version>
   <name>Spring-Data-MongoDB</name>
   <description>Spring Data MongoDB project using Spring Boot</description>
   <properties>
      <java.version>1.8</java.version>
   </properties>
   <dependencies>
      <dependency>
         <groupId>org.springframework.boot</groupId>
         <artifactId>spring-boot-starter-data-mongodb</artifactId>
      </dependency>
      <dependency>
         <groupId>org.springframework.boot</groupId>
         <artifactId>spring-boot-starter-web</artifactId>
      </dependency>
      <dependency>
         <groupId>org.springframework.boot</groupId>
         <artifactId>spring-boot-starter-test</artifactId>
         <scope>test</scope>
         <exclusions>
            <exclusion>
               <groupId>org.junit.vintage</groupId>
               <artifactId>junit-vintage-engine</artifactId>
            </exclusion>
         </exclusions>
      </dependency>
   </dependencies>
   <build>
      <plugins>
         <plugin>
            <groupId>org.springframework.boot</groupId>
            <artifactId>spring-boot-maven-plugin</artifactId>
         </plugin>
      </plugins>
   </build>
</project>
Creating Collection
A collection is equivalent to a model, it will be created as a POJO. Lets define our first collection −
import org.springframework.data.annotation.Id;
import org.springframework.data.mongodb.core.index.IndexDirection;
import org.springframework.data.mongodb.core.index.Indexed;
import org.springframework.data.mongodb.core.mapping.Document;
@Document(collection = "customer")
public class Customer {
   @Id
   private Long id;
   private String name;
   @Indexed(unique = true)
   private String email;
   @Indexed(direction = IndexDirection.DESCENDING)
   private Double salary;
   public Long getId() {
      return id;
   }
   public void setId(Long id) {
      this.id = id;
   }
   public String getName() {
      return name;
   }
   public void setName(String name) {
      this.name = name;
   }
   public String getEmail() {
      return email;
   }
   public void setEmail(String email) {
      this.email = email;
   }
   public Double getSalary() {
      return salary;
   }
   public void setSalary(Double salary) {
      this.salary = salary;
   }
   @Override
   public String toString() {
      return "Customer [id=" + id + ", name=" + name + ", email=" + email
      + ", salary=" + salary + "]";
   }
}
@Document: Unlike JPA where we used to mark our domain object with annotation @Entity,here we mark it with @Document. If we do not specify a collection attribute, by default, a collectionwith the class name (first character lowercased) will get created i.e., customer. If we want to specify some other name we can add attribute collection to the @Document annotation. @Id: This is for identity purposes. @Indexed(unique = true): @Indexed annotation is used to mark the field as Indexed in the MongoDB. Here, it will index the email with a unique attribute. @Indexed(direction = IndexDirection.DESCENDING): This is applied to the field that will be indexed in a descending order. Similarly we can use IndexDirection.ASCENDING for ascending order.
Creating a Repository
Lets define an interface which will be our repository −
import org.springframework.data.mongodb.repository.MongoRepository;
import com.tutorialspoint.document.Customer;
public interface CustomerRepository extends MongoRepository<Customer, Long>
{
}
The process of creating a repository is similar to the repository creation in any Spring data−based project, the only difference here is that it extends MongoRepository from org.springframework.data.mongodb.repository, which works on top of CrudRepository.
Configuring the DataSource
Lets define our MongoDB related details in application.properties file. If our MongoDB server is clustered then we can specify its url as follows
spring.data.mongodb.uri=mongodb+srv://<username>:<password>@<cluster-name>-
<instance-id>/<database-name>?retryWrites=true
If it is on our local machine the configuration will go like this.
spring.data.mongodb.host=localhost
spring.data.mongodb.port=27017
spring.data.mongodb.database=tutorials_point
spring.data.mongodb.username=test
spring.data.mongodb.password=test
Performing CRUD Operation
Now lets perform below some CRUD operation. We will try adding some customers to the above document, and retrieve some of them by their id or name. Following is the code for the same.
import org.springframework.boot.CommandLineRunner;
import org.springframework.boot.SpringApplication;
import org.springframework.boot.autoconfigure.SpringBootApplication;
import org.springframework.context.annotation.Bean;
import com.tutorialspoint.document.Customer;
import com.tutorialspoint.repository.CustomerRepository;
@SpringBootApplication
public class SpringDataMongoDbApplication {
   public static void main(String[] args) {
      SpringApplication.run(SpringDataMongoDbApplication.class, args);
   }
   @Bean
   CommandLineRunner commandLineRunner(CustomerRepository customerReposito
   ry) {
      return new CommandLineRunner() {
         @Override
         public void run(String... args) throws Exception {
            //Persist customers
            System.out.println(customerRepository.save(new Customer(1l,
            "Johnson", "john@yahoo.co", 10000d)));
            System.out.println(customerRepository.save(new Customer(2l,
            "Kallis", "kallis@yahoo.co", 20000d)));
            // Fetch customer by Id
            System.out.println(customerRepository.findById(1l));
         }
      };
   }
}
The above code has used CommandLineRunner which will be executed on application startup. We have created two customers and saved them in the database and executed the method findById() to see if it is actually finding the correct one. Lets run the application as the Spring Boot App, below is the output.
Customer [id=1, name=Johnson, email=john@yahoo.co, salary=10000.0]
Customer [id=2, name=Kallis, email=kallis@yahoo.co, salary=20000.0]
Optional[Customer [id=1, name=Johnson, email=john@yahoo.co, salary=10000.0]]
