- SolidJS - Home
- SolidJS - Cheatsheet
- SolidJS - vs Vue, and Svelte
- SolidJS - Environment Setup
- SolidJS - First Solid App
- SolidJS - JSX Fundamentals
- SolidJS - Fine-grained Reactivity
- Building with Components
- SolidJS - Function Components
- SolidJS - Styling Your Components
- SolidJS - Conditional Rendering
- SolidJS - Dynamic Lists
- SolidJS - Passing Data
- SolidJS - Event Handling
- Routing, Data, and Async Operations
- SolidJS - Setting up Routes
- SolidJS - Input Handling
- SolidJS - Input Types
- SolidJS - Form Handling
- SolidJS Useful Resources
- SolidJS - Useful Resources
- SolidJS - Discussion
SolidJS - Forms and User Input
Forms are used to collect data from users such as email, password, name, etc. Signals and event listeners handle the form in Solid.js. Fine-grained reactivity in Solid.js helps in updating only the exact part of the DOM where data changes, which makes form handling fast. We will be using the form tag to collect the data from the user
Understanding Reactivity in Forms
Reactivity in Solid.js means that when the form data changes, only the UI elements that depend on that data are updated. The whole component does not reload. In the program, the signal stores the data, and wherever the data is used, the UI is automatically updated.
We will create a file called app.tsx and will paste the code in it, or create another file(example reactivity) and import it into the app.tsx file −
import { createSignal } from "solid-js";
function BasicExample() {
const [name, setName] = createSignal("Tutorialspoint");
return (
<div>
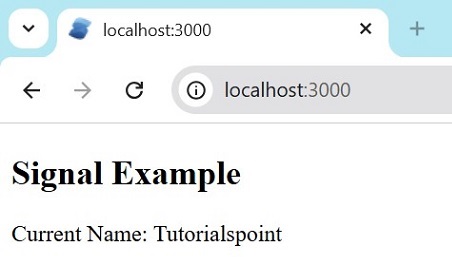
<h2>Signal Example</h2>
<p>Current Name: {name()}</p>
</div>
);
}
export default BasicExample;
The output for the above code is −
Form Tag
The <form> tag is an HTML element used to wrap input fields and buttons into a single unit.
Common CSS for All the Codes
The CSS is common for all the forms given below. Paste the code in app.css −
input,
textarea {
  width: 60%;
  margin-bottom: 6px;
  padding: 6px;
  border: 1px solid #999;
  font-size: 14px;
}

button {
  padding: 6px 10px;
  margin-right: 6px;
  border: 1px solid #666;
  background: #f2f2f2;
  cursor: pointer;
}

button:hover {
  background: #e0e0e0;
}

label {
  display: block;
  margin-bottom: 6px;
}

.error-message {
  color: red;
  font-size: 12px;
  margin-bottom: 8px;
  display: block;
}
If you create a CSS file with a different name, make sure to import that file name correctly in the component −
import './app.css'
Form Submission
Form submission is used to submit a form using signals. It prevents the page from reloading and handles the data using code. Paste the code in app.tsx or create FormSubmission.tsx and import the CSS.
import { createSignal } from 'solid-js'
import './app.css'
type FormState = {
name: string
email: string
message: string
}
export default function FormSubmission() {
const initialState: FormState = {
name: '',
email: '',
message: '',
}
const [form, setForm] = createSignal<FormState>({ ...initialState })
const updateField =
(field: keyof FormState) =>
(
e: InputEvent & {
currentTarget: HTMLInputElement | HTMLTextAreaElement
}
) => {
setForm({ ...form(), [field]: e.currentTarget.value })
}
const handleSubmit = (e: Event) => {
e.preventDefault()
alert('Form submitted successfully!')
}
return (
<form onSubmit={handleSubmit}>
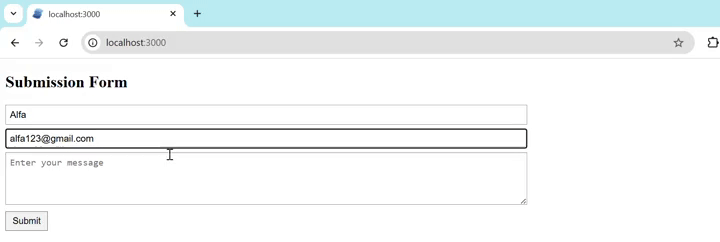
<h2>Submission Form</h2>
<input
type="text"
placeholder="Enter your name"
value={form().name}
onInput={updateField('name')}
required
/>
<input
type="email"
placeholder="Enter your email"
value={form().email}
onInput={updateField('email')}
required
/>
<textarea
placeholder="Enter your message"
value={form().message}
onInput={updateField('message')}
rows={4}
required
/>
<div>
<button type="submit">Submit</button>
</div>
</form>
)
}
The output for the above code will be −
Form Reset
Form reset removes all input fields and sets them back to empty values. When we want to start again, or after submitting the form. Paste the code in app.tsx or create ResettableForm.tsx and import the CSS.
import { createSignal } from 'solid-js'
import './app.css'

type FormState = {
  name: string
  email: string
  message: string
}

export default function ResettableForm() {
  const initialState: FormState = {
    name: '',
    email: '',
    message: '',
  }

  const [form, setForm] = createSignal<FormState>({ ...initialState })

  const updateField =
    (field: keyof FormState) =>
    (
      e: InputEvent & {
        currentTarget: HTMLInputElement | HTMLTextAreaElement
      }
    ) => {
      setForm({ ...form(), [field]: e.currentTarget.value })
    }

  const handleReset = () => setForm({ ...initialState })

  const handleSubmit = (e: Event) => {
    e.preventDefault()
    alert('Form submitted successfully!')
    handleReset()
  }

  return (
    <form onSubmit={handleSubmit}>
      <h2>Reset Form</h2>

      <input
        type="text"
        placeholder="Enter your name"
        value={form().name}
        onInput={updateField('name')}
        required
      />

      <input
        type="email"
        placeholder="Enter your email"
        value={form().email}
        onInput={updateField('email')}
        required
      />

      <textarea
        placeholder="Enter your message"
        value={form().message}
        onInput={updateField('message')}
        rows={4}
        required
      />

      <div>
        <button type="submit">Submit</button>
        <button type="button" class="reset" onClick={handleReset}>
          Reset
        </button>
      </div>
    </form>
  )
}
The output for the above code will be −

Basic Login
Validation is used to make sure that the user enters the correct and required data before submitting the form. Paste the code in app.tsx or create BasicValidation.tsx and import the CSS.
import { createSignal, Show } from 'solid-js'
import './app.css'
type FormState = {
email: string
password: string
}
type ErrorState = {
email?: string
password?: string
}
export default function BasicValidation() {
const [form, setForm] = createSignal<FormState>({
email: '',
password: '',
})
const [errors, setErrors] = createSignal<ErrorState>({})
const updateField =
(field: keyof FormState) =>
(
e: InputEvent & {
currentTarget: HTMLInputElement
}
) => {
setForm({ ...form(), [field]: e.currentTarget.value })
}
const validate = () => {
const newErrors: ErrorState = {}
if (!form().email) {
newErrors.email = 'Email is required'
} else if (!/\S+@\S+\.\S+/.test(form().email)) {
newErrors.email = 'Email is invalid'
}
if (!form().password) {
newErrors.password = 'Password is required'
} else if (form().password.length < 8) {
newErrors.password = 'Password must be at least 8 characters'
}
setErrors(newErrors)
return Object.keys(newErrors).length === 0
}
const handleSubmit = (e: Event) => {
e.preventDefault()
if (validate()) {
alert('Form submitted successfully!')
console.log('Valid form:', form())
}
}
return (
<form onSubmit={handleSubmit}>
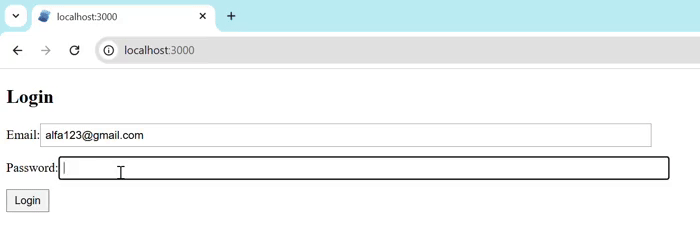
<h2>Login</h2>
<label>
Email:
<input
type="email"
value={form().email}
onInput={updateField('email')}
/>
</label>
<Show when={errors().email}>
<span class="error-message">{errors().email}</span>
</Show>
<label>
Password:
<input
type="password"
value={form().password}
onInput={updateField('password')}
/>
</label>
<Show when={errors().password}>
<span class="error-message">{errors().password}</span>
</Show>
<button type="submit">Login</button>
</form>
)
}
The output for the above code will be −
Store-based Form
In the store-based form, we will be using createStore to manage complex and nested form data. When the form has many fields or sections, we use a store-based form. Paste the code in app.tsx or create StoreBasedForm.tsx and import the CSS.
import { createStore } from 'solid-js/store'
type FormStore = {
personal: {
firstName: string
lastName: string
email: string
}
address: {
street: string
city: string
country: string
}
preferences: {
newsletter: boolean
notifications: boolean
}
}
export default function StoreBasedForm() {
const [form, setForm] = createStore<FormStore>({
personal: {
firstName: '',
lastName: '',
email: '',
},
address: {
street: '',
city: '',
country: '',
},
preferences: {
newsletter: false,
notifications: true,
},
})
const handleSubmit = (e: Event) => {
e.preventDefault()
console.log('Form data:', JSON.stringify(form, null, 2))
alert('Form submitted successfully!')
}
return (
<form onSubmit={handleSubmit}>
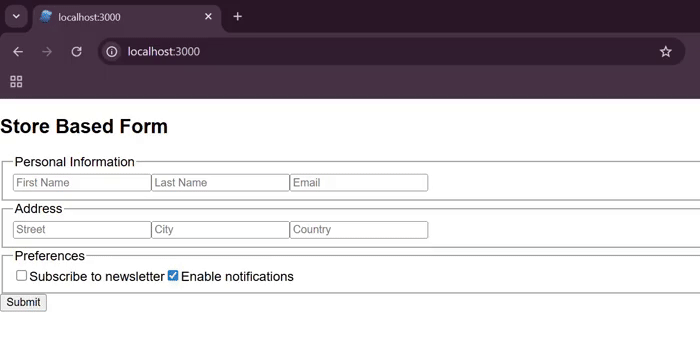
<h2>Store Based Form</h2>
<fieldset>
<legend>Personal Information</legend>
<input
type="text"
placeholder="First Name"
value={form.personal.firstName}
onInput={e => setForm('personal', 'firstName', e.currentTarget.value)}
required
/>
<input
type="text"
placeholder="Last Name"
value={form.personal.lastName}
onInput={e => setForm('personal', 'lastName', e.currentTarget.value)}
required
/>
<input
type="email"
placeholder="Email"
value={form.personal.email}
onInput={e => setForm('personal', 'email', e.currentTarget.value)}
required
/>
</fieldset>
<fieldset>
<legend>Address</legend>
<input
type="text"
placeholder="Street"
value={form.address.street}
onInput={e => setForm('address', 'street', e.currentTarget.value)}
required
/>
<input
type="text"
placeholder="City"
value={form.address.city}
onInput={e => setForm('address', 'city', e.currentTarget.value)}
required
/>
<input
type="text"
placeholder="Country"
value={form.address.country}
onInput={e => setForm('address', 'country', e.currentTarget.value)}
required
/>
</fieldset>
<fieldset>
<legend>Preferences</legend>
<label>
<input
type="checkbox"
checked={form.preferences.newsletter}
onChange={e =>
setForm('preferences', 'newsletter', e.currentTarget.checked)
}
/>
Subscribe to newsletter
</label>
<label>
<input
type="checkbox"
checked={form.preferences.notifications}
onChange={e =>
setForm('preferences', 'notifications', e.currentTarget.checked)
}
/>
Enable notifications
</label>
</fieldset>
<button type="submit">Submit</button>
</form>
)
}
Multi-step Form
A multi-step form divides a long form into small steps. Users must complete one step before moving to the next. Paste the code in app.tsx or create MultiStepForm.tsx and import the CSS.
import { createSignal, Show, For } from 'solid-js'
import { createStore } from 'solid-js/store'

export default function MultiStepForm() {
  const [currentStep, setCurrentStep] = createSignal(0)

  const [formData, setFormData] = createStore({
    firstName: '',
    lastName: '',
    email: '',
    street: '',
    city: '',
    zipCode: '',
    country: '',
    agreed: false,
  })

  const steps = [
    {
      title: 'Personal Information',
      validate: () => formData.firstName && formData.lastName && formData.email,
    },
    {
      title: 'Address Details',
      validate: () =>
        formData.street &&
        formData.city &&
        formData.zipCode &&
        formData.country,
    },
    {
      title: 'Terms & Conditions',
      validate: () => formData.agreed,
    },
  ]

  const nextStep = () => {
    if (steps[currentStep()].validate()) {
      setCurrentStep(s => Math.min(s + 1, steps.length - 1))
    } else {
      alert('Please complete all required fields')
    }
  }

  const prevStep = () => setCurrentStep(s => Math.max(s - 1, 0))

  const handleSubmit = (e: Event) => {
    e.preventDefault()
    if (steps[currentStep()].validate()) {
      alert('Form submitted successfully!')
    }
  }

  return (
    <div>
      <h2>Multi Step Form</h2>
      <div>
        <For each={steps}>
          {(step, i) => (
            <div>
              {i() + 1}. {step.title}
            </div>
          )}
        </For>
      </div>

      <form onSubmit={handleSubmit}>
        <h3>{steps[currentStep()].title}</h3>

        {/* Step 1 */}
        <Show when={currentStep() === 0}>
          <div>
            <label>First Name</label>
            <input
              value={formData.firstName}
              onInput={e => setFormData('firstName', e.currentTarget.value)}
            />
          </div>

          <div>
            <label>Last Name</label>
            <input
              value={formData.lastName}
              onInput={e => setFormData('lastName', e.currentTarget.value)}
            />
          </div>

          <div>
            <label>Email</label>
            <input
              type="email"
              value={formData.email}
              onInput={e => setFormData('email', e.currentTarget.value)}
            />
          </div>
        </Show>

        {/* Step 2 */}
        <Show when={currentStep() === 1}>
          <div>
            <label>Street</label>
            <input
              value={formData.street}
              onInput={e => setFormData('street', e.currentTarget.value)}
            />
          </div>

          <div>
            <label>City</label>
            <input
              value={formData.city}
              onInput={e => setFormData('city', e.currentTarget.value)}
            />
          </div>

          <div>
            <label>ZIP Code</label>
            <input
              value={formData.zipCode}
              onInput={e => setFormData('zipCode', e.currentTarget.value)}
            />
          </div>

          <div>
            <label>Country</label>
            <select
              value={formData.country}
              onChange={e => setFormData('country', e.currentTarget.value)}
            >
              <option value="">Select country</option>
              <option value="us">India</option>
              <option value="uk">UK</option>
              <option value="ca">Sri Lanka</option>
            </select>
          </div>
        </Show>

        {/* Step 3 */}
        <Show when={currentStep() === 2}>
          <p>
            By submitting this form, you agree to our terms and conditions.
            <br />
            Please read all policies carefully before proceeding.
          </p>

          <div>
            <label>
              <input
                type="checkbox"
                checked={formData.agreed}
                onChange={e => setFormData('agreed', e.currentTarget.checked)}
              />
              I agree to the Terms & Conditions *
            </label>
          </div>
        </Show>

        {/* Navigation */}
        <button type="button" onClick={prevStep} disabled={currentStep() === 0}>
          Previous
        </button>

        <Show
          when={currentStep() < steps.length - 1}
          fallback={<button type="submit">Submit</button>}
        >
          <button type="button" onClick={nextStep}>
            Next
          </button>
        </Show>
      </form>
    </div>
  )
}
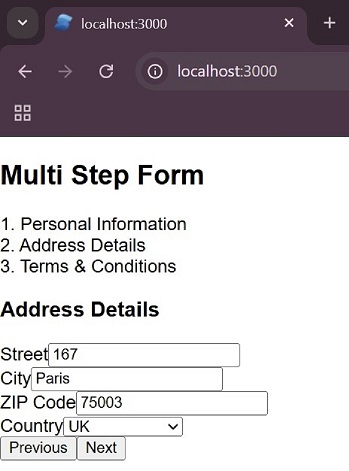
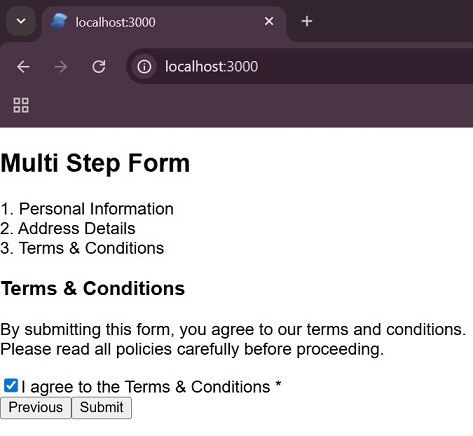
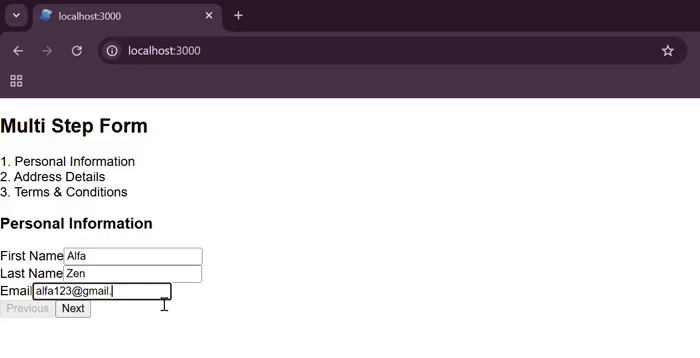
The output for the above program will be −
Step 1 − Getting name and email

Step 2 − Getting the address of the user
Step 3 − Telling the user terms and conditions
Working of multi-step form works from start to finish, including step navigation, data entry, and final submission −
Conclusion
In this chapter, we learned about form handling. We covered different form-handling techniques such as basic form submission, form reset, login validation, store-based forms for complex data, and multi-step forms. We also understood the role of signals, stores, and the form tag in managing user input.
