- SolidJS - Home
- SolidJS - Cheatsheet
- SolidJS - vs Vue, and Svelte
- SolidJS - Environment Setup
- SolidJS - First Solid App
- SolidJS - JSX Fundamentals
- SolidJS - Fine-grained Reactivity
- Building with Components
- SolidJS - Function Components
- SolidJS - Styling Your Components
- SolidJS - Conditional Rendering
- SolidJS - Dynamic Lists
- SolidJS - Passing Data
- SolidJS - Event Handling
- Routing, Data, and Async Operations
- SolidJS - Setting up Routes
- SolidJS - Input Handling
- SolidJS - Input Types
- SolidJS - Form Handling
- SolidJS Useful Resources
- SolidJS - Useful Resources
- SolidJS - Discussion
SolidJS - First App
Read this chapter to learn how to create your first SolidJS application. Here we have explained the process step by step.
Creating Your First SolidJS Application
SolidJS provides the following two methods to create your first project there are as follows −
Using SolidJS Starter
Follow the steps given below to set up your first SolidJS application.
Step 1 − Run the npm create command that will download the latest Solid.js project template on your computer locally.
# Using npm
npm create solid@latest my-solid-demo

# Using yarn
yarn create solid my-solid-demo

# Using pnpm pnpm create solid my-solid-demo
Here, "my-solid-demo" is the name of the project. You can use a name of your convenience.
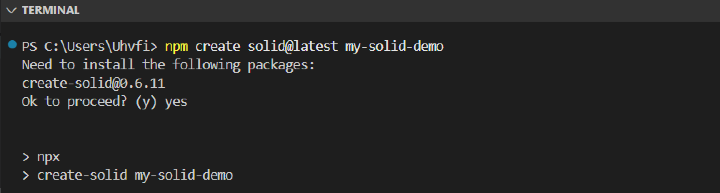
Step 2 − Configure the project, as the setup wizard will guide you through these options −
Need to install the following packages:
create-solid@0.6.11
0k to proceed? (y) yes

> npx
> create-solid my-solid-demo

Create-Solid v0.6.1

What type of project would you like to create?
>Solidstart

Use Typescript?
>Yes

Which terrplate would you like to use?
>bare
Step 3 − Then navigate to your project directory using thecd command and install the necessary node dependencies.
cd my-solid-demo
npm install

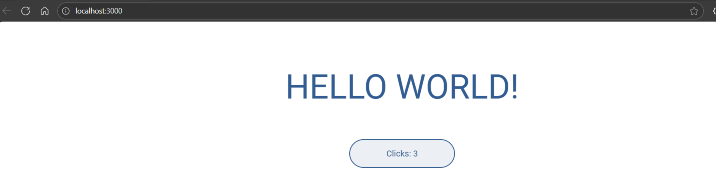
Step 4 − Start the development server with the "npm run dev" command. Then your "my-solid-demo" project will be available at http://localhost:3000.
npm run dev
The output below will be seen if we open the link. We will now make the changes in the code.
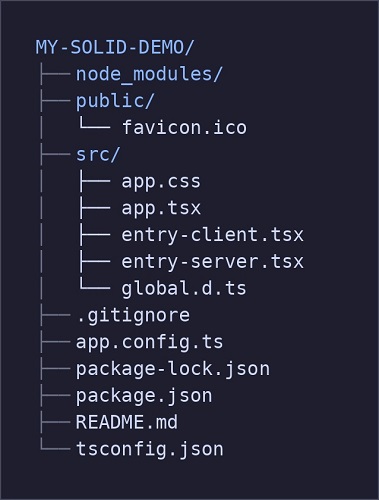
Project Structure
After setting up your first SolidJS application, you will have this structure −
package.json File
Make sure that your package.json file contains the project scripts and dependencies −
{
  "name": "example-bare",
  "type": "module",
  "scripts": {
    "dev": "vinxi dev",
    "build": "vinxi build",
    "start": "vinxi start"
  },
  "dependencies": {
    "@solidjs/start": "^1.1.0",
    "solid-js": "^1.9.5",
    "vinxi": "^0.5.7"
  },
  "engines": {
    "node": ">=22"
  }
}
Update Main App
Modify your App.tsx file in the src folder. Here, we have added a heading, "Welcome to SolidJS Tutorial!" and an image of the TutorialsPoint logo. You can modify your App.tsx as per your preferences.
import { createSignal } from 'solid-js'
import './app.css'

export default function App() {
  const [count, setCount] = createSignal(0)

  return (
    <main>
      <h1>Welcome to SolidJS Tutorial!</h1>
      <img
        src="https://www.tutorialspoint.com/images/tp_logo_436.png"
        alt="logo"
      />
    </main>
  )
}
Restart the server by running "npm run dev" again, and now you can see the changes reflected.

Using Vite Directly
To create your first SolidJS app with ViteJS, these steps will guide you through the whole process. Please follow the steps given below to set up your first SolidJS application with ViteJS.
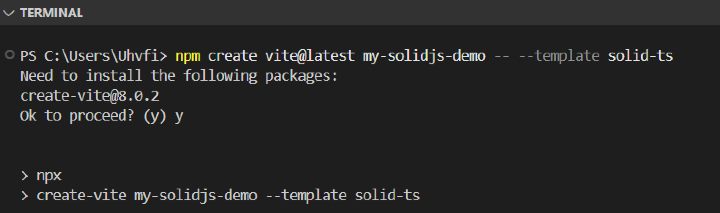
Step 1 − Run the npm create command that will download the latest Solid.js + Vite.js project template on your computer locally.
# Using npm
npm create vite@latest my-solidjs-demo -- --template solid-ts

# Using yarn
yarn create vite my-solidjs-demo --template solid-ts

# Using pnpm
pnpm create vite my-solidjs-demo --template solid-ts
Here, "my-solidjs-demo" is the name of the project. You can use a name of your convenience. Then follow the setup wizard steps to configure your project.
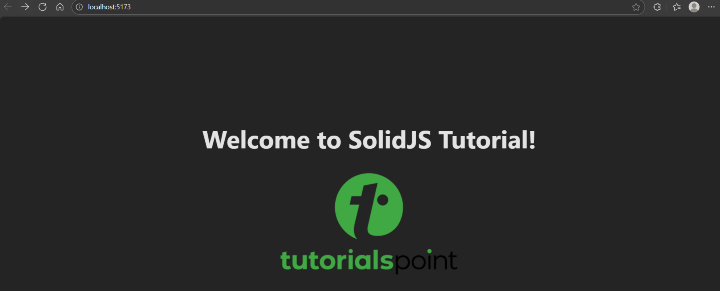
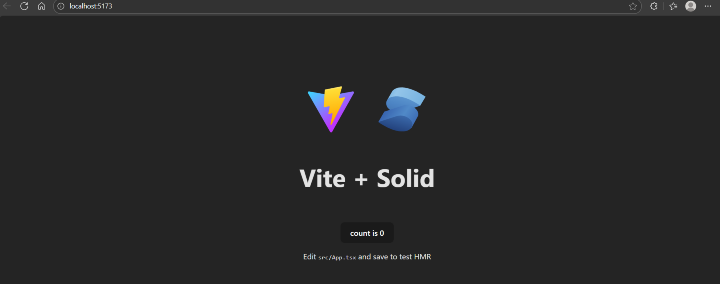
Step 2 − Then navigate to your project directory using thecd command and start the development server with "npm run dev".Then your "my-solidjs-demo" project will be available at http://localhost:5173.
cd my-solid-demo
npm run dev
The output below will be seen if we open the link. We will now make the changes in the code.
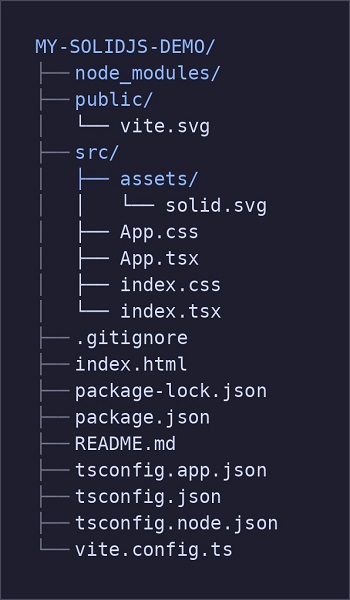
Project Structure
After setting up your first SolidJS application with ViteJS, you will have this structure −
package.json File
Make sure that your package.json file contains the project scripts and dependencies −
{
  "name": "my-solidjs-demo",
  "private": true,
  "version": "0.0.0",
  "type": "module",
  "scripts": {
    "dev": "vite",
    "build": "tsc -b && vite build",
    "preview": "vite preview"
  },
  "dependencies": {
    "solid-js": "^1.9.9"
  },
  "devDependencies": {
    "@types/node": "^24.6.0",
    "typescript": "~5.9.3",
    "vite": "^7.1.7",
    "vite-plugin-solid": "^2.11.8"
  }
}
Update the Main App
Modify your App.tsx file in the src folder. Here, we have added a heading, "Welcome to SolidJS Tutorial!" and an image of the TutorialsPoint logo. You can modify your App.tsx as per your preferences.
import { createSignal } from 'solid-js'
import './App.css'

function App() {
  const [count, setCount] = createSignal(0)

  return (
    <>
      <h1>Welcome to SolidJS Tutorial!</h1>
      <img
        src="https://www.tutorialspoint.com/images/tp_logo_436.png"
        alt="logo"
      />
    </>
  )
}

export default App
Restart the server by running "run dev" again, and now you can see the changes reflected.