- Kivy - Home
- Kivy Basics
- Kivy - Getting Started
- Kivy - Installation
- Kivy - Architecture
- Kivy - File Syntax
- Kivy - Applications
- Kivy - Hello World
- Kivy - App Life Cycle
- Kivy - Events
- Kivy - Properties
- Kivy - Inputs
- Kivy - Behaviors
- Kivy Buttons
- Kivy - Buttons
- Kivy - Button Events
- Kivy - Button Colors
- Kivy - Button Size
- Kivy - Button Position
- Kivy - Round Buttons
- Kivy - Disabled Buttons
- Kivy - Image Button
- Kivy Widgets
- Kivy - Widgets
- Kivy - Label
- Kivy - Text Input
- Kivy - Canvas
- Kivy - Line
- Kivy - Checkbox
- Kivy - Dropdown List
- Kivy - Windows
- Kivy - ScrollView
- Kivy - Carousel
- Kivy - Slider
- Kivy - Images
- Kivy - Popup
- Kivy - Switch
- Kivy - Spinner
- Kivy - Splitter
- Kivy - Progress Bar
- Kivy - Bubble
- Kivy - Tabbed Panel
- Kivy - Scatter
- Kivy - Accordion
- Kivy - File Chooser
- Kivy - Color Picker
- Kivy - Code Input
- Kivy - Modal View
- Kivy - Toggle Button
- Kivy - Camera
- Kivy - Tree View
- Kivy - reStructuredText
- Kivy - Action Bar
- Kivy - Video Player
- Kivy - Stencil View
- Kivy - VKeyboard
- Kivy - Touch Ripple
- Kivy - Audio
- Kivy - Videos
- Kivy - Spelling
- Kivy - Effects
- Kivy - Input Recorder
- Kivy - OpenGL
- Kivy - Text
- Kivy - Text Markup
- Kivy - Settings
- Kivy Layouts
- Kivy - Layouts
- Kivy - Float Layout
- Kivy - Grid Layouts
- Kivy - Box Layouts
- Kivy - Stack Layout
- Kivy - Anchor Layout
- Kivy - Relative Layout
- Kivy - Page Layout
- Kivy - Recycle Layout
- Kivy - Layouts in Layouts
- Kivy Advanced Concepts
- Kivy - Configuration Object
- Kivy - Atlas
- Kivy - Data Loader
- Kivy - Cache Manager
- Kivy - Console
- Kivy - Animation
- Kivy - Multistroke
- Kivy - Clock
- Kivy - SVGs
- Kivy - UrlRequest
- Kivy - Clipboard
- Kivy - Factory
- Kivy - Gesture
- Kivy - Language
- Kivy - Graphics
- Kivy - Drawing
- Kivy - Packaging
- Kivy - Garden
- Kivy - Storage
- Kivy - Vector
- Kivy - Utils
- Kivy - Inspector
- Kivy - Tools
- Kivy - Logger
- Kivy - Framebuffer
- Kivy Applications and Projects
- Kivy - Drawing App
- Kivy - Calculator App
- Kivy - Stopwatch App
- Kivy - Camera Handling
- Kivy - Image Viewer
- Kivy - Bezier
- Kivy - Canvas Stress
- Kivy - Circle Drawing
- Kivy - Widget Animation
- Kivy - Miscellaneous
- Kivy Useful Resources
- Kivy - Quick Guide
- Kivy - Useful Resources
- Kivy - Discussion
Kivy - Splitter
The Splitter widget in Kivy puts a draggable boundary around any other widget or a layout contained in it. You can drag the boundary to resize the size of the object enclosed in it. The boundary can be placed to the top or bottom, or to the left or right of the enclosed widget.
The Splitter class is defined in the "kivy.uix.splitter" module.
from kivy.uix.splitter import Splitter
split = Splitter(**kwargs)
One of the important properties required to configure the placement of boundary is 'sizable_from'. It defines Specifies from which direction the widget is resizable. Options are: left, right, top or bottom; the default being 'left'.
The boundary has a grip in the middle. You can drag the boundary with this grip or even by double-clicking it.
Other properties of the Splitter class are as follows −
border − Border used for the BorderImage graphics instruction. This must be a list of four values: (bottom, right, top, left) and default is [4,4,4,4]
keep_within_parent − If True, it will limit the splitter to stay within its parent widget.
max_size − Specifies the maximum size beyond which the widget is not resizable. max_size defaults to 500pt.
min_size − Specifies the minimum size beyond which the widget is not resizable. Defaults to 100 pt.
rescale_with_parent − If True, will automatically change size to take up the same proportion of the parent widget when it is resized, while staying within min_size and max_size.
sizable_from − Specifies whether the widget is resizable. Options are − left, right, top or bottom; defaults to left.
Example
Let us create a simple horizontal box layout and place an Image widget in between two buttons. The Image object however, is placed inside a Splitter, resizable from the left.
from kivy.app import App
from kivy.uix.button import Button
from kivy.uix.image import Image
from kivy.uix.boxlayout import BoxLayout
from kivy.uix.splitter import Splitter
from kivy.core.window import Window

Window.size = (720,350)

class splitterApp(App):
   def build(self):
      layout=BoxLayout(orientation='horizontal')
      b1=Button(
         text='Button1',
         font_size=24, color=(1,0,0,1)
      )
      layout.add_widget(b1)
      spl=Splitter(sizable_from = 'left')
      img=Image(source='Logo.jpg')
      spl.add_widget(img)
      layout.add_widget(spl)
      b2=Button(
         text='Button 2', font_size=24,
         background_color =(.8, .4, .3, 1)
      )
      layout.add_widget(b2)
      return layout

splitterApp().run()
Output
As the program is run, you will see a dragable boundary with grip towards the left of the image. Drag it to resize the image.
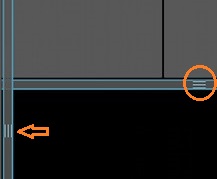
Here is the "kv" script version of program to demonstrate the use of a vertical splitter, sizable from bottom.
BoxLayout:
   orientation:'vertical'
   Button:
      text: 'Button 1'
      font_size:24
      color:(1,0,0,1)
   Splitter:
      sizable_from : 'bottom'
      Image:
         source:'Logo.jpg'
   Button:
      text:'Button 2'
      font_size:24
      background_color: (.8, .4, .3, 1)
The vertically resizable image widget appears as shown below −