- WebdriverIO - Home
- WebdriverIO - Introduction
- WebdriverIO - Prerequisite
- WebdriverIO - Architecture
- WebdriverIO - Getting Started with NodeJS
- WebdriverIO - Installation of NPM
- WebdriverIO - VS Code Installation
- WebdriverIO - Package.json
- WebdriverIO - Mocha Installation
- Selenium Standalone Server Installation
- WebdriverIO - Configuration File generation
- WebdriverIO - VS Code Intellisense
- WebdriverIO - Wdio.conf.js file
- WebdriverIO - Xpath Locator
- WebdriverIO - CSS Locator
- WebdriverIO - Link Text Locator
- WebdriverIO - ID Locator
- WebdriverIO - Tag Name Locator
- WebdriverIO - Class Name Locator
- WebdriverIO - Name Locator
- Expect Statement for Assertions
- WebdriverIO - Happy Path Flow
- WebdriverIO - General Browser Commands
- WebdriverIO - Handling Browser Size
- WebdriverIO - Browser Navigation Commands
- Handling Checkboxes & Dropdowns
- WebdriverIO - Mouse Operations
- Handling Child Windows/Pop ups
- WebdriverIO - Hidden Elements
- WebdriverIO - Frames
- WebdriverIO - Drag & Drop
- WebdriverIO - Double Click
- WebdriverIO - Cookies
- WebdriverIO - Handling Radio Buttons
- Chai Assertions on webelements
- WebdriverIO - Multiple Windows/Tabs
- WebdriverIO - Scrolling Operations
- WebdriverIO - Alerts
- WebdriverIO - Debugging Code
- WebdriverIO - Capturing Screenshots
- WebdriverIO - JavaScript Executor
- WebdriverIO - Waits
- WebdriverIO - Running Tests in Parallel
- WebdriverIO - Data Driven Testing
- Running Tests from command-line parameters
- Execute Tests with Mocha Options
- Generate HTML reports from Allure
- WebdriverIO Useful Resources
- WebdriverIO - Quick Guide
- WebdriverIO - Useful Resources
- WebdriverIO - Discussion
WebdriverIO - Installation of NPM
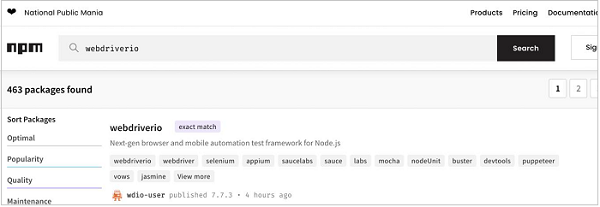
Once Nodejs has been installed, we have to create a NPM folder. NPM is actually the package manager for writing tests in JavaScript. The official page for NPM is available in the below link −
https://www.npmjs.com/search?q=webdriverio
Once we launch this page, enter WebdriverIO in the search box and click on Search, to get the npm packages for WebdriverIO. The following screen will appear on your computer −
Create NPM Project
The steps to create a NPM project are listed below −
Step 1 − Create an empty folder, say webdriverIO in a location.
Step 2 − Open the terminal and move from the current directory to the directory of the empty folder that we have created.
Step 3 − Run the following command −
npm init -y
The y parameter is given to set the default values. The following screen will appear on your computer −

Step 4 − The output obtained on running the command in Step 3 says that all the default configurations have been captured within the package.json file. It is generated within the folder we have created (named webdriverIO) in Step 1.
The following screen will appear on your computer −

This package.json contains all the dependencies which we need to work with the WebdriverIO project. To get any package under NPM, we can refer to the link −
