- WebdriverIO - Home
- WebdriverIO - Introduction
- WebdriverIO - Prerequisite
- WebdriverIO - Architecture
- WebdriverIO - Getting Started with NodeJS
- WebdriverIO - Installation of NPM
- WebdriverIO - VS Code Installation
- WebdriverIO - Package.json
- WebdriverIO - Mocha Installation
- Selenium Standalone Server Installation
- WebdriverIO - Configuration File generation
- WebdriverIO - VS Code Intellisense
- WebdriverIO - Wdio.conf.js file
- WebdriverIO - Xpath Locator
- WebdriverIO - CSS Locator
- WebdriverIO - Link Text Locator
- WebdriverIO - ID Locator
- WebdriverIO - Tag Name Locator
- WebdriverIO - Class Name Locator
- WebdriverIO - Name Locator
- Expect Statement for Assertions
- WebdriverIO - Happy Path Flow
- WebdriverIO - General Browser Commands
- WebdriverIO - Handling Browser Size
- WebdriverIO - Browser Navigation Commands
- Handling Checkboxes & Dropdowns
- WebdriverIO - Mouse Operations
- Handling Child Windows/Pop ups
- WebdriverIO - Hidden Elements
- WebdriverIO - Frames
- WebdriverIO - Drag & Drop
- WebdriverIO - Double Click
- WebdriverIO - Cookies
- WebdriverIO - Handling Radio Buttons
- Chai Assertions on webelements
- WebdriverIO - Multiple Windows/Tabs
- WebdriverIO - Scrolling Operations
- WebdriverIO - Alerts
- WebdriverIO - Debugging Code
- WebdriverIO - Capturing Screenshots
- WebdriverIO - JavaScript Executor
- WebdriverIO - Waits
- WebdriverIO - Running Tests in Parallel
- WebdriverIO - Data Driven Testing
- Running Tests from command-line parameters
- Execute Tests with Mocha Options
- Generate HTML reports from Allure
- WebdriverIO Useful Resources
- WebdriverIO - Quick Guide
- WebdriverIO - Useful Resources
- WebdriverIO - Discussion
WebdriverIO - Handling Radio Buttons
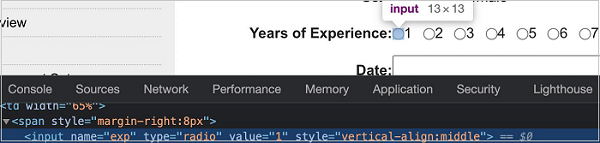
We can handle radio buttons in the UI while automating a test using WebdriverIO. The radio buttons are identified in the html code with the tagname as input and type as radio.
The following screen will appear on your computer −
Methods for Radio Buttons
Some methods to work with radio buttons are as follows −
click()
It is used to select a radio button.
Syntax
The syntax is as follows −
const l = $('.rad')
l.click()
isSelected()
It is used to check if an element of type radio is selected or not. It returns a Boolean value (true if selected, false if not).
Syntax
The syntax is as follows −
const l = $('.rad')
l.isSelected()
To begin, follow Steps 1 to 5 from the Chapter titled Happy path flow with WebdriverIO which are as follows −
Step 1 − Install NodeJS. The details on how to perform this installation are given in detail in the Chapter titled Getting Started with NodeJS.
Step 2 − Install NPM. The details on how to perform this installation are given in detail in the Chapter titled Installation of NPM.
Step 3 − Install VS Code. The details on how to perform this installation are given in detail in the Chapter titled VS Code Installation.
Step 4 − Create the Configuration file. The details on how to perform this installation are given in detail in the Chapter titled Configuration File generation.
Step 5 − Create a spec file. The details on how to perform this installation are given in the Chapter titled Mocha Installation.
Step 6 − Add the below code within the Mocha spec file created.
// test suite name
describe('Tutorialspoint application', function(){
   //test case
   it('Radio Button', function(){
   // launch url
   browser.url('https://www.tutorialspoint.com/selenium/selenium_automation_practice.htm')
      //identify radio button with CSS then click
      const p = $("input[value='1']")
      p.click()
      //verify if selected
      console.log(p.isSelected())
   });
});
Run the Configuration file - wdio.conf.js file with the following command −
npx wdio run wdio.conf.js
The details on how to create a Configuration file are discussed in detail in the Chapter titled Wdio.conf.js file and Chapter titled Configuration File generation.
The following screen will appear on your computer −
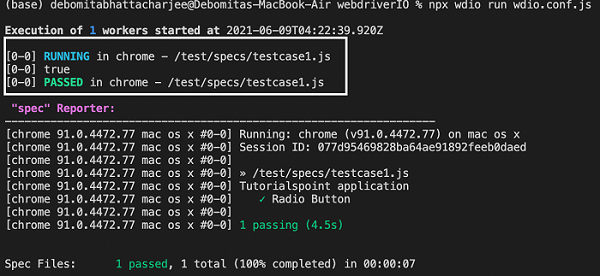
After the command has been executed successfully, the boolean value is printed in the console. This is returned by the isSelected() function which returns true as the radio button is selected in the previous step.
