- Home
- Introduction
- Reporting and Dashboard Tools
- Different BO Tools Connection to HANA
- Creating a Relational Connection
- Creating an OLAP Connection
- HANA Modeling Views
- Input Parameters in HANA
- Using Attribute View
- Using Analytic View
- Using Calculation View
- Using Tables in HANA DB
- Connecting Webi to HANA
- Universe Development
- User Prompts and Filter in IDT
- Webi Report Development
- Lumira Connection to HANA
- Dashboard Development in Lumira
- Dashboard Designer Connection to HANA
- Dashboard Development in DD
- Connecting Crystal to HANA Views
- Crystal Report Development on HANA
- BW on HANA Connection
- Design Studio Connection with HANA
- Development in Design Studio
- Publishing BI Reports on HANA
- Benefits of Using HANA
- Connecting HANA with Other BI Tools
- Interview Questions
SAP HANA BI Development - Universe
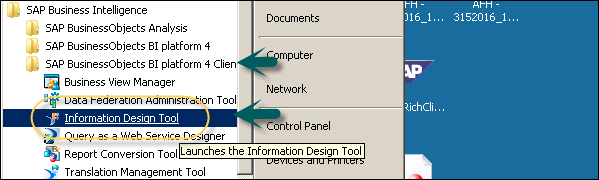
To create a Universe in IDT, go to Start → All Programs → SAP Business Intelligence → SAP Business Objects BI Platform 4 Client Tool.
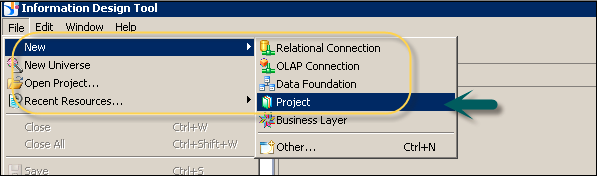
In Information Design Tool, you have to create a New Project. Go to File → New → Project. Enter the Project Name and Click Finish.
Once the project is created, next is to create an OLAP or Relational connection to connect to a data source - SAP HANA in this case. A Relational connection is used to connect to the Database layer to import tables and joins. An OLAP connection is used to connect to the multidimensional model like an Information View in SAP HANA.
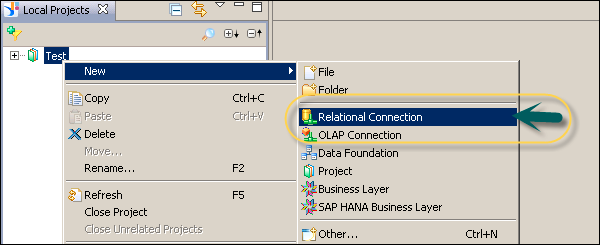
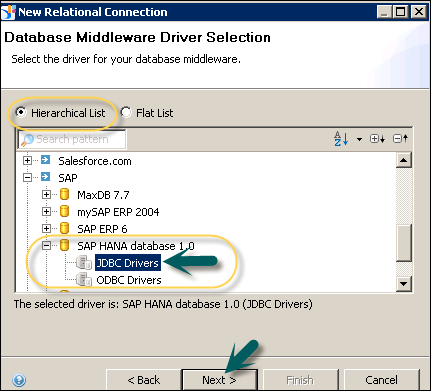
Right-click on Project name → New → Select Relational Connection → Enter connection/resource name → Next. Select SAP from the list → SAP HANA → Select Drivers JDBC → Next → Enter details.
Enter the system details, username, password, and click Next. Then, click Finish. Under General Information → Click Test Connection → Successful.
You have to publish this connection to the Repository to make it available for use. Right-click the connection name → Publish the connection to the Repository → Enter BO repository password → Click Connect → Finish → Yes.
The next step is to create a Data Foundation Layer on this secure connection. Right-click .cns Repository connection → Click New Data Foundation.

Enter Resource Name and click Finish. It will show you a list of all available schemas in the database. You can add Tables and Joins from Schema to Data Foundation layer. This can be done by dragging the table or by a double-click. Apply the joins on Dimension and Fact tables to create a logical schema.
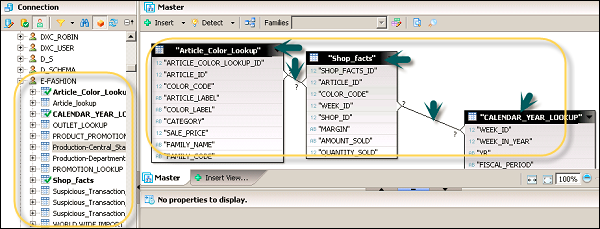
To define a Join, double-click the Join between tables. It will show you both the tables. You can select from different Joins as per data requirement and click Detect Cardinality to define the cardinality - 1:1, 1:n, n:n.
Next is to create a Business Layer on the Data Foundation. Click the Save All icon at the top of the screen. Then, right-click Data foundation .dfx → New Business Layer. Enter Resource Name → (Generating Business Layer for Data Foundation) Finish. It will add Business Layer .blx under the Local Project.

It will show a list of all dimensions and measures under Data Foundation. Define dimensions, measures, aggregation, etc.
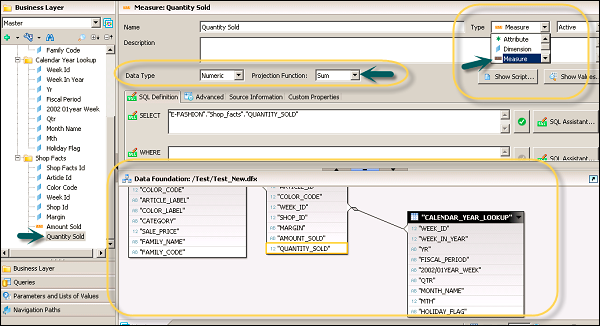
To define an Aggregation, select from the Projection Function. You can hide few objects in the report if you want using the dropdown next to measures and dimension. You can select Hidden for a particular object.

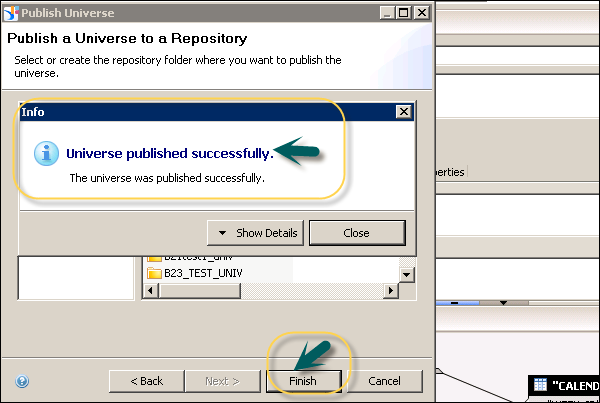
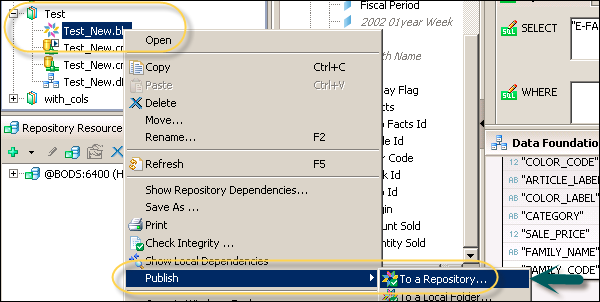
Once you define the Business Layer, click Save All icon at the top of the screen as shown in the following screenshot. To publish a Universe to the Repository, right-click .blx → Publish → To a Repository.
Select Resources, then click Next. In the Publish Universe window, select Next → Select the Repository folder where you want to publish the Universe and click Finish.