- Home
- Introduction
- Reporting and Dashboard Tools
- Different BO Tools Connection to HANA
- Creating a Relational Connection
- Creating an OLAP Connection
- HANA Modeling Views
- Input Parameters in HANA
- Using Attribute View
- Using Analytic View
- Using Calculation View
- Using Tables in HANA DB
- Connecting Webi to HANA
- Universe Development
- User Prompts and Filter in IDT
- Webi Report Development
- Lumira Connection to HANA
- Dashboard Development in Lumira
- Dashboard Designer Connection to HANA
- Dashboard Development in DD
- Connecting Crystal to HANA Views
- Crystal Report Development on HANA
- BW on HANA Connection
- Design Studio Connection with HANA
- Development in Design Studio
- Publishing BI Reports on HANA
- Benefits of Using HANA
- Connecting HANA with Other BI Tools
- Interview Questions
Creating an OLAP Connection
An OLAP connection is used to connect to HANA Information view or a data model and to directly import all the business objects defined in the Business Layer for reporting.
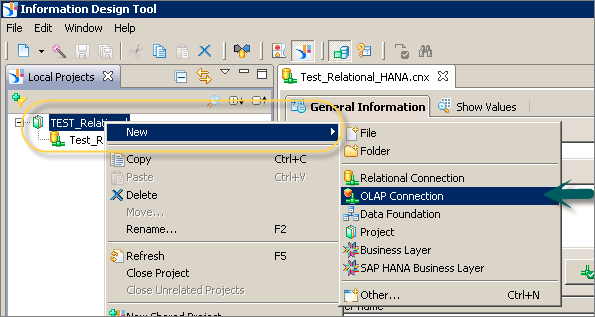
To create a new OLAP connection, right-click the Project name → New → OLAP Connection.
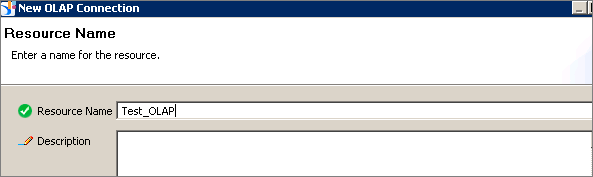
In the next window, enter the Connection name, Description (Optional) and click Next.
Note − You point an OLAP connection to a specific cube or to complete HANA repository. When this connection is used in any BO Reporting tool, you can directly import all objects in HANA Modeling view or can also view all published information views in the repository and select any of them for reporting.
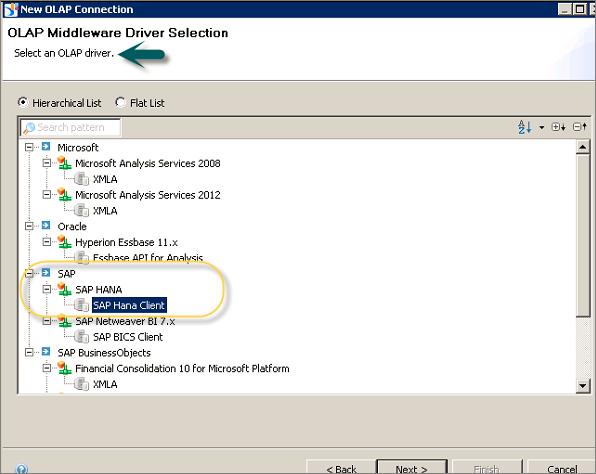
Next, select an OLAP middleware driver. It shows a list of all available OLAP data sources. You can select any OLAP data source as per requirement.
Note − You don't need to create a Data Foundation, as an OLAP directly hits the Business Layer. You can define dimensions, measures, and other properties at the Business Layer.
Select the suitable middleware driver to connect to OLAP data source and click Next. To connect to HANA views, select SAP HANA → SAP HANA Client.
To connect to HANA system, you need the following information −
- Server Name
- Instance Number
- Authentication Details

When you fill the above details and click the Next button, you have an option asking if you want this connection to point to a specific cube or to all cubes in HANA repository.
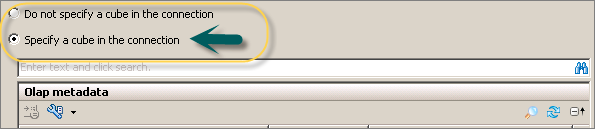
Once this option is selected, click the Finish button at the bottom of the screen.
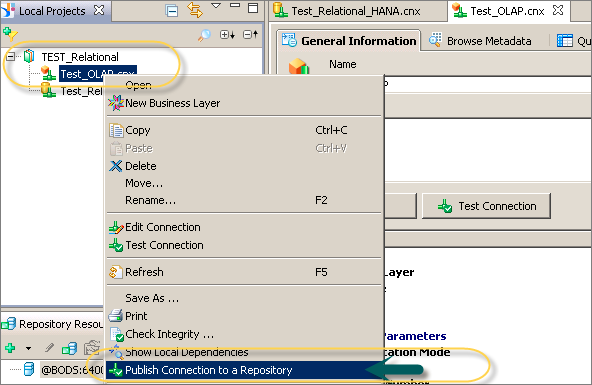
Now, you need to publish the connection to the Repository. Right-click Connection → Publish the Connection to the Repository.
When a new connection is created using Information Design tool, you have the following connection parameters that can be defined −
Connection Pool Mode − This is used to keep the connection active.
Pool Timeout − When you set the Connection Pool Mode to Keep the connection active for, it is the length of time in minutes to keep the connection open.
Array Fetch Size − This tells the maximum number of rows that can be fetched from the database.
Example
Let us consider an example. You enter a value of 25 and your query returns 150 rows. Hence, it will be fetched with 6 fetches of 25 rows each.
Array Bind Size − This field is not required for designing the Universe in IDT.
Login Timeout − It determines the minutes a connection attempts timeout and an error message is displayed.
There are various custom parameters that can also be defined such as ConnectInit, Hint.
