- Home
- Introduction
- Tools
- Databases
- Servers
- Client Applications
- Central Management Console
- Upgrade Management Tool
- Managing Licenses
- Managing Users
- Managing Groups
- Creating Guest Account
- BI Launchpad Configuration
- BI Authentication Types
- Backup
- Promotion Management
- Managing Universe and Connections
- Monitoring
- Auditing
- Roles
- SAP BO Administration Resources
- Quick Guide
- Useful Resources
- Discussion
SAP BO Administration - Quick Guide
SAP BO Administration - Introduction
BusinessObjects (BO) is a Business intelligence (BI) software from SAP to create interactive ad-hoc reports for users on SAP and non-SAP data sources. Managing BO environment in a large enterprise is one of biggest challenge for System Administrators. SAP BO tool comes with large number of inbuilt tools which is used by BO Administrators to configure and manage BO environment.
BusinessObjects Administrator tools are used for configuring BO environment and services, manage BI reports, monitoring and auditing, users and security, events and alert management and other administration activities.
All these tools provide SAP Administrators with a solution for improving overall reporting experience for end users and reducing administrative effort in managing BO environment. A list of admin tasks performed using BO Administration tool is given below −
- Creating publications in BI environment for report distribution.
- Create Users and user groups.
- Create and Manage BI users.
- Start and stop BI services.
- Content and Server Management.
- Managing objects in BO environment.
- License Management - Concurrent and named users.
- Auditing BO environment.
- Alert and events management.
- BO version upgrade and migration activities.
- Managing Security profiles.
- Maintenance of CMC and BI Launchpad.
- Backup and restore.
- Troubleshooting and node configuration.
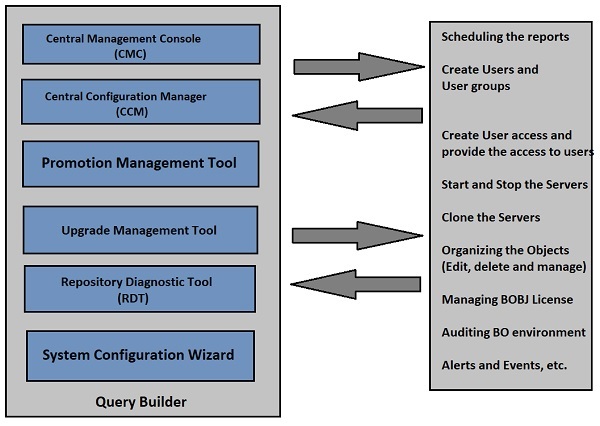
SAP BO Administration - Tools
SAP BusinessObjects comes with set of administrative tools used to perform various administrative tasks in BI environment.
Most common BO administration tool includes −
Central Management Console (CMC)
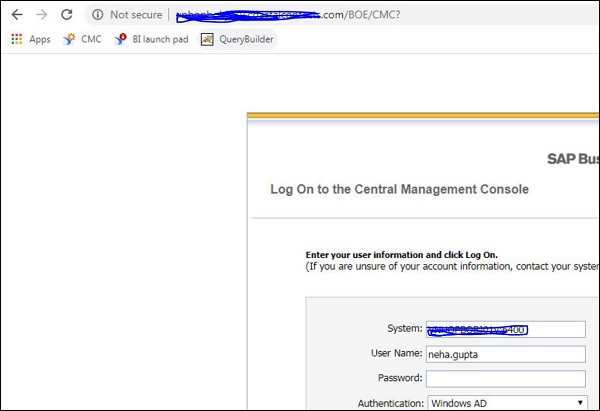
CMC is a web based administrative tool to perform user, content and server management. You can set security settings, define monitoring and auditing policies, create and manage connections to data sources, set alerts and event management, manage license type and other activities using CMC.
The default URL for CMC is http://servername/BOE/CMC/.
Once, you click on the above URL, the screen will be displayed as shown below −
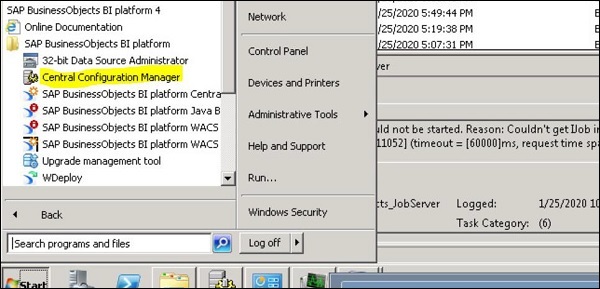
Central Configuration Manager (CCM)
CCM tool is used to manage servers in cluster environment. You can manage servers using CCM graphical user interface (GUI) or using a command line. CCM can be used to create new nodes or to stop/start your web application server. It is also used for perming troubleshooting and configuring nodes in BO environment.
To access CCM, you need to login to your BO server and navigate to All Programs → SAP BusinessObjects BI platform → Central Configuration Manager.
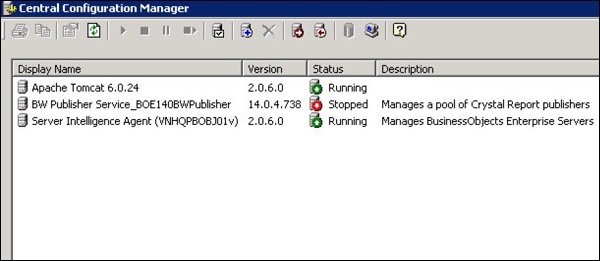
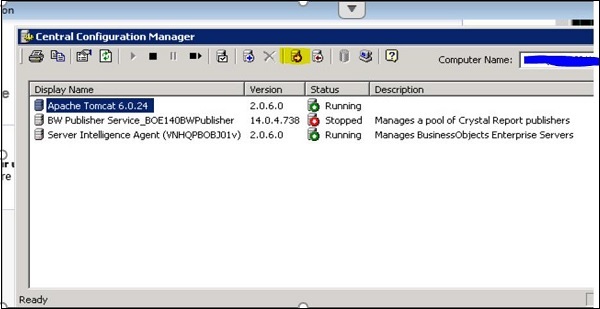
When you follow the above mentioned path, a screen will appear as shown below −
When you open CCM, it shows you Service display name, version, status and description of service, as shown below −
Promotion Management Tool
In BO 4.x environment, Promotion Management wizard is part of CMC console only. This is used for promoting BO environment object from the source system to the destination system. Common objects used are Universe, Connections, Users/Groups and BI reports.
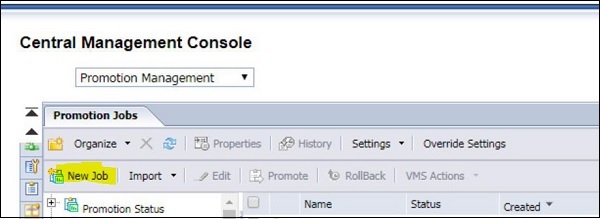
The following screen will appear for the promotion management tool in CMC.
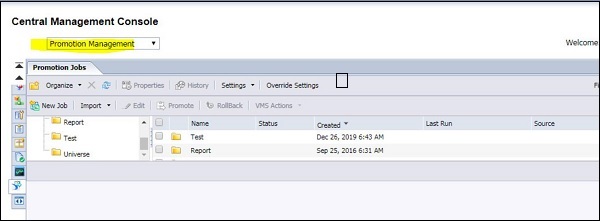
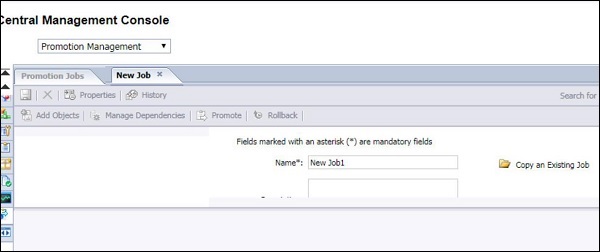
You can create new Promotion job under Promotion Management in CMC as stated below −
Upgrade Management Tool (UMT)
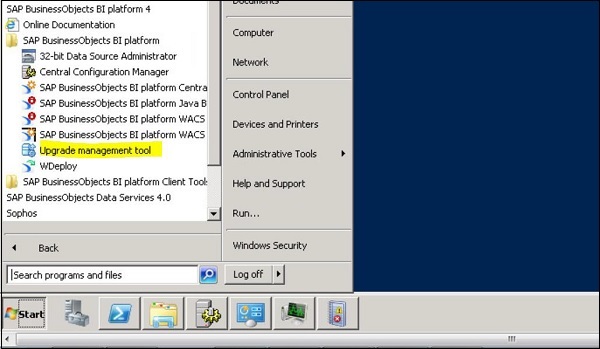
This tool is used to export and upgrade BO objects from BO to BO 4.x environment. It was earlier known as Import Wizard. You can upgrade BO objects like user accounts, groups, folders, reports, universes, security, and other objects using Upgrade Management tool. To access UMT, you need to login to your BO server and navigate to All Programs → SAP BusinessObjects BI platform → Upgrade Management Tool.
The screen that appears for the Upgrade Management Tool is given below −
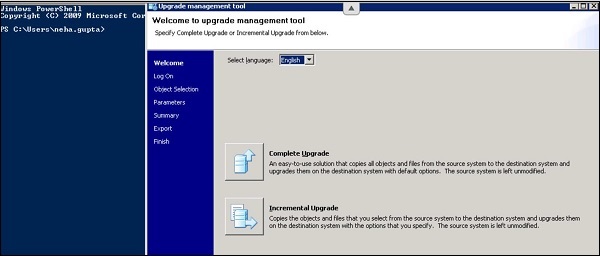
When you click on Upgrade Management Tool, it opens user interface to perform complete or incremental upgrade as shown below −
Repository Diagnostic Tool (RDT)
You can use Repository Diagnostic Tool (RDT) tool to perform a scan, diagnose, and repair inconsistencies that occur on Central Management Server (CMS) system database and the File Repository Servers (FRS) file store.
It is recommended that you run RDT with Repair option disabled to find underlying system issues in your production environment.
You can execute RDT as explained below −
On WINDOWS − reposcan.exe is in "<INSTALLDIR>\BusinessObjects Enterprise 12.0\win64_x64\"
RepoScan Usage is − reposcan.exe -dbdriver <dbdriver> -dbkey <cluster_key> -connect <dbconnectstring> -inputfrsdir <inputfrsdir> -outputfrsdir <outputfrsdir> [options...]
On UNIX − "boe_reposcan.sh" is in "<INSTALLDIR>/bobje/"
RepoScan Usage is − $BOBJDIR/boe_reposcan.sh -dbdriver <dbdriver> -dbkey <cluster_key> -connect <dbconnectstring> -inputfrsdir <inputfrsdir> -outputfrsdir <outputfrsdir> [options...]
For all the Operating Systems, the options list is identical except for the dbdriver "sqlserverdatabasesubsystem" which doesn't exist on Unix.
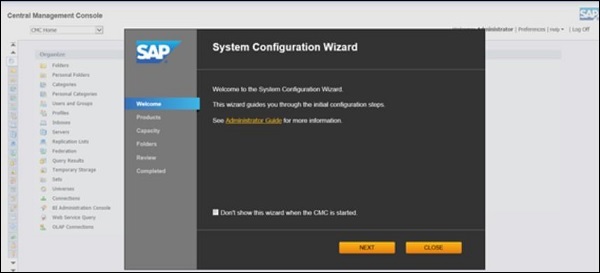
System Configuration wizard
Using System Configuration Wizard, you can easily configure BO environment deployment. With use of this wizard, you can perform basic configuration options as mentioned below −
You can define servers to start automatically with BO environment.
You can optimise your deployment for maximum performance with limited system resource.
Default setting is to run the wizard automatically when you log in to the Central Management Console (CMC), however, this can be changed using Wizard. You can change this setting in the wizard by navigating to Manage option in CMC.
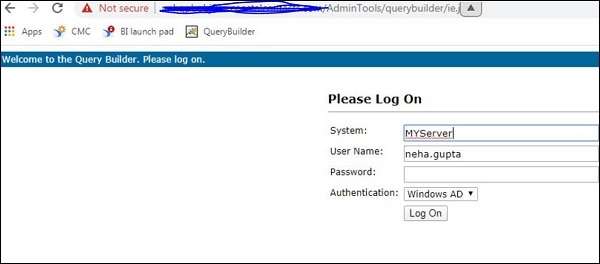
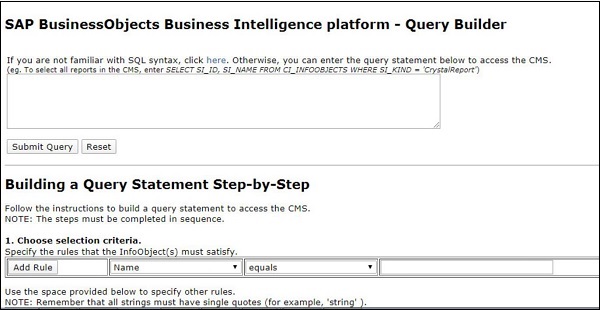
Query Builder
Query Builder is one of Administrative tool in SAP BusinessObjects environment. With its use, you can query the BusinessObjects repository and get the required information from metadata stored in repository related to Universes, reports, Users, etc. You cant query this information directly using SQL query.
You can use the following link https://<servername>/ AdminTools/querybuilder.
The respective screens that will be displayed are given below −
SAP BO Administration - Databases
You have different database configured in BO environment which serves different purpose based on your requirement. It includes database used for BI reporting, auditing, monitoring database or CMS system database. Each of the database is used for different activity based on your deployment practice −
The common databases configured in a BO environment are as follows −
Reporting Database
This database is used as data source for BI reports to fetch and display the data and used by BO client tools to create interactive reports and dashboards. This database is commonly a Relational database but you can also use other sources like text files, or Online analytical processing (OLAP) systems.
CMS System Database
It is also referred as a system repository and maintained by CMS. This is used to hold the information related to servers, nodes, user, configuration and access details.
When you perform SAP BI installation, during setup you need to provide database to connect for storing default system details. When you select the database, the setup process creates the tables and views required to use that database as system database.
For Windows installation, it uses SQL Server 2008 Release 2 database client and server. Also, it creates a database user account and schema to be used in CMS database.
The CMS Database overview for this Windows pattern is stated in the below mentioned table.
| Version | SQL Server 2008 R2 |
|---|---|
| Database Name | cms08r2u03v |
Server Name Port Username |
XXXXX.dhcp.pgdev.sap.corp 1433 i817318a |
| DSN | CMSDB |
Before you start with BO installation, you need to create Open Database Connectivity (ODBC) data source name (DSN) to be used later during installation process, as CMS is 64-bit service. So DSN should be created as 64 bit ODBC Administrator only.
Auditing Data Store (ADS)
This is used to track the events in your BI environment. It captures all system components usage, user sessions in environment and other activities.
LCM Database
This is used to capture version and configuration details related to BI installation and also other upgrade activities. When you move BI objects from one repository to other using LCM tool, this database stores the version of same BO object.
Monitoring Database
You can configure monitoring of BO servers in your environment. When you configure monitoring, it uses Java Derby database to store system configuration details.
SAP BO Administration - Servers
In SAP BO environment, you must create multiple servers responsible for performing different tasks in the environment. These servers are usually services running under SIA (Server intelligent agent) on one server. All these servers can be created in CMC console under server tab.
The servers are explained below −
Adaptive Job Server |
A generic server that processes scheduled lobs. When you add a Job server to the BI platform system. you can configure the Job server to process reports. documents. programs. or publications and send the results to different destinations. |
Adaptive Processing Server |
A generic server that hosts services responsible for processing requests from a variety of sources. The installation program installs one Adaptive Processing Server (APS) per host system. Depending on the features that you've installed. Ms APS may most a large number of services. such as the Monitoring Service. Lifecycle Management Service. Mufti-Dimensional Analysis Service (MDAS), Publishing Service, and others. |
Central Management Server (CMS) |
Maintains a database of information about your BI platform System (in the CMS System database) and audited user actions (in the Auditing Data store). All platform service, are managed by the CMS The CMS site Controls access to the system files where documents are stored, and information on users user groups. security levels (including authentication and authorization), and content. |
Connection Server |
Provides database access to Source data. It supports relational databases, as well as OLAP and other formats. The Connection Server is responsible for handling connection and interaction with the various data sources and providing a Common feature set to clients. |
Crystal Reports Cache Server |
Intercepts report requests sent from clients to the page server. If the cache server cannot fulfill the request with a cached report page, it passes the request on to the Crystal Reports Processing server, which runs the report and returns the results. The cache server then caches the report page for potential future use. |
Crystal Reports Processing Server |
Responds to page requests by processing reports and generating encapsulated page format (EPE) pages. The key benefit of EPE is that it supports page-on-demand access, so only the requested page is returned, not the entire report. This improves system performance and reduces unnecessary network traffic for large reports. |
Dashboards Cache Server |
Intercepts report requests sent from clients to the Dashboard server. If the cache server cannot fulfill the request with a cached report page, it passes the request on to the Dashboard server, which runs the report and returns the results. The cache server then caches the report page for potential future use. |
Dashboards Processing Server |
Responds to Dashboards requests by processing reports and generating encapsulated page format (EPF) pages. The key benefit of EPF is that it supports page-on-demand access, so only the requested page is returned, not the entire report. This improves system performance and reduces unnecessary network traffic for large reports. |
Event Server |
Monitors the system for events, which can act as a trigger for running a report. When you set up an event trigger, the Event Server monitors the condition and notifies the CMS that an event has occurred The CMS can then start any jobs that are set to run upon the event. The Event Server manages file-based events that occur in the storage tier. |
File Repository Server |
Responsible for the creations of file system objects, such as exported reports, and imported files in non-native formats. An Inputs FRS stores reports and program objects that have been published to the system by administrators or end users. An Output FRS stores all of the reports instances generated by the Job Server. |
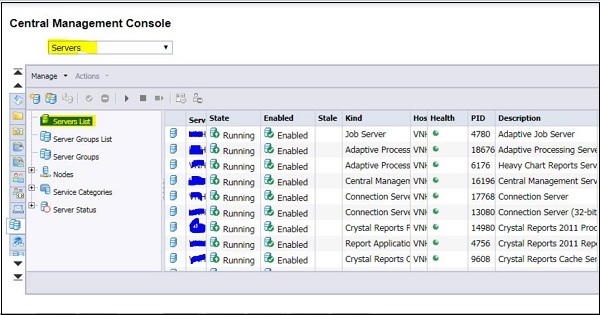
To check all running servers in your BO environment, you have to login to CMC -> Servers as shown below −
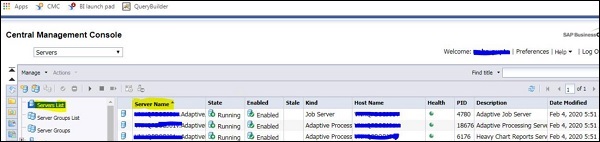
To see the list of servers, navigate to Servers List option in CMC console. It shows you name of servers, state, Host name, health status and other detail about all the servers created in CMC.
The Servers List in CMC console is shown below in the screen −
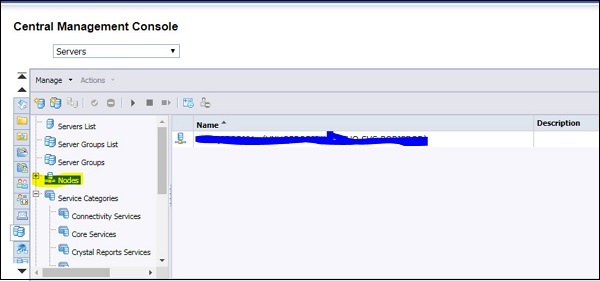
You can also check Node names where these services/servers are running using Nodes tab. When you expand, it will show you node names used for running these servers. The screen given below explains the same.
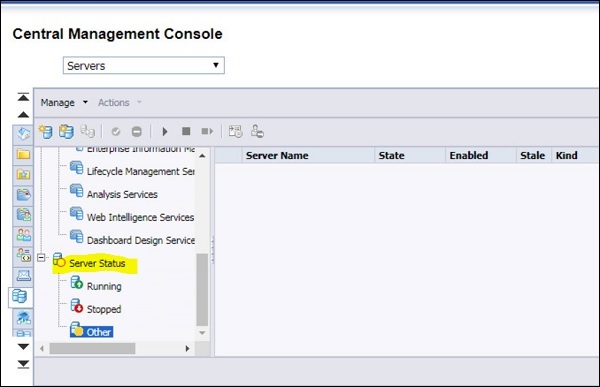
CMC console also provides you an option to check server status quickly. Go to Server status tab and you can have three different statuses, as mentioned below −
Running
Stopped
Other
You can click on any of server status and it will show you the list of servers running with that status, as shown in the screen below −
SAP BO Administration - Client Applications
When you perform installation of BO tools, you can also install client tools to create reports and manage BO environment. You can further divide these in two categories as stated below −
- Desktop based application
- Web based application
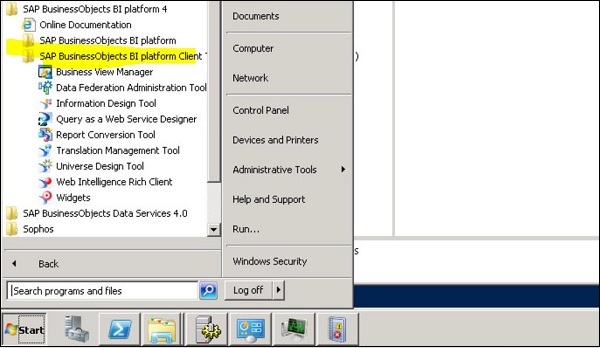
Desktop client tools must be installed on Windows based system and are usually used for data processing and creating reports. With BO installation, desktop client tools are not getting installed and has to be separately installed using client tools setup files from SAP, as shown below −
Web based tools hosted using web application server and can be supported on web browser on different OS platform. This usually allows user to access different client application using a web URL. Communication to web URLs performed over HTTP using SSL or without SSL encryptions. The common web based application includes BI Launchpad, Web intelligence and CMC console.
To install BI platform client tools, navigate to support.sap.com.
The process to download the software is explained below −
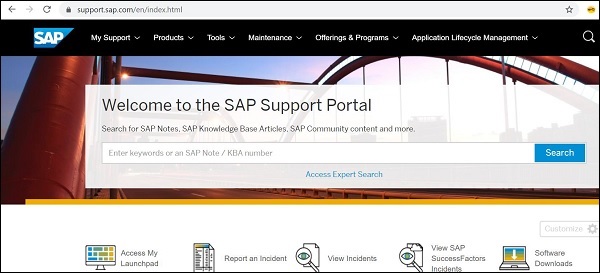
Select Installations and Upgrades → AZ Index
Select B → SBOP BI platform (former SBOP Enterprise) → SBOP BI PLATFORM (ENTERPRISE) SBOP BI PLATFORM 4.2
Select Installation and Upgrade and then select your platform.
Select SBOP BI PLATFORM
CLIENT TOOLS WINDOWS (32B) and follow the steps to complete the installation.
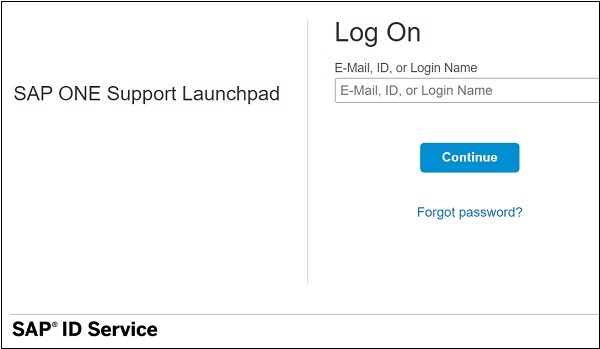
To download software, you need to have SAP SID and password. The log on screen that appears for SAP BO is shown below −
Different SAP BI desktop client tools that can be installed. These tools are installed with SAP BusinessObjects Business Intelligence platform client tools, which includes −
- Web Intelligence rich client
- Business View Manager
- Report Conversion Tool
- Universe Design Tool
- Query as a web service (QAAS)
- Information Design Tool
- Translation Management Tool
- Data Federation Administration Tool
- Widgets for BI platform
Following desktop based Administrative tools are installed with SAP BusinessObjects Business Intelligence Platform Client Tools −
- Central Configuration Manager CCM
- Upgrade Management Tools
- Repository diagnostic Tools
Central Management Console
Central Management Console (CMC) is a web-based tool to perform the day to day administrative tasks in a BO environment. This includes user and group management, server management, monitoring and auditing, and content management.
To login to CMC portal and perform any tasks in CMC, user must be member of administrative group. The default URL is http://webservername:8080/BOE/CMC/
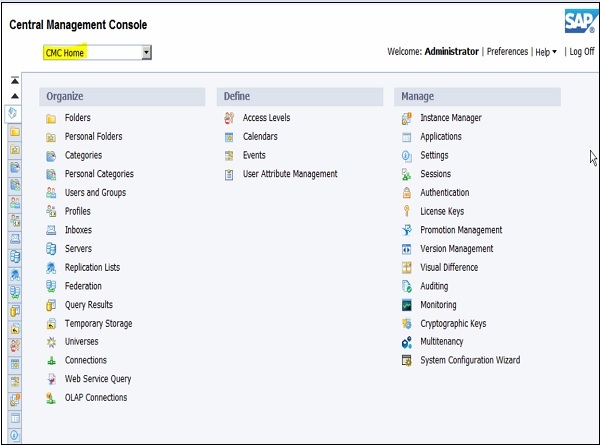
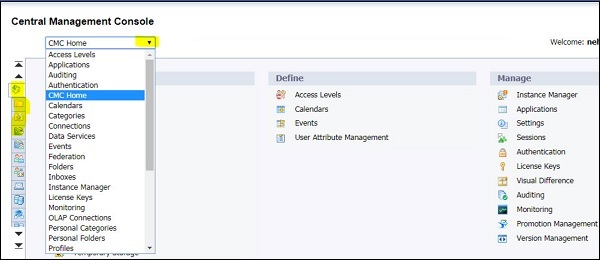
To see the list of all options in CMC, you must select CMC Home from drop down, as shown below −
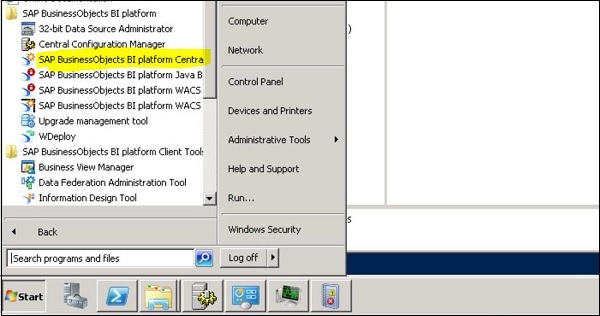
You can also access CMC by navigating All Programs → SAP Business Intelligence → SAP BusinessObjects BI platform 4 → SAP BusinessObjects BI platform → Central Management Console, as explained below −
There are 2 ways to navigate options in CMC icons on left side or you can use options in drop down menu, as shown below −
Adding objects in CMC
CMC users can add objects to BI environment and these objects can be made available to other authorised CMC users. Objects in BI platform can be added using CMC or by saving objects to the Central Management Server (CMS).
The object types that can be added to BI platform are as follows −
- SAP Web Intelligence (Webi) documents
- SAP Crystal reports
- Microsoft Excel, Word, and PowerPoint files
- Adobe PDF files
- Flash objects
- Programs
- Text files
- Rich text format files
Object Properties in CMC
You can also manage object properties after they are published in CMC. You can modify the below mentioned properties −
- Object title
- Object description
- Database logon information
- User permissions
- Schedules, etc.
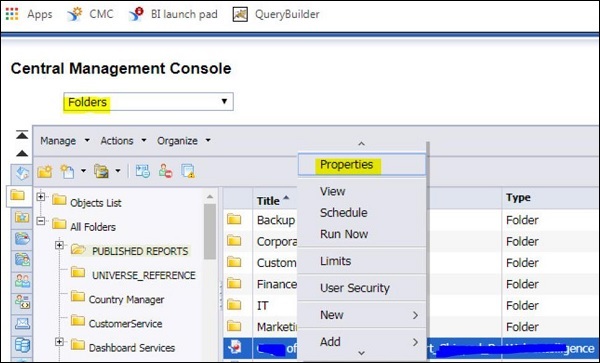
To manage Object properties, navigate to Folder option in CMC → It will show you all objects published in repository → Right click and navigate to Properties.
The following screen will appear −
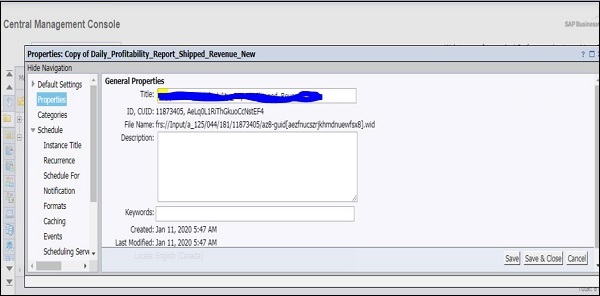
In next window, you can check General properties related to that object. You can update default settings, Schedule, user security and other properties. To apply changes, click on Save button.
Given below is the screen which explains how changes can be applied and saved.
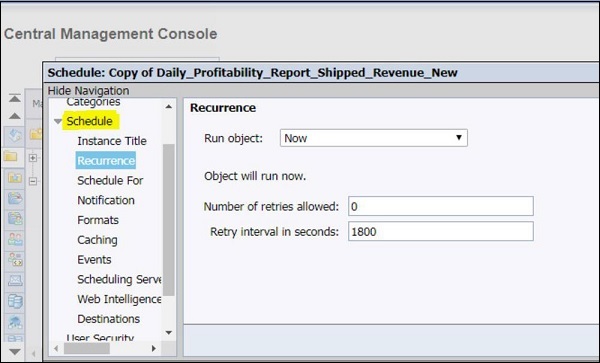
Under Schedule, you have the below options to define scheduling parameters for published objects −
Upgrade Management Tool
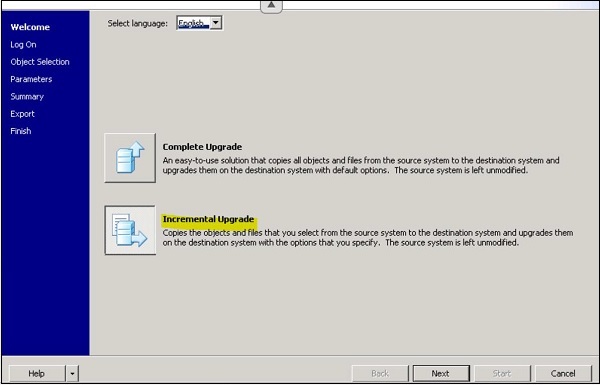
With use of Upgrade Management tool (UMT), you can import BO objects - users, groups, and BO Content objects from previous version of BI platform to upgraded version. When you upgrade your BO environment, you have two options to perform upgrade.
Complete Upgrade − You can opt for moving all objects from source to target.
Incremental Upgrade − You can also opt for moving objects in batches.
Configuring UMT
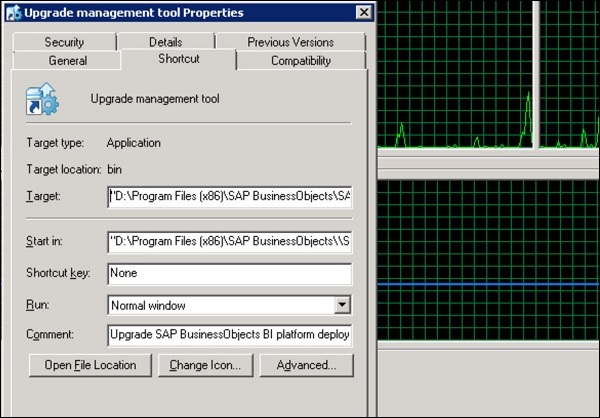
To use UMT for upgrade, you need to configure UMT for better performance. Run Java Xmx command while you launch Upgrade Management Tool to run it with Java Heap → Right click on UMT and go to Properties, as explained below −
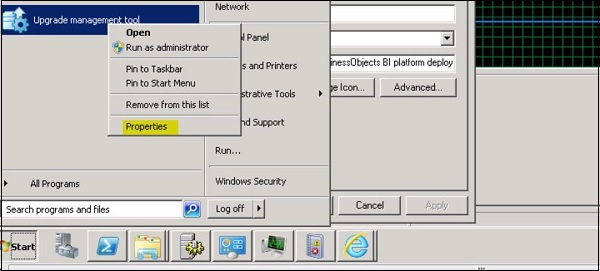
You have to copy the Target path to Notepad and replace Xmx with amount of Heap configure for your system, as shown below −
You can also configure your timeout in Upgrade Management Tool. Set the below parameter −
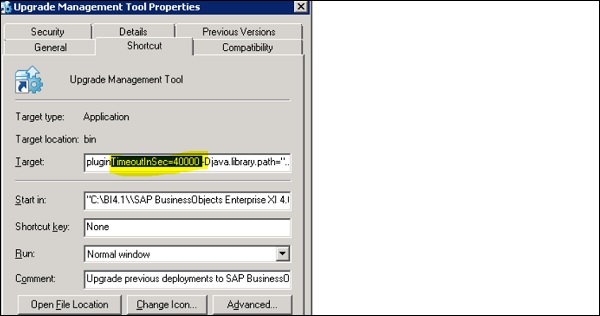
To set CORBA timeout for UMT, you have to navigate to Properties file and add the below entry. Properties file is located in your BO installation directory at this path − SAP BusinessObjects Enterprise XI 4.0\java\apps\upgradeManagementTool\jars
<entry key="umt.systemVar.backendCommunicationTimeoutInMS">630000</entry>
It is recommended to keep value below 630000, otherwise, you may face error related to CMS login.
Setting up source and target in UMT
You can define your source and target CMS system in UMT and check the connectivity. Run Upgrade Management Tool from All Programs → Select Incremental upgrade → Next. The screen given below explains the same.
Enter your source and target CMS name and provide the credentials. Provide the upgrade scenario from drop down list, as shown below −
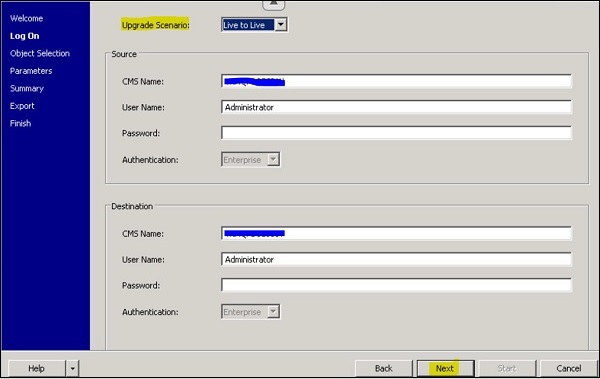
You have different upgrade scenarios available in UMT, such as −
Live to Live − This will require both source and target system to be up.
BIAR to Live − This option is used to import the objects from BIAR file format to live target system.
Live to BIAR − This option is used to export the objects in BIAR format from live system.
These scenarios can be used based on status of your source and target system. Both systems are up, you can perform live to live upgrade without exporting/importing objects.
In BO 4.2, UMT has few new features as below −
You can define log level as low, medium and high from the drop-down list.
When you select log level - High, it captures all the errors, warning and failures during the process.
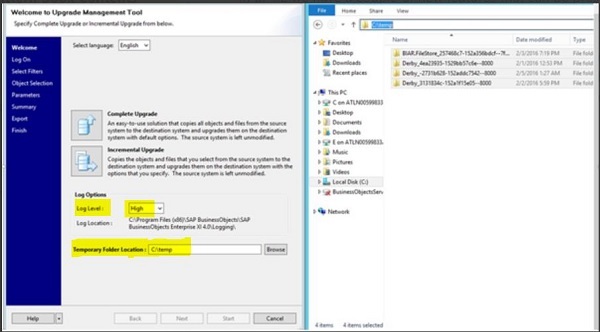
You can also define temp space to any of required directory and relaunch UMT tool after changes.
The temp space usually stores all the entries of Derby Database and once upgrade is completed; these files can be removed.
When you perform BO upgrade from BOXI 3.x to BI 4.1, you can have multiple scenarios to migrate different objects, contents, users, etc. and scope defined in each scenario. As per SAP recommendation, below iterations can be used −
| Iteration | Scope |
|---|---|
|
Iteration #1 |
In this iteration, following objects were migrated with their dependencies −
The same approach can be used for all user groups, all access levels in a single iteration. However, this can be time consuming based on the number of objects etc. Therefore it's recommended to decide the number of iteration based on your repository objects. |
|
Iteration #2 |
The following objects were considered for update with dependencies. You can select these objects for migration in the Object selection screen −
For this pattern book, we have done migration in a single iteration. However, depending upon the number of iterations based on your repository objects. |
|
Iteration #3 |
In the initial "Select Filter" screen, the time filter was set according to the requirement. In our pattern book, we are.selecting the start date as 02/01/2016 and the end date as 02/05/2016. So, only the following objects will be listed and migrated −
|
|
Iteration #4 |
The following objects were considered for upgrade with dependencies. These are the objects selected for migration in the Object Selection screen −
In this iterations, all the content dependencies(related to all the documents) were set to be upgraded first. However, this can also be done in increments. Note that any objects that have already been migrated will not be listed in the object selection screen. Again, in this iteration as we are using the feature "Hide objects which are already upgraded" from the selection filter screen. |
|
Iteration #5 |
The following objects were selected for upgrade with dependencies −
For this pattern book, we have done the migration in a single iteration. However, depending upon the number of objects, this iteration cab be time consuming. Therefore it's recommended to decide the number of iterations based on your repository size and number of objects. |
SAP BO Administration - Managing Licenses
Usage of BO applications depend type of user license assigned, and it grants or restricts access to applications. Based on license, you may be unable to access some applications or to perform some tasks in BO repository.
Below license types are available in BI platform −
- Concurrent user
- Named user
Note
In BO environment, maximum number of concurrent logon sessions for a named user is 10. When a named user tries to log into the 11th concurrent logon session, it displays an error message.
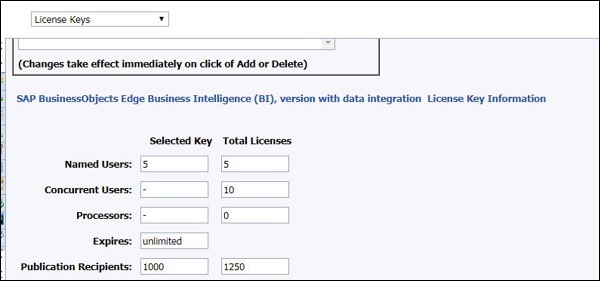
To check existing license type installed, login to CMC console and select License Keys as shown in the below mentioned screen −
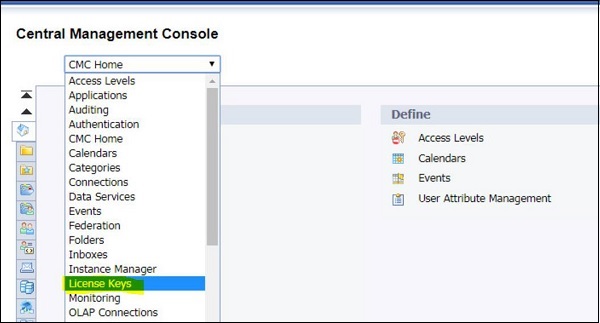
You can check currently held licensing keys and select a key to check licensing information. You can also add or delete license key and it takes effect immediately.
The screen given below explains the same.
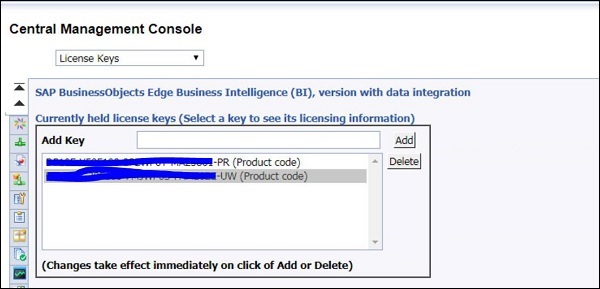
When you select any of license key, it shows the number of named users, concurrent users, publication recipients, and other details about that license, as shown below −
SAP BO Administration - Managing Users
You need to manage users in your BI environment to control the access to Repository objects. User and groups are managed in CMC under Users and Groups management area. Login to CMC console and then Select Users and Groups, as shown in the screen below −

When you select Users and Groups from drop down list, it shows you below options in CMC console −
- User List
- Group List
- Group hierarchy
There are also default Administrator and two users are created to perform the default activities. The table given below lists default Account name and their use.
| Account name | Usage |
|---|---|
Administrator |
This user belongs to the Administrators and Everyone groups. An administrator can perform all tasks in all BI platform applications (for example, the CMC, CCM, Publishing Wizard, and BI launch pad). |
Guest |
This user belongs to the Everyone group. This account is enabled by default, and is not assigned a password by the system. If you assign it a password, the single sign-on to BI launch pad will be broken. |
SMAdmin |
This is a read-only account used by SAP Solution Manager to access BI platform components. |
To create new user/group, use Manage → New → User/Group. You can also create new Users / groups or add users to group or hierarchy, as shown below −
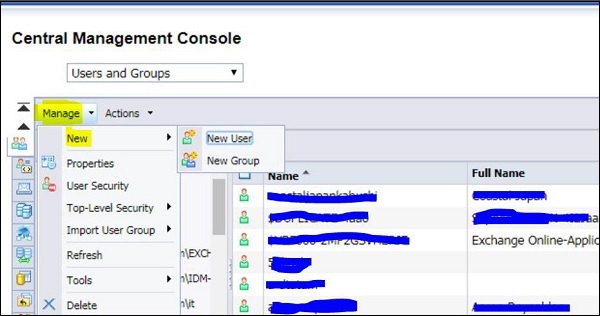
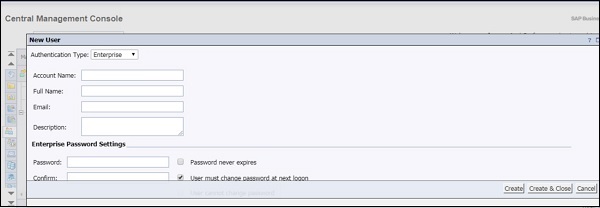
When you click on New user, you must provide the details for user profile −
- Authentication Type
- Account Name
- Full Name
- Description
- Email, etc.
Given below is the screen for the New user with all the required details.
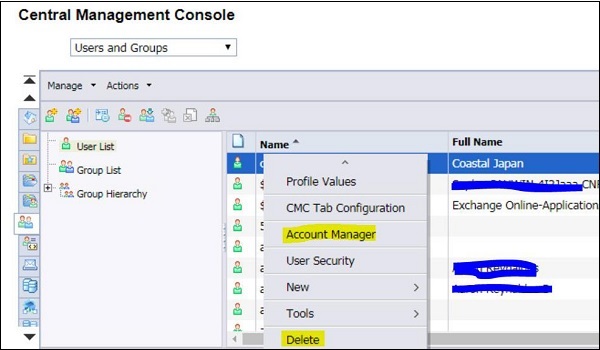
You can also manage the object properties using CMC console. Select any of user or group and click on Manage Object Properties option, as explained below −
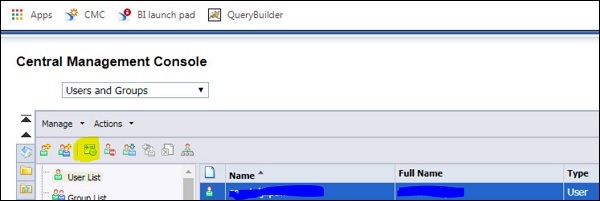

You can also modify or delete an existing user in your BO environment. Select any user and right click to edit or delete an existing user, as given in the screen below −
SAP BO Administration - Managing Groups
When you need to assign same permissions to set of users, groups can be created, and users can be added to provide similar permissions. With group management, you can change the permissions of whole group instead of making changes to individual users. Using groups, you can provide access to repository objects instead of managing single user permissions.
There are few default Group accounts in SAP BO environment, as explained below −
| Administrators | Members of this group can perform all task in all of the BI platform applications(CMC, CCM, Publishing Wizard, and BI launch pad). By default, the Administrators group contains only the Administrator user. |
| Everyone | Each user is a member of the Everyone group. |
| QaaWS Group designer | Members of this group have access to Query as a Web Service |
| Report Conversion Tool Users | Members of this group have access to the Report Conversion Tool application. |
| Translators | Members of this group have access to the Translation Manager application. |
| Universe Designer Users | User who belong to this group are granted access to the Universe Designer folder and the Connections folder. They can control who has access rights to the Designer application. You must add users to this group as needed. By default, no user belongs to this group. |
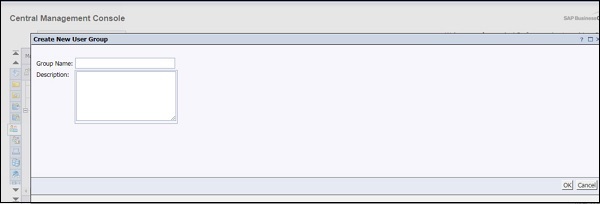
You can also create a new Group by navigating to Users and Groups tab in CMC Console → New Group and provide Group name and description as below −
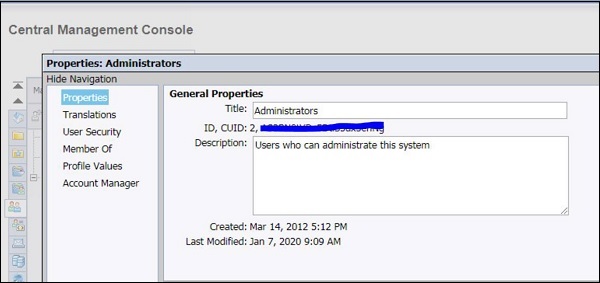
Once new group is created, you can add users, subgroups, and assign group memberships. To modify group properties, select group → Manage → Properties.
This can be viewed in the screen given below −
To add a user to an existing group, right click on Group name − Add member to Group and it will open a new window with User list that can be added to selected group, as stated below −
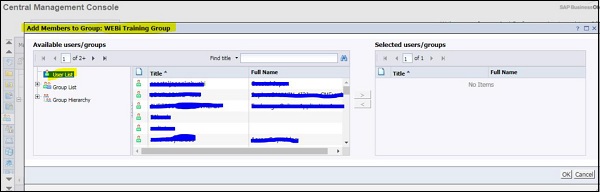
You can select any user from left side and use arrow key to add the user to selected group. To save the changes, click OK button.
Creating Guest Account
In SAP BO environment, your guest account is disabled by default, however, you enable this to allow access to BI Launchpad without providing their own credentials.
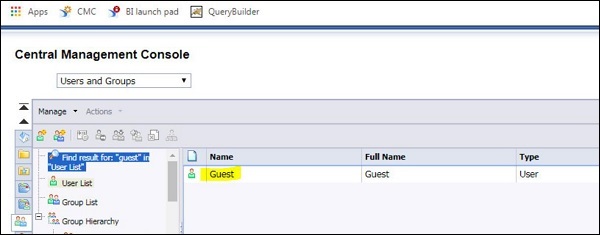
To create or enable the guest account, navigate to Users and Groups management area in CMC console. Under User list, search for the Guest account as below −
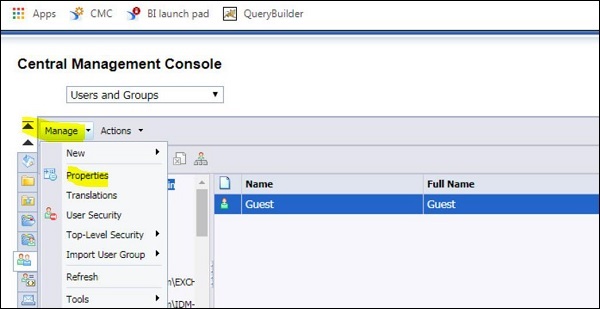
To enable or manage the guest account, select Guest account → Manage → Properties. This can be seen in the screen given below −
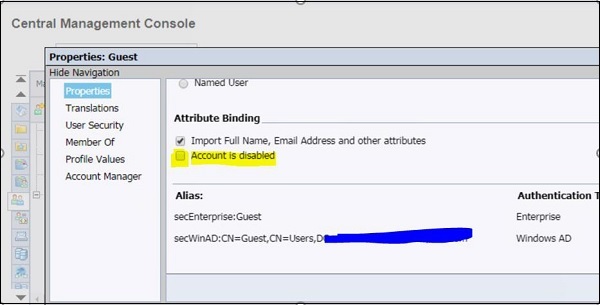
This will open Properties window for Guest account. To enable the guest account, you must scroll down and find checkbox which says Account is disabled and uncheck this option Save and Close. For your reference, this is shown below −
BI Launchpad Configuration
BO Administrators can also configure BI Launchpad preferences using CMC console. User can also configure their own preferences in Launchpad, and it takes precedence over default setting. Following preferences can be configured −
Home tab
Default location to store
Folders
Categories
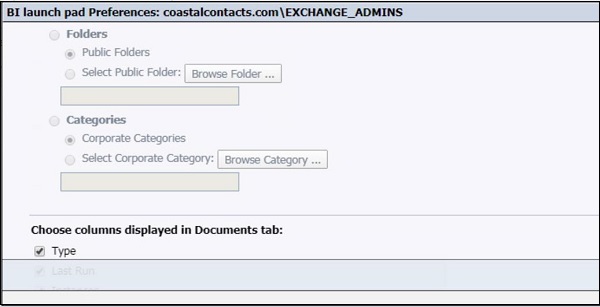
Number of objects per page
Columns displayed on the Document tab
Whether to display documents in BI launch pad on a tab or in a new window
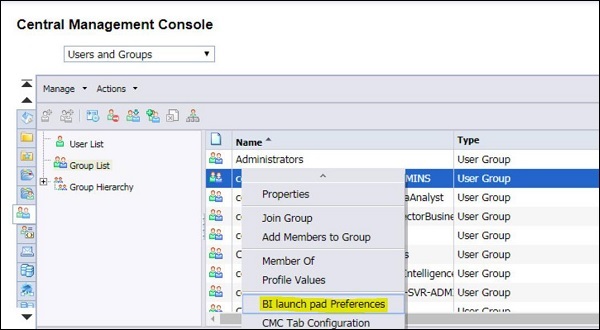
You can define BI Launchpad preferences for different groups using CMC console → Users and Groups → Select group for which you want to set BI Launchpad preferences, as stated below −
To setup BI Launchpad preferences, clear checkbox No Preferences Defined and select Home tab or Documents tab to choose the default start page in BI launch pad. This is explained in the screen given below −
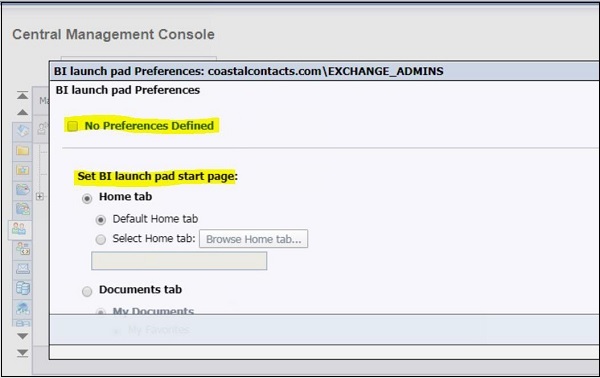
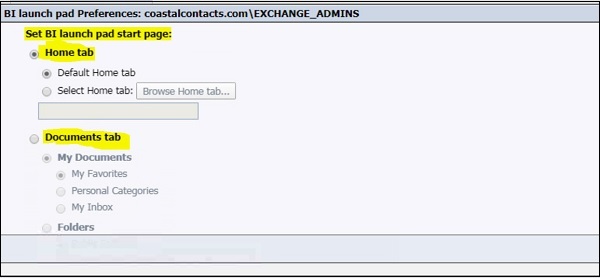
When you select Home tab, select one of the following actions to choose the home page on the tab −
To display the default BI launch pad Home tab, select Default Home tab.
To display a specific web site as the Home tab, select Home tab → Browse Home Tab → select an object in the BI repository → Open.
When you select Documents tab, you can select My Documents to display your documents drawer, and choose from below to show as default node −
My Favorites
Personal Categories
My Inbox
You can also select your Folder structure and Categories to display for group users, as stated below −
Note
When an Administrator make some changes to BI Launchpad preferences, it takes precedence over user and default settings.
BI Authentication Types
SAP BO Administrators can also include authentication options in BI Launchpad logon screen. To modify BI Launchpad setting, you need to update BOE.war file.
To make changes, navigate to following directory in your BI platform installation. <INSTALLDIR>\SAP BusinessObjects Enterprise XI 4.0\warfiles\webapps\BOE\WEB-INF\config\custom\ → Create a new file using a text editor and save it with this name- BIlaunchpad.properties, as explained below −
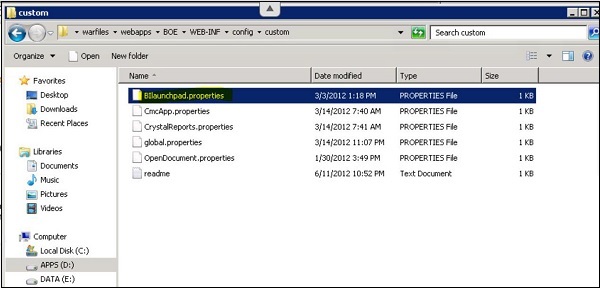
To include the authentication options for BI Launchpad, add this line to text file − authentication.visible=true
To change the default authentication, add this line: authentication.default=<authentication> and then you must replace <authentication> with any of the below options
| Enterprise | secEnterprise |
|---|---|
| LDAP | secLDAP |
| Windows AD | secWinAD |
| SAP | secSAPR3 |
If you want to prompt BO users for the CMS name on the BI launch pad logon screen, add the following line: cms.visible=true. To apply these changes → Save and close the file and restart web application server.
Server Administration
SAP BO Administrators can use CMC to perform server management and to check server status using Server management area in console. When you select Server in CMC drop down list, you can see below tree structure related to server management.
Tree Structure Under Server Management
| Servers List | Displays a complete list of all servers in the deployment. |
| Server Groups List | Displays a flat list of all available server groups in the Details pane. Select this option if you want to configure a server group's settings or security. |
| Server Groups | Lists the server groups and the servers within each server group. When you select a server group, its servers and server groups are displayed in the Details pane in a hierarchical view. |
| Nodes | Displays a list of the nodes in your deployment. Nodes are configured in the CCM. You can select a node by clicking it to view or manage the servers on the node. |
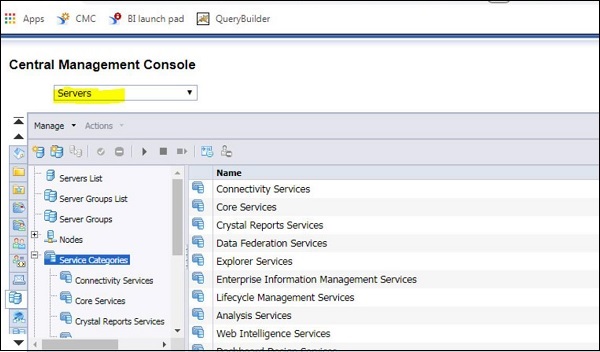
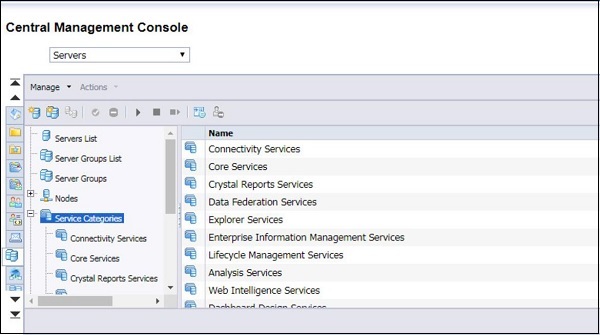
Service Categories
This option is used to get all service types in your deployment. Service categories are usually divided into core BI platform services and services associated with specific SAP objects. To manage any service, select the service.
Server Status
This is used to display the servers in BO environment as per their status. This is useful tool to perform health check of your BO environment and to quickly checks status of all servers.
- Running
- Stopped
- Other

You can use Server status option to Start/Stop/Restart any of server. You can also terminate any of server in hung/other state using Force termination option. This is explained below −

SAP BO Administration - Backup
Backup is used to restore the system in case of system failure due to any reasons, hardware or software failure. With restoring backup files, you can resume critical functions and reduce the application downtime. You can select from different backup plans as below −
Backup of Full System
You can take backup of your full system using hot or cold backup plan. Hot backup plans allow you to keep system live for users and take backup so there is no downtime.
To configure hot backup, you can navigate to CMC console → Manage area → Settings from drop down. How to take the backup of full system is explained below −
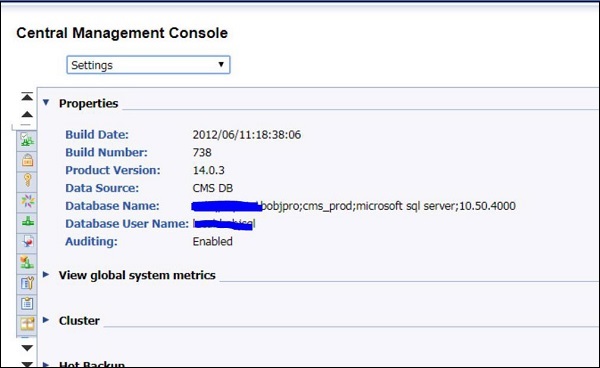
Next is to scroll down and in Hot backup section → Enable Hot backup

Mention Hot Backup maximum duration as maximum time to run and complete the backup. If the actual duration of the backup exceeds the limit entered here, it can cause inconsistencies in backed-up data. To avoid this, it is safer to overestimate the time required. This time includes total duration to take CMS database and file system backup of BI → click on Update to enable the hot backup.
Backup of System configuration
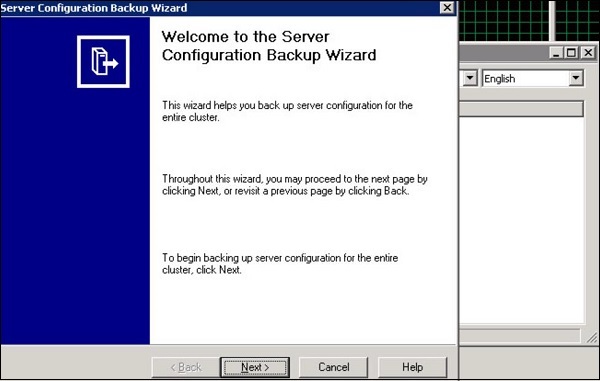
You can also take backup of server configuration in CCM. It is not possible to take backup of the setting of individual servers. To take server configuration backup wizard, open CCM → Backup Server Configuration and this will open Server Configuration backup wizard.
To start the wizard, click on Next button, as shown below −
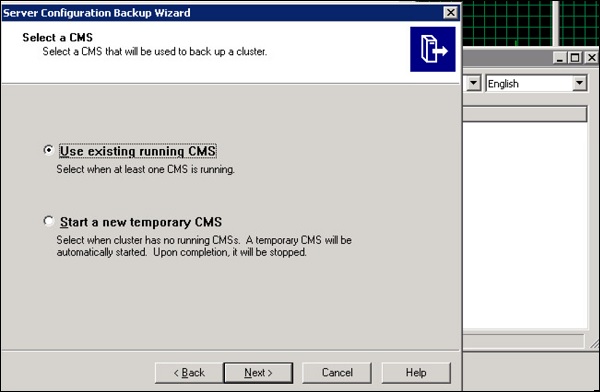
In next window, you must select whether to use an existing CMS to back up server configuration settings or to create a temporary CMS.
To back up server settings from a system that is running, select Use existing running CMS, and click Next.
To back up server settings from a system that is not running, select Start a new temporary CMS, and click Next.
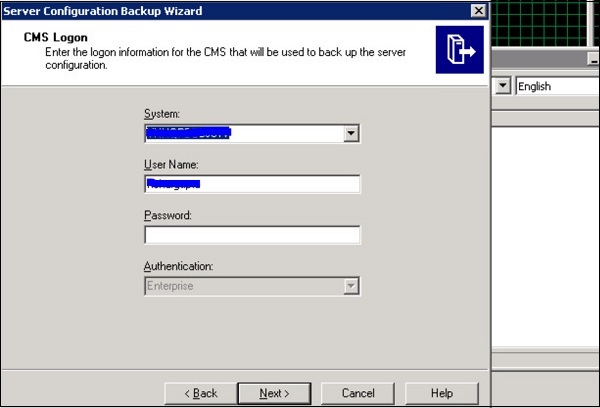
In next window, you have to provide logon information for CMS to backup server and the information includes System Name, User name and password for connection.
Backup of BI Objects
When you take backup of BI content, it allows you to restore the BI objects without need of restoring full system or server configuration. You can use standard Database and File backup tools and procedures to regularly back up.
- CMS Database
- FRS File stores
Restoring the Data
Before restoring your database, you need to use the Central Configuration Manager (CCM) to stop all nodes in your BI platform deployment. When you restore auditing database, you must select which point in time you want to restore the database to.
You must perform this task in case you are aware that only auditing database is the effected system in BI environment. If additional components are affected, you must perform a full system restore. To restore, you can use database tools to restore the database.
Promotion Management
Promotion Management tool is available in CMC Management area to migrate BI objects from one environment to another environment. You can also manage dependencies and roll back the promoted objects from destination system.
You can migrate BI objects from one environment to other, if source and target systems are running with same version of BI. With Promotion Management tool, you can perform the below mentioned tasks −
- Create a Promotion job to move objects.
- Copy an existing job from Promotion Management.
- Edit an existing Promotion job.
- Schedule a Promotion job.
- View details of Promotion job.
- Export as LCMBIAR.
- Import both BIAR /LCMBIAR.
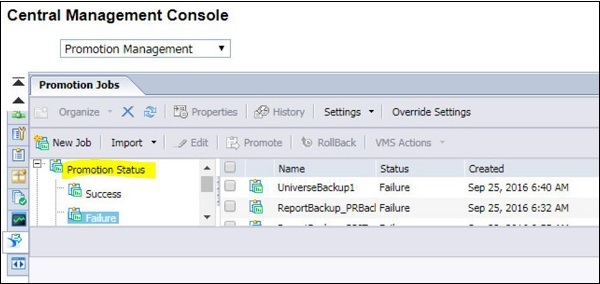
To access Promotion Management, navigate to CMC Console Management area and select Promotion Management from drop down.
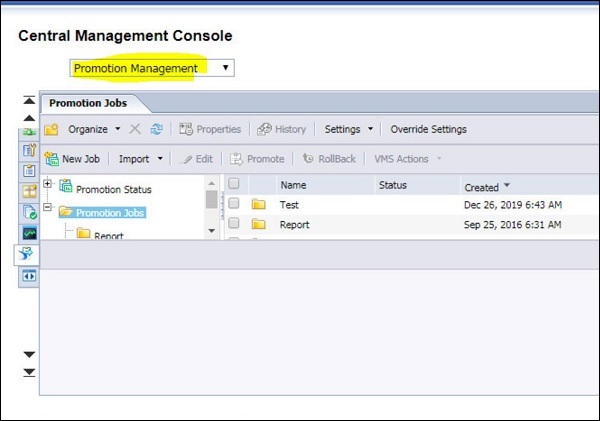
You can also check Promotion status under Promotion Management. You have three options, which are listed below −
- Success
- Failure
- Partial Success
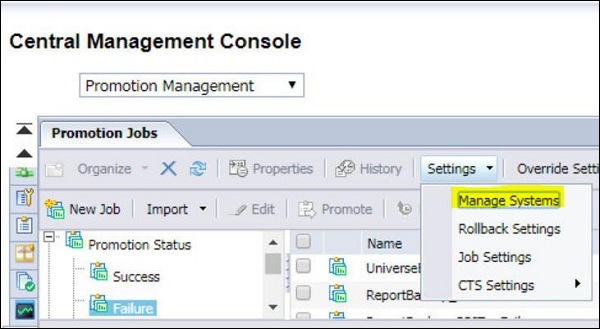
You can also add/delete host system using Manage System option → Settings → Manage Systems. The Manage Systems window is displayed → it shows you list of host names, port numbers, display names, and descriptions.
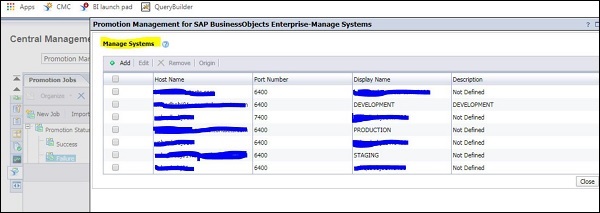
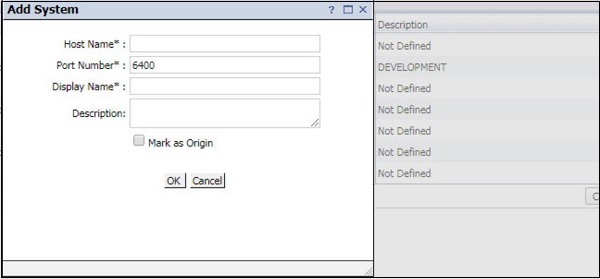
To add a new host system, click on Add button and it will open a new dialog box. You have to provide Host name details to add new system under Promotion Management.
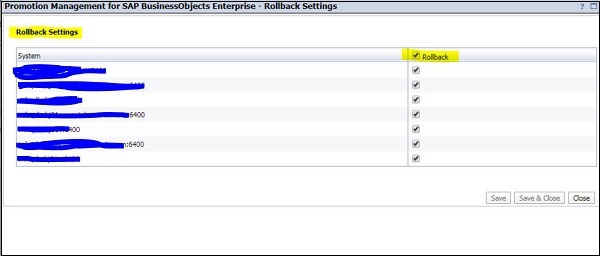
Rollback Settings
You can also manage roll back setting under Promotion Management. By default, rollback process is enabled at the system level, however you can also disable the rollback process at the system level.
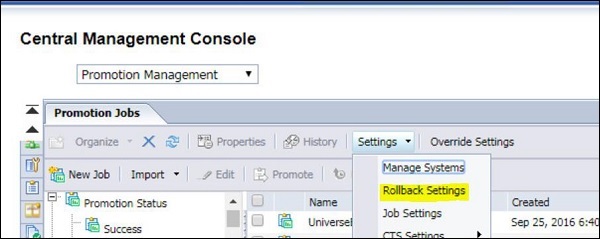
To disable the rollback process at the system level, perform the below mentioned steps −
Select the host system to disable the rollback process and uncheck the checkbox in front of system name − Save and Close to save the changes.
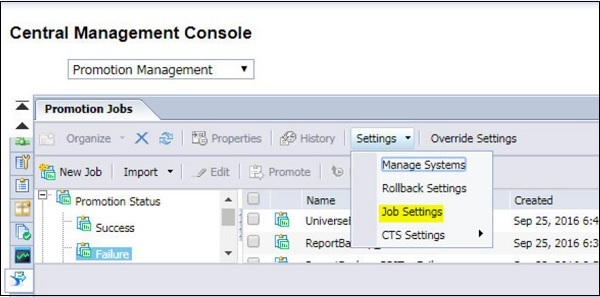
Job Setting Options
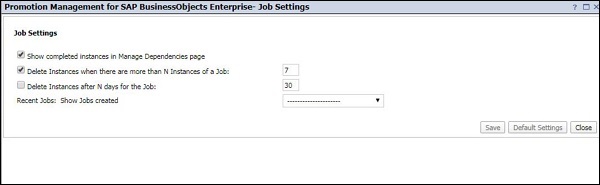
With use of Job Settings option, you can specify whether you want to show completed instances on the Manage Dependencies page and limit the number of job instances in the system. To access Job setting, navigate to Promotion Management → Job Settings.
You can set value against any of field under Job setting and click on Save button to save the changes. To restore the default value, use Default Settings at the bottom.
Creating a Job
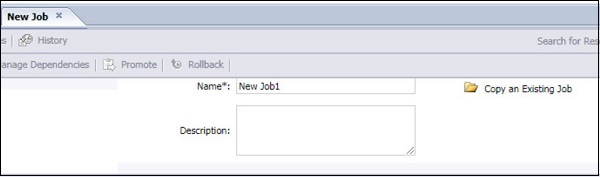
You can create new jobs to migrate objects in Promotion Management tool. Navigate to Promotion management page in CMC console → New Job
Enter the job name, description, and keywords for the job in fields and click on Save Job in field to save the job in required folder.
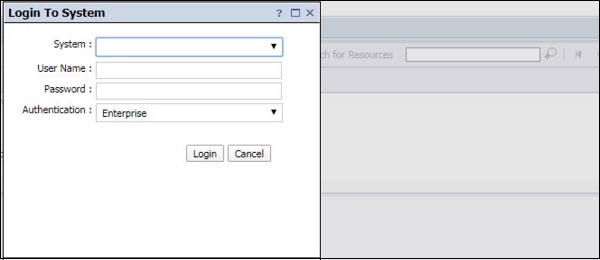
Next is to select Source and target system from the drop-down lists. You can also add a new system by clicking on Login to a new CMS option and provide system name and password → Click on Create → Add objects from Source system and select Add and Close to save the job.

Managing Universe and Connections
In SAP BO environment, Connections are used to define how your BO applications connect and fetch data from a Relational or OLAP database. Universe are created on top of connections to provide a semantic layer to developers to convert technical design into business requirement. Connections and Universes are usually published in Repository to share with other BO users.
Using CMC console, you can also manage Universes and connections in your BI platform. Relations connections can only be created using UDT or IDT tool, however in CMC Console, you can create OLAP connections to data models.
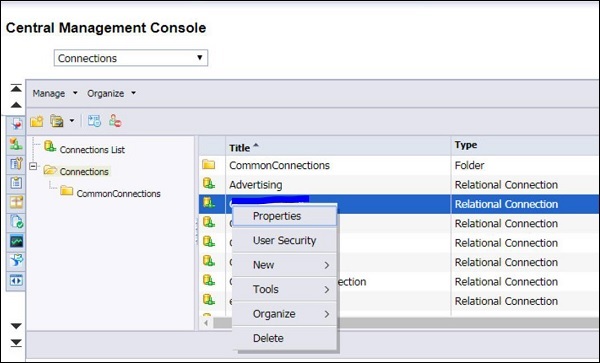
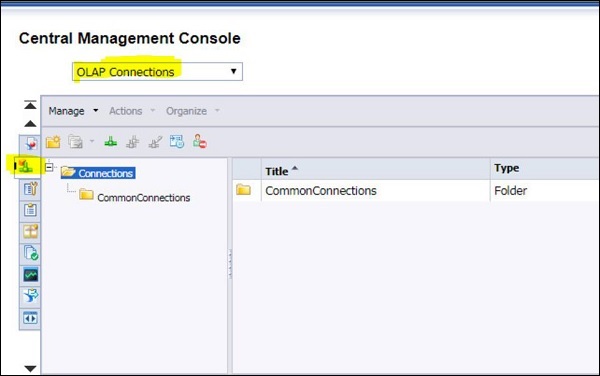
To manage connections, you must navigate to Connection option in drop down list. It shows you list of all database connections published into BI repository.
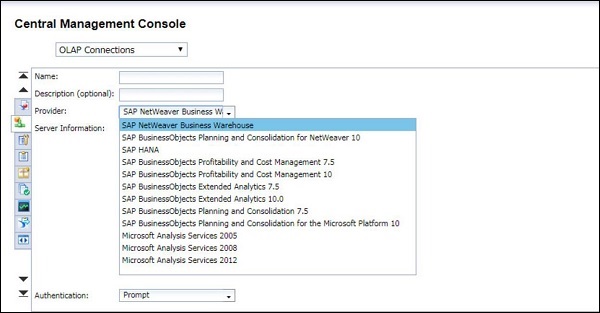
To create an OLAP connection, navigate to OLAP Connections from drop down list → Click on green icon.
In Connection parameters window, you must provide below details and click on Save button to save this connection.
- Name
- Description
- Provider
- Server Information
- Authentication
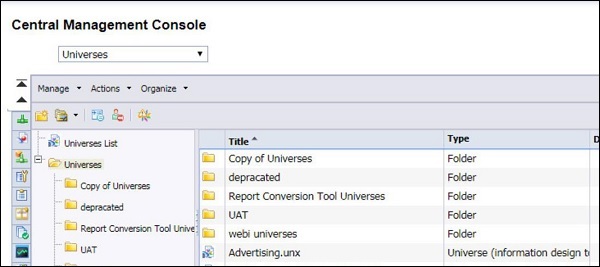
To manage Universes in your BO environment, navigate to Universe option in drop down. It will show you all the published Universes in BI repository.
SAP BO Administration - Monitoring
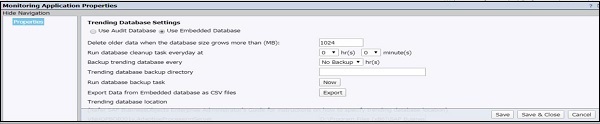
You can also configure monitoring of your BI system using CMC Console. With this feature, SAP BO Administrator can see the usage and health of BO system. There are few default monitoring parameters which can be used by Administrators directly without much effort. Monitoring information is stored in monitoring database and it is usually Derby database.
You can activate Monitoring database by login to CMC Console → Applications → Monitoring Application.
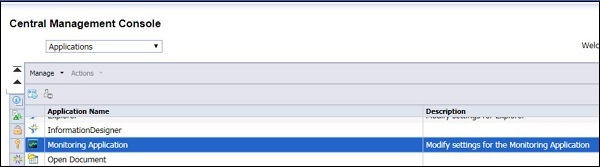
In next window, you can see settings related to Monitoring Application. To enable monitoring, you must select checkbox Enable Monitoring Application → Save and Close.
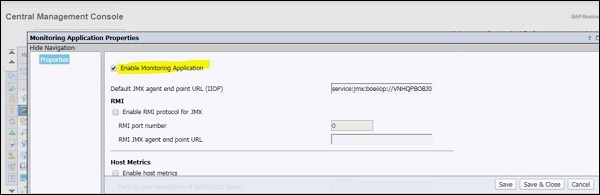
To apply the changes, restart the Adaptive Processing Server if it was not checked. The information in the DB is deleted when it grows the mentioned size.
When you navigate to Monitoring tab, there are 5 different tabs in this section −
- Dashboards
- Metrics
- Watchlists
- Probes
- Alerts
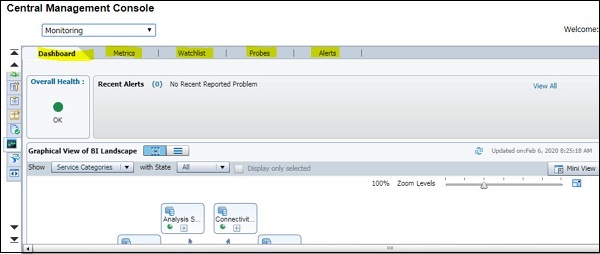
All these tabs can be used by Administrator to perform a health check of your BO system.
SAP BO Administration - Auditing
With use of Auditing, you can track all the events occurred in your BO environment including, how information is assessed, changed and who performed those changes. This event information is maintained in Auditing Data Store (ADS).
The list of BO client tools that supports auditing feature is given below −
Central Management Console (CMC)
Analysis Applications
SAP BusinessObjects Design Studio version 1.3 and above
BI launch pad
Live Office Web Services Provider
Web Intelligence Rich Client
Dashboards & Presentation Design
Open Document
Office for Analysis
When login to CMC console and navigate to Auditing, it shows you the below information −
Status Summary
Set Events
Set Event Details
Configuration
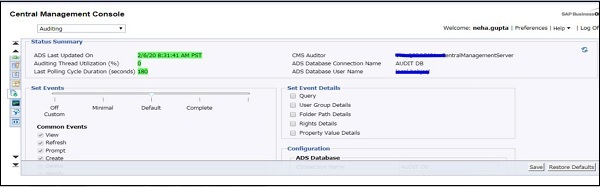
You can configure the auditing events, Navigate to Central Management Console → Auditing tab and this will open Auditing page → Adjust Set Events slider to level as per requirement.
| Minimal |
|
| Default |
Minimal event, plus −
|
| Complete |
Minimal and Default events plus −
|
SAP BO Administration - Roles
To undertake the responsibility as a SAP BO Administrator, one should have three to four years of experience in managing SAP BO multitenant environment.
Job Responsibilities
The job responsibilities of SAP BO Administrator are as follows −
Setting up the monitoring of BO servers.
Setting up the auditing policies, and manage event and alerts related to CMS, Audit and Reporting Database services
Keep availability of BO Web applications CMC, BI Launchpad, and other applications.
Manage day to day scheduled report jobs from Instance Manager.
Handling the support issues from business users.
Monitoring the resources of BusinessObjects servers.
Manage user and permissions.
Manage Universe and Connections and other BI Repository objects.
Backup and Restore of BusinessObjects environment.
