- Home
- Introduction
- Tools
- Databases
- Servers
- Client Applications
- Central Management Console
- Upgrade Management Tool
- Managing Licenses
- Managing Users
- Managing Groups
- Creating Guest Account
- BI Launchpad Configuration
- BI Authentication Types
- Backup
- Promotion Management
- Managing Universe and Connections
- Monitoring
- Auditing
- Roles
- SAP BO Administration Resources
- Quick Guide
- Useful Resources
- Discussion
Central Management Console
Central Management Console (CMC) is a web-based tool to perform the day to day administrative tasks in a BO environment. This includes user and group management, server management, monitoring and auditing, and content management.
To login to CMC portal and perform any tasks in CMC, user must be member of administrative group. The default URL is http://webservername:8080/BOE/CMC/
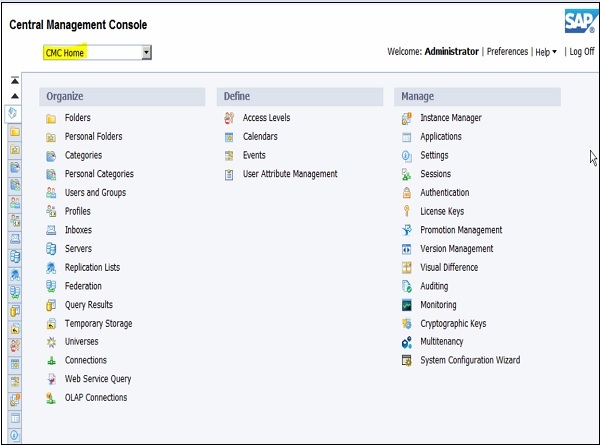
To see the list of all options in CMC, you must select CMC Home from drop down, as shown below −
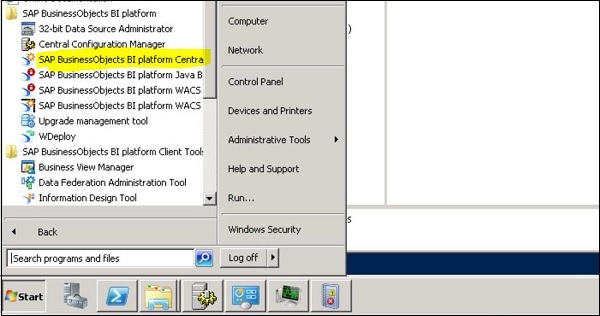
You can also access CMC by navigating All Programs → SAP Business Intelligence → SAP BusinessObjects BI platform 4 → SAP BusinessObjects BI platform → Central Management Console, as explained below −
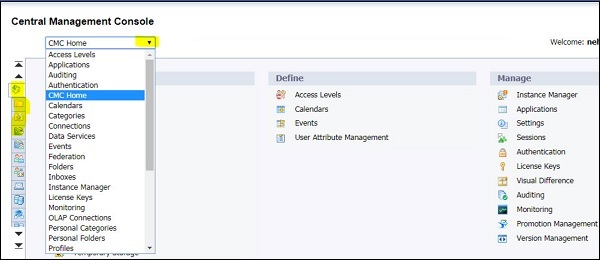
There are 2 ways to navigate options in CMC icons on left side or you can use options in drop down menu, as shown below −
Adding objects in CMC
CMC users can add objects to BI environment and these objects can be made available to other authorised CMC users. Objects in BI platform can be added using CMC or by saving objects to the Central Management Server (CMS).
The object types that can be added to BI platform are as follows −
- SAP Web Intelligence (Webi) documents
- SAP Crystal reports
- Microsoft Excel, Word, and PowerPoint files
- Adobe PDF files
- Flash objects
- Programs
- Text files
- Rich text format files
Object Properties in CMC
You can also manage object properties after they are published in CMC. You can modify the below mentioned properties −
- Object title
- Object description
- Database logon information
- User permissions
- Schedules, etc.
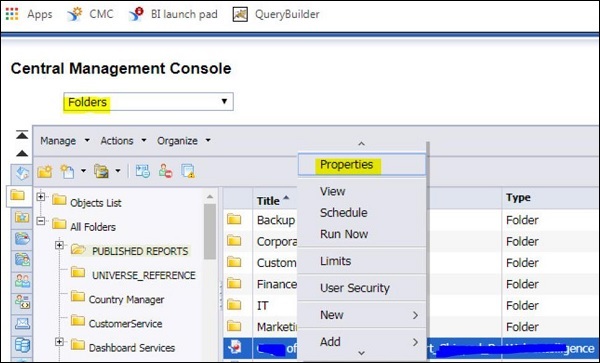
To manage Object properties, navigate to Folder option in CMC → It will show you all objects published in repository → Right click and navigate to Properties.
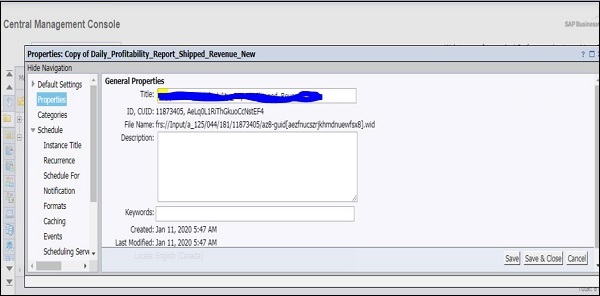
The following screen will appear −
In next window, you can check General properties related to that object. You can update default settings, Schedule, user security and other properties. To apply changes, click on Save button.
Given below is the screen which explains how changes can be applied and saved.
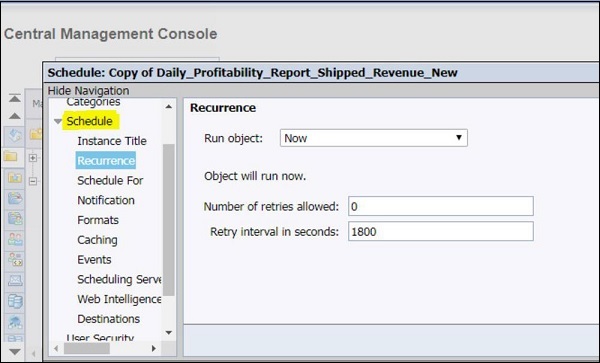
Under Schedule, you have the below options to define scheduling parameters for published objects −