
Article Categories
- All Categories
-
 Data Structure
-
 Networking
-
 RDBMS
RDBMS
-
 Operating System
-
 Java
Java
-
 MS Excel
-
 iOS
iOS
-
 HTML
HTML
-
 CSS
CSS
-
 Android
-
 Python
-
 C Programming
-
 C++
C++
-
 C#
C#
-
 MongoDB
-
 MySQL
MySQL
-
 Javascript
-
 PHP
PHP
-
 Economics & Finance
How to Print Worksheets without Blank Rows in Excel?
Worksheets without any blank rows mean an Excel sheet that does not contains any blank row. But while mapping any data to reality the same thing is not possible. So, it is better to remove the blank rows from Excel before printing the worksheets. The same task can be done in two ways, first method is to remove the blank rows, from the Excel sheet by using the VBA code, while the second method describes the process of using kutools to perform the same task. This article provides two general examples, to demonstrate the process of achieving the same task, briefly.
Example 1: To print worksheets without blank rows in Excel.
Step 1
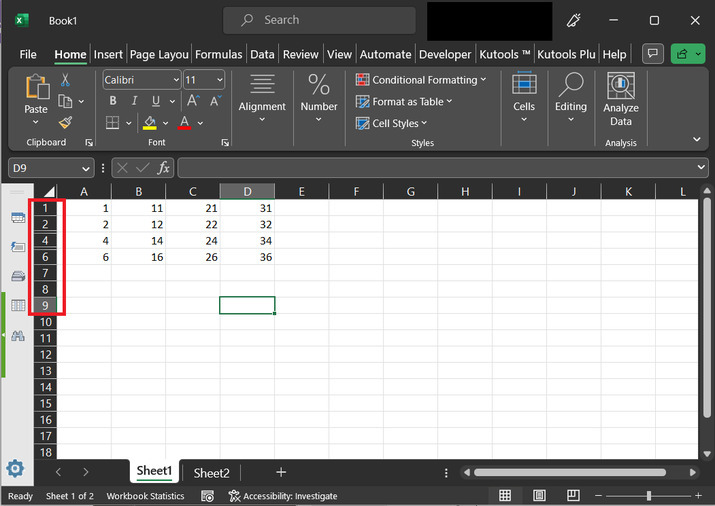
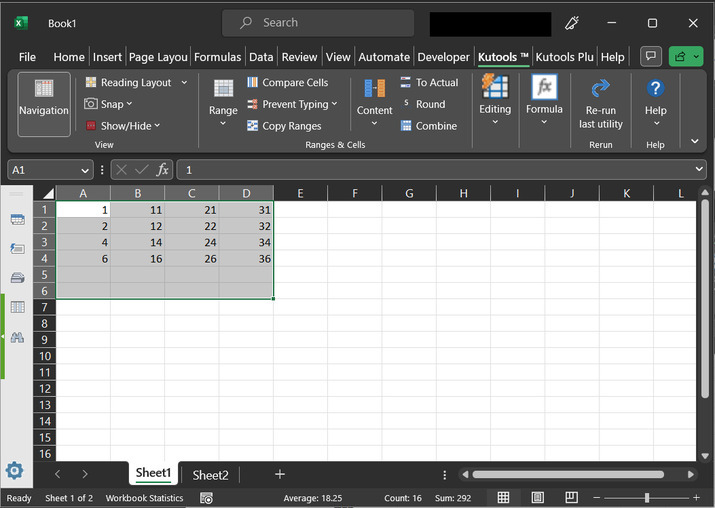
To understand the process of hiding blank rows, consider the below-provided image for reference. In the below depicted Excel sheet, will enter record values to a few cells, and make the 3 rd and 5 th rows empty from the data.

Step 2
In the opened worksheet, use right-click on the sheet 1, tile and select the option "View Code". Consider the below-depicted image for proper reference:

Step 3
The above step will open a new dialog box, "Microsoft Visual Basic for Applications". This dialog box contains a blank area. Type the code in the provided area.
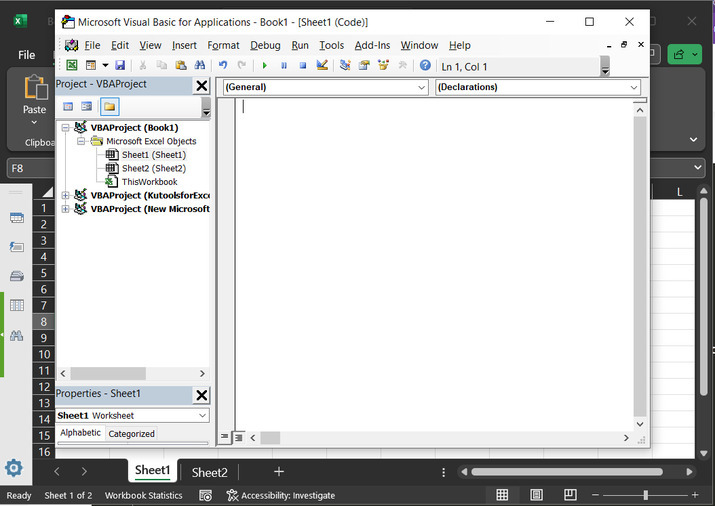
Step 4
Click inside the above-shown blank area, and type the below-given code:
' define function header
Sub Worksheet_bl()
    ' declare required variables
    Dim g1 As Range
    Dim cell_x As Range
    Dim m As String
    Dim t As Boolean
    Dim I As Long
    ' if any error happen
    ' continue next statement
    On Error Resume Next
    ' acess address
    m = Application.ActiveWindow.RangeSelection.Address
    ' set range for applications
    Set g1 = Application.InputBox("Range to be selected", "Required range", m, , , , , 8)
    Set g1 = Application.Intersect(rang_x, ActiveSheet.UsedRange)
    ' if range is not provided
    If g1 Is Nothing Then Exit Sub
        If g1.Areas.Count < 1 Then
            ' then display message
            MsgBox "Error", , "Kutools"
            ' exit method definition
            Exit Sub
            ' end of if block
            End If
            ' set variable value
            t = Application.ScreenUpdating
            ' set updating to false
            Application.ScreenUpdating = False
            ' use for each loop expression
            For l = 1 To g1.Rows.Count
                ' hidden value
                g1.Rows(l).EntireRow.Hidden = (Application.CountA(g1.Rows(l)) = 0)
            ' next keyword
            Next
            Application.ScreenUpdating = t
' end of method definition
End Sub
Please write code with proper indentation to avoid any error.
Step 5
After typing the code with proper indentation, click on the "run" button, provided at the toolbar. To get the proper reference click on the "run" button, highlighted below:

Step 6
Consider the below highlighted row number. From there users will see that a few rows have been folded automatically. More specifically, 3 rd and 5th rows are folded, as both these rows are empty.
Example 2: To hide the blank rows by using the kutools.
Step 1
To understand the process of hiding blank rows. Consider the image provided below for reference. Here, also will be taking the same Excel sheet. To understand more precisely assume that the provided Excel sheet will enter record values to a few cells and make the 3rd and 5th rows empty from the data.
Step 2
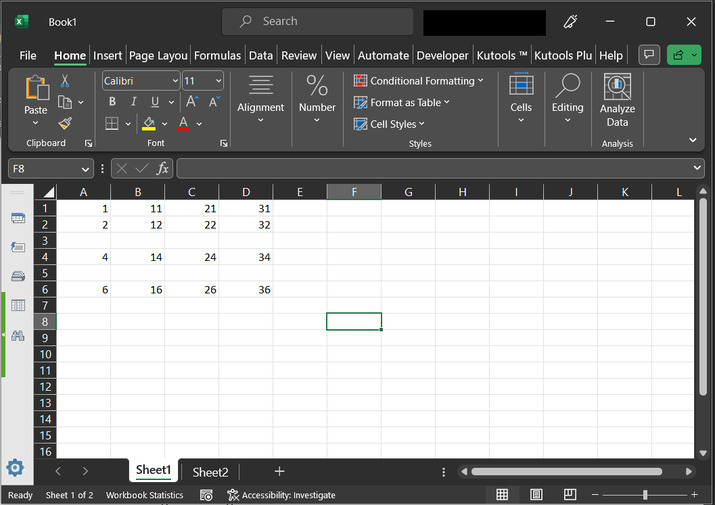
Open the "Kutools" tab, and then go to the "Editing" section. Under the editing section, select the option for "Delete". Further, select the option for "Delete Blank Rows". Consider the below depicted image for reference:

Step 3
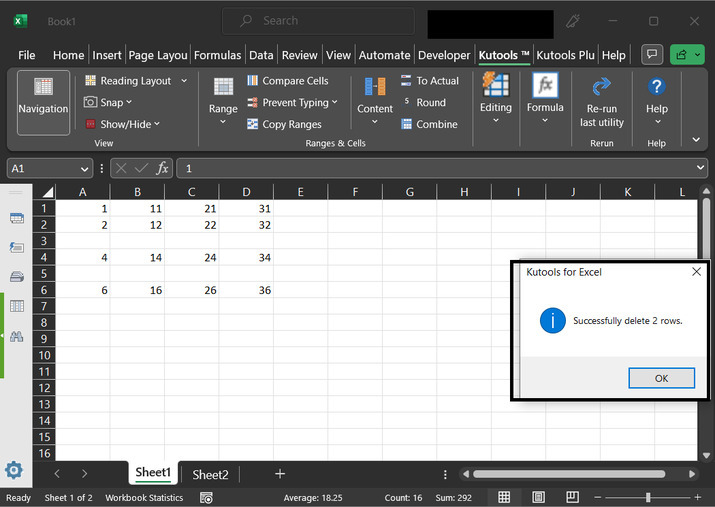
The above step will finally display the "Kutools for Excel" dialog box, as depicted below. Click on "OK" button.
Step 4
This will remove all the rows that contain empty rows values. Consider the below-given image for proper reference:
Conclusion
This article briefs two common and easy ways to perform the same task. This article is useful for beginners willing to learn the method to print a worksheet, without any blank rows. Removing blank rows while printing will make data accurate and precise. Removing blank records will allow the user to remove the extra space from the sheet. However, there are chances that data will become inconsistent due to the removal of extra space.

660 Views
