
Article Categories
- All Categories
-
 Data Structure
-
 Networking
-
 RDBMS
RDBMS
-
 Operating System
-
 Java
Java
-
 MS Excel
-
 iOS
iOS
-
 HTML
HTML
-
 CSS
CSS
-
 Android
-
 Python
-
 C Programming
-
 C++
C++
-
 C#
C#
-
 MongoDB
-
 MySQL
MySQL
-
 Javascript
-
 PHP
PHP
-
 Economics & Finance
How to Autonumber Rows if the Adjacent Cells are Not Blank in Excel?
In Excel, we can get the sequence of numbers by using the auto-fill handle if there are no conditions. But have you ever tried to auto-number the cells by ignoring the blank cells in Excel? This tutorial will help you understand how we can auto-number rows if adjacent cells are not blank in Excel. If you need to manually enter the number, it will be an awfully long and time-consuming process. We can make it a fast process by making it automated. We solve this problem by using the formulas in an uncomplicated process.
Autonumber Rows If the Adjacent Cells are Not Blank
Here, we will first use the formula to assign the first number, then use the autofill handle to fill in all the numbering. Let us look at a simple procedure for using formulas to auto-number rows if adjacent cells are not blank in Excel. This procedure can be used to determine the number of non-empty cells in the Excel sheet.
Step 1
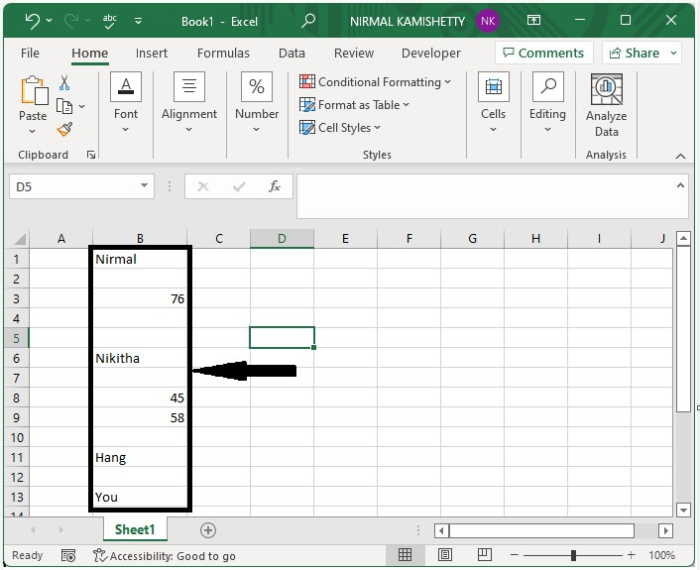
Let us consider an Excel sheet where the data is like the data shown in the below image.
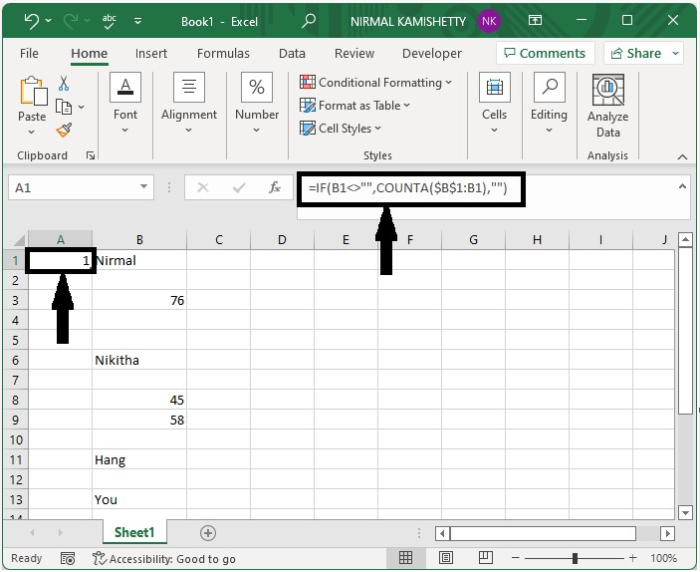
Now, in the formula box, enter the formula =IF(B1>"",COUNTA($B$1:B1),"") and press Enter to get the first result, as shown in the image below. In the formula, cell B1 is the one where we have entered our first value.
Step 2
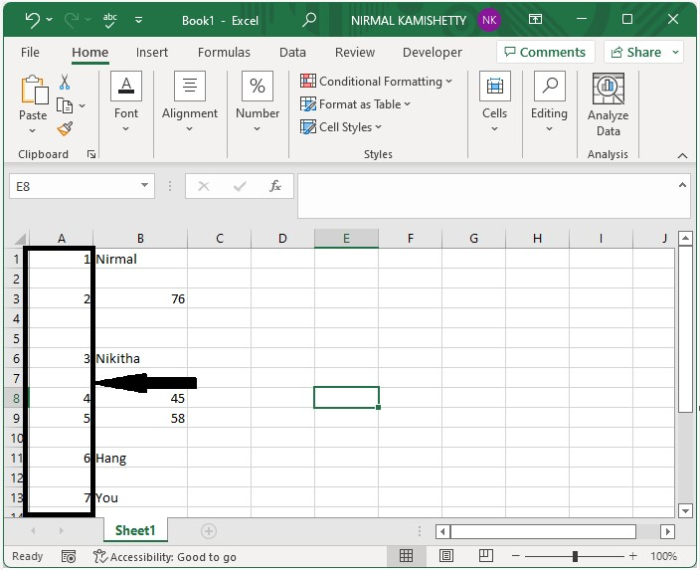
We have successfully gotten the first result. We can get all the results by dragging down the auto-fill handle till all the cells in the sheet are filled, and our final output will be similar to the below image.
We can also count the number of empty cells in a column using the same process, but we can change the formula to =COUNTBLANK(B1:B13).
Conclusion
In this tutorial, we used a simple example to demonstrate how you can auto-number rows if the adjacent cells are not blank in Excel.

3K+ Views
