
Article Categories
- All Categories
-
 Data Structure
-
 Networking
-
 RDBMS
RDBMS
-
 Operating System
-
 Java
Java
-
 MS Excel
-
 iOS
iOS
-
 HTML
HTML
-
 CSS
CSS
-
 Android
-
 Python
-
 C Programming
-
 C++
C++
-
 C#
C#
-
 MongoDB
-
 MySQL
MySQL
-
 Javascript
-
 PHP
PHP
-
 Economics & Finance
How to Print Each Row/Cell on a Separate Page in Excel?
Introduction
Excel, one of the most popular spreadsheet programs, has a number of various printing choices. The capacity to print each row or cell on a different page is one such need. For the purposes of analysis, documentation, or dissemination, users may make printouts of each row or column in their dataset. In this tutorial, you'll learn how to set up Excel so that it prints each row or cell on a new page, allowing you to quickly and easily format your printouts to meet your exact requirements.
When working with datasets that demand particular attention or analysis, it may be necessary to print each row or cell on a different page. Each row or cell may be printed on its own page so that readers can zero in on individual pieces of information, make extensive notes, and do thorough analyses. Users benefit from a deeper grasp of their data and quicker, more informed decisions because to this degree of detail.
For reference reasons, it may be helpful to print each row or cell on a separate page. Create a tangible log of your data points so you can quickly find what you need when you need it. This may be especially helpful when a hard copy is needed for auditing, legal, or archiving reasons.
Sharing information is made easier when each row or cell is printed on its own page. Users may easily share relevant data with various audiences by printing out customized reports, without having to spend time manually modifying or cropping the data. This guarantees that everyone gets the specific data they need, which streamlines communication and boosts teamwork.
In this tutorial, we'll look at a few alternative approaches to making Excel display each row or column on its own page. You may do this in a number of ways, such as by using VBA (Visual Basic for Applications) macros to automate the process and by making use of the Print Titles function. These methods are adaptable and may be modified to meet specific needs in the printing industry.
Excel's ability to print each row or column on a distinct page is a powerful tool for better data analysis, documentation, and collaboration, and it's easy to learn how to utilize it. Let's dive into what it takes to accomplish personalized printing and release its full potential.
Why does it happen?
Excel's ability to print each row or column on a single page allows for a more detailed and specific method of data analysis, documentation, and dissemination. The following factors contribute to the desirability of this feature and help explain its advantages.
Enhanced Analysis: Each data point may be examined in more depth if it is printed in its own row or cell on a different page. Users may concentrate on a subset of data by hiding everything except the selected rows or cells, allowing for more thorough inspection of numbers, computations, and comments. This fine?grained view of the dataset allows for thorough investigation and comprehension.
Comprehensive Documentation :In certain cases, a hard copy of specific data points is required. Users may produce detailed documentation that records relevant information by printing each row or cell on a separate page. When a complete record of all of the data points is needed for auditing, legal, or archiving reasons, this comes in very handy.
Customized Sharing :Sharing discrete information with others is made easier by printing each row or cell on a separate page. Users may print off just the data they need, rather than sending the whole spreadsheet or data collection. Sharing just what is relevant to certain individuals improves the effectiveness of communication and lessens the likelihood of misunderstandings.
Visual Clarity :When data is printed on separate pages, it eliminates the visual clutter that can arise from multiple rows or cells being displayed together. Each data point gets its dedicated space, which enhances the visual clarity and readability of the information. This is especially beneficial for complex or extensive datasets where presenting information in a focused manner improves comprehension.
Flexibility and Customization :Excel's flexible print settings and options provide users the freedom to create documents that perfectly suit their needs. Part of this adaptability is the option to print each row or cell on its own page, allowing users to pick and choose whatever pieces of information to print and how they want it laid up.
Launch Excel and go to the page with the information you need to print.
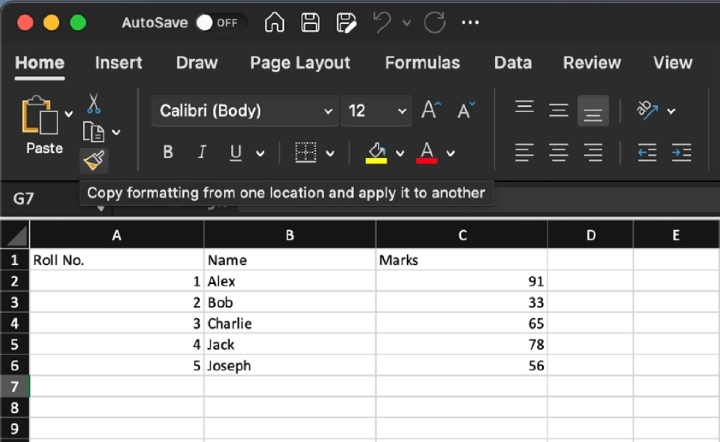
Choose the columns or cells you wish to break off into their own pages. To select several rows or cells, click and drag the mouse over the area you want to work in.
Click the "Page Layout" tab on Excel's upper ribbon after you've selected your choice.
The "Print Titles" option may be found in the "Page Setup" menu. Clicking this button will bring up the Page Setup window.
To do this, choose the "Sheet" tab in the Page Setup dialogue box.
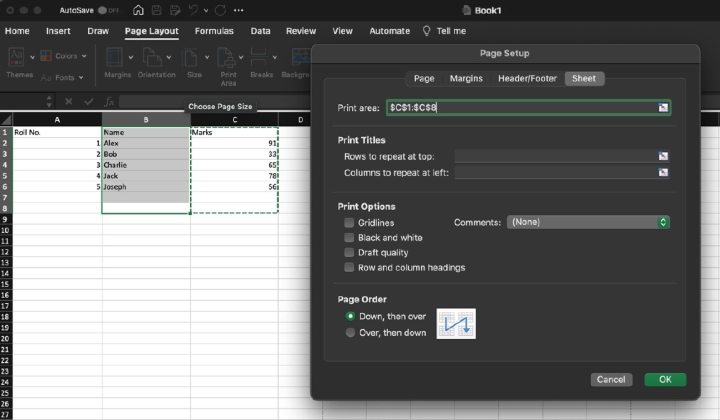
To set the "Rows to repeat at top" to repeat, click the arrow at the far right of the field. Choose which rows you'd want to appear at the top of every printed page.
Pick the columns you need to print the information over numerous pages. Simply click and hold the mouse button to choose several rows.
When you're done customizing your page, click the "OK" button to close the Page Setup dialogue box.
For a print preview, choose "Print" from the "File" menu.

If you choose several rows or cells, each one will be printed on a separate page. Verify the content of each page by using the page?turn buttons.
It is possible to adjust the printout's scale, margins, and orientation.
Finally, choose "Print" to get a printout where each row or cell begins on a new page.
Conclusion
As a strong tool for analysis, documenting, sharing, readability, and clarity, Excel's ability to print each row or column on a single page is invaluable. Users can improve readability by removing unnecessary visual elements, dive deeper into data, keep detailed records for legal or auditing purposes, and personalize the printing process to meet their specific needs, all by isolating specific data.
Users can examine and evaluate data with more accuracy if each row or cell is printed on its own page. It's easy to keep detailed records with the help of the system, since it generates individual printouts for each data point. It's much simpler to collaborate and communicate when each party just receives the information they need.
In addition, by isolating each row or cell on its own page, visual clutter is reduced and each data item is given its own space, resulting in greater readability. This is particularly useful when reviewing large, complex datasets, which benefit from a more concentrated presentation. Users may customize the printing process in Excel to better suit their needs for analysis, documentation, and sharing.
Spreadsheets are easier to maintain and share because to Excel's unique ability to print each row or column on its own page. Users may now conduct in?depth studies, maintain accurate records, work together on targeted projects, improve readability, and refine their printed output. When utilized correctly, this feature helps users boost the value and usefulness of their data, leading to more informed decision?making and more efficient teamwork.

6K+ Views
