
Article Categories
- All Categories
-
 Data Structure
-
 Networking
-
 RDBMS
RDBMS
-
 Operating System
-
 Java
Java
-
 MS Excel
-
 iOS
iOS
-
 HTML
HTML
-
 CSS
CSS
-
 Android
-
 Python
-
 C Programming
-
 C++
C++
-
 C#
C#
-
 MongoDB
-
 MySQL
MySQL
-
 Javascript
-
 PHP
PHP
-
 Economics & Finance
How to Delete Infinite Blank Rows in Excel
You know how aggravating it may be when your Excel worksheet appears to contain an infinite number of empty rows. These blank rows not only make it difficult to explore your data, but they also use extra memory and computing resources. Fortunately, you can quickly eliminate those unending blank rows and optimise the efficiency of your Excel file by following a few simple steps.
In this tutorial, we'll walk you through the process of identifying and eliminating these empty rows using Excel's built?in features. Whether you're a novice or an experienced user, this lesson will teach you how to manage and tidy up your worksheets quickly.
By the end of this tutorial, you'll have learned how to successfully remove limitless blank rows from any Excel spreadsheet. So, let's get started and learn how to get rid of those irritating unending blank rows in your worksheets step by step!
Deleting Infinite Blank Rows in Excel
Here we will use the find and select function to select the cells and then delete them. So let us see a simple process to learn how you can delete infinite blank rows in Excel.
Step 1
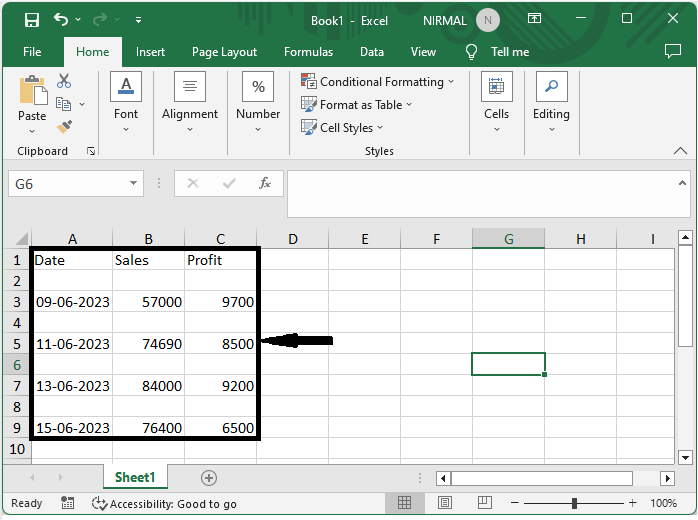
Consider an Excel sheet where you have blank rows between the data, similar to the one shown below.
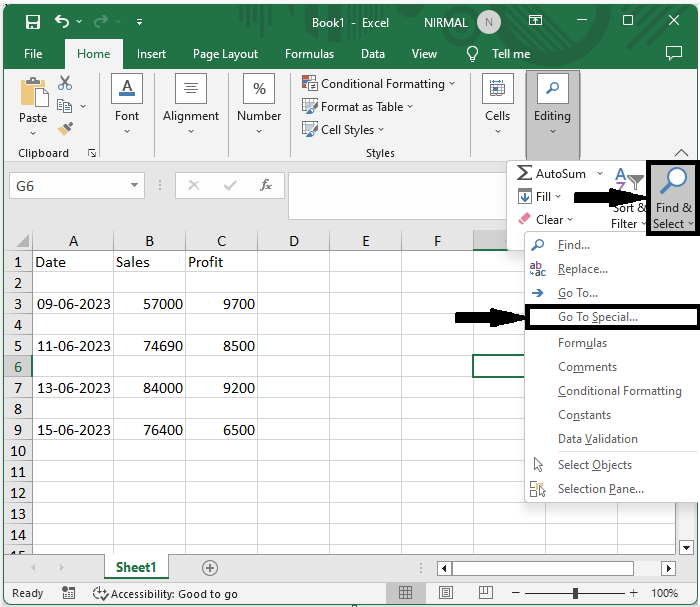
First, click on Find, select "Home," and select "Go to Specials" to open the Go to Specials" window.
Home > Find and select > Go to Special.
Step 2
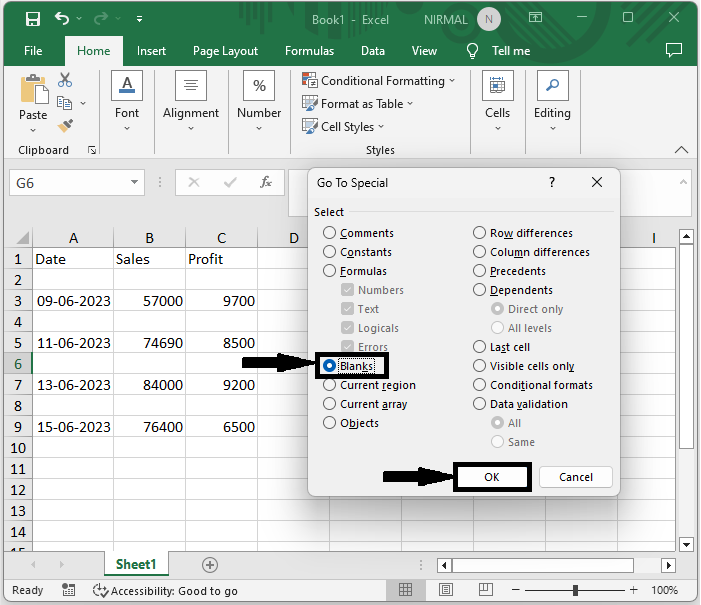
Then click on "Blanks" and "OK." Then you can see that all the blank cells will be selected.
Blanks > Ok.
Step 3
Then right?click on any selected cell, click on "Delete," select the entire row, and click "OK" to complete the task.
Right click > Delete > Entire Row > Ok.

Conclusion
In this tutorial, we have used a simple example to demonstrate how you can delete infinite blank rows in Excel to highlight a particular set of data.

1K+ Views
