- Ionic - Colors
- Ionic - Content
- Ionic - Header
- Ionic - Footer
- Ionic - Buttons
- Ionic - Lists
- Ionic - Cards
- Ionic - Forms
- Ionic - Toggle
- Ionic - Checkbox
- Ionic - Radio Button
- Ionic - Range
- Ionic - Select
- Ionic - Tabs
- Ionic - Grid
- Ionic - Icons
- Ionic - Padding
- Ionic Javascript Components
- Ionic - JS Action Sheet
- Ionic - JS Backdrop
- Ionic - JS Content
- Ionic - JS Forms
- Ionic - JS Events
- Ionic - JS Header
- Ionic - JS Footer
- Ionic - JS Keyboard
- Ionic - JS List
- Ionic - JS Loading
- Ionic - JS Modal
- Ionic - JS Navigation
- Ionic - JS Popover
- Ionic - JS Popup
- Ionic - JS Scroll
- Ionic - JS Side Menu
- Ionic - JS Slide Box
- Ionic - JS Tabs
- Ionic Advanced Concepts
- Ionic - Cordova Integration
- Ionic - AdMob
- Ionic - Camera
- Ionic - Facebook
- Ionic - In App Browser
- Ionic - Native Audio
- Ionic - Geolocation
- Ionic - Media
- Ionic - Splash Screen
- Ionic Useful Resources
- Ionic - Quick Guide
- Ionic - Useful Resources
- Ionic - Discussion
Ionic - Forms
Ionic forms are mostly used for interaction with users and collecting needed info. This chapter will cover various text input forms and in our subsequent chapters, we will explain how to use other form elements using the Ionic framework.
Using Input Form
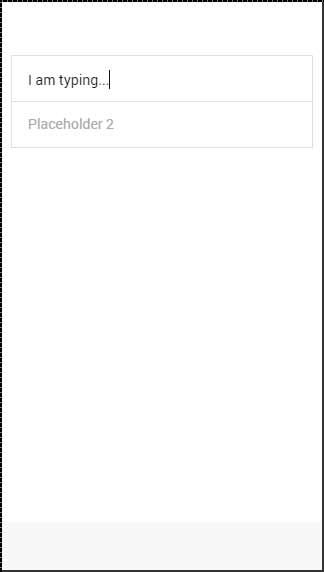
The best way to use forms is to use list and item as your main classes. Your app will usually consist more than one-form element, so it makes sense to organize it as a list. In the following example, you can notice that the item element is a label tag.
You can use any other element, but a label will provide the ability to tap on any part of the element to focus your text input. You can set a placeholder that will look different from the input text and it will be hidden as soon as you start typing. You can see this in the example below.
<div class = "list">
   <label class = "item item-input">
      <input type = "text" placeholder = "Placeholder 1" />
   </label>

   <label class = "item item-input">
      <input type = "text" placeholder = "Placeholder 2" />
   </label>
</div>
The above code will produce the following screen −
Ionic Labels
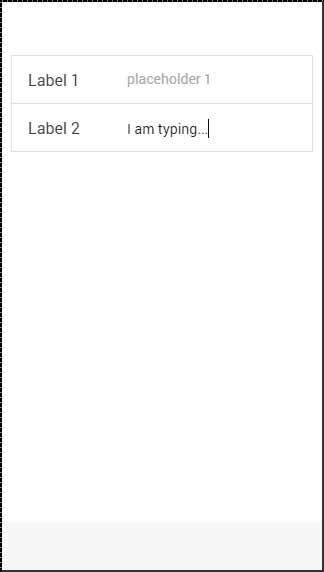
Ionic offers some other options for your label. You can use the input-label class, if you want your placeholder to be on the left side when you type the text.
<div class = "list">
   <label class = "item item-input">
      <input type = "text" placeholder = "Placeholder 1" />
   </label>

   <label class = "item item-input">
      <input type = "text" placeholder = "Placeholder 2" />
   </label>
</div>
The above code will produce the following screen −
Stacked Label
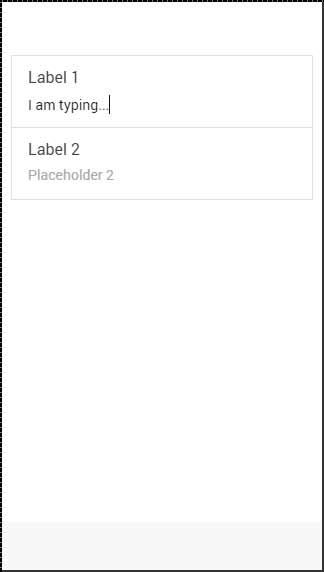
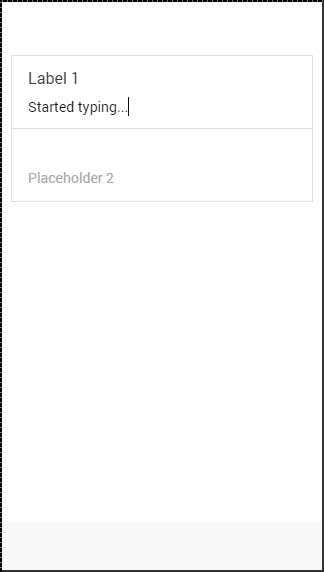
Stacked label is the other option that allows moving your label on top or the bottom of the input. To achieve this, we will add the item-stacked-label class to our label element and we need to create a new element and assign the input-label class to it. If we want it to be on top, we just need to add this element before the input tag. This is shown in the following example.
Notice that the span tag is before the input tag. If we changed their places, it would appear below it on the screen.
<div class = "list">
   <label class = "item item-input item-stacked-label">
      <span class = "input-label">Label 1</span>
      <input type = "text" placeholder = "Placeholder 1" />
   </label>

   <label class = "item item-input item-stacked-label">
      <span class = "input-label">Label 2</span>
      <input type = "text" placeholder = "Placeholder 2" />
   </label>
</div>
The above code will produce the following screen −
Floating Label
Floating labels are the third option we can use. These labels will be hidden before we start typing. As soon the typing starts, they will appear on top of the element with nice floating animation. We can use floating labels the same way as we used stacked labels. The only difference is that this time we will use item-floating-label class.
<div class = "list">
   <label class = "item item-input item-floating-label">
      <span class = "input-label"t>Label 1</span>
      <input type = "text" placeholder = "Placeholder 1" />
   </label>

   <label class = "item item-input item-floating-label">
      <span class = "input-label">Label 2</span>
      <input type = "text" placeholder = "Placeholder 2" />
   </label>
</div>
The above code will produce the following screen −
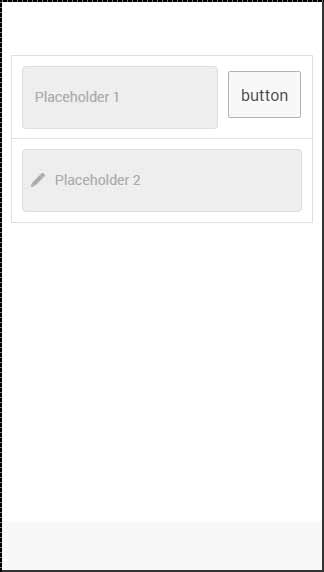
Inset inputs
In our last chapter, we discussed how to inset Ionic elements. You can also inset an input by adding the item-input-inset class to your item and the item-input-wrapper to your label. A Wrapper will add additional styling to your label.
If you add some other elements next to your label, the label size will adjust to accommodate the new element. You can also add elements inside your label (usually icons).
The following example shows two inset inputs. The first one has a button next to the label, and the second one has an icon inside it. We used the placeholder-icon class to make the icon with the same color as the placeholder text. Without it, the icon would use the color of the label.
<div class = "list">
   <div class = "item item-input-inset">
      <label class = "item item-input-wrapper">
         <input type = "text" placeholder = "Placeholder 1" />
      </label>
      <button class = "button">button</button>
   </div>

   <div class = "item item-input-inset">
      <label class = "item item-input-wrapper">
         <i class = "icon ion-edit placeholder-icon"></i>
         <input type = "text" placeholder = "Placeholder 2" />
      </label>
   </div>
</div>
The above code will produce the following screen −