- Ionic - Colors
- Ionic - Content
- Ionic - Header
- Ionic - Footer
- Ionic - Buttons
- Ionic - Lists
- Ionic - Cards
- Ionic - Forms
- Ionic - Toggle
- Ionic - Checkbox
- Ionic - Radio Button
- Ionic - Range
- Ionic - Select
- Ionic - Tabs
- Ionic - Grid
- Ionic - Icons
- Ionic - Padding
- Ionic Javascript Components
- Ionic - JS Action Sheet
- Ionic - JS Backdrop
- Ionic - JS Content
- Ionic - JS Forms
- Ionic - JS Events
- Ionic - JS Header
- Ionic - JS Footer
- Ionic - JS Keyboard
- Ionic - JS List
- Ionic - JS Loading
- Ionic - JS Modal
- Ionic - JS Navigation
- Ionic - JS Popover
- Ionic - JS Popup
- Ionic - JS Scroll
- Ionic - JS Side Menu
- Ionic - JS Slide Box
- Ionic - JS Tabs
- Ionic Advanced Concepts
- Ionic - Cordova Integration
- Ionic - AdMob
- Ionic - Camera
- Ionic - Facebook
- Ionic - In App Browser
- Ionic - Native Audio
- Ionic - Geolocation
- Ionic - Media
- Ionic - Splash Screen
- Ionic Useful Resources
- Ionic - Quick Guide
- Ionic - Useful Resources
- Ionic - Discussion
Ionic - Cordova Facebook
This plugin is used for connecting to Facebook API. Before you start integrating Facebook, you need to create a Facebook app here. You will create a web app and then skip the quick start screen. Then, you need to add the website platform on the settings page. You can use the following code snippet for the site URL while in development.
http://localhost:8100/
After that, you need to add Valid OAuth redirect URIs on the settings/advanced page. Just copy the following two URLs.
https://www.facebook.com/connect/login_success.html
http://localhost:8100/oauthcallback.html
Installing Facebook Plugin
We did all the steps above to tackle some issues that often appear when using this plugin. This plugin is hard to set up because there are a lot of steps involved and documentation doesn't cover all of them. There are also some known compatibility issues with other Cordova plugins, so we will use Teleric verified plugin version in our app. We will start by installing browser platform to our app from the command prompt.
C:\Users\Username\Desktop\MyApp>ionic platform add browser
Next, what we need to do is to add the root element on top of the body tag in index.html.
index.html
<div id = "fb-root"></div>
Now we will add Cordova Facebook plugin to our app. You need to change APP_ID and APP_NAME to match the Facebook app you created before.
C:\Users\Username\Desktop\MyApp>cordova -d plugin add
   https://github.com/Telerik-Verified-Plugins/Facebook/
   --variable APP_ID = "123456789" --variable APP_NAME = "FbAppName"
Now open index.html and add the following code after your body tag. Again you need to make sure that the appId and version are matching the Facebook app you created. This will ensure that Facebook SDK is loaded asynchronously without blocking the rest of the app.
index.html
<script>
   window.fbAsyncInit = function() {
      FB.init({
         appId      : '123456789',
         xfbml      : true,
         version    : 'v2.4'
      });
   };

   (function(d, s, id) {
      var js, fjs = d.getElementsByTagName(s)[0];
      if (d.getElementById(id)) {return;}
      js = d.createElement(s); js.id = id;
      js.src = "//connect.facebook.net/en_US/sdk.js";
      fjs.parentNode.insertBefore(js, fjs);
   }(document, 'script', 'facebook-jssdk'));
</script>
Angular Service
Since we installed everything, we need to create service that will be our connection to the Facebook. These things can be done with less code inside the controller, but we try to follow the best practices, so we will use Angular service. The following code shows the entire service. We will explain it later.
services.js
.service('Auth', function($q, $ionicLoading) {
   this.getLoginStatus = function() {
      var defer = $q.defer();

      FB.getLoginStatus(function(response) {
		   if (response.status === "connected") {
            console.log(JSON.stringify(response));
         } else {
            console.log("Not logged in");
         }
      });

      return defer.promise;
   }
   this.loginFacebook = function() {
      var defer = $q.defer();

      FB.login(function(response) {
		   if (response.status === "connected") {
            console.log(JSON.stringify(response));
         } else {
            console.log("Not logged in!");
         }
      });

      return defer.promise;
   }
   this.logoutFacebook = function() {
      var defer = $q.defer();

      FB.logout(function(response) {
         console.log('You are logged out!');
      });

      return defer.promise;
   }
   this.getFacebookApi = function() {
      var defer = $q.defer();

      FB.api("me/?fields = id,email", [], function(response) {

         if (response.error) {
            console.log(JSON.stringify(response.error));
         } else {
            console.log(JSON.stringify(response));
         }
      });

      return defer.promise;
   }
});
In the above service, we are creating four functions. First three are self-explanatory. The fourth function is used for connecting to Facebook graph API. It will return the id and email from the Facebook user.
We are creating promise objects to handle asynchronic JavaScript functions. Now we need to write our controller that will call those functions. We will call each function separately for better understanding, but you will probably need to mix some of them together to get the desired effect.
Controller Code
.controller('MyCtrl', function($scope, Auth, $ionicLoading) {

   $scope.checkLoginStatus = function() {
      getLoginUserStatus();
   }

   $scope.loginFacebook = function(userData) {
      loginFacebookUser();
   };

   $scope.facebookAPI = function() {
      getFacebookUserApi();
   }

   $scope.logoutFacebook = function() {
      logoutFacebookUser();
   };

   function loginFacebookUser() {
      return Auth.loginFacebook();
   }

   function logoutFacebookUser() {
      return Auth.logoutFacebook();
   }

   function getFacebookUserApi() {
      return Auth.getFacebookApi();
   }

   function getLoginUserStatus() {
      return Auth.getLoginStatus();
   }
})
You are probably wondering why didn't we returned Auth service directly from the function expressions (first four functions). The reason for this is that you will probably want to add some more behavior after the Auth function is returned. You might send some data to your database, change the route after login, etc. This can be easily done by using JavaScript then() method to handle all the asynchronous operations instead of callbacks.
Now we need to allow users to interact with the app. Our HTML will contain four buttons for calling the four functions we created.
HTML Code
<button class = "button" ng-click = "loginFacebook()">LOG IN</button>
<button class = "button" ng-click = "logoutFacebook()">LOG OUT</button>
<button class = "button" ng-click = "checkLoginStatus()">CHECK</button>
<button class = "button" ng-click = "facebookAPI()">API</button>
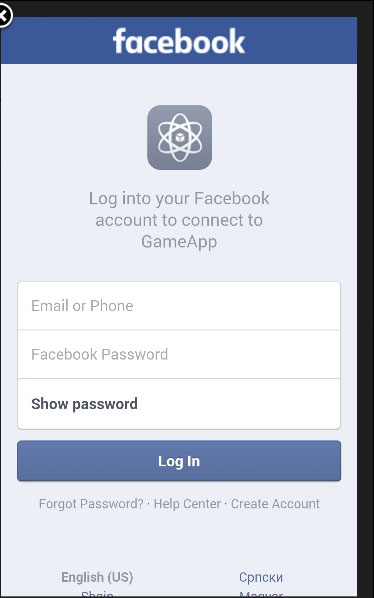
When the user taps the LOG IN button, the Facebook screen will appear. The user will be redirected to the app after the login is successful.