- Ionic - Colors
- Ionic - Content
- Ionic - Header
- Ionic - Footer
- Ionic - Buttons
- Ionic - Lists
- Ionic - Cards
- Ionic - Forms
- Ionic - Toggle
- Ionic - Checkbox
- Ionic - Radio Button
- Ionic - Range
- Ionic - Select
- Ionic - Tabs
- Ionic - Grid
- Ionic - Icons
- Ionic - Padding
- Ionic Javascript Components
- Ionic - JS Action Sheet
- Ionic - JS Backdrop
- Ionic - JS Content
- Ionic - JS Forms
- Ionic - JS Events
- Ionic - JS Header
- Ionic - JS Footer
- Ionic - JS Keyboard
- Ionic - JS List
- Ionic - JS Loading
- Ionic - JS Modal
- Ionic - JS Navigation
- Ionic - JS Popover
- Ionic - JS Popup
- Ionic - JS Scroll
- Ionic - JS Side Menu
- Ionic - JS Slide Box
- Ionic - JS Tabs
- Ionic Advanced Concepts
- Ionic - Cordova Integration
- Ionic - AdMob
- Ionic - Camera
- Ionic - Facebook
- Ionic - In App Browser
- Ionic - Native Audio
- Ionic - Geolocation
- Ionic - Media
- Ionic - Splash Screen
- Ionic Useful Resources
- Ionic - Quick Guide
- Ionic - Useful Resources
- Ionic - Discussion
Ionic - Environment Setup
This chapter will show you how to start with Ionic Framework. The following table contains the list of components needed to start with Ionic.
| Sr.No. | Software & Description |
|---|---|
| 1 | NodeJS This is the base platform needed to create Mobile Apps using Ionic. You can find detail on the NodeJS installation in our NodeJS Environment Setup. Make sure you also install npm while installing NodeJS. |
| 2 | Android SDK If you are going to work on a Windows platform and are developing your apps for the Android platform, then you should have Android SDK setup on your machine. The following link has detailed information on the Android Environment Setup. |
| 3 | XCode If you are going to work on the Mac platform and are developing your apps for the iOS platform, then you should have XCode setup on your machine. The following link has detailed information on the iOS Environment Setup. |
| 4 | cordova and Ionic These are the main SDKs which is needed to start working with Ionic. This chapter explains how to setup Ionic in simple step assuming you already have the required setup as explained in the table above. |
Installing Cordova and Ionic
We will use the Windows command prompt for this tutorial. The same steps can be applied to the OSX terminal. Open your command window to install Cordova and Ionic −
C:\Users\Username> npm install -g cordova ionic
Creating Apps
While creating apps in Ionic, you can choose from the following three options to start with −
- Tabs App
- Blank App
- Side menu app
In your command window, open the folder where you want to create the app and try one of the options mentioned below.
Tabs App
If you want to use the Ionic tabs template, the app will be built with the tab menu, header and a couple of useful screens and functionalities. This is the default Ionic template. Open your command window and choose where you want to create your app.
C:\Users\Username> cd Desktop
This command will change the working directory. The app will be created on the Desktop.
C:\Users\Username\Desktop> ionic start myApp tabs
Ionic Start command will create a folder named myApp and setup Ionic files and folders.
C:\Users\Username\Desktop> cd myApp
Now, we want to access the myApp folder that we just created. This is our root folder.
Let us now add the Cordova project for the Android Platform and install the basic Cordova plugins as well. The following code allows us to run the app on the Android emulator or a device.
C:\Users\Username\Desktop\myApp> ionic platform add android
The next step is to build the app. If you have building errors after running the following command, you probably did not install the Android SDK and its dependencies.
C:\Users\Username\Desktop\myApp> ionic build android
The last step of the installation process is to run your app, which will start the mobile device, if connected, or the default emulator, if there is no device connected. Android Default Emulator is slow, so I suggest you to install Genymotion or some other popular Android Emulator.
C:\Users\Username\Desktop\myApp> ionic run android
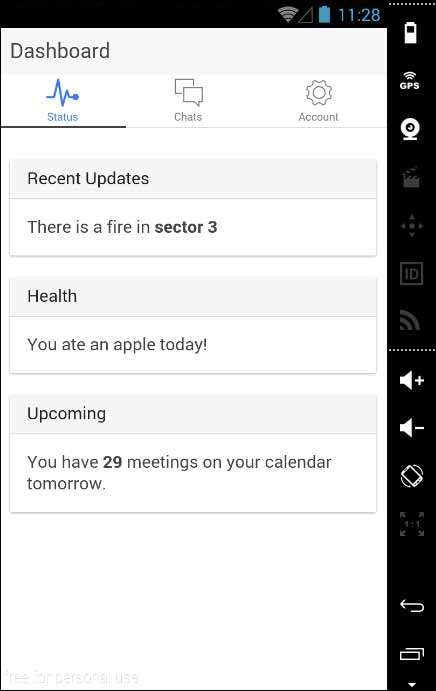
This will produce below result, which is an Ionic Tabs App.
Blank App
If you want to start from the scratch, you can install the Ionic blank template. We will use the same steps that have been explained above with the addition of ionic start myApp blank instead of ionic start myApp tabs as follows.
C:\Users\Username\Desktop> ionic start myApp blank
The Ionic Start command will create a folder named myApp and setup the Ionic files and folders.
C:\Users\Username\Desktop> cd myApp
Let us add the Cordova project for the Android Platform and install the basic Cordova plugins as explained above.
C:\Users\Username\Desktop\myApp>ionic platform add android
The next step is to build our app −
C:\Users\Username\Desktop\myApp> ionic build android
Finally, we will start the App as with the following code −
C:\Users\Username\Desktop\myApp> ionic run android
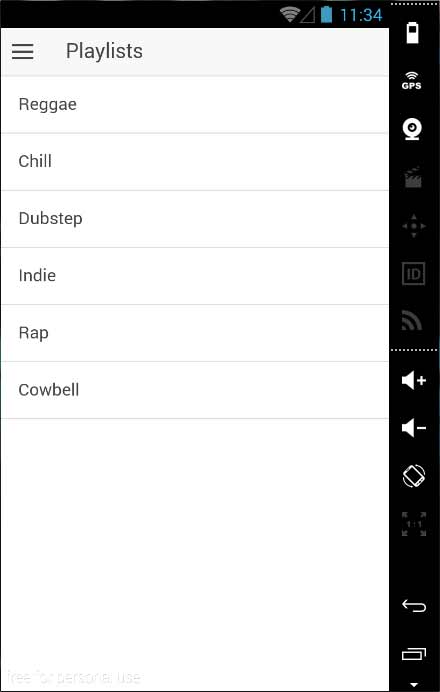
This will produce the following result, which is a Ionic Blank App.

Side Menu App
The third template that you can use is the Side Menu Template. The steps are the same as the previous two templates; we will just add sidemenu when starting our app as shown in the code below.
C:\Users\Username\Desktop> ionic start myApp sidemenu
The Ionic Start command will create a folder named myApp and setup the Ionic files and folders.
C:\Users\Username\Desktop> cd myApp
Let us add the Cordova project for the Android Platform and install the basic Cordova plugins with the code given below.
C:\Users\Username\Desktop\myApp> ionic platform add android
The next step is to build our app with the following code.
C:\Users\Username\Desktop\myApp> ionic build android
Finally, we will start the App with the code given below.
C:\Users\Username\Desktop\myApp> ionic run android
This will produce the following result, which is an Ionic Side Menu App.
Test App in Browser
Since we are working with the JavaScript, you can serve your app on any web browser. This will speed up your building process, but you should always test your app on native emulators and devices. Type the following code to serve your app on the web browser.
C:\Users\Username\Desktop\myApp> ionic serve
The above command will open your app in the web browser. Google Chrome provides the device mode functionality for mobile development testing. Press F12 to access the developer console.
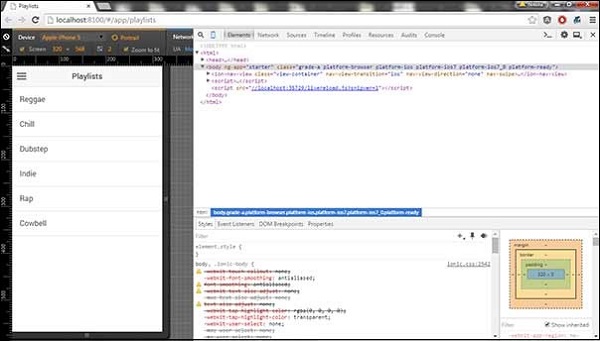
The top left corner of the console window click has the "Toggle Device Mode" icon. The next step will be to click "Dock to Right" icon in the top right corner. Once the page is refreshed, you should be ready for testing on the web browser.
Project Folder Structure
Ionic creates the following directory structure for all type of apps. This is important for any Ionic developer to understand the purpose of every directory and the files mentioned below −
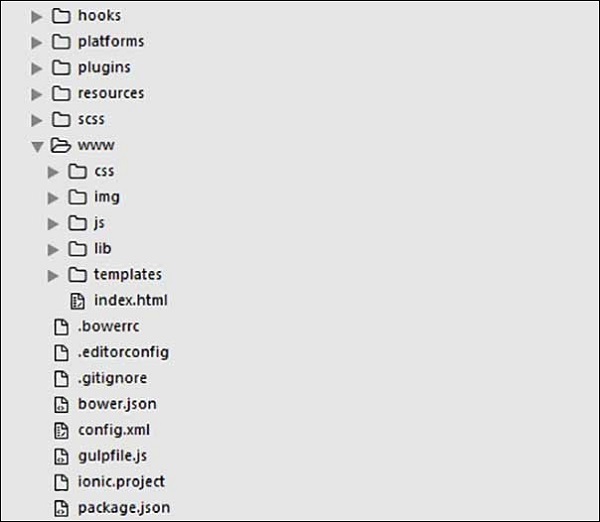
Let us have a quick understanding of all the folders and files available in the project folder structure shown in the image above.
Hooks − Hooks are scripts that can be triggered during the build process. They are usually used for the Cordova commands customization and for building automated processes. We will not use this folder during this tutorial.
Platforms − This is the folder where Android and IOS projects are created. You might encounter some platform specific problems during development that will require these files, but you should leave them intact most of the time.
Plugins − This folder contains Cordova plugins. When you initially create an Ionic app, some of the plugins will be installed. We will show you how to install Cordova plugins in our subsequent chapters.
Resources − This folder is used for adding resources like icon and splash screen to your project.
Scss − Since Ionic core is built with Sass, this is the folder where your Sass file is located. For simplifying the process, we will not use Sass for this tutorial. Our styling will be done using CSS.
www − www is the main working folder for Ionic developers. They spend most of their time here. Ionic gives us their default folder structure inside 'www', but the developers can always change it to accommodate their own needs. When this folder is opened, you will find the following sub-folders −
The css folder, where you will write your CSS styling.
The img folder for storing images.
The js folder that contains the apps main configuration file (app.js) and AngularJS components (controllers, services, directives). All your JavaScript code will be inside these folders.
The libs folder, where your libraries will be placed.
The templates folder for your HTML files.
Index.html as a starting point to your app.
Other Files − Since this is a beginners tutorial, we will just mention some of the other important files and their purposes as well.
.bowerrc is the bower configuration file.
.editorconfig is the editor configuration file.
.gitignore is used to instruct which part of the app should be ignored when you want to push your app to the Git repository.
bower.json will contain the bower components and dependencies, if you choose to use the bower package manager.
gulpfile.js is used for creating automated tasks using the gulp task manager.
config.xml is the Cordova configuration file.
package.json contains the information about the apps, their dependencies and plugins that are installed using the NPM package manager.
In the next chapter, we will discuss the different colors available in Ionic open source framework.
