- Google AMP - Home
- Google AMP - Overview
- Google AMP - Introduction
- Google AMP - Images
- Google AMP - Form
- Google AMP - Iframes
- Google AMP - Video
- Google AMP - Button
- Google AMP - Timeago
- Google AMP - Mathml
- Google AMP - Fit Text
- Google AMP - Date Countdown
- Google AMP - Date Picker
- Google AMP - Story
- Google AMP - Selector
- Google AMP - Link
- Google AMP - Font
- Google AMP - List
- Google AMP - User Notification
- Google AMP - Next Page
- Google AMP - Attributes
- Styles And Custom CSS
- Google AMP - Dynamic CSS Classes
- Google AMP - Actions And Events
- Google AMP - Animations
- Google AMP - Data Binding
- Google AMP - Layout
- Google AMP - ADS
- Google AMP - Analytics
- Google AMP - Social Widgets
- Google AMP - Media
- Html Page To Amp Page
- Google AMP - Basic Syntax
- Google AMP - Validation
- Google AMP - Caching
- Google AMP - Custom Javascript
- Google AMP - Cors
- Google AMP Useful Resources
- Google AMP - Quick Guide
- Google AMP - Useful Resources
- Google AMP - Discussion
Google AMP - Quick Guide
Google AMP - Overview
Google Accelerated Mobile Pages (Google-AMP) is Googles new open source project specially designed to build light-weight web pages using amp html. The main aim of this project is to make sure the amp code works fine and loads fast on all possible devices such as smartphones, tablets etc.
What is AMP?
Accerated Mobile Pages (AMP) is Google's open source project specially designed to make th web pages mobile friendly by making it render contents faster, smoother and responsive in any browser.
The official site of Google amp is − https://www.ampproject.org/
WHY AMP?
Any user expects that websites would load the contents very fast. However, this may not be the case when the pages are almost flooded with images, videos, animations, social widgets, which makes page very heavy and thus increases its loading time. Such scenario may cause loss of users to the website in a long term.
Google AMP is designed to solve this issue. AMP has a special way to take care of images, iframes, javascripts, ads, videos, animations, css, font loaded etc. The contents of AMP pages are cached at the Google end, so each time the user clicks on the search results the content is served from cache. The cache version is also updated timely so that the user always gets a fresh updated page.
Why to Choose AMP?
This section tells you why you have to opt for AMP for your site −
Prioritized on Google Search
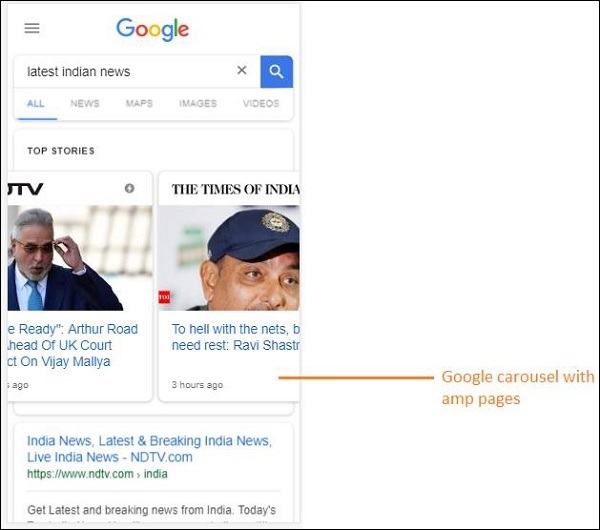
Today when you search something on the Google, you will find a Google carousel displayed at the top with pages, followed by the list of pages as a response to your search. The news carousel displayed are all valid AMP sites. It means Google gives priority to amp pages and displays them as per ranking in the news carousel.
An example for a search made in Google with the keyword latest indian news is given here −
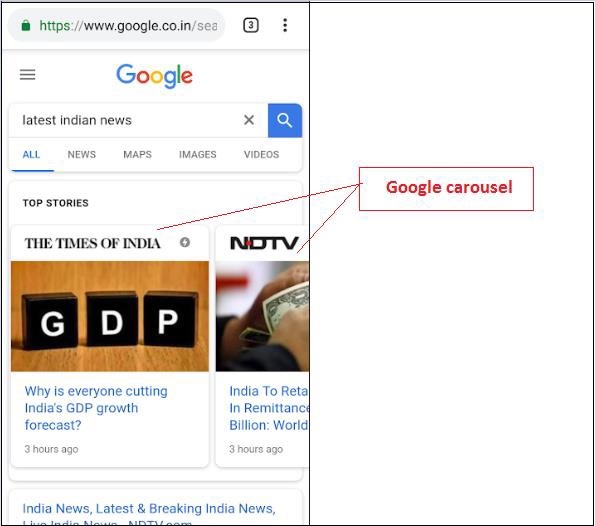
All the high ranked pages which are AMP pages are displayed at the start in the Google carousel as shown in the image above.
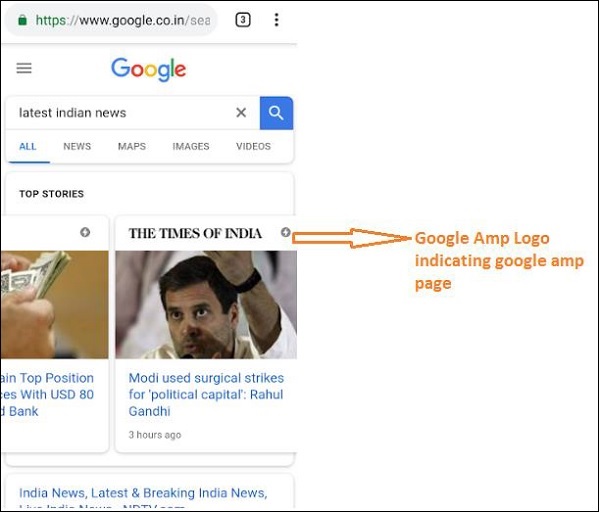
A Google AMP page looks as shown below when user searches something in Google search. Note that there is a Google AMP logo on the AMP pages.
Faster Loading Time
When your page is AMP converted the load time will be much better in comparison to a non-amp page. Faster load time is also an important factor in page ranking in Google search.
No Pop-ups
Using Google AMP gives a pleasant web browsing experience as the user will not see any unwanted pop-ups for pages designed with Google AMP.
Generates Traffic
When loading rate of pages is fast, it automatically increases number of viewers and thus traffic to the page increases.
How AMP works?
The most important components that are used to build website are javascript, images, videos, fonts, css etc. AMP page design is done by taking care of all these factors in a unique way. In this section, let us discuss in brief what exactly AMP does to make the pages faster.
Asynchronous JavaScript
Javascript plays an important role on the page, as it helps in adding interactivity to the page in the form of animations, DOM changes etc. It also adds slowness to the page and can block other contents from rendering on the page.
How AMP tackles JavaScript?
AMP loads JavaScript asynchronously. Custom JavaScript is strictly not allowed inside a AMP page. Note that AMP has lot of components added, some of them are a replacement to the existing html tags; for example amp-img, amp-iframe, amp-video, amp-lightbox, amp-animations etc.
For each of this component, there is a JavaScript file to be loaded which has the async attribute added to the script tag. Only JavaScript files related to the amp-components are allowed on the page and any other JavaScript inside a AMP page or third party javascript file is not allowed. As AMP uses Google AMP cache, the files are preloaded from cache making their loading faster.
Sizes for HTML Tags
It is mandatory to give size for the image, iframe, video tags so that amp page can locate the space on the page without having to load the resource. The resources to be loaded are prioritized by the amp page. The content is given more priority over the resources to be loaded.
Social Widgets/ ADs
Amp provides special components namely amp-facebook, amp-twitter, amp-ad, amp-sticky to take care of social widgets to be shown on the page. AMP-ad component is used to serve ads on the page. AMP takes special care in handling the components and loads the contents on a priority based on the requirements.
CSS
External CSS is not allowed in AMP pages. Custom CSS if any can be added inside style tag using amp-custom attribute. Inline CSS is also allowed. AMP reduces http requests in all possible ways.
Fonts
Fonts are allowed in amp pages and the priority of loading the fonts are decided by AMP.
Animation
AMP supports amp-animation components and allows transition as supported by modern browsers.
Considering all the points listed above, AMP takes very special care for HTTP request made for fonts, images, iframes , ads to be served etc. The resources available above the page fold are rendered first and later preference are given for resources available below the fold.
Other Points
Google AMP Cache is another important factor which helps in rendering the contents faster as the contents are fetched from the cache.
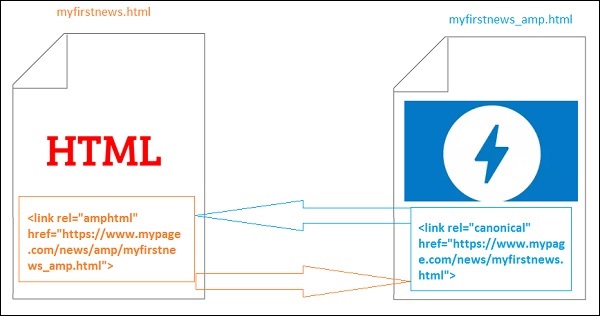
Publisher has to maintain two sites amp and non-amp page. For example, consider that the site has the address − https://www.mypage.com. Then, the pages internally for non-amp to be served on desktop will be https://www.mypage.com/news. For devices or AMP, it will be: https://www.mypage/com/news/amp/
How does Google Identify AMP and non-AMP page?
Now, let us understand how Google identifies AMP and non-AMP page.
When Google search crawls the page, if it happens to get amp in html or <html amp> or <html >, it knows that it is an AMP page.
Also incase Google comes across a non-amp page, first to know about the amp page it is mandatory to add following link tags in head section of html page for both amp and non-amp pages.
Page-url for Non amp-page
<link rel = "amphtml" href = "https://www.mypage.com/news/amp/myfirstnews_amp.html">
Here rel = amphtml is specified for a non-amp page to point to the amp version, so that Google shows the right one based on the platform.
Page-url for amp-page
<link rel = "canonical" href = "https://www.mypage.com/news/myfirstnews.html">
Here rel = canonical is specified in amp page to point to the standard version of html, so that Google shows the right one based on the platform.
Incase your site has only one amp page, still you should not forget to add the rel = canonical which will point to itself −
<link rel = "canonical" href = "https://www.mypage.com/news/amp/myfirstnews_amp.html">
The following diagram shows reference to rel=amphtml pointing to amp page and rel = canonical pointing to standard html page.
Features of Google AMP
In this section, let us discuss the important features available with Google AMP −
Amp Caching
Google Amp caching is one of the core feature added to amp. It provides a proxy based content delivery network to serve pure amp pages.Amp cache is available by default to all the valid amp pages.It helps in rendering the pages faster in comparison to non amp pages.At present there are 2 amp cache providers Google AMP Cache and Cloudflare AMP Cache. When the user clicks and gets redirected to the amp page, the content is served from the google cache.
Amp Components
Amp has a big list of components designed for various purposes. Some of them are listed below −
amp-img − Used to show images on amp pages.
amp-iframe − Used to show iframe with external content to be shown on the pages. Please note the iframe used are sandboxed which means it needs permission to show data on the amp page. So the cross origin details has to be specified for sandbox attribute.
amp-video − To show video on the page.
amp-audio − To show audio on the page.
amp-datepicker − Used to show date widgets on the page. You dont have to go for any third party datepickers as the same is directly available is amp.
amp-story − A medium to display your stories on the page.
amp-selector − Is an amp component which displays menu of options and the user can select between the options. The options displayed can be text,images or any other amp-component.
amp-list − Is an amp-component which calls a CORS json endpoint and the data from the json file is displayed inside a template.
Advertising
Advertising is very important for publishers as their revenue is completely dependent on the ads served on the page. Amp does not allow any external javascript to be added on the page, but has a special amp component called amp-ad is introduced which takes care of serving ads on the page.
The adnetwork the publisher wants to serve on their page needs to be amp-ad supported. For example, to serve double click ads on the page, double click needs to support ads to be served using amp-ad component. The following code shows an amp-ad tag of doubleclick.
<amp-ad width = "300"
   height = "200"
   type = "doubleclick"
   data-slot = "/4119129/ad-layout">
   <div placeholder>
      <b>Placeholder here!!!</b>
   </div>
</amp-ad>
Amp also supports amphtmlads which are pure ampads developed from AMP components and html. Amp also supports amp-sticky-ads, a footer ad displayed at the bottom of the page. The details of ads in amp is discussed in amp ads chapter.
Social Widgets
Social widgets like Facebook, Twitter, Instagram have become very important to be displayed on the publisher page , so that the pages are shared across social media. AMP has extended its supports to all the important social media widgets to be used on the page by developing AMP components like amp-facebook, amp-twitter, amp-instagram, amp-pinterest etc.
Amp Media
Another important component on pages is media to shows videos and also serve ads in between the video as midroll ads. AMP provides a medium to do that using amp-jwplayer, amp-youtube etc. You dont have to load any extra third party files to have jwplayer, youtube to be shown on your page.
Amp Analytics
Amp analytics is an AMP component used to track data on a given page. All the user interaction on the page can be recorded and saved to analyze the data for further improvements or business purpose.
Amp Animations
Amp-animation is an amp component which defines animations to be used on other amp components. IT supports the animation, transition which works well with modern browser. You dont have to use any external CSS library to perform the animation and can make use of amp-animation component.
Amp Layouts
AMP-Layout is one of the important feature available in google-amp. Amp Layout makes sure the amp components are rendered properly when the page is loaded without causing any flicker or scrolling issue.
Google AMP makes sure that layout rendering is done on the page before any other remote resources like http request for images, data calls are done. The attributes available for layout are width/height to all amp components, layout attribute with values like responsive, fill, fixed etc., placeholder attribute to be shown when the resource takes time to load or has any error, fallback attribute to be shown when the resource has any error.
Amp Display Layouts
Amp supports a lot of components used to display content on the page without a need for any third party library or without having to make any heavy CSS on the page. The list includes
Accordion − Amp-accordion is an amp component used to display the content in the expand-collapse format. It becomes easy for users to view it on mobile devices where they can select the section as per their choice from the accordion.
Carousel − Amp-carousel is an amp-component to show a set of similar contents on the screen and using the arrows to shift between the content.
Lightbox − Amp-lightbox is an amp component that will take up the full viewport and display like an overlay.
Slider − Amp-image-slider is an amp component used to compare 2 images by adding slider on moving it vertically over the image.
Sidebar − Amp sidebar is an amp component used to display content which slides from the sides of the window on tap of a button.
Advantages of AMP
AMP pages are lightweight and loads faster
Google gives for priority to AMP pages on google search. AMP pages are listed in the carousel format at the top of the page. To get a higher ranking, it is a good advantage to have your pages in AMP.
AMP pages are mobile friendly as the content is responsive and adjusts well in all browsers without the need of any additional styling.
Users satisfaction increases for AMP pages as the page load rate is faster in comparison to non-amp pages, thus saving their bandwidth and mobile battery.
Disadvantages of AMP
Amp possesses the following disadvantages −
Publisher has to maintain two version for their pages amp and non-amp.
The user has to put additional efforts in converting the non-amp pages to amp. As amp does not support custom javascript or loading of external javascript, the same has to be achieved with whatever is available with amp.
Google AMP - Introduction
Google Accelerated Mobile Pages (Google-AMP) is Googles new open source project specially designed to build light-weight web pages using amp html. The main aim of this project is to make sure the AMP code works fine and loads fast on all possible devices such as smartphones and tablets.
AMP is just an extension to standard HTML. Few HTML tags have changed and AMP has added restriction on their usage. In this chapter, we will list out the html tags which are changed and the restrictions added onto them. The tags which deals with loading external resources, for example images, css, js, forms submission, video, audio etc., are changed.
Also there are lot of new features added to amp, for example amp-date-picker, amp-facebook, amp-ad, amp-analytics, amp-ad, amp-lightbox and much more which can be used directly in html pages. Rest others which are meant for display are used as it is.
With all these changes and new features, AMP promises to give faster loading, better performance for pages when used in live environment.
When you search anything in Google search on your mobile, the display that is seen in the google carousel at the top are mostly amp pages as shown below −
When you click the AMP page, the URL which you get in the address bar is as follows −
https://www.google.co.in/amp/s/m.timesofindia.com/sports/cricket/india-in-australia/to-hell-with-the-nets-boys-need-rest-ravi-shastri/amp_articleshow/67022458.cms

The URL is not coming from the publisher directly, but Google points it to its own copy on Google server which is a cached version and helps rendering the content faster in comparison to a non-amp page. This will happen only on devices or in Google emulator mode.
Sample Amp Page
An example for amp page is shown below −
<!doctype html>
<html amp>
   <head>
      <meta charset = "utf-8">
      <title>Amp Sample Page</title>
      <link rel = "canonical" href = "./regular-html-version.html">
      <meta name = "viewport" content = "width = device-width,
         minimum-scale = 1,initial-scale = 1">
      <style amp-custom>
         h1 {color: red}
      </style>
      <script type = application/json>{
         "vars": {
            "uid": "23870",
            "domain": "dummyurl.com",
            "sections": "us",
            "authors": "Hello World"
         }
      }
      </script>
      <style amp-boilerplate>
         body{
            -webkit-animation:
            -amp-start 8s steps(1,end) 0s 1 normal both;-moz-animation:
            -amp-start 8s steps(1,end) 0s 1 normal both;-ms-animation:
            -amp-start 8s steps(1,end) 0s 1 normal both;animation:
            -amp-start 8s steps(1,end) 0s 1 normal both
         }
         @-webkit-keyframes
         -amp-start{from{visibility:hidden}to{visibility:visible}}@-moz-keyframes
         -amp-start{from{visibility:hidden}to{visibility:visible}}@-ms-keyframes
         -amp-start{from{visibility:hidden}to{visibility:visible}}@-o-keyframes
         -amp-start{from{visibility:hidden}to{visibility:visible}}@keyframes
         -amp-start{from{visibility:hidden}to{visibility:visible}}
      </style>
      <noscript>
         <style amp-boilerplate>
            body{
               -webkit-animation:none;
               -moz-animation:none;
               -ms-animation:none;
               animation:none}
         </style>
      </noscript>

      <script async src = "https://cdn.ampproject.org/v0.js"></script>
   </head>
   <body>
      <h1>Amp Sample Page</h1>
      <p>
         <amp-img src = "imgurl.jpg" width = "300" height = "300"
            layout = "responsive"></amp-img>
      </p>
      <amp-ad width = "300" height = "250" type = "doubleclick"
         data-slot = "/4119129/no-ad">
         <div fallback>
            <p style = "color:green;font-size:25px;">No ads to Serve!</p>
         </div>
      </amp-ad>
   </body>
</html>
Dos and Donts in an AMP Page
Let us understand some dos and donts a programmer has to follow in an AMP page.
Mandatory Tags
There are some mandatory tags to be included in an amp page as given below −
We have to make sure that there is amp or added to the html tag as shown below −
<html amp>
   OR
<html >
<head> and <body> tags should be added to the html page.
The following mandatory meta tags should be added in the head section of the page; otherwise it will fail for amp validation
<meta charset = "utf-8">
<meta name = "viewport" content = "width=device-width, minimum-scale = 1, initial-scale = 1">
Link of rel = "canonical" to be added inside head tag
<link rel = "canonical" href = "./regular-html-version.html">
Style tag with amp-boilerplate −
<style amp-boilerplate>
   body{
      -webkit-animation:
      -amp-start 8s steps(1,end) 0s 1 normal both;-moz-animation:
      -amp-start 8s steps(1,end) 0s 1 normal both;-ms-animation:
      -amp-start 8s steps(1,end) 0s 1 normal both;animation:
      -amp-start 8s steps(1,end) 0s 1 normal both
   }
   @-webkit-keyframes
   -amp-start{from{visibility:hidden}to{visibility:visible}}@-moz-keyframes
   -amp-start{from{visibility:hidden}to{visibility:visible}}@-ms-keyframes
   -amp-start{from{visibility:hidden}to{visibility:visible}}@-o-keyframes
   -amp-start{from{visibility:hidden}to{visibility:visible}}@keyframes
   -amp-start{from{visibility:hidden}to{visibility:visible}}
</style>
Noscript tag with amp-boilerplate −
<noscript>
   <style amp-boilerplate>
      body{
         -webkit-animation:none;
         -moz-animation:none;
         -ms-animation:none;
         animation:none
      }
   </style>
</noscript>
Very important the amp script tag with async added to it as shown below −
<script async src = "https://cdn.ampproject.org/v0.js"> </script>
In case you want to add custom CSS to the page, please make a note here we cannot call external style sheet in amp pages. To add custom CSS , all your CSS has to go here as shown −
<style amp-custom>
   //all your styles here
</style>
The style tag should have amp-custom attribute added to it.
Scripts for AMP components
Note that scripts with src and type = text/javascript are strictly not allowed in a amp page. Only script tags which async and related to amp-components are allowed to be added in head section.
This section lists few scripts used for amp components as given below −
amp-ad
<script async custom-element = "amp-ad"
   src = "https://cdn.ampproject.org/v0/amp-ad-0.1.js">
</script>
amp-iframe
<script async custom-element = "amp-iframe"
   src = "https://cdn.ampproject.org/v0/amp-iframe-0.1.js">
</script>
Notice that the script has async and custom-element attribute with the name of the amp component to be loaded. Amp validates script tags based on async and custom-element property and does not allow any other script to be loaded. It does take type=application/json which we have added in the sample file as shown below
<type = application/json>
{
   "vars": {
      "uid": "23870",
      "domain": "dummyurl.com",
      "sections": "us",
      "authors": "Hello World"
   }
}
</script>
The above script can be used with other amp-components if required, for example for amp-analytics.
HTML Tags
So far we have seen the mandatory tags required in the amp page. Now we will discuss the HTML elements which are allowed/not allowed and restrictions imposed on them.
Here is the list of HTML tags that are allowed/not allowed −
| Sr.No | HTML Tag & Description |
|---|---|
| 1 | img This tag is replaced with amp-img. Using of direct img tag is not allowed in an AMP page |
| 2 | video Replaced with amp-video |
| 3 | audio Replaced with amp-audio |
| 4 | iframe Replaced with amp-iframe |
| 5 | object Not allowed |
| 6 | embed Not allowed |
| 7 | form Can be used as <form>. We need to add the script to work with form in an AMP page. Example − <script async custom-element = "amp-form" src = "https://cdn.ampproject.org/v0/amp-form-0.1.js"> </script> |
| 8 | Input elements Allowed.<input[type = image]>, <input[type = button]>, <input[type = password]>, <input[type = file]> are not allowed |
| 9 | <fieldset> Allowed |
| 10 | <label> Allowed |
| 11 | P, div, header,footer,section Allowed |
| 12 | button Allowed |
| 13 | a <a> tag is allowed with following condition, the href should not begin with javascript. If present the target attribute value must be _blank. |
| 14 | svg Not allowed |
| 15 | meta Allowed |
| 16 | Link Allowed. But does not allow to load external stylesheet. |
| 17 | style Allowed. It needs to have amp-boilerplate or amp-custom attribute to it. |
| 18 | base Not allowed |
| 19 | noscript Allowedd |
Comments
Conditional html comments are not allowed. For example −
<!--[if Chrome]> This browser is chrome (any version) <![endif]-->
HTML Events
Events that we use in html pages like onclick, onmouseover are not allowed in an AMP page.
We can use events as follows −
on = "eventName:elementId[.methodName[(arg1 = value, arg2 = value)]]"
Here is a example of event used on input element −
<input id = "txtname" placeholder = "Type here"
on = "inputthrottled:
AMP.setState({name: event.value})">
The event used is input-throlled.
Classes
You cannot have classes in your pages with prefix like -amp- or i-amp-. Besides, you can use class name as per your requirement.
Ids
You cannot have ids to your html elements prefixed with -amp or i-amp-. Besides, you can use ids to your html element as per your requirement.
Links
Having JavaScript to href is not allowed in amp pages.
Example
<a href = "javascript:callfunc();">click me</a>
Style Sheets
External stylesheets are not allowed in AMP page. It is possible to add the styles required for the page inside −
<style amp-custom> //all your styles here </style>
The style tag should have amp-custom attribute added to it.
@-rules
The following @-rules are allowed in stylesheets −
@font-face, @keyframes, @media, @page, @supports.@import will not be allowed. The support for same will be added in future.
@keyframes are allowed to be used inside <style amp-custom>. If there too many of @keyframes, it will be good to create <style amp-keyframes> tag and call this tag at the end of the amp document.
Class names, ids, tag names and attributes should not be prefixed with -amp- and i-amp- as they internally used in amp code which can cause conflicts if defined on the page too at runtime.
!important property is not allowed inside styling as amp wants to control the element sizing whenever required.
Custom Fonts
Stylesheet for custom fonts are allowed in AMP pages.
Example
<link rel = "stylesheet" href = "https://fonts.googleapis.com/css?family=Tangerine">
Fonts are whitelisted from following origins which can be used inside AMP pages.
Fonts.com − https://fast.fonts.net
Google Fonts − https://fonts.googleapis.com
Font Awesome − https://maxcdn.bootstrapcdn.com
Typekit − https://use.typekit.net/kitId.css (replace kitId accordingly)
Note − @font-face custom fonts are allowed in amp pages.
Example
@font-face {
font-family: myFirstFont;
src: url(dummyfont.woff);
}
AMP Runtime
Amp runtime environment is decided once the amp core file is loaded −
<script async src = "https://cdn.ampproject.org/v0.js"></script>
The core file takes care of loading the external resources, decides the prioritization of when to load them and also helps in validation of amp document when #development=1 is added to the amp URL.
Example
http://localhost:8080/googleamp/amppage.html#development=1
The above URL when executed in the browser will list the errors if failed for amp validation or displays amp validation successful message, if no errors.
AMP Components
Amp has a lot of amp-components added. They are basically used to handle the loading of the resource in an efficient manner. It also contains components to take care of animation, display data, displaying of ads, social widgets etc.
There are 2 types of components in AMP.
- Built-in
- External
Note − <amp-img> is a built-in component and available if the core amp js file is added. External components like <amp-ad>, <amp-facebook>, <amp-video> and many more needs respective js file related to the component to be added.
Common Attributes
Attributes such as width, height, layout, placeholder and fallback will be available for almost all the AMP components available. These attributes are very important for any AMP component as it decides the display of the component in the AMP page.
All the above features listed for AMP are discussed in details in the later chapters of this tutorial.
Note that all the examples in this tutorial are tested for devices and use the Google Mobile Emulator mode. Let us learn about this in detail now.
Google Mobile Emulator
To use the Google mobile emulator, open Chrome browser, right click and open the developer console as shown below −
We can see the developer tool for Chrome as shown above. Hit the link which you want to test in the browser. Observe that the page is displayed in the Desktop mode.
To the get the above page to test for devices, click on Toggle device toolbar as shown below −
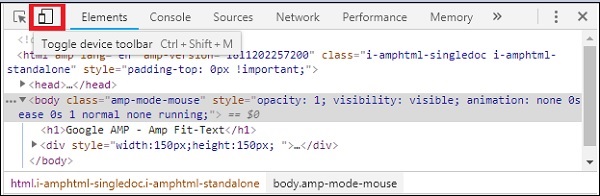
You can also use the shortcut key Ctrl+shift+M. This will change the desktop mode to device mode as shown below −
A list of devices can be seen as shown below −
You can choose the device you want to test the page. Please note all the pages in these tutorials are tested on the Google Mobile Emulator as shown above. The same feature is available for Firefox and recent Internet Explorer browsers too.
Google AMP - Images
Images used in Google AMP page is similar to how it is used in a standard html page, but only difference is the way the tag name is used with some additional properties. This chapter discusses these in detail.
Observe the syntaxes shown below −
Standard HTML
<img src = example.jpg width = 300 height = 250 alt = Example ></img>
In AMP page
<amp-img src = "example.jpg" alt = "Example" height = "300" width = "250" ><//amp-img>
Note that the tag from img is changed to amp-img.
Why to use amp-img instead of img?
The reason behind changing img to amp-img is to have more control on the page layout and the network request made to load the image. Amp adds lazy loading to the image resource and prioritizes the loading as per other resources available on the page.
Example
Observe the following code for a better understanding −
<!doctype html>
<html amp lang = "en">
<head>
<meta charset = "utf-8">
<script async src = "https://cdn.ampproject.org/v0.js"></script>
<title>Google AMP - Image</title>
<link rel = "canonical" href = "http://example.ampproject.org/articlemetadata.html">
<meta name = "viewport" content = "width = device-width,
minimum-scale = 1,initialscale = 1">
<style amp-boilerplate>
body{
-webkit-animation:
-amp-start 8s steps(1,end) 0s1 normal both;-moz-animation:
-amp-start 8s steps(1,end) 0s 1 normal both;-msanimation:
- amp-start 8s steps(1,end) 0s 1 normal both;animation:
-amp-start 8s steps(1,end) 0s 1 normal both
}
@-webkit-keyframes
-ampstart{from{visibility:hidden}to{visibility:visible}}@-moz-keyframes
-ampstart{from{visibility:hidden}to{visibility:visible}}@-ms-keyframes
-ampstart{from{visibility:hidden}to{visibility:visible}}@-o-keyframes
-ampstart{from{visibility:hidden}to{visibility:visible}}@keyframes
amp-start{from{visibility:hidden}to{visibility:visible}}
</style>
<noscript>
<style amp-boilerplate>
body{
-webkit-animation:none;
-moz-animation:none;
-msanimation:none;
animation:none
}
</style>
</noscript>
</head>
<body>
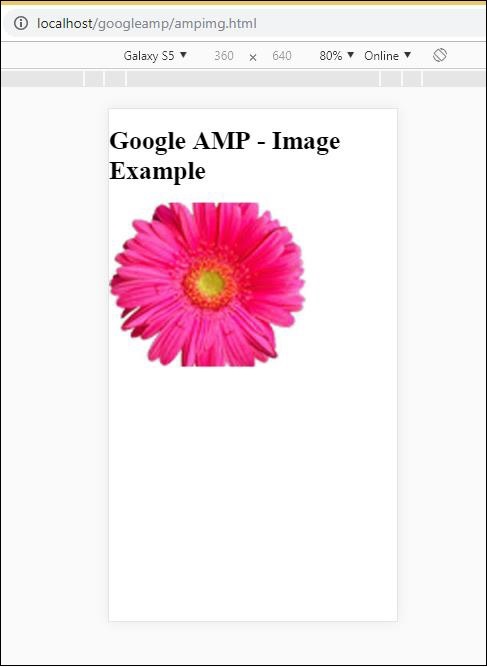
<h1>Google AMP - Image Example</h1>
<amp-img alt = "Beautiful Flower" src = "images/flower.jpg"
width = "246"
height = "205">
</amp-img>
</body>
</html>
Output
When you executed the code shown above, you will find the result as shown below −
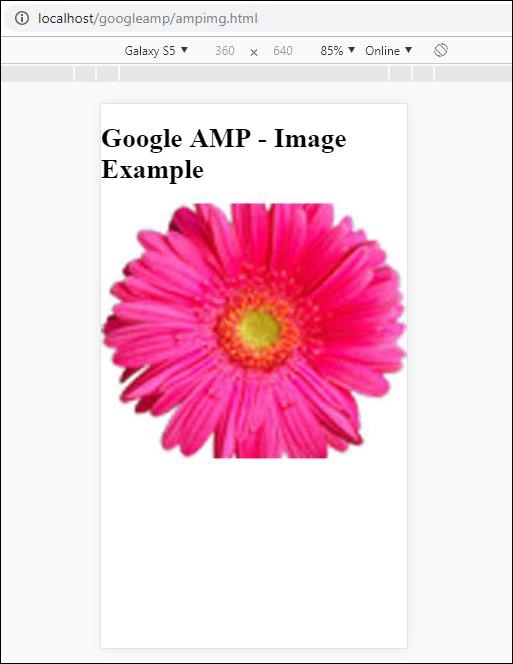
You can also make the image responsive by adding property layout = responsive to amp-img tag as shown below
Example
Observe the following code for a better understanding −
<amp-img alt = "Beautiful Flower" src = "images/flower.jpg" width = "246" height = "205" layout = "responsive"> </amp-img>
Output
When you executed the code shown above, you will find the result as shown below −
Google AMP - Form
This chapter explains how to work with form in Google AMP.
Note that forms tag remains the same as in standard HTML. AMP has added special restriction on the use of forms due to which we need to add the amp-form JavaScript file to work with forms.
Script for amp-form
<script async custom-element = "amp-form" src = "https://cdn.ampproject.org/v0/ampform-0.1.js"></script>
To use forms in a AMP page, we need to include the above script in the .html file. The amp-form JavaScript file supports http and xmlhttprequest for form submission. Using HTTP request the page is reloaded and with xmlhttprequest it does not reload the page acts like ajax request.
Form tag in AMP
For xmlhttprequest : <form method = "post" class = "p2" action-xhr = "submitform.php" target = "_top"> //Input fields here </form> For http : <form method = "post" class = "p2" action = "submitform.php" target = "_top"> //Input fields here </form>
Amp-form provides special attributes i.e, submit-error and submit-success to handle error and success when form is submitted.
Example
An example for amp-form is shown below −
<!doctype html>
<html amp lang = "en">
<head>
<meta charset = "utf-8">
<script async src = "https://cdn.ampproject.org/v0.js"></script>
<title>Google AMP - Form</title>
<link rel = "canonical" href = "ampform.html">
<meta name = "viewport" conten t = "width = device-width,
minimum-scale = 1,initialscale = 1">
<style amp-boilerplate>
body{
-webkit-animation:
-amp-start 8s steps(1,end) 0s1 normal both;-moz-animation:
-amp-start 8s steps(1,end) 0s 1 normal both;-msanimation:
-amp-start 8s steps(1,end) 0s 1 normal both;animation:
-amp-start 8s steps(1,end) 0s 1 normal both
}
@-webkit-keyframes
-ampstart{from{visibility:hidden}to{visibility:visible}}@-moz-keyframes
-ampstart{from{visibility:hidden}to{visibility:visible}}@-ms-keyframes
-ampstart{from{visibility:hidden}to{visibility:visible}}@-o-keyframes
-ampstart{from{visibility:hidden}to{visibility:visible}}@keyframes
-ampstart{from{visibility:hidden}to{visibility:visible}}
</style>
<noscript>
<style amp-boilerplate>
body{
-webkit-animation:none;
-moz-animation:none;
-msanimation:none;
animation:none
}
</style>
</noscript>
<script async custom-element = "amp-form"
   src = "https://cdn.ampproject.org/v0/amp-form-0.1.js">
</script>
<script async custom-template = "amp-mustache"
src = "https://cdn.ampproject.org/v0/amp-mustache-0.2.js">
</script>
<style amp-custom>
form.amp-form-submit-success [submit-success],
form.amp-form-submit-error [submit-error]{
margin-top: 16px;
}
form.amp-form-submit-success [submit-success] {
color: white;
background-color:gray;
}
form.amp-form-submit-error [submit-error] {
color: red;
}
form.amp-form-submit-success.hide-inputs > input {
display: none;
}
</style>
</head>
<body>
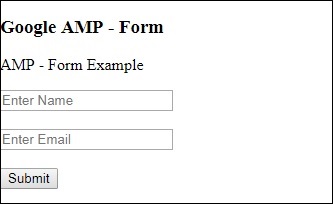
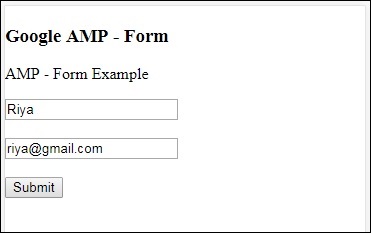
<h3>Google AMP - Form</h3>
<form method = "post"
class = "p2"
action-xhr = "submitform.php"
target = "_top">
<p>AMP - Form Example</p>
<div>
<input type = "text" name = "name" placeholder = "Enter
Name" required><br/><br/>
<input type = "email" name = "email"
placeholder = "Enter Email" required>
<br/>
<br/>
</div>
<input type = "submit" value = "Submit">
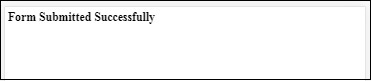
<div submit-success>
<template type = "amp-mustache">
Form Submitted! Thanks {{name}}.
</template>
</div>
<div submit-error>
<template type = "amp-mustache">
Error! {{name}}, please try again.
</template>
</div>
</form>
</body>
</html>
Output
When you executed the code shown above, you will find the result as shown below −
Now, enter the details and click the Submit button. The output screen displayed is as follows −
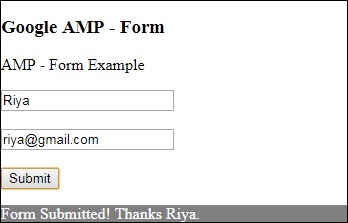
Observe that we have used amp-mustache for data-binding. The form is using action-xhr ie xmlhttprequest to submit form. We have used submitform.php file which returns the data in json format.
<form method = "post" class = "p2" action-xhr = "submitform.php" target = "_top"> </form>
submitform.php
<?php
if(!empty($_POST)){
$domain_url = (isset($_SERVER['HTTPS']) ? "https" : "http") . "://$_SERVER[HTTP_HOST]";
header("Content-type: application/json");
header("AMP-Access-Control-Allow-Source-Origin: " . $domain_url);
header("Access-Control-Expose-Headers: AMP-Access-Control-Allow-Source-Origin");
$myJSON = json_encode($_POST);
echo $myJSON;
}
?>
For the form to work using xmlhttprequest, we need to add headers as per the CORS specification. Details of response headers added to submitform.php are shown below −
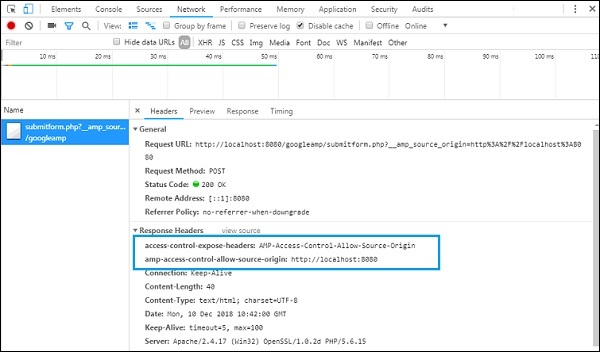
For the form to work, we need to add headers such as access-control-expose-headers with value AMP-Access-Control-Allow-Source-Origin and amp-access-controlallow- source-origin −http://localhost:8080.
Note that we are using a php file and apache server. In php file, we have added the required headers as shown below −
<?php
if(!empty($_POST)){
$domain_url = (isset($_SERVER['HTTPS']) ? "https" : "http") . "://$_SERVER[HTTP_HOST]";
header("Content-type: application/json");
header("AMP-Access-Control-Allow-Source-Origin: " . $domain_url);
header("Access-Control-Expose-Headers: AMP-Access-Control-Allow-Source-Origin");
$myJSON = json_encode($_POST);
echo $myJSON;
}
?
?>
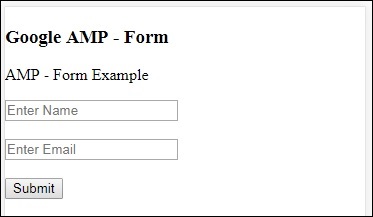
In case we use a normal http request the page will get reloaded as shown below −
For http request we have used form as follows −
<form method = "GET" class = "p2" action = "submitform.php" target = "_top"> </form>
Example
Observe the following code for a better understanding −
<!doctype html>
<html amp lang = "en">
<head>
<meta charset = "utf-8">
<script async src = "https://cdn.ampproject.org/v0.js"></script>
<title>Google AMP - Form</title>
<link rel = "canonical" href = "ampform.html">
<meta name = "viewport" content = "width = device-width,minimum-scale = 1,initialscale = 1">
<style amp-boilerplate>
body{
-webkit-animation:
-amp-start 8s steps(1,end) 0s1 normal both;-moz-animation:
-amp-start 8s steps(1,end) 0s 1 normal both;-msanimation:
-amp-start 8s steps(1,end) 0s 1 normal both;animation:
-amp-start 8s steps(1,end) 0s 1 normal both
}
@-webkit-keyframes
-ampstart{from{visibility:hidden}to{visibility:visible}}@-moz-keyframes
-ampstart{from{visibility:hidden}to{visibility:visible}}@-ms-keyframes
-ampstart{from{visibility:hidden}to{visibility:visible}}@-o-keyframes
-ampstart{from{visibility:hidden}to{visibility:visible}}@keyframes
-ampstart{from{visibility:hidden}to{visibility:visible}}
</style>
<noscript>
<style amp-boilerplate>
body {
-webkit-animation:none;
-moz-animation:none;
-msanimation:none;
animation:none}
>/style>
</noscript>
<script async custom-element = "amp-form"
src = "https://cdn.ampproject.org/v0/amp-form-0.1.js">
</script>
<script async custom-template = "amp-mustache"
src = "https://cdn.ampproject.org/v0/amp-mustache-0.2.js">
</script>
<style amp-custom>
form.amp-form-submit-success [submit-success],
form.amp-form-submit-error [submit-error]{
margin-top: 16px;
}
form.amp-form-submit-success [submit-success] {
color: white;
background-color:gray;
}
form.amp-form-submit-error [submit-error] {
color: red;
}
form.amp-form-submit-success.hide-inputs >
input {
display: none;
}
</style>
</head>
<body>
<h3>Google AMP - Form</h3>
<form method = "GET" class = "p2" action = "submitform.php" target = "_top">
<p>AMP - Form Example</p>
<div>
<input type = "text" name = "name" placeholder = "Enter Name" required>
<br/>
<br/>
<input type = "email" name = "email" placeholder = "Enter Email" required>
<br/>
<br/>
<div>
<input type = "submit" value = "Submit">
<div submit-success>
<template type = "amp-mustache">
Form Submitted! Thanks {{name}}.
</template>
</div>
<div submit-error>
<template type = "amp-mustache">
Error! {{name}}, please try again.
</template>
</div>
</form>
</body>
</html>
Output
When you executed the code shown above, you will find the result as shown below −
Google AMP - Iframes
Google amp-iframe is used to show iframes on the page.There are some conditions to be added to amp-iframe and thus we cannot use normal iframes on the page. This chapter discusses more about this.
Conditions to be Followed for iFrames
The conditions to be taken care while using iframe in AMP pages are as follows −
The url used on an iframe has to be a https request or data-URI or using srcdoc attribute.
amp-iframe by default will have sandbox attribute added to it. The sandbox attribute will be set to empty. A empty value to sandbox means that the iframe is maximum sandboxed (extra restriction on iframe). We can add values to the sandbox which will discuss with the help of an example below.
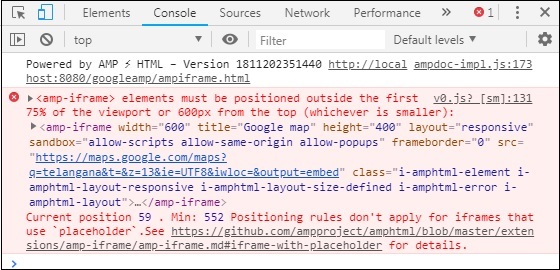
A amp-iframe cannot be displayed at the top of the page, it should be almost 600px away from the top or within the first 75% of the viewport when scrolled on top. Incase you have to display iframe at the start, you need to add placeholder to the iframe which we will discuss with the help of examples later in the tutorial.
amp-iframe must not have same origin as the container. For example, if your main site is on www.xyz.com , you cannot have iframe src as www.xyz.com/urlname. It can take other such as.xyz.com, example.xyz.com etc.
To work with iframes, we need to add the following script −
<script async custom-element = "amp-iframe" src = "https://cdn.ampproject.org/v0/amp-iframe-0.1.js"></script>
Amp-iframe format is as follows −
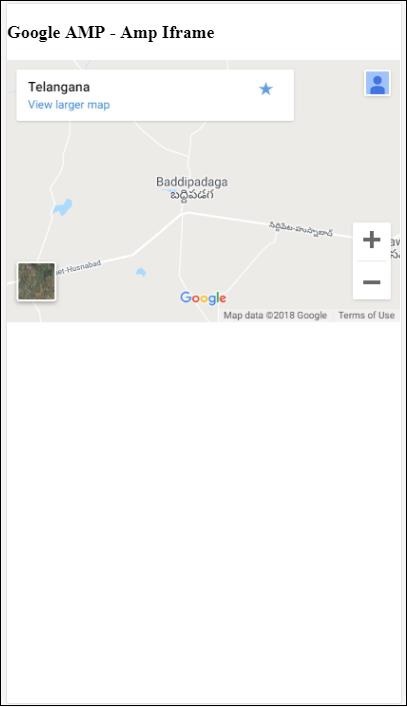
<amp-iframe width = "600" title = "Google map" height = "400" layout = "responsive" sandbox = "allow-scripts allow-same-origin allow-popups" frameborder = "0" src = "https://maps.google.com/maps?q=telangana&t=&z=13&ie=UTF8&iwloc=&output=embed"> </amp-iframe>
Let us understand this with the help of a working example where will use iframe to display Google maps as given below.
Example
<!doctype html>
<html amp lang = "en">
<head>
<meta charset = "utf-8">
<script async src = "https://cdn.ampproject.org/v0.js"></script>
<title>Google AMP - Amp Iframe</title>
<link rel = "canonical" href = "http://example.ampproject.org/article-metadata.html">
<meta name = "viewport" content = "width = device-width,minimum-scale = 1,initial-scale = 1">
<style amp-boilerplate>
body{
-webkit-animation:-amp-start 8s steps(1,end) 0s
1 normal both;-moz-animation:
-amp-start 8s steps(1,end) 0s 1 normal both;-ms-animation:
-amp-start 8s steps(1,end) 0s 1 normal both;animation:
-amp-start 8s steps(1,end) 0s 1 normal both}
@-webkit-keyframes
-amp-start{from{visibility:hidden}to{visibility:visible}}@-moz-keyframes
-amp-start{from{visibility:hidden}to{visibility:visible}}@-ms-keyframes
-amp-start{from{visibility:hidden}to{visibility:visible}}@-o-keyframes
-amp-start{from{visibility:hidden}to{visibility:visible}}@keyframes
-amp-start{from{visibility:hidden}to{visibility:visible}}
</style><noscript>
<style amp-boilerplate>
body{-webkit-animation:none;-moz-animation:
none;-ms-animation:none;animation:none}
</style></noscript>
<script async custom-element = "amp-iframe"
src = "https://cdn.ampproject.org/v0/amp-iframe-0.1.js"
></script>
<style>
div {
height:850px;
text-align:center;
}
</style>
</head>
<body>
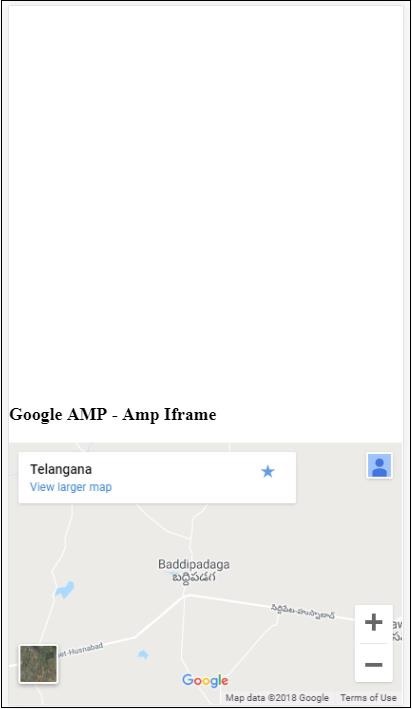
<h3>Google AMP - Amp Iframe</h3>
<div>
Google Maps in Iframe
</div>
<h3>Google AMP - Amp Iframe</h3>
<amp-iframe width = "600"
title = "Google map"
height = "400"
layout = "responsive"
sandbox = "allow-scripts allow-same-origin allow-popups"
frameborder = "0" src = "https://maps.google.com/maps?q=telangana&t=&z=13&ie=UTF8&iwloc=&output=embed">
</amp-iframe>
</body>
</html>
Output
Observe that we have placed the iframe at more than 600px from the top. It gives an error as shown below −
In the example above, we have used sandbox with values as given below −
sandbox = "allow-scripts allow-same-origin allow-popups"
Sandbox attribute acts like a permission to the contents to be loaded inside iframe. Here we are allowing all the scripts to be loaded which are coming from the Google maps links. Incase we are not giving sandbox attribute, this is the error displayed which blocks the content to be loaded in the iframe −

Note that we have to give the right permission to the sandbox. You can find the details of all the permissions to be given to sandbox here − https://developer.mozilla.org/en-US/docs/Web/HTML/Element/iframe#attr-sandbox.
We can make use of placeholder attribute inside an amp-iframe to get rid of the more than 600px condition.
A working example for the same is given below −
<!doctype html>
<html amp lang = "en">
<head>
<meta charset = "utf-8">
<script async src = "https://cdn.ampproject.org/v0.js"></script>
<title>Google AMP - Amp Iframe</title>
<link rel = "canonical" href = "http://example.ampproject.org/article-metadata.html">
<meta name = "viewport" content = "width = device-width, minimum-scale=1,initial-scale=1">
<style amp-boilerplate>
body{
-webkit-animation:-amp-start 8s steps(1,end) 0s
1 normal both;-moz-animation:
-amp-start 8s steps(1,end) 0s 1 normal both;-ms-animation:
-amp-start 8s steps(1,end) 0s 1 normal both;animation:
-amp-start 8s steps(1,end) 0s 1 normal both
}
@-webkit-keyframes
-amp-start{from{visibility:hidden}to{visibility:visible}}@-moz-keyframes
-amp-start{from{visibility:hidden}to{visibility:visible}}@-ms-keyframes
-amp-start{from{visibility:hidden}to{visibility:visible}}@-o-keyframes
-amp-start{from{visibility:hidden}to{visibility:visible}}@keyframes
-amp-start{from{visibility:hidden}to{visibility:visible}}
</style>
<noscript>
<style amp-boilerplate>
body{
-webkit-animation:none;
-moz-animation:none;
-ms-animation:none;
animation:none
}
</style>
</noscript>
<script async custom-element = "amp-iframe"
src = "https://cdn.ampproject.org/v0/amp-iframe-0.1.js">
</script>
<style>
div {
height:850px;
text-align:center;
}
</style>
</head>
<body>
<h3>Google AMP - Amp Iframe</h3>
<amp-iframe width = "600"
title = "Google map"
height = "400"
layout = "responsive"
sandbox = "allow-scripts allow-same-origin allow-popups"
frameborder = "0"
src = "https://maps.google.com/maps?q=telangana&t=&z=13&ie=UTF8&iwloc=&output=embed">
<amp-img layout = "fill" src = "images/loading.jpg" placeholder></amp-img>
</amp-iframe>
</body>
</html>
We have used amp-img as a placeholder as follows −
<amp-iframe width = "600" title = "Google map" height = "400" layout = "responsive" sandbox = "allow-scripts allow-same-origin allow-popups" frameborder = "0" src = "https://maps.google.com/maps?q=telangana&t=&z=13&ie = UTF8&iwloc = &output = embed"> <amp-img layout = "fill" src = "images/loading.jpg" placeholder></amp-img> </amp-iframe>
In this case, the restriction of 600px and amp-iframe in 75% viewport is not considered. A loading indicator (three dots) are shown on the image is used as placeholder, which is basically for the amp-iframe src. Once the iframe contents are loaded, the image is removed and the iframe content is shown as displayed in the output shown below −
Output
Google AMP - Video
Amp-video in amp is a standard html5 video used to play direct video embeds. In this chapter, let us understand how to work with and use amp-video.
To work with amp-video we need to add following script −
<script async custom-element = "amp-video" src = "https://cdn.ampproject.org/v0/amp-video-0.1.js"> </script>
Amp-video has src attribute which has the video resource to be loaded, which is lazily loaded by amp at runtime. Besides, all the features are almost same as html5 video tag.
The following are the nodes that are to be added to amp video −
Source − You can add different media files to be played using this tag.
Track − This tag lets you enable the subtitles for the video.
Placeholder − This placeholder tag will show content before the video starts.
Fallback − This tag will be called when the browser does not support HTML5 video.
Format of amp-video tag
The format for amp-video tag is shown here −
<amp-video controls width = "640" height = "360"
layout = "responsive" poster = "images/videoposter.png">
<source src = "video/bunny.webm" type = "video/webm" />
<source src = "video/samplevideo.mp4" type = "video/mp4" />
<div fallback>
<p>This browser does not support the video element.</p>
</div>
</amp-video>
Let us understand amp-video using a working example as shown below −
Example
<!doctype html>
<html amp lang = "en">
<head>
<meta charset = "utf-8">
<script async src = "https://cdn.ampproject.org/v0.js"></script>
<title>Google AMP - Amp Video</title>
<link rel = "canonical" href = "http://example.ampproject.org/article-metadata.html">
<meta name = "viewport" content = "width = device-width, minimum-scale = 1,initial-scale=1">
<style amp-boilerplate>
body {
-webkit-animation:
-amp-start 8s steps(1,end) 0s 1 normal both;-moz-animation:
-amp-start 8s steps(1,end) 0s 1 normal both;-ms-animation:
-amp-start 8s steps(1,end) 0s 1 normal both;animation:
-amp-start 8s steps(1,end) 0s 1 normal both}
@-webkit-keyframes
-amp-start{from{visibility:hidden}to{visibility:visible}}@-moz-keyframes
-amp-start{from{visibility:hidden}to{visibility:visible}}@-ms-keyframes
-amp-start{from{visibility:hidden}to{visibility:visible}}@-o-keyframes
-amp-start{from{visibility:hidden}to{visibility:visible}}@keyframes
-amp-start{from{visibility:hidden}to{visibility:visible}}
</style>
<noscript>
<style amp-boilerplate>
body {
-webkit-animation:none;
-moz-animation:none;
-ms-animation:none;
animation:none
}
</style>
</noscript>
<script async custom-element = "amp-video"
src = "https://cdn.ampproject.org/v0/amp-video-0.1.js">
</script>
</head>
<body>
<h3>Google AMP - Amp Video</h3>
<amp-video controls
width = "640"
height = "360"
layout = "responsive"
poster = "images/videoposter.png">
<source src = "video/bunny.webm" type = "video/webm" />
<source src = "video/samplevideo.mp4" type = "video/mp4" />
<div fallback>
<p>This browser does not support the video element.</p>
</div>
</amp-video>
</body>
</html>
Output
The output of the code given above is as shown below −

Attributes Available for amp-video
The attributes available for amp-video are listed in the table here −
| Sr.No | Attributes & Description |
|---|---|
| 1 | src If the <source> node is not present, then src has to be specified and it has be https:// url. |
| 2 | poster The poster takes img url which is displayed before the video starts. |
| 3 | autoplay Having this attribute on amp-video will autoplay the video if browser supports .The video will play in a muted mode and user will have to tap on the video to unmute it. |
| 4 | controls Having this attribute on amp-video will show controls on the video similar to html5 video. |
| 5 | loop If this attribute is present on amp-video, the video will play again once finished. |
| 6 | crossorigin This attribute comes into picture if the resource to play video are on a different origin. |
| 7 | rotate-to-fullscreen If the video is visible, the video displays fullscreen after the user rotates their device into landscape mode |
Autoplay AMP Video
We can use autoplay attribute incase we need to autoplay the video. This feature will work as per browser support. Note that the video will be in mute state when autoplaying. When user taps on the video, it will be unmuted.
Let us the autoplay feature with the help of a working example as given below −
Example
<!doctype html>
<html amp lang = "en">
<head>
<meta charset = "utf-8">
<script async src = "https://cdn.ampproject.org/v0.js"></script>
<title>Google AMP - Amp Video</title>
<link rel = "canonical" href = "http://example.ampproject.org/article-metadata.html">
<meta name = "viewport" content = "width=device-width,minimum-scale = 1, initial-scale = 1">
<style amp-boilerplate>
body {
-webkit-animation:
-amp-start 8s steps(1,end) 0s 1 normal both;
-moz-animation:-amp-start 8s steps(1,end) 0s 1 normal both;-ms-animation:
-amp-start 8s steps(1,end) 0s 1 normal both;animation:
-amp-start 8s steps(1,end) 0s 1 normal both
}
@-webkit-keyframes
-amp-start{from{visibility:hidden}to{visibility:visible}}@-moz-keyframes
-amp-start{from{visibility:hidden}to{visibility:visible}}@-ms-keyframes
-amp-start{from{visibility:hidden}to{visibility:visible}}@-o-keyframes
-amp-start{from{visibility:hidden}to{visibility:visible}}@keyframes
-amp-start{from{visibility:hidden}to{visibility:visible}}
</style>
<noscript>
<style amp-boilerplate>
body{
-webkit-animation:none;
-moz-animation:none;
-ms-animation:none;
animation:none
}
</style>
</noscript>
<script async custom-element = "amp-video" src = "
https://cdn.ampproject.org/v0/amp-video-0.1.js">
</script>
</head>
<body>
<h3>Google AMP - Amp Video Autoplay</h3>
<amp-video controls
width = "640"
height = "360"
layout = "responsive"
poster = "images/videoposter.png" autoplay>
<source src = "video/bunny.webm" type = "video/webm" />
<source src = "video/samplevideo.mp4" type = "video/mp4" />
<div fallback>
<p>This browser does not support the video element.</p>
</div>
</amp-video>
</body>
</html>
You can activate controls to the video by adding controls attribute as shown in the following code −
<amp-video controls
width = "640"
height = "360"
layout = "responsive"
poster = "images/videoposter.png" autoplay>
<source src = "video/bunny.webm" type = "video/webm" />
<source src = "video/samplevideo.mp4" type = "video/mp4" />
<div fallback>
<p>This browser does not support the video element.</p>
</div>
</amp-video>
Google AMP - Button
Buttons are another feature of AMP. Note that there is no change for buttons in AMP and they are used like standard a HTML button tag. The only difference with buttons in AMP page is the working of events on it.
In this chapter, we will see some examples to show the working of button and how to use it with AMP components.
Sample Code for Lightbox
The following example shows us how to use button to show/hide amp-lightbox as shown below −
<!doctype html>
<html amp lang = "en">
<head>
<meta charset = "utf-8">
<script async src = "https://cdn.ampproject.org/v0.js"></script>
<title>Google AMP - Amp Lightbox</title>
<link rel = "canonical" href = "http://example.ampproject.org/article-metadata.html">
<meta name = "viewport" content ="width = device-width,minimum-scale = 1,initial-scale = 1">
<style amp-boilerplate>
body{
-webkit-animation:-amp-start 8s steps(1,end) 0s 1 normal both;-moz-animation:
-amp-start 8s steps(1,end) 0s 1 normal both;-ms-animation:
-amp-start 8s steps(1,end) 0s 1 normal both;animation:
-amp-start 8s steps(1,end) 0s 1 normal both
}
@-webkit-keyframes
-amp-start{from{visibility:hidden}to{visibility:visible}}@-moz-keyframes
-amp-start{from{visibility:hidden}to{visibility:visible}}@-ms-keyframes
-amp-start{from{visibility:hidden}to{visibility:visible}}@-o-keyframes
-amp-start{from{visibility:hidden}to{visibility:visible}}@keyframes
-amp-start{from{visibility:hidden}to{visibility:visible}}
</style>
<noscript>
<style amp-boilerplate>
body{
-webkit-animation:none;-moz-animation:none;-ms-an
imation:none;animation:none
}
</style>
</noscript>
<script async custom-element = "amp-lightbox"
src = "https://cdn.ampproject.org/v0/amp-lightbox-0.1.js">
</script>
<style amp-custom>
amp-img {
border: 1px solid #ddd;
border-radius: 4px;
padding: 5px;
}
button{
background-color:
#ACAD5C; color: white;
padding: 12px 20px;
border: none;
border-radius: 4px;
cursor: pointer;
float: left;
}
.lightbox {
background: rgba(211,211,211,0.8);
width: 100%;
height: 100%;
position: absolute;
display: flex;
align-items: center;
justify-content: center;
}
</style>
</head>
<body>
<h3>Google AMP - Amp Lightbox</h3>
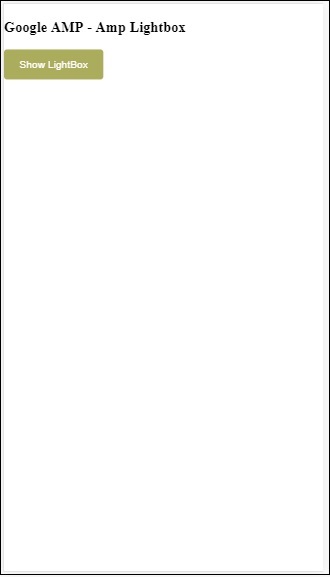
<button on = "tap:my-lightbox">
Show LightBox
</button>
<amp-lightbox id = "my-lightbox" layout = "nodisplay">
<div class = "lightbox" on = "tap:my-lightbox.close" tabindex = "0">
<amp-img alt = "Beautiful Flower"
src = "images/flower.jpg"
width = "246"
height = "205">
</amp-img>
</div>
</amp-lightbox>
</body>
</html>
Output
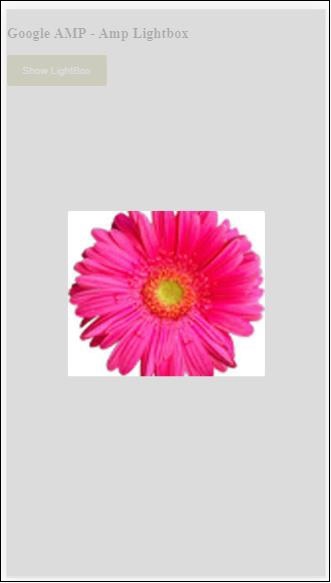
Now, you can click anywhere on the screen to close the lightbox.
In the above example, we have used a button using the code as shown below −
<button on = "tap:my-lightbox"> Show LightBox </button> Next, we have added action on the button using on attribute as shown: on = "tap:my-lightbox"
The action will take place when you tap on the button. Note that the id of the lightbox is given to it. When the user taps on the button, the lightbox will be opened. Similarly, you can use the button with on action with any component to interact with it.
Google AMP - Timeago
Timeago will give the timestamp details by comparing it to the past, for example x hours ago. In this chapter, let us discuss in detail about this feature.
To insert this feature in our work, we need to add the script given below to the .html page −
<script async custom-element = "amp-timeago" src = "https://cdn.ampproject.org/v0/amp-timeago-0.1.js"> </script>
The amp-timeago tag looks as shown below −
<amp-timeago layout = "fixed" width = "160" height = "20" datetime = "2018-10-01T00:37:33.809Z" locale = "en">Monday 01 October 2018 00.37 </amp-timeago>
Let us understand this with the help of a working example as shown below −
Example
<!doctype html>
<html amp lang = "en">
<head>
<meta charset = "utf-8">
<script async src = "https://cdn.ampproject.org/v0.js"></script>
<title>Google AMP - TimeAgo</title>
<link rel = "canonical" href = " http://example.ampproject.org/article-metadata.html">
<meta name = "viewport" content = "width = device-width,minimum-scale = 1,initial- scale = 1">
<style amp-boilerplate>
body{
-webkit-animation:-amp-start 8s steps(1,end)
0s 1 normal both;-moz-animation:
-amp-start 8s steps(1,end) 0s 1 normal both;-ms-animation:
-amp-start 8s steps(1,end) 0s 1 normal both;animation:
-amp-start 8s steps(1,end) 0s 1 normal both
}
@-webkit-keyframes
-amp-start{from{visibility:hidden}to{visibility:visible}}@-moz-keyframes
-amp-start{from{visibility:hidden}to{visibility:visible}}@-ms-keyframes
-amp-start{from{visibility:hidden}to{visibility:visible}}@-o-keyframes
-amp-start{from{visibility:hidden}to{visibility:visible}}@keyframes
-amp-start{from{visibility:hidden}to{visibility:visible}}
</style>
<noscript>
<style amp-boilerplate>
body{
-webkit-animation:none;-moz-animation:none;-ms
-animation:none;animation:none
}
</style>
</noscript>
<script async custom-element="amp-timeago"
src = "https://cdn.ampproject.org/v0/amp-timeago-0.1.js">
</script>
</head>
<body>
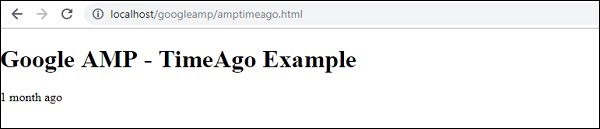
<h1>Google AMP - TimeAgo Example</h1>
<amp-timeago
layout = "fixed"
width = "160"
height = "20"
datetime = "2018-10-01T00:37:33.809Z"
locale = "en">Monday 01 October 2018 00.37
</amp-timeago>
</body>
</html>
Output
By default, the locale is set to en. We can change the same and display timeago in the locale as needed. Locales which can be used with timeago tag are given in the table shown below.
| Sr.No | Locale & Description |
|---|---|
| 1 | ar Arabic |
| 2 | be Belarusian |
| 3 | be Belarusian |
| 4 | bg Bulgarian |
| 5 | ca Catalan |
| 6 | da Danish |
| 7 | de German |
| 8 | el Greek |
| 9 | en English |
| 10 | enShort English - short |
| 11 | es Spanish |
| 12 | eu Basque |
| 13 | fi Finnish |
| 14 | fr French |
| 15 | he Hebrew |
| 16 | hu Hungarian |
| 17 | inBG Bangla |
| 18 | inHI Hindi |
| 19 | inID Malay |
| 20 | it Italian |
| 21 | ja Japanese |
| 22 | ko Korean |
| 23 | ml Malayalam |
| 24 | nbNO Norwegian Bokml |
| 25 | nl Dutch |
| 26 | nnNO Norwegian Nynorsk |
| 27 | pl Polish |
| 28 | ptBR Portuguese |
| 29 | ro Romanian |
| 30 | ru Russian |
| 31 | sv Swedish |
| 32 | ta Tamil |
| 33 | th Thai |
| 34 | tr Turkish |
| 35 | uk Ukrainian |
| 36 | vi Vietnamese |
| 37 | zhCN Chinese |
| 38 | zhTW Taiwanese |
Let us discuss few locales using working examples as given below −
Example
<!doctype html>
<html amp lang = "en">
<head>
<meta charset = "utf-8">
<script async src = "https://cdn.ampproject.org/v0.js"></script>
<title>Google AMP - TimeAgo Using Locale</title>
<link rel = "canonical" href = "http://example.ampproject.org/article-metadata.html">
<meta name = "viewport" content = "width = device-width,minimum-scale = 1, initial-scale = 1">
<style amp-boilerplate>
body{
-webkit-animation:
-amp-start 8s steps(1,end) 0s 1 normal both;-moz-animation:
-amp-start 8s steps(1,end) 0s 1 normal both;-ms-animation:
-amp-start 8s steps(1,end) 0s 1 normal both;animation:
-amp-start 8s steps(1,end) 0s 1 normal both
}
@-webkit-keyframes
-amp-start{from{visibility:hidden}to{visibility:visible}}@-moz-keyframes
-amp-start{from{visibility:hidden}to{visibility:visible}}@-ms-keyframes
-amp-start{from{visibility:hidden}to{visibility:visible}}@-o-keyframes
-amp-start{from{visibility:hidden}to{visibility:visible}}@keyframes
-amp-start{from{visibility:hidden}to{visibility:visible}}
</style>
<noscript>
<style amp-boilerplate>
body{
-webkit-animation:none;
-moz-animation:none;-ms
-animation:none;
animation:none
}
</style>
</noscript>
<script async custom-element = "amp-timeago"
src = "https://cdn.ampproject.org/v0/amp-timeago-0.1.js">
</script>
</head>
<body>
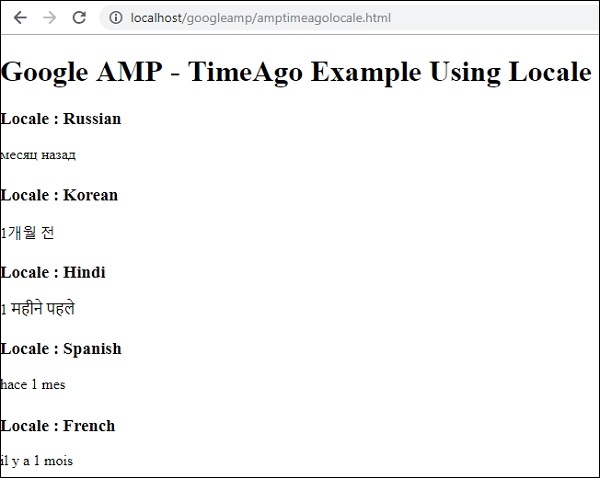
<h1>Google AMP - TimeAgo Example Using Locale</h1>
<h3>Locale : Russian</h3>
<amp-timeago layout = "fixed"
width = "160" height = "20"
datetime = "2018-10-01T00:37:33.809Z"
locale = "ru">
Monday 01 October 2018 00.37
</amp-timeago>
<h3>Locale : Korean</h3>
<amp-timeago
layout = "fixed"
width = "160"
height = "20"
datetime = "2018-10-01T00:37:33.809Z"
locale = "ko">
Monday 01 October 2018 00.37
</amp-timeago>
<h3>Locale : Hindi</h3>
<amp-timeago
layout = "fixed"
width = "160"
height = "20"
datetime = "2018-10-01T00:37:33.809Z"
locale = "inHI">
Monday 01 October 2018 00.37
</amp-timeago>
<h3>Locale : Spanish</h3>
<amp-timeago
layout = "fixed"
width = "160"
height = "20"
datetime = "2018-10-01T00:37:33.809Z"
locale = "es">
Monday 01 October 2018 00.37
</amp-timeago>
<h3>Locale : French</h3>
<amp-timeago
layout = "fixed"
width = "160"
height = "20"
datetime = "2018-10-01T00:37:33.809Z"
locale = "fr">
Monday 01 October 2018 00.3
</amp-timeago>
</body>
</html>
Output
The output of the above code is as shown below −
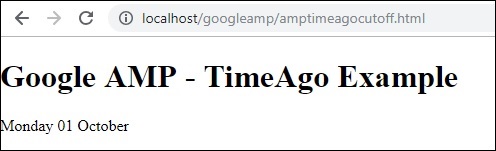
Incase the "X time ago" display needs to be changed, we can use the cutoff attribute with timeago. Cutoff takes values in seconds to get rid of the ago display.
Let us understand this with the help of a working example as given below −
Example
<!doctype html>
<html amp lang = "en">
<head>
<meta charset = "utf-8">
<script async src = "https://cdn.ampproject.org/v0.js"></script>
<title>Google AMP - TimeAgo</title>
<link rel = "canonical" href = "http://example.ampproject.org/article-metadata.html">
<meta name = "viewport" content = "width = device-width,minimum-scale=1, initial-scale=1">
<style amp-boilerplate>
body{
-webkit-animation:
-amp-start 8s steps(1,end) 0s 1 normal both;-moz-animation:
-amp-start 8s steps(1,end) 0s 1 normal both;-ms-animation:
-amp-start 8s steps(1,end) 0s 1 normal both;animation:
-amp-start 8s steps(1,end) 0s 1 normal both
}
@-webkit-keyframes
-amp-start{from{visibility:hidden}to{visibility:visible}}@-moz-keyframes
-amp-start{from{visibility:hidden}to{visibility:visible}}@-ms-keyframes
-amp-start{from{visibility:hidden}to{visibility:visible}}@-o-keyframes
-amp-start{from{visibility:hidden}to{visibility:visible}}@keyframes
-amp-start{from{visibility:hidden}to{visibility:visible}}
</style>
<noscript>
<style amp-boilerplate>
body{
-webkit-animation:none;
-moz-animation:none;
-ms-animation:none;
animation:none
}
</style>
</noscript>
<script async custom-element = "amp-timeago"
src = "https://cdn.ampproject.org/v0/amp-timeago-0.1.js">
</script>
</head>
<body>
<h1>Google AMP - TimeAgo Example</h1>
<amp-timeago
layout = "fixed"
width = "160"
height = "20"
datetime = "2018-10-01T00:37:33.809Z"
locale = "en"
cutoff = "300">
Monday 01 October 2018 00.37
</amp-timeago>
</body>
</html>
Output
Google AMP - Mathml
Using MathML, we can display maths formula. In this chapter let us see a working example how to use MathML and work with few mathematical formulae to display the same.
To work with MathML, we need to include the following javascript file −
<script async custom-element = "amp-mathml" src = "https://cdn.ampproject.org/v0/amp-mathml-0.1.js"> </script>
MathML AMP tag
The mathML amp tag has the format as shown here −
<amp-mathml layout = "container"
data-formula = "\[x = {-b \pm \sqrt{b^2-4ac} \over 2a}.\]">
</amp-mathml>
Note that the data-formula is the mandatory attribute to which the formula is given.
Example
Let us understand this tag better with the help of an example.
<!doctype html>
<html amp lang = "en">
<head>
<meta charset = "utf-8">
<script async src = "https://cdn.ampproject.org/v0.js"></script>
<title>Google AMP - MathML</title>
<link rel = "canonical" href = " http://example.ampproject.org/article-metadata.html">
<meta name = "viewport" content = "width = device-width,minimum-scale = 1,initial-scale = 1">
<style amp-boilerplate>
body{
-webkit-animation:
-amp-start 8s steps(1,end) 0s 1 normal both;-moz-animation:
-amp-start 8s steps(1,end) 0s 1 normal both;-ms-animation:
-amp-start 8s steps(1,end) 0s 1 normal both;animation:
-amp-start 8s steps(1,end) 0s 1 normal both
}
@-webkit-keyframes
-amp-start{from{visibility:hidden}to{visibility:visible}}@-moz-keyframes
-amp-start{from{visibility:hidden}to{visibility:visible}}@-ms-keyframes
-amp-start{from{visibility:hidden}to{visibility:visible}}@-o-keyframes
-amp-start{from{visibility:hidden}to{visibility:visible}}@keyframes
-amp-start{from{visibility:hidden}to{visibility:visible}}
</style>
<noscript>
<style amp-boilerplate>
body{
-webkit-animation:none;
-moz-animation:none;
-ms-animation:none;
animation:none
}
</style>
</noscript>
<script async custom-element = "amp-mathml"
src = "https://cdn.ampproject.org/v0/amp-mathml-0.1.js">
</script>
</head>
<body>
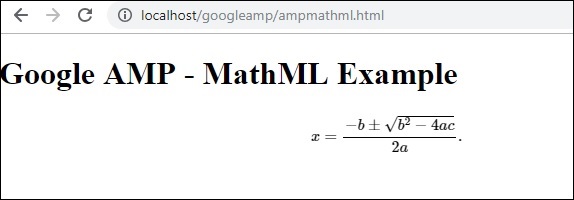
<h1>Google AMP - MathML Example</h1>
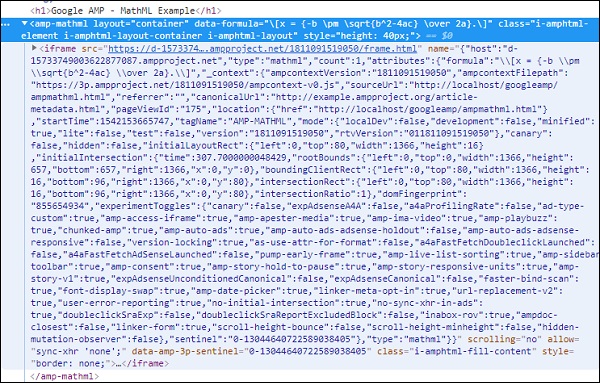
<amp-mathml layout = "container"
data-formula = "\[x = {-b \pm \sqrt{b^2-4ac} \over 2a}.\]">
</amp-mathml>
</body>
</html>
Output
Amp-mathml tags when it executes renders the display in an iframe as shown below −
Google AMP - Fit Text
Amp tag amp-fit-text will reduce the font-size, if the space is not sufficient to render the display. This chapter discusses this tag in detail.
To get amp-fit-text working, we need to add the following script −
<script async custom-element = "amp-fit-text" src = "https://cdn.ampproject.org/v0/amp-fit-text-0.1.js"> </script>
Amp Fit-Text Tag
The format for amp-fit text tag is shown below −
<amp-fit-text width = "200" height = "200" layout = "responsive"> Text here </amp-fit-text>
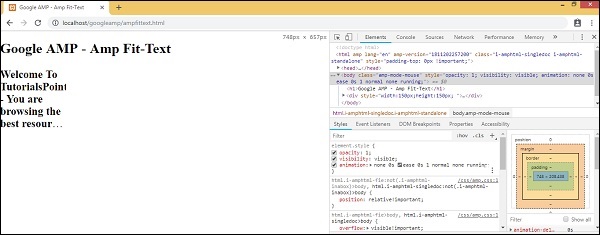
Example
Let us understand this tag better with the help of an example.
<!doctype html>
<html amp lang = "en">
<head>
<meta charset = "utf-8">
<script async src = "https://cdn.ampproject.org/v0.js"></script>
<title>Google AMP - Amp Fit-Text</title>
<link rel = "canonical" href = "http://example.ampproject.org/article-metadata.html">
<meta name = "viewport" content = "width = device-width,minimum-scale = 1, initial-scale = 1">
<style amp-boilerplate>
body{
-webkit-animation:-amp-start 8s steps(1,end)
0s 1 normal both;-moz-animation:
-amp-start 8s steps(1,end) 0s 1 normal both;-ms-animation:
-amp-start 8s steps(1,end) 0s 1 normal both;animation:
-amp-start 8s steps(1,end) 0s 1 normal both
}
@-webkit-keyframes
-amp-start{from{visibility:hidden}to{visibility:visible}}@-moz-keyframes
-amp-start{from{visibility:hidden}to{visibility:visible}}@-ms-keyframes
-amp-start{from{visibility:hidden}to{visibility:visible}}@-o-keyframes
-amp-start{from{visibility:hidden}to{visibility:visible}}@keyframes
-amp-start{from{visibility:hidden}to{visibility:visible}}
</style>
<noscript>
<style amp-boilerplate>
body{
-webkit-animation:none;-moz-animation:none;-ms
-animation:none;animation:none}
</style>
</noscript>
<script async custom-element = "amp-fit-text"
src = "https://cdn.ampproject.org/v0/amp-fit-text-0.1.js">
</script>
</head>
<body>
<h1>Google AMP - Amp Fit-Text</h1>
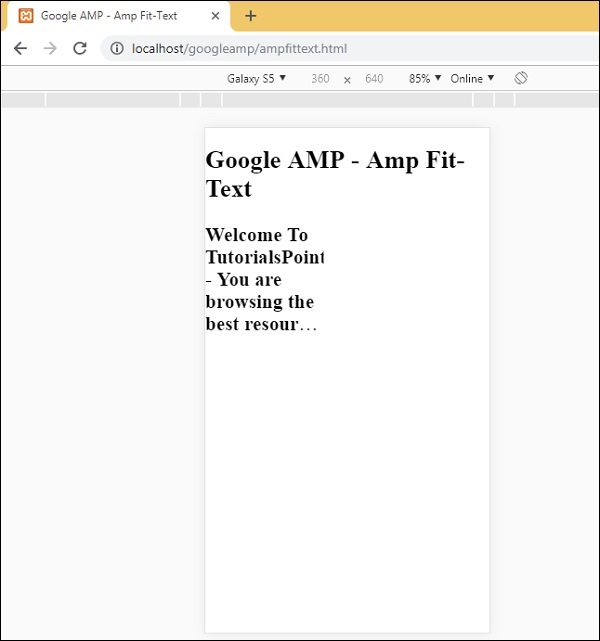
<div style = "width:150px;height:150px; ">
<amp-fit-text
width = "150"
height = "150"
layout = "responsive">
<b>Welcome To TutorialsPoint - You are browsing the best resource
for Online Education</b>
</amp-fit-text>
</div>
</body>
</html>
Output
The output of the code given above is as shown below −
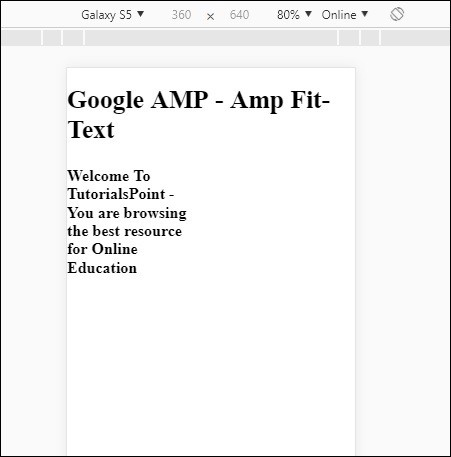
If you see the display using amp-fit-text, the content tries to adjust as per the space available.
Amp-fit-text comes with 2 attributes max-font-size and min-font-size.
When we use max-font-size, and if the space is not available to render the text, it will try to reduce the size and adjust inside the space available.
Incase we specify min-font-size and if the space is not available it will truncate the text and show dots where the text is hidden.
Example
Let us see a working example where we will specify both max-font-size and min-font-size to amp-fit-text.
<!doctype html>
<html amp lang = "en">
<head>
<meta charset = "utf-8">
<script async src = "https://cdn.ampproject.org/v0.js"></script>
<title>Google AMP - Amp Fit-Text</title>
<link rel = "canonical" href = " http://example.ampproject.org/article-metadata.html">
<meta name = "viewport" content = "width = device-width,minimum-scale = 1,initial-scale = 1">
<style amp-boilerplate>
body{
-webkit-animation:
-amp-start 8s steps(1,end) 0s 1 normal both;-moz-animation:
-amp-start 8s steps(1,end) 0s 1 normal both;-ms-animation:
-amp-start 8s steps(1,end) 0s 1 normal both;animation:
-amp-start 8s steps(1,end) 0s 1 normal both
}
@-webkit-keyframes
-amp-start{from{visibility:hidden}to{visibility:visible}}@-moz-keyframes
-amp-start{from{visibility:hidden}to{visibility:visible}}@-ms-keyframes
-amp-start{from{visibility:hidden}to{visibility:visible}}@-o-keyframes
-amp-start{from{visibility:hidden}to{visibility:visible}}@keyframes
-amp-start{from{visibility:hidden}to{visibility:visible}}
</style>
<noscript>
<style amp-boilerplate>
body{
-webkit-animation:none;
-moz-animation:none;
-ms-animation:none;
animation:none}
</style>
</noscript>
<script async custom-element = "amp-fit-text" src =
"https://cdn.ampproject.org/v0/amp-fit-text-0.1.js">
</script>
</head>
<body>
<h1>Google AMP - Amp Fit-Text</h1>
<div style = "width:150px;height:150px; ">
<amp-fit-text
width = "150"
height = "150"
layout = "responsive"
max-font-size = "30"
min-font-size = "25">
<b>Welcome To TutorialsPoint - You are
browsing the best resource for Online Education</b>
</amp-fit-text>
</div>
</body>
</html>
Output
Google AMP - Date Countdown
Yet another amp component called Amp Date countdown which is used to display days, hours, minutes , seconds till a given date ie Y2K38 ( 2038) by default.The display can be done as per locales of your choice; by default it is en (english).Amp-date-countdown uses amp-mustache template for rendering data.
In this chapter, we will take a look at some working examples to understand amp-date-countdown in more details.
To work with amp-date-countdown, we need to add the following script
For amp-date-countdown
<script async custom-element = "amp-date-countdown" src = "https://cdn.ampproject.org/v0/amp-date-countdown-0.1.js"> </script>
For amp-mustache
<script async custom-template = "amp-mustache" src = "https://cdn.ampproject.org/v0/amp-mustache-0.1.js"> </script>
Amp-date-countdown Tag
The amp-date-countdown tag is as follows −
<amp-date-countdown timestamp-seconds = "2100466648"
layout = "fixed-height"
height = "50">
<template type = "amp-mustache">
<p class = "p1">
{{d}} days, {{h}} hours, {{m}} minutes and {{s}} seconds until
<a href = "https://en.wikipedia.org/wiki/Year_2038_problem">
Y2K38
</a>.
</p>
</template>
</amp-date-countdown>
Attributes for amp-date-countdown
The attributes for amp-date-countdown are listed in the table here −
| Sr.No | Attribute & Description |
|---|---|
| 1 | end-date An ISO formatted date to count down to. For example, 2025-08-01T00:00:00+08:00 |
| 2 | timestamp-ms A POSIX epoch value in milliseconds; assumed to be UTC timezone. For example, timestamp-ms="1521880470000" |
| 3 | timestamp-seconds A POSIX epoch value in seconds; assumed to be UTC timezone. For example, timestamp-seconds="1521880470" |
| 4 | timeleft-ms A value in milliseconds which is left to be counting down. For example, 50 hours left timeleft-ms="180,000,000" |
| 5 | offset-seconds (optional) A positive or negative number which indicated the number of seconds to be added or subtracted from the given end-date. For example, offset-seconds="60" adds 60 seconds to the end-date |
| 6 | when-ended (optional) Specifies whether to stop the timer when it reaches 0 seconds. The value can be set to stop (default) to indicate the timer to stop at 0 seconds and will not pass the final date or continue to indicate the timer should continue after reaching 0 seconds. |
| 7 | locale (optional) An internationalization language string for each timer unit. The default value is en (for English). Supported values are listed in below. |
Format
The formats that amp-date-countdown uses to display the countdown are given in the following table −
| Sr.No | Format & Description |
|---|---|
| 1 | d Display day as 0,1,2,3...infinity |
| 2 | dd Display day as 00,01,02,03...infinity |
| 3 | h Display hour as 0,1,2,3...infinity |
| 4 | hh Display hour as 00,01,02,03...infinity |
| 5 | m Display minute as 0,1,2,3,4 infinity |
| 6 | mm Display minute as 00,01,02,03.infinity |
| 7 | s Display second as 0,1,2,3...infinity |
| 8 | ss Display second as 00,01,02,03 .infinity |
| 9 | days Display day or days string as per locale |
| 10 | hours Display hour or hours string as per locale |
| 11 | minutes Display minute or minutes string as per locale |
| 12 | seconds Display second or seconds string as per locale |
Example
<!doctype html>
<html amp lang = "en">
<head>
<meta charset = "utf-8">
<script async src = "https://cdn.ampproject.org/v0.js"></script>
<title>Google AMP - Amp Date-Countdown</title>
<link rel = "canonical" href = " http://example.ampproject.org/article-metadata.html">
<meta name = "viewport" content = "width = device-width,minimum-scale = 1,initial-scale = 1">
<style amp-boilerplate>
body{-webkit-animation:-amp-start 8s steps(1,end)
0s 1 normal both;-moz-animation:
-amp-start 8s steps(1,end) 0s 1 normal both;-ms-animation:
-amp-start 8s steps(1,end) 0s 1 normal both;animation:
-amp-start 8s steps(1,end) 0s 1 normal both
}
@-webkit-keyframes
-amp-start{from{visibility:hidden}to{visibility:visible}}@-moz-keyframes
-amp-start{from{visibility:hidden}to{visibility:visible}}@-ms-keyframes
-amp-start{from{visibility:hidden}to{visibility:visible}}@-o-keyframes
-amp-start{from{visibility:hidden}to{visibility:visible}}@keyframes
-amp-start{from{visibility:hidden}to{visibility:visible}}
</style>
<noscript>
<style amp-boilerplate>
body{-webkit-animation:none;-moz-animation:none;-ms
-animation:none;animation:none}
</style>
</noscript>
<script async custom-element = "amp-date-countdown"
src = "https://cdn.ampproject.org/v0/amp-date-countdown-0.1.js">
</script>
<script async custom-template="amp-mustache" src=
"https://cdn.ampproject.org/v0/amp-mustache-0.1.js">
</script>
</head>
<body>
<h1>Google AMP - Amp Date-Countdown</h1>
<amp-date-countdown
timestamp-seconds = "2145683234"
layout = "fixed-height"
height = "50">
<template type = "amp-mustache">
<p class = "p1">
{{d}} days, {{h}} hours, {{m}} minutes and
{{s}} seconds until
<a href = "https://en.wikipedia.org/wiki/Year_2038_problem">
Y2K38
</a>.
</p>
</template>
</amp-date-countdown>
</body>
</html>
Output
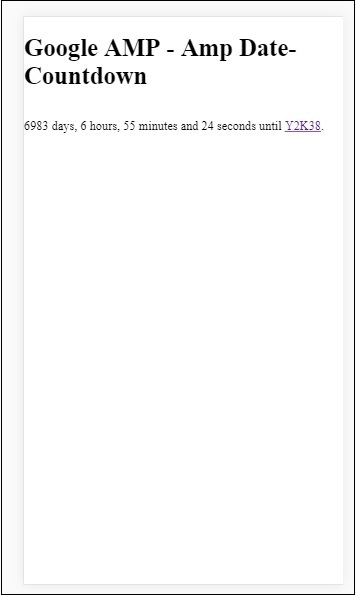
Example
Let us understand the amp-countdown attributes offset-seconds with a working example −
<!doctype html>
<html amp lang = "en">
<head>
<meta charset = "utf-8">
<script async src = "https://cdn.ampproject.org/v0.js"></script>
<title>Google AMP - Amp Date-Countdown</title>
<link rel = "canonical" href = " http://example.ampproject.org/article-metadata.html">
<meta name = "viewport" content = "width = device-width,minimum-scale = 1,initial-scale = 1">
<style amp-boilerplate>
body{
-webkit-animation:-amp-start 8s steps(1,end)
0s 1 normal both;-moz-animation:
-amp-start 8s steps(1,end) 0s 1 normal both;-ms-animation:
-amp-start 8s steps(1,end) 0s 1 normal both;animation:
-amp-start 8s steps(1,end) 0s 1 normal both
}
@-webkit-keyframes
-amp-start{from{visibility:hidden}to{visibility:visible}}@-moz-keyframes
-amp-start{from{visibility:hidden}to{visibility:visible}}@-ms-keyframes
-amp-start{from{visibility:hidden}to{visibility:visible}}@-o-keyframes
-amp-start{from{visibility:hidden}to{visibility:visible}}@keyframes
-amp-start{from{visibility:hidden}to{visibility:visible}}
</style>
<noscript>
<style amp-boilerplate>
body{
-webkit-animation:none;-moz-animation:none;-ms
-animation:none;animation:none}
</style>
</noscript>
<script async custom-element = "amp-date-countdown"
src = "https://cdn.ampproject.org/v0/amp-date-countdown-0.1.js">
</script>
<script async custom-template = "amp-mustache"
src = "https://cdn.ampproject.org/v0/amp-mustache-0.1.js">
</script>
</head>
<body>
<h1>Google AMP - Amp Date-Countdown</h1>
<amp-date-countdown
end-date = "2020-01-19T08:14:08.000Z"
offset-seconds = "-50"
layout = "fixed-height"
height = "100">
<template type = "amp-mustache">
<p class = "p1">
{{d}} days, {{h}} hours, {{m}}
minutes and {{s}} seconds until 50
seconds before 2020.
</p>
</template>
</amp-date-countdown>
</body>
</html>
Output
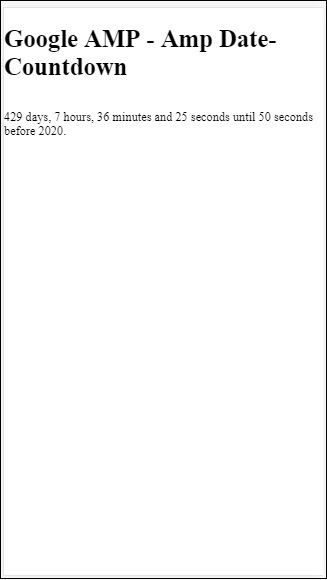
List of Locales Supported
The following is the list of locales supported by amp-date-countdown −
| Sr.No | Name & Locale |
|---|---|
| 1 | en English |
| 2 | es Spanish |
| 3 | fr French |
| 4 | de German |
| 5 | id Indonesian |
| 6 | it Italian |
| 7 | ja Japanese |
| 8 | ko Korean |
| 9 | nl Dutch |
| 10 | pt Portuguese |
| 11 | ru Russian |
| 12 | th Thai |
| 13 | tr Turkish |
| 14 | vi Vietnamese |
| 15 | zh-cn Chinese Simplified |
| 16 | zh-tw Chinese Traditional |
Now, we will try out one example to display the countdown using one of the locale above.
Example
<!doctype html>
<html amp lang = "en">
<head>
<meta charset = "utf-8">
<script async src = "https://cdn.ampproject.org/v0.js"></script>
<title>Google AMP - Amp Date-Countdown</title>
<link rel = "canonical" href = "http://example.ampproject.org/article-metadata.html">
<meta name="viewport" content="width = device-width, minimum-scale = 1,initial-scale = 1">
<style amp-boilerplate>
body{
-webkit-animation:
-amp-start 8s steps(1,end)0s 1 normal both;-moz-animation:
-amp-start 8s steps(1,end) 0s 1 normal both;-ms-animation:
-amp-start 8s steps(1,end) 0s 1 normal both;animation:
-amp-start 8s steps(1,end) 0s 1 normal both
}
@-webkit-keyframes
-amp-start{from{visibility:hidden}to{visibility:visible}}@-moz-keyframes
-amp-start{from{visibility:hidden}to{visibility:visible}}@-ms-keyframes
-amp-start{from{visibility:hidden}to{visibility:visible}}@-o-keyframes
-amp-start{from{visibility:hidden}to{visibility:visible}}@keyframes
-amp-start{from{visibility:hidden}to{visibility:visible}}
</style>
<noscript>
<style amp-boilerplate>
body{
-webkit-animation:none;
-moz-animation:none;
-ms-animation:none;
animation:none}
</style>
</noscript>
<script async custom-element = "amp-date-countdown"
src = "https://cdn.ampproject.org/v0/amp-date-countdown-0.1.js">
</script>
<script async custom-template = "amp-mustache"
src = "https://cdn.ampproject.org/v0/amp-mustache-0.1.js">
</script>
</head>
<body>
<h1>Google AMP - Amp Date-Countdown</h1>
<amp-date-countdown
locale = "ja"
end-date = "2020-01-19T08:14:08.000Z"
offset-seconds = "-50"
layout = "fixed-height"
height = "100">
<template type = "amp-mustache">
<p class = "p1">
{{d}} {{days}}, {{h}} {{hours}}, {{m}}
{{minutes}} and {{s}} {{seconds}} until
50 seconds before 2020.
</p>
</template>
</amp-date-countdown>
</body>
</html>
Output
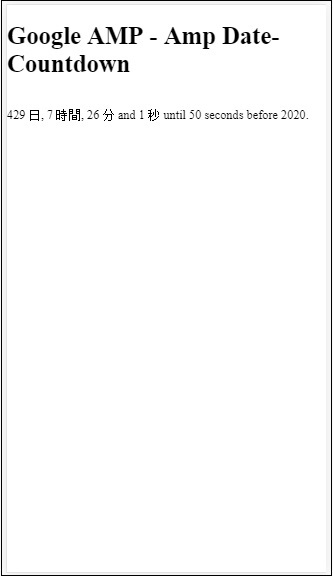
Google AMP - Date Picker
AMP Datepicker is an amp component which displays calendar on the page wherein the user can select dates. AMP datepicker can be displayed like a static calendar or based on input selection, that is with a click of a button.
To get amp-date-picker working we need to add following script to the page −
<script async custom-element = "amp-date-picker" src = "https://cdn.ampproject.org/v0/amp-date-picker-0.1.js"> </script>
Amp-date-picker Tag
The tag of amp-date-picker looks as follows −
<amp-date-picker layout = "fixed-height" height = "360"></amp-date-picker>
Supported Attributes
The following attributes are supported for amp-date-picker −
| Sr.No | Attribute & Description |
|---|---|
| 1 | mode Options available are static and overlay. For static, calendar will open by default on the page. For Overlay, the calendar will open upon interaction. |
| 2 | mode Options available are single and range. With single, you can select only one date on the calendar. With range, you can select more than one date but in a continuous range. |
| 3 | input-selector This can be a queryselector for date input. For example, for id is is #nameoftheid for class it is. nameoftheclass. The date will be updated for the tag to which the id is assigned. |
| 4 | start-input-selector This can be a queryselector for date input. For example, for id is is #nameoftheid for class it is .nameoftheclass. The date will be updated for the tag to which the id is assigned. |
| 5 | end-input-selector This can be a queryselector for date input. For example for id is is #nameoftheid for class it is .nameoftheclass. The date will be updated for the tag to which the id is assigned. |
| 6 | min The earliest date that the user may select. This must be formatted as an ISO 8601 date. If no min attribute is present, the current date will be the minimum date. |
| 7 | max The latest date that the user may select. This must be formatted as an ISO 8601 date. If no max attribute is present, the date picker will have no maximum date. |
| 8 | month-format The month format you need to display the date selected. By default, the values are "MMMM YYYY" |
| 9 | format The format in which you want the date to displayed in the input box or any htmlelement whose selector is used. By default it is "YYYY-MM-DD" |
| 10 | week-day-format Format to display day of the week. |
| 11 | locale Locale to display calendar view. By default it is en. |
| 12 | minimum-nights The number of nights that the user must select in a date range. The default is "1". A value of "0" allows users to select the same date for the start and end dates. |
| 13 | number-of-months The number of months to display at one time in the calendar view. The default is "1". |
| 14 | first-day-of-week The day to specify as the first day of the week (0-6). The default value is "0" (Sunday). |
| 15 | day-size The size in px of the date cells in the calendar view table. The default is 39. |
The main attributes are type and mode. For mode, we have static and overlay type calendars. For type we can have single and range options. With type = single we can select only one date from the calendar and for type = range we can select more than one data in a range.
Now, let us understand amp-date-picker for static and overlay type calendars through some working examples.
AMP Static date picker
For static type date picker we need to specify the mode=static as shown in the example below.
Example
<!doctype html>
<html amp lang = "en">
<head>
<meta charset = "utf-8">
<script async src = "https://cdn.ampproject.org/v0.js"></script>
<title>Google AMP - Amp Date-Picker Static </title>
<link rel = "canonical" href = " http://example.ampproject.org/article-metadata.html">
<meta name = "viewport" content = "width = device-width, minimum-scale = 1,initial-scale = 1">
<style amp-boilerplate>
body{
-webkit-animation:
-amp-start 8s steps(1,end) 0s 1 normal both;-moz-animation:
-amp-start 8s steps(1,end) 0s 1 normal both;-ms-animation:
-amp-start 8s steps(1,end) 0s 1 normal both;animation:
-amp-start 8s steps(1,end) 0s 1 normal both
}
@-webkit-keyframes
-amp-start{from{visibility:hidden}to{visibility:visible}}@-moz-keyframes
-amp-start{from{visibility:hidden}to{visibility:visible}}@-ms-keyframes
-amp-start{from{visibility:hidden}to{visibility:visible}}@-o-keyframes
-amp-start{from{visibility:hidden}to{visibility:visible}}@keyframes
-amp-start{from{visibility:hidden}to{visibility:visible}}
</style>
<noscript>
<style amp-boilerplate>
body{-webkit-animation:
none;-moz-animation:none;-ms-animation:none;animation:none}
</style>
</noscript>
<script async custom-element = "amp-date-picker"
src = "https://cdn.ampproject.org/v0/amp-date-picker-0.1.js">
</script>
<script async custom-element = "amp-bind"
src = "https://cdn.ampproject.org/v0/amp-bind-0.1.js">
</script>
<script async custom-template = "amp-mustache"
src = "https://cdn.ampproject.org/v0/amp-mustache-0.1.js">
</script>
<style>
input[type = text]{
width: 50%;
padding: 12px;
border: 1px
solid #ccc;
border-radius: 4px;
resize: vertical;
}
label {
padding: 12px 12px 12px 0;display: inline-block;
}
.col-label {
float: left;width: 25%;margin-top: 6px;
}
.col-content {
float: left;width: 75%;margin-top: 6px;
}
.row:after {
content: "";display: table;clear: both;
}
.amp_example {
background-color: #f1f1f1;
padding: 0.01em 16px;
margin: 20px 0;
box-shadow: 0 2px 4px 0
rgba(0,0,0,0.16),0 2px 10px 0
rgba(0,0,0,0.12)!important;
}
h3{font-family: "Segoe UI",Arial,sans-serif;
font-weight: 400;margin: 10px 0;}
</style>
</head>
<body>
<div class = "amp_example">
<h3>Google AMP - Amp Date-Picker using type = single</h3>
<amp-date-picker
id = "static-date"
type = "single"
mode = "static"
layout = "fixed-height"
height = "600"
format = "YYYY-MM-DD"
input-selector = "#date">
<div class = "row">
<div class = "col-label">
<label for = "start">
Date is:
</label>
</div>
<div class = "col-content">
<input type = "text" id = "date" name = "date"
placeholder = "Date Selected Is...">
</div>
</div>
</amp-date-picker>
<div>
</body>
</html>
Observe that in this example we are displaying calendar i.e datepicker by default on the screen.
The date selected by the user is shown in the text field as shown in the demo screen shown below −
Output
How to get the date selected from amp-date-picker?
If you check the above example, there is an attribute called input-selector which is given the id of the text field. When user selects the date , it is shown inside the input field.
<amp-date-picker
id = "static-date"
type = "single"
mode = "static"
layout = "fixed-height"
height = "600"
format = "YYYY-MM-DD"
input-selector = "#date"
<div class = "row">
<div class = "col-label">
<label for = "start">Date is:</label>
</div>
<div class = "col-content">
<input type = "text" id = "date" name = "date"
placeholder = "Date Selected Is...">
</div>
</div>
</amp-date-picker>
You can also give name property to input-selector attribute as follows −
<amp-date-picker type = "single" mode = "static" layout = "container" input-selector = "[name = date]"> <input type = "text" id = "date" name = "date" placeholder = "Date Selected Is..."> </amp-date-picker>
Incase if the input-selector is not given than amp-date-picker creates a hidden input field and gives it a name of date or ${id}-date using the amp-date picker's id.
We will discuss some more examples with different attributes available with date-picker. In the above, we can select the single date as we mentioned type=single and mode as static. We can also select range of dates by giving the type as type=range.
Example
<!doctype html>
<html amp lang = "en">
<head>
<meta charset = "utf-8">
<script async src = "https://cdn.ampproject.org/v0.js"></script>
<title>Google AMP - Amp Date-Picker Static </title>
<link rel = "canonical" href = "http://example.ampproject.org/article-metadata.html">
<meta name = "viewport" content = "width = device-width, minimum-scale = 1,initial-scale = 1">
<style amp-boilerplate>
body{-webkit-animation:
-amp-start 8s steps(1,end) 0s 1 normal both;-moz-animation:
-amp-start 8s steps(1,end) 0s 1 normal both;-ms-animation:
-amp-start 8s steps(1,end) 0s 1 normal both;animation:
-amp-start 8s steps(1,end) 0s 1 normal both
}
@-webkit-keyframes
-amp-start{from{visibility:hidden}to{visibility:visible}}@-moz-keyframes
-amp-start{from{visibility:hidden}to{visibility:visible}}@-ms-keyframes
-amp-start{from{visibility:hidden}to{visibility:visible}}@-o-keyframes
-amp-start{from{visibility:hidden}to{visibility:visible}}@keyframes
-amp-start{from{visibility:hidden}to{visibility:visible}}
</style>
<noscript>
<style amp-boilerplate>
body{
-webkit-animation:
none;-moz-animation:none;-ms-animation:none;animation:none}
</style>
</noscript>
<script async custom-element = "amp-date-picker"
src = "https://cdn.ampproject.org/v0/amp-date-picker-0.1.js">
</script>
<script async custom-element = "amp-bind"
src = "https://cdn.ampproject.org/v0/amp-bind-0.1.js">
</script>
<script async custom-template = "amp-mustache"
src = "https://cdn.ampproject.org/v0/amp-mustache-0.1.js">
</script>
<style>
input[type = text]{
width: 50%;
padding: 12px;
border: 1px solid #ccc;
border-radius: 4px;
resize: vertical;
}
label {padding: 12px 12px 12px 0;display: inline-block;}
.col-label {float: left;width: 25%;margin-top: 6px;}
.col-content {float: left;width: 75%;margin-top: 6px;}
.row:after {content: "";display: table;clear: both;}
.amp_example {
background-color: #f1f1f1;
padding: 0.01em 16px;
margin: 20px 0;
box-shadow: 0 2px 4px 0
rgba(0,0,0,0.16),0 2px 10px 0
rgba(0,0,0,0.12)!important;
}
h3{
font-family: "Segoe UI",Arial,sans-serif;
font-weight: 400;margin: 10px 0;
}
</style>
</head>
<body>
<div class = "amp_example">
<h3>Google AMP - Amp Date-Picker Static Multi Select Dates using type = range</h3>
<amp-date-picker
id = "static-date"
type = "range"
mode = "static"
layout = "fixed-height"
height = "600"
start-input-selector = "#start"
end-input-selector = "#end"
format = "YYYY-MM-DD"
input-selector = "#static-date-input">
<div class = "row">
<div class = "col-label">
<label for = "start">Start Date:</label>
</div>
<div class = "col-content">
<input type = "text" id = "start"
name = "start" placeholder = "Start Date">
</div>
</div>
<div class = "row">
<div class = "col-label">
<label for = "end">End Date:</label>
</div>
<div class = "col-content">
<input type = "text" id = "end"
name = "end" placeholder = "End Date">
</div>
</div>
</amp-date-picker>
</div>
</body>
</html>
Output
The output of the code shown above is as given below −
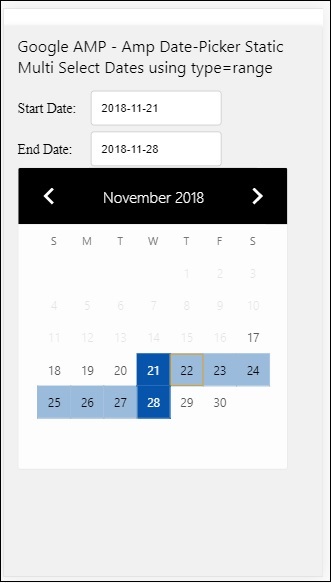
How to get the start and end date using type= range selected from amp-date-picker?
To get the start and end date, we have used amp-date-picker attribute start-input-selector and end-input-selector.
The details of the syntax are shown here −
<amp-date-picker id = "static-date" type = "range" mode = "static" layout = "fixed-height" height = "600" start-input-selector = "#start" end-input-selector="#end" format = "YYYY-MM-DD" input-selector = "#static-date-input"> <input type = "text" id = "start" name = "start" placeholder="Start Date"> <input type = "text" id = "end" name = "end" placeholder = "End Date"> </amp-date-picker>
Both the selectors have input field id where we want the start and end date to be displayed. You can also give the name of the input field as discussed here.
AMP Overlay Date Picker
For Overlay mode date picker, the calendar is displayed in response to the input field. We can have overlay with type= single and type=range as we have seen for static date-picker.
Let us now see a working example of selecting date range for Overlay type date-picker.
Example
<!doctype html>
<html amp lang = "en">
<head>
<meta charset = "utf-8">
<script async src = "https://cdn.ampproject.org/v0.js"></script>
<itle>Google AMP - Amp Date-Picker Static</title>
<link rel = "canonical" href = "http://example.ampproject.org/article-metadata.html">
<meta name = "viewport" content = "width = device-width,minimum-scale = 1,initial-scale = 1">
<style amp-boilerplate>
body{
-webkit-animation:
-amp-start 8s steps(1,end) 0s 1 normal both;-moz-animation:
-amp-start 8s steps(1,end) 0s 1 normal both;-ms-animation:
-amp-start 8s steps(1,end) 0s 1 normal both;animation:
-amp-start 8s steps(1,end) 0s 1 normal both
}
@-webkit-keyframes
-amp-start{from{visibility:hidden}to{visibility:visible}}@-moz-keyframes
-amp-start{from{visibility:hidden}to{visibility:visible}}@-ms-keyframes
-amp-start{from{visibility:hidden}to{visibility:visible}}@-o-keyframes
-amp-start{from{visibility:hidden}to{visibility:visible}}@keyframes
-amp-start{from{visibility:hidden}to{visibility:visible}}
</style>
<noscript>
<style amp-boilerplate>
body{
-webkit-animation:
none;-moz-animation:none;-ms-animation:none;animation:none}
</style>
</noscript>
<script async custom-element = "amp-date-picker"
src = "https://cdn.ampproject.org/v0/amp-date-picker-0.1.js">
</script>
<script async custom-element = "amp-bind"
src = "https://cdn.ampproject.org/v0/amp-bind-0.1.js">
</script>
<script async custom-template = "amp-mustache"
src = "https://cdn.ampproject.org/v0/amp-mustache-0.1.js">
</script>
<style>
input[type=text]{
width: 50%;
padding: 12px;border:
1px solid #ccc;
border-radius: 4px;resize: vertical;
}
label {
padding: 12px 12px 12px 0;
display: inline-block;
font-family: "Segoe UI",Arial,sans-serif;
font-weight: 400;
}
.col-label {float: left;width: 25%;margin-top: 6px;}
.col-content {float: left;width: 75%;margin-top: 6px;}
.row:after {content: "";display: table;clear: both;}
.amp_example {
background-color: #f1f1f1;
padding: 0.01em 16px;
margin: 20px 0;
box-shadow: 0 2px 4px 0
rgba(0,0,0,0.16),0 2px 10px 0
rgba(0,0,0,0.12)!important;
}
h3{font-family: "Segoe UI",Arial,sans-serif;font-weight: 400;margin: 10px 0;}
button { background-color: #ACAD5C;
color: white;
padding: 12px 20px;
border: none;
border-radius: 4px;
cursor: pointer;
float: right;
}
</style>
</head>
<body>
<div class = "amp_example">
<h3>Google AMP - Amp Date-Picker Overlay Multi Select Dates using type = rangelt;/h3>
<amp-date-picker id = "overlay-date"
type = "range"
mode = "overlay"
start-input-selector = "#start"
end-input-selector = "#end"
format = "YYYY-MM-DD"
open-after-select
input-selector = "#start">
<div class = "row">
<div class = "col-label">
<label for = "start">Start Date:lt;/label>
</div>
<div class = "col-content">
<input type = "text" id = "start"
name = "start" placeholder = "Start Date">
</div>
</div>
<div class = "row">
<div class = "col-label">
<label for = "end">End Date:lt;/label>
</div>
<div class = "col-content">
<input type = "text" id="end" name = "end"
placeholder = "End Date">
</div>
</div>
<div class = "row">
<div class = "col-label">
</div>
<div class = "col-content">
<button class = "ampstart-btn caps" on = "tap:overlay-date.clear">
Clear
</button>
</div>
</div>
</amp-date-picker>
</div>
</body>
</html>
Output
The output of the code shown above is as given below −
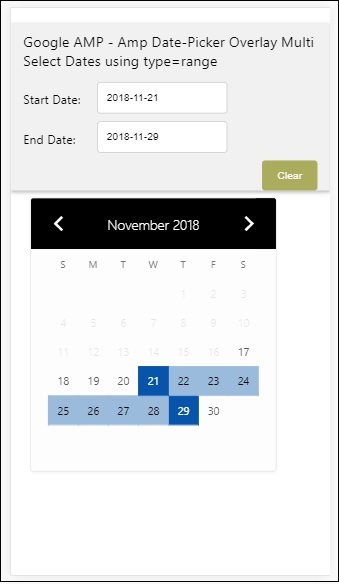
We have already seen how to get the start and the end date. Observe that we have used one more attribute here open-after-select. This attribute will keep the overlay open after selection. If you click outside the date-picker, it will be closed. There is also a button added called clear. Onclick of clear button the dates selected with be cleared.The syntax to perform this is as follows −
<button class = "ampstart-btn caps" on = "tap:overlay-date.clear"> Clear </button>
To add event, we have to use on attribute. Further details about events will be discussed in the Events Chapter of this tutorial. We have used the tag behaviour and to that the id of the datepicker is given and clear event, which takes care of clearing the date -range selected.
Next, let us see how to use amp-date-picker as a lightbox.
AMP Lightbox Date Picker
Date-picker can be used inside a modal window. We can also use lightbox date-picker for same. Let us understand this with the help of a working example.
To use date-picker inside lightbox, we need to add the light-box script as shown below −
<script async custom-element = "amp-lightbox" src = "https://cdn.ampproject.org/v0/amp-lightbox-0.1.js"> </script>
Example
<!doctype html>
<html amp lang = "en">
<head>
<meta charset = "utf-8">
<script async src = "https://cdn.ampproject.org/v0.js"></script>
<title>Google AMP - Amp Date-Picker Static </title>
<link rel = "canonical" href = "http://example.ampproject.org/article-metadata.html">
<meta name = "viewport" content = "width=device-width,minimum-scale = 1,initial-scale = 1">
<style amp-boilerplate>
body{
-webkit-animation:
-amp-start 8s steps(1,end) 0s 1 normal both;-moz-animation:
-amp-start 8s steps(1,end) 0s 1 normal both;-ms-animation:
-amp-start 8s steps(1,end) 0s 1 normal both;animation:
-amp-start 8s steps(1,end) 0s 1 normal both
}
@-webkit-keyframes
-amp-start{from{visibility:hidden}to{visibility:visible}}@-moz-keyframes
-amp-start{from{visibility:hidden}to{visibility:visible}}@-ms-keyframes
-amp-start{from{visibility:hidden}to{visibility:visible}}@-o-keyframes
-amp-start{from{visibility:hidden}to{visibility:visible}}@keyframes
-amp-start{from{visibility:hidden}to{visibility:visible}}
</style>
<noscript>
<style amp-boilerplate>
body{
-webkit-animation:none;
-moz-animation:none;
-ms-animation:none;
animation:none}
</style>
</noscript>
<script async custom-element = "amp-date-picker"
src = "https://cdn.ampproject.org/v0/amp-date-picker-0.1.js">
</script>
<script async custom-element = "amp-bind" src = "
https://cdn.ampproject.org/v0/amp-bind-0.1.js">
<script>
<script async custom-template = "amp-mustache"
src = "https://cdn.ampproject.org/v0/amp-mustache-0.1.js">
</script>
<script async custom-element = "amp-lightbox"
src = "https://cdn.ampproject.org/v0/amp-lightbox-0.1.js">
</script>
<style>
input[type=text]{
width: 50%;
padding: 12px;
border: 1px solid #ccc;
border-radius: 4px;
resize: vertical;
}
label {
padding: 12px 12px 12px 0;
display: inline-block;
font-family: "Segoe UI",Arial,sans-serif;
font-weight: 400;
}
.col-label {
float: left;width: 25%;
margin-top: 6px;
}
.col-content {
float: left;
width: 75%;
margin-top: 6px;
}
.row:after {
content: "";
display: table;clear: both;
}
.amp_example {
background-color: #f1f1f1;
padding: 0.01em 16px;
margin: 20px 0;
box-shadow: 0 2px 4px 0 rgba(0,0,0,0.16),0 2px 10px 0rgba(0,0,0,0.12)!important;
}
h3{font-family: "Segoe UI",Arial,sans-serif;
font-weight: 400;
margin: 10px 0;
}
button {
background-color: #ACAD5C;
color: white;
padding: 12px 20px;
border: none;
border-radius: 4px;
cursor: pointer;
float: right;
}
.lightbox {background-color: rgba(100, 100, 100, 0.5);}
</style>
</head>
<body>
<div class = "amp_example">
<h3>Google AMP - Amp Date-Picker Overlay Multi Select Dates using type = range</h3>
<div class = "row">
<div class = "col-label">
<label for = "start">Start Date:</label>
<div>
<div class = "col-content">
<input type = "text" id = "start" name =
"start" placeholder = "Start Date" on = "tap:lightbox.open">
</div>
</div>
<div class = "row">
<div class = "col-label">
<label for = "end">End Date:</label>
</div>
<div class = "col-content">
<input type = "text" id = "end" name =
"end" placeholder = "End Date" on = "tap:lightbox.open">
</div>
</div>
<div class = "row">
<div class = "col-label"></div>
<div class = "col-content">
<button class = "ampstart-btn caps" on =
"tap:overlay-date.clear">Clear</button>
</div>
</div>
<amp-lightbox id = "lightbox" layout = "nodisplay" class = "lightbox">
<amp-date-picker id = "overlay-date"
type = "range"
layout = "fill"
start-input-selector = "#start"
end-input-selector = "#end"
format = "YYYY-MM-DD"
on = "activate: lightbox.open;deactivate: lightbox.close">
</amp-date-picker>
</amp-lightbox>
</div>
</body>
</html>
Output
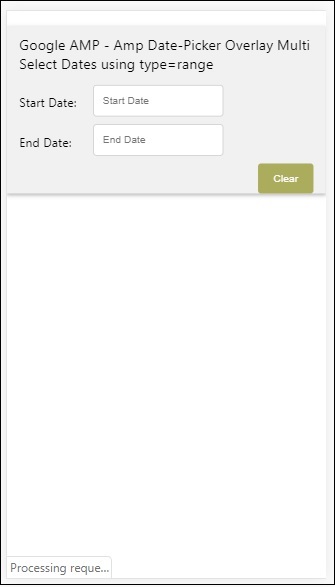
When a user clicks on the input field the date-picker is opened inside the lightbox as shown below −

To perform this, there is a event added on the input field as shown below −
<input type = "text" id = "start" name = "start" placeholder = "Start Date" on = "tap:lightbox.open"> <input type = "text" id = "end" name = "end" placeholder = "End Date" on = "tap:lightbox.open">
Note that on is the event it calls tap − lightbox.open to open the lightbox.
Here lightbox is the id given to amp-lightbox as shown below. Amp-date-picker is called inside amp-lightbox and it is activated on tap of the input fields.
<amp-lightbox id = "lightbox" layout = "nodisplay" class = "lightbox">
<amp-date-picker id = "overlay-date"
type = "range"
layout = "fill"
start-input-selector = "#start"
end-input-selector = "#end"
format = "YYYY-MM-DD"
on = "activate: lightbox.open;deactivate: lightbox.close">
</amp-date-picker>
</amp-lightbox>
Google AMP - Story
Amp-story is a amp-component used to display content keeping the user engaged with the story. For example using a series of images telling about a brand.
To get working with amp-story, we need to include the script as shown below −
<script async custom-element = "amp-story" src = "https://cdn.ampproject.org/v0/amp-story-1.0.js"> </script>
In this chapter, let us understand what amp-story is and how it works. Assume that we have a image gallery and want to display the same on the page. In the amp page we can make it look beautiful and interactive to the user using amp-story component.
The format of amp-story tag looks like as shown below −
<amp-story standalone> ---> Main story Tag
<amp-story-page id = "page-1"> ---> Pages inside the story e.g page1
<amp-story-grid-layer template = "fill"> -->
Layers for the page1.You can have more than one layer.
//Add html elements here or amp components
</amp-story-grid-layer>
<amp-story-grid-layer template = "fill"> -->
Layers for the page1.You can have more than one layer.
//Add html elements here or amp components
</amp-story-grid-layer>
...
</amp-story-page>
<amp-story-page id = "page-2"> ---> Pages inside the story e.g page2
<amp-story-grid-layer template = "fill"> -->
Layers for the page2.You can have more than one layer.
//Add html elements here or amp components
</amp-story-grid-layer>
...
</amp-story-page>
...
</amp-story>
There are some additional attributes added for amp-story as follows −
<amp-story standalone title = "My Story" publisher = "The AMP Team" publisher-logo-src = "publisherlogo image here" poster-portrait-src = "poster portrait here" poster-square-src = "poster square image here" poster-landscape-src = "poster landscape image here">
This feature makes the story telling using amp very interactive.
The following code shows a working example for amp-story. The output for the same is shown for desktop as well as mobile mode.
Example
<!doctype html>
<html amp lang = "en">
<head>
<meta charset = "utf-8">
<script async src = "https://cdn.ampproject.org/v0.js"></script>
<script async custom-element = "amp-story" src = "https://cdn.ampproject.org/v0/amp-story-1.0.js"></script>
<title>Google AMP - Story</title>
<meta name = "viewport" content = "width = device-width,minimum-scale = 1,initial-scale=1">
<link rel = "canonical" href = "/stories/introduction/amp_story_hello_world/">
<style amp-boilerplate>
body{
-webkit-animation:
-amp-start 8s steps(1,end) 0s 1 normal both;-moz-animation:
-amp-start 8s steps(1,end) 0s 1 normal both;-ms-animation:
-amp-start 8s steps(1,end) 0s 1 normal both;animation:
-amp-start 8s steps(1,end) 0s 1 normal both
}
@-webkit-keyframes
-amp-start{from{visibility:hidden}to{visibility:visible}}@-moz-keyframes
-amp-start{from{visibility:hidden}to{visibility:visible}}@-ms-keyframes
-amp-start{from{visibility:hidden}to{visibility:visible}}@-o-keyframes
-amp-start{from{visibility:hidden}to{visibility:visible}}@keyframes
-amp-start{from{visibility:hidden}to{visibility:visible}}
</style>
<noscript>
<style amp-boilerplate>
body{
-webkit-animation:
none;-moz-animation:none;
-ms-animation:none;
animation:none}
</style>
</noscript>
<style amp-custom>
amp-story {
font-family: Roboto, Helvetica, Arial, sans-serif;
}
amp-story-page * {
color: white;
text-align: center;
}
</style>
</head>
<body>
<amp-story standalone title = "Stories in AMP - Hello World" publisher = "AMP Project">
<amp-story-page id = "page-1">
<amp-story-grid-layer template = "fill">
<amp-img src = "images/christmas1.jpg"
width = "300" height = "250"
layout = "responsive">
</amp-img>
</amp-story-grid-layer>
<amp-story-grid-layer template = "vertical">
<h1>Hello World</h1>
<p>This is an AMP Story.</p>
</amp-story-grid-layer>
</amp-story-page>
<amp-story-page id = "page-2">
<amp-story-grid-layer template = "fill">
<amp-img src = "images/christmas5.jpg"
width = "300" height = "250"
layout = "responsive">
</amp-img>
</amp-story-grid-layer>
<amp-story-grid-layer template = "vertical">
<h1>Hello World</h1>
<p>This is an AMP Story.</p>
</amp-story-grid-layer>
</amp-story-page>
<amp-story-page id = "page-3">
<amp-story-grid-layer template = "fill">
<amp-img src = "images/christmas3.jpg"
width = "300" height = "250"
layout = "responsive">
</amp-img>
</amp-story-grid-layer>
<amp-story-grid-layer template = "vertical">
<h1>Hello World</h1>
<p>This is an AMP Story.</p>
</amp-story-grid-layer>
</amp-story-page>
<amp-story-page id = "page-4">
<amp-story-grid-layer template = "fill">
<amp-img src = "images/christmas4.jpg"
width = "300" height="250"
layout = "responsive">
</amp-img>
</amp-story-grid-layer>
<amp-story-grid-layer template = "vertical">
<h1>Hello World</h1>
<p>This is an AMP Story.</p>
</amp-story-grid-layer>
</amp-story-page>
<amp-story-bookend src = "ampstory.json" layout = "nodisplay">
</amp-story-bookend>
</amp-story>
<body>
</html>
ampstory.json
{
"bookendVersion": "v1.0",
"shareProviders": [
"email",
"twitter",
"tumblr",
{
"provider": "facebook",
"app_id": "254325784911610"
}
],
"components": [
{
"type": "heading",
"text": "Introduction"
},
{
"type": "small",
"title": "Next Story is on Car Brands",
"url": "ampcarbrand.html",
"image": "images/audi.jpg"
}
]
}
Output on Desktop


This is how the story section is displayed. You may also add videos, or any other amp component to make the story more interactive.
Once it reaches end of the story it will show what is given in the amp-bookend as shown below −
<amp-story-bookend src = "ampstory.json" layout = "nodisplay"> </amp-story-bookend>
We have given a ampstory.json file to the amp-bookend.The json file has the details of the preview of the next story as shown below. When a user clicks on the three dots shown at right side, the following screen will be displayed −
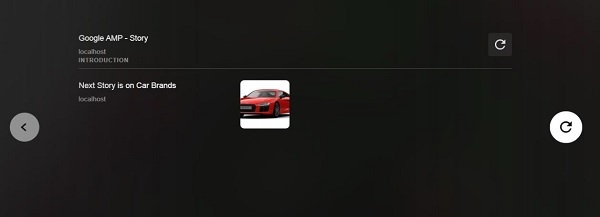
It gives a replay button which will load the story again. You can click the image of the car which will display the story of the car brands.
The output in the mobile mode is as follows −


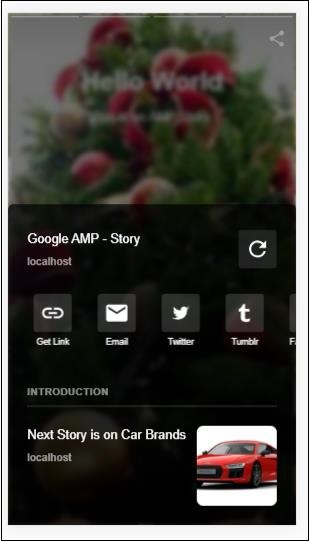
Google AMP - Selector
Amp-selector is an amp component which displays menu of options and the user can select between the options. The options displayed can be text, images or any other amp-component. In this chapter, let us discuss this in detail.
To work with amp-selector, we need to include following javascript files −
<script async custom-element = "amp-selector" src = "https://cdn.ampproject.org/v0/amp-selector-0.1.js"> </script>
Format of amp-selector
The following code shows the sample for format of amp-selector −
<amp-selector layout = "container">
<amp-img src = "images/christmas1.jpg"
width = "60"
height = "40"
option = "1">
<amp-img src = "images/christmas2.jpg"
width = "60"
height = "40"
option = "2">
</amp-img>
<amp-img src = "images/christmas3.jpg"
width = "60"
height = "40"
option = "3">
</amp-img>
<amp-img src = "images/christmas4.jpg"
width = "60"
height = "40"
option = "4">
</amp-img>
</amp-selector>
You can use standard html tags or amp components inside amp-selector.The contents are displayed like menu on the screen and the user can select between them.The menus displayed can be a single select or multiselect.
Let us understand this with the help of an example of single and multi select as given below.
Amp Selector Single Select
The following code is a sample for amp-selector single select −
<!doctype html>
<html amp lang = "en">
<head>
<meta charset = "utf-8">
<script async src = "https://cdn.ampproject.org/v0.js"></script>
<title>Google AMP - Amp Selector</title>
<link rel = "canonical" href = "http://example.ampproject.org/article-metadata.html">
<meta name="viewport" content="width=device-width,minimum-scale = 1,initial-scale = 1">
<style amp-boilerplate>
body{-
webkit-animation:-amp-start 8s steps(1,end) 0s 1 normal both;-moz-animation:
-amp-start 8s steps(1,end) 0s 1 normal both;-ms-animation:
-amp-start 8s steps(1,end) 0s 1 normal both;animation:
-amp-start 8s steps(1,end) 0s 1 normal both
}
@-webkit-keyframes
-amp-start{from{visibility:hidden}to{visibility:visible}}@-moz-keyframes
-amp-start{from{visibility:hidden}to{visibility:visible}}@-ms-keyframes
-amp-start{from{visibility:hidden}to{visibility:visible}}@-o-keyframes
-amp-start{from{visibility:hidden}to{visibility:visible}}@keyframes
-amp-start{from{visibility:hidden}to{visibility:visible}}
</style>
<noscript>
<style amp-boilerplate>
body{
-webkit-animation:none;-moz-animation:none;
-ms-animation:none;animation:none}
</style>
</noscript>
<script async custom-element="amp-selector"
src = "https://cdn.ampproject.org/v0/amp-selector-0.1.js">
</script>
<style amp-custom>
amp-selector:not([disabled])
amp-img[option][selected]:not([disabled]) {
outline-color: #b6A848;
outline-width: 2px;
}
</style>
</head>
<body>
<h3>Google AMP - Amp Selector</h3>
<amp-selector layout = "container">
<amp-img src = "images/christmas1.jpg"
width = "60"
height = "40"
option="1">
</amp-img>
<amp-img src="images/christmas2.jpg"
widt h = 60"
height = "40"
option = "2">
</amp-img>
<amp-img src = "images/christmas3.jpg"
width = "60"
height = "40"
option = "3">
</amp-img>
<amp-img src = "images/christmas4.jpg"
width = "60"
height = "40"
option = "4">
</amp-img>
</amp-selector>
</body>
</html>
Output
The output of the above given code is as shown below −
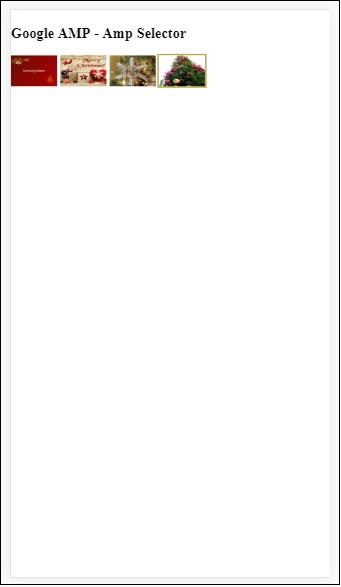
Note that in the above example we have used amp-selector and used images inside to show the options. It is a single select selector so you can select any one image as shown in the output.
Amp Selector Multiple Select
In this example, let us display amp-selector with images using multiple attributes, we can select multiple options from the selector.
Example
<!doctype html>
<html amp lang = "en">
<head>
<meta charset = "utf-8 ">
<script async src = "https://cdn.ampproject.org/v0.js"></script>
<title>Google AMP - Amp Selector</title>
<link rel = "canonical" href = "http://example.ampproject.org/article-metadata.html">
<meta name = "viewport" content = "width = device-width,minimum-scale = 1,initial-scale =1">
<style amp-boilerplate>
body{-webkit-animation:
-amp-start 8s steps(1,end) 0s 1 normal both;-moz-animation:
-amp-start 8s steps(1,end) 0s 1 normal both;-ms-animation:
-amp-start 8s steps(1,end) 0s 1 normal both;animation:
-amp-start 8s steps(1,end) 0s 1 normal both}
@-webkit-keyframes
-amp-start{from{visibility:hidden}to{visibility:visible}}@-moz-keyframes
-amp-start{from{visibility:hidden}to{visibility:visible}}@-ms-keyframes
-amp-start{from{visibility:hidden}to{visibility:visible}}@-o-keyframes
-amp-start{from{visibility:hidden}to{visibility:visible}}@keyframes
-amp-start{from{visibility:hidden}to{visibility:visible}}
</style>
<noscript>
<style amp-boilerplate>
body{
-webkit-animation:none;-moz-animation:none;
-ms-animation:none;animation:none
}
</style>
</noscript>
<script async custom-element = "amp-selector"
src = "https://cdn.ampproject.org/v0/amp-selector-0.1.js">
</script>
<style amp-custom>
amp-selector:not([disabled])
amp-img[option][selected]:not([disabled]) {
outline-color: blue;
outline-width: 2px;
}
</style>
</head>
<body>
<h3>Google AMP - Amp Selector</h3>
<amp-selector layout = "container" multiple>
<amp-img src = "images/christmas1.jpg"
width = "60"
height ="40"
option = "1">
</amp-img>
<amp-img src="images/christmas2.jpg"
width = "60"
height = "40"
option = "2">
</amp-img>
<amp-img src ="images/christmas3.jpg"
width = "60"
height = "40"
option = "3">
</amp-img>
<amp-img src = "images/christmas4.jpg"
width = "60"
height = "40"
option = "4">
</amp-img>
</amp-selector>
</body>
</html>
Output
The output of the code shown above is given below −
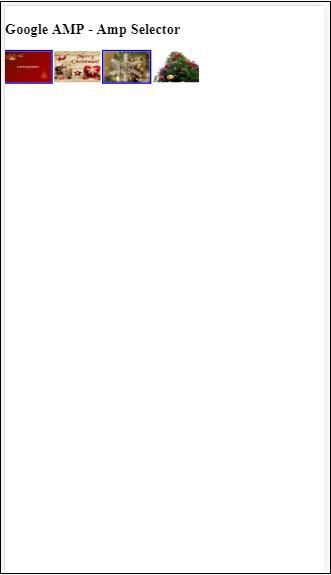
We can also use amp-selector to show radio buttons as shown in the code given below −
Example
<!doctype html>
<html amp lang = "en">
<head>
<meta charset = "utf-8">
<script async src = "https://cdn.ampproject.org/v0.js"></script>
<title>Google AMP - Amp Selector</title>
<link rel = "canonical" href = "http://example.ampproject.org/article-metadata.html">
<meta name = "viewport" content ="width = device-width,minimum-scale = 1,initial-scale = 1">
<style amp-boilerplate>
body{
-webkit-animation:
-amp-start 8s steps(1,end) 0s 1 normal both;-moz-animation:
-amp-start 8s steps(1,end) 0s 1 normal both;-ms-animation:
-amp-start 8s steps(1,end) 0s 1 normal both;animation:
-amp-start 8s steps(1,end) 0s 1 normal both
}
@-webkit-keyframes
-amp-start{from{visibility:hidden}to{visibility:visible}}@-moz-keyframes
-amp-start{from{visibility:hidden}to{visibility:visible}}@-ms-keyframes
-amp-start{from{visibility:hidden}to{visibility:visible}}@-o-keyframes
-amp-start{from{visibility:hidden}to{visibility:visible}}@keyframes
-amp-start{from{visibility:hidden}to{visibility:visible}}
</style>
<noscript>
<style amp-boilerplate>
body{
-webkit-animation:none;
-moz-animation:none;
-ms-animation:none;
animation:none}
</style>
</noscript>
<script async custom-element = "amp-selector"
src = "https://cdn.ampproject.org/v0/amp-selector-0.1.js">
</script>
<style amp-custom>
.radio-menu {
list-style: none;
}
.radio-menu [option][selected] {
outline: none;
}
.radio-menu [option] {
display: flex;
align-items: center;
}
.radio-menu [option]:before {
transition: background 0.25s ease-in-out;
content: "";
display: inline-block;
width: 24px;
height: 24px;
margin: 8px;
border-radius: 100%;
border: solid 1px black;
}
.radio-menu [option = red][selected]:before {
text-align: center;
content: "";
color: white;
background: red;
}
.radio-menu [option = green][selected]:before {
text-align: center;
content: "";
color: white;
background: green;
}
.radio-menu [option = blue][selected]:before {
text-align: center;
content: "";
color: white;
background: blue;
}
</style>
</head>
<body>
<h3>Google AMP - Amp Selector</h3>
<amp-selector class = "radio-menu" layout = "container" name = "my-selector">
<div option = "red">Red</div>
<div option = "green">Green</div>
<div option = "blue">Blue</div>
</amp-selector>
</body>
</html>
Output
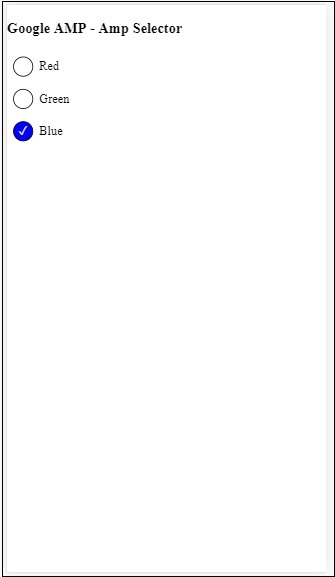
Google AMP - Link
The Link tag in amp is used to tell the Google search engine about the amp and non-amp pages available. In this chapter, let us discuss in detail the aspects involved with Link tag and how google decides about the amp-page and non amp-page.
AMP Page Discovery
Consider you have a site called www.mypage.com. The news article links to the page − www.mypage.com/news/myfirstnews.html.
When a user searches in the Google search engine and happens to get the non amp-page, in order to also get reference to the amp page, we need to specify the amp url using the link tag as shown below −
Example
Page-url for Non amp-page
<link rel = "amphtml" href = "https://www.mypage.com/news/amp/myfirstnews_amp.html">
Here rel= amphtml is specified for a non amp page to point to the amp version, so that Google shows the right one based on platform
Page-url for amp-page
<link rel = "canonical" href = "https://www.mypage.com/news/myfirstnews.html">
Here rel=canonical is specified in amp page to point to the standard version of html, so that Google shows the right one based on platform.
Incase your site has only one page, which is an amp page, you should still not forget to add the rel=canonical which will point to itself −
<link rel = "canonical" href = "https://www.mypage.com/news/amp/myfirstnews_amp.html">
The following diagram shows a reference to rel=amphtml pointing to amp page and rel=canonical pointing to standard html page.

Fonts Using Link
Fonts can be loaded externally using link as shown below −
<link rel = "stylesheet" href = "https://fonts.googleapis.com/css?family=Roboto">
Note that only whitelisted origins are allowed. The list of whitelisted origin where we can get the fonts is as shown here −
Fonts.com − https://fast.fonts.net
Google Fonts − https://fonts.googleapis.com
Font Awesome − https://maxcdn.bootstrapcdn.com
Typekit − https://use.typekit.net/kitId.css (replace kitId accordingly)
A working example using rel=canonical and rel=stylesheet is shown below −
Example
<!doctype html>
<html amp>
<head>
<meta charset ="utf-8">
<title>Amp Sample Page</title>
<link rel = "canonical" href = "amppage.html">
<meta name = "viewport" content = "width = device-width,minimum-scale=1,initial-scale = 1">
<style amp-custom>
h1 {color: red}
</style>
<style amp-boilerplate>
body{
-webkit-animation:
-amp-start 8s steps(1,end) 0s 1 normal both;-moz-animation:
-amp-start 8s steps(1,end) 0s 1 normal both;-ms-animation:
-amp-start 8s steps(1,end) 0s 1 normal both;animation:
-amp-start 8s steps(1,end) 0s 1 normal both
}
@-webkit-keyframes
-amp-start{from{visibility:hidden}to{visibility:visible}}@-moz-keyframes
-amp-start{from{visibility:hidden}to{visibility:visible}}@-ms-keyframes
-amp-start{from{visibility:hidden}to{visibility:visible}}@-o-keyframes
-amp-start{from{visibility:hidden}to{visibility:visible}}@keyframes
-amp-start{from{visibility:hidden}to{visibility:visible}}
</style>
<noscript>
<style amp-boilerplate>
body{
-webkit-animation:none;
-moz-animation:none;
-ms-animation:none;
animation:none
}
</style>
</noscript>
<script async src = "https://cdn.ampproject.org/v0.js"></script>
<link rel = "stylesheet" href = "https://fonts.googleapis.com/css?family=Roboto">
</head>
<body>
<h1>Amp Sample Page</h1>
<p>
<amp-img src = "images/christmas1.jpg"
width = "300" height = "250"
layout = "responsive">
</amp-img>
</p>
<p style = "font-family: 'Roboto'; font-size:25px;">
Welcome to Amp Page
</p>
</body>
</html>
Output
The output of the code shown above is as shown below −
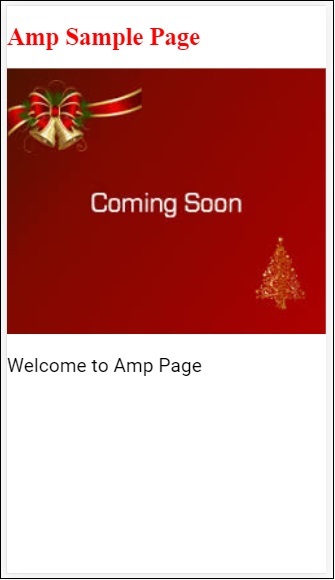
Google AMP - Font
Amp font is an amp-component in amp which basically helps to trigger and monitor custom fonts to amp page. This chapter discusses amp-font in detail.
To work with amp-font, we need to add following javascript file −
<script async custom-element = "amp-font" src = "https://cdn.ampproject.org/v0/amp-font-0.1.js"> </script>
The amp-font component is used for controlling the time taken for font loading. It has a timeout attribute, which takes time in milliseconds.By default, it is 3000ms. The component allows to add/remove classes from document.documentElement or document.body depending upon whether the font required is loaded or got into an error state.
The format for amp-font tag is as shown below −
<amp-font layout = "nodisplay" font-family = "Roboto Italic" timeout = "2000" on-error-remove-class = "robotoitalic-loading" on-error-add-class = "robotoitalic-missing" on-load-remove-class = "robotoitalic-loading" on-load-add-class = "robotoitalic-loaded"> </amp-font>
A working example on how to use amp-font in amp pages is as shown here −
Example
<!doctype html>
<html amp lang = "en">
<head>
<meta charset = "utf-8">
<script async src = "https://cdn.ampproject.org/v0.js"></script>
<title>Google AMP - Amp Font</title>
<link rel = "canonical" href = "http://example.ampproject.org/article-metadata.html">
<meta name = "viewport" content = "width = device-width,minimum-scale = 1,initial-scale = 1">
<style amp-boilerplate>
body{
-webkit-animation:
-amp-start 8s steps(1,end) 0s 1 normal both;-moz-animation:
-amp-start 8s steps(1,end) 0s 1 normal both;-ms-animation:
-amp-start 8s steps(1,end) 0s 1 normal both;animation:
-amp-start 8s steps(1,end) 0s 1 normal both
}
@-webkit-keyframes
-amp-start{from{visibility:hidden}to{visibility:visible}}@-moz-keyframes
-amp-start{from{visibility:hidden}to{visibility:visible}}@-ms-keyframes
-amp-start{from{visibility:hidden}to{visibility:visible}}@-o-keyframes
-amp-start{from{visibility:hidden}to{visibility:visible}}@keyframes
-amp-start{from{visibility:hidden}to{visibility:visible}}
</style>
<noscript>
<style amp-boilerplate>
body{
-webkit-animation:none;
-moz-animation:none;
-ms-animation:none;
animation:none}
</style>
</noscript>
<cript async custom-element = "amp-font"
src = "https://cdn.ampproject.org/v0/amp-font-0.1.js"
></script>
<style amp-custom>
@font-face {
font-family: 'This font is not available';
font-style: normal;
font-weight: 300;
src: url(fonts/MissingFont.ttf) format('truetype');
}
.font-missing {
color:red;
font-size:25px;
}
</style>
</head>
<body>
<h1>Google AMP - Amp Font</h1>
<amp-font
layout = "nodisplay"
font-family = "Font Does Not exist"
timeout = "2000"
on-error-remove-class = "font-missing"
on-error-add-class = "font-error"
on-load-remove-class = "font-missing"
on-load-add-class = "font-loaded">
</amp-font>
<p class = "font-missing">
Example of amp-font component to show how
attributes on-error-remove-class,
on-error-add-class, on-load-remove-class
and on-load-add-class works when the font
file to be loaded does not exist.
</p>
</body>
</html>
Output
The output of the sample code given above is as shown below −
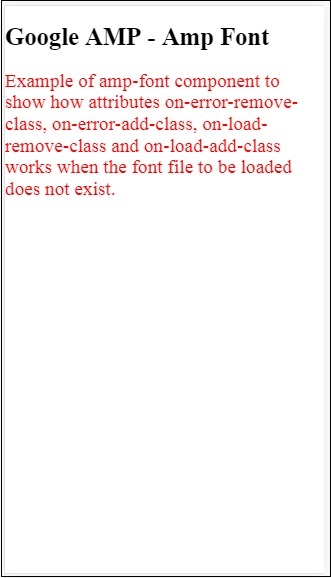
An example of amp-font when font file loads successfully is shown here −
Example
<!doctype html>
<html amp lang = "en">
<head>
<meta charset = "utf-8">
<script async src = "https://cdn.ampproject.org/v0.js"></script>
<title>Google AMP - Amp Font</title>
<link rel = "canonical" href = "http://example.ampproject.org/article-metadata.html">
<meta name = "viewport" content = "width = device-width,minimum-scale = 1,initial-scale = 1">
<style amp-boilerplate>
body{
-webkit-animation:
-amp-start 8s steps(1,end) 0s 1 normal both;-moz-animation:
-amp-start 8s steps(1,end) 0s 1 normal both;-ms-animation:
-amp-start 8s steps(1,end) 0s 1 normal both;animation:
-amp-start 8s steps(1,end) 0s 1 normal both
}
@-webkit-keyframes
-amp-start{from{visibility:hidden}to{visibility:visible}}@-moz-keyframes
-amp-start{from{visibility:hidden}to{visibility:visible}}@-ms-keyframes
-amp-start{from{visibility:hidden}to{visibility:visible}}@-o-keyframes
-amp-start{from{visibility:hidden}to{visibility:visible}}@keyframes
-amp-start{from{visibility:hidden}to{visibility:visible}}
</style>
<noscript>
<style amp-boilerplate>
body{
-webkit-animation:none;
-moz-animation:none;
-ms-animation:none;
animation:none}
</style>
</noscript>
<script async custom-element = "amp-font"
src = "https://cdn.ampproject.org/v0/amp-font-0.1.js">
</script>
<style amp-custom>
@font-face {
font-family: 'This font is not available';
font-style: normal;
font-weight: 300;
src: url(fonts/MissingFont.ttf)
format('truetype');
}
@font-face {
font-family: 'Roboto Italic';
font-style: normal;
font-weight: 300;
src:url(fonts/Roboto-Italic.ttf) format('truetype');
}
.font-missing {
color:red;
font-size:25px;
}
.robotoitalic-loading {
color: green;
}
.robotoitalic-loaded {
font-size:25px;
color: blue;
}
.robotoitalic-missing {
color: red;
}
.robotoitalic {
font-family: 'Roboto Italic';
}
</style>
</head>
<body>
<h1>Google AMP - Amp Font</h1>
<amp-font
layout = "nodisplay"
font-family = "Font Does Not exist"
timeout = "2000"
on-error-remove-class = "font-missing"
on-error-add-class = "font-error"
on-load-remove-class = "font-missing"
on-load-add-class = "font-loaded">
</amp-font>
<p class="font-missing">
Example of amp-font component to show
how attributes on-error-remove-class,
on-error-add-class, on-load-remove-class
and on-load-add-class works when the
font file to be loaded does not exist.
</p>
<amp-font
layout = "nodisplay"
font-family = "Roboto Italic"
timeout = "2000"
on-error-remove-class = "robotoitalic-
loading"
on-error-add-class = "robotoitalic-missing"
on-load-remove-class = "robotoitalic-loading"
on-load-add-class = "robotoitalic-loaded">
</amp-font>
<p class = "robotoitalic">
Example of amp-font component to show how
attributes on-error-remove-class,
on-error-add-class, on-load-remove-class
and on-load-add-class works when the font
file exists and loads fine.
</p>
</body>
</html>
Output
The output of the sample code given above is as shown below −
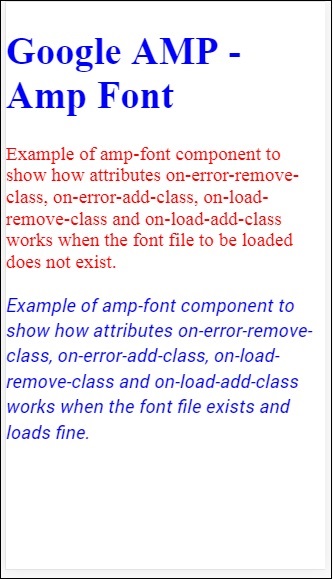
The above example shows how to work with font attributes like font-family,timeout,on-error-remove-class,on-error-add-class,on-load-remove-class,on-load-add-class.The classes decide whether there is error or success in font loading.
Google AMP - List
Amp-list is an amp-component which calls a CORS json endpoint and displays the data in the form of a json file inside a template. Let us understand this with the help of working examples.
To work with amp-list, we need to include following script −
<script async custom-element = "amp-list" src = "https://cdn.ampproject.org/v0/amp-list-0.1.js"> </script>
This is the format of amp-list tag −
<amp-list width = "auto" height = "100"
layout = "fixed-height" src = "amplist.json" class = "m1">
<template type = "amp-mustache">
<div class = "images_for_display">
<amp-img width = "150"
height = "100"
alt = "{{title}}"
src = "{{url}}">
</amp-img>
</div>
</template>
</amp-list>
The src used for amp-list is a json file which has the details to be listed. We can use normal html tags or amp-components inside amp-list to display the data from the json file. Template type amp-mustache is used for data-binding the data to be displayed.
Let us understand this with the help of a working example as shown below −
Example
<!doctype html>
<html amp lang = "en">
<head>
<meta charset = "utf-8">
<script async src = "https://cdn.ampproject.org/v0.js"></script>
<title>Google AMP - Amp List</title>
<link rel = "canonical" href = "http://example.ampproject.org/article-metadata.html">
<meta name = "viewport" content = "width = device-width,minimum-scale = 1,initial-scale = 1">
<style amp-boilerplate>
body{-webkit-animation:
-amp-start 8s steps(1,end) 0s 1 normal both;-moz-animation:
-amp-start 8s steps(1,end) 0s 1 normal both;-ms-animation:
-amp-start 8s steps(1,end) 0s 1 normal both;animation:
-amp-start 8s steps(1,end) 0s 1 normal both
}
@-webkit-keyframes
-amp-start{from{visibility:hidden}to{visibility:visible}}@-moz-keyframes
-amp-start{from{visibility:hidden}to{visibility:visible}}@-ms-keyframes
-amp-start{from{visibility:hidden}to{visibility:visible}}@-o-keyframes
-amp-start{from{visibility:hidden}to{visibility:visible}}@keyframes
-amp-start{from{visibility:hidden}to{visibility:visible}}
</style>
<noscript>
<style amp-boilerplate>
body{
-webkit-animation:none;-moz-animation:none;
-ms-animation:none;animation:none}
</style>
</noscript>
<script async custom-element = "amp-list"
src = "https://cdn.ampproject.org/v0/amp-list-0.1.js">
</script>
<script async custom-template = "amp-mustache"
src ="https://cdn.ampproject.org/v0/amp-mustache-0.2.js">
</script>
<style amp-custom>
amp-img {
border: 1px solid #ddd;
border-radius: 4px;
padding: 5px;
}
</style>
</head>
<body>
<h3>Google AMP - Amp List</h3>
<amp-list width = "auto" height = "100"
layout = "fixed-height" src = "amplist.json" class = "m1">
<template type = "amp-mustache">
<div class = "images_for_display">
<amp-img width = "150"
height = "100"
alt = "{{title}}"
src = "{{url}}">
</amp-img>
</div>
</template>
</amp-list>
</body>
</html>
Output
The output of the working example shown above is as shown below −
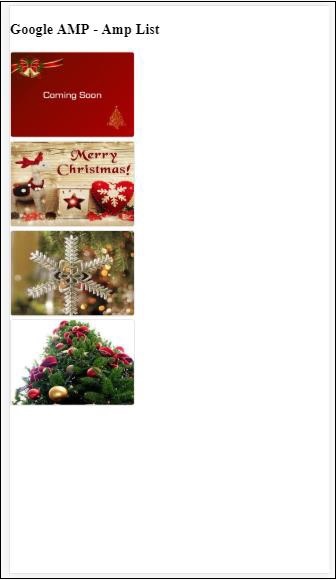
The json file used in the working example given above is shown here −
{
"items": [
{
"title": "Christmas Image 1",
"url": "images/christmas1.jpg"
},
{
"title": "Christmas Image 2",
"url": "images/christmas2.jpg"
},
{
"title": "Christmas Image 3",
"url": "images/christmas3.jpg"
},
{
"title": "Christmas Image 4",
"url": "images/christmas4.jpg"
}
]
}
We can refresh the list using event on the amp-list as shown in the code given below −
Example
<!doctype html>
<html amp lang = "en">
<head>
<meta charset = "utf-8">
<script async src = "https://cdn.ampproject.org/v0.js"></script>
<title>Google AMP - Amp List</title>
<link rel = "canonical" href = "http://example.ampproject.org/article-metadata.html">
<meta name = "viewport" content = "width = device-width,minimum-scale = 1,initial-scale = 1">
<style amp-boilerplate>
body{
-webkit-animation:
-amp-start 8s steps(1,end) 0s 1 normal both;-moz-animation:
-amp-start 8s steps(1,end) 0s 1 normal both;-ms-animation:
-amp-start 8s steps(1,end) 0s 1 normal both;animation:
-amp-start 8s steps(1,end) 0s 1 normal both
}
@-webkit-keyframes
-amp-start{from{visibility:hidden}to{visibility:visible}}@-moz-keyframes
-amp-start{from{visibility:hidden}to{visibility:visible}}@-ms-keyframes
-amp-start{from{visibility:hidden}to{visibility:visible}}@-o-keyframes
-amp-start{from{visibility:hidden}to{visibility:visible}}@keyframes
-amp-start{from{visibility:hidden}to{visibility:visible}}
</style>
<noscript>
<style amp-boilerplate>
body{
-webkit-animation:none;
-moz-animation:none;
-ms-animation:none;
animation:none}
</style>
</noscript>
<script async custom-element = "amp-list"
src = "https://cdn.ampproject.org/v0/amp-list-0.1.js">
</script>
<script async custom-template = "amp-mustache"
src = "https://cdn.ampproject.org/v0/amp-mustache-0.2.js">
</script>
<style amp-custom>
amp-img {
border: 1px solid #ddd;
border-radius: 4px;
padding: 5px;
}
button{
background-color: #ACAD5C;
color: white;
padding: 12px 20px;
border: none;
border-radius: 4px;
cursor: pointer;
float: right;
}
</style>
</head>
<body>
<h3>Google AMP - Amp List</h3>
<button on = "tap:amplist.refresh">Refresh Images</button>
<amp-list id = "amplist" width = "auto" height = "100"
layout = "fixed-height" src = "amplist.json" class = "m1">
<template type = "amp-mustache">
<div class = "images_for_display">
<amp-img width = "150"
height = "100"
alt = "{{title}}"
src = "{{url}}"></amp-img>
</div>
</template>
</amp-list>
</body>
</html>
Output
The output for the working example given above is as shown here −
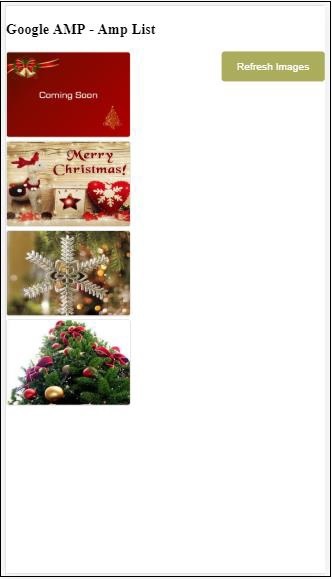
There is a button added which when clicked calls the refresh action using the on event as shown below −
<button on = "tap:amplist.refresh"> Refresh Images </button> //amplist is the id used for amp-list
Onclick of the button the json file is called again and the contents are loaded. If there are images already loaded, they will be cached.
Google AMP - User Notification
Google amp-user-notification is used to show dismissible dialog box messages to the user. We can use it to notify user about cookies on the page.
To work with amp-user-notification we need add following script on the page −
<script async custom-element = "amp-user-notification" src = "https://cdn.ampproject.org/v0/amp-user-notification-0.1.js"> </script>
Amp-user-notification tag format −
<amp-user-notification id = "my-notification" layout = "nodisplay">
<div>Example of amp-user-notification.
<button on = "tap:my-notification.dismiss">I accept
</button>
</div>
</amp-user-notification>
Let us understand the amp-user-notification using a working example −
Example
<!doctype html>
<html amp lang = "en">
<head>
<meta charset = "utf-8">
<script async src = "https://cdn.ampproject.org/v0.js"></script>
<title>Google AMP - Amp Selector</title>
<link rel = "canonical" href = " http://example.ampproject.org/article-metadata.html">
<meta name = "viewport" content = "width = device-width,minimum-scale = 1,initial-scale = 1">
<style amp-boilerplate>
body{
-webkit-animation:
-amp-start 8s steps(1,end) 0s 1 normal both;-moz-animation:
-amp-start 8s steps(1,end) 0s 1 normal both;-ms-animation:
-amp-start 8s steps(1,end) 0s 1 normal both;animation:
-amp-start 8s steps(1,end) 0s 1 normal both
}
@-webkit-keyframes
-amp-start{from{visibility:hidden}to{visibility:visible}}@-moz-keyframes
-amp-start{from{visibility:hidden}to{visibility:visible}}@-ms-keyframes
-amp-start{from{visibility:hidden}to{visibility:visible}}@-o-keyframes
-amp-start{from{visibility:hidden}to{visibility:visible}}@keyframes
-amp-start{from{visibility:hidden}to{visibility:visible}}
</style>
<noscript>
<style amp-boilerplate>
body{
-webkit-animation:none;
-moz-animation:none;
-ms-animation:none
animation:none
}
</style>
</noscript>
<script async custom-element = "amp-user-notification"
src = "https://cdn.ampproject.org/v0/amp-user-notification-0.1.js">
</script>
<style amp-custom>
div {
font-size: 15px;
background-color : #ccc;
padding: 10px 10px;
border-radius: 2px;
}
button{
background-color: #ACAD5C;
color: white;
cursor: pointer;
float: right;
}
</style>
</head>
<body>
<h3>Google AMP - Amp User Notification</h3>
<amp-user-notification
id = "my-notification"
layout = "nodisplay">
<div>Example of amp-user-notification.
<button on = "tap:my-notification.dismiss">I accept
</button>
</div>
</amp-user-notification>
</body>
</html>
Output
The output of the working example code given above is as shown below −
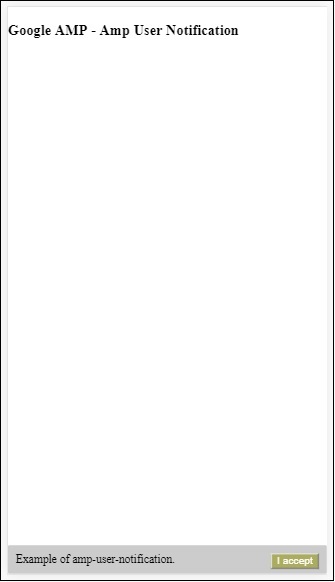
Once the user clicks the button, the notification is dismissed. Once dismissed, the notification will not be displayed even if you reload the page.
The data of the user notification is stored in the browser localStorage.If the localstorage is cleared and the page is refreshed, you will be able to see the notification again. You can try the same using localStorage.clear() in the browser console.
Using dismiss action the notification can be dismissed, by using the action on a button as follows
<button on = "tap:my-notification.dismiss"> I accept </button>
When user taps on the button the notification will be dismissed.
Google AMP - Next Page
Amp next page is an amp component which can dynamically load more pages when the user reaches at the end of the document. This chapter deals with this concept in detail.
To work with amp-next-page component we need to add following script −
<script async custom-element = "amp-next-page" src = "https://cdn.ampproject.org/v0/amp-next-page-0.1.js"> </script>
Also amp-next-page is not fully launched, so to get the test page working add the following meta tag −
<meta name = "amp-experiments-opt-in" content = "amp-next-page">
To load the pages dynamically, we need to give the page-urls to the script tag of type=application/json as shown below −
<amp-next-page>
<script type = "application/json">
{
"pages": [
{
"title": "Page 2",
"image": "images/christmas1.jpg",
"ampUrl": "ampnextpage1.html"
},
{
"title": "Page 3",
"image": "images/christmas1.jpg",
"ampUrl": "ampnextpage2.html"
}
]
}
</script>
</amp-next-page>
In the above tag, we are trying to load 2 pages ampnextpage1.html and ampnextpage2.html.
Now, let us see the final output. All the pages that need to be loaded has to be added to the pages array with title, image and ampUrl.
Example
<!doctype html>
<html amp>
<head>
<meta charset = "utf-8">
<title>Google Amp - Next Page</title>
<link rel = "canonical" href = "ampnextpage.html">
<meta name = "amp-experiments-opt-in" content = "amp-next-page">
<meta name = "viewport" content ="width = device-width,
minimum-scale = 1,initial-scale = 1">
<style amp-boilerplate>
body {
-webkit-animation:
-amp-start 8s steps(1,end) 0s 1 normal both;-moz-animation:
-amp-start 8s steps(1,end) 0s 1 normal both;-ms-animation:
-amp-start 8s steps(1,end) 0s 1 normal both;animation:
-amp-start 8s steps(1,end) 0s 1 normal both
}
@-webkit-keyframes
-amp-start{from{visibility:hidden}to{visibility:visible}}@-moz-keyframes
-amp-start{from{visibility:hidden}to{visibility:visible}}@-ms-keyframes
-amp-start{from{visibility:hidden}to{visibility:visible}}@-o-keyframes
-amp-start{from{visibility:hidden}to{visibility:visible}}@keyframes
-amp-start{from{visibility:hidden}to{visibility:visible}}
</style>
<noscript>
<style amp-boilerplate>
body{
-webkit-animation:none;
-moz-animation:none;
-ms-animation:none;
animation:none
}
</style>
</noscript>
<script async src="https://cdn.ampproject.org/v0.js">
</script>
<script async custom-element = "amp-next-page"
src = "https://cdn.ampproject.org/v0/amp-next-page-0.1.js">
</script>
</head>
<body>
<h1>Google Amp - Next Page</h1>
<h1>Page 1</h1>
<p>Start of page 1</p>
<p>This content is loaded from page 1</p>
<p>This content is loaded from page 1</p>
<p>This content is loaded from page 1</p>
<p>This content is loaded from page 1</p>
<p>This content is loaded from page 1</p>
<p>This content is loaded from page 1</p>
<p>This content is loaded from page 1</p>
<p>This content is loaded from page 1</p>
<p>This content is loaded from page 1</p>
<p>This content is loaded from page 1</p>
<p>This content is loaded from page 1</p>
<p>This content is loaded from page 1</p>
<p>This content is loaded from page 1</p>
<p>This content is loaded from page 1</p>
<p>This content is loaded from page 1</p>
<p>This content is loaded from page 1</p>
<p>This content is loaded from page 1</p>
<p>This content is loaded from page 1</p>
<p>This content is loaded from page 1</p>
<p>This content is loaded from page 1</p>
<p>This content is loaded from page 1</p>
<p>This content is loaded from page 1</p>
<p>End of page 1</p>
<amp-next-page>
<script type = "application/json">
{
"pages": [
{
"title": "Page 2",
"image": "images/christmas1.jpg",
"ampUrl": "ampnextpage1.html"
},
{
"title": "Page 3",
"image": "images/christmas1.jpg",
"ampUrl": "ampnextpage2.html"
}
]
}
</script>
</amp-next-page>
</body>
</html>
Output
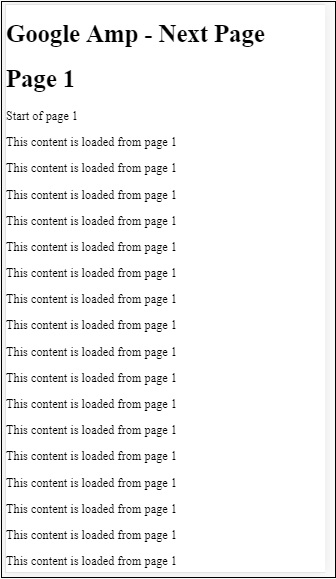
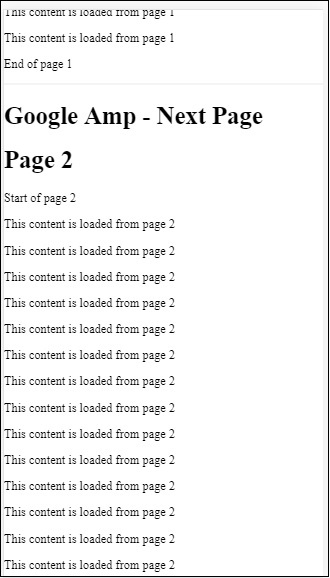
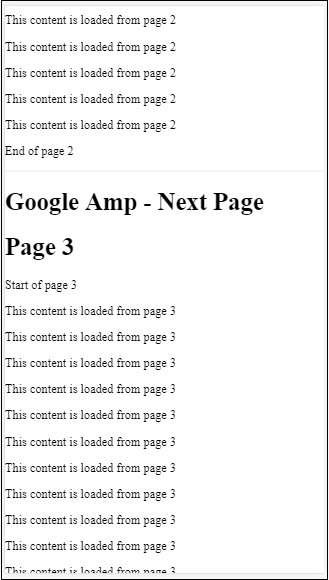
You can notice that as you scroll, the page the next page to be loaded is shown, also the page-url in the address bar is changed.
Google AMP - Attributes
This chapter will discuss all the common attributes used by the amp-components.
The list of common attributes is as follows −
- fallback
- heights
- layout
- media
- noloading
- on
- placeholder
- sizes
- width and height
fallback attribute
The fallback attribute is mostly used when the browser does not support the element used or has issues with the file loading or having errors with the file used.
For example, you are using amp-video and the media file is having issues on the browser so in such cases we can specify the fallback attribute and display a message that the media file cannot be played or not supported by the browser, instead of showing the error message on the page.
Fallback used on amp-video
<amp-video controls
width = "640"
height = "360"
layout = "responsive"
poster = "images/videoposter.png">
<source src = "video/bunny.webm" type = "video/webm" />
<source src = "video/samplevideo.mp4" type = "video/mp4" />
<div fallback>
<p>This browser does not support the video element.</p>
</div>
</amp-video>
Let us understand the working os fallback using an example −
Example
<!doctype html>
<html amp lang = "en">
<head>
<meta charset = "utf-8">
<script async src = "https://cdn.ampproject.org/v0.js"></script>
<title>Google AMP - Amp Video</title>
<link rel = "canonical" href = " http://example.ampproject.org/article-metadata.html">
<meta name = "viewport" content = "width = device-width,minimum-scale = 1,initial-scale = 1">
<style amp-boilerplate>
body{
-webkit-animation:
-amp-start 8s steps(1,end) 0s 1 normal both;-moz-animation:
-amp-start 8s steps(1,end) 0s 1 normal both;-ms-animation:
-amp-start 8s steps(1,end) 0s 1 normal both;animation:
-amp-start 8s steps(1,end) 0s 1 normal both
}
@-webkit-keyframes
-amp-start{from{visibility:hidden}to{visibility:visible}}@-moz-keyframes
-amp-start{from{visibility:hidden}to{visibility:visible}}@-ms-keyframes
-amp-start{from{visibility:hidden}to{visibility:visible}}@-o-keyframes
-amp-start{from{visibility:hidden}to{visibility:visible}}@keyframes
-amp-start{from{visibility:hidden}to{visibility:visible}}
</style>
<noscript>
<style amp-boilerplate>
body{
-webkit-animation:none;-moz-animation:none;
-ms-animation:none;animation:none
}
</style>
</noscript>
<script async custom-element = "amp-video"
src = "https://cdn.ampproject.org/v0/amp-video-0.1.js">
</script>
</head>
<body>
<h3>Google AMP - Amp Video</h3>
<amp-video controls
width = "640"
height = "360"
layout = "responsive"
poster = "images/videoposter.png">
<source src = "video/bunny.webm"type="video/webm" />
<source src = "video/samplevideo.mp4"type = "video/mp4" />
<div fallback>
<p>This browser does not support the video element.</p>
</div>
</amp-video>
</body>
</html>
Output

Heights Attribute
This attribute is basically supported for a responsive layout. You can use a media expression to the heights attribute and it applies to the height of the element. It also takes the percent values, so the height is calculated based on the percentage width given.
Example
<!doctype html>
<html amp lang = "en">
<head>
<meta charset = "utf-8">
<script async src = "https://cdn.ampproject.org/v0.js"></script>
<title>Google AMP - heights attribute</title>
<link rel = "canonical" href = "http://example.ampproject.org/article-metadata.html">
<meta name = "viewport" content = "width=device-width,minimum-scale = 1,initial-scale = 1">
<style amp-boilerplate>
body{
-webkit-animation:
-amp-start 8s steps(1,end) 0s 1 normal both;-moz-animation:
-amp-start 8s steps(1,end) 0s 1 normal both;-ms-animation:
-amp-start 8s steps(1,end) 0s 1 normal both;animation:
-amp-start 8s steps(1,end) 0s 1 normal both
}
@-webkit-keyframes
-amp-start{from{visibility:hidden}to{visibility:visible}}@-moz-keyframes
-amp-start{from{visibility:hidden}to{visibility:visible}}@-ms-keyframes
-amp-start{from{visibility:hidden}to{visibility:visible}}@-o-keyframes
-amp-start{from{visibility:hidden}to{visibility:visible}}@keyframes
-amp-start{from{visibility:hidden}to{visibility:visible}}
</style>
<noscript>
<style amp-boilerplate>
body{
-webkit-animation:none;-moz-animation:none;
-ms-animation:none;animation:none
}
</style>
</noscript>
<style amp-custom>
amp-img {
border: 1px solid black;
border-radius: 4px;
padding: 5px;
}
h1{font-family: "Segoe UI",Arial,sans-serif;font-weight: 400;margin: 10px 0;}
</style>
</head>
<body>
<h1>Google AMP - heights attribute</h1>
<amp-img src = "images/christmas1.jpg"
width = "320" height = "256"
heights = "(min-width:500px) 200px, 80%">
</amp-img>
</body>
</html>
Output

layout attribute
AMP-Layout is one of the important feature available in google-amp. Amp Layout makes sure the amp components are rendered properly when the page is loaded without causing any flicker or scrolling issue. It also checks the page rendering before any other remote resources like http request for images, data calls are done.
The list of layout supported by amp is as follows −
- Not Present
- Container
- fill
- fixed
- fixed-height
- flex-item
- intrinsic
- nodisplay
- Responsive
You will learn in detail about the same in the chapter Google AMP − Layout of this tutorial.
Let is understand the working of layout= responsive with the help of an example as shown −
Example
<!doctype html>
<html amp lang = "en">
<head>
<meta charset = "utf-8">
<script async src = "https://cdn.ampproject.org/v0.js"></script>
<title>Google AMP - Image>/title>
<link rel = "canonical" href = " http://example.ampproject.org/article-metadata.html">
<meta name = "viewport" content = "width = device-width,minimum-scale = 1,initial-scale = 1">
<style amp-boilerplate>
body {
-webkit-animation:
-amp-start 8s steps(1,end) 0s 1 normal both;-moz-animation:
-amp-start 8s steps(1,end) 0s 1 normal both;-ms-animation:
-amp-start 8s steps(1,end) 0s 1 normal both;animation:
-amp-start 8s steps(1,end) 0s 1 normal both
}
@-webkit-keyframes
-amp-start{from{visibility:hidden}to{visibility:visible}}@-moz-keyframes
-amp-start{from{visibility:hidden}to{visibility:visible}}@-ms-keyframes
-amp-start{from{visibility:hidden}to{visibility:visible}}@-o-keyframes
-amp-start{from{visibility:hidden}to{visibility:visible}}@keyframes
-amp-start{from{visibility:hidden}to{visibility:visible}}
</style>
<noscript>
<style amp-boilerplate>
body {
-webkit-animation:none;-moz-animation:none;
-ms-animation:none;animation:none
}
</style>
</noscript>
<style amp-custom>
amp-img {
border: 1px solid black;
border-radius: 4px;
padding: 5px;
}
displayitem {
display: inline-block;
width: 200px;
height:200px;
margin: 5px;
}
h1{font-family: "Segoe
UI",Arial,sans-serif;font-weight: 400;margin: 10px 0;}
</style>
</head>
<body>
<h1>Google AMP - Layout = responsive Image Example>/h1>
<div class = "displayitem">
<amp-img alt = "Beautiful Flower"
src = "images/flower.jpg"
width = "246"
height = "205"
layout = "responsive">
</amp-img>
</div>
</body>
</html>
Output
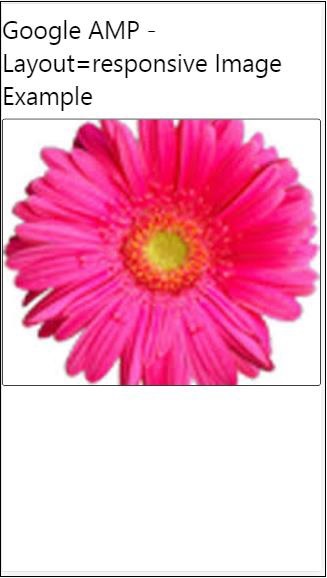
Media Attribute
This attribute can be used on most of the amp components. It takes a media query and if the value does not match the component will not be rendered.
Let us understand the working of media attribute with the help of an example −
Example
<!doctype html>
<html amp lang = "en">
<head>
<meta charset = "utf-8">
<script async src = "https://cdn.ampproject.org/v0.js"></script>
<title>Google AMP - Image</title>
<link rel = "canonical" href = " http://example.ampproject.org/article-metadata.html">
<meta name = "viewport" content = "width = device-width,minimum-scale = 1,initial-scale = 1">
<style amp-boilerplate>
body{
-webkit-animation:
-amp-start 8s steps(1,end) 0s 1 normal both;-moz-animation:
-amp-start 8s steps(1,end) 0s 1 normal both;-ms-animation:
-amp-start 8s steps(1,end) 0s 1 normal both;animation:
-amp-start 8s steps(1,end) 0s 1 normal both
}
@-webkit-keyframes
-amp-start{from{visibility:hidden}to{visibility:visible}}@-moz-keyframes
-amp-start{from{visibility:hidden}to{visibility:visible}}@-ms-keyframes
-amp-start{from{visibility:hidden}to{visibility:visible}}@-o-keyframes
-amp-start{from{visibility:hidden}to{visibility:visible}}@keyframes
-amp-start{from{visibility:hidden}to{visibility:visible}}
</style>
<noscript>
<style amp-boilerplate>
body {
-webkit-animation:none;-moz-animation:none;
-ms-animation:none;animation:none
}
</style>
</noscript>
<style amp-custom>
amp-img {
border: 1px solid black;
border-radius: 4px;
padding: 5px;
}
h1{font-family: "Segoe
UI",Arial,sans-serif;font-weight: 400;margin: 10px 0;}
</style>
</head>
<body>
<h1>Google AMP - Media Attribute</h1>
<div class = "displayitem">
<amp-img
media = "(min-width: 600px)"
src = "images/christmas1.jpg"
width = "466"
height = "355"
layout = "responsive">
</amp-img>
</div>
</body>
</html>
We have used media attribute on the <amp-img> tag as shown below −
<amp-img media = "(min-width: 600px)" src = "images/christmas1.jpg" width = "466" height = "355" layout = "responsive"> </amp-img>
Note that the image will not be displayed if the width of the screen is less than 600px. We will use the Google emulator mobile mode to test the example.
Output on Smartphone
We checked on the device the image is not visible as the width of the device is less than 600px. If we check on a tablet, we get the output as shown below −
Output on IPAD

Noloading Attribute
Amp components like <amp-img>, <amp-video>, <amp-facebook> shows a loading indicator before the actual content is loaded and shown to user.
To stop showing the loading indicator, we can use the noloading attribute as follows −
<amp-img src = "images/christmas1.jpg" noloading height = "300" width = "250" layout = "responsive"> </amp-img>
On Attribute
The on attribute is used on elements for event handling and the actions on the amp-components. The syntax to use on attribute is as follows −
Syntax −
on = "eventName:elementId[.methodName[(arg1 = value, arg2 = value)]]"
The details passed to the on attribute are as follows −
eventName − This takes the name of the event which is available for the amp-component. For example, for forms we can use submit-success, submit-error eventNames.
elementId − This takes the id of the element on which the event needs to be called. It can be the id of the form for which we want to know about the success or error.
methodName − This takes the name of the method to be called on the event occurrence.
arg=value − This takes the arguments with key=value form passed to the method.
It is also possible to pass multiple events to the On attribute as follows −
on = "submit-success:lightbox;submit-error:lightbox1"
Note − If there are multiple events, they are passed to the on attribute and seperated using semicolon(;).
Actions Attribute
Actions are basically used with the on attribute and the syntax is as follows −
on = "tab:elementid.hide;"
We can pass multiple actions as follows −
on = "tab:elementid.open;tab:elementid.hide;
Elementid is the id of the element on which the action is to be performed.
Amp has some globally defined events and actions which can be used on any amp-component and they are tap events and the actions are hide, show and togglevisibility.
Note − If you want to hide/show or use togglevisibility on any html or amp component, you can use on=tap:elementid.[hide/show/togglevisibility]
Placeholder Attribute
Placeholder attribute can be used on any html element such as an input element and also can be used on an amp-component.The placeholder is the first thing that will be shown on the page and once the content is loaded the placeholder is removed and is made invisible.
Placeholder on input element
<input type = "text" id = "date" name = "date" placeholder = "Start Date">
Placeholder on amp-component
<amp-anim src = "images/loreal.gif" width = "300" height = "250" layout = "responsive"> <amp-img placeholder src = "images/flower.jpg" layout = "fill"> </amp-img> </amp-anim>
Sizes Attribute
This is used just like the heights attribute. The value is an expression as shown below −
<amp-img src = "amp.png" width = "400" height = "300" layout = "responsive" sizes = "(min-width: 250px) 250px, 100vw"> </amp-img>
Width and Height Attributes
They are used on almost all the html elements and amp components. The width and height is used to mention the space an amp-element occupies on the page.
Example
<amp-img src = "amp.png" width = "400" height = "300" layout = "responsive"> </amp-img>
Google AMP - Styles and Custom CSS
Amp renders the pages on the screen after a lot careful consideration.The pages loaded will contain images, videos, iframes etc., which are more of http requests to be done. So the http request to be done are delayed so that the content on the page is displayed and also a necessary space is created for the images, videos, iframes to be loaded.
Amp has features such as placeholders, fallbacks, srcset and layout attribute to make the pages responsive and also makes sure the content on the page is not disturbed. In this chapter, let us discuss all these in detail.
Amp Style Tag
Amp has a style tag with amp-custom on it as shown below −
<style amp-custom>
button{
background-color: #ACAD5C;
color: white;
padding: 12px 20px;
border: none;
border-radius: 4px;
cursor: pointer;
float: left;
}
amp-img {
border: 1px solid black;
border-radius: 4px;
padding: 5px;
}
p {
padding: 1rem;
font-size:25px;
}
largeText {
font-size:30px;
background-color:red;
}
</style>
It is basically used to write the custom css required for the page. Please do not forget to add the amp-custom attribute; otherwise it will fail for amp validation as shown below −
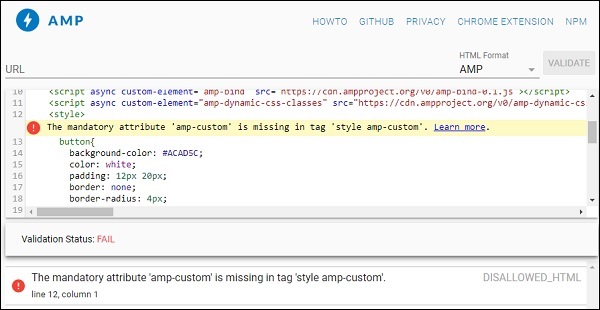
Amp also supports inline css for html elements as shown below −
<div style = "color:green;margin-left:30px;"> Welcome to TutorialsPoint</p>
External Stylesheet Tag
Amp does not support external stylesheet and will fail for validation when validated for amp.
Example
<!doctype html>
<html amp lang = "en">
<head>
<meta charset = "utf-8">
<script async src = "https://cdn.ampproject.org/v0.js"></script>
<title>Google AMP - Dynamic Css Classes</title>
<link rel = "canonical" href = "
http://example.ampproject.org/article-metadata.html">
<meta name = "viewport" content = "width = device-width,minimum-scale = 1,initial-scale = 1">
<style amp-boilerplate>
body {
-webkit-animation:
-amp-start 8s steps(1,end) 0s 1 normal both;-moz-animation:
-amp-start 8s steps(1,end) 0s 1 normal both;-ms-animation:
-amp-start 8s steps(1,end) 0s 1 normal both;animation:
-amp-start 8s steps(1,end) 0s 1 normal both
}
@-webkit-keyframes
-amp-start{from{visibility:hidden}to{visibility:visible}}@-moz-keyframes
-amp-start{from{visibility:hidden}to{visibility:visible}}@-ms-keyframes
-amp-start{from{visibility:hidden}to{visibility:visible}}@-o-keyframes
-amp-start{from{visibility:hidden}to{visibility:visible}}@keyframes
-amp-start{from{visibility:hidden}to{visibility:visible}}
</style>
<noscript>
<style amp-boilerplate>
body {
-webkit-animation:none;
-moz-animation:none;
-ms-animation:none;
animation:none
}
</style>
</noscript>
<script async custom-element = "amp-bind" src = "
https://cdn.ampproject.org/v0/amp-bind-0.1.js">
</script>
<script async custom-element = "amp-dynamic-css-classes"
src = "https://cdn.ampproject.org/v0/amp-dynamic-css-classes-0.1.js">
</script>
<link rel = "stylesheet"
href = "https://cdnjs.cloudflare.com/ajax/libs/materialize/0.9 8.0/css/materialize.min.css">
<style amp-custom>
p {
padding: 1rem;
font-size:25px;
}
</style>
</head>
<body>
<h3>Google AMP - Dynamic Css Classes</h3>
<div style = "color:green;margin-left:30px;">
Welcome to TutorialsPoint</p>
</body>
</html>
When validated with AMP validator, we get the following error.
To display the elements in the page responsively, amp elements need to specify the width and the height the element will take on the page. Adding layout = responsive will make the element responsive on the page maintaining the aspect ratio.
The details of layout attribute is discussed in detail in the chapter Google AMP Layout.
Google AMP - Dynamic CSS Classes
The amp-dynamic-css-classes adds dynamic classes to the body tag. In this chapter, let us learn the details of this tag.
To work with amp-dynamic-css-classes, we need to add following script −
<script asynccustom-element="amp-dynamic-css-classes" src = "https://cdn.ampproject.org/v0/amp-dynamic-css-classes-0.1.js"> </script>
There are two important classes that are taken care by amp-dynamic-css-classes −
- amp-referrer-*
- amp-viewer
Let us discuss each of them in detail.
amp-referrer-*
These classes are set depending on how the users are coming. It means if the user is coming from Google, the referrer class related to Google will be set. The same applies true for Twitter and Pinterest.
The classes are available based on the type of the referrer.
For example, for Google the following classes will be added if the user clicks amp pages from Google search engine.
- amp-referrer-www-google-com
- amp-referrer-google-com
- amp-referrer-com
Similarly there are classes available for Twitter, Pinterest, Linkedin etc.
amp-viewer
Amp viewer is basically going to change the amp url to get the details from Google cache. If you search something in Google search, the carousel that is displayed will a have all the amp pages.
When you click them, they are redirected to the url with Google url as the prefix. The amp-viewer class will be set when the page is being viewed by the user in amp- viewer and using dynamic classes.

When you click the amp page the url which you get in the address bar is as follows −
https://www.google.co.in/amp/s/m.timesofindia.com/sports/cricket/india-in-australia/to-hell-with-the-nets-boys-need-rest-ravi-shastri/amp_articleshow/67022458.cms

Example
<!doctype html>
<html amp lang = "en">
<head>
<meta charset = "utf-8">
<script async src = "https://cdn.ampproject.org/v0.js"></script>
<title>Google AMP - Dynamic Css Classes</title>
<link rel = "canonical" href = "http://example.ampproject.org/article-metadata.html">
<meta name = "viewport" content = "width = device-width,minimum-scale = 1,initial-scale = 1">
<style amp-boilerplate>
body{
-webkit-animation:
-amp-start 8s steps(1,end) 0s 1 normal both;-moz-animation:
-amp-start 8s steps(1,end) 0s 1 normal both;-ms-animation:
-amp-start 8s steps(1,end) 0s 1 normal both;animation:
-amp-start 8s steps(1,end) 0s 1 normal both
}
@-webkit-keyframes
-amp-start{from{visibility:hidden}to{visibility:visible}}@-moz-keyframes
-amp-start{from{visibility:hidden}to{visibility:visible}}@-ms-keyframes
-amp-start{from{visibility:hidden}to{visibility:visible}}@-o-keyframes
-amp-start{from{visibility:hidden}to{visibility:visible}}@keyframes
-amp-start{from{visibility:hidden}to{visibility:visible}}
</style>
<noscript>
<style amp-boilerplate>
body {
-webkit-animation:none;-moz-animation:none;
-ms-animation:none;animation:none
}
</style>
</noscript>
<script async custom-element = "amp-bind"
src = "https://cdn.ampproject.org/v0/amp-bind-0.1.js">
</script>
<script async custom-element = "amp-dynamic-css-classes"
src = "https://cdn.ampproject.org/v0/amp-dynamic-css-classes-0.1.js">
</script>
<link rel = "stylesheet" href = "https://cdnjs.cloudflare.com/ajax/libs/materialize/0.98.0/css/materialize.min.css">
<style amp-custom>
body:not(.amp-referrer-pinterest-com) .if-pinterest,
body:not(.amp-referrer-ampbyexample-com) .if-ampbyexample,
body:not(.amp-referrer-google-com) .if-google,
body:not(.amp-referrer-twitter-com) .if-twitter,
body:not(.amp-referrer-linkedin-com) .if-linkedin,
body:not(.amp-referrer-localhost) .if-localhost {
display: none;
}
body:not(.amp-viewer) .if-viewer,
body.amp-viewer .if-not-viewer {
display: none;
}
p {
padding: 1rem;
font-size:25px;
}
</style>
</head>
<body>
<h3>Google AMP - Dynamic Css Classes</h3>
<div>
<p class = "if-pinterest">You were referred here or embedded by Pinterest!</p>
<p class = "if-twitter">You were referred here or embedded by Twitter!</p>
<p class = "if-google">You were referred here or embedded by Google!</p>
<p class = "if-ampbyexample">You came here directly! Cool :)</p>
< class = "if-localhost">You came here directly! Cool :)</p>
</div>
<div>
<p class = "if-not-viewer">Hey! You are not coming from amp viewer</p>
<p class = "if-viewer">Hey! From amp viewer.</p>
<div>
</body>
</html>
Output
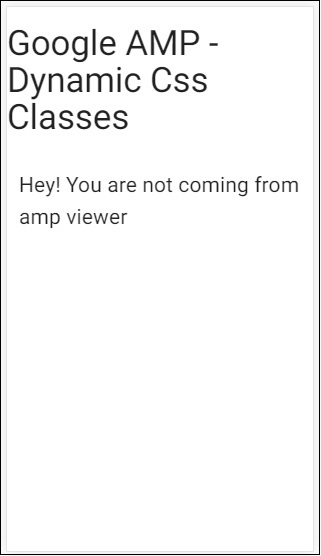
Google AMP - Actions and Events
To use actions or events on a amp-component, we can use the on attribute. In this chapter, let us discuss them in detail.
Events
The syntax to work with events is as follows −
on = "eventName:elementId[.methodName[(arg1 = value, arg2 = value)]]"
The details passed to on attribute are as follows −
eventName − This takes the name of the event which is available for the amp-component. For example, for forms we can use submit-success, submit-error eventNames.
elementId − This takes the id of the element on which the event needs to be called. It can be the id of the form for which we want to know about the success or error.
methodName − This takes the name of the method to be called on the event occurrence.
arg=value − This takes the arguments with key=value form passed to the method.
It is also possible to pass multiple events to the on attribute and it is done as follows −
on = "submit-success:lightbox;submit-error:lightbox1"
If there are multiple events, they are passed to the on attribute and separated using semicolon(;).
Actions
Actions are basically used with on attribute and the syntax is as follows −
on = "tab:elementid.hide;"
We can pass multiple actions as follows −
on = "tab:elementid.open;tab:elementid.hide;
Elementid is the id of the element on which the action is to be performed.
Amp has some globally defined event and actions which can be used on any amp-component and they are tap event and the actions are hide, show and togglevisibility.
If you want to hide/show or use togglevisibility on any html or amp component, you can use on=tap:elementid.[hide/show/togglevisibility]
Let us see some working examples for events and actions.
On Input Element
Let us understand this better with the help of a working example −
Example
<!doctype html>
<html amp lang = "en">
<head>
<meta charset = "utf-8">
<script async src = "https://cdn.ampproject.org/v0.js"></script>
<title>Google AMP - Amp Bind</title>
<link rel = "canonical" href = "http://example.ampproject.org/article-metadata.html">
<meta name = "viewport" content = "width = device-width,minimum-scale = 1,initial-scale = 1">
<style amp-boilerplate>
body{
-webkit-animation:
-amp-start 8s steps(1,end) 0s 1 normal both;-moz-animation:
-amp-start 8s steps(1,end) 0s 1 normal both;-ms-animation:
-amp-start 8s steps(1,end) 0s 1 normal both;animation:
-amp-start 8s steps(1,end) 0s 1 normal both
}
@-webkit-keyframes
-amp-start{from{visibility:hidden}to{visibility:visible}}@-moz-keyframes
-amp-start{from{visibility:hidden}to{visibility:visible}}@-ms-keyframes
-amp-start{from{visibility:hidden}to{visibility:visible}}@-o-keyframes
-amp-start{from{visibility:hidden}to{visibility:visible}}@keyframes
-amp-start{from{visibility:hidden}to{visibility:visible}}
</style>
<noscript>
<style amp-boilerplate>
body {
-webkit-animation:none;
-moz-animation:none;
-ms-animation:none;
animation:none
}
</style>
</noscript>
<script async custom-element = "amp-bind" src = "
https://cdn.ampproject.org/v0/amp-bind-0.1.js">
</script>
<script async custom-element = "amp-lightbox" src = "
https://cdn.ampproject.org/v0/amp-lightbox-0.1.js">
</script>
<style amp-custom>
button{
background-color: #ACAD5C;
color: white;
padding: 12px 20px;
border: none;
border-radius: 4px;
cursor: pointer;
float: left;}
.lightbox {
background: rgba(211,211,211,0.8);
width: 100%;
height: 100%;
position: absolute;
display: flex;
align-items: center;
justify-content: center;
}
#txtname{
width: 100%;
padding: 12px 20px;
margin: 8px 0;
display: inline-block;
border: 1px solid #ccc;
border-radius: 4px;
box-sizing: border-box;
}
div {
font-size:25px;
}
</style>
</head>
<body>
<h3>Google AMP - Amp Bind</h3>
<button on = "tap:AMP.setState({displaylightbox: true})">
Click Here
</button>
<br/>
<br/>
<h3>AMP - Input Element</h3>
<input id = "txtname" placeholder = "Type here" on =
"input-throttled:AMP.setState({name: event.value})">
<div [text] = "name"></div>
</body>
</html>
Output
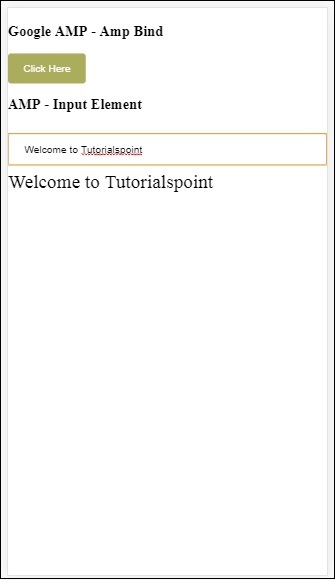
Note that in the above example, we are using event on the input field as follows −
<input id = "txtname" placeholder = "Type here"
on = "input-throttled:AMP.setState({name: event.value})">
The event used is input-throlled.
We can also use change as follows −
<input id = "txtname" placeholder = "Type here" on =
"change:AMP.setState({name: event.value})">
The output will be displayed once the user comes out of the input box. We can use change event on input type as radio, checkbox etc and also on select element.
<input id = "txtname" placeholder = "Type here" on =
"input-debounced:AMP.setState({name: event.value})">
Event input-debounced is same as changeevent but the output is seen after 300ms after the user types.
Example
<!doctype html>
<html amp lang = "en">
<head>
<meta charset = "utf-8">
<script async src = "https://cdn.ampproject.org/v0.js"></script>
<title>Google AMP - Amp Bind</title>
<link rel = "canonical" href = " http://example.ampproject.org/article-metadata.html">
<meta name = "viewport" content = "width = device-width,minimum-scale = 1,initial-scale = 1">
<style amp-boilerplate>
body{
-webkit-animation:
-amp-start 8s steps(1,end) 0s 1 normal both;-moz-animation:
-amp-start 8s steps(1,end) 0s 1 normal both;-ms-animation:
-amp-start 8s steps(1,end) 0s 1 normal both;animation:
-amp-start 8s steps(1,end) 0s 1 normal both
}
@-webkit-keyframes
-amp-start{from{visibility:hidden}to{visibility:visible}}@-moz-keyframes
-amp-start{from{visibility:hidden}to{visibility:visible}}@-ms-keyframes
-amp-start{from{visibility:hidden}to{visibility:visible}}@-o-keyframes
-amp-start{from{visibility:hidden}to{visibility:visible}}@keyframes
-amp-start{from{visibility:hidden}to{visibility:visible}}
</style>
<noscript>
<style amp-boilerplate>
body{
-webkit-animation:none;
-moz-animation:none;
-ms-animation:none;
animation:none}
</style>
</noscript>
<script async custom-element = "amp-bind"
src = "https://cdn.ampproject.org/v0/amp-bind-0.1.js">
</script>
<script async custom-element = "amp-lightbox"
src = "https://cdn.ampproject.org/v0/amp-lightbox-0.1.js">
</script>
<style amp-custom>
button{
background-color: #ACAD5C;
color: white;
padding: 12px 20px;
border: none;
border-radius: 4px;
cursor: pointer;
float: left;
}
.lightbox {
background: rgba(211,211,211,0.8);
width: 100%;
height: 100%;
position: absolute;
display: flex;
align-items: center;
justify-content: center;
}
#txtname{
width: 100%;
padding: 12px 20px;
margin: 8px 0;
display: inline-block;
border: 1px solid #ccc;
border-radius: 4px;
box-sizing: border-box;
}
div {
font-size:25px;
}
</style>
</head>
<body>
<h3>Google AMP - Amp Bind</h3>
<button on = "tap:AMP.setState({displaylightbox: true})">
Click Here
</button>
<br/>
<br/>
<h3>AMP - Input Element</h3>
<input id = "txtname" placeholder = "Type here" on =
"input-debounced:AMP.setState({name: event.value})">
<div [text] = "name"></div>
</body>
</html>
Output
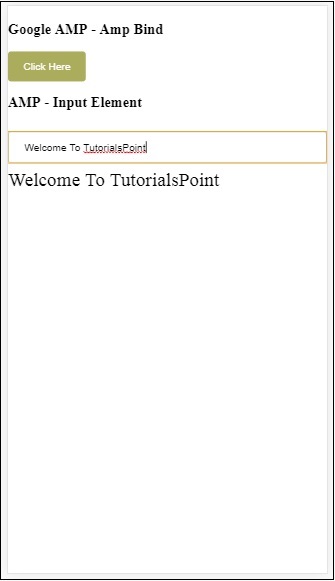
On Amp Lightbox
In this section, we are going to test the following events on lightbox −
- lightboxOpen
- lightboxClose
Example
<!doctype html>
<html amp lang = "en">
<head>
<meta charset = "utf-8">
<script async src = "https://cdn.ampproject.org/v0.js"></script>
<title>Google AMP - Amp Lightbox</title>
<link rel = "canonical" href = " http://example.ampproject.org/article-metadata.html">
<meta name = "viewport" content = "width = device-width,minimum-scale = 1,initial-scale = 1">
<style amp-boilerplate>
body{
-webkit-animation:
-amp-start 8s steps(1,end) 0s 1 normal both;-moz-animation:
-amp-start 8s steps(1,end) 0s 1 normal both;-ms-animation:
-amp-start 8s steps(1,end) 0s 1 normal both;animation:
-amp-start 8s steps(1,end) 0s 1 normal both
}
@-webkit-keyframes
-amp-start{from{visibility:hidden}to{visibility:visible}}@-moz-keyframes
-amp-start{from{visibility:hidden}to{visibility:visible}}@-ms-keyframes
-amp-start{from{visibility:hidden}to{visibility:visible}}@-o-keyframes
-amp-start{from{visibility:hidden}to{visibility:visible}}@keyframes
-amp-start{from{visibility:hidden}to{visibility:visible}}
</style>
<noscript>
<style amp-boilerplate>
body{
-webkit-animation:none;
-moz-animation:none;
-ms-animation:none;
animation:none}
</style>
</noscript>
<script async custom-element = "amp-bind"
src = "https://cdn.ampproject.org/v0/amp-bind-0.1.js">
</script>
<script async custom-element = "amp-lightbox"
src = "https://cdn.ampproject.org/v0/amp-lightbox-0.1.js">
</script>
<style amp-custom>
amp-img {
border: 1px solid #ddd;
border-radius: 4px;
padding: 5px;
}
button {
background-color: #ACAD5C;
color: white;
padding: 12px 20px;
border: none;
border-radius: 4px;
cursor: pointer;
float: left;
}
.lightbox {
background: rgba(211,211,211,0.8);
width: 100%;
height: 100%;
position: absolute;
display: flex;
align-items: center;
justify-content: center;
}
p{font-size:30px;}
</style>
</head>
<body>
<h3>Google AMP - Amp Lightbox</h3>
<p [text] = "'Lightbox is ' + lightboxstatus + '.'">
Lightbox Event Testing
</p>
<button on = "tap:my-lightbox.open">
Show LightBox
</button>
<amp-lightbox id = "my-lightbox" layout = "nodisplay"
close-button on = "lightboxOpen:AMP.setState({lightboxstatus:'opened'});
lightboxClose:AMP.setState({lightboxstatus:'closed'});">
<div class = "lightbox">
<amp-img alt = "Beautiful Flower" src = "images/loreal.gif"
width = "246"
height = "205">
</amp-img>
</div>
</amp-lightbox>
</body>
</html>
Output
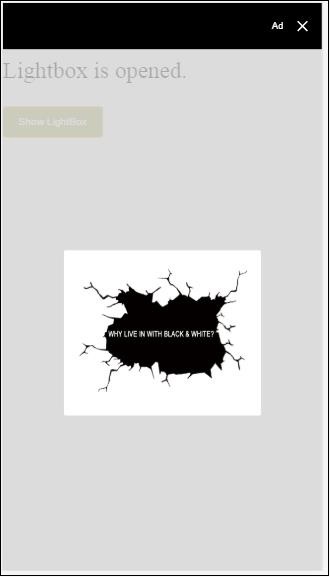
The following code shows how the events open and close are implemented on lightbox −
<p [text]="'Lightbox is ' + lightboxstatus + '.'">Lightbox Event Testing</p>
<button on = "tap:my-lightbox.open">Show LightBox</button>
<amp-lightbox id = "my-lightbox" layout = "nodisplay"
close-button on = "lightboxOpen:AMP.setState({lightboxstatus:'opened'});
lightboxClose:AMP.setState({lightboxstatus:'closed'});">
<div class = "lightbox">
<amp-img alt = "Beautiful Flower" src = "images/loreal.gif"
width = "246"
height = "205">
</amp-img>
</div>
</amp-lightbox>
Event on Amp -Selector
The event available on amp-selector is select.
Example
<!doctype html>
<html amp lang = "en">
<head>
<meta charset = "utf-8">
<script async src = "https://cdn.ampproject.org/v0.js"></script>
<title>Google AMP - Amp Selector</title>
<link rel = "canonical" href = "http://example.ampproject.org/article-metadata.html">
<meta name = "viewport" content = "width = device-width,minimum-scale = 1,initial-scale = 1">
<style amp-boilerplate>
body{
-webkit-animation:
-amp-start 8s steps(1,end) 0s 1 normal both;-moz-animation:
-amp-start 8s steps(1,end) 0s 1 normal both;-ms-animation:
-amp-start 8s steps(1,end) 0s 1 normal both;animation:
-amp-start 8s steps(1,end) 0s 1 normal both
}
@-webkit-keyframes
-amp-start{from{visibility:hidden}to{visibility:visible}}@-moz-keyframes
-amp-start{from{visibility:hidden}to{visibility:visible}}@-ms-keyframes
-amp-start{from{visibility:hidden}to{visibility:visible}}@-o-keyframes
-amp-start{from{visibility:hidden}to{visibility:visible}}@keyframes
-amp-start{from{visibility:hidden}to{visibility:visible}}
</style>
<noscript>
<style amp-boilerplate>
body {
-webkit-animation:none;
-moz-animation:none;
-ms-animation:none;
animation:none
}
</style>
</noscript>
<script async custom-element = "amp-bind"
src = "https://cdn.ampproject.org/v0/amp-bind-0.1.js">
</script>
<script async custom-element = "amp-selector"
src = "https://cdn.ampproject.org/v0/amp-selector-0.1.js">
</script>
<style amp-custom>
.radio-menu {
list-style: none;
}
.radio-menu [option][selected] {
outline: none;
}
.radio-menu [option] {
display: flex;
align-items: center;
}
.radio-menu [option]:before {
transition: background 0.25s ease-in-out;
content: "";
display: inline-block;
width: 24px;
height: 24px;
margin: 8px;
border-radius: 100%;
border: solid 1px black;
}
.radio-menu [option = red][selected]:before {
text-align: center;
content: "";
color: white;
background: red;
}
.radio-menu [option = green][selected]:before {
text-align: center;
content: "";
color: white;
background: green;
}
.radio-menu [option = blue][selected]:before {
text-align: center;
content: "";
color: white;
background: blue;
}
p{font-size:30px;}
</style>
</head>
<body>
<h3>Google AMP - Amp Selector</h3>
<p [text] = "'Color selected is ' + ampselectorstatus + '.'">
Amp Selector Event Testing
<p>
<amp-selector
class = "radio-menu"
layout = "container"
name = "my-selector"
on = "select:AMP.setState({ampselectorstatus:event.selectedOptions})">
<div option = "red">
Red
</div>
<div option = "green">
Green
</div>
<div option = "blue">
Blue
</div>
</amp-selector>
</body>
</html>
Output
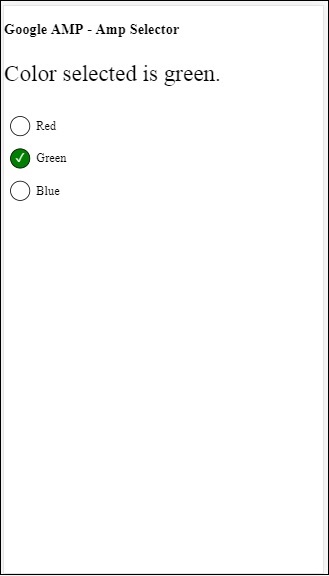
The event select is used as follows −
<p [text]="'Color selected is ' + ampselectorstatus + '.'">
Amp Selector Event Testing
</p>
<amp-selector
class = "radio-menu"
layout ="container"
name =" my-selector"
on = "select:AMP.setState({ampselectorstatus:event.selectedOptions})">
<div option = "red">
Red
</div>
<div option = "green">
Green
</div>
<div option = "blue">
Blue
</div>
</amp-selector>
Event on Amp-Sidebar
The events available are sidebarOpen and sidebarClose.
Example
<!doctype html>
<html amp lang = "en">
<head>
<meta charset = "utf-8">
<script async src = "https://cdn.ampproject.org/v0.js"></script>
<title>Google AMP - Amp Sidebar</title>
<link rel = "canonical" href = "http://example.ampproject.org/article-metadata.html">
<meta name = "viewport" content = "width = device-width,minimum-scale = 1,initial-scale = 1">
<style amp-boilerplate>
body{
-webkit-animation:
-amp-start 8s steps(1,end) 0s 1 normal both;-moz-animation:
-amp-start 8s steps(1,end) 0s 1 normal both;-ms-animation:
-amp-start 8s steps(1,end) 0s 1 normal both;animation:
-amp-start 8s steps(1,end) 0s 1 normal both
}
@-webkit-keyframes
-amp-start{from{visibility:hidden}to{visibility:visible}}@-moz-keyframes
-amp-start{from{visibility:hidden}to{visibility:visible}}@-ms-keyframes
-amp-start{from{visibility:hidden}to{visibility:visible}}@-o-keyframes
-amp-start{from{visibility:hidden}to{visibility:visible}}@keyframes
-amp-start{from{visibility:hidden}to{visibility:visible}}
</style>
<noscript>
<style amp-boilerplate>
body{
-webkit-animation:none;
-moz-animation:none;
-ms-animation:none;
animation:none
}
</style>
</noscript>
<script async custom-element = "amp-bind"
src = "https://cdn.ampproject.org/v0/amp-bind-0.1.js">
</script>
<script async custom-element = "amp-sidebar"
src = "https://cdn.ampproject.org/v0/amp-sidebar-0.1.js">
</script>
<style amp-custom>
amp-img {
border: 1px solid #ddd;
border-radius: 4px;
padding: 5px;
}
button{
background-color: #ACAD5C;
color: white;
padding: 12px 20px;
border: none;
border-radius: 4px;
cursor: pointer;
float: left;
}
.amp-sidebar-toolbar-target-shown {
display: none;
}
p{font-size:30px;}
</style>
</head>
<body>
<h3>Google AMP - Amp Sidebar</h3>
<p [text] = "'Sidebar is ' + ampsidebarstatus + '.'">
Amp Sidebar Event Testing
</p>
<button on = "tap:sidebar1">
Show Sidebar
</button>
<amp-sidebar
id = "sidebar1"
layout = "nodisplay"
side = "right"
on = "sidebarOpen:AMP.setState({ampsidebarstatus: 'Opened'});
sidebarClose:AMP.setState({ampsidebarstatus: 'Closed'})">
<ul>
<li>Nav item 1</li>
<li>
<a href = "#idTwo" on = "tap:idTwo.scrollTo">Nav item 2</a>
</li>
<li>Nav item 3</li>
<li>
<a href = "#idFour" on="tap:idFour.scrollTo">Nav item 4</a>
</li>
<li>Nav item 5</li>
<li>Nav item 6</li>
</ul>
</amp-sidebar>
<div id = "target-element">
</div>
</body>
</html>
Output
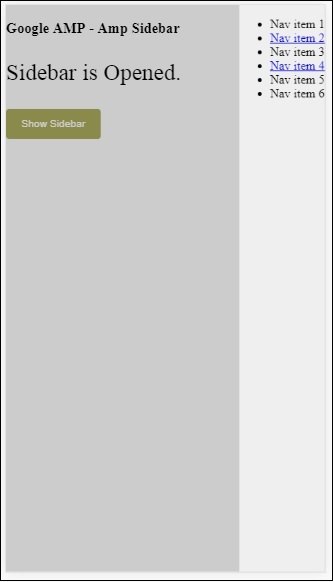
The events are used as follows −
<p [text] = "'Sidebar is ' + ampsidebarstatus + '.'">
Amp Sidebar Event Testing
</p>
<button on = "tap:sidebar1">
Show Sidebar
</button>
<amp-sidebar
id = "sidebar1"
layout = "nodisplay"
side = "right"
on = "sidebarOpen:AMP.setState({ampsidebarstatus: 'Opened'});
sidebarClose:AMP.setState({ampsidebarstatus: 'Closed'})">
<ul>
<li>Nav item 1</li>
<li>
<a href = "#idTwo" on = "tap:idTwo.scrollTo">Nav item 2</a>
</li>
<li>Nav item 3</li>
<li>
<a href = "#idFour" on = "tap:idFour.scrollTo">Nav item 4</a>
</li>
<li>Nav item 5</li>
<li>Nav item 6</li>
</ul>
</amp-sidebar>
Google AMP - Animations
Amp-animation is an amp component which defines animations to be used on other amp components. This chapter discusses them in detail.
To work with amp-animation, we need to add following script −
<script async custom-element = "amp-animation" src = "https://cdn.ampproject.org/v0/amp-animation-0.1.js"> </script>
The details of animation are defined inside a json structure.
The basic structure of amp-animation is as shown here −
<amp-animation layout = "nodisplay">
<script type = "application/json">
{
// Timing properties
...
"animations": [
{
// animation 1
},
...
{
// animation n
}
]
}
</script>
</amp-animation>
The animation component consists of the following − Selectors, Variables, Timing Properties, Keyframes etc.
{
"selector": "#target-id",
// Variables
// Timing properties
// Subtargets
...
"keyframes": []
}
Selector
Here we need to give the class or id of the element on which the animation will be used.
Variables
They are the values which are defined to be used inside keyframes. Variables are defined using var().
Example
{
"--delay": "0.5s",
"animations": [
{
"selector": "#target1",
"delay": "var(--delay)",
"--x": "150px",
"--y" : "200px",
"keyframes": {
"transform": "translate(var(--x), var(--y, 0px)"
}
}
]
}
Here delay, x and y are variables and the values for the variables are defined in the example shown.
Timing properties
Here you can define the duration and delay for your animation. The following are the timing properties supported −
| Property | Value | Description |
|---|---|---|
| duration | Time property.Value has to be in milliseconds. | The duration used for animation. |
| delay | Time property.Value has to be in milliseconds. | The delay before animation starts executing |
| endDelay | Time property.Value has to be in milliseconds or seconds. | The delay given which applies when the animation completes. |
| iterations | Value has to be a number. | The number of times the animation has to repeat. |
| iterationStart | Value has to be a number. | The time offset at which the effect begins animating. |
| easing | Value is a string | This is used to get the easing effect to the animation.Some examples for easing are linear , ease, ease-in, ease-out , ease-in-out etc |
| direction | Value is a string | One of "normal", "reverse", "alternate" or "alternate-reverse". |
| fill | Value is a string | Values can be "none", "forwards", "backwards", "both", "auto". |
Keyframes
Keyframes can be defined in many ways such as in object form or array form. Consider the following examples.
Example
"keyframes": {"transform": "translate(100px,200px)"}
Example
{
"keyframes": {
"opacity": [1, 0],
"transform": ["scale(1)", "scale(2)"]
}
}
Example
{
"keyframes": [
{"opacity": 1, "transform": "scale(1)"},
{"opacity": 0, "transform": "scale(2)"}
]
}
Example
{
"keyframes": [
{"easing": "ease-out", "opacity": 1, "transform": "scale(1)"},
{"opacity": 0, "transform": "scale(2)"}
]
}
Keyframe using CSS
<style amp-custom>
div {
width: 100px;
height: 100px;
background-color: red;
position: relative;
margin: 0 auto;
transform:scale(3);
}
@keyframes example { 0% {transform:scale(3)}
75% {transform:scale(2)}
100% {transform:scale(1)}
}
</style>
<amp-animation layout = "nodisplay">
<script type = "application/json">
{
"duration": "4s",
"keyframes": "example"
}
</script>
</amp-animation>
There are some CSS properties that can be used inside keyframes. The supported ones are called whitelisted properties. The following are the whitelisted properties which can be used inside keyframes −
- opacity
- transform
- visibility
- 'offsetDistance'
Note − Using any other property besides the white listed ones will throw error in the console.
Let us now understand through a simple example which will rotate the image when the animation is applied on it. In this example, we are rotating the image using amp-animation.
Example
<!doctype html>
<html amp lang = "en">
<head>
<meta charset = "utf-8">
<script async src = "https://cdn.ampproject.org/v0.js"></script>
<title>Google AMP - Amp Video</title>
<link rel = "canonical" href = "http://example.ampproject.org/article-metadata.html">
<meta name = "viewport" content = "width = device-width, minimum-scale = 1,initial-scale = 1">
<style amp-boilerplate>
body{
-webkit-animation:
-amp-start 8s steps(1,end) 0s 1 normal both;-moz-animation:
-amp-start 8s steps(1,end) 0s 1 normal both;-ms
-amp-start 8s steps(1,end) 0s 1 normal both;animation:
-amp-start 8s steps(1,end) 0s 1 normal both
}
@-webkit-keyframes
-amp-start{from{visibility:hidden}to{visibility:visible}}@-moz-keyframes
-amp-start{from{visibility:hidden}to{visibility:visible}}@-ms-keyframes
-amp-start{from{visibility:hidden}to{visibility:visible}}@-o-keyframes
-amp-start{from{visibility:hidden}to{visibility:visible}}@keyframes
-amp-start{from{visibility:hidden}to{visibility:visible}}
</style>
<noscript>
<style amp-boilerplate>
body{
-webkit-animation:none;
-moz-animation:none;
-ms-animation:none;
animation:none
}
</style>
</noscript>
<script async custom-element = "amp-animation"
src =" https://cdn.ampproject.org/v0/amp-animation-0.1.js">
</script>
<style amp-custom>
amp-img {
border: 1px solid black;
border-radius: 4px;
padding: 5px;
}
</style>
</head>
<body>
<h3>Google AMP - Amp Animation Example</h3>
<amp-animation id = "anim1" layout = "nodisplay" trigger = "visibility">
<script type = "application/json">
{
"duration": "1s",
"fill": "both",
"direction": "alternate",
"animations": [
{
"selector": "#image1",
"easing": "cubic-bezier(0,0,.21,1)",
"keyframes": {
"transform": "rotate(20deg)"
}
}
]
}
</script>
</amp-animation>
<br/>
<br/>
<amp-img
id = "image1"
src = "images/christmas1.jpg"
width = 300
height = 250
layout = "responsive">
</amp-img>
<br/>
</body>
</html>
Output

The details of amp-animation details used above are given in the code shown below −
<amp-animation id = "anim1" layout = "nodisplay" trigger = "visibility">
<script type = "application/json">
{
"duration": "1s",
"fill": "both",
"direction": "alternate",
"animations": [
{
"selector": "#image1",
"easing": "cubic-bezier(0,0,.21,1)",
"keyframes": {
"transform": "rotate(20deg)"
}
}
]
}
</script>
</amp-animation>
The selector here is the id of the image on which the rotate animation is applied −
<amp-img id = "image1" src = "images/christmas1.jpg" width = 300 height = 250 layout = "responsive"> </amp-img>
Example using Keyframes from CSS
Example
<!doctype html>
<html amp lang = "en">
<head>
<meta charset = "utf-8">
<script async src = "https://cdn.ampproject.org/v0.js"></script>
<title>Google AMP - Amp Video</title>
<link rel = "canonical" href = "http://example.ampproject.org/article-metadata.html">
<meta name = "viewport" content = "width = device-width,minimum-scale = 1,initial-scale = 1">
<style amp-boilerplate>
body{
-webkit-animation:
-amp-start 8s steps(1,end) 0s 1 normal both;-moz-animation:
-amp-start 8s steps(1,end) 0s 1 normal both;-ms-animation:
-amp-start 8s steps(1,end) 0s 1 normal both;animation:
-amp-start 8s steps(1,end) 0s 1 normal both
}
@-webkit-keyframes
-amp-start{from{visibility:hidden}to{visibility:visible}}@-moz-keyframes
-amp-start{from{visibility:hidden}to{visibility:visible}}@-ms-keyframes
-amp-start{from{visibility:hidden}to{visibility:visible}}@-o-keyframes
-amp-start{from{visibility:hidden}to{visibility:visible}}@keyframes
-amp-start{from{visibility:hidden}to{visibility:visible}}
</style>
<noscript>
<style amp-boilerplate>
body{
-webkit-animation:none;
-moz-animation:none;
-ms-animation:none;
animation:none
}
</style>
</noscript>
<script async custom-element = "amp-animation"
src = "https://cdn.ampproject.org/v0/amp-animation-0.1.js">
</script>
<style amp-custom>
div {
width: 100px;
height: 100px;
background-color: red;
position: relative;
margin: 0 auto;
transform:scale(3);
}
@keyframes example {
0% {transform:scale(3)}
75% {transform:scale(2)}
100% {transform:scale(1)}
}
</style>
</head>
<body>
<h3>Google AMP - Amp Animation Example</h3>
<amp-animation id = "anim1" layout = "nodisplay" trigger = "visibility">
<script type = "application/json">
{
"duration": "3s",
"fill": "both",
"direction": "alternate",
"animations": [{
"selector": "#image1",
"easing": "cubic-bezier(0,0,.21,1)",
"keyframes":"example"
}]
}
</script>
</amp-animation>
<br/>
<br/>
<div id = "image1"></div>
<br/>
</body>
</html>
Output
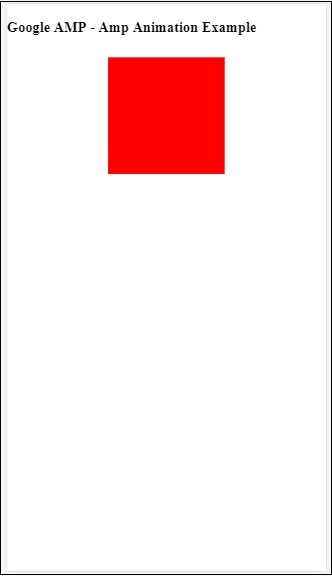
Animation Trigger
With trigger = visibility, the animation is applied by default. In order to start the animation on a event, we have to remove the trigger = visibility and add the event to start animation as shown in the example below −
Example
<!doctype html>
<html amp lang = "en">
<head>
<meta charset = "utf-8">
<script async src = "https://cdn.ampproject.org/v0.js"></script>
<title>Google AMP - Amp Video</title>
<link rel = "canonical" href = "http://example.ampproject.org/article-metadata.html">
<meta name = "viewport" content = "width = device-width,
minimum-scale = 1,initial-scale = 1">
<style amp-boilerplate>
body{
-webkit-animation:
-amp-start 8s steps(1,end) 0s 1 normal both;-moz-animation:
-amp-start 8s steps(1,end) 0s 1 normal both;-ms-animation:
-amp-start 8s steps(1,end) 0s 1 normal both;animation:
-amp-start 8s steps(1,end) 0s 1 normal both
}
@-webkit-keyframes
-amp-start{from{visibility:hidden}to{visibility:visible}}@-moz-keyframes
-amp-start{from{visibility:hidden}to{visibility:visible}}@-ms-keyframes
-amp-start{from{visibility:hidden}to{visibility:visible}}@-o-keyframes
-amp-start{from{visibility:hidden}to{visibility:visible}}@keyframes
-amp-start{from{visibility:hidden}to{visibility:visible}}
</style>
<noscript>
<style amp-boilerplate>
body{
-webkit-animation:none;
-moz-animation:none;
-ms-animation:none;
animation:none}
</style>
</noscript>
<script async custom-element = "amp-animation"
src = "https://cdn.ampproject.org/v0/amp-animation-0.1.js">
</script>
<style amp-custom>
div {
width: 100px;
height: 100px;
background-color: red;
position: relative;
margin: 0 auto;
transform:scale(2);
}
@keyframes example {
0% {transform:scale(2)}
75% {transform:scale(1)}
100% {transform:scale(0.5)}
}
button{
background-color: #ACAD5C;
color: white;
padding: 12px 20px;
border: none;
border-radius: 4px;
cursor: pointer;
float: left;
}
</style>
</head>
<body>
<h3>Google AMP - Amp Animation Example</h3>
<amp-animation id = "anim1" layout = "nodisplay">
<script type = "application/json">
{
"duration": "3s",
"fill": "both",
"direction": "alternate",
"animations": [{
"selector": "#image1",
"easing": "cubic-bezier(0,0,.21,1)",
"keyframes":"example"
}]
}
</script>
</amp-animation>
<button on = "tap:anim1.start">Start</button>
<br/>
<br/>
<div id = "image1"></div>
</body>
</html>
Note that animation will start when the start button is tapped.
Output

We have used action called start on On to start with the animation. Similarly, there are other actions supported which are as follows −
- start
- pause
- restart
- resume
- togglePause
- seekTo
- reverse
- finish
- cancel
Let us see a working example where we can use the action.
Example
<!doctype html>
<html amp lang = "en">
<head>
<meta charset = "utf-8">
<script async src = "https://cdn.ampproject.org/v0.js"></script>
<title>Google AMP - Amp Video</title>
<link rel = "canonical" href = "http://example.ampproject.org/article-metadata.html">
<meta name = "viewport" content = "width=device-width,minimum-scale = 1,initial-scale = 1">
<style amp-boilerplate>
body{
-webkit-animation:
-amp-start 8s steps(1,end) 0s 1 normal both;-moz-animation:
-amp-start 8s steps(1,end) 0s 1 normal both;-ms-animation:
-amp-start 8s steps(1,end) 0s 1 normal both;animation:
-amp-start 8s steps(1,end) 0s 1 normal both
}
@-webkit-keyframes
-amp-start{from{visibility:hidden}to{visibility:visible}}@-moz-keyframes
-amp-start{from{visibility:hidden}to{visibility:visible}}@-ms-keyframes
-amp-start{from{visibility:hidden}to{visibility:visible}}@-o-keyframes
-amp-start{from{visibility:hidden}to{visibility:visible}}@keyframes
-amp-start{from{visibility:hidden}to{visibility:visible}}
</style>
<noscript>
<style amp-boilerplate>
body{
-webkit-animation:none;
-moz-animation:none;
-ms-animation:none;
animation:none}
</style>
</noscript>
<script async custom-element = "amp-animation"
src = "https://cdn.ampproject.org/v0/amp-animation-0.1.js">
</script>
<style amp-custom>
#image1 {
width: 100px;
height: 100px;
background-color: red;
position: relative;
margin: 0 auto;
transform:scale(2);
}
@keyframes example {
0% {transform:scale(2)}
75% {transform:scale(1)}
100% {transform:scale(0.5)}
}
button1{
background-color: #ACAD5C;
color: white;
padding: 12px 20px;
border: none;
border-radius: 4px;
cursor: pointer;
float: left;
}
</style>
</head>
<body>
<h3>Google AMP - Amp Animation Example</h3>
<amp-animation id = "anim1" layout = "nodisplay">
<script type = "application/json">
{
"duration": "3s",
"fill": "both",
"direction": "alternate",
"animations": [{
"selector": "#image1",
"easing": "cubic-bezier(0,0,.21,1)",
"keyframes":"example"
}]
}
</script>
</amp-animation>
<button on = "tap:anim1.start">Start</button>
<button on = "tap:anim1.pause">Pause</button>
<button on = "tap:anim1.resume">Resume</button>
<button on = "tap:anim1.reverse">Reverse</button>
<button on = "tap:anim1.cancel">cancel</button>
<button on = "tap:anim1.finish">finish</button>
<button on = "tap:anim1.togglePause">togglePause</button>
<button on = "tap:anim1.seekTo(percent = 1.00)">seekTo(100%)</button>
<br/>
<br/>
<br/>
<br/>
<div id="image1"></div>
</body>
</html>
Output
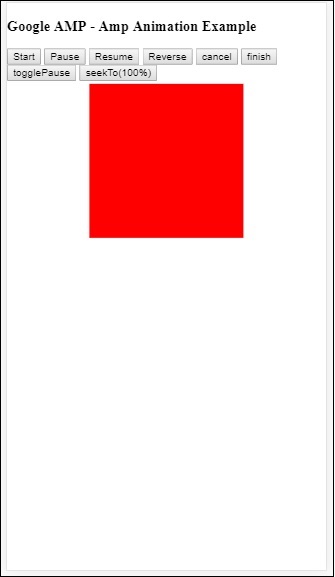
Google AMP - Data Binding
Amp-bind helps to add interactivity to the amp-components and html tags based on a action using data-binding and JS-like expressions. This chapter discusses data binding in detail.
To work with amp-bind, we need to add the following script to our page −
<script async custom-element = "amp-bind" src = "https://cdn.ampproject.org/v0/amp-bind-0.1.js"> </script>
Let us understand this fully with the help of a working example as shown −
Example
<!doctype html>
<html amp lang = "en">
<head>
<meta charset = "utf-8">
<script async src = "https://cdn.ampproject.org/v0.js"></script>
<title>Google AMP - Amp Bind</title>
<link rel = "canonical" href =
"http://example.ampproject.org/article-metadata.html">
<meta name = "viewport" content = "width = device-width,
minimum-scale = 1,initial-scale = 1">
<style amp-boilerplate>
body{
-webkit-animation:
-amp-start 8s steps(1,end) 0s 1 normal both;-moz-animation:
-amp-start 8s steps(1,end) 0s 1 normal both;-ms-animation:
-amp-start 8s steps(1,end) 0s 1 normal both;animation:
-amp-start 8s steps(1,end) 0s 1 normal both
}
@-webkit-keyframes
-amp-start{from{visibility:hidden}to{visibility:visible}}@-moz-keyframes
-amp-start{from{visibility:hidden}to{visibility:visible}}@-ms-keyframes
-amp-start{from{visibility:hidden}to{visibility:visible}}@-o-keyframes
-amp-start{from{visibility:hidden}to{visibility:visible}}@keyframes
-amp-start{from{visibility:hidden}to{visibility:visible}}
</style>
<noscript>
<style amp-boilerplate>
body{
-webkit-animation:none;
-moz-animation:none;
-ms-animation:none;
animation:none
}
</style>
</noscript>
<script async custom-element = "amp-bind"
src = "https://cdn.ampproject.org/v0/amp-bind-0.1.js"></script>
<style amp-custom>
button{
background-color: #ACAD5C;
color: white;
padding: 12px 20px;
border: none;
border-radius: 4px;
}
</style>
</head>
<body>
<h3>Google AMP - Amp Bind</h3>
<p [text] = "'Hello ' + world + '.'">
Click on the button to change the text
</p>
<button on = "tap:AMP.setState({world: 'This is amp-bind example'})">
Click Here
</button>
</body>
</html>
Output
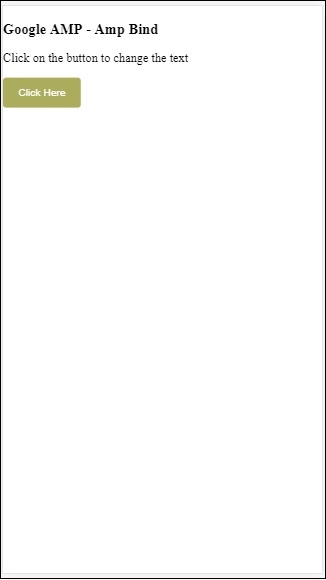
Click the button to see the text changing as shown below −
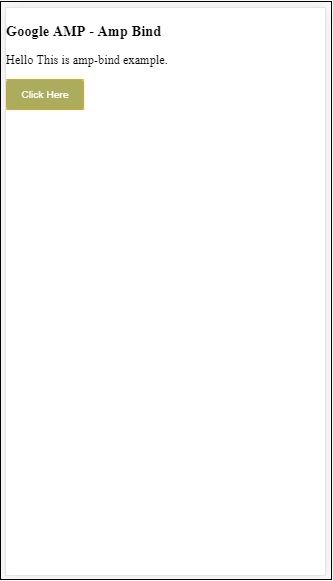
Thus, in the example shown above we have used amp-bind to change the text on click of the button.
Amp-bind has three components −
State − Initially the state is empty. Once you click the button the state is changed. For example,
<button on = "tap:AMP.setState({world: 'This is amp-bind example'})">
Click Here
</button>
AMP.setState method is used to change the state. The variable world is assigned the value This is amp-bind example. The variable world is used inside the html tag −
<p [text] = "'Hello ' + world + '.'"> Click on the button to change the text </p>
On click of the button, world is assigned a new value: This is amp-bind example.
We can also use amp-state with binding as shown below −
<amp-state id = "myState">
<script type = "application/json">
{
"foo": "bar"
}
</script>
</amp-state>
The expression will be assigned bmyState.foo during binding.
Expressions − The expressions for amp-bind to work is given as follows −
'Hello ' + world
world is said to be a state variable.
Bindings − Bindings are applied to special attributes in the form [attributes]. For example −
<p [text] = "'Hello ' + world + '.'"> Click on the button to change the text </p>
In the above example, [text] has the expression which is used for binding the p tag.
We can use the following attribute for bindings −
- [text]
- [class]
- [hidden]
- [width]
- [height]
Bindings is also possible to be done on amp-components and only specific attributes are allowed. The following list shows suh components and attributes −
| Sr.No | Amp component | Attributes & Description |
|---|---|---|
| 1 | <amp-carousel type=slides> | [slide]*
Change the slide using this binding behaviour |
| 2 | <amp-date-picker> | [min]
min -> Sets the earliest selectable date [max]max -> Sets the latest selectable date |
| 3 | <amp-iframe> | [src]
Change src of iframe |
| 4 | <amp-img> | [alt]
[attribution]
[src]
[srcset]
We can change alt , attribution, src and srcset.If src is changed do change srcset as it is used for caching |
| 5 | <amp-lightbox> | [open]*
You can show/hide lightbox by binding to open |
| 6 | <amp-list> | [src]
If expression is a string, fetches and renders JSON from the string URL. If expression is an object or array, renders the expression data. |
| 7 | <amp-selector> | [selected]*
[disabled]
Changes the currently selected children element(s) identified by their option attribute values. Supports a comma-separated list of values for multiple selection |
Binding using Amp-State
We can define amp-state with all the data that we would want to use on html element or amp-component.
The data used inside amp-state has to be in json format as shown below −
<amp-state id = "myCarsList">
<script type = "application/json">
{
"currentcar" : "bmw",
"audi": {
"imageUrl": "images/audi.jpg"
},
"bmw": {
"imageUrl": "images/bmw.jpg"
}
}
</script>
</amp-state>
Thus, we have defined key-value pairs with the name of the car and the image used for the car.
Amp-bind on text and Amp-Image
A working example using amp-state with amp-bind is shown below −
<!doctype html>
<html amp lang = "en">
<head>
<meta charset = "utf-8">
<script async src = "https://cdn.ampproject.org/v0.js"></script>
<title>Google AMP - Amp Bind</title>
<link rel = "canonical" href =
"http://example.ampproject.org/article-metadata.html">
<meta name = "viewport" content = "width = device-width,
minimum-scale = 1,initial-scale = 1">
<style amp-boilerplate>
body{
-webkit-animation:
-amp-start 8s steps(1,end) 0s 1 normal both;-moz-animation:
-amp-start 8s steps(1,end) 0s 1 normal both;-ms-animation:
-amp-start 8s steps(1,end) 0s 1 normal both;animation:
-amp-start 8s steps(1,end) 0s 1 normal both
}
@-webkit-keyframes
-amp-start{from{visibility:hidden}to{visibility:visible}}@-moz-keyframes
-amp-start{from{visibility:hidden}to{visibility:visible}}@-ms-keyframes
-amp-start{from{visibility:hidden}to{visibility:visible}}@-o-keyframes
-amp-start{from{visibility:hidden}to{visibility:visible}}@keyframes
-amp-start{from{visibility:hidden}to{visibility:visible}
}
</style>
<noscript>
<style amp-boilerplate>
body{
-webkit-animation:none;
-moz-animation:none;
-ms-animation:none;
animation:none
}
</style>
</noscript>
<script async custom-element = "amp-bind" src =
"https://cdn.ampproject.org/v0/amp-bind-0.1.js"></script>
<style amp-custom>
button{
background-color: #ACAD5C;
color: white;
padding: 12px 20px;
border: none;
border-radius: 4px;
cursor: pointer;
float: left;
}
</style>
</head>
<body>
<h3>Google AMP - Amp Bind</h3>
<amp-state id = "myCarsList">
<script type = "application/json">
{
"currentcar" : "bmw",
"audi": {
"imageUrl": "images/audi.jpg",
"style": "greenBackground"
},
"bmw": {
"imageUrl": "images/bmw.jpg",
"style": "redBackground"
}
}
</script>
</amp-state>
<amp-img
width = "300"
height = "200"
src = "images/bmw.jpg"
[src] = "myCarsList[currentcar].imageUrl">
</amp-img>
<p [text] = "'This is a ' + currentcar + '.'">
This is a BMW.
</p>
<br/>
<button on = "tap:AMP.setState({currentcar: 'audi'})">
Change Car
</button>
</body>
</html>
Output
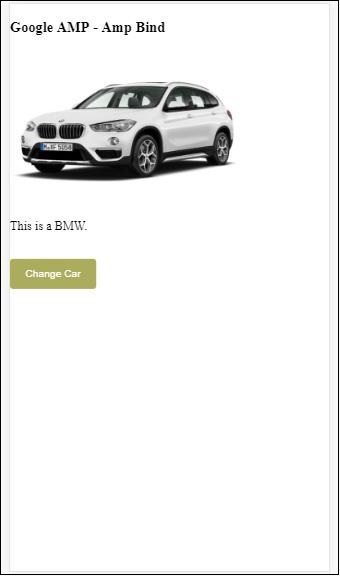
Click the button to see the image of the car changing and also the text below.
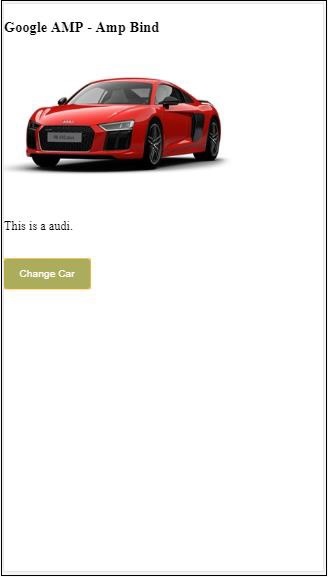
Amp-bind on Video and IFrame
We will now see a working example which will change the amp-iframe and amp-video src.
<!doctype html>
<html amp lang = "en">
<head>
<meta charset = "utf-8">
<script async src = "https://cdn.ampproject.org/v0.js"></script>
<title>Google AMP - Amp Bind</title>
<link rel = "canonical" href =
"http://example.ampproject.org/article-metadata.html">
<meta name = "viewport" content = "width = device-width,
minimum-scale = 1,initial-scale = 1">
<style amp-boilerplate>
body{
-webkit-animation:
-amp-start 8s steps(1,end) 0s 1 normal both;-moz-animation:
-amp-start 8s steps(1,end) 0s 1 normal both;-ms-animation:
-amp-start 8s steps(1,end) 0s 1 normal both;animation:
-amp-start 8s steps(1,end) 0s 1 normal both
}
@-webkit-keyframes
-amp-start{from{visibility:hidden}to{visibility:visible}}@-moz-keyframes
-amp-start{from{visibility:hidden}to{visibility:visible}}@-ms-keyframes
-amp-start{from{visibility:hidden}to{visibility:visible}}@-o-keyframes
-amp-start{from{visibility:hidden}to{visibility:visible}}@keyframes
-amp-start{from{visibility:hidden}to{visibility:visible}}
</style>
<noscript>
<style amp-boilerplate>
body{
-webkit-animation:none;
-moz-animation:none;
-ms-animation:none;
animation:none
}
</style>
</noscript>
<script async custom-element = "amp-bind" src =
"https://cdn.ampproject.org/v0/amp-bind-0.1.js"></script>
<script async custom-element = "amp-video" src =
"https://cdn.ampproject.org/v0/amp-video-0.1.js"></script>
<script async custom-element = "amp-iframe" src =
"https://cdn.ampproject.org/v0/amp-iframe-0.1.js"></script>
<style amp-custom>
button{
background-color: #ACAD5C;
color: white;
padding: 12px 20px;
border: none;
border-radius: 4px;
cursor: pointer;
float: left;
}
</style>
</head>
<body>
<h3>Google AMP - Amp Bind</h3>
<button on = "tap:AMP.setState({currentlist: 'list1'})">
Click Here
</button>
<br/>
<br/>
<amp-state id = "myList">
<script type = "application/json">
{
"currentlist" : "",
"list1": {
"url": "video/m.mp4",
"style": "greenBackground",
"iframeurl":"https://maps.google.com/maps?q=hyderabad&t=&z=13&ie=UTF8&iwloc=&output=embed"
}
}
</script>
</amp-state>
<h3>AMP - IFRAME</h3>
<amp-iframe
width = "600"
title = "Google map"
height = "400"
layout = "responsive"
sandbox = "allow-scripts allow-same-origin allow-popups"
frameborder = "0"
src = "https://maps.google.com/maps?q=telangana&t=&z=13&ie=UTF8&iwloc=&output=embed"
[src] = "myList[currentlist].iframeurl">
<amp-img
layout = "fill"
src = "images/loading.jpg"
placeholder
>
/amp-img>
</amp-iframe>
<h3>AMP - VIDEO</h3>
<amp-video
id = "amp-video"
src = "video/samplevideo.mp4"
layout="responsive"
[src] = "myList[currentlist].url"
width = "300"
height = "170" autoplay controls>
</amp-video>
</body>
</html>
Note that here we have used amp-state with iframesrc and video src.
<amp-state id = "myList">
<script type = "application/json">
{
"currentlist" : "",
"list1": {
"url": "video/m.mp4",
"style": "greenBackground",
"iframeurl":"
https://maps.google.com/maps?q=hyderabad&t=&z=13&ie=UTF8&iwloc=&output=embed"
}
}
</script>
</amp-state>
The currentlist is set to empty and on tap of the button, it is set to list1.The currentlist varaible is used for src of iframe and video as shown below −
<amp-iframe width="600"
title = "Google map"
height = "400"
layout = "responsive"
sandbox = "allow-scripts allow-same-origin allow-popups"
frameborder = "0" src = "https://maps.google.com/maps?q=telangana&t=&z=13&ie=UTF8&iwloc=&output=embed"
[src] = "myList[currentlist].iframeurl">
<amp-img layout = "fill" src = "images/loading.jpg" placeholder>
</amp-img>
</amp-iframe>
<amp-video id = "amp-video" src = "video/samplevideo.mp4"
layout = "responsive" [src] = "myList[currentlist].url" width = "300"
height = "170" autoplay controls>
</amp-video>
Output
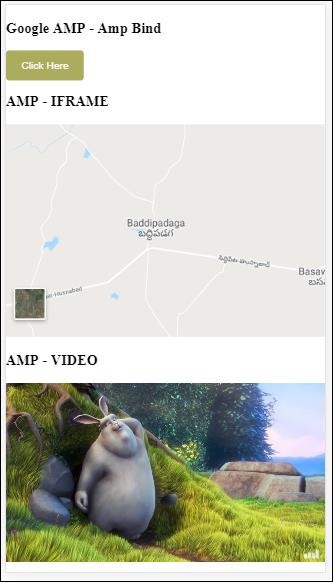
Click the button to see the video and iframe src changing.
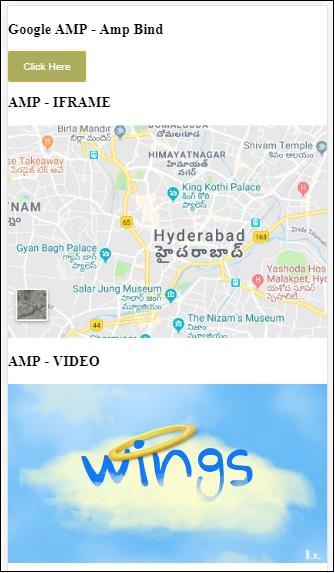
Amp-bind with amp-lightbox
Now, let us see the working of binding and amp-lightbox when used together.
Example
<!doctype html>
<html amp lang = "en">
<head>
<meta charset = "utf-8">
<script async src="https://cdn.ampproject.org/v0.js"></script>
<title>Google AMP - Amp Bind</title>
<link rel = "canonical" href =
"http://example.ampproject.org/article-metadata.html">
<meta name = "viewport" content = "width = device-width,
minimum-scale = 1,initial-scale = 1">
<style amp-boilerplate>
body{
-webkit-animation:
-amp-start 8s steps(1,end) 0s 1 normal both;-moz-animation:
-amp-start 8s steps(1,end) 0s 1 normal both;-ms-animation:
-amp-start 8s steps(1,end) 0s 1 normal both;animation:
-amp-start 8s steps(1,end) 0s 1 normal both
}
@-webkit-keyframes
-amp-start{from{visibility:hidden}to{visibility:visible}}@-moz-keyframes
-amp-start{from{visibility:hidden}to{visibility:visible}}@-ms-keyframes
-amp-start{from{visibility:hidden}to{visibility:visible}}@-o-keyframes
-amp-start{from{visibility:hidden}to{visibility:visible}}@keyframes
-amp-start{from{visibility:hidden}to{visibility:visible}}
</style>
<noscript>
<style amp-boilerplate>
body{
-webkit-animation:none;
-moz-animation:none;
-ms-animation:none;
animation:none
}
</style>
</noscript>
<script async custom-element = "amp-bind" src =
"https://cdn.ampproject.org/v0/amp-bind-0.1.js"></script>
<script async custom-element = "amp-lightbox" src =
"https://cdn.ampproject.org/v0/amp-lightbox-0.1.js"></script>
<style amp-custom>
button{
background-color: #ACAD5C;
color: white;
padding: 12px 20px;
border: none;
border-radius: 4px;
cursor: pointer;
float: left;
}
.lightbox {
background: rgba(211,211,211,0.8);
width: 100%;
height: 100%;
position: absolute;
display: flex;
align-items: center;
justify-content: center;
}
</style>
</head>
<body>
<h3>Google AMP - Amp Bind</h3>
<button on = "tap:AMP.setState({displaylightbox: true})">
Click Here
</button>
<br/>
<br/>
<h3>AMP - Lightbox</h3>
<amp-lightbox
id = "my-lightbox"
[open] = "displaylightbox"
layout = "nodisplay"
close-button>
<div class = "lightbox" on = "tap:AMP.setState({displaylightbox: false})">
<amp-img alt = "Beautiful Flower"
src = "images/loreal.gif"
width = "246"
height = "205">
</amp-img>
</div>
</amp-lightbox>
</body>
</html>
To use binding on amp-lightbox, we have used [open] on amp-lightbox as shown below −
<amp-lightbox id = "my-lightbox" [open] = "displaylightbox"
layout = "nodisplay" close-button>
<div class = "lightbox" on="tap:AMP.setState({displaylightbox: false})">
<amp-img alt = "Beautiful Flower"
src = "images/loreal.gif"
width = "246"
height = "205">
</amp-img>
</div>
</amp-lightbox>
The [open] = displaylightbox is a variable state is changed on click of button and on the tap of the lightbox div to true/false −
<button on = "tap:AMP.setState({displaylightbox: true})">
Click Here
</button>
<div class = "lightbox" on = "tap:AMP.setState({displaylightbox: false})">
<amp-img alt = "Beautiful Flower"
src = "images/loreal.gif"
width = "246"
height = "205">
</amp-img>
</div>
Output
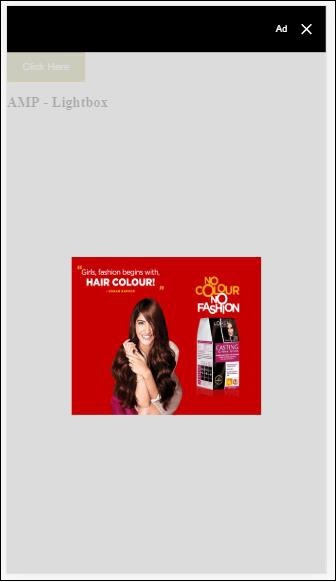
Amp binding to Input element
Let us understand the working of amp-binding to the input element with the help of a working example as shown −
<!doctype html>
<html amp lang = "en">
<head>
<meta charset = "utf-8">
<script async src = "https://cdn.ampproject.org/v0.js"></script>
<title>Google AMP - Amp Bind</title>
<link rel = "canonical" href=
"http://example.ampproject.org/article-metadata.html">
<meta name = "viewport" content = "width = device-width,
minimum-scale = 1,initial-scale = 1">
<style amp-boilerplate>
body{
-webkit-animation:
-amp-start 8s steps(1,end) 0s 1 normal both;-moz-animation:
-amp-start 8s steps(1,end) 0s 1 normal both;-ms-animation:
-amp-start 8s steps(1,end) 0s 1 normal both;animation:
-amp-start 8s steps(1,end) 0s 1 normal both
}
@-webkit-keyframes
-amp-start{from{visibility:hidden}to{visibility:visible}}@-moz-keyframes
-amp-start{from{visibility:hidden}to{visibility:visible}}@-ms-keyframes
-amp-start{from{visibility:hidden}to{visibility:visible}}@-o-keyframes
-amp-start{from{visibility:hidden}to{visibility:visible}}@keyframes
-amp-start{from{visibility:hidden}to{visibility:visible}}
</style>
<noscript>
<style amp-boilerplate>
body{
-webkit-animation:none;
-moz-animation:none;
-ms-animation:none;
animation:none
}
</style>
<noscript>
<script async custom-element = "amp-bind"
src = "https://cdn.ampproject.org/v0/amp-bind-0.1.js">
<script>
<script async custom-element = "amp-lightbox"
src = "https://cdn.ampproject.org/v0/amp-lightbox-0.1.js">
</script>
<style amp-custom>
button{
background-color: #ACAD5C;
color: white;
padding: 12px 20px;
border: none;
border-radius: 4px;
cursor: pointer;
float: left;
}
.lightbox {
background: rgba(211,211,211,0.8);
width: 100%;
height: 100%;
position: absolute;
display: flex;
align-items: center;
justify-content: center;
}
#txtname{
width: 100%;
padding: 12px 20px;
margin: 8px 0;
display: inline-block;
border: 1px solid #ccc;
border-radius: 4px;
box-sizing: border-box;
}
div {
font-size:25px;
}
</style>
</head>
<body>
<h3>Google AMP - Amp Bind</h3>
<button on = "tap:AMP.setState({displaylightbox: true})">
Click Here
</button>
<br/>
<br/>
<h3>
AMP - Input Element
<h3>
<input id = "txtname" placeholder = "Type here"
on = "input-throttled:AMP.setState({name: event.value})">
<div [text] = "name">
</div>
</body>
</html>
Output
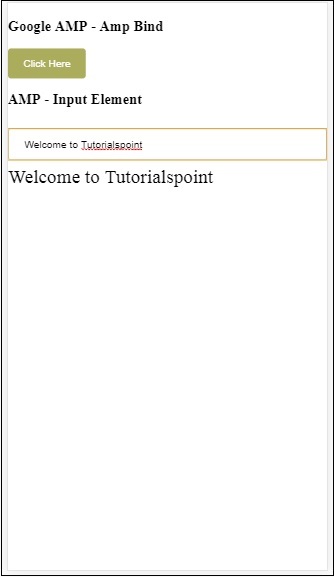
The data entered inside the textbox is displayed at the bottom. It can be done by changing the state variable name on the input event as shown −
<input id = "txtname" placeholder = "Type here" on =
"input-throttled:AMP.setState({name: event.value})">
<div [text] = "name">
</div>
Google AMP - Layout
AMP-Layout is one of the important feature available in Google-amp. Amp Layout makes sure the amp components are rendered properly when the page is loaded without causing any flicker or scrolling issue. Google AMP make sure that layout rendering is done on the page before any other remote resources like http request for images, data calls are done.
The list of layout attributes is given below.
width and height
layout
sizes
heights
media
placeholder
fallback
noloading
We will consider the layout attribute in detail in this chapter. The rest attributes are discussed in details in the chapter − Google AMP Attributes of this tutorial.
Layout Attribute
We can use layout attribute on an amp-component which will decide how the component will render inside the page. A list of layouts supported by amp is given below −
Not Present
Container
fill
fixed
fixed-height
flex-item
intrinsic
nodisplay
Responsive
For each of this layout, we will see a working example which will show how the layout attribute renders the amp-component differently. We will make use of amp-img component in our examples.
Not Present Example
<!doctype html>
<html amp lang = "en">
<head>
<meta charset = "utf-8">
<script async src="https://cdn.ampproject.org/v0.js"></script>
<title>Google AMP - Image</title>
<link rel = "canonical" href =
"http://example.ampproject.org/article-metadata.html">
<meta name = "viewport" content = "width = device-width,
minimum-scale = 1,initial-scale = 1">
<style amp-boilerplate>
body{
-webkit-animation:
-amp-start 8s steps(1,end) 0s 1 normal both;-moz-animation:
-amp-start 8s steps(1,end) 0s 1 normal both;-ms-animation:
-amp-start 8s steps(1,end) 0s 1 normal both;animation:
-amp-start 8s steps(1,end) 0s 1 normal both
}
@-webkit-keyframes
-amp-start{from{visibility:hidden}to{visibility:visible}}@-moz-keyframes
-amp-start{from{visibility:hidden}to{visibility:visible}}@-ms-keyframes
-amp-start{from{visibility:hidden}to{visibility:visible}}@-o-keyframes
-amp-start{from{visibility:hidden}to{visibility:visible}}@keyframes
-amp-start{from{visibility:hidden}to{visibility:visible}}
</style>
<noscript>
<style amp-boilerplate>
body{
-webkit-animation:none;
-moz-animation:none;
-ms-animation:none;
animation:none
}
</style>
</noscript>
<style amp-custom>
amp-img {
border: 1px solid black;
border-radius: 4px;
padding: 5px;
}
</style>
</head>
<body>
<h1>Google AMP - Image Example</h1>
<amp-img
alt = "Beautiful
Flower"src = "images/flower.jpg"
width = "246"
height = "205">
</amp-img>
</body>
</html>
Output
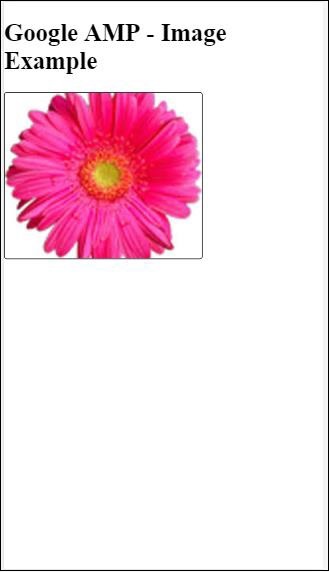
Container Example
Layout=container is mostly given to the parent element and the child element takes the sizes defined.
<!doctype html>
<html amp lang = "en">
<head>
<meta charset = "utf-8">
<script async src = "https://cdn.ampproject.org/v0.js"></script>
<title>Google AMP - Image</title>
<link rel = "canonical" href =
"http://example.ampproject.org/article-metadata.html">
<meta name = "viewport" content = "width = device-width,
minimum-scale = 1,initial-scale = 1">
<style amp-boilerplate>
body{
-webkit-animation:
-amp-start 8s steps(1,end) 0s 1 normal both;-moz-animation:
-amp-start 8s steps(1,end) 0s 1 normal both;-ms-animation:
-amp-start 8s steps(1,end) 0s 1 normal both;animation:
-amp-start 8s steps(1,end) 0s 1 normal both
}@-webkit-keyframes
-amp-start{from{visibility:hidden}to{visibility:visible}}@-moz-keyframes
-amp-start{from{visibility:hidden}to{visibility:visible}}@-ms-keyframes
-amp-start{from{visibility:hidden}to{visibility:visible}}@-o-keyframes
-amp-start{from{visibility:hidden}to{visibility:visible}}@keyframes
-amp-start{from{visibility:hidden}to{visibility:visible}}
</style>
<noscript>
<style amp-boilerplate>
body{
-webkit-animation:none;
-moz-animation:none;
-ms-animation:none;
animation:none
}
</style>
</noscript>
<style amp-custom>
amp-img {
border: 1px solid black;
border-radius: 4px;
padding: 5px;
}
h1{
font-family: "Segoe UI",Arial,sans-serif;
font-weight: 400;margin: 10px 0;
}
</style>
</head>
<body>
<h1>Google AMP - Layout = container Image Example</h1>
<amp-accordion layout = "container">
<amp-img alt = "Beautiful Flower"
src = "images/flower.jpg"
width = "246"
height = "205">
</amp-img>
</amp-accordion>
</body>
</html>
Output
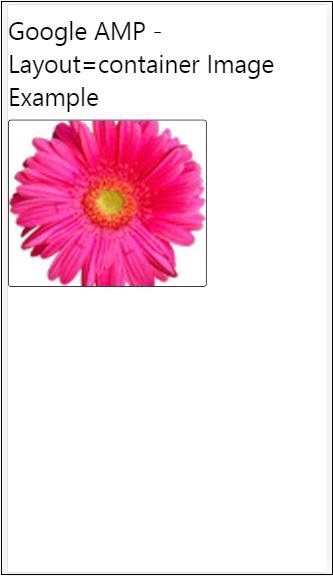
Fill Example
Layout= fill takes the width and height of the parent element.
<!doctype html>
<html amp lang = "en">
<head>
<meta charset = "utf-8">
<script async src = "https://cdn.ampproject.org/v0.js"></script>
<title>
Google AMP - Image
<title>
<link rel = "canonical" href =
"http://example.ampproject.org/article-metadata.html">
<meta name = "viewport" content = "width = device-width,
minimum-scale = 1,initial-scale = 1">
<style amp-boilerplate>
body{
-webkit-animation:
-amp-start 8s steps(1,end) 0s 1 normal both;-moz-animation:
-amp-start 8s steps(1,end) 0s 1 normal both;-ms-animation:
-amp-start 8s steps(1,end) 0s 1 normal both;animation:
-amp-start 8s steps(1,end) 0s 1 normal both
}
@-webkit-keyframes
-amp-start{from{visibility:hidden}to{visibility:visible}}@-moz-keyframes
-amp-start{from{visibility:hidden}to{visibility:visible}}@-ms-keyframes
-amp-start{from{visibility:hidden}to{visibility:visible}}@-o-keyframes
-amp-start{from{visibility:hidden}to{visibility:visible}}@keyframes
-amp-start{from{visibility:hidden}to{visibility:visible}}
</style>
<noscript>
<style amp-boilerplate>
body{
-webkit-animation:none;
-moz-animation:none;
-ms-animation:none;
animation:none
}
</style>
</noscript>
<style amp-custom>
amp-img {
border: 1px solid black;
border-radius: 4px;
padding: 5px;
}
h1{font-family: "Segoe UI",Arial,sans-serif;
font-weight: 400;margin: 10px 0;}
</style>
</head>
<body>
<h1>Google AMP - Layout = fill Image Example</h1>
<div style = "position:relative;width:100px;height:100px;">
<amp-img alt = "Beautiful Flower"
src = "images/flower.jpg"
width = "246"
height = "205"
layout = "fill">
</amp-img>
</div>
</body>
</html>
Output
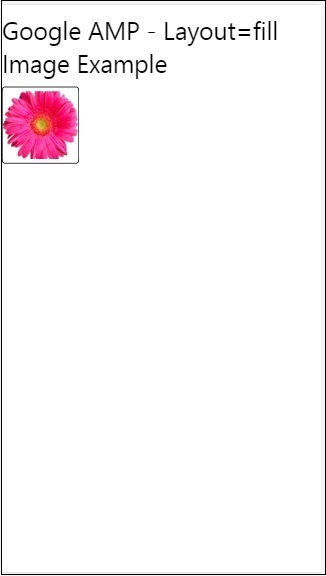
Fixed and fixed-height Example
Before understanding the usage of fixed and fixed-height, please note the following two points −
layout=fixed needs to have width and height and the amp-component will be shown in that.
layout=fixed-height needs to have height specified for the component.It will make sure the height is not changed .The width must not be specified when using fixed-height or it can be auto.
<!doctype html>
<html amp lang = "en">
<head>
<meta charset = "utf-8">
<script async src = "https://cdn.ampproject.org/v0.js"></script>
<title>Google AMP - Image</title>
<link rel = "canonical" href =
"http://example.ampproject.org/article-metadata.html">
<meta name = "viewport" content = "width = device-width,
minimum-scale = 1,initial-scale = 1">
<style amp-boilerplate>
body{
-webkit-animation:
-amp-start 8s steps(1,end) 0s 1 normal both;-moz-animation:
-amp-start 8s steps(1,end) 0s 1 normal both;-ms-animation:
-amp-start 8s steps(1,end) 0s 1 normal both;animation:
-amp-start 8s steps(1,end) 0s 1 normal both
}
@-webkit-keyframes
-amp-start{from{visibility:hidden}to{visibility:visible}}@-moz-keyframes
-amp-start{from{visibility:hidden}to{visibility:visible}}@-ms-keyframes
-amp-start{from{visibility:hidden}to{visibility:visible}}@-o-keyframes
-amp-start{from{visibility:hidden}to{visibility:visible}}@keyframes
-amp-start{from{visibility:hidden}to{visibility:visible}}
</style>
<noscript>
<style amp-boilerplate>
body{
-webkit-animation:none;
-moz-animation:none;
-ms-animation:none;
animation:none
}
</style>
</noscript>
<style amp-custom>
amp-img {
border: 1px solid black;
border-radius: 4px;
padding: 5px;
}
div{
display: inline-block;
width: 200px;
height:200px;
margin: 5px;
}
h1{font-family: "Segoe UI",Arial,sans-serif;
font-weight: 400;margin: 10px 0;}
</style>
</head>
<body>
<h1>Google AMP - Layout = fixed and
Layout = fixed-height Image Example
</h1>
<div>
<amp-img alt = "Beautiful Flower"
src = "images/flower.jpg"
width = "246"
height = "205"
layout = "fixed">
</amp-img>
</div>
<div>
<amp-img alt = "Beautiful Flower"
src = "images/flower.jpg"
height = "205"
layout = "fixed-height">
</amp-img>
</div>
</body>
</html>
Output
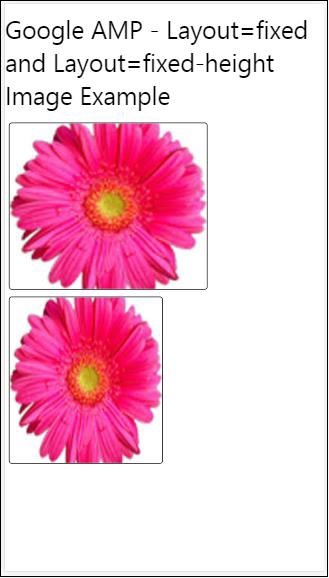
Flex-item and intrinsic
<!doctype html>
<html amp lang = "en">
<head>
<meta charset = "utf-8">
<script async src ="https://cdn.ampproject.org/v0.js"></script>
<title>Google AMP - Image</title>
<link rel = "canonical" href ="
http://example.ampproject.org/article-metadata.html">
<meta name = "viewport" content = "width = device-width,
minimum-scale = 1,initial-scale = 1">
<style amp-boilerplate>
body{
-webkit-animation:
-amp-start 8s steps(1,end) 0s 1 normal both;-moz-animation:
-amp-start 8s steps(1,end) 0s 1 normal both;-ms-animation:
-amp-start 8s steps(1,end) 0s 1 normal both;animation:
-amp-start 8s steps(1,end) 0s 1 normal both
}
@-webkit-keyframes
-amp-start{from{visibility:hidden}to{visibility:visible}}@-moz-keyframes
-amp-start{from{visibility:hidden}to{visibility:visible}}@-ms-keyframes
-amp-start{from{visibility:hidden}to{visibility:visible}}@-o-keyframes
-amp-start{from{visibility:hidden}to{visibility:visible}}@keyframes
-amp-start{from{visibility:hidden}to{visibility:visible
<style>
<noscript>
<style amp-boilerplate>
body{
-webkit-animation:none;
-moz-animation:none;
-ms-animation:none;
animation:none
}
</style>
</noscript>
<style amp-custom>
amp-img {
border: 1px solid black;
border-radius: 4px;
padding: 5px;
}
displayitem {
display: inline-block;
width: 200px;
height:200px;
margin: 5px;
}
h1{font-family: "Segoe UI",Arial,sans-serif;
font-weight: 400;margin: 10px 0;}
</style>
</head>
<body>
<h1>Google AMP - Layout = flex-item and
Layout = intrinsic Image Example
</h1>
<div class = "displayitem">
<amp-img alt = "Beautiful Flower"
src = "images/flower.jpg"
layout = "flex-item">
</amp-img>
</div>
<div class = "displayitem">
<amp-img alt = "Beautiful Flower"
src = "images/flower.jpg"
width = "246"
height = "205"
layout = "intrinsic">
</amp-img>
</div>
</body>
</html>
Output
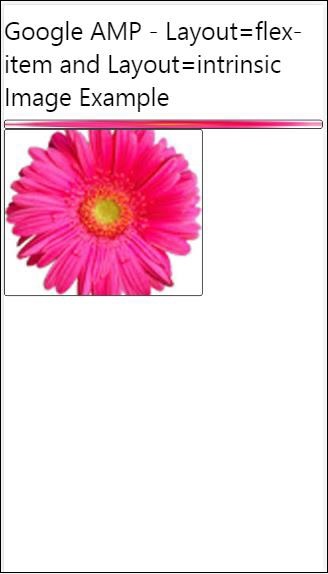
nodisplay and responsive
Amp component with layout = nodisplay will not take up any space on the page, just like display:none. There is no need to add any width and height property to such layout.
Amp component with layout = responsive will take up the space available or width of the page and height is resized maintaining the aspect ratio of the element.
<!doctype html>
<html amp lang = "en">
<head>
<meta charset = "utf-8">
<script async src = "https://cdn.ampproject.org/v0.js">
</script>
<title>Google AMP - Image</title>
<link rel = "canonical" href =
"http://example.ampproject.org/article-metadata.html">
<meta name = "viewport" content="width=device-width,
minimum-scale = 1,initial-scale = 1">
<style amp-boilerplate>
body{
-webkit-animation:
-amp-start 8s steps(1,end) 0s 1 normal both;-moz-animation:
-amp-start 8s steps(1,end) 0s 1 normal both;-ms-animation:
-amp-start 8s steps(1,end) 0s 1 normal both;animation:
-amp-start 8s steps(1,end) 0s 1 normal both}
@-webkit-keyframes
-amp-start{from{visibility:hidden}to{visibility:visible}}@-moz-keyframes
-amp-start{from{visibility:hidden}to{visibility:visible}}@-ms-keyframes
-amp-start{from{visibility:hidden}to{visibility:visible}}@-o-keyframes
-amp-start{from{visibility:hidden}to{visibility:visible}}@keyframes
-amp-start{from{visibility:hidden}to{visibility:visible}}
</style>
<noscript>
<style amp-boilerplate>
body{
-webkit-animation:none;
-moz-animation:none;
-ms-animation:none;
animation:none}
</style>
</noscript>
<style amp-custom>
amp-img {
border: 1px solid black;
border-radius: 4px;
padding: 5px;
}
displayitem {
display: inline-block;
width: 200px;
height:200px;
margin: 5px;
}
h1{font-family: "Segoe UI",Arial,sans-serif;
font-weight: 400;margin: 10px 0;}
</style>
</head>
<body>
<h1>Google AMP - Layout=no-display and
Layout = responsive Image Example</h1>
<div class = "displayitem">
<amp-img alt = "Beautiful Flower"
src = "images/flower.jpg"
layout = "no-display">
</amp-img>
</div>
<div class = "displayitem">
<amp-img alt = "Beautiful Flower"
src = "images/flower.jpg"
width = "246"
height = "205"
layout = "responsive">
</amp-img>
</div>
</body>
</html>
Output
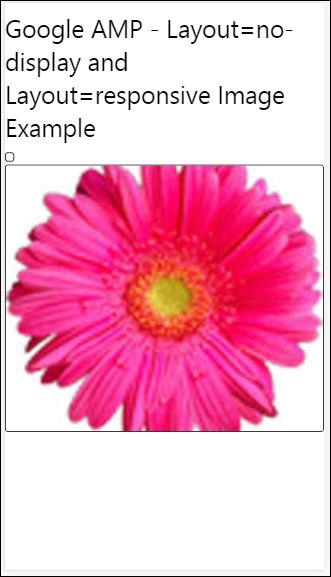
The list of layouts supported in Google AMP are as follows
Accordion
Carousel
Lightbox
Slider
Sidebar
Amp- Accordion
Amp-accordion is an amp component used to display the content in the expand-collapse format. It becomes easy for users to view it on mobile devices where they can select the section as per their choice from the accordion.
To work with amp-accordion you need to add the following script −
<script async custom-element = "amp-accordion" src = "https://cdn.ampproject.org/v0/amp-accordion-0.1.js"> </script>
Amp-accordion tag
<amp-accordion>
<section class = "seca">
<h3>Content 1</h3>
<div>
<p>Content 1 is opened for amp-accordion</p>
<p>Content 1 is opened for amp-accordion</p>
<p>Content 1 is opened for amp-accordion</p>
<p>Content 1 is opened for amp-accordion</p>
<p>Content 1 is opened for amp-accordion</p>
<p>Content 1 is opened for amp-accordion</p>
</div>
</section>
</amp-accordion>
Let us see a working example of amp-accordion.
<!doctype html>
<html amp lang = "en">
<head>
<meta charset = "utf-8">
<script async src = "https://cdn.ampproject.org/v0.js">
</script>
<title>Google AMP - Amp Accordion </title>
<link rel = "canonical" href=
"http://example.ampproject.org/article-metadata.html">
<meta name = "viewport" content = "width = device-width,
minimum-scale = 1,initial-scale = 1">
<style amp-boilerplate>
body{
-webkit-animation:
-amp-start 8s steps(1,end) 0s 1 normal both;-moz-animation:
-amp-start 8s steps(1,end) 0s 1 normal both;-ms-animation:
-amp-start 8s steps(1,end) 0s 1 normal both;animation:
-amp-start 8s steps(1,end) 0s 1 normal both
}
@-webkit-keyframes
-amp-start{from{visibility:hidden}to{visibility:visible}}@-moz-keyframes
-amp-start{from{visibility:hidden}to{visibility:visible}}@-ms-keyframes
-amp-start{from{visibility:hidden}to{visibility:visible}}@-o-keyframes
-amp-start{from{visibility:hidden}to{visibility:visible}}@keyframes
-amp-start{from{visibility:hidden}to{visibility:visible}}
</style>
<noscript>
<style amp-boilerplate>
body{
-webkit-animation:none;
-moz-animation:none;
-ms-animation:none;
animation:none}
</style>
</noscript>
<script async custom-element = "amp-accordion" src =
"https://cdn.ampproject.org/v0/amp-accordion-0.1.js">
</script>
<style>
input[type = text]{
width: 50%;
padding: 12px;
border: 1px solid #ccc;
border-radius: 4px;
resize: vertical;
}
label {
padding: 12px 12px 12px 0;
display: inline-block;
font-family: "Segoe UI",Arial,sans-serif;
font-weight: 400;
}
.col-label {
float: left;
width: 25%;
margin-top: 6px;
}
.col-content {
float: left;
width: 75%;
margin-top: 6px;
}
.row:after {
content: "";
display: table;
clear: both;
}
.amp_example {
background-color: #f1f1f1;
padding: 0.01em 16px;
margin: 20px 0;
box-shadow: 0 2px 4px 0
rgba(0,0,0,0.16),0 2px 10px 0
rgba(0,0,0,0.12)!important;
}
h3{
font-family: "Segoe UI",Arial,sans-serif;
font-weight: 400;margin: 10px 0;
}
input[type=submit] {
background-color: #ACAD5C;
color: white;
padding: 12px 20px;
border: none;
border-radius: 4px;
cursor: pointer;
float: right;
}
.lightbox {background-color: rgba(100, 100, 100, 0.5);}
.seca {background-color:#fff;}
</style>
</head>
<body>
<div class = "amp_example">
<h3>Google AMP - Amp Accordion</h3>
<amp-accordion>
<section class = "seca">
<h3>Content 1</h3>
<div>
<p>Content 1 is opened for amp-accordion</p>
<p>Content 1 is opened for amp-accordion</p>
<p>Content 1 is opened for amp-accordion</p>
<p>Content 1 is opened for amp-accordion</p>
<p>Content 1 is opened for amp-accordion</p>
<p>Content 1 is opened for amp-accordion</p>
</div>
</section>
<section expanded class = "seca">
<h3>Content 2</h3>
<div>
<p>Content 2 is opened for amp-accordion</p>
<p>Content 2 is opened for amp-accordion</p>
<p>Content 2 is opened for amp-accordion</p>
<p>Content 2 is opened for amp-accordion</p>
<p>Content 2 is opened for amp-accordion</p>
</div>
</section>
<section class="seca">
<h3>Content 3</h3>
<div>
<p>Content 3 is opened for amp-accordion</p>
<p>Content 3 is opened for amp-accordion</p>
<p>Content 3 is opened for amp-accordion</p>
<p>Content 3 is opened for amp-accordion</p>
<p>Content 3 is opened for amp-accordion</p>
</div>
</section>
</amp-accordion>
</div>
</body>
</html>
Output
Amp-accordion has sections inside it. Each section can have 2 children and more than 2 will display an error in the browser console. You can add a container in section and can have multiple elements in it.
By default, we have kept one section in an expanded mode using the attribute expanded to the section.
Auto-collapsing Accordions
For auto-collapsing, we are using attribute expand-single-section on amp-accordion as shown in the example.The section which user opens will only remain in expanded rest others will close using expand-single-section attribute.
<!doctype html>
<html amp lang = "en">
<head>
<meta charset = "utf-8">
<script async src = "https://cdn.ampproject.org/v0.js">
</script>
<title>Google AMP - Amp Accordion </title>
<link rel = "canonical" href=
"http://example.ampproject.org/article-metadata.html">
<meta name = "viewport" content = "width = device-width,
minimum-scale = 1,initial-scale = 1">
<style amp-boilerplate>
body{
-webkit-animation:
-amp-start 8s steps(1,end) 0s 1 normal both;-moz-animation:
-amp-start 8s steps(1,end) 0s 1 normal both;-ms-animation:
-amp-start 8s steps(1,end) 0s 1 normal both;animation:
-amp-start 8s steps(1,end) 0s 1 normal both
}
@-webkit-keyframes
-amp-start{from{visibility:hidden}to{visibility:visible}}@-moz-keyframes
-amp-start{from{visibility:hidden}to{visibility:visible}}@-ms-keyframes
-amp-start{from{visibility:hidden}to{visibility:visible}}@-o-keyframes
-amp-start{from{visibility:hidden}to{visibility:visible}}@keyframes
-amp-start{from{visibility:hidden}to{visibility:visible}}
</style>
<noscript>
<style amp-boilerplate>
body{
-webkit-animation:none;
-moz-animation:none;
-ms-animation:none;
animation:none}
</style>
</noscript>
<script async custom-element = "amp-accordion" src =
"https://cdn.ampproject.org/v0/amp-accordion-0.1.js">
</script>
<style>
input[type = text]{
width: 50%;
padding: 12px;
border: 1px solid #ccc;
border-radius: 4px;
resize: vertical;
}
label {
padding: 12px 12px 12px 0;
display: inline-block;
font-family: "Segoe UI",Arial,sans-serif;
font-weight: 400;
}
.col-label {
float: left;
width: 25%;
margin-top: 6px;
}
.col-content {
float: left;
width: 75%;
margin-top: 6px;
}
.row:after {
content: "";
display: table;
clear: both;
}
.amp_example {
background-color: #f1f1f1;
padding: 0.01em 16px;
margin: 20px 0;
box-shadow: 0 2px 4px 0
rgba(0,0,0,0.16),0 2px 10px 0
rgba(0,0,0,0.12)!important;
}
h3{
font-family: "Segoe UI",Arial,sans-serif;
font-weight: 400;
margin: 10px 0;
}
input[type=submit] {
background-color: #ACAD5C;
color: white;
padding: 12px 20px;
border: none;
border-radius: 4px;
cursor: pointer;
float: right;}
.lightbox {background-color: rgba(100, 100, 100, 0.5);}
.seca {background-color:#fff;}
</style>
<head>
<body>
<div class = "amp_example">
<h3>Google AMP - Amp Accordion</h3>
<amp-accordion expand-single-section>
<section class = "seca">
<h3>Content 1</h3>
<div>
<p>Content 1 is opened for amp-accordion</p>
<p>Content 1 is opened for amp-accordion</p>
<p>Content 1 is opened for amp-accordion</p>
<p>Content 1 is opened for amp-accordion</p>
<p>Content 1 is opened for amp-accordion</p>
<p>Content 1 is opened for amp-accordion</p>
</div>
</section>
<section class = "seca">
<h3>Content 2</h3>
<div>
<p>Content 2 is opened for amp-accordion</p>
<p>Content 2 is opened for amp-accordion</p>
<p>Content 2 is opened for amp-accordion</p>
<p>Content 2 is opened for amp-accordion</p>
<;p>Content 2 is opened for amp-accordion</p>
</div>
</section>
<section class = "seca">
<h3>Content 3</h3>
<div>
<p>Content 3 is opened for amp-accordion</p>
<p>Content 3 is opened for amp-accordion</p>
<p>Content 3 is opened for amp-accordion</p>
<p>Content 3 is opened for amp-accordion</p>
<p>Content 3 is opened for amp-accordion</p>
</div>
</section>
</amp-accordion>
</div>
</body>
</html>
Output
Animation on Accordions
Using the animate attribute, we can add animation for the expand-collapse of accordion. Take a look at the example below −
<!doctype html>
<html amp lang = "en">
<head>
<meta charset = "utf-8">
<script async src = "https://cdn.ampproject.org/v0.js">
</script>
<title>Google AMP - Amp Accordion </title>
<link rel = "canonical" href = "http://example.ampproject.org/article-metadata.html>
<meta name = "viewport" content = "width = device-width,minimum-scale = 1,initial-scale = 1">
<style amp-boilerplate>
body{
-webkit-animation:
-amp-start 8s steps(1,end) 0s 1 normal both;-moz-animation:
-amp-start 8s steps(1,end) 0s 1 normal both;-ms-animation:
-amp-start 8s steps(1,end) 0s 1 normal both;animation:
-amp-start 8s steps(1,end) 0s 1 normal both
}
@-webkit-keyframes
-amp-start{from{visibility:hidden}to{visibility:visible}}@-moz-keyframes
-amp-start{from{visibility:hidden}to{visibility:visible}}@-ms-keyframes
-amp-start{from{visibility:hidden}to{visibility:visible}}@-o-keyframes
-amp-start{from{visibility:hidden}to{visibility:visible}}@keyframes
-amp-start{from{visibility:hidden}to{visibility:visible}}
</style>
<noscript>
<style amp-boilerplate>
body{
-webkit-animation:none;
-moz-animation:none;
-ms-animation:none;animation:none
}
</style>
</noscript>
<script async custom-element = "amp-accordion" src =
"https://cdn.ampproject.org/v0/amp-accordion-0.1.js">
</script>
<style>
input[type = text]{
width: 50%;
padding: 12px;
border: 1px solid #ccc;
border-radius: 4px;
resize: vertical;
}
label {
padding: 12px 12px 12px 0;
display: inline-block;
font-family: "Segoe UI",Arial,sans-serif;
font-weight: 400;
}
.col-label {
float: left;
width: 25%;
margin-top: 6px;
}
.col-content {
float: left;
width: 75%;
margin-top: 6px;
}
.row:after {
content: "";
display: table;
clear: both;
}
.amp_example {
background-color: #f1f1f1;
padding: 0.01em 16px;
margin: 20px 0;
box-shadow: 0 2px 4px 0 rgba(0,0,0,0.16),
0 2px 10px 0 rgba(0,0,0,0.12)!important;
}
h3{
font-family: "Segoe UI",Arial,sans-serif;
font-weight: 400;margin: 10px 0;
}
input[type=submit] {
background-color: #ACAD5C;
color: white;
padding: 12px 20px;
border: none;
border-radius: 4px;
cursor: pointer;
float: right;
}
.lightbox {background-color: rgba(100, 100, 100, 0.5);}
.seca {background-color:#fff;}
</style>
</head>
<body>
<div class = "amp_example">
<h3>Google AMP - Amp Accordion</h3>
<amp-accordion animate expand-single-section>
<section class = "seca">
<h3>Content 1</h3>
<div>
<p>Content 1 is opened for amp-accordion</p>
<p>Content 1 is opened for amp-accordion</p>
<p>Content 1 is opened for amp-accordion</p>
<p>Content 1 is opened for amp-accordion</p>
<p>Content 1 is opened for amp-accordion</p>
<p>Content 1 is opened for amp-accordion</p>
</div>
</section>
<section class = "seca">
<h3>Content 2</h3>
<div>
<p>Content 2 is opened for amp-accordion</p>
<p>Content 2 is opened for amp-accordion</p>
<p>Content 2 is opened for amp-accordion</p>
<p>Content 2 is opened for amp-accordion</p>
<p>Content 2 is opened for amp-accordion</p>
</div>
</section>
<section class="seca">
<h3>Content 3</h3>
<div>
<p>Content 3 is opened for amp-accordion</p>
<p>Content 3 is opened for amp-accordion</p>
<p>Content 3 is opened for amp-accordion</p>
<p>Content 3 is opened for amp-accordion</p>
<p>Content 3 is opened for amp-accordion</p>
</div>
</section>
</amp-accordion>
</div>
</body>
</html>
Output
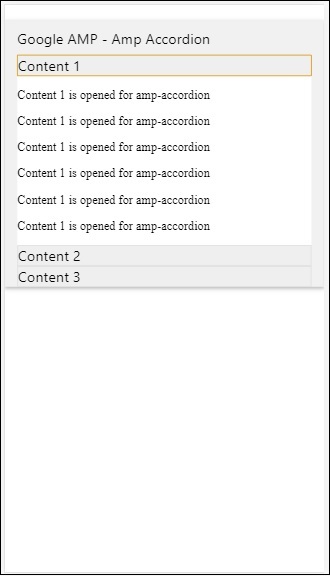
AMP Carousel
Amp-carousel is an amp-component to show a set of similar contents on the screen and using the arrows to shift between the content.
To work with amp-carousel, we need to add the following script −
<script async custom-element = "amp-carousel" src = "https://cdn.ampproject.org/v0/amp-carousel-0.1.js"></script>
Amp-carousel tag
The amp-carousel tag is as shown below −
<amp-carousel height="300" layout="fixed-height" type="carousel">
<amp-img src="images/christmas1.jpg" width="400" height="300" alt="a sample image"></amp-img>
.
</amp-carousel>
Attributes available for amp-carousel
The attributes available for amp-carousel are listed in the table shown below −
| Sr.No | Attribute & Description |
|---|---|
| 1 | type
We can display carousel items as carousel and slides |
| 2 | height
Height of carousel in pixels |
| 3 | controls (optional)
It displays left /right arrow on the screen.IT disappears after few seconds on devices.Css can be used to make the arrows visible all the time. |
| 4 | data-next-button-aria-label (optional)
Use to set the label for next carousel. |
| 5 | data-prev-button-aria-label (optional)
Use to set the label for previous carousel. |
| 6 | autoplay (optional)
Use to show the next slide after 5000ms .IT can overwritten using delay attribute with no of miiliseconds on amp-carousel.It will add loop attribute to the carousel and the slides will play again once it reaches the end.Used only for type=slides and need at least 2 slides for autoplay to work. |
Now, let us work on examples to display carousels in different ways.
Amp Carousel type as carousel
With carousel type, the items are scrollable horizontally.
Example
<!doctype html>
<html amp lang = "en">
<head>
<meta charset = "utf-8">
<title>amp-carousel</title>
<script async src = "https://cdn.ampproject.org/v0.js">
</script>
<!-- ## Setup -->
<!-- Import the carousel component in the header. -->
<script async custom-element = "amp-carousel" src =
"https://cdn.ampproject.org/v0/amp-carousel-0.1.js">
</script>
<link rel = "canonical" href="
https://ampbyexample.com/components/amp-carousel/">
<meta name = "viewport" content = "width = device-width,
minimum-scale = 1,initial-scale = 1">
<style amp-boilerplate>
body{
-webkit-animation:
-amp-start 8s steps(1,end) 0s 1 normal both;-moz-animation:
-amp-start 8s steps(1,end) 0s 1 normal both;-ms-animation:
-amp-start 8s steps(1,end) 0s 1 normal both;animation:
-amp-start 8s steps(1,end) 0s 1 normal both
}
@-webkit-keyframes
-amp-start{from{visibility:hidden}to{visibility:visible}}@-moz-keyframes
-amp-start{from{visibility:hidden}to{visibility:visible}}@-ms-keyframes
-amp-start{from{visibility:hidden}to{visibility:visible}}@-o-keyframes
-amp-start{from{visibility:hidden}to{visibility:visible}}@keyframes
-amp-start{from{visibility:hidden}to{visibility:visible}}
</style>
<noscript>
<style amp-boilerplate>
body{
-webkit-animation:none;
-moz-animation:none;
-ms-animation:none;
animation:none
}
</style>
</noscript>
<style amp-custom>
h3{
font-family: "Segoe UI",Arial,sans-serif;
font-weight: 400;
margin: 10px 0;
}
</style>
</head>
<body>
<h3>Google Amp-Carousel</h3>
<amp-carousel height = "300" layout = "fixed-height" type = "carousel">
<amp-img
src = "images/christmas1.jpg"
width = "400"
height = "300"
alt = "a sample image">
</amp-img>
<amp-img src = "images/christmas2.jpg"
width = "400"
height = "300"
alt = "another sample image">
</amp-img>
<amp-img
src = "images/christmas3.jpg"
width = "400"
height = "300"
alt = "and another sample image">
</amp-img>
</amp-carousel>
</body>
</html>
Output
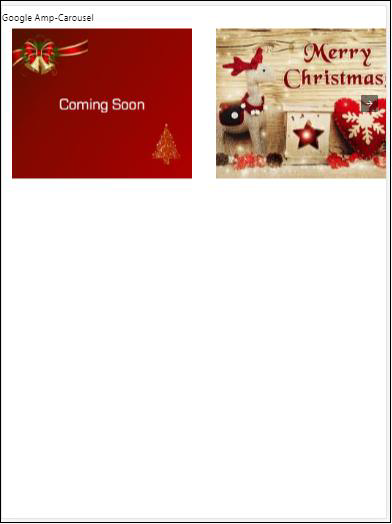
Amp Carousel type as slides
Amp carousel type = slides shows single item at a time.You can use layout as fill, fixed, fixed-height, flex-item, nodisplay, and responsive.
Example
<!doctype html>
<html amp lang = "en">
<head>
<meta charset = "utf-8">
<title>amp-carousel</title>
<script async src = "https://cdn.ampproject.org/v0.js">
</script>
<!-- ## Setup -->
<!-- Import the carousel component in the header. -->
<script async custom-element = "amp-carousel" src =
"https://cdn.ampproject.org/v0/amp-carousel-0.1.js">
</script>
<link rel = "canonical" href=
"https://ampbyexample.com/components/amp-carousel/">
<meta name = "viewport" content = "width = device-width,
minimum-scale = 1,initial-scale = 1">
<style amp-boilerplate>
body{
-webkit-animation:
-amp-start 8s steps(1,end) 0s 1 normal both;-moz-animation:
-amp-start 8s steps(1,end) 0s 1 normal both;-ms-animation:
-amp-start 8s steps(1,end) 0s 1 normal both;animation:
-amp-start 8s steps(1,end) 0s 1 normal both
}
@-webkit-keyframes
-amp-start{from{visibility:hidden}to{visibility:visible}}@-moz-keyframes
-amp-start{from{visibility:hidden}to{visibility:visible}}@-ms-keyframes
-amp-start{from{visibility:hidden}to{visibility:visible}}@-o-keyframes
-amp-start{from{visibility:hidden}to{visibility:visible}}@keyframes
-amp-start{from{visibility:hidden}to{visibility:visible}}
</style>
<noscript>
<style amp-boilerplate>
body{
-webkit-animation:none;
-moz-animation:none;
-ms-animation:none;
animation:none}
</style>
</noscript>
<style amp-custom>
h3{
font-family: "Segoe UI",Arial,sans-serif;
font-weight: 400;margin: 10px 0;}
</style>
</head>
<body>
<h3>Google Amp-Carousel</h3>
<amp-carousel
width = "400"
height = "300"
layout = "responsive"
type = "slides">
<amp-img
src = "images/christmas1.jpg"
width = "400"
height = "300"
layout = "responsive"
alt = "a sample image">
</amp-img>
<amp-img
src = "images/christmas2.jpg"
width = "400"
height = "300"
layout = "responsive"
alt="another sample image">
</amp-img>
<amp-img
src = "images/christmas3.jpg"
width = "400"
height = "300"
layout = "responsive"
alt = "and another sample image">
</amp-img>
</amp-carousel>
</body>
</html>
Output
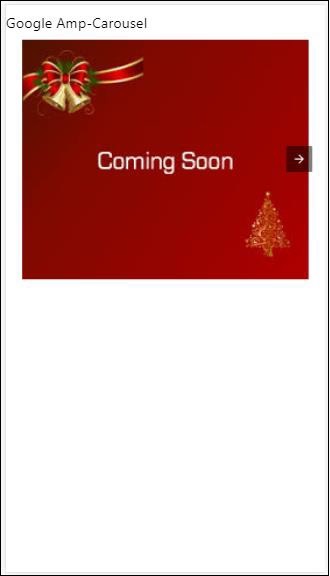
Amp carousel using autoplay
In the example given below, we have added autoplay attribute with a delay of 2000 milliseconds (2seconds). This will change the slides after a delay of 2seconds. By default, the delay is 5000 milliseconds (5seconds).
Example
<!doctype html>
<html amp lang = "en">
<head>
<meta charset = "utf-8">
<title>amp-carousel</title>
<script async src = "https://cdn.ampproject.org/v0.js">
</script>
<!-- ## Setup -->
<!-- Import the carousel component in the header. -->
<script async custom-element = "amp-carousel" src =
"https://cdn.ampproject.org/v0/amp-carousel-0.1.js">
</script>
<link rel = "canonical" href =
"https://ampbyexample.com/components/amp-carousel/">
<meta name = "viewport" content = "width = device-width,
minimum-scale = 1,initial-scale = 1">
<style amp-boilerplate>
body{
-webkit-animation:
-amp-start 8s steps(1,end) 0s 1 normal both;-moz-animation:
-amp-start 8s steps(1,end) 0s 1 normal both;-ms-animation:
-amp-start 8s steps(1,end) 0s 1 normal both;animation:
-amp-start 8s steps(1,end) 0s 1 normal both
}
@-webkit-keyframes
-amp-start{from{visibility:hidden}to{visibility:visible}}@-moz-keyframes
-amp-start{from{visibility:hidden}to{visibility:visible}}@-ms-keyframes
-amp-start{from{visibility:hidden}to{visibility:visible}}@-o-keyframes
-amp-start{from{visibility:hidden}to{visibility:visible}}@keyframes
-amp-start{from{visibility:hidden}to{visibility:visible}}
</style>
<noscript>
<style amp-boilerplate>
body{
-webkit-animation:none;
-moz-animation:none;
-ms-animation:none;
animation:none}
</style>
</noscript>
<style amp-custom>
h3{
font-family: "Segoe UI",Arial,sans-serif;
font-weight: 400;
margin: 10px 0;
}
</style>
</head>
<body>
<h3>Google Amp-Carousel</h3>
<amp-carousel
width = "400"
height = "300"
layout = "responsive"
type = "slides"
autoplay delay = "2000">
<amp-img
src = "images/christmas1.jpg"
width = "400"
height = "300"
layout = "responsive"
alt = "a sample image">
</amp-img>
<amp-img
src = "images/christmas2.jpg"
width = "400"
height = "300"
layout = "responsive"
alt = "another sample image">
</amp-img>
<amp-img
src = "images/christmas3.jpg"
width = "400"
height = "300"
layout = "responsive"
alt = "and another sample image">
</amp-img>
</amp-carousel>
</body>
</html>
Output
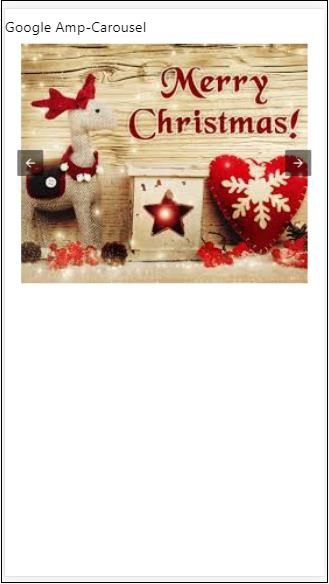
AMP Lightbox
Amp-lightbox is an amp component that will take up the full viewport and display like a overlay.
To work with amp-lightbox, add the following script −
<script async custom-element = "amp-lightbox" src = "https://cdn.ampproject.org/v0/amp-lightbox-0.1.js"> </script>
Attributes available for amp-lightbox
The list of attributes for amp-lightbox is given below −
| Sr.no | Attributes & Description |
|---|---|
| 1 | animate-in (optional)
Here you can specify style of animation for opening the lightbox.By default it is fade-in .Values supported for stying are fade-in, fly-in-bottom and fly-in-top |
| 2 | close-button (required on AMPHTML ads)
When used for amphtmlads we can specify close button for the lightbox. |
| 3 | id (required)
Unique identifier for lightbox |
| 4 | layout (required)
The value for layout will be nodisplay |
| 5 | Scrollable (optional)
With this attribute on amp-lightbox the content of the lightbox can be scrolled , overflowing height of the lightbox. |
Example of Lightbox
<!doctype html>
<html amp lang = "en">
<head>
<meta charset = "utf-8">
<script async src = "https://cdn.ampproject.org/v0.js">
</script>
<title>Google AMP - Amp Lightbox</title>
<link rel = "canonical" href =
"http://example.ampproject.org/article-metadata.html">
<meta name = "viewport" content = "width = device-width,
minimum-scale = 1,initial-scale = 1">
<style amp-boilerplate>
body{
-webkit-animation:
-amp-start 8s steps(1,end) 0s 1 normal both;-moz-animation:
-amp-start 8s steps(1,end) 0s 1 normal both;-ms-animation:
-amp-start 8s steps(1,end) 0s 1 normal both;animation:
-amp-start 8s steps(1,end) 0s 1 normal both
}
@-webkit-keyframes
-amp-start{from{visibility:hidden}to{visibility:visible}}@-moz-keyframes
-amp-start{from{visibility:hidden}to{visibility:visible}}@-ms-keyframes
-amp-start{from{visibility:hidden}to{visibility:visible}}@-o-keyframes
-amp-start{from{visibility:hidden}to{visibility:visible}}@keyframes
-amp-start{from{visibility:hidden}to{visibility:visible}}
</style>
<noscript>
<style amp-boilerplate>
body{
-webkit-animation:none;
-moz-animation:none;
-ms-animation:none;
animation:none}
</style>
</noscript>
<script async custom-element = "amp-lightbox" src =
"https://cdn.ampproject.org/v0/amp-lightbox-0.1.js">
</script>
<style amp-custom>
amp-img {
border: 1px solid #ddd;
border-radius: 4px;
padding: 5px;
}
button{
background-color: #ACAD5C;
color: white;
padding: 12px 20px;
border: none;
border-radius: 4px;
cursor: pointer;
float: left;
}
.lightbox {
background: rgba(211,211,211,0.8);
width: 100%;
height: 100%;
position: absolute;
display: flex;
align-items: center;
justify-content: center;
}
</style>
</head>
<body>
<h3>Google AMP - Amp Lightbox</h3>
<button on = "tap:my-lightbox">
Show LightBox
</button>
<amp-lightbox id = "my-lightbox" layout = "nodisplay">
<div class = "lightbox" on="tap:my-lightbox.close" tabindex = "0">
<amp-img
alt = "Beautiful Flower"
src = "images/flower.jpg"
width = "246"
height = "205">
</amp-img>
</div>
</amp-lightbox>
</body>
</html>
Output


Click anywhere on the screen to close the lightbox.
You can add close button to the lightbox which is mostly used when overlay type ads are shown. Observe the following example −
Example
<!doctype html>
<html amp lang = "en">
<head>
<meta charset = "utf-8">
<script async src = "https://cdn.ampproject.org/v0.js">
</script>
<title>Google AMP - Amp Lightbox</title>
<link rel = "canonical" href =
"http://example.ampproject.org/article-metadata.html">
<meta name = "viewport" content = "width = device-width,
minimum-scale = 1,initial-scale = 1">
<style amp-boilerplate>
body{
-webkit-animation:
-amp-start 8s steps(1,end) 0s 1 normal both;-moz-animation:
-amp-start 8s steps(1,end) 0s 1 normal both;-ms-animation:
-amp-start 8s steps(1,end) 0s 1 normal both;animation:
-amp-start 8s steps(1,end) 0s 1 normal both
}
@-webkit-keyframes
-amp-start{from{visibility:hidden}to{visibility:visible}}@-moz-keyframes
-amp-start{from{visibility:hidden}to{visibility:visible}}@-ms-keyframes
-amp-start{from{visibility:hidden}to{visibility:visible}}@-o-keyframes
-amp-start{from{visibility:hidden}to{visibility:visible}}@keyframes
-amp-start{from{visibility:hidden}to{visibility:visible}}
</style>
<noscript>
<style amp-boilerplate>
body{
-webkit-animation:none;
-moz-animation:none;
-ms-animation:none;
animation:none}
</style>
</noscript>
<script async custom-element = "amp-lightbox" src =
"https://cdn.ampproject.org/v0/amp-lightbox-0.1.js">
</script>
<style amp-custom>
amp-img {
border: 1px solid #ddd;
border-radius: 4px;
padding: 5px;
}
button{
background-color: #ACAD5C;
color: white;
padding: 12px 20px;
border: none;
border-radius: 4px;
cursor: pointer;
float: left;
}
.lightbox {
background: rgba(211,211,211,0.8);
width: 100%;
height: 100%;
position: absolute;
display: flex;
align-items: center;
justify-content: center;
}
</style>
</head>
<body>
<h3>Google AMP - Amp Lightbox</h3>
<button on = "tap:my-lightbox">
Show LightBox
</button>
<amp-lightbox id = "my-lightbox" layout = "nodisplay" close-button>
<div class = "lightbox" on = "tap:my-lightbox.close">
<amp-img
alt = "Beautiful Flower"
src = "images/flower.jpg"
width = "246"
height = "205">
</amp-img>
</div>
</amp-lightbox>
</body>
</html>
Output
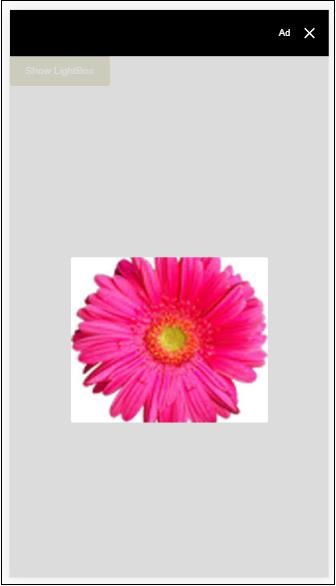
Amp Sidebar
Amp sidebar is amp component used to display content which slides from the sides of the window on tap of a button.
To work with amp-sidebar we need to add following script −
<script async custom-element = "amp-sidebar" src = " https://cdn.ampproject.org/v0/amp-sidebar-0.1.js"> </script>
Amp-sidebar tag
<amp-sidebar id = "sidebar" layout = "nodisplay" side = "right"> <span on = "tap:sidebar.close">X</span> Html content here.. </amp-sidebar>
The list of attributes available on amp-sidebar is given below −
| Sr.no | Attributes & Description |
|---|---|
| 1 | side
This attribute will open the sidebar in the direction specified. Example left/right |
| 2 | layout
Nodisplay will be used for sidebar layout |
| 3 | open
This attribute is added when side bar is open. |
| 4 | data-close-button-aria-label
Used to set label for close button. |
We will work with sidebar using above attributes. Observe the example shown below −
Example
<!doctype html>
<html amp lang = "en">
<head>
<meta charset = "utf-8">
<script async src = "https://cdn.ampproject.org/v0.js">
</script>
<title>Google AMP - Amp Sidebar</title>
<link rel = "canonical" href="
http://example.ampproject.org/article-metadata.html">
<meta name = "viewport" content = "width = device-width,
minimum-scale = 1,initial-scale = 1">
<style amp-boilerplate>
body{
-webkit-animation:
-amp-start 8s steps(1,end) 0s 1 normal both;-moz-animation:
-amp-start 8s steps(1,end) 0s 1 normal both;-ms-animation:
-amp-start 8s steps(1,end) 0s 1 normal both;animation:
-amp-start 8s steps(1,end) 0s 1 normal both
}
@-webkit-keyframes
-amp-start{from{visibility:hidden}to{visibility:visible}}@-moz-keyframes
-amp-start{from{visibility:hidden}to{visibility:visible}}@-ms-keyframes
-amp-start{from{visibility:hidden}to{visibility:visible}}@-o-keyframes
-amp-start{from{visibility:hidden}to{visibility:visible}}@keyframes
-amp-start{from{visibility:hidden}to{visibility:visible}}
</style>
<noscript>
<style amp-boilerplate>
body{
-webkit-animation:none;
-moz-animation:none;
-ms-animation:none;
animation:none}
</style>
</noscript>
<script async custom-element = "amp-sidebar" src =
"https://cdn.ampproject.org/v0/amp-sidebar-0.1.js">
</script>
<style amp-custom>
amp-img {
border: 1px solid #ddd;
border-radius: 4px;
padding: 5px;
}
button{
background-color: #ACAD5C;
color: white;
padding: 12px 20px;
border: none;
border-radius: 4px;
cursor: pointer;
float: left;
}
</style>
</head>
<body>
<h3>Google AMP - Amp Sidebar</h3>
<button on = "tap:sidebar">
Show Sidebar
</button>
<amp-sidebar id = "sidebar" layout = "nodisplay" side = "right">
<span on = "tap:sidebar.close">X</span>
<ul>
<li><a href = "/">About</a></li>
<li><a href = "/">Services</a></li>
<li><a href = "/">Contact US</a></li>
</ul>
</amp-sidebar>
</body>
</html>
Output
We have used side attribute to open the sidebar on right side. You can use left value to side attribute to open it on left side. The layout attribute has to nodisplay.Open attribute is present when the sidebar is opened.
data-close-button-aria-label
attribute is used to add close button.It is optional one and not mandatory to be used.Amp Image Slider
Amp-image-slider is an amp component used to compare two images by adding slider on moving it vertically over the image.
To work with amp-img-slider add following script −
<script async custom-element = "amp-image-slider" src = " https://cdn.ampproject.org/v0/amp-image-slider-0.1.js"> </script>
Amp-img-slider tag
<amp-image-slider width = "300" height = "200" layout = "responsive"> <amp-img src = "images/christmas1.jpg" layout = "fill"> </amp-img> <amp-img src = "images/christmas2.jpg" layout = "fill"> </amp-img> </amp-image-slider>
An example of amp-img-slider is shown here. Here we have added 2 images inside amp-img-slider, where the first image acts like a slider and you can slide in on the top on the 2nd image.
Example
<!doctype html>
<html amp lang = "en">
<head>
<meta charset = "utf-8">
<script async src = "https://cdn.ampproject.org/v0.js">
</script>
<title>Google AMP - Amp Image Slider</title>
<link rel = "canonical" href =
"http://example.ampproject.org/article-metadata.html">
<meta name = "viewport" content = "width = device-width,
minimum-scale = 1,initial-scale = 1">
<style amp-boilerplate>
body{
-webkit-animation:
-amp-start 8s steps(1,end) 0s 1 normal both;-moz-animation:
-amp-start 8s steps(1,end) 0s 1 normal both;-ms-animation:
-amp-start 8s steps(1,end) 0s 1 normal both;animation:
-amp-start 8s steps(1,end) 0s 1 normal both
}
@-webkit-keyframes
-amp-start{from{visibility:hidden}to{visibility:visible}}@-moz-keyframes
-amp-start{from{visibility:hidden}to{visibility:visible}}@-ms-keyframes
-amp-start{from{visibility:hidden}to{visibility:visible}}@-o-keyframes
-amp-start{from{visibility:hidden}to{visibility:visible}}@keyframes
-amp-start{from{visibility:hidden}to{visibility:visible}}
</style>
<noscript>
<style amp-boilerplate>
body{
-webkit-animation:none;
-moz-animation:none;
-ms-animation:none;
animation:none}
</style>
</noscript>
<script async custom-element = "amp-image-slider" src =
"https://cdn.ampproject.org/v0/amp-image-slider-0.1.js">
</script>
<style amp-custom>
amp-img {
border: 1px solid #ddd;
border-radius: 4px;
padding: 5px;
}
</style>
</head>
<body>
<h3>Google AMP - Amp Image Slider</h3>
<amp-image-slider
width = "300"
height = "200"
layout = "responsive">
<amp-img
src = "images/christmas1.jpg"
layout = "fill">
</amp-img>
<amp-img
src = "images/christmas2.jpg"
layout = "fill">
</amp-img>
</amp-image-slider>
</body>
</html>
Output
Amp-image-slider has action called seekTo using which you can change the image as shown in the example below −
Example
<!doctype html>
<html amp lang = "en">
<head>
<meta charset = "utf-8">
<script async src = "https://cdn.ampproject.org/v0.js">
</script>
<title>Google AMP - Amp Image Slider</title>
<link rel = "canonical" href ="
http://example.ampproject.org/article-metadata.html">
<meta name = "viewport" content = "width = device-width,
minimum-scale = 1,initial-scale = 1">
<style amp-boilerplate>
body{
-webkit-animation:
-amp-start 8s steps(1,end) 0s 1 normal both;-moz-animation:
-amp-start 8s steps(1,end) 0s 1 normal both;-ms-animation:
-amp-start 8s steps(1,end) 0s 1 normal both;animation:
-amp-start 8s steps(1,end) 0s 1 normal both
}
@-webkit-keyframes
-amp-start{from{visibility:hidden}to{visibility:visible}}@-moz-keyframes
-amp-start{from{visibility:hidden}to{visibility:visible}}@-ms-keyframes
-amp-start{from{visibility:hidden}to{visibility:visible}}@-o-keyframes
-amp-start{from{visibility:hidden}to{visibility:visible}}@keyframes
-amp-start{from{visibility:hidden}to{visibility:visible}}
</style>
<noscript>
<style amp-boilerplate>
body{
-webkit-animation:none;
-moz-animation:none;
-ms-animation:none;
animation:none}
</style>
</noscript>
<script async custom-element = "amp-image-slider" src =
"https://cdn.ampproject.org/v0/amp-image-slider-0.1.js">
</script>
<style amp-custom>
amp-img {
border: 1px solid #ddd;
border-radius: 4px;
padding: 5px;
}
button{
background-color: #ACAD5C;
color: white;
padding: 12px 20px;
border: none;
border-radius: 4px;
cursor: pointer;
float: left;
}
.amp-sidebar-toolbar-target-shown {
display: none;
}
</style>
</head>
<body>
<h3>Google AMP - Amp Image Slider</h3>
<amp-image-slider
width = "300"
id="slider1"
height = "200"
layout = "responsive">
<amp-img src = "images/christmas1.jpg" layout = "fill">
</amp-img>
<amp-img src = "images/christmas2.jpg" layout = "fill">
</amp-img>
</amp-image-slider>
<button on = "tap:slider1.seekTo(percent = 1)">
Image 1
</button>
<button on = "tap:slider1.seekTo(percent = 0)">
Image 2
</button>
</body>
</html>
Output
You can change the images by tapping the button.
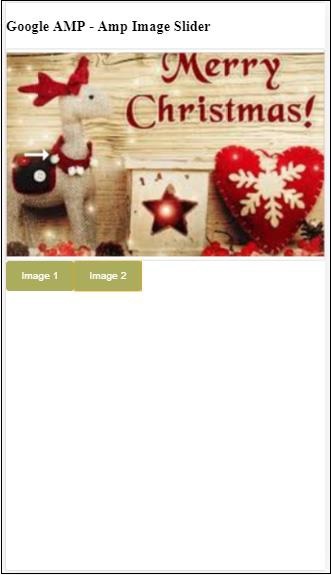
<button on = "tap:slider1.seekTo(percent = 1)">Image 1</button> <button on = "tap:slider1.seekTo(percent = 0)">Image 2</button> </div>
Google AMP - Ads
Ads play an important role for publisher pages as they are the source of revenue for the publisher. In the case of amp pages, there is a slight variation. They do not allow to add third party javascript files. In order to show ads on the page, there is an amp component called amp-ad which helps to show ad on the page. Most of the ad-networks which serves ads are compatible with amp-ad tag.
The details about how ads work is shown in the following image −
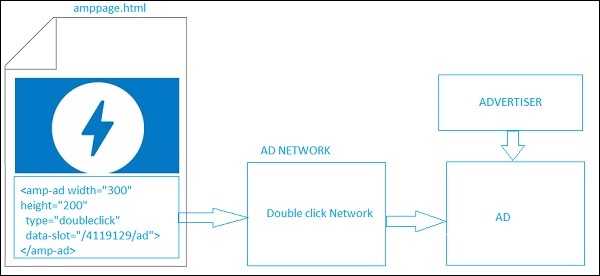
To show ads on the publisher page, we need to add <amp-ad> which will act as a placeholder to serve ads on the page. <amp-ad> will call the ad-network specified for type.
AD-network internally will call the ad to be shown back on the page which is given by advertiser which is mostly a html or an amphtml ad.
To make it work, we need to first add the script to the page.
<script async custom-element = "amp-ad" src = " https://cdn.ampproject.org/v0/amp-ad-0.1.js"> </script>
The amp-ad tag for doubleclick looks as follows −
<amp-ad width = "300"
height = "200"
type = "doubleclick"
data-slot = "/4119129/ad">
<div placeholder>
<b>Placeholder here!!!</b>
</div>
</amp-ad>
There are many ad-networks which support amp-ad. Note that we will take a look at doubleclick amp-ad tag in our examples.The ad-network name has to be specified in thetype attribute.
Example
<!doctype html>
<html amp lang = "en">
<head>
<meta charset = "utf-8">
<script async src = "https://cdn.ampproject.org/v0.js">
</script>
<title>Google AMP - AD</title>
<link rel = "canonical" href=
"http://example.ampproject.org/article-metadata.html">
<meta name = "viewport" content = "width = device-width,
minimum-scale = 1,initial-scale = 1">
<style amp-boilerplate>
body{
-webkit-animation:
-amp-start 8s steps(1,end) 0s 1 normal both;-moz-animation:
-amp-start 8s steps(1,end) 0s 1 normal both;-ms-animation:
-amp-start 8s steps(1,end) 0s 1 normal both;animation:
-amp-start 8s steps(1,end) 0s 1 normal both
}
@-webkit-keyframes
-amp-start{from{visibility:hidden}to{visibility:visible}}@-moz-keyframes
-amp-start{from{visibility:hidden}to{visibility:visible}}@-ms-keyframes
-amp-start{from{visibility:hidden}to{visibility:visible}}@-o-keyframes
-amp-start{from{visibility:hidden}to{visibility:visible}}@keyframes
-amp-start{from{visibility:hidden}to{visibility:visible}}
</style>
<noscript>
<style amp-boilerplate>
body{
-webkit-animation:none;
-moz-animation:none;
-ms-animation:none;
animation:none}
</style>
</noscript>
<script async custom-element = "amp-ad" src =
"https://cdn.ampproject.org/v0/amp-ad-0.1.js">
</script>
<style amp-custom>
div {
text-align:center;
}
</style>
</head>
<body>
<h3>Google AMP - AD</h3>
<h3>300x250 - Banner AD</h3>
<p>This is a example of adnetwork doubleclick banner ad</p>
<p>This is a example of adnetwork doubleclick banner ad</p>
<p>This is a example of adnetwork doubleclick banner ad</p>
<p>This is a example of adnetwork doubleclick banner ad</p>
<p>This is a example of adnetwork doubleclick banner ad</p>
<p>This is a example of adnetwork doubleclick banner ad</p>
<div>
<amp-ad
data-slot = /30497360/amp_by_example/AMP_Banner_300x250
height = 250
layout = fixed
style = width:300px;height:250px;
type = doubleclick
width = 300>
</amp-ad>
</div>
<p>This is a example of adnetwork doubleclick banner ad</p>
<p>This is a example of adnetwork doubleclick banner ad</p>
<p>This is a example of adnetwork doubleclick banner ad</p>
<p>This is a example of adnetwork doubleclick banner ad</p>
<p>This is a example of adnetwork doubleclick banner ad</p>
<p>This is a example of adnetwork doubleclick banner ad</p>
<p>This is a example of adnetwork doubleclick banner ad</p>
<p>This is a example of adnetwork doubleclick banner ad</p>
<p>This is a example of adnetwork doubleclick banner ad</p>
</body>
</html>
Output
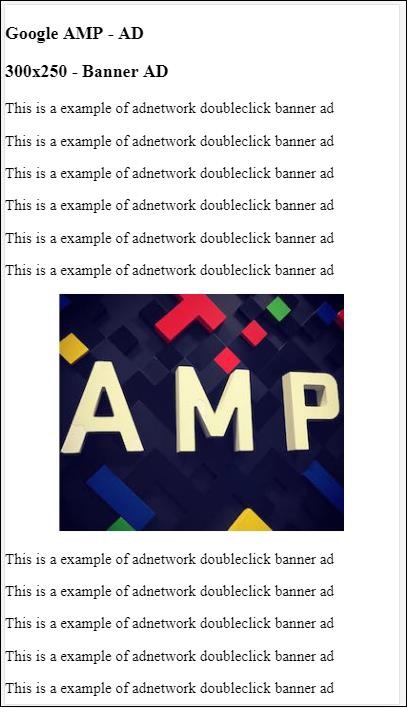
Let us take a look at some of the important attributes available on amp-ad as listed in the table given below −
| Sr.No | Attributes & Description |
|---|---|
| 1 | type
Name of the ad-network |
| 2 | width
Width of the ad |
| 3 | height
Height of the ad |
| 4 | placeholder
Placeholder used as child element and is displayed to the user when the ad is still loading.Please note this attribute has to be supported by the ad-network end. |
| 5 | data-*
Data attributes to be passed to the ad-network. For example doubleclick ad-network needs data-slot=/30497360/amp_by_example/AMP_Banner_300x250 to render the ad on the page. There will be data params specified by each ad-network. We can also override the width and height used using data-override-width and data-override-height. |
| 6 | fallback
Fallback is used as a child element to amp-ad and displayed when there is no ad to serve. |
Let us understand this with the help of a working example which uses placeholder which is executed when there is no ad to serve.
Example
<!doctype html>
<html amp lang = "en">
<head>
<meta charset = "utf-8">
<script async src = "https://cdn.ampproject.org/v0.js">
</script>
<title>Google AMP - AD</title>
<link rel = "canonical" href =
"http://example.ampproject.org/article-metadata.html">
<meta name = "viewport" content="width = device-width,
minimum-scale = 1,initial-scale = 1">
<style amp-boilerplate>
body{
-webkit-animation:
-amp-start 8s steps(1,end) 0s 1 normal both;-moz-animation:
-amp-start 8s steps(1,end) 0s 1 normal both;-ms-animation:
-amp-start 8s steps(1,end) 0s 1 normal both;animation:
-amp-start 8s steps(1,end) 0s 1 normal both
}
@-webkit-keyframes
-amp-start{from{visibility:hidden}to{visibility:visible}}@-moz-keyframes
-amp-start{from{visibility:hidden}to{visibility:visible}}@-ms-keyframes
-amp-start{from{visibility:hidden}to{visibility:visible}}@-o-keyframes
-amp-start{from{visibility:hidden}to{visibility:visible}}@keyframes
-amp-start{from{visibility:hidden}to{visibility:visible}}
</style>
<noscript>
<style amp-boilerplate>
body{
-webkit-animation:none;
-moz-animation:none;
-ms-animation:none;
animation:none}
</style>
</noscript>
<script async custom-element = "amp-ad" src =
"https://cdn.ampproject.org/v0/amp-ad-0.1.js">
</script>
<style amp-custom>
div {
text-align:center;
}
</style>
</head>
<body>
<h3>Google AMP - AD</h3>
<h3>300x250 - Banner AD</h3>
<p>This is a example of adnetwork doubleclick banner ad</p>
<p>This is a example of adnetwork doubleclick banner ad</p>
<p>This is a example of adnetwork doubleclick banner ad</p>
<p>This is a example of adnetwork doubleclick banner ad</p>
<p>This is a example of adnetwork doubleclick banner ad</p>
<p>This is a example of adnetwork doubleclick banner ad</p>
<div>
<amp-ad
data-slot = /30497360/amp_by_example/AMP_Banner_300x250
height = 250
layout = fixed
style = width:300px;height:250px;
type = doubleclick
width = 300>
<div placeholder>
<b>Placeholder Example : Ad is loading!!!</b>
</div>
</amp-ad>
</div>
<p>This is a example of adnetwork doubleclick banner ad</p>
<p>This is a example of adnetwork doubleclick banner ad</p>
<p>This is a example of adnetwork doubleclick banner ad</p>
<p>This is a example of adnetwork doubleclick banner ad<p>
<p>This is a example of adnetwork doubleclick banner ad</p>
<p>This is a example of adnetwork doubleclick banner ad</p>
</body>
</html>
Output
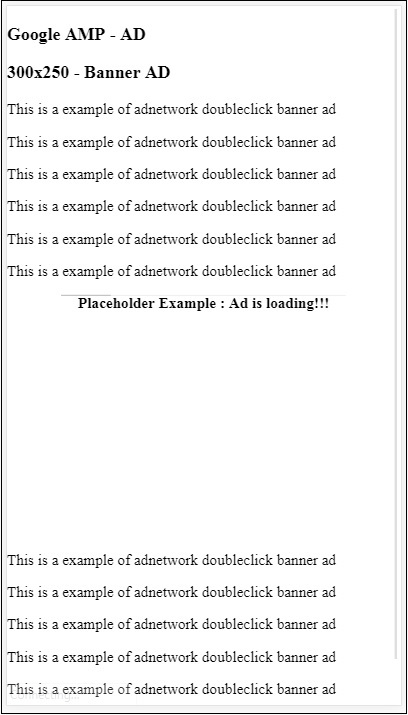
We can use fallback attribute which is child element to amp-ad and is displayed when there is no ad to serve.
Example
<!doctype html>
<html amp lang = "en">
<head>
<meta charset = "utf-8">
<script async src = "https://cdn.ampproject.org/v0.js">
</script>
<title>Google AMP - AD</title>
<link rel = "canonical" href =
"http://example.ampproject.org/article-metadata.html">
<meta name = "viewport" content = "width = device-width,
minimum-scale = 1,initial-scale = 1">
<style amp-boilerplate>
body{
-webkit-animation:
-amp-start 8s steps(1,end) 0s 1 normal both;-moz-animation:
-amp-start 8s steps(1,end) 0s 1 normal both;-ms-animation:
-amp-start 8s steps(1,end) 0s 1 normal both;animation:
-amp-start 8s steps(1,end) 0s 1 normal both
}
@-webkit-keyframes
-amp-start{from{visibility:hidden}to{visibility:visible}}@-moz-keyframes
-amp-start{from{visibility:hidden}to{visibility:visible}}@-ms-keyframes
-amp-start{from{visibility:hidden}to{visibility:visible}}@-o-keyframes
-amp-start{from{visibility:hidden}to{visibility:visible}}@keyframes
-amp-start{from{visibility:hidden}to{visibility:visible}}
</style>
<noscript>
<style amp-boilerplate>
body{
-webkit-animation:none;
-moz-animation:none;
-ms-animation:none;
animation:none}
</style>
</noscript>
<script async custom-element = "amp-ad" src =
"https://cdn.ampproject.org/v0/amp-ad-0.1.js">
</script>
<style amp-custom>
div, p{
text-align:center;
}
amp-ad {
border : solid 1px black;
}
</style>
</head>
<body>
<h3>Google AMP - AD</h3>
<h3>300x250 - Banner AD</h3>
<p>This is a example of adnetwork doubleclick banner ad</p>
<p>This is a example of adnetwork doubleclick banner ad</p>
<p>This is a example of adnetwork doubleclick banner ad</p>
<p>This is a example of adnetwork doubleclick banner ad</p>
<p>This is a example of adnetwork doubleclick banner ad</p>
<p>This is a example of adnetwork doubleclick banner ad</p>
<div>
<amp-ad
width = "300"
height = "250"
type = "doubleclick"
data-slot = "/4119129/no-ad">
<div fallback>
<p style = "color:green;font-size:25px;">No ads to Serve!</p>
</div>
</amp-ad>
</div>
<p>This is a example of adnetwork doubleclick banner ad</p>
<p>This is a example of adnetwork doubleclick banner ad</p>
<p>This is a example of adnetwork doubleclick banner ad</p>
<p>This is a example of adnetwork doubleclick banner ad</p>
<p>This is a example of adnetwork doubleclick banner ad</p>
<p>This is a example of adnetwork doubleclick banner ad</p>
</body>
</html>
Output
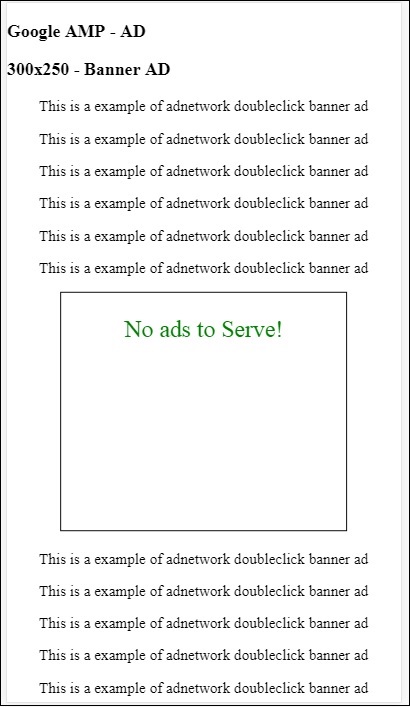
In case of fallback attribute if the ad is in viewport, it will display the message inside fallback element.
If the ad component is below viewport and if there is no ad, amp-ad will collapse the space and will not show the fallback message.
The ad-unit is only collapsed if there is noad and if its below viewport, so that the user is not disturbed while reading content as collapsing can cause the content to shift.
The list of supported ad-networks is given here: https://www.ampproject.org/docs/ads/ads_vendors
In this chapter, we are going to discuss the following ad related tags in amp −
Google AMP − Event Tracking Pixel
Google AMP − Sticky Ad
Google AMP − AMPHTML Ads
Event Tracking Pixel
Amp offers amp-pixel which is basically used to fire a pixel to count page views. Amp-pixel is similar to the img tag wherein we need to give the pixel url which is going to be fired and the user can see the url fired in the browsers network tab while debugging.The pixel will not be displayed on the page.
To work with amp-pixel, we do not need to add any additional script as its functionality is available in the core amp script.
The tag amp-pixel looks like as shown here −
<amp-pixel src = "https://urlhere" layout = "nodisplay"> </amp-pixel>
Let us understand the working of amp-pixel with the help of a working example −
Example
<!doctype html>
<html amp lang = "en">
<head>
<meta charset = "utf-8">
<script async src = "https://cdn.ampproject.org/v0.js">
</script>
<title>Google AMP - Tracking Pixel</title>
<link rel = "canonical" href =
"http://example.ampproject.org/article-metadata.html">
<meta name = "viewport" content = "width = device-width,
minimum-scale = 1,initial-scale = 1">
<style amp-boilerplate>
body{
-webkit-animation:
-amp-start 8s steps(1,end) 0s 1 normal both;-moz-animation:
-amp-start 8s steps(1,end) 0s 1 normal both;-ms-animation:
-amp-start 8s steps(1,end) 0s 1 normal both;animation:
-amp-start 8s steps(1,end) 0s 1 normal both
}
@-webkit-keyframes
-amp-start{from{visibility:hidden}to{visibility:visible}}@-moz-keyframes
-amp-start{from{visibility:hidden}to{visibility:visible}}@-ms-keyframes
-amp-start{from{visibility:hidden}to{visibility:visible}}@-o-keyframes
-amp-start{from{visibility:hidden}to{visibility:visible}}@keyframes
-amp-start{from{visibility:hidden}to{visibility:visible}}
</style>
<noscript>
<style amp-boilerplate>
body{
-webkit-animation:none;
-moz-animation:none;
-ms-animation:none;
animation:none}
</style>
</noscript>
</head>
<body>
<h3>Google AMP - Tracking Pixel</h3>
<amp-pixel src = "https://www.trackerurlhere.com/tracker/foo"
layout = "nodisplay">
</amp-pixel>
</body>
</html>
Output
You will see the url firing in the browser network tab. Here we have used a dummy pixel just to show the working of amp-pixel. In a live environment, you should see data getting tracked against the pixel fired. As each time the pixel gets fired in the live webpage, the data across it is counted at the server end. Later the data can be analyzed from the business point of view.
Sticky Ad
Sticky AD is a type of format to display the ad. The ad will stick to the bottom of the page which will call the amp-ad component as a child. This is basically like a footer ad which we mostly see on pages.
To work with amp-sticky-ad, we need to add the following script −
<script async custom-element = "amp-sticky-ad" src = " https://cdn.ampproject.org/v0/amp-sticky-ad-1.0.js"> </script>
The conditions linked to amp-sticky-ad are as follows −
You are allowed to use only one amp-sticky-ad on the page.
amp-ad has to be direct child of amp-sticky-ad. For example −
<amp-sticky-ad> <amp-ad></amp-ad> </amp-sticky-ad>
The sticky ad component will be always positioned at the bottom of the page.
The sticky ad will take full width of the container and fill the space with width and height of the amp-ad
Height of sticky-ad is 100px.If the height of amp-ad is less than 100px sticky ad will take the height of the amp-ad.If the height of amp-ad is more than 100px than the height will remain as 100px with overflow content hidden.It will not be possible to change the height of the sticky ad beyond 100px.
The background color of sticky-ad can be changed. But transparent background is not allowed.
When the user scrolls and reaches at the bottom of the page the ad will be seen at the end of the page so that the bottom contents are not hidden.
In landscape mode the sticky ad will be center aligned.
If there is no ad to serve, the container of sticky ad will collapse and will not be visible.
Let us see a working example of amp-sticky-ad on page as given below −
Example
<!doctype html>
<html amp lang = "en">
<head>
<meta charset = "utf-8">
<script async src = "https://cdn.ampproject.org/v0.js">
</script>
<title>Google AMP - AD</title>
<link rel = "canonical" href =
"http://example.ampproject.org/article-metadata.html">
<meta name = "viewport" content = "width = device-width,
minimum-scale = 1,initial-scale = 1">
<style amp-boilerplate>
body{
-webkit-animation:
-amp-start 8s steps(1,end) 0s 1 normal both;-moz-animation:
-amp-start 8s steps(1,end) 0s 1 normal both;-ms-animation:
-amp-start 8s steps(1,end) 0s 1 normal both;animation:
-amp-start 8s steps(1,end) 0s 1 normal both
}
@-webkit-keyframes
-amp-start{from{visibility:hidden}to{visibility:visible}}@-moz-keyframes
-amp-start{from{visibility:hidden}to{visibility:visible}}@-ms-keyframes
-amp-start{from{visibility:hidden}to{visibility:visible}}@-o-keyframes
-amp-start{from{visibility:hidden}to{visibility:visible}}@keyframes
-amp-start{from{visibility:hidden}to{visibility:visible}}
</style>
<noscript>
<style amp-boilerplate>
body{
-webkit-animation:none;
-moz-animation:none;
-ms-animation:none;
animation:none}
</style>
</noscript>
<script async custom-element = "amp-sticky-ad" src =
"https://cdn.ampproject.org/v0/amp-sticky-ad-1.0.js">
</script>
<style amp-custom>
div, p{
text-align:center;
}
amp-ad {
border : solid 1px black;
}
</style>
</head>
<body>
<h3>Google AMP - Sticky AD</h3>
<p>This is a example of adnetwork doubleclick banner ad</p>
<p>This is a example of adnetwork doubleclick banner ad</p>
<p>This is a example of adnetwork doubleclick banner ad</p>
<p>This is a example of adnetwork doubleclick banner ad</p>
<p>This is a example of adnetwork doubleclick banner ad</p>
<p>This is a example of adnetwork doubleclick banner ad</p>
<div>
<amp-sticky-ad layout = "nodisplay">
<amp-ad
width = "320"
height = "50"
type = "doubleclick"
data-slot = "/35096353/amptesting/formats/sticky">
</amp-ad>
</amp-sticky-ad>
</div>
<p>This is a example of adnetwork doubleclick banner ad</p>
<p>This is a example of adnetwork doubleclick banner ad</p>
<p>This is a example of adnetwork doubleclick banner ad</p>
<p>This is a example of adnetwork doubleclick banner ad</p>
<p>This is a example of adnetwork doubleclick banner ad</p>
<p>This is a example of adnetwork doubleclick banner ad</p>
<p>This is a example of adnetwork doubleclick banner ad</p>
<p>This is a example of adnetwork doubleclick banner ad</p>
<p>This is a example of adnetwork doubleclick banner ad</p>
<p>This is a example of adnetwork doubleclick banner ad</p>
<p>This is a example of adnetwork doubleclick banner ad</p>
<p>This is a example of adnetwork doubleclick banner ad</p>
<p>This is a example of adnetwork doubleclick banner ad</p>
<p>This is a example of adnetwork doubleclick banner ad</p>
<p>This is a example of adnetwork doubleclick banner ad</p>
<p>This is a example of adnetwork doubleclick banner ad</p>
<p>This is a example of adnetwork doubleclick banner ad</p>
<p>This is a example of adnetwork doubleclick banner ad</p>
<p>This is a example of adnetwork doubleclick banner ad</p>
<p>This is a example of adnetwork doubleclick banner ad</p>
<p>This is a example of adnetwork doubleclick banner ad</p>
<p>This is a example of adnetwork doubleclick banner ad</p>
<p>This is a example of adnetwork doubleclick banner ad</p>
<p>This is a example of adnetwork doubleclick banner ad</p>
<p>This is a example of adnetwork doubleclick banner ad</p>
<p>This is a example of adnetwork doubleclick banner ad</p>
<p>This is a example of adnetwork doubleclick banner ad</p>
<p>This is a example of adnetwork doubleclick banner ad</p>
<p>This is a example of adnetwork doubleclick banner ad</p>
<p>This is a example of adnetwork doubleclick banner ad</p>
<p>This is a example of adnetwork doubleclick banner ad</p>
<p>This is a example of adnetwork doubleclick banner ad</p>
<p>This is a example of adnetwork doubleclick banner ad</p>
<p>This is a example of adnetwork doubleclick banner ad</p>
<p>This is a example of adnetwork doubleclick banner ad</p>
<p>This is a example of adnetwork doubleclick banner ad</p>
<p>This is a example of adnetwork doubleclick banner ad</p>
<p>This is a example of adnetwork doubleclick banner ad</p>
<p>This is a example of adnetwork doubleclick banner ad</p>
<p>This is a example of adnetwork doubleclick banner ad</p>
<p>This is a example of adnetwork doubleclick banner ad</p>
<p>This is a example of adnetwork doubleclick banner ad</p>
<p>This is a example of adnetwork doubleclick banner ad</p>
<p>This is a example of adnetwork doubleclick banner ad</p>
<p>This is a example of adnetwork doubleclick banner ad</p>
<p>This is a example of adnetwork doubleclick banner ad</p>
<p>This is a example of adnetwork doubleclick banner ad</p>
<p>This is a example of adnetwork doubleclick banner ad</p>
<p>This is a example of adnetwork doubleclick banner ad</p>
<p>This is a example of adnetwork doubleclick banner ad</p>
<p>This is a example of adnetwork doubleclick banner ad</p>
<p>This is a example of adnetwork doubleclick banner ad</p>
<p>This is a example of adnetwork doubleclick banner ad</p>
<h2>END OF PAGE IS VISIBLE AND CONTENT IS NOT COVERED</h2>
</body>
</html>
Output
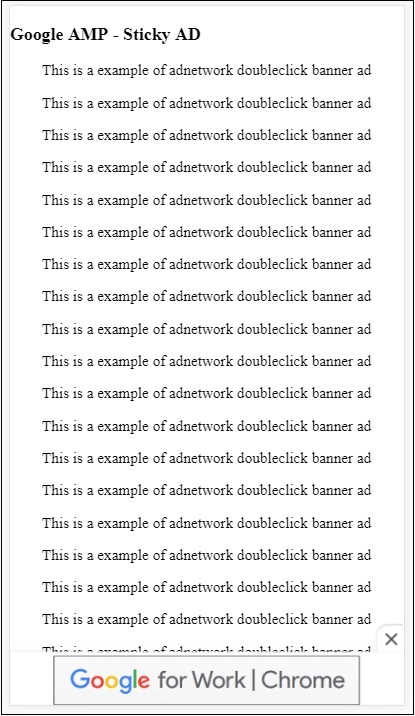
This is how it looks when user scrolls to the end of the page −
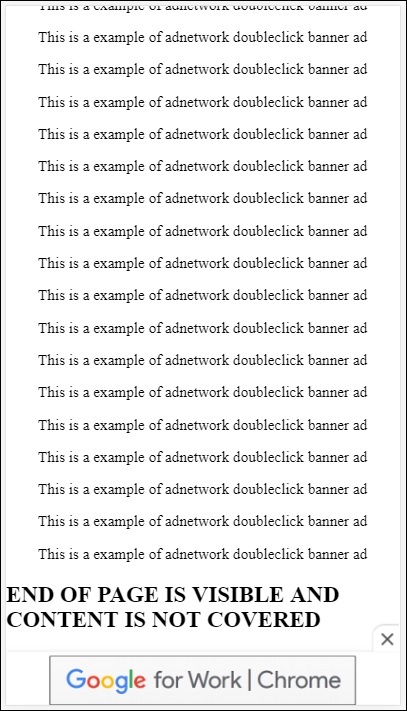
The ad does not overlap contents when you reach the end of page. The close button is made available which allows users to close the ad.
If you want to change anything related to the close button ie, the image or width etc it can be done using .amp-sticky-ad-close-button in style component.
Example to change the background color of close button
<!doctype html>
<html amp lang = "en">
<head>
<meta charset = "utf-8">
<script async src = "https://cdn.ampproject.org/v0.js">
</script>
<title>Google AMP - AD</title>
<link rel = "canonical" href =
"http://example.ampproject.org/article-metadata.html">
<meta name = "viewport" content = "width = device-width,
minimum-scale = 1,initial-scale = 1">
<style amp-boilerplate>
body{
-webkit-animation:
-amp-start 8s steps(1,end) 0s 1 normal both;-moz-animation:
-amp-start 8s steps(1,end) 0s 1 normal both;-ms-animation:
-amp-start 8s steps(1,end) 0s 1 normal both;animation:
-amp-start 8s steps(1,end) 0s 1 normal both
}
@-webkit-keyframes
-amp-start{from{visibility:hidden}to{visibility:visible}}@-moz-keyframes
-amp-start{from{visibility:hidden}to{visibility:visible}}@-ms-keyframes
-amp-start{from{visibility:hidden}to{visibility:visible}}@-o-keyframes
-amp-start{from{visibility:hidden}to{visibility:visible}}@keyframes
-amp-start{from{visibility:hidden}to{visibility:visible}}
</style>
<noscript>
<style amp-boilerplate>
body{
-webkit-animation:none;
-moz-animation:none;
-ms-animation:none;
animation:none}
</style>
</noscript>
<script async custom-element = "amp-sticky-ad"
src = "https://cdn.ampproject.org/v0/amp-sticky-ad-1.0.js">
</script>
<style amp-custom>
div, p{
text-align:center;
}
amp-ad {
border : solid 1px black;
}
.amp-sticky-ad-close-button {
background-color: red;
}
</style>
</head>
<body>
<h3>Google AMP - Sticky AD</h3>
<p>This is a example of adnetwork doubleclick banner ad</p>
<p>This is a example of adnetwork doubleclick banner ad</p>
<p>This is a example of adnetwork doubleclick banner ad</p>
<p>This is a example of adnetwork doubleclick banner ad</p>
<p>This is a example of adnetwork doubleclick banner ad</p>
<p>This is a example of adnetwork doubleclick banner ad</p>
<div>
<amp-sticky-ad layout = "nodisplay">
<amp-ad
width = "320"
height = "50"
type = "doubleclick"
data-slot = "/35096353/amptesting/formats/sticky">
</amp-ad>
</amp-sticky-ad>
</div>
<p>This is a example of adnetwork doubleclick banner ad</p>
<p>This is a example of adnetwork doubleclick banner ad</p>
<p>This is a example of adnetwork doubleclick banner ad</p>
<p>This is a example of adnetwork doubleclick banner ad</p>
<p>This is a example of adnetwork doubleclick banner ad</p>
<p>This is a example of adnetwork doubleclick banner ad</p>
<p>This is a example of adnetwork doubleclick banner ad</p>
<p>This is a example of adnetwork doubleclick banner ad</p>
<p>This is a example of adnetwork doubleclick banner ad</p>
<p>This is a example of adnetwork doubleclick banner ad</p>
<p>This is a example of adnetwork doubleclick banner ad</p>
<p>This is a example of adnetwork doubleclick banner ad</p>
<p>This is a example of adnetwork doubleclick banner ad</p>
<p>This is a example of adnetwork doubleclick banner ad</p>
<p>This is a example of adnetwork doubleclick banner ad</p>
<p>This is a example of adnetwork doubleclick banner ad</p>
<p>This is a example of adnetwork doubleclick banner ad</p>
<p>This is a example of adnetwork doubleclick banner ad</p>
<p>This is a example of adnetwork doubleclick banner ad</p>
<p>This is a example of adnetwork doubleclick banner ad</p>
<p>This is a example of adnetwork doubleclick banner ad</p>
<p>This is a example of adnetwork doubleclick banner ad</p>
<p>This is a example of adnetwork doubleclick banner ad</p>
<p>This is a example of adnetwork doubleclick banner ad</p>
<p>This is a example of adnetwork doubleclick banner ad</p>
<p>This is a example of adnetwork doubleclick banner ad</p>
<p>This is a example of adnetwork doubleclick banner ad</p>
<p>This is a example of adnetwork doubleclick banner ad</p>
<p>This is a example of adnetwork doubleclick banner ad</p>
<p>This is a example of adnetwork doubleclick banner ad</p>
<p>This is a example of adnetwork doubleclick banner ad</p>
<p>This is a example of adnetwork doubleclick banner ad</p>
<p>This is a example of adnetwork doubleclick banner ad</p>
<p>This is a example of adnetwork doubleclick banner ad</p>
<p>This is a example of adnetwork doubleclick banner ad</p>
<p>This is a example of adnetwork doubleclick banner ad</p>
<p>This is a example of adnetwork doubleclick banner ad</p>
<p>This is a example of adnetwork doubleclick banner ad</p>
<p>This is a example of adnetwork doubleclick banner ad</p>
<p>This is a example of adnetwork doubleclick banner ad</p>
<p>This is a example of adnetwork doubleclick banner ad</p>
<p>This is a example of adnetwork doubleclick banner ad</p>
<p>This is a example of adnetwork doubleclick banner ad</p>
<p>This is a example of adnetwork doubleclick banner ad</p>
<p>This is a example of adnetwork doubleclick banner ad</p>
<p>This is a example of adnetwork doubleclick banner ad</p>
<p>This is a example of adnetwork doubleclick banner ad</p>
<p>This is a example of adnetwork doubleclick banner ad</p>
<p>This is a example of adnetwork doubleclick banner ad</p>
<p>This is a example of adnetwork doubleclick banner ad</p>
<p>This is a example of adnetwork doubleclick banner ad</p>
<p>This is a example of adnetwork doubleclick banner ad</p>
<p>This is a example of adnetwork doubleclick banner ad</p>
<h2>END OF PAGE IS VISIBLE AND CONTENT IS NOT COVERED</h2>
</body>
</html>
Output
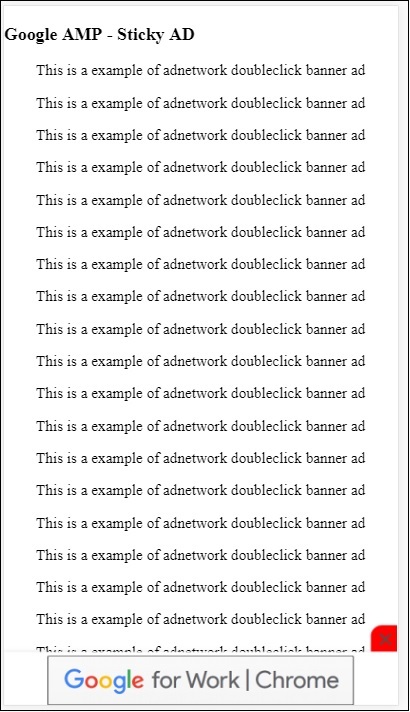
Example of amp sticky ad on publisher page

AMPHTML Ads
We have seen <amp-ad> which is used to load ads. The ad content loaded using <amp-ad> can use non amp style of loading ads. Incase, the <amp-ad> loads ad which uses amp specification for ads, then it is called as amphtml ads. AmpHTML ads are faster in comparison to the non amp ones as they follow the amp specification.
Using the amp-components available like lightbox and carousel, we can form many types of amphtml ad formats which can help to display ads.
Currently, the following ad-serves support amphtml ads −
DoubleClick for Publishers
TripleLift
Dianomi
Adzerk
Google AdSense
The amphtml ads will serve from the <amp-ad> component as shown below −
Example
<!doctype html>
<html amp lang = "en">
<head>
<meta charset = "utf-8">
<script async src = "https://cdn.ampproject.org/v0.js">
</script>
<title>Google AMP - Amp HTMLAds</title>
<link rel = "canonical" href=
"http://example.ampproject.org/article-metadata.html">
<meta name = "viewport" content = "width=device-width,
minimum-scale = 1,initial-scale = 1">
<style amp-boilerplate>
body{
-webkit-animation:
-amp-start 8s steps(1,end) 0s 1 normal both;-moz-animation:
-amp-start 8s steps(1,end) 0s 1 normal both;-ms-animation:
-amp-start 8s steps(1,end) 0s 1 normal both;animation:
-amp-start 8s steps(1,end) 0s 1 normal both
}
@-webkit-keyframes
-amp-start{from{visibility:hidden}to{visibility:visible}}@-moz-keyframes
-amp-start{from{visibility:hidden}to{visibility:visible}}@-ms-keyframes
-amp-start{from{visibility:hidden}to{visibility:visible}}@-o-keyframes
-amp-start{from{visibility:hidden}to{visibility:visible}}@keyframes
-amp-start{from{visibility:hidden}to{visibility:visible}}
</style>
<noscript>
<style amp-boilerplate>
body{
-webkit-animation:none;
-moz-animation:none;
-ms-animation:none;
animation:none}
</style>
</noscript>
<script async custom-element = "amp-ad" src =
"https://cdn.ampproject.org/v0/amp-ad-0.1.js">
</script>
<style amp-custom>
.ad-container {
background: #FFFFFF;
margin: 0;
padding: 0px;
text-align:center;
}
.article-body{
font-family: avenir, Helvetica, arial, serif, sans-serif !important;
font-weight: 400;
text-align:center;
}
.adv {
text-align:center;
}
</style>
</head>
<body>
<div>
<p>Amphtml ads are faster in comparison to the non
amp ones as they follow the amp specification.</p>
<p>Amphtml ads work fine in amp pages as well as non amp pages</p>
<div class = "ad-container">
<div>Advertising</div>
<amp-ad layout = "fixed"
width = "300"
height = "250"
type = "fake"
id = "i-amphtml-demo-fake"
src = "ampimg.html">
</amp-ad>
</div>
<p>Amphtml ads are faster in comparison to the non amp
ones as they follow the amp specification.</p>
<p>Amphtml ads work fine in amp pages as well as non amp pages</p>
</div>
</body>
</html>
We are calling amp-ad to show the ad. The src used in amp-ad is another amp page. We have used type=fake and id=i-amphtml-demo-fake. The amp page details or the ampimg.html used in amp-ad tag is shown here −
ampimg.html
<!doctype html>
<html amp lang = "en">
<head>
<meta charset = "utf-8">
<script async src = "https://cdn.ampproject.org/v0.js">
</script>
<title>Google AMP - Image</title>
<link rel = "canonical" href =
"http://example.ampproject.org/article-metadata.html">
<meta name = "viewport" content="width = device-width,
minimum-scale = 1,initial-scale = 1">
<style amp-boilerplate>
body{
-webkit-animation:
-amp-start 8s steps(1,end) 0s 1 normal both;-moz-animation:
-amp-start 8s steps(1,end) 0s 1 normal both;-ms-animation:
-amp-start 8s steps(1,end) 0s 1 normal both;animation:
-amp-start 8s steps(1,end) 0s 1 normal both
}
@-webkit-keyframes
-amp-start{from{visibility:hidden}to{visibility:visible}}@-moz-keyframes
-amp-start{from{visibility:hidden}to{visibility:visible}}@-ms-keyframes
-amp-start{from{visibility:hidden}to{visibility:visible}}@-o-keyframes
-amp-start{from{visibility:hidden}to{visibility:visible}}@keyframes
-amp-start{from{visibility:hidden}to{visibility:visible}}
</style>
<noscript>
<style amp-boilerplate>
body{
-webkit-animation:none;
-moz-animation:none;
-ms-animation:none;
animation:none}
</style>
</noscript>
<style amp-custom>
amp-img {
border: 1px solid black;
border-radius: 4px;
padding: 5px;
}
</style>
</head>
<body>
<amp-img alt = "Beautiful Flower"
src = "images/bannerad.png"
width = "246"
height = "205">
</amp-img>
</body>
</html>
Output
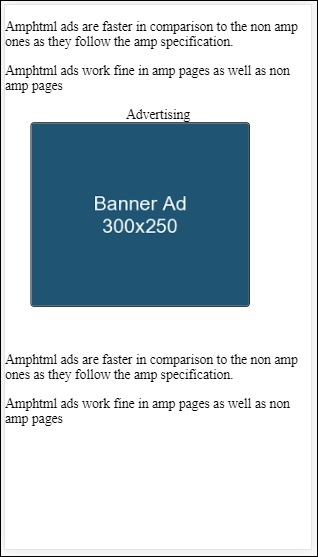
We are showing amp page inside the amp-ad. Similarly, we can use amp-video, amp-carousel to show the ads in the amp page. The adserver listed have support to call a proper amp page for serving ads under amphtml ads.
Google AMP - Analytics
Amp analytics is an amp component used to track data on a page. All the user interaction on the page can be recorded and saved to analyze the data for further improvements or business purpose.
To work with amp-analytics component we need to add following script inside head section −
<script async custom-element = "amp-analytics" src = "https://cdn.ampproject.org/v0/amp-analytics-0.1.js"> </script>
To record the events used in amp-analytics, we can use a third party vendor or can also have a inhouse tracking system.
Example of amp-analytics using GoogleAnalytics vendor −
<amp-analytics type = googleanalytics>
<script type = application/json>{
"requests": {
"pageview": "${eventId}"
},
"vars": {
"account": "UA-44450152-1"
},
"triggers": {
"trackPageview" : {
"on": "visible",
"request": "pageview",
"vars": {
"eventId": "pageview"
}
}
}
}
</script>
</amp-analytics>
Example of amp-analytics using comscore vendor
<amp-analytics type = comscore>
<script type = application/json>
{"vars": {"c2":"7922264"}}
</script>
</amp-analytics>
Example of amp-analytics using chartbeat vendor
<amp-analytics type = chartbeat>
<script type = application/json>{
"vars": {
"uid": "230",
"domain": "dummyurl.com",
"sections": "us",
"authors": "Hello World"
}
}</script>
</amp-analytics>
The detailed list of vendors are available here.
A working example on how to use in-house analytics vendor is given below −
Example
<!doctype html>
<html amp>
<head>
<meta charset = "utf-8">
<title>amp-analytics</title>
<script async src = "https://cdn.ampproject.org/v0.js">
</script>
<script async custom-element = "amp-analytics"
src = "https://cdn.ampproject.org/v0/amp-analytics-0.1.js">
</script>
<link rel = "canonical" href = "ampanalytics.html">
<meta name = "viewport" content = "width = device-width,
minimum-scale = 1,initial-scale = 1">
<style amp-boilerplate>
body{
-webkit-animation:
-amp-start 8s steps(1,end) 0s 1 normal both;-moz-animation:
-amp-start 8s steps(1,end) 0s 1 normal both;-ms-animation:
-amp-start 8s steps(1,end) 0s 1 normal both;animation:
-amp-start 8s steps(1,end) 0s 1 normal both}
@-webkit-keyframes
-amp-start{from{visibility:hidden}to{visibility:visible}}@-moz-keyframes
-amp-start{from{visibility:hidden}to{visibility:visible}}@-ms-keyframes
-amp-start{from{visibility:hidden}to{visibility:visible}}@-o-keyframes
-amp-start{from{visibility:hidden}to{visibility:visible}}@keyframes
-amp-start{from{visibility:hidden}to{visibility:visible}}
</style>
<noscript>
<style amp-boilerplate>
body{
-webkit-animation:none;
-moz-animation:none;
-ms-animation:none;
animation:none}
</style>
</noscript>
</head>
<body>
<h1>Google Amp - Analytics</h1>
<amp-analytics>
<script type = "application/json">
{
"requests": {
"event": "http://localhost:8080/googleamp/tracking.php?
user=test&account=localhost&event=${eventId}"
},
"triggers": {
"trackPageview": {
"on": "visible",
"request": "event",
"vars": {
"eventId": "pageview"
}
}
}
}
</script>
</amp-analytics>
</body>
</html>
When the page is hit in the browser the tracker will be fired for pageview. It can be seen in the google network tab as shown below.
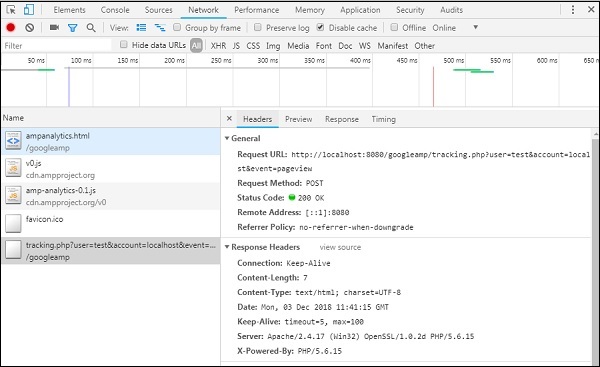
You can also fire amp-analytics event when a particular element is visible on the page. A working example for the same is shown here −
Example
<!doctype html>
<html amp>
<head>
<meta charset = "utf-8">
<title>amp-analytics</title>
<script async src = "https://cdn.ampproject.org/v0.js">
</script>
<script async custom-element = "amp-analytics"
src = "https://cdn.ampproject.org/v0/amp-analytics-0.1.js">
</script>
<link rel = "canonical" href = "ampanalytics.html">
<meta name = "viewport" content = "width = device-width,
minimum-scale = 1,initial-scale = 1">
<style amp-boilerplate>
body{
-webkit-animation:
-amp-start 8s steps(1,end) 0s 1 normal both;-moz-animation:
-amp-start 8s steps(1,end) 0s 1 normal both;-ms-animation:
-amp-start 8s steps(1,end) 0s 1 normal both;animation:
-amp-start 8s steps(1,end) 0s 1 normal both
}
@-webkit-keyframes
-amp-start{from{visibility:hidden}to{visibility:visible}}@-moz-keyframes
-amp-start{from{visibility:hidden}to{visibility:visible}}@-ms-keyframes
-amp-start{from{visibility:hidden}to{visibility:visible}}@-o-keyframes
-amp-start{from{visibility:hidden}to{visibility:visible}}@keyframes
-amp-start{from{visibility:hidden}to{visibility:visible}}
</style>
<noscript>
<style amp-boilerplate>
body{
-webkit-animation:none;
-moz-animation:none;
-ms-animation:none;
animation:none}
</style>
</noscript>
<script async custom-element = "amp-video"
src = "https://cdn.ampproject.org/v0/amp-video-0.1.js">
</script>
</head>
<body>
<h1>Google Amp - Analytics</h1>
<amp-video controls
id = "videoplayer"
width = "640"
height = "360"
layout = "responsive"
poster = "images/videoposter.png"
autoplay>
<source src = "video/bunny.webm" type = "video/webm" />
<source src = "video/samplevideo.mp4" type = "video/mp4" />
<div fallback>
<p>This browser does not support the video element.</p>
</div>
</amp-video>
<amp-analytics>
<script type = "application/json">
{
"requests": {
"event": "http://localhost:8080/googleamp/tracking.php?
user=test&account=localhost&event=${eventId}"
},
"triggers": {
"trackPageview": {
"on": "visible",
"request": "event",
"visibilitySpec": {
"selector": "#videoplayer",
"visiblePercentageMin": 20,
"totalTimeMin": 2000,
"continuousTimeMin": 200
},
"vars": {
"eventId": "video"
}
}
}
}
</script>
</amp-analytics>
</body>
</html>
Output
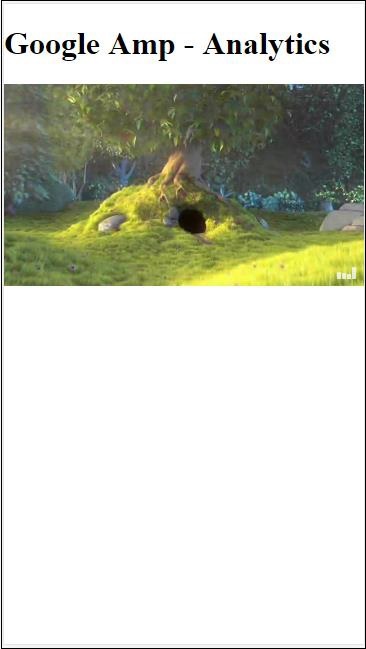
Amp-analytics component requires a json object to be passed to the script tag. The format of the json is as follows −
{
"requests": {
request-name: request-value,
...
},
"vars": {
var-name: var-value,
...
},
"extraUrlParams": {
extraurlparam-name: extraurlparam-value,
...
},
"triggers": {
trigger-name: trigger-object,
...
},
"transport": {
"beacon": *boolean*,
"xhrpost": *boolean*,
"image": *boolean*,
}
}
All the objects specified above are not mandatory to be passed to amp-analytics. If you are using a third party vendor, the vendor will have its format and the user will need to pass the data in that fashion.
Let us understand each of the object in detail −
Requests
The requests object has a url which is used to fire when the conditions are met. An example of requests object is shown here −
"requests": {
"request-name": "http://localhost:8080/googleamp/tracking.php?
user=test&account=localhost&event=${eventId}"
},
The request-name will be specified in the trigger object and same name has to be used for it.
Vars
All variables to be used in the request object are specified in the vars object.
"requests": {
"event": "http://localhost:8080/googleamp/tracking.php?
user=test&account=localhost&event=${eventId}"
},
"vars": {
"eventId": "video"
}
Extra URL Params
Any additional parameters to be appended to the request url as query string can be defined in this object. Observe the following example
"requests": {
"event": "http://localhost:8080/googleamp/tracking.php?
user=test&account=localhost&event=${eventId}&x=1&y=2&z=3"
},
"vars": {
"eventId": "video"
},
"extraUrlParams": {
"x": "1",
"y": "2",
"z": "3"
}
Triggers
This object will tell when the request url has to be fired. The key-value pairs that are available inside the trigger object are as given below −
on − You should mention the event to be listened. The values available for on are render-start, ini-load, click, scroll, timer, visible, hidden, user-error, access-*, and video-*
request − This is the name of the request. This has to match with the request-name in requests object.
vars − This is object with key-value variables defined to be used inside trigger object or used to override the vars key-value defined.
selector − This shows the details of the element on which the trigger is set.
scrollSpec − This will have details of the scroll trigger.
timerSpec − This will have details of the time to given.
videoSpec − This will have details to be invoked for a video.
Here is an example wherein we have added amp-video. Amp-analytics will fire tracker when the video element is available on the page, at least 20% visible on the page, the video has to play at least for 2 seconds, and is continuous in view for 200ms. When all these conditions are met than only the tracker will get fired. The details are shown below −

To add the conditions about the visibility of the element and other conditions like the element has to be viewable atleast 20%, video should play for 2s , all these conditions has to be specified inside the visibilitySpec as shown below −
<amp-analytics>
<script type = "application/json">
{
"requests": {
"event": "http://localhost:8080/googleamp/tracking.php?
user=test&account=localhost&event=${eventId}"
},
"triggers": {
"trackPageview": {
"on": "visible",
"request": "event",
"visibilitySpec": {
"selector": "#videoplayer",
"visiblePercentageMin": 20,
"totalTimeMin": 2000,
"continuousTimeMin": 200
},
"vars": {
"eventId": "video"
}
}
}
}
</script>
</amp-analytics>
videoSpec allows you to define conditions based on which you want to trigger the tracker firing. The conditions are listed here −
waitFor
This property is used for visibility trigger to wait for certain case before firing. The options available for waitFor are none, ini-load and render-start. By default, the value for waitFor is ini-load.
reportWhen
This property is used for visibility trigger to wait for certain case before firing. The value supported is documentExit.You cannot use reportWhen and repeat property together inside visibilitySpec
continuousTimeMin and continuousTimeMax
This property indicates that the visibility tracker to fire it needs the element has to be in viewport continuously between continuousTimeMin and continuousTimeMax. If continousTimeMin is not specified, it will be by default set to 0. The value is specified in milliseconds.
totalTimeMin and totalTimeMin
This property indicates that the visibility tracker to fire it needs the element has to be in viewport for a total time between totalTimeMin and totalTimeMin. If totalTimeMin is not specified it will default to 0.The value is specified in milliseconds.
visiblePercentageMin and visiblePercentageMax
This property indicates that the visibility tracker to fire its needs the element to be visible within the viewport between the percentage assigned to visiblePercetageMin and visiblePercentageMax. The default values for visiblePercentageMin is 0 and 100 for visibilePercentageMax.It both have values 0 than the visibility trigger will fire when the element is not visible and if both have 100 than it will fire when the element is fully visible.
Repeat
If set to true, the trigger will fire everytime the visibilitySpec conditions are met. By default, the value for repeat is false. It cannot be used together with reportWhen property.
An example for click trigger is shown here −
<!doctype html>
<html amp>
<head>
<meta charset = "utf-8">
<title>amp-analytics</title>
<script async src = "https://cdn.ampproject.org/v0.js">
</script>
<script async custom-element = "amp-analytics"
src="https://cdn.ampproject.org/v0/amp-analytics-0.1.js">
</script>
<link rel = "canonical" href = "ampanalytics.html">
<meta name = "viewport" content = "width = device-width,
minimum-scale = 1,initial-scale = 1">
<style amp-boilerplate>
body{
-webkit-animation:
-amp-start 8s steps(1,end) 0s 1 normal both;-moz-animation:
-amp-start 8s steps(1,end) 0s 1 normal both;-ms-animation:
-amp-start 8s steps(1,end) 0s 1 normal both;animation:
-amp-start 8s steps(1,end) 0s 1 normal both
}
@-webkit-keyframes
-amp-start{from{visibility:hidden}to{visibility:visible}}@-moz-keyframes
-amp-start{from{visibility:hidden}to{visibility:visible}}@-ms-keyframes
-amp-start{from{visibility:hidden}to{visibility:visible}}@-o-keyframes
-amp-start{from{visibility:hidden}to{visibility:visible}}@keyframes
-amp-start{from{visibility:hidden}to{visibility:visible}}
</style>
<noscript>
<style amp-boilerplate>
body{
-webkit-animation:none;
-moz-animation:none;
-ms-animation:none;
animation:none}
</style>
</noscript>
<script async custom-element = "amp-video"
src = "https://cdn.ampproject.org/v0/amp-video-0.1.js">
</script>
<style amp-custom>
a {
color: blue;
}
</style>
</head>
<body>
<h1>Google Amp - Analytics</h1>
<a>Click Here</a>
<amp-analytics>
<script type = "application/json">
{
"requests": {
"event": "http://localhost:8080/googleamp/tracking.php?
user=test&account=localhost&event=${eventId}"
},
"triggers": {
"trackAnchorClicks": {
"on": "click",
"selector": "a",
"request": "event",
"vars": {
"eventId": "clickonlink"
}
}
}
}
</script>
</amp-analytics>
</body>
</html>
Output

Onclick of the link, the event will get fired as shown below −
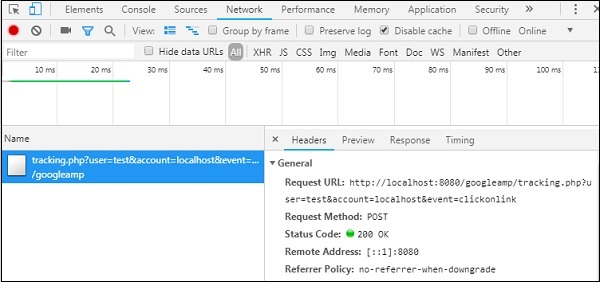
Google AMP - Social Widgets
Amp provides support to show social widgets on the page without having to load any external library. In this chapter, we are going to discuss some popular social widgets listed here −
Google AMP − Facebook
Google AMP − Twitter
Google AMP − Pinterest
Google Amp - Facebook
Using amp-facebook component, we can connect to facebook and display post, video, comment in a amp page.
To make use of amp-facebook, we need to add the following script to the page −
<script async custom-element = "amp-facebook" src = "https://cdn.ampproject.org/v0/amp-facebook-0.1.js"> </script>
Amp-facebook tag format
<amp-facebook width = "552" height = "310" layout = "responsive" data-href = "https://www.facebook.com/tutorialspointindia/ posts/1784197988358159"> </amp-facebook>
A working example for amp-facebook is shown here −
Example: Showing post from facebook
<!doctype html>
<html amp lang = "en">
<head>
<meta charset = "utf-8">
<script async src = "https://cdn.ampproject.org/v0.js">
</script>
<title>Google AMP - Amp Facebook</title>
<link rel = "canonical" href =
"http://example.ampproject.org/article-metadata.html">
<meta name = "viewport" content = "width = device-width,
minimum-scale = 1,initial-scale = 1">
<style amp-boilerplate>
body{
-webkit-animation:
-amp-start 8s steps(1,end) 0s 1 normal both;-moz-animation:
-amp-start 8s steps(1,end) 0s 1 normal both;-ms-animation:
-amp-start 8s steps(1,end) 0s 1 normal both;animation:
-amp-start 8s steps(1,end) 0s 1 normal both
}
@-webkit-keyframes
-amp-start{from{visibility:hidden}to{visibility:visible}}@-moz-keyframes
-amp-start{from{visibility:hidden}to{visibility:visible}}@-ms-keyframes
-amp-start{from{visibility:hidden}to{visibility:visible}}@-o-keyframes
-amp-start{from{visibility:hidden}to{visibility:visible}}@keyframes
-amp-start{from{visibility:hidden}to{visibility:visible}}
</style>
<noscript>
<style amp-boilerplate>
body{
-webkit-animation:none;
-moz-animation:none;
-ms-animation:none;
animation:none}
</style>
</noscript>
<script async custom-element = "amp-facebook"
src = "https://cdn.ampproject.org/v0/amp-facebook-0.1.js">
</script>
</head>
<body>
<h3>Google AMP - Amp Facebook</h3>
<h2>Learn Python webscrapping</h2>
<amp-facebook
width = "552"
height = "310"
layout = "responsive"
data-href = "https://www.facebook.com/tutorialspointindia/posts/1784197988358159">
</amp-facebook>
</body>
</html>
Output
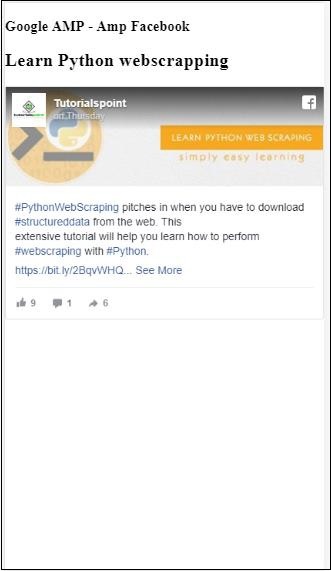
Example: Showing video from facebook
<!doctype html>
<html amp lang = "en">
<head>
<meta charset = "utf-8">
<script async src = "https://cdn.ampproject.org/v0.js">
</script>
<title>Google AMP - Amp Facebook>/title>
<link rel = "canonical" href =
"http://example.ampproject.org/article-metadata.html">
<meta name = "viewport" content = "width = device-width,
minimum-scale = 1,initial-scale = 1">
<style amp-boilerplate>
body{
-webkit-animation:
-amp-start 8s steps(1,end) 0s 1 normal both;-moz-animation:
-amp-start 8s steps(1,end) 0s 1 normal both;-ms-animation:
-amp-start 8s steps(1,end) 0s 1 normal both;animation:
-amp-start 8s steps(1,end) 0s 1 normal both
}
@-webkit-keyframes
-amp-start{from{visibility:hidden}to{visibility:visible}}@-moz-keyframes
-amp-start{from{visibility:hidden}to{visibility:visible}}@-ms-keyframes
-amp-start{from{visibility:hidden}to{visibility:visible}}@-o-keyframes
-amp-start{from{visibility:hidden}to{visibility:visible}}@keyframes
-amp-start{from{visibility:hidden}to{visibility:visible}}
</style>
<noscript>
<style amp-boilerplate>
body{
-webkit-animation:none;
-moz-animation:none;
-ms-animation:none;
animation:none}
</style>
</noscript>
<script async custom-element = "amp-facebook"
src = "https://cdn.ampproject.org/v0/amp-facebook-0.1.js">
</script>
</head>
<body>
<h3<Google AMP - Amp Facebook Video</h3>
<h2<Learn Python</h2>
<amp-facebook
width = "476"
height = "316"
layout = "responsive"
data-embed-as = "video"
data-href = "https://www.facebook.com/thetutorialkings/videos/701545820223256">
</amp-facebook>
</body>
</html>
Output
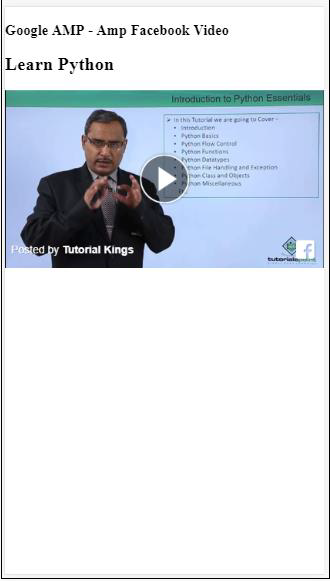
Example : Showing comments for a Facebook post
<!doctype html>
<html amp lang = "en">
<head>
<meta charset = "utf-8">
<script async src = "https://cdn.ampproject.org/v0.js">
</script>
<title>Google AMP - Amp Facebook</title>
<link rel = "canonical" href =
"http://example.ampproject.org/article-metadata.html">
<meta name = "viewport" content = "width = device-width,
minimum-scale = 1,initial-scale = 1">
<style amp-boilerplate>
body{
-webkit-animation:
-amp-start 8s steps(1,end) 0s 1 normal both;-moz-animation:
-amp-start 8s steps(1,end) 0s 1 normal both;-ms-animation:
-amp-start 8s steps(1,end) 0s 1 normal both;animation:
-amp-start 8s steps(1,end) 0s 1 normal both
}
@-webkit-keyframes
-amp-start{from{visibility:hidden}to{visibility:visible}}@-moz-keyframes
-amp-start{from{visibility:hidden}to{visibility:visible}}@-ms-keyframes
-amp-start{from{visibility:hidden}to{visibility:visible}}@-o-keyframes
-amp-start{from{visibility:hidden}to{visibility:visible}}@keyframes
-amp-start{from{visibility:hidden}to{visibility:visible}}
</style>
<noscript>
<style amp-boilerplate>
body{
-webkit-animation:none;
-moz-animation:none;
-ms-animation:none;
animation:none}
</style>
</noscript>
<script async custom-element = "amp-facebook"
src = "https://cdn.ampproject.org/v0/amp-facebook-0.1.js">
</script>
</head>
<body>
<h3>Google AMP - Amp Facebook comment for post</h3>
<h2>Learn Microprocessor</h2>
<amp-facebook
width = "552"
height = "500"
layout = "responsive"
data-embed-type = "comment"
data-href = "https://www.facebook.com/tutorialspointindia/posts/1744145745696717?
comment_id=1744179789026646&include_parent=false">
</amp-facebook>
</body>
</html>
Output

The attributes available on amp-facebook are
data-href (mandatory) − Here you need to specify the facebook url.
data-embed-as− The options available are post, video and comment. By default, it is post.
data-locale (mandatory) − It shows the display in locale language, you can change it as per your choice.
data-include-comment-parent− It takes values true or false. It is false by default. When you use data-embed-as option as comment, incase you need the parent reply to the comment, you can set this option as true.
So far we have seen how to add post/video and comment to the amp page. Incase we need to add the facebook page, amp has a component called amp-facebook-page.
Amp Facebook Page Plugin
Amp-facebook-page component gives us the facebook page details we want.To work with amp-facebook-page we need to add following script −
<script async custom-element = "amp-facebook-page" src = " https://cdn.ampproject.org/v0/amp-facebook-page-0.1.js"> </script>
A working example using amp-facebook-page is shown here −
Example
<!doctype html>
<html amp lang = "en">
<head>
<meta charset = "utf-8">
<script async src = "https://cdn.ampproject.org/v0.js">
</script>
<title>Google AMP - Amp Facebook</title>
<link rel = "canonical" href =
"http://example.ampproject.org/article-metadata.html">
<meta name = "viewport" content = "width = device-width,
minimum-scale = 1,initial-scale = 1">
<style amp-boilerplate>
body{
-webkit-animation:
-amp-start 8s steps(1,end) 0s 1 normal both;-moz-animation:
-amp-start 8s steps(1,end) 0s 1 normal both;-ms-animation:
-amp-start 8s steps(1,end) 0s 1 normal both;animation:
-amp-start 8s steps(1,end) 0s 1 normal both
}
@-webkit-keyframes
-amp-start{from{visibility:hidden}to{visibility:visible}}@-moz-keyframes
-amp-start{from{visibility:hidden}to{visibility:visible}}@-ms-keyframes
-amp-start{from{visibility:hidden}to{visibility:visible}}@-o-keyframes
-amp-start{from{visibility:hidden}to{visibility:visible}}@keyframes
-amp-start{from{visibility:hidden}to{visibility:visible}}
</style>
<noscript>
<style amp-boilerplate>
body{
-webkit-animation:none;
-moz-animation:none;
-ms-animation:none;
animation:none}
</style>
</noscript>
<script async custom-element = "amp-facebook-page"
src = "https://cdn.ampproject.org/v0/amp-facebook-page-0.1.js">
</script>
</head>
<body>
<h3>Google AMP - Amp Facebook Page</h3>
<h3>Welcome to Tutorialspoint Facebook Page</h3>
<amp-facebook-page
width = "340"
height = "130"
layout = "responsive"
data-href = "https://www.facebook.com/tutorialspointindia/">
</amp-facebook-page>
</body>
</html>
Output

Amp-facebook-like
To embed the facebook page like button plugin, we can use amp-facebook-like component. To work with amp-facebook-like, we need to add following script −
"<script async custom-element = "amp-facebook-like" src = "https://cdn.ampproject.org/v0/amp-facebook-like-0.1.js"> </script>
Example
<!doctype html>
<html amp lang = "en">
<head>
<meta charset = "utf-8">
<script async src = "https://cdn.ampproject.org/v0.js">
</script>
<title>Google AMP - Amp Facebook</title>
<link rel = "canonical"
href = "http://example.ampproject.org/article-metadata.html">
<meta name = "viewport" content = "width = device-width,
minimum-scale = 1,initial-scale = 1">
<style amp-boilerplate>
body{
-webkit-animation:
-amp-start 8s steps(1,end) 0s 1 normal both;-moz-animation:
-amp-start 8s steps(1,end) 0s 1 normal both;-ms-animation:
-amp-start 8s steps(1,end) 0s 1 normal both;animation:
-amp-start 8s steps(1,end) 0s 1 normal both
}
@-webkit-keyframes
-amp-start{from{visibility:hidden}to{visibility:visible}}@-moz-keyframes
-amp-start{from{visibility:hidden}to{visibility:visible}}@-ms-keyframes
-amp-start{from{visibility:hidden}to{visibility:visible}}@-o-keyframes
-amp-start{from{visibility:hidden}to{visibility:visible}}@keyframes
-amp-start{from{visibility:hidden}to{visibility:visible}}
</style>
<noscript>
<style amp-boilerplate>
body{
-webkit-animation:none;
-moz-animation:none;
-ms-animation:none;
animation:none}
</style>
</noscript>
<script async custom-element = "amp-facebook-like"
src = "https://cdn.ampproject.org/v0/amp-facebook-like-0.1.js">
</script>
<style amp-custom>
amp-facebook-like {
margin: 1rem
}
</style>
</head>
<body>
<h3>Google AMP - Amp Facebook Likes</h3>
<h3>Welcome to Tutorialspoint Facebook Likes</h3>
<amp-facebook-like
width = "110"
height = "20"
layout = "fixed"
data-layout = "button_count"
data-href = "https://www.facebook.com/tutorialspointindia">
</amp-facebook-like>
</body>
</html>
Output
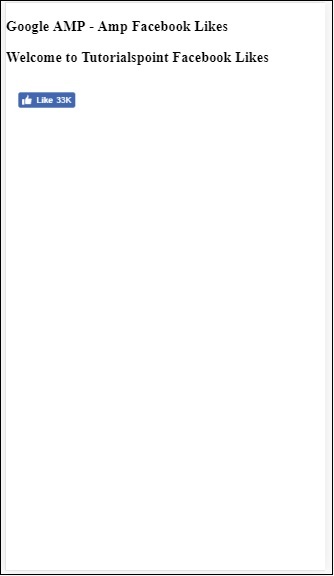
Amp facebook comments plugin
Amp-facebook-comments component will give the comments of the page given.
To work with amp-facebook-comments, we need to add following script −
<script async custom-element = "amp-facebook-comments" src = "https://cdn.ampproject.org/v0/amp-facebook-comments-0.1.js"> </script>
Example
<!doctype html>
<html amp lang = "en">
<head>
<meta charset = "utf-8">
<script async src = "https://cdn.ampproject.org/v0.js">
</script>
<title>Google AMP - Amp Facebook</title>
<link rel = "canonical" href =
"http://example.ampproject.org/article-metadata.html">
<meta name = "viewport" content = "width = device-width,
minimum-scale = 1,initial-scale = 1">
<style amp-boilerplate>
body{
-webkit-animation:
-amp-start 8s steps(1,end) 0s 1 normal both;-moz-animation:
-amp-start 8s steps(1,end) 0s 1 normal both;-ms-animation:
-amp-start 8s steps(1,end) 0s 1 normal both;animation:
-amp-start 8s steps(1,end) 0s 1 normal both
}
@-webkit-keyframes
-amp-start{from{visibility:hidden}to{visibility:visible}}@-moz-keyframes
-amp-start{from{visibility:hidden}to{visibility:visible}}@-ms-keyframes
-amp-start{from{visibility:hidden}to{visibility:visible}}@-o-keyframes
-amp-start{from{visibility:hidden}to{visibility:visible}}@keyframes
-amp-start{from{visibility:hidden}to{visibility:visible}}
</style>
<noscript>
<style amp-boilerplate>
body{
-webkit-animation:none;
-moz-animation:none;
-ms-animation:none;
animation:none}
</style>
</noscript>
<script async custom-element = "amp-facebook-comments"
src = "https://cdn.ampproject.org/v0/amp-facebook-comments-0.1.js">
</script>
<style amp-custom>
amp-facebook-like {
margin: 1rem
}
</style>
</head>
<body>
<h3>Google AMP - Amp Facebook Likes</h3>
<amp-facebook-comments
width = 486
height = 657
layout = "responsive"
data-numposts = "2"
data-href = "https://developers.facebook.com/docs/plugins/comments">
</amp-facebook-comments>
</body>
</html>
Output
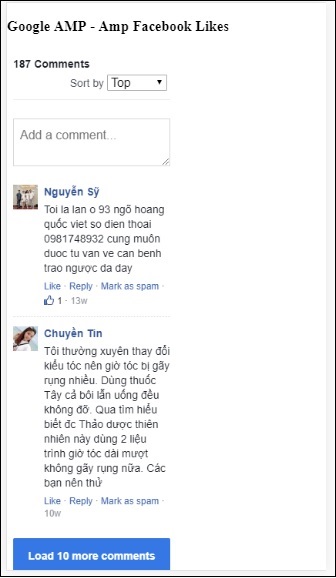
Attribute data-numposts decides the number of comments to be displayed on the screen. If you want to get all comments, you can remove the attribute.
Google AMP - Pinterest
Amp provides a pinterest widget using amp-pinterest component. We can use this component to show pinterest widget, pinterest save button and pinterest follow button.
To start working with amp-pinterest, we need to add the following script −
<script async custom-element="amp-pinterest" src="https://cdn.ampproject.org/v0/amp-pinterest-0.1.js"> </script>
Amp-pinterest tag
<amp-pinterest width = 300 height = 450 data-do = "embedPin" data-url = "https://in.pinterest.com/pin/856739529089490354/"> </amp-pinterest>
Pinterest Widget
Example
To show pinterest widget, we need to use the attribute data-do="embedPin". A working example for the same is shown here −
<!doctype html>
<html amp lang = "en">
<head>
<meta charset = "utf-8">
<script async src = "https://cdn.ampproject.org/v0.js">
</script>
<title>Google AMP - Amp Pinterest Widget</title>
<link rel = "canonical" href =
"http://example.ampproject.org/article-metadata.html">
<meta name = "viewport" content = "width = device-width,
minimum-scale = 1,initial-scale = 1">
<style amp-boilerplate>
body{
-webkit-animation:
-amp-start 8s steps(1,end) 0s 1 normal both;-moz-animation:
-amp-start 8s steps(1,end) 0s 1 normal both;-ms-animation:
-amp-start 8s steps(1,end) 0s 1 normal both;animation:
-amp-start 8s steps(1,end) 0s 1 normal both}@-webkit-keyframes
-amp-start 8s steps(1,end) 0s 1 normal both
}
@-webkit-keyframes
-amp-start{from{visibility:hidden}to{visibility:visible}}@-moz-keyframes
-amp-start{from{visibility:hidden}to{visibility:visible}}@-ms-keyframes
-amp-start{from{visibility:hidden}to{visibility:visible}}@-o-keyframes
-amp-start{from{visibility:hidden}to{visibility:visible}}@keyframes
-amp-start{from{visibility:hidden}to{visibility:visible}}
</style>
<noscript>
<style amp-boilerplate>
body{
-webkit-animation:none;
-moz-animation:none;
-ms-animation:none;
animation:none}
</style>
</noscript>
<script async custom-element = "amp-pinterest"
src = "https://cdn.ampproject.org/v0/amp-pinterest-0.1.js">
</script>
<style amp-custom>
amp-facebook-like {
margin: 1rem
}
</style>
</head>
<body>
<h3>Google AMP - Amp Pinterest Widget</h3>
<amp-pinterest
width = 300
height = 450
data-do = "embedPin"
data-url = "https://in.pinterest.com/pin/856739529089490354/">
</amp-pinterest>
</body>
</html>
Output
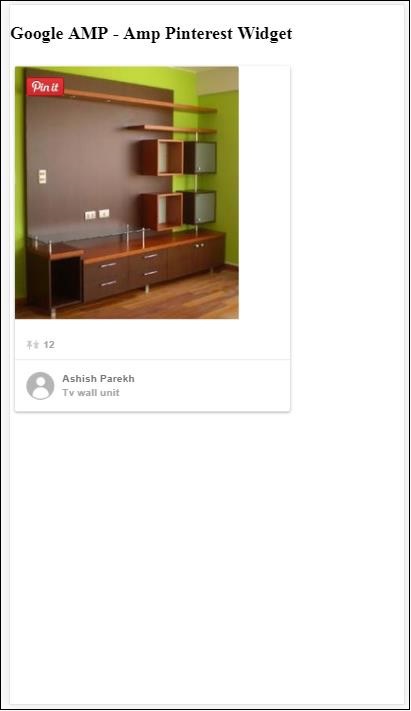
Pinterest Save Button
To show the save button for pinterest we need to use attribute data-do="buttonPin". A working example of pinterest save button is shown here −
Example
<!doctype html>
<html amp lang = "en">
<head>
<meta charset = "utf-8">
<script async src = "https://cdn.ampproject.org/v0.js">
</script>
<title>Google AMP - Amp Pinterest Widget</title>
<link rel = "canonical" href =
"http://example.ampproject.org/article-metadata.html">
<meta name = "viewport" content = "width = device-width,
minimum-scale = 1,initial-scale = 1">
<style amp-boilerplate>
body{
-webkit-animation:
-amp-start 8s steps(1,end) 0s 1 normal both;-moz-animation:
-amp-start 8s steps(1,end) 0s 1 normal both;-ms-animation:
-amp-start 8s steps(1,end) 0s 1 normal both;animation:
-amp-start 8s steps(1,end) 0s 1 normal both
}
@-webkit-keyframes
-amp-start{from{visibility:hidden}to{visibility:visible}}@-moz-keyframes
-amp-start{from{visibility:hidden}to{visibility:visible}}@-ms-keyframes
-amp-start{from{visibility:hidden}to{visibility:visible}}@-o-keyframes
-amp-start{from{visibility:hidden}to{visibility:visible}}@keyframes
-amp-start{from{visibility:hidden}to{visibility:visible}}
</style>
<noscript>
<style amp-boilerplate>
body{
-webkit-animation:none;
-moz-animation:none;
-ms-animation:none;
animation:none}
</style>
</noscript>
<script async custom-element = "amp-pinterest"
src = "https://cdn.ampproject.org/v0/amp-pinterest-0.1.js">
</script>
<style amp-custom>
amp-facebook-like {
margin: 1rem
}
</style>
</head>
<body>
<h3>Google AMP - Amp Pinterest Save Button</h3>
<h3>TutorialsPoint - ReactJS</h3>
<amp-img
src = "images/reactjs.png"
width = "100"
height = "100"
alt = "blockchain image">
</amp-img>
<amp-pinterest
height = "18"
width = "56"
data-do = "buttonPin"
data-url = "https://www.tutorialspoint.com/"
data-media = "https://www.tutorialspoint.com/images/tp-logo-diamond.png"
data-description = "amp-pinterest in action">
</amp-pinterest>
</body>
</html>
Output
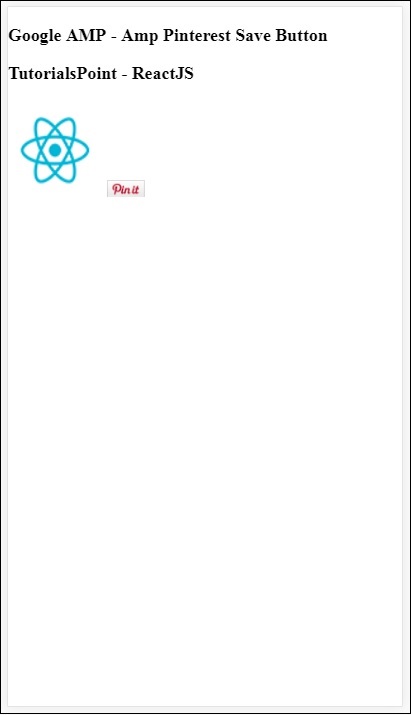
Pinterest Follow Button
To show save follow button for Pinterest, we need to use attribute data-do="buttonFollow". A working example of Pinterest save button is shown here −
Example
<!doctype html>
<html amp lang = "en">
<head>
<meta charset = "utf-8">
<script async src = "https://cdn.ampproject.org/v0.js">
</script>
<title>Google AMP - Amp Pinterest Widget</title>
<link rel = "canonical" href =
"http://example.ampproject.org/article-metadata.html">
<meta name = "viewport" content = "width = device-width,
minimum-scale = 1,initial-scale = 1">
<style amp-boilerplate>
body{
-webkit-animation:
-amp-start 8s steps(1,end) 0s 1 normal both;-moz-animation:
-amp-start 8s steps(1,end) 0s 1 normal both;-ms-animation:
-amp-start 8s steps(1,end) 0s 1 normal both;animation:
-amp-start 8s steps(1,end) 0s 1 normal both
}
@-webkit-keyframes
-amp-start{from{visibility:hidden}to{visibility:visible}}@-moz-keyframes
-amp-start{from{visibility:hidden}to{visibility:visible}}@-ms-keyframes
-amp-start{from{visibility:hidden}to{visibility:visible}}@-o-keyframes
-amp-start{from{visibility:hidden}to{visibility:visible}}@keyframes
-amp-start{from{visibility:hidden}to{visibility:visible}}
</style>
<noscript>
<style amp-boilerplate>
body{
-webkit-animation:none;
-moz-animation:none;
-ms-animation:none;
animation:none}
</style>
</noscript>
<script async custom-element = "amp-pinterest"
src = "https://cdn.ampproject.org/v0/amp-pinterest-0.1.js">
</script>
<style amp-custom>
amp-facebook-like {
margin: 1rem
}
</style>
</head>
<body>
<h3>Google AMP - Amp Pinterest Follow Button</h3>
<amp-pinterest
height = 50
width = 130
data-do = "buttonFollow"
data-href = "https://in.pinterest.com/wedgehairstyles/"
data-label = "wedgehairstyles">
</amp-pinterest>
</body>
</html>
Output
Google Amp - Twitter
Amp has a component to show twitter feeds using amp-twitter.
To work with amp-twitter we need to add following script −
<script async custom-element = "amp-twitter" src = "https://cdn.ampproject.org/v0/amp-twitter-0.1.js"> </script>
Amp-twitter tag
<amp-twitter width = "375" height = "472" layout = "responsive" data-tweetid = "885634330868850689"> </amp-twitter>
A working example showing tweets is shown here
Example
<!doctype html>
<html amp lang = "en">
<head>
<meta charset = "utf-8">
<script async src = "https://cdn.ampproject.org/v0.js">
</script>
<title>Google AMP - Amp Twitter</title>
<link rel = "canonical" href =
"http://example.ampproject.org/article-metadata.html">
<meta name = "viewport" content = "width = device-width,
minimum-scale = 1,initial-scale = 1">
<style amp-boilerplate>
body{
-webkit-animation:
-amp-start 8s steps(1,end) 0s 1 normal both;-moz-animation:
-amp-start 8s steps(1,end) 0s 1 normal both;-ms-animation:
-amp-start 8s steps(1,end) 0s 1 normal both;animation:
-amp-start 8s steps(1,end) 0s 1 normal both
}
@-webkit-keyframes
-amp-start{from{visibility:hidden}to{visibility:visible}}@-moz-keyframes
-amp-start{from{visibility:hidden}to{visibility:visible}}@-ms-keyframes
-amp-start{from{visibility:hidden}to{visibility:visible}}@-o-keyframes
-amp-start{from{visibility:hidden}to{visibility:visible}}@keyframes
-amp-start{from{visibility:hidden}to{visibility:visible}}
</style>
<noscript>
<style amp-boilerplate>
body{
-webkit-animation:none;
-moz-animation:none;
-ms-animation:none;
animation:none}
</style>
</noscript>
<script async custom-element = "amp-twitter" src =
"https://cdn.ampproject.org/v0/amp-twitter-0.1.js">
</script>
<style amp-custom>
amp-facebook-like {
margin: 1rem
}
</style>
</head>
<body>
<h3>Google AMP - Amp Twitter</h3>
<amp-twitter
width = "375"
height = "472"
layout = "responsive"
data-tweetid = "885634330868850689">
</amp-twitter>
</body>
</html>
Output
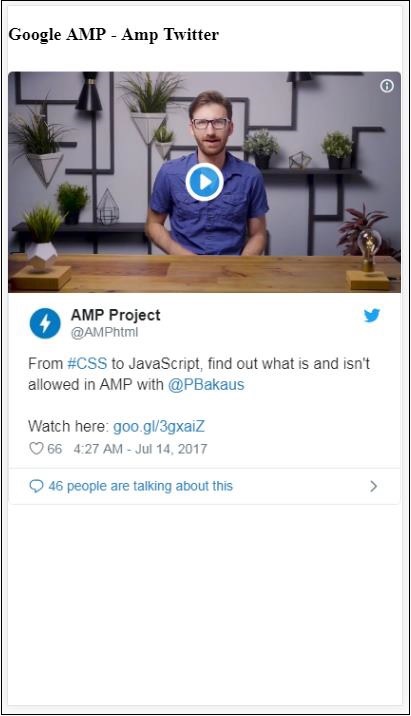
Google AMP - Media
In this chapter, we will discuss how to display video and audio from third party partners such as jwplayer and Youtube. Let us learn in detail about the following −
Google AMP − JwPlayer
Google AMP − YouTube
Google AMP − Audio
Google AMP - JwPlayer
If you want to use jwplayer to show videos on the page, amp has amp-jwplayer to do it.
To work with amp-jwplayer, include the following script in your page −
<script async custom-element = "amp-jwplayer" src = " https://cdn.ampproject.org/v0/amp-jwplayer-0.1.js"> </script>
Amp-jwplayer tag
<amp-jwplayer data-playlist-id = "482jsTAr" data-player-id = "uoIbMPm3" layout = "responsive" width = "16" height = "9"> </amp-jwplayer>
A working example of jwplayer in amp page is shown below −
Example
<!doctype html>
<html amp lang = "en">
<head>
<meta charset = "utf-8">
<script async src = "https://cdn.ampproject.org/v0.js">
</script>
<title>Google AMP - Amp Jwplayer</title>
<link rel = "canonical" href =
"http://example.ampproject.org/article-metadata.html">
<meta name = "viewport" content = "width = device-width,
minimum-scale = 1,initial-scale = 1">
<style amp-boilerplate>
body{
-webkit-animation:
-amp-start 8s steps(1,end) 0s 1 normal both;-moz-animation:
-amp-start 8s steps(1,end) 0s 1 normal both;-ms-animation:
-amp-start 8s steps(1,end) 0s 1 normal both;animation:
-amp-start 8s steps(1,end) 0s 1 normal both
}
@-webkit-keyframes
-amp-start{from{visibility:hidden}to{visibility:visible}}@-moz-keyframes
-amp-start{from{visibility:hidden}to{visibility:visible}}@-ms-keyframes
-amp-start{from{visibility:hidden}to{visibility:visible}}@-o-keyframes
-amp-start{from{visibility:hidden}to{visibility:visible}}@keyframes
-amp-start{from{visibility:hidden}to{visibility:visible}}
</style>
<noscript>
<style amp-boilerplate>
body{
-webkit-animation:none;
-moz-animation:none;
-ms-animation:none;
animation:none}
</style>
</noscript>
<script async custom-element = "amp-jwplayer" src =
"https://cdn.ampproject.org/v0/amp-jwplayer-0.1.js">
</script>
</head>
<body>
<h3>Google AMP - Amp Jwplayer</h3>
<amp-jwplayer
data-playlist-id = "482jsTAr"
data-player-id = "uoIbMPm3"
layout = "responsive"
width = "16"
height = "9">
</amp-jwplayer>
</body>
</html>
Output

For amp-jwplayer, there are three important attributes
data-player-id
data-media-id
data-playlist-id
To get the ids of player , media and playlist, you need to have a login in jwplayer which can be done from here − https://dashboard.jwplayer.com/#/players
Player id will be available in jwplayer player section. Media id will be available in jwplayer content section and playlist id in jwplayer playlist section.
Jwplayer gives an eight digit alphanumeric id which needs to be used in the amp-jwplayer for the respective attribute.
Google AMP - Youtube
If you want to show Youtube video on your amp page, amp has amp-youtube to embed youtube videos on the page.
To use amp-youtube, you need to add following script to your page −
<script async custom-element = "amp-youtube" src = " https://cdn.ampproject.org/v0/amp-youtube-0.1.js"> </script>
Amp-youtube tag
<amp-youtube width = "480" height = "270" layout = "responsive" autoplay = "true" data-videoid = "fWZ6-p7mGK0"> </amp-youtube>
Let us now work on an example that shows the working of amp-youtube on the page.
Example
<!doctype html>
<html amp lang = "en">
<head>
<meta charset = "utf-8">
<script async src = "https://cdn.ampproject.org/v0.js">
</script>
<title>Google AMP - Youtube</title>
<link rel = "canonical" href =
"http://example.ampproject.org/article-metadata.html">
<meta name = "viewport" content = "width = device-width,
minimum-scale = 1,initial-scale = 1">
<style amp-boilerplate>
body{
-webkit-animation:
-amp-start 8s steps(1,end) 0s 1 normal both;-moz-animation:
-amp-start 8s steps(1,end) 0s 1 normal both;-ms-animation:
-amp-start 8s steps(1,end) 0s 1 normal both;animation:
-amp-start 8s steps(1,end) 0s 1 normal both
}
@-webkit-keyframes
-amp-start{from{visibility:hidden}to{visibility:visible}}@-moz-keyframes
-amp-start{from{visibility:hidden}to{visibility:visible}}@-ms-keyframes
-amp-start{from{visibility:hidden}to{visibility:visible}}@-o-keyframes
-amp-start{from{visibility:hidden}to{visibility:visible}}@keyframes
-amp-start{from{visibility:hidden}to{visibility:visible}}
</style>
<noscript>
<style amp-boilerplate>
body{
-webkit-animation:none;
-moz-animation:none;
-ms-animation:none;
animation:none}
</style>
</noscript>
<script async custom-element = "amp-youtube" src =
"https://cdn.ampproject.org/v0/amp-youtube-0.1.js">
</script>
</head>
<body>
<h3>Google AMP - Youtube</h3>
<h3>Youtube Videos from Tutorialspoint</h3>
<amp-youtube
width = "480"
height = "270"
layout = "responsive"
autoplay = "true"
data-videoid = "fWZ6-p7mGK0">
</amp-youtube>
</body>
</html>
Output
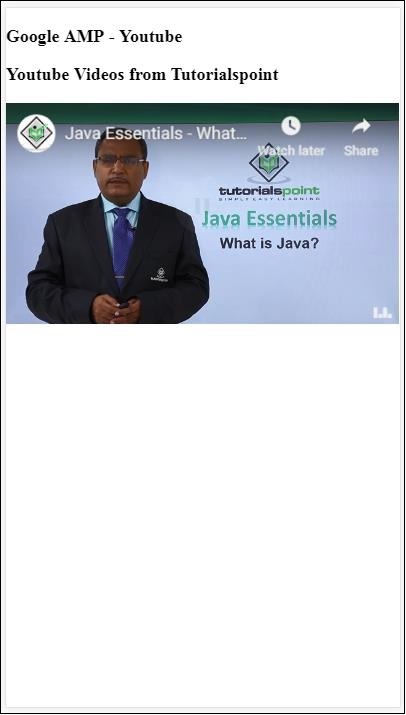
To show youtube video you need to give videoid to the amp-youtube as shown below −
<amp-youtube width = "480" height = "270" layout = "responsive" autoplay = "true" data-videoid = "fWZ6-p7mGK0"> </amp-youtube>
How to get the data-videoid?
Consider any Youtube url for example − https://www.youtube.com/watch?v=fWZ6-p7mGK0. The highlighted part is the id to be used in your amp-youtube.
We have used the attribute autoplay as true. The video will autoplay as supported by the browser and also the video will play in a muted mode. You will have to tap on the video to unmute it. Video will be paused when it goes out of view and will resume from the paused state when it comes to view. If user pauses the video and goes in/out of view, the video will remain in pause state only. The same is applicable for mute/unmute.
Google Amp - Audio
Amp has a tag to play audio which is a replacement to html5 audio tag. To play audio in the amp page, we can use amp-audio.
To work with amp-audio, we need to add the following script −
<script async custom-element = "amp-audio" src = " https://cdn.ampproject.org/v0/amp-audio-0.1.js"> </script>
Amp-audio tag
<amp-audio
width = "auto"
height = "50"
src = "audio/test.mp3">
<div fallback>
<p>HTML5 audio is not supported on your browser!</p>
</div>
</amp-audio>
Hence, amp-audio will take up src attribute which is a http request to the audio file. The reason we are using amp-audio instead of the standard html5 audio is because amp puts a lazy loading concept in place for elements which require http request.
It will start loading the request based on priority.It will be loaded just before or when it is about to reach the viewport.
A working example of using amp-audio in your page is shown here −
Example
<!doctype html>
<html amp lang = "en">
<head>
<meta charset = "utf-8">
<script async src = "https://cdn.ampproject.org/v0.js">
</script>
<title>Google AMP - Audio</title>
<link rel = "canonical" href =
"http://example.ampproject.org/article-metadata.html">
<meta name = "viewport" content = "width = device-width,
minimum-scale = 1,initial-scale = 1">
<style amp-boilerplate>
body{
-webkit-animation:
-amp-start 8s steps(1,end) 0s 1 normal both;-moz-animation:
-amp-start 8s steps(1,end) 0s 1 normal both;-ms-animation:
-amp-start 8s steps(1,end) 0s 1 normal both;animation:
-amp-start 8s steps(1,end) 0s 1 normal both
}
@-webkit-keyframes
-amp-start{from{visibility:hidden}to{visibility:visible}}@-moz-keyframes
-amp-start{from{visibility:hidden}to{visibility:visible}}@-ms-keyframes
-amp-start{from{visibility:hidden}to{visibility:visible}}@-o-keyframes
-amp-start{from{visibility:hidden}to{visibility:visible}}@keyframes
-amp-start{from{visibility:hidden}to{visibility:visible}}
</style>
<noscript>
<style amp-boilerplate>
body{
-webkit-animation:none;
-moz-animation:none;
-ms-animation:none;
animation:none}
</style>
</noscript>
<script async custom-element = "amp-audio"
src = "https://cdn.ampproject.org/v0/amp-audio-0.1.js">
</script>
</head>
<body>
<h3>Google AMP - Audio</h3>
<amp-audio
width = "auto"
height = "50"
src="audio/test.mp3">
<div fallback>
<p>HTML5 audio is not supported on your browser!</p>
</div>
</amp-audio>
</body>
</html>
Output

The tag for amp-audio where the attributes like width, height, src is specified is shown here. We have also added a div with fallback attribute which will act as a fallback if amp-audio is not supported on the browser.
<amp-audio
width = "auto"
height = "50"
src = "audio/test.mp3">
<div fallback>
<p>HTML5 audio is not supported on your browser!</p>
</div>
</amp-audio>
Note that controls are added by default to the audio tag and can be used to play/pause, and mute/unmute the audio. You get download option for the audio tag as shown below −
On click of the download you can download the media file used. To disable the download you can use attribute − controlsList="nodownload" as shown in the example below −
Example
<!doctype html>
<html amp lang = "en">
<head>
<meta charset = "utf-8">
<script async src = "https://cdn.ampproject.org/v0.js">
</script>
<title>Google AMP - Audio</title>
<link rel = "canonical" href =
"http://example.ampproject.org/article-metadata.html">
<meta name = "viewport" content = "width = device-width,
minimum-scale = 1,initial-scale = 1">
<style amp-boilerplate>
body{
-webkit-animation:
-amp-start 8s steps(1,end) 0s 1 normal both;-moz-animation:
-amp-start 8s steps(1,end) 0s 1 normal both;-ms-animation:
-amp-start 8s steps(1,end) 0s 1 normal both;animation:
-amp-start 8s steps(1,end) 0s 1 normal both
}
@-webkit-keyframes
-amp-start{from{visibility:hidden}to{visibility:visible}}@-moz-keyframes
-amp-start{from{visibility:hidden}to{visibility:visible}}@-ms-keyframes
-amp-start{from{visibility:hidden}to{visibility:visible}}@-o-keyframes
-amp-start{from{visibility:hidden}to{visibility:visible}}@keyframes
-amp-start{from{visibility:hidden}to{visibility:visible}}
</style>
<noscript>
<style amp-boilerplate>
body{
-webkit-animation:none;
-moz-animation:none;
-ms-animation:none;
animation:none}
</style>
</noscript>
<script async custom-element = "amp-audio"
src = "https://cdn.ampproject.org/v0/amp-audio-0.1.js">
</script>
</head>
<body>
<h3>Google AMP - Audio</h3>
<amp-audio
width = "auto"
height = "50"
src = "audio/test.mp3"
controlsList = "nodownload">
<div fallback>
<p>HTML5 audio is not supported on your browser!</p>
</div>
</amp-audio>
</body>
</html>
Output

Using controlsList="nodownload" the three vertical dots on right side are gone.
There are attributes such as preload and autoplay , if they are added to the audio tag, the audio file will be loaded on page load and will autoplay if the browser supports it. The following example shows audio autoplay.
Example
<!doctype html>
<html amp lang = "en">
<head>
<meta charset="utf-8">
<script async src = "https://cdn.ampproject.org/v0.js">
</script>
<title>Google AMP - Audio</title>
<link rel = "canonical" href =
"http://example.ampproject.org/article-metadata.html">
<meta name = "viewport" content = "width = device-width,
minimum-scale = 1,initial-scale = 1">
<style amp-boilerplate>
body{
-webkit-animation:
-amp-start 8s steps(1,end) 0s 1 normal both;-moz-animation:
-amp-start 8s steps(1,end) 0s 1 normal both;-ms-animation:
-amp-start 8s steps(1,end) 0s 1 normal both;animation:
-amp-start 8s steps(1,end) 0s 1 normal both
}
@-webkit-keyframes
-amp-start{from{visibility:hidden}to{visibility:visible}}@-moz-keyframes
-amp-start{from{visibility:hidden}to{visibility:visible}}@-ms-keyframes
-amp-start{from{visibility:hidden}to{visibility:visible}}@-o-keyframes
-amp-start{from{visibility:hidden}to{visibility:visible}}@keyframes
-amp-start{from{visibility:hidden}to{visibility:visible}}
</style>
<noscript>
<style amp-boilerplate>
body{
-webkit-animation:none;
-moz-animation:none;
-ms-animation:none;
animation:none}
</style>
</noscript>
<script async custom-element = "amp-audio"
src = "https://cdn.ampproject.org/v0/amp-audio-0.1.js">
</script>
</head>
<body>
<h3>Google AMP - Audio</h3>
<amp-audio
width = "auto"
height = "50"
src = "audio/test.mp3" preload autoplay>
<div fallback>
<p>HTML5 audio is not supported on your browser!</p>
</div>
</amp-audio>
</body>
</html>
Output

The Attribute loop, if present will make the audio play again once it is complete.
Example
<amp-audio
width = "auto"
height = "50"
src = "audio/test.mp3" loop>
<div fallback>
<p>HTML5 audio is not supported on your browser!</p>
</div>
</amp-audio>
Google AMP - Html Page to Amp Page
In this chapter, we will understand how to convert a normal html page to an amp page. We will also validate the page for amp and check the output at the last.
To start with, let us take the normal html page as shown below −
test.html
<!DOCTYPE html>
<html>
<head>
<meta charset = "utf-8">
<title>Tutorials</title>
<link href = "style.css" rel = "stylesheet" />
<meta name = "viewport" content = "width = device-width, initial-scale = 1.0">
<script src = "js/jquery.js"></script>
</head>
<body>
<header role = "banner">
<h2>Tutorials</h2>
</header>
<h2>Some Important Tutorials List</h2>
<article>
<section>
<img src = "images/tut1.png" width="90%" height = "90%"/>
</section>
<section>
<img src = "images/tut2.png" width="90%" height = "90%"/>
</section>
<section>
<img src = "images/tut3.png" width="90%" height = "90%"/>
</section>
<section>
<img src = "images/tut4.png" width="90%" height = "90%"/>
</section>
</article>
<footer>
<p>For More tutorials Visit <a href =
"https://tutorialspoint.com/">Tutorials Point</a></p>
</footer>
</body>
</html>
Note that we are using style.css in it and the details of the css file are as given here −
h1 {color: blue;text-align: center;}
h2 {text-align: center;}
img {
border: 1px solid #ddd;
border-radius: 4px;
padding: 5px;
}
article {
text-align: center;
}
header{
width: 100%;
height: 50px;
margin: 5px auto;
border: 1px solid #000000;
text-align: center;
background-color: #ccc;
}
footer {
width: 100%;
height: 35px;
margin: 5px auto;
border: 1px solid #000000;
text-align: center;
background-color: yellow;
}
Note that we have also used jquery.js file in the .html listed above.
Now, host test.html locally and see the output seen in link given here −
http://localhost:8080/googleamp/test.html
Now, let us go step-by-step to change above test.html file to test_amp.html file.
First, we have to save test.html as test_amp.html and follow the steps given below.
Step 1 − Add the amp library in the head section as shown below −
<script async src = "https://cdn.ampproject.org/v0.js"> </script>
For example, once added to test_amp.html, it will be as follows −
<head>
<meta charset = "utf-8">
<title>Tutorials</title>
<script async src = "https://cdn.ampproject.org/v0.js">
</script>
<link href = "style.css" rel = "stylesheet" />
<meta name = "viewport" content = "width = device-width, initial-scale = 1.0">
<script src = "js/jquery.js"></script>
</head>
Now run the page test_amp.html in the browser and open the browser console. It will display the console message as shown below −
To know if your html file is a valid amp add #development=1 to your html page url at the end as shown below −
http://localhost:8080/googleamp/test_amp.html#development=1
Hit the above url in the browser and in the Google Chrome console. It will list you errors which amp thinks are invalid from amp specification point of view.
The errors we have got for test_amp.html are shown here −
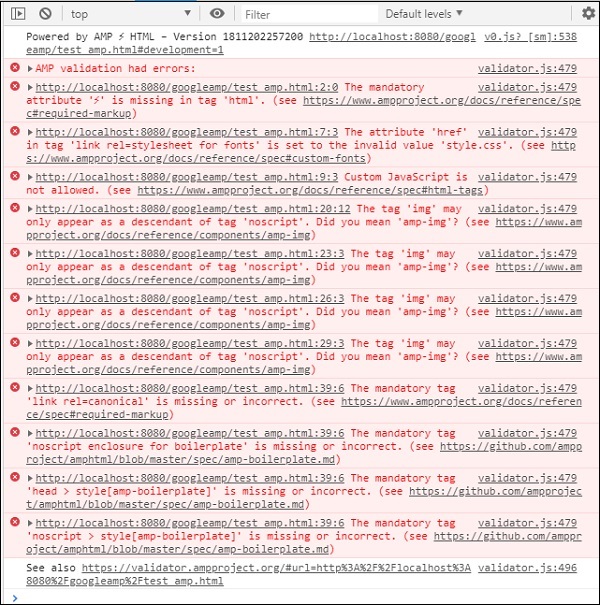
Let us now fix them one by one till we get amp successful message.
Step 2 − We can see the following error in the console −

We can fix that by adding or amp for the html tag. We will add amp to html tag as shown below −
<html amp>
Step 3 − Please make sure you have the meta tag with charset and name=viewport in the head tag as shown below −
<head> <meta charset = "utf-8"> <meta name = "viewport" content = "width = device-width, initial-scale = 1.0"> </head>
Step 4 − The next error that we have is shown here −

It says href in link rel=stylesheet ie the following link is throwing error. This is because amp does not allow external stylesheet using link with href to be put inside pages.
<link href = "style.css" rel = "stylesheet" />
We can add the all the css in style.css as follows −
<style amp-custom> /*All styles from style.css please add here */ </style>
So the css data present in style.css has to be added in style with amp-custom attribute.
<style amp-custom>
h1 {color: blue;text-align: center;}
h2 {text-align: center;}
img {
border: 1px solid #ddd;
border-radius: 4px;
padding: 5px;
}
article {
text-align: center;
}
header{
width: 100%;
height: 50px;
margin: 5px auto;
border: 1px solid #000000;
text-align: center;
background-color: #ccc;
}
footer {
width: 100%;
height: 35px;
margin: 5px auto;
border: 1px solid #000000;
text-align: center;
background-color: yellow;
}
</style>
Add the style tag to your amp page. Let us now test the same with the above style tag in the browser. The changes we have done so far to test_amp.html are shown here −
<!DOCTYPE html>
<html amp>
<head>
<meta charset = "utf-8">
<title>Tutorials</title>
<script async src = "https://cdn.ampproject.org/v0.js">
</script>
<meta name = "viewport" content = "width = device-width, initial-scale = 1.0">
<script src = "js/jquery.js"></script>
<style amp-custom>
h1 {color: blue;text-align: center;}
h2 {text-align: center;}
img {
border: 1px solid #ddd;
border-radius: 4px;
padding: 5px;
}
article {
text-align: center;
}
header{
width: 100%;
height: 50px;
margin: 5px auto;
border: 1px solid #000000;
text-align: center;
background-color: #ccc;
}
footer {
width: 100%;
height: 35px;
margin: 5px auto;
border: 1px solid #000000;
text-align: center;
background-color: yellow;
}
</style>
</head>
<body>
<header role = "banner">
<h2>Tutorials</h2>
</header>
<h2>Some Important Tutorials List</h2>
<article>
<section>
<img src = "images/tut1.png" width = "90%" height = "90%"/>
</section>
<section>
<img src = "images/tut2.png" width = "90%" height = "90%"/>
</section>
<section>
<img src = "images/tut3.png" width = "90%" height = "90%"/>
</section>
<section>
<img src = "images/tut4.png" width="90%" height = "90%"/>
</section>
</article>
<footer>
<p>For More tutorials Visit <a href =
"https://tutorialspoint.com/">Tutorials Point</a></p>
</footer>
</body>
</html>
Let us see the output and errors in console for above page. Observe the following screenshot −
The error shown in the console is as follows −
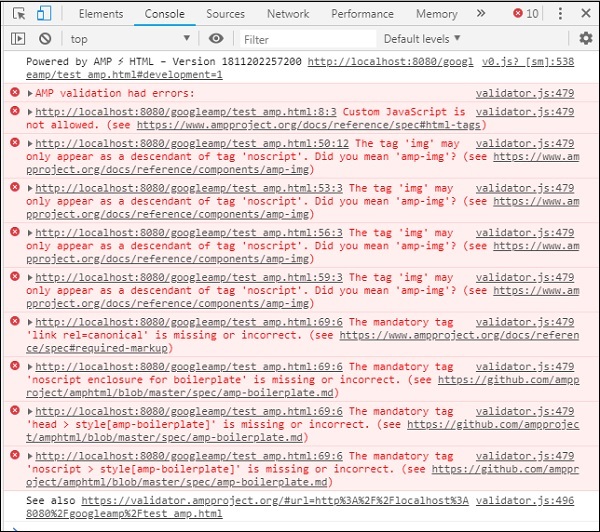
Now, you can see that for some of the errors for amp, style is removed. Let us fix the remaining errors now.
Step 5 − The next error we see in the list is as follows −

We have added the script tag calling jquery file. Note that amp pages do not allow any custom javascript in the page. We will have to remove it and make sure to use amp-component which is available.
For example, we have amp-animation if any animation is required, amp-analytics incase we want to add google analytics code to the page. Similarly, we have amp-ad component to display ads to be shown on the page. There is also an amp-iframe component which we can point the src to same origin and call any custom javascript if required in the amp-iframe.
Now, let us remove the script tag from the page.
Step 6 − The next error displayed is shown here −
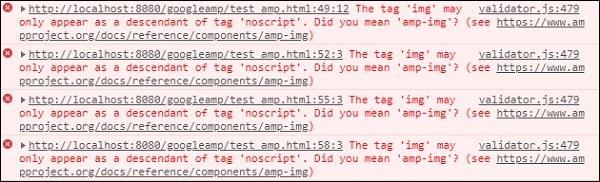
The above errors are pointing to the image tag we have used on the page. Amp does not allow <img src= /> tags to be used inside the page. Note that we need to use amp-img tag instead.
Let us replace <img> tag with <amp-img> as shown here −
<section>
<amp-img alt = "Beautiful Flower"
src = "images/tut1.png"
width = "500"
height = "160"
layout = "responsive">
</amp-img>
</section>
<section>
<amp-img alt = "Beautiful Flower"
src = "images/tut2.png"
width = "500"
height = "160"
layout = "responsive">
</amp-img>
</section>
<section>
<amp-img alt = "Beautiful Flower"
src = "images/tut3.png"
width = "500"
height = "160"
layout = "responsive">
</amp-img>
</section>
<section>
<amp-img alt = "Beautiful Flower"
src = "images/tut4.png"
width = "500"
height = "160"
layout = "responsive">
</amp-img>
</section>
We have replaced all the <img> tag to <amp-img> as shown above. Now, let us run the page in the browser to see output and errors −
Errors
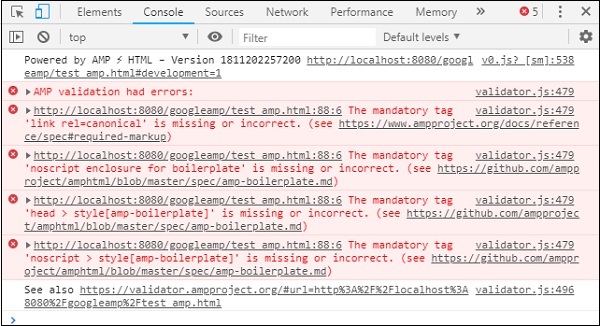
Observe that the errors are getting less now.
Step 7 − The next error displayed in console is as follows −

We need to add link rel=canonical tag in the head section. Please note this is a mandatory tag and should always be added in the head as follows −
<link rel = "canonical" href = "http://example.ampproject.org/article-metadata.html">
Step 8 − The next error displayed in for missing noscript tag in the console as shown here −

We need to add <noscript> tag enclosed with amp-boilerplate in the head section as follows −
<noscript>
<style amp-boilerplate>
body{
-webkit-animation:none;
-moz-animation:none;
-ms-animation:none;
animation:none}
</style>
</noscript>
Step 9 − The next error displayed is given below −

Another mandatory tag is the style tag with amp-boilerplate and has to be placed before noscript tag. The style tag with amp-boilerplate is shown here −
<style amp-boilerplate>
body{
-webkit-animation:
-amp-start 8s steps(1,end) 0s 1 normal both;-moz-animation:
-amp-start 8s steps(1,end) 0s 1 normal both;-ms-animation:
-amp-start 8s steps(1,end) 0s 1 normal both;animation:
-amp-start 8s steps(1,end) 0s 1 normal both
}
@-webkit-keyframes
-amp-start{from{visibility:hidden}to{visibility:visible}}@-moz-keyframes
-amp-start{from{visibility:hidden}to{visibility:visible}}@-ms-keyframes
-amp-start{from{visibility:hidden}to{visibility:visible}}@-o-keyframes
-amp-start{from{visibility:hidden}to{visibility:visible}}@keyframes
-amp-start{from{visibility:hidden}to{visibility:visible}}
</style>
Add above style tag to the test_amp.html page.
Once done test the page in the browser to see the output and the console −
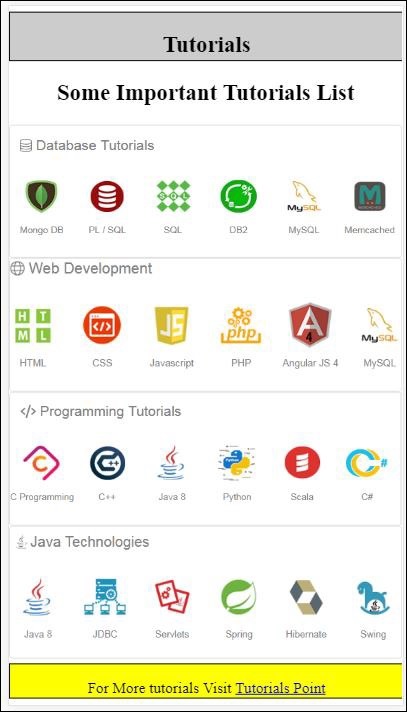
The console details are shown here −

Thus, we have finally solved all the errors and now the page test_amp.html is a valid amp page.
There is some styling to be added as the header and footer is getting truncated, we can update the same in custom style that we have added. So we have removed width:100% from header and footer.
Here is the final output −

Final test_amp.html file
<!DOCTYPE html>
<html amp>
<head>
<meta charset = "utf-8">
<title>Tutorials</title>
<link rel = "canonical" href=
"http://example.ampproject.org/article-metadata.html">
<script async src = "https://cdn.ampproject.org/v0.js">
</script>
<meta name = "viewport" content = "width = device-width,
initial-scale = 1.0">
<style amp-boilerplate>
body{
-webkit-animation:
-amp-start 8s steps(1,end) 0s 1 normal both;-moz-animation:
-amp-start 8s steps(1,end) 0s 1 normal both;-ms-animation:
-amp-start 8s steps(1,end) 0s 1 normal both;animation:
-amp-start 8s steps(1,end) 0s 1 normal both
}
@-webkit-keyframes
-amp-start{from{visibility:hidden}to{visibility:visible}}@-moz-keyframes
-amp-start{from{visibility:hidden}to{visibility:visible}}@-ms-keyframes
-amp-start{from{visibility:hidden}to{visibility:visible}}@-o-keyframes
-amp-start{from{visibility:hidden}to{visibility:visible}}@keyframes
-amp-start{from{visibility:hidden}to{visibility:visible}}
</style>
<noscript>
<style amp-boilerplate>
body{
-webkit-animation:none;
-moz-animation:none;
-ms-animation:none;
animation:none}
</style>
</noscript>
<style amp-custom>
h1 {color: blue;text-align: center;}
h2 {text-align: center;}
amp-img {
border: 1px solid #ddd;
border-radius: 4px;
padding: 5px;
}
article {
text-align: center;
}
header{
height: 50px;
margin: 5px auto;
border: 1px solid #000000;
text-align: center;
background-color: #ccc;
}
footer {
height: 35px;
margin: 5px auto;
border: 1px solid #000000;
text-align: center;
background-color: yellow;
}
</style>
</head>
<body>
<header role = "banner">
<h2>Tutorials</h2>
</header>
<h2>Some Important Tutorials List</h2>
<article>
<section>
<amp-img
alt = "Beautiful Flower"
src = "images/tut1.png"
width = "500"
height = "160"
layout = "responsive">
</amp-img>
</section>
<section>
<amp-img
alt = "Beautiful Flower"
src = "images/tut2.png"
width = "500"
height = "160"
layout = "responsive">
</amp-img>
</section>
<section>
<amp-img
alt = "Beautiful Flower"
src = "images/tut3.png"
width = "500"
height = "160"
layout = "responsive">
</amp-img>
</section>
<section>
<amp-img
alt = "Beautiful Flower"
src = "images/tut4.png"
width = "500"
height = "160"
layout = "responsive">
</amp-img>
</section>
</article>
<footer>
<p>For More tutorials Visit <a href =
"https://tutorialspoint.com/">
Tutorials Point</a>
</p>
</footer>
</body>
</html>
Thus, finally we are done with converting a normal html file to amp.
Google AMP - Basic Syntax
In this chapter, we will discuss the basic requirements to get started with Google AMP pages.
Sample Amp Page
A basic example for an amp page is shown below −
<!doctype html>
<html amp>
<head>
<meta charset = "utf-8">
<title>Amp Sample Page</title>
<link rel = "canonical" href = "./regular-html-version.html">
<meta name = "viewport" content = "width = device-width,
minimum-scale = 1,initial-scale = 1">
<style amp-custom>
h1 {color: red}
</style>
<style amp-boilerplate>
body{
-webkit-animation:
-amp-start 8s steps(1,end) 0s 1 normal both;-moz-animation:
-amp-start 8s steps(1,end) 0s 1 normal both;-ms-animation:
-amp-start 8s steps(1,end) 0s 1 normal both;animation:
-amp-start 8s steps(1,end) 0s 1 normal both
}
@-webkit-keyframes
-amp-start{from{visibility:hidden}to{visibility:visible}}@-moz-keyframes
-amp-start{from{visibility:hidden}to{visibility:visible}}@-ms-keyframes
-amp-start{from{visibility:hidden}to{visibility:visible}}@-o-keyframes
-amp-start{from{visibility:hidden}to{visibility:visible}}@keyframes
-amp-start{from{visibility:hidden}to{visibility:visible}}
</style>
<noscript>
<style amp-boilerplate>
body{
-webkit-animation:none;
-moz-animation:none;
-ms-animation:none;
animation:none}
</style>
</noscript>
<script async src = "https://cdn.ampproject.org/v0.js">
</script>
</head>
<body>
<h1>Amp Sample Page</h1>
<p>
<amp-img
src = "images/christmas1.jpg"
width = "300"
height = "300"
layout = "responsive">
</amp-img>
</p>
</body>
</html>
Mandatory Tags
There are some mandatory tags to be included in a amp page. This section discusses them in detail −
We have to make sure that we add amp or to the html tag as shown below
<html amp> OR <html >
We should add the <head> and <body> tags to the html page.
Amp validation may fail if you miss any of the mandatory meta tags. Some mandatory mets tags that are to be added head section of the page are shown here −
<meta charset="utf-8">
<meta name = "viewport"
content = "width = device-width,
minimum-scale = 1,
initial-scale = 1">
Link of rel="canonical" to be added inside head tag
<link rel = "canonical" href = "./regular-html-version.html">
Style tag with amp-boilerplate −
<style amp-boilerplate>
body{
-webkit-animation:
-amp-start 8s steps(1,end) 0s 1 normal both;-moz-animation:
-amp-start 8s steps(1,end) 0s 1 normal both;-ms-animation:
-amp-start 8s steps(1,end) 0s 1 normal both;animation:
-amp-start 8s steps(1,end) 0s 1 normal both
}
@-webkit-keyframes
-amp-start{from{visibility:hidden}to{visibility:visible}}@-moz-keyframes
-amp-start{from{visibility:hidden}to{visibility:visible}}@-ms-keyframes
-amp-start{from{visibility:hidden}to{visibility:visible}}@-o-keyframes
-amp-start{from{visibility:hidden}to{visibility:visible}}@keyframes
-amp-start{from{visibility:hidden}to{visibility:visible}}
</style>
Noscript tag with amp-boilerplate −
<noscript>
<style amp-boilerplate>
body{
-webkit-animation:none;
-moz-animation:none;
-ms-animation:none;
animation:none}
</style>
</noscript>
The amp script tag with async added to it as shown below. This is the most important tag of all −
<script async src = "https://cdn.ampproject.org/v0.js"> </script>
You should use this tag incase you want to add custom css to the page. Please make a note here we cannot call external style sheet in amp pages. To add custom css, all your css has to go here −
<style amp-custom>
   //all your styles here
</style>
You can validate the above page in your browser using #developement=1 at the end of the page-url.
Now, let us test the same in the browser. I have hosted the page locally and saved it as amppage.html.
The url for above to be tested is
http://localhost/googleamp/amppage.html#development=1
Example
<!doctype html>
<html amp>
<head>
<meta charset = "utf-8">
<title>Amp Sample Page</title>
<link rel = "canonical" href = "./regular-html-version.html">
<meta name = "viewport" content = "width=device-width,
minimum-scale = 1,initial-scale = 1">
<style amp-custom>
h1 {color: red}
</style>
<style amp-boilerplate>
body{
-webkit-animation:
-amp-start 8s steps(1,end) 0s 1 normal both;-moz-animation:
-amp-start 8s steps(1,end) 0s 1 normal both;-ms-animation:
-amp-start 8s steps(1,end) 0s 1 normal both;animation:
-amp-start 8s steps(1,end) 0s 1 normal both
}
@-webkit-keyframes
-amp-start{from{visibility:hidden}to{visibility:visible}}@-moz-keyframes
-amp-start{from{visibility:hidden}to{visibility:visible}}@-ms-keyframes
-amp-start{from{visibility:hidden}to{visibility:visible}}@-o-keyframes
-amp-start{from{visibility:hidden}to{visibility:visible}}@keyframes
-amp-start{from{visibility:hidden}to{visibility:visible}}
</style>
<noscript>
<style amp-boilerplate>
body{
-webkit-animation:none;
-moz-animation:none;
-ms-animation:none;
animation:none}
</style>
</noscript>
<script async src = "https://cdn.ampproject.org/v0.js">
</script>
</head>
<body>
<h1>Amp Sample Page</h1>
<p>
<amp-img
src = "images/christmas1.jpg"
width = "300"
height = "250"
layout = "responsive">
</amp-img>
</p>
</body>
</html>
Output

You can see the amp validation status in the developer console as follows −
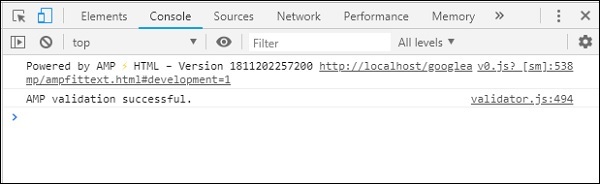
It gives us AMP validation successful as we have added all the required mandatory tags for a valid amp page.
Google AMP - Validation
Google AMP is a way to get the web pages to load faster on the devices. To work with amp we can make use of HTML5, CSS and amp-components.
Google Amp provides many ways to validate an amp page. Some of the important ones that we are going to discuss in this chapter are −
Using #development=1
Using Amp Validator
Using command line
Let us discuss each of them in detail.
Using #development =1
Once you know your page is ready to be validated, just add #development=1 to the end of the page-url and test the same in chrome developer tools.
You can add #development=1 to your html page url at the end as shown in the example given below −
http://localhost:8080/googleamp/test_amp.html#development=1
Hit the above url in the browser and in the Google Chrome console. It will list the errors which amp thinks are invalid from amp specification point of view.
Here are the errors we have got for test_amp.html.

You can fix the errors displayed and once all the errors are fixed it will display as follows −
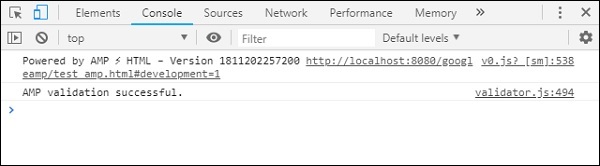
Using Amp Validator
Amp has a validator tool wherein we can enter the HTML content and it displays the status as PASS or ERROR and also shows the error on the page. The link is − https://validator.ampproject.org/
The display for amp validator tool is as shown below −
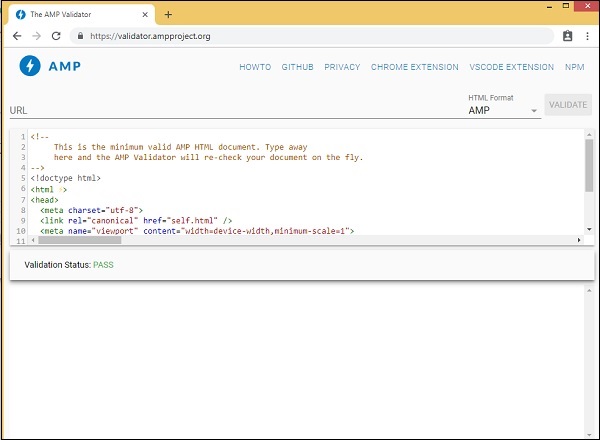
The example of error in the page content is shown below −
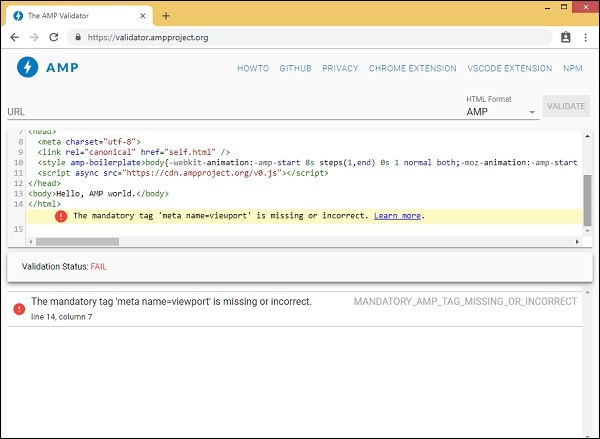
Using Command Line
You can install the npm package using the following command −
npm install -g amphtml-validator
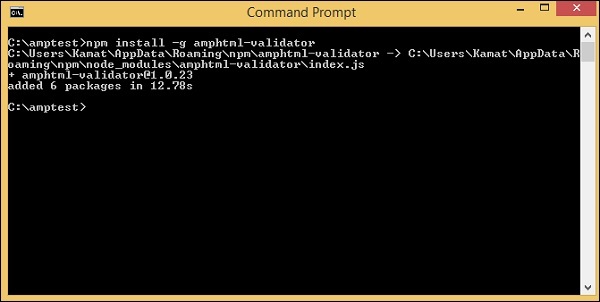
We have created a folder amptest/ and saved amp_test.html file in that folder. Let us validate amp_test.html using the following command in the command line.
amphtml-validator youramppage.html
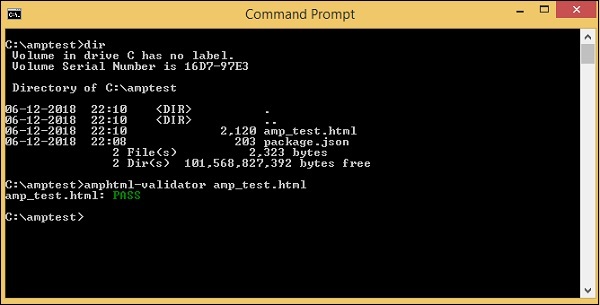
Let us remove some tags from the page to see if it displays the error.
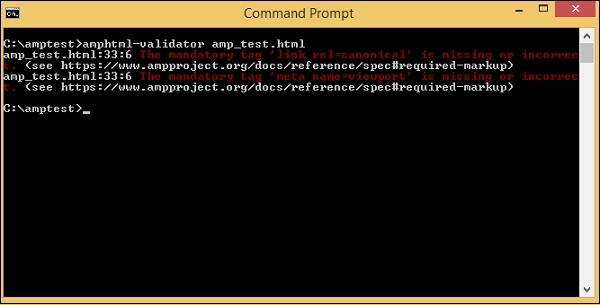
The displayed error can be fixed till we get the status as PASS.
Google AMP - Caching
Google amp provides caching facility which is a proxy based content delivery network to serve pure amp pages. Amp cache is available by default to all the valid amp pages. It helps in rendering the pages faster in comparison to non amp pages.
Currently, there are 2 amp cache providers Google AMP Cache and Cloudflare AMP Cache. As said earlier, amp caching is made available to all valid amp pages. Incase if the user does not want to use amp cache feature, you need to make your amp page invalid. Amp cache is not applied for invalid amp pages.
The moment Google search crawls and finds amp () for the html content, it considers for caching.
In this section, we will discuss various components of Google amp cache URL.
Subdomain
Google AMP adds a subdomain to the url requested. There are some rules followed for amp cache subdomain url. They are shown here −
Rules for Subdomain cache URL
Converting the AMP document domain from IDN (Punycode) to UTF-8.
The dash (-) in the url is replaced with two dashes (--)
The dot (.) in the url is replaced with dash(-).
Converting back to IDN (Punycode).
For example pub.mypage will be replaced with pub-mypage.cdn.ampproject.com. Here cdn.ampproject.com is the subdomain added by google amp. Now the cached url is Pub-mypage.cdn.ampproject.com.
Content Type
The content type available are c for AMP HTML Document, i for image and r for resource like for example font. You will get 404 error if the content type does not match with the ones specified.
Optional s
If s is present, the content will be fetched from the origin https:// ; else, it will fetch from http://
An example for the request made to cached image from https and http is shown here −
Example
https://pub-mypage-com.cdn.ampproject.org/i/s/examples/images/testimage.png
So, in the above example the url is having i which means image and s for https −
Example
http://pub-mypage-com.cdn.ampproject.org/i/examples/images/testimage.png
Thus, in the above example the url is having i which means image and there is no s, so the url will be fetched from http.
For a font cached file, the url will be as follows −
Example
https://pub-mypage-com.cdn.ampproject.org/r/s/examples/themes/lemon/fonts/Genericons.ttf
Content type r is used for resources like fonts and s for secure url.
For html document the url is as follows −
Example
https://pub-mypage-com.cdn.ampproject.org/c/s/trends/main.html
It has c in the url is for HTML document, followed by s which is for https://
Google AMP cache uses http headers like Max-age to decide whether the content cache is stale or fresh and automatically sends fresh requests and updates the contents so that next user gets the contents updated.
Google AMP - Custom Javascript
In the previous chapters, we have studied many amp-components. We have also seen that for each component to work we need add a javascript file.
For example, for amp-iframe the script added is as follows −
<script async custom-element="amp-iframe" src="https://cdn.ampproject.org/v0/amp-iframe-0.1.js"> </script>
We have async added to the script tag. This is the standard for amp as they load all the javascript files asynchronously. There is a custom-element attribute added which has the name of the component it is used for.
To use any amp-component if it is not a part of the core amp javascript file, the script has to be added as shown above.
We are mostly used to writing, a lot of javascript code inside pages and also include javascript file using script tag.
How can we do that in amp? So for that AMP does not allow any script code to be written or load script tag externally.
Amp has its own component to take care of the job which is suppose to be done by the additional script which is added on the page. This is basically done for performance reasons, to load the page content faster and not have javascript delay the rendering or do any changes to the DOM.
This is the specification given by AMP as per their official site for script tags −
Prohibited unless the type is application/ld+json. (Other non-executable values may be added as needed.) Exception is the mandatory script tag to load the AMP runtime and the script tags to load extended components.
A working example where we can use application/ld+json inside our amp pages is shown here. Note that we are using the script tag with type=application/ld+json for amp-analytics component to fire tracker.
Similarly, we can use script tag with type=application/ld+json on other amp-components wherever required.
Example
<!doctype html>
<html amp>
<head>
<meta charset = "utf-8">
<title>amp-analytics</title>
<script async src = "https://cdn.ampproject.org/v0.js">
</script>
<script async custom-element = "amp-analytics"
src = "https://cdn.ampproject.org/v0/amp-analytics-0.1.js">
</script>
<link rel = "canonical" href = "ampanalytics.html">
<meta name = "viewport" content = "width=device-width,
minimum-scale = 1,initial-scale = 1">
<style amp-boilerplate>
body{
-webkit-animation:
-amp-start 8s steps(1,end) 0s 1 normal both;-moz-animation:
-amp-start 8s steps(1,end) 0s 1 normal both;-ms-animation:
-amp-start 8s steps(1,end) 0s 1 normal both;animation:
-amp-start 8s steps(1,end) 0s 1 normal both
}
@-webkit-keyframes
-amp-start{from{visibility:hidden}to{visibility:visible}}@-moz-keyframes
-amp-start{from{visibility:hidden}to{visibility:visible}}@-ms-keyframes
-amp-start{from{visibility:hidden}to{visibility:visible}}@-o-keyframes
-amp-start{from{visibility:hidden}to{visibility:visible}}@keyframes
-amp-start{from{visibility:hidden}to{visibility:visible}}
</style>
<noscript>
<style amp-boilerplate>
body{
-webkit-animation:none;
-moz-animation:none;
-ms-animation:none;
animation:none}
</style>
</noscript>
</head>
<body>
<h1>Google Amp - Analytics</h1>
<amp-analytics>
<script type = "application/json">
{
"requests": {
"event": "http://localhost:8080/googleamp/tracking.php?
user=test&account=localhost&event=${eventId}"
},
"triggers": {
"trackPageview": {
"on": "visible",
"request": "event",
"vars": {
"eventId": "pageview"
}
}
}
}
</script>
</amp-analytics>
</body>
</html>
When the page is hit in the browser, the tracker will be fired for pageview. It can be seen in the Google network tab as shown below.

Google AMP - Cors
In this chapter, we will try to understand CORS in AMP. Before we dig deeper into the details, let us understand the basics of CORS and how it is useful.
What is CORS?
CORS stands for Cross Origin Resource Sharing. CORS is a process that needs extra HTTP header data to tell the browser whether the request made to the url by the web page running at say xyz.com origin should be given permission to access the data from the requested url. We make many http requests from the web page and for that we need to have CORS in place to get the data required.
When we make a http request to a different server than the host, we call it as cross origin request which means that either the domain, protocol, and port are different from the host origin. In such case, there should be a permission from the requested url for accessing the data; it means GET/PUT/POST/DELETE request made.
This additional data is available in the browser header for the http request call made. This step of permission is basically required for security reasons so that no webpage can make or get data from another domain without the required permission.
The header of the browser should have details such as Access-Control-Allow-Origin which can have values as shown below −
Access-Control-Allow-Origin : *
Having value * to the request URL header means it tells the browsers to allow requesting data from any origin to access the resource.
Access-Control-Allow-Origin: https://www.example.com
Having value as above tells the browser the request made from web page www.example.com will only be allowed to get the data for the requested url.
The server configuration for CORS has to be done keeping in mind how the data that is shared will be used. Depending on that the required headers has to be set on the server side.
Now that we know what CORS is, let us go another step ahead. In case of amp, we have components like amp-form, amp-list which uses http endpoints to load data dynamically.
In case of amp pages, even if the http request is made from the same origin we need to have CORS setting in place. Questions arise here why should we have CORS enabled even if the request and response will come from same origin. Technically we do not need CORS enabled in such case because we are requesting and displaying data for the same domain, origin etc.
Amp has a feature called caching which is added to get the data faster to the user who hits the page. In case the user has already visited the page, the data will be cached on google cdn the next user will get data served from the cache.
The data is stored at amp end which now has a different domain. When the user clicks any button to get fresh data, the amp cache url is compared with the webpage domain to get the new data. Here now if the CORS is not enabled as it deals with amp cached url and the webpage domain the request will not be valid and will fail for CORS permission. This is the reason why we need to have CORS enabled even for same origin in case of amp pages.
A working example of working with forms having CORS enabled is shown here −
<!doctype html>
<html amp lang = "en">
<head>
<meta charset = "utf-8">
<script async src = "https://cdn.ampproject.org/v0.js">
</script>
<title>Google AMP - Form</title>
<link rel = "canonical" href = "ampform.html">
<meta name = "viewport" content = "width = device-width,
minimum-scale = 1,initial-scale = 1">
<style amp-boilerplate>
body{
-webkit-animation:
-amp-start 8s steps(1,end) 0s 1 normal both;-moz-animation:
-amp-start 8s steps(1,end) 0s 1 normal both;-ms-animation:
-amp-start 8s steps(1,end) 0s 1 normal both;animation:
-amp-start 8s steps(1,end) 0s 1 normal both
}
@-webkit-keyframes
-amp-start{from{visibility:hidden}to{visibility:visible}}@-moz-keyframes
-amp-start{from{visibility:hidden}to{visibility:visible}}@-ms-keyframes
-amp-start{from{visibility:hidden}to{visibility:visible}}@-o-keyframes
-amp-start{from{visibility:hidden}to{visibility:visible}}@keyframes
-amp-start{from{visibility:hidden}to{visibility:visible}}
</style>
<noscript>
<style amp-boilerplate>
body{
-webkit-animation:none;
-moz-animation:none;
-ms-animation:none;
animation:none}
</style>
</noscript>
<script async custom-element = "amp-form"
src = "https://cdn.ampproject.org/v0/amp-form-0.1.js">
</script>
<script async custom-template = "amp-mustache"
src = "https://cdn.ampproject.org/v0/amp-mustache-0.2.js">
</script>
<style amp-custom>
form.amp-form-submit-success [submit-success],
form.amp-form-submit-error [submit-error]{
margin-top: 16px;
}
form.amp-form-submit-success [submit-success] {
color: white;
background-color:gray;
}
form.amp-form-submit-error [submit-error] {
color: red;
}
form.amp-form-submit-success.hide-inputs > input {
display: none;
}
</style>
</head>
<body>
<h3>Google AMP - Form</h3>
<form
method = "post"
class = "p2"
action-xhr = "submitform.php"
target = "_top">
<p>AMP - Form Example</p>
<div>
<input
type = "text"
name = "name"
placeholder = "Enter Name" required>
<br/>
<br/>
<input
type = "email"
name = "email"
placeholder = "Enter Email"
required>
<br/>
<br/>
</div>
<input type = "submit" value = "Submit">
<div submit-success>
<template type = "amp-mustache">
Form Submitted! Thanks {{name}}.
</template>
</div>
<div submit-error>
<template type = "amp-mustache">
Error! {{name}}, please try again.
</template>
</div>
</form>
</body>
</html>
submitform.php
<?php
   if(!empty($_POST)){
      $domain_url = (isset($_SERVER['HTTPS']) ? "https" : "http") .      "://$_SERVER[HTTP_HOST]";
      header("Content-type: application/json");
      header("AMP-Access-Control-Allow-Source-Origin: " . $domain_url);
      header("Access-Control-Expose-Headers: AMP-Access-Control-Allow-Source-Origin");
      $myJSON = json_encode($_POST);
      echo $myJSON;
   }
?>
Output
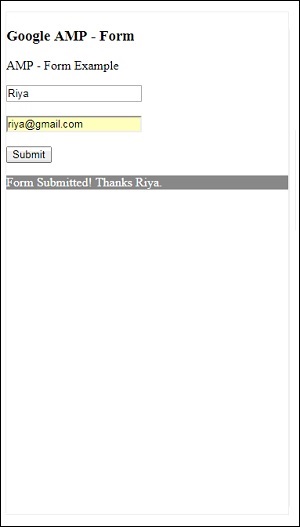
The details of response headers added to submitform.php −

For the form to work, we need to add headers like access-control-expose-headers with value AMP-Access-Control-Allow-Source-Origin and amp-access-control-allow-source-origin − http://localhost:8080.
Here we are using php file and apache is the server used. In php file, we have added the required headers as shown below −
<?php
if(!empty($_POST)){
$domain_url = (isset($_SERVER['HTTPS']) ? "https" : "http") .
"://$_SERVER[HTTP_HOST]";
header("Content-type: application/json");
header("AMP-Access-Control-Allow-Source-Origin: " . $domain_url);
header("Access-Control-Expose-Headers:
AMP-Access-Control-Allow-Source-Origin");
$myJSON = json_encode($_POST);
echo $myJSON;
}
?>
When the required headers are added, the origin http://localhost:8080 will be allowed to interact and get the data back.,
