- Google AMP - Home
- Google AMP - Overview
- Google AMP - Introduction
- Google AMP - Images
- Google AMP - Form
- Google AMP - Iframes
- Google AMP - Video
- Google AMP - Button
- Google AMP - Timeago
- Google AMP - Mathml
- Google AMP - Fit Text
- Google AMP - Date Countdown
- Google AMP - Date Picker
- Google AMP - Story
- Google AMP - Selector
- Google AMP - Link
- Google AMP - Font
- Google AMP - List
- Google AMP - User Notification
- Google AMP - Next Page
- Google AMP - Attributes
- Styles And Custom CSS
- Google AMP - Dynamic CSS Classes
- Google AMP - Actions And Events
- Google AMP - Animations
- Google AMP - Data Binding
- Google AMP - Layout
- Google AMP - ADS
- Google AMP - Analytics
- Google AMP - Social Widgets
- Google AMP - Media
- Html Page To Amp Page
- Google AMP - Basic Syntax
- Google AMP - Validation
- Google AMP - Caching
- Google AMP - Custom Javascript
- Google AMP - Cors
- Google AMP Useful Resources
- Google AMP - Quick Guide
- Google AMP - Useful Resources
- Google AMP - Discussion
Google AMP - Basic Syntax
In this chapter, we will discuss the basic requirements to get started with Google AMP pages.
Sample Amp Page
A basic example for an amp page is shown below −
<!doctype html>
<html amp>
   <head>
      <meta charset = "utf-8">
      <title>Amp Sample Page</title>
      <link rel = "canonical" href = "./regular-html-version.html">
      <meta name = "viewport" content = "width = device-width,
      minimum-scale = 1,initial-scale = 1">
      <style amp-custom>
         h1 {color: red}
      </style>

      <style amp-boilerplate>
         body{
            -webkit-animation:
            -amp-start 8s steps(1,end) 0s 1 normal both;-moz-animation:
            -amp-start 8s steps(1,end) 0s 1 normal both;-ms-animation:
            -amp-start 8s steps(1,end) 0s 1 normal both;animation:
            -amp-start 8s steps(1,end) 0s 1 normal both
         }
         @-webkit-keyframes
         -amp-start{from{visibility:hidden}to{visibility:visible}}@-moz-keyframes
         -amp-start{from{visibility:hidden}to{visibility:visible}}@-ms-keyframes
         -amp-start{from{visibility:hidden}to{visibility:visible}}@-o-keyframes
         -amp-start{from{visibility:hidden}to{visibility:visible}}@keyframes
         -amp-start{from{visibility:hidden}to{visibility:visible}}
      </style>
      <noscript>
         <style amp-boilerplate>
            body{
               -webkit-animation:none;
               -moz-animation:none;
               -ms-animation:none;
               animation:none}
         </style>
      </noscript>
      <script async src = "https://cdn.ampproject.org/v0.js">
      </script>
   </head>
   <body>
      <h1>Amp Sample Page</h1>
      <p>
         <amp-img
            src = "images/christmas1.jpg"
            width = "300"
            height = "300"
            layout = "responsive">
         </amp-img>
      </p>
   </body>
</html>
Mandatory Tags
There are some mandatory tags to be included in a amp page. This section discusses them in detail −
We have to make sure that we add amp or to the html tag as shown below
<html amp>
   OR
<html >
We should add the <head> and <body> tags to the html page.
Amp validation may fail if you miss any of the mandatory meta tags. Some mandatory mets tags that are to be added head section of the page are shown here −
<meta charset="utf-8">
   <meta name  =  "viewport"
      content = "width = device-width,
      minimum-scale = 1,
      initial-scale = 1">
Link of rel="canonical" to be added inside head tag
<link rel = "canonical" href = "./regular-html-version.html">
Style tag with amp-boilerplate −
<style amp-boilerplate>
   body{
     -webkit-animation:
      -amp-start 8s steps(1,end) 0s 1 normal both;-moz-animation:
      -amp-start 8s steps(1,end) 0s 1 normal both;-ms-animation:
      -amp-start 8s steps(1,end) 0s 1 normal both;animation:
      -amp-start 8s steps(1,end) 0s 1 normal both
   }
   @-webkit-keyframes
   -amp-start{from{visibility:hidden}to{visibility:visible}}@-moz-keyframes
   -amp-start{from{visibility:hidden}to{visibility:visible}}@-ms-keyframes
   -amp-start{from{visibility:hidden}to{visibility:visible}}@-o-keyframes
   -amp-start{from{visibility:hidden}to{visibility:visible}}@keyframes
   -amp-start{from{visibility:hidden}to{visibility:visible}}
</style>
Noscript tag with amp-boilerplate −
<noscript>
   <style amp-boilerplate>
      body{
         -webkit-animation:none;
         -moz-animation:none;
         -ms-animation:none;
         animation:none}
   </style>
</noscript>
The amp script tag with async added to it as shown below. This is the most important tag of all −
<script async src = "https://cdn.ampproject.org/v0.js">
</script>
You should use this tag incase you want to add custom css to the page. Please make a note here we cannot call external style sheet in amp pages. To add custom css, all your css has to go here −
<style amp-custom>
   //all your styles here
</style>
You can validate the above page in your browser using #developement=1 at the end of the page-url.
Now, let us test the same in the browser. I have hosted the page locally and saved it as amppage.html.
The url for above to be tested is
http://localhost/googleamp/amppage.html#development=1
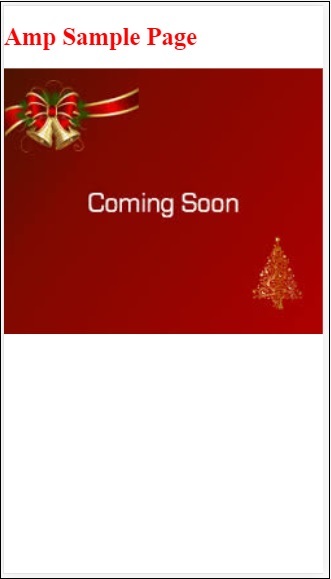
Example
<!doctype html>
<html amp>
   <head>
      <meta charset = "utf-8">
      <title>Amp Sample Page</title>
      <link rel = "canonical" href = "./regular-html-version.html">
      <meta name = "viewport" content = "width=device-width,
      minimum-scale = 1,initial-scale = 1">
      <style amp-custom>
         h1 {color: red}
      </style>
      <style amp-boilerplate>
         body{
            -webkit-animation:
            -amp-start 8s steps(1,end) 0s 1 normal both;-moz-animation:
            -amp-start 8s steps(1,end) 0s 1 normal both;-ms-animation:
            -amp-start 8s steps(1,end) 0s 1 normal both;animation:
            -amp-start 8s steps(1,end) 0s 1 normal both
         }
         @-webkit-keyframes
         -amp-start{from{visibility:hidden}to{visibility:visible}}@-moz-keyframes
         -amp-start{from{visibility:hidden}to{visibility:visible}}@-ms-keyframes
         -amp-start{from{visibility:hidden}to{visibility:visible}}@-o-keyframes
         -amp-start{from{visibility:hidden}to{visibility:visible}}@keyframes
         -amp-start{from{visibility:hidden}to{visibility:visible}}
      </style>
      <noscript>
         <style amp-boilerplate>
            body{
               -webkit-animation:none;
               -moz-animation:none;
               -ms-animation:none;
               animation:none}
         </style>
      </noscript>
      <script async src = "https://cdn.ampproject.org/v0.js">
      </script>
   </head>
   <body>
      <h1>Amp Sample Page</h1>
      <p>
         <amp-img
            src = "images/christmas1.jpg"
            width = "300"
            height = "250"
            layout = "responsive">
         </amp-img>
      </p>
   </body>
</html>
Output
You can see the amp validation status in the developer console as follows −
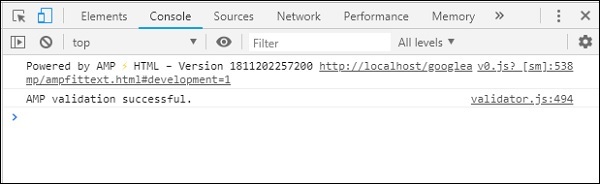
It gives us AMP validation successful as we have added all the required mandatory tags for a valid amp page.
