- Google AMP - Home
- Google AMP - Overview
- Google AMP - Introduction
- Google AMP - Images
- Google AMP - Form
- Google AMP - Iframes
- Google AMP - Video
- Google AMP - Button
- Google AMP - Timeago
- Google AMP - Mathml
- Google AMP - Fit Text
- Google AMP - Date Countdown
- Google AMP - Date Picker
- Google AMP - Story
- Google AMP - Selector
- Google AMP - Link
- Google AMP - Font
- Google AMP - List
- Google AMP - User Notification
- Google AMP - Next Page
- Google AMP - Attributes
- Styles And Custom CSS
- Google AMP - Dynamic CSS Classes
- Google AMP - Actions And Events
- Google AMP - Animations
- Google AMP - Data Binding
- Google AMP - Layout
- Google AMP - ADS
- Google AMP - Analytics
- Google AMP - Social Widgets
- Google AMP - Media
- Html Page To Amp Page
- Google AMP - Basic Syntax
- Google AMP - Validation
- Google AMP - Caching
- Google AMP - Custom Javascript
- Google AMP - Cors
- Google AMP Useful Resources
- Google AMP - Quick Guide
- Google AMP - Useful Resources
- Google AMP - Discussion
Google AMP - Analytics
Amp analytics is an amp component used to track data on a page. All the user interaction on the page can be recorded and saved to analyze the data for further improvements or business purpose.
To work with amp-analytics component we need to add following script inside head section −
<script async custom-element = "amp-analytics"
   src   = "https://cdn.ampproject.org/v0/amp-analytics-0.1.js">
</script>
To record the events used in amp-analytics, we can use a third party vendor or can also have a inhouse tracking system.
Example of amp-analytics using GoogleAnalytics vendor −
<amp-analytics type = googleanalytics>
   <script type = application/json>{
      "requests": {
         "pageview": "${eventId}"
      },
      "vars": {
         "account": "UA-44450152-1"
      },
      "triggers": {
         "trackPageview" : {
            "on": "visible",
            "request": "pageview",
            "vars": {
               "eventId": "pageview"
            }
         }
      }
   }
   </script>
</amp-analytics>
Example of amp-analytics using comscore vendor
<amp-analytics type = comscore>
   <script type = application/json>
      {"vars": {"c2":"7922264"}}
   </script>
</amp-analytics>
Example of amp-analytics using chartbeat vendor
<amp-analytics type = chartbeat>
   <script type = application/json>{
      "vars": {
         "uid": "230",
         "domain": "dummyurl.com",
         "sections": "us",
         "authors": "Hello World"
      }
   }</script>
</amp-analytics>
The detailed list of vendors are available here.
A working example on how to use in-house analytics vendor is given below −
Example
<!doctype html>
<html amp>
   <head>
      <meta charset = "utf-8">
      <title>amp-analytics</title>
      <script async src = "https://cdn.ampproject.org/v0.js">
      </script>
      <script async custom-element = "amp-analytics"
         src = "https://cdn.ampproject.org/v0/amp-analytics-0.1.js">
      </script>
      <link rel = "canonical" href = "ampanalytics.html">
      <meta name = "viewport" content = "width = device-width,
      minimum-scale = 1,initial-scale = 1">

      <style amp-boilerplate>
         body{
            -webkit-animation:
            -amp-start 8s steps(1,end) 0s 1 normal both;-moz-animation:
            -amp-start 8s steps(1,end) 0s 1 normal both;-ms-animation:
            -amp-start 8s steps(1,end) 0s 1 normal both;animation:
            -amp-start 8s steps(1,end) 0s 1 normal both}
         @-webkit-keyframes
         -amp-start{from{visibility:hidden}to{visibility:visible}}@-moz-keyframes
         -amp-start{from{visibility:hidden}to{visibility:visible}}@-ms-keyframes
         -amp-start{from{visibility:hidden}to{visibility:visible}}@-o-keyframes
         -amp-start{from{visibility:hidden}to{visibility:visible}}@keyframes
         -amp-start{from{visibility:hidden}to{visibility:visible}}
      </style>

      <noscript>
         <style amp-boilerplate>
            body{
               -webkit-animation:none;
               -moz-animation:none;
               -ms-animation:none;
               animation:none}
         </style>
      </noscript>
   </head>
   <body>
      <h1>Google Amp - Analytics</h1>
      <amp-analytics>
         <script type = "application/json">
            {
               "requests": {
                  "event": "http://localhost:8080/googleamp/tracking.php?
                  user=test&account=localhost&event=${eventId}"
               },
               "triggers": {
                  "trackPageview": {
                     "on": "visible",
                     "request": "event",
                        "vars": {
                           "eventId": "pageview"
                        }
                  }
               }
            }
         </script>
      </amp-analytics>
   </body>
</html>
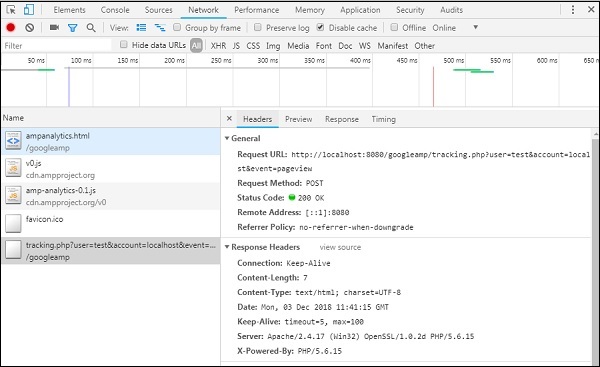
When the page is hit in the browser the tracker will be fired for pageview. It can be seen in the google network tab as shown below.
You can also fire amp-analytics event when a particular element is visible on the page. A working example for the same is shown here −
Example
<!doctype html>
<html amp>
   <head>
      <meta charset = "utf-8">
      <title>amp-analytics</title>
      <script async src = "https://cdn.ampproject.org/v0.js">
      </script>
      <script async custom-element = "amp-analytics"
         src = "https://cdn.ampproject.org/v0/amp-analytics-0.1.js">
      </script>
      <link rel = "canonical" href = "ampanalytics.html">
      <meta name = "viewport" content = "width = device-width,
      minimum-scale = 1,initial-scale = 1">

      <style amp-boilerplate>
         body{
            -webkit-animation:
            -amp-start 8s steps(1,end) 0s 1 normal both;-moz-animation:
            -amp-start 8s steps(1,end) 0s 1 normal both;-ms-animation:
            -amp-start 8s steps(1,end) 0s 1 normal both;animation:
            -amp-start 8s steps(1,end) 0s 1 normal both
         }
         @-webkit-keyframes
         -amp-start{from{visibility:hidden}to{visibility:visible}}@-moz-keyframes
         -amp-start{from{visibility:hidden}to{visibility:visible}}@-ms-keyframes
         -amp-start{from{visibility:hidden}to{visibility:visible}}@-o-keyframes
         -amp-start{from{visibility:hidden}to{visibility:visible}}@keyframes
         -amp-start{from{visibility:hidden}to{visibility:visible}}
      </style>
      <noscript>
         <style amp-boilerplate>
            body{
               -webkit-animation:none;
               -moz-animation:none;
               -ms-animation:none;
               animation:none}
         </style>
      </noscript>
      <script async custom-element = "amp-video"
         src = "https://cdn.ampproject.org/v0/amp-video-0.1.js">
      </script>
   </head>
   <body>
      <h1>Google Amp - Analytics</h1>
      <amp-video controls
         id = "videoplayer"
         width = "640"
         height = "360"
         layout = "responsive"
         poster = "images/videoposter.png"
         autoplay>
            <source src = "video/bunny.webm" type = "video/webm" />
            <source src = "video/samplevideo.mp4" type = "video/mp4" />
               <div fallback>
                  <p>This browser does not support the video element.</p>
               </div>
      </amp-video>
      <amp-analytics>
         <script type = "application/json">
         {
         "requests": {
            "event": "http://localhost:8080/googleamp/tracking.php?
            user=test&account=localhost&event=${eventId}"
         },
         "triggers": {
            "trackPageview": {
               "on": "visible",
               "request": "event",
                  "visibilitySpec": {
                     "selector": "#videoplayer",
                     "visiblePercentageMin": 20,
                     "totalTimeMin": 2000,
                     "continuousTimeMin": 200
                  },
                  "vars": {
                     "eventId": "video"
                  }
               }
            }
         }
         </script>
      </amp-analytics>
   </body>
</html>
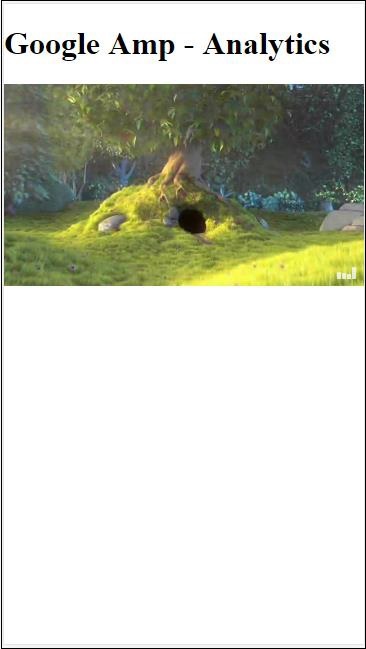
Output
Amp-analytics component requires a json object to be passed to the script tag. The format of the json is as follows −
{
   "requests": {
      request-name: request-value,
      ...
   },
   "vars": {
      var-name: var-value,
      ...
   },
   "extraUrlParams": {
      extraurlparam-name: extraurlparam-value,
      ...
   },
   "triggers": {
      trigger-name: trigger-object,
      ...
   },
   "transport": {
      "beacon": *boolean*,
      "xhrpost": *boolean*,
      "image": *boolean*,
   }
}
All the objects specified above are not mandatory to be passed to amp-analytics. If you are using a third party vendor, the vendor will have its format and the user will need to pass the data in that fashion.
Let us understand each of the object in detail −
Requests
The requests object has a url which is used to fire when the conditions are met. An example of requests object is shown here −
"requests": {
   "request-name": "http://localhost:8080/googleamp/tracking.php?
   user=test&account=localhost&event=${eventId}"
},
The request-name will be specified in the trigger object and same name has to be used for it.
Vars
All variables to be used in the request object are specified in the vars object.
"requests": {
   "event": "http://localhost:8080/googleamp/tracking.php?
   user=test&account=localhost&event=${eventId}"
},
"vars": {
   "eventId": "video"
}
Extra URL Params
Any additional parameters to be appended to the request url as query string can be defined in this object. Observe the following example
"requests": {
   "event": "http://localhost:8080/googleamp/tracking.php?
   user=test&account=localhost&event=${eventId}&x=1&y=2&z=3"
},
"vars": {
   "eventId": "video"
},
"extraUrlParams": {
   "x": "1",
   "y": "2",
   "z": "3"
}
Triggers
This object will tell when the request url has to be fired. The key-value pairs that are available inside the trigger object are as given below −
on − You should mention the event to be listened. The values available for on are render-start, ini-load, click, scroll, timer, visible, hidden, user-error, access-*, and video-*
request − This is the name of the request. This has to match with the request-name in requests object.
vars − This is object with key-value variables defined to be used inside trigger object or used to override the vars key-value defined.
selector − This shows the details of the element on which the trigger is set.
scrollSpec − This will have details of the scroll trigger.
timerSpec − This will have details of the time to given.
videoSpec − This will have details to be invoked for a video.
Here is an example wherein we have added amp-video. Amp-analytics will fire tracker when the video element is available on the page, at least 20% visible on the page, the video has to play at least for 2 seconds, and is continuous in view for 200ms. When all these conditions are met than only the tracker will get fired. The details are shown below −

To add the conditions about the visibility of the element and other conditions like the element has to be viewable atleast 20%, video should play for 2s , all these conditions has to be specified inside the visibilitySpec as shown below −
<amp-analytics>
  <script type = "application/json">
   {
      "requests": {
         "event": "http://localhost:8080/googleamp/tracking.php?
         user=test&account=localhost&event=${eventId}"
      },
      "triggers": {
         "trackPageview": {
            "on": "visible",
            "request": "event",
               "visibilitySpec": {
                  "selector": "#videoplayer",
                  "visiblePercentageMin": 20,
                  "totalTimeMin": 2000,
                  "continuousTimeMin": 200
               },
               "vars": {
                  "eventId": "video"
               }
         }
      }
   }
   </script>
</amp-analytics>
videoSpec allows you to define conditions based on which you want to trigger the tracker firing. The conditions are listed here −
waitFor
This property is used for visibility trigger to wait for certain case before firing. The options available for waitFor are none, ini-load and render-start. By default, the value for waitFor is ini-load.
reportWhen
This property is used for visibility trigger to wait for certain case before firing. The value supported is documentExit.You cannot use reportWhen and repeat property together inside visibilitySpec
continuousTimeMin and continuousTimeMax
This property indicates that the visibility tracker to fire it needs the element has to be in viewport continuously between continuousTimeMin and continuousTimeMax. If continousTimeMin is not specified, it will be by default set to 0. The value is specified in milliseconds.
totalTimeMin and totalTimeMin
This property indicates that the visibility tracker to fire it needs the element has to be in viewport for a total time between totalTimeMin and totalTimeMin. If totalTimeMin is not specified it will default to 0.The value is specified in milliseconds.
visiblePercentageMin and visiblePercentageMax
This property indicates that the visibility tracker to fire its needs the element to be visible within the viewport between the percentage assigned to visiblePercetageMin and visiblePercentageMax. The default values for visiblePercentageMin is 0 and 100 for visibilePercentageMax.It both have values 0 than the visibility trigger will fire when the element is not visible and if both have 100 than it will fire when the element is fully visible.
Repeat
If set to true, the trigger will fire everytime the visibilitySpec conditions are met. By default, the value for repeat is false. It cannot be used together with reportWhen property.
An example for click trigger is shown here −
<!doctype html>
<html amp>
   <head>
      <meta charset = "utf-8">
      <title>amp-analytics</title>
      <script async src = "https://cdn.ampproject.org/v0.js">
      </script>
      <script async custom-element = "amp-analytics"
      src="https://cdn.ampproject.org/v0/amp-analytics-0.1.js">
      </script>
      <link rel = "canonical" href = "ampanalytics.html">
      <meta name = "viewport" content = "width = device-width,
      minimum-scale = 1,initial-scale = 1">

      <style amp-boilerplate>
         body{
            -webkit-animation:
            -amp-start 8s steps(1,end) 0s 1 normal both;-moz-animation:
            -amp-start 8s steps(1,end) 0s 1 normal both;-ms-animation:
            -amp-start 8s steps(1,end) 0s 1 normal both;animation:
            -amp-start 8s steps(1,end) 0s 1 normal both
         }
         @-webkit-keyframes
         -amp-start{from{visibility:hidden}to{visibility:visible}}@-moz-keyframes
         -amp-start{from{visibility:hidden}to{visibility:visible}}@-ms-keyframes
         -amp-start{from{visibility:hidden}to{visibility:visible}}@-o-keyframes
         -amp-start{from{visibility:hidden}to{visibility:visible}}@keyframes
         -amp-start{from{visibility:hidden}to{visibility:visible}}
      </style>
      <noscript>
         <style amp-boilerplate>
            body{
               -webkit-animation:none;
               -moz-animation:none;
               -ms-animation:none;
               animation:none}
         </style>
      </noscript>
      <script async custom-element = "amp-video"
         src = "https://cdn.ampproject.org/v0/amp-video-0.1.js">
      </script>
      <style amp-custom>
         a {
            color: blue;
         }
      </style>
   </head>
   <body>
      <h1>Google Amp - Analytics</h1>
      <a>Click Here</a>
      <amp-analytics>
         <script type = "application/json">
            {
               "requests": {
                  "event": "http://localhost:8080/googleamp/tracking.php?
                  user=test&account=localhost&event=${eventId}"
               },
               "triggers": {
                  "trackAnchorClicks": {
                  "on": "click",
                  "selector": "a",
                  "request": "event",
                     "vars": {
                        "eventId": "clickonlink"
                     }
                  }
               }
            }
         </script>
      </amp-analytics>
   </body>
</html>
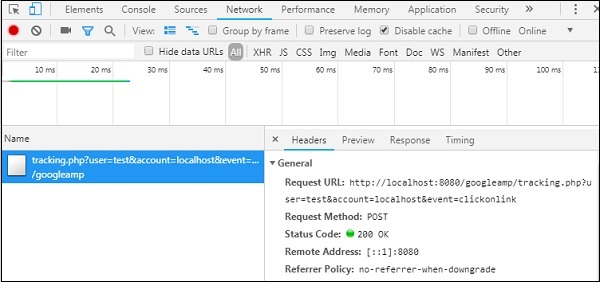
Output
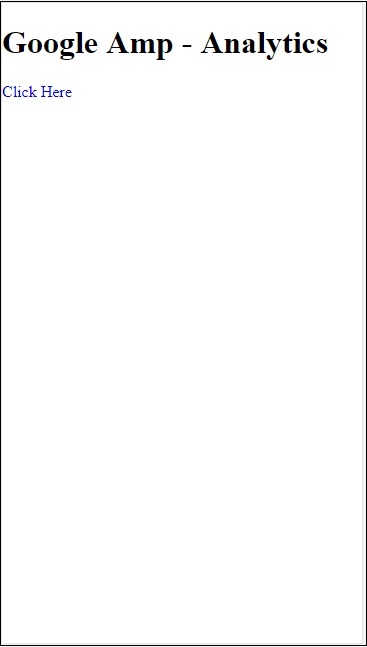
Onclick of the link, the event will get fired as shown below −