 Data Structure
 Networking
 RDBMS
RDBMS Operating System
 Java
Java MS Excel
 iOS
iOS HTML
HTML CSS
CSS Android
 Python
 C Programming
 C++
C++ C#
C# MongoDB
 MySQL
MySQL Javascript
 PHP
PHP
- Selected Reading
- UPSC IAS Exams Notes
- Developer's Best Practices
- Questions and Answers
- Effective Resume Writing
- HR Interview Questions
- Computer Glossary
- Who is Who
Creating a wizard in Tkinter
Tkinter, the standard GUI toolkit for Python, provides a robust foundation for creating graphical user interfaces. A wizard, in the context of a Tkinter application, typically involves multiple steps or pages that guide users through a specific workflow. The user navigates through these steps using "Next" and "Back" buttons until they reach the final step.
In this article, we'll explore the creation of a simple three-step wizard using Tkinter. Each step is represented by a distinct frame, and we'll delve into the essential components, such as setting up the Tkinter application, creating frames for each wizard step, implementing navigation logic, and running the wizard application.
Let's begin a journey to create a Tkinter wizard that you can adapt and expand based on your specific application requirements.
Understanding the Wizard Structure
A wizard typically consists of multiple steps or pages, each representing a stage in a process. Users navigate through these steps using "Next" and "Back" buttons until they reach the final step. Let's start by setting up the basic structure of our Tkinter wizard.
Step 1: Setting up the Tkinter Application
Now, let's break down the code for setting up the Tkinter application. In the __init__ method of the Wizard class, we create the main window, a container frame, and configure grid options.
import tkinter as tk
from tkinter import ttk
class Wizard(tk.Tk):
   def __init__(self, *args, **kwargs):
      tk.Tk.__init__(self, *args, **kwargs)

      self.title("Creating a Wizard in tkinter")
      self.geometry("720x250")

      # Create a container to hold wizard frames
      self.container = ttk.Frame(self)
      self.container.pack(side="top", fill="both", expand=True)
      self.container.grid_rowconfigure(0, weight=1)
      self.container.grid_columnconfigure(0, weight=1)

      self.frames = {}

      # Define wizard steps
      steps = [Step1, Step2, Step3]

      for Step in steps:
         frame = Step(self.container, self)
         self.frames[Step] = frame
         frame.grid(row=0, column=0, sticky="nsew")

      self.show_frame(Step1)
Step 2: Creating Wizard Steps as Frames
Let's dive into the code that creates the frames for each wizard step. Each step is represented by a class (e.g., Step1, Step2, Step3), each inheriting from ttk.Frame. In the __init__ method of each step class, we define the widgets for that step.
class Step1(ttk.Frame):
   def __init__(self, parent, controller):
      ttk.Frame.__init__(self, parent)
      label = ttk.Label(self, text="Step 1")
      label.pack(pady=10, padx=10)
      button = ttk.Button(self, text="Next", command=lambda: controller.show_frame(Step2))
      button.pack()

class Step2(ttk.Frame):
   def __init__(self, parent, controller):
      ttk.Frame.__init__(self, parent)
      label = ttk.Label(self, text="Step 2")
      label.pack(pady=10, padx=10)
      button1 = ttk.Button(self, text="Back", command=lambda: controller.show_frame(Step1))
      button1.pack()
      button2 = ttk.Button(self, text="Next", command=lambda: controller.show_frame(Step3))
      button2.pack()

class Step3(ttk.Frame):
   def __init__(self, parent, controller):
      ttk.Frame.__init__(self, parent)
      label = ttk.Label(self, text="Step 3")
      label.pack(pady=10, padx=10)
      button1 = ttk.Button(self, text="Back", command=lambda: controller.show_frame(Step2))
      button1.pack()
      button2 = ttk.Button(self, text="Finish", command=self.finish)
      button2.pack()

   def finish(self):
      print("Wizard finished!")
Step 3: Implementing Navigation Logic
Now, let's explore the code responsible for implementing the navigation logic. The Wizard class includes a show_frame method that takes a step class as an argument and raises that step's frame to the top. This method is used to navigate between wizard steps.
def show_frame(self, cont):
   frame = self.frames[cont]
   frame.tkraise()
In the example, each button in the step classes is associated with a command that calls controller.show_frame to switch to the appropriate step. The Step3 class has a "Finish" button, and clicking it triggers the finish method, signaling the end of the wizard.
Step 4: Running the Wizard Application
The final part of the script creates an instance of the Wizard class and starts the Tkinter event loop.
if __name__ == "__main__":
   app = Wizard()
   app.mainloop()
Example
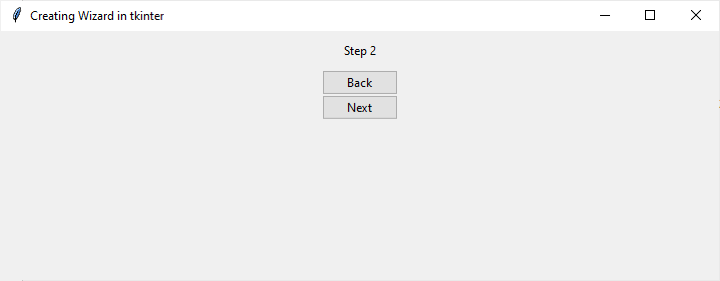
The complete example demonstrates the integration of these concepts.
import tkinter as tk
from tkinter import ttk

class Wizard(tk.Tk):
   def __init__(self, *args, **kwargs):
      tk.Tk.__init__(self, *args, **kwargs)

      self.title("Creating Wizard in tkinter")
      self.geometry("720x250")

      # Create a container to hold wizard frames
      self.container = ttk.Frame(self)
      self.container.pack(side="top", fill="both", expand=True)
      self.container.grid_rowconfigure(0, weight=1)
      self.container.grid_columnconfigure(0, weight=1)

      self.frames = {}

      # Define wizard steps
      steps = [Step1, Step2, Step3]

      for Step in steps:
         frame = Step(self.container, self)
         self.frames[Step] = frame
         frame.grid(row=0, column=0, sticky="nsew")

      self.show_frame(Step1)

   def show_frame(self, cont):
      frame = self.frames[cont]
      frame.tkraise()

class Step1(ttk.Frame):
   def __init__(self, parent, controller):
      ttk.Frame.__init__(self, parent)
      label = ttk.Label(self, text="Step 1")
      label.pack(pady=10, padx=10)
      button = ttk.Button(self, text="Next", command=lambda: controller.show_frame(Step2))
      button.pack()

class Step2(ttk.Frame):
   def __init__(self, parent, controller):
      ttk.Frame.__init__(self, parent)
      label = ttk.Label(self, text="Step 2")
      label.pack(pady=10, padx=10)
      button1 = ttk.Button(self, text="Back", command=lambda: controller.show_frame(Step1))
      button1.pack()
      button2 = ttk.Button(self, text="Next", command=lambda: controller.show_frame(Step3))
      button2.pack()

class Step3(ttk.Frame):
   def __init__(self, parent, controller):
      ttk.Frame.__init__(self, parent)
      label = ttk.Label(self, text="Step 3")
      label.pack(pady=10, padx=10)
      button1 = ttk.Button(self, text="Back", command=lambda: controller.show_frame(Step2))
      button1.pack()
      button2 = ttk.Button(self, text="Finish", command=self.finish)
      button2.pack()

   def finish(self):
      print("Wizard finished!")

if __name__ == "__main__":
   app = Wizard()
   app.mainloop()
Output

Conclusion
In conclusion, building a wizard in Tkinter involves creating a series of frames, each representing a step in a process, and implementing navigation logic to move between these steps. The example provided offers a foundation for creating more complex wizards tailored to specific applications.
You can customize the example to suit your needs, adding more steps, incorporating input fields, or enhancing the appearance with additional styling. Tkinter's flexibility makes it a powerful tool for creating intuitive GUI applications, and wizards can greatly improve the user experience when dealing with multi-step processes.

