 Data Structure
 Networking
 RDBMS
RDBMS Operating System
 Java
Java MS Excel
 iOS
iOS HTML
HTML CSS
CSS Android
 Python
 C Programming
 C++
C++ C#
C# MongoDB
 MySQL
MySQL Javascript
 PHP
PHP
- Selected Reading
- UPSC IAS Exams Notes
- Developer's Best Practices
- Questions and Answers
- Effective Resume Writing
- HR Interview Questions
- Computer Glossary
- Who is Who
Creating multiple check boxes using a loop in Tkinter
Graphical User Interfaces (GUIs) play a crucial role in enhancing the user experience of software applications. Tkinter is a built-in Python library that provides tools for creating GUI applications. It comes with a wide range of widgets, including buttons, labels, entry fields, and checkboxes, which can be combined to design intuitive and user-friendly interfaces. In this article, we'll explore how to streamline the process of creating multiple checkboxes in Tkinter using loops, offering a more efficient and scalable approach to GUI development.
Understanding Tkinter Checkboxes
Tkinter's Checkbutton widget is the key to incorporating checkboxes into your GUI. A basic example involves creating a single checkbox and associating it with a variable that tracks its state (checked or unchecked). Here's a simple code snippet
Example
import tkinter as tk
def on_checkbox_change():
   print("Checkbox is checked" if checkbox_var.get() else "Checkbox is unchecked")

# Create the main window
root = tk.Tk()
root.title("Example of Single Checkbox")
# Set window dimensions
root.geometry("720x250")
# Create a checkbox and associate it with a variable
checkbox_var = tk.BooleanVar()
checkbox = tk.Checkbutton(root, text="single checkbox", variable=checkbox_var, command=on_checkbox_change)
checkbox.pack()

# Run the Tkinter event loop
root.mainloop()
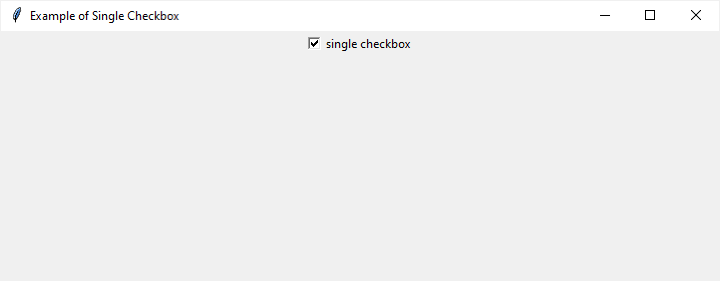
This code creates a window with a single checkbox labeled "single checkbox." The on_checkbox_change function is called whenever the checkbox is clicked, printing a message indicating its current state. Let's check the output below.
Output

When you click in the checkbox, it will print a message on the terminal that checkbox is checked.
Creating Multiple Checkboxes Using a Loop
Now, let's move on to the main topic of dynamically creating multiple checkboxes using a loop. This technique is particularly useful when dealing with a variable number of options or settings that need checkboxes. We can define a function to encapsulate the process, making the code more modular and maintainable. The below code snippet gives more understanding
Example
# Importing the necessary libraries
import tkinter as tk

# Function called when a checkbox is clicked
def on_checkbox_change(checkbox_value, checkbox_var):
   print(f"Checkbox {checkbox_value} is {'checked' if checkbox_var.get() else 'unchecked'}")

# Function to create multiple checkboxes using a loop
def create_checkboxes(root, num_checkboxes):
   checkboxes = []  # List to store BooleanVar objects for each checkbox

   # Loop to create checkboxes dynamically
   for i in range(num_checkboxes):
      checkbox_var = tk.BooleanVar()  # Variable to track the state of the checkbox
      checkbox = tk.Checkbutton(
         root,
         text=f"Checkbox {i+1}",
         variable=checkbox_var,
         command=lambda i=i, var=checkbox_var: on_checkbox_change(i+1, var)
      )
      checkbox.pack()  # Place the checkbox in the window
      checkboxes.append(checkbox_var)  # Add the variable to the list

   return checkboxes  # Return the list of checkbox variables

# Main function
def main():
   root = tk.Tk()  # Create the main window
   root.title("Creating Multiple Checkboxes Using Loop")  # Set the title of the window
   root.geometry("720x250") # Set window dimensions

   num_checkboxes = 5  # Number of checkboxes to create
   checkboxes = create_checkboxes(root, num_checkboxes)  # Create checkboxes and get the list of variables

   root.mainloop()  # Run the Tkinter event loop

# Entry point for the script
if __name__ == "__main__":
   main()
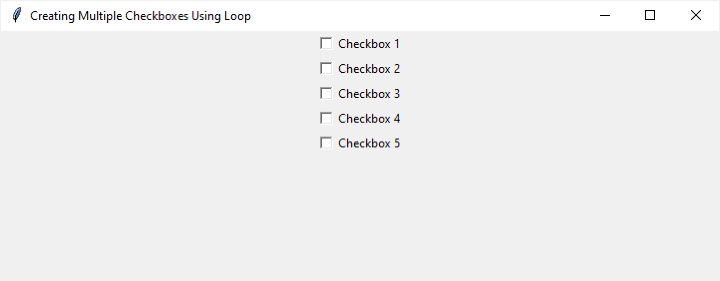
In this example, the create_checkboxes function takes the main window and the desired number of checkboxes as parameters. It then uses a loop to create checkboxes dynamically, associating each with a unique variable and label. The on_checkbox_change function is still utilized to handle checkbox state changes. Let's check the output below
Output

You can check either all or any number of checkboxes among them. Once checked, it will print the message on terminal.
Advantages of Dynamic Checkbox Creation
Scalability Dynamic checkbox creation allows developers to handle an arbitrary number of options without hardcoding each checkbox individually. This makes the code more scalable and adaptable to changing requirements.
Readability and Maintainability Using a loop improves the readability of the code by eliminating repetitive sections. It also enhances maintainability, as changes to the number of checkboxes or their behavior can be made within the function, rather than scattered throughout the code.
Consistency When checkboxes share a common behavior, such as the on_checkbox_change function in the example, dynamic creation ensures consistency. If a change is needed in the handling of checkbox events, it can be applied universally.
Conclusion
In this article, we explored the process of creating multiple checkboxes in Tkinter using loops. Leveraging the dynamic creation of checkboxes not only streamlines the code but also enhances scalability, readability, and maintainability. By encapsulating the checkbox creation process in a function, developers can easily adapt to changing requirements and customize the checkboxes based on specific needs.
As you embark on GUI development with Tkinter, consider the power and efficiency that dynamic checkbox creation brings to your applications. Whether you're building a settings menu, preference panel, or any other feature requiring user options, this approach will undoubtedly simplify your code and contribute to a more enjoyable user experience.

