- TestLodge - Home
- TestLodge - Introduction
- TestLodge - Features
- TestLodge - Free Trial Access
- TestLodge - Login
- TestLodge - Dashboard
- TestLodge - Add Users
- TestLodge - Add a Project
- TestLodge - Test Plans
- TestLodge - Copy a Test Plan
- TestLodge - Requirements
- TestLodge - Copy Requirements
- TestLodge - Test Suites
- TestLodge - Copy Test Cases
- TestLodge - Import Test Cases
- TestLodge - Add Test Run
- TestLodge - Execute a Test Run
- TestLodge - Test Run Summary
- TestLodge - Reports
- TestLodge - Export Contents
- Issue Tracker Integration
- TestLodge - Search
- TestLodge - Logout
TestLodge - Execute a Test Run
You can execute a single or multiple Test Runs and Test Suites. You can even assign individual test cases to different users from the same test suite. While executing a test case, the tester follows the written manual steps and records the result. TestLodge supports the functionality to mark test cases as Pass, Fail, or Skip. You can add the actual result and attach images as well.
Execute Test Runs
There are many ways to start the execution of test cases such as from a Test Plan or Requirement tab. Here, we will discuss about Test Run tab. After clicking Test run from any of the available options, brings the control at Test Run.
Following are the steps to execute a test run.
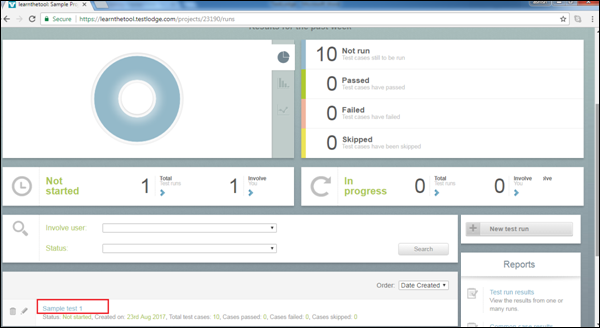
Step 1 − Go to the Test Runs section. Move down and select one of the available test runs and click as shown in the following screenshot.
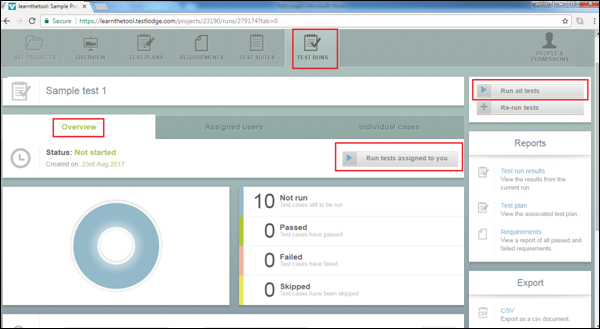
It will open the Test Run Overview page. There are many options to start the execution −
Run tests assigned to you − This button is present at the starting of the Overview section.
Run all tests − This button is present on the right side of the page.
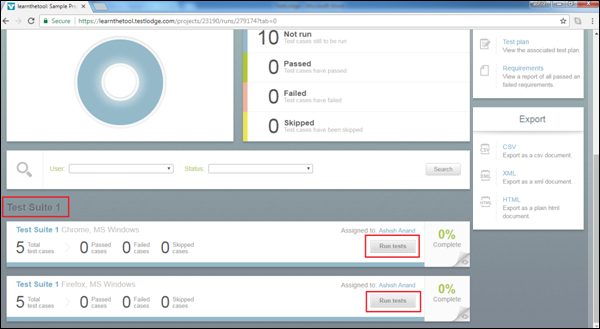
Run tests − This button is at the bottom of the page, user can see this button against each suite.
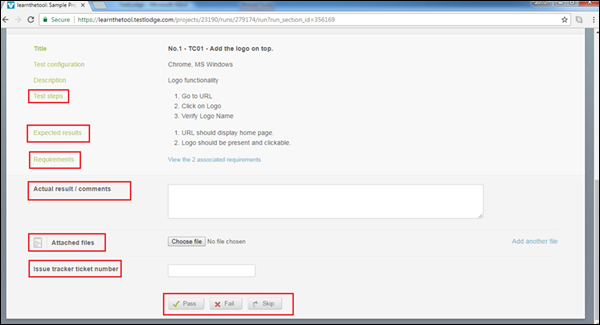
Step 2 − Click Run tests to run individual test cases. It opens the detail of test case where steps, expected result, and requirements are available.
Step 3 − Enter the actual result and attach the result file, if required.
Step 4 − Click Pass/Fail/Skip. If it is failed, you can enter the issue tracker number for a defect.
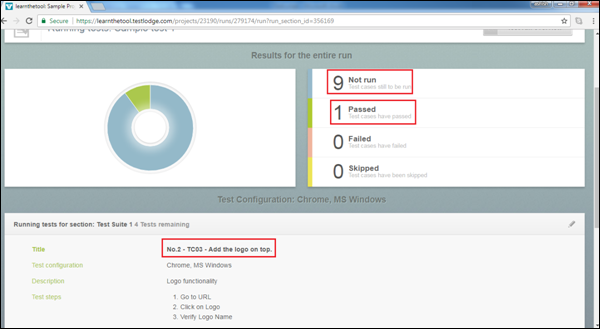
The following screenshot shows the test run page of individual test case.
Step 5 − Click Pass. It updates the test run summary and the next test case opens automatically as shown in the following screenshot.
When you click on Run tests assigned to you or Run all tests, it works the same as explained above.
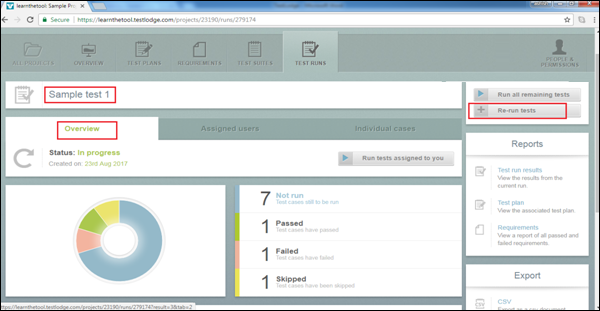
Re-Run Tests
Re-run tests option allows you to run test cases again. You can choose which test cases need to re-run such as only failed/passed/skipped or All test cases.
Following are the steps to use this option.
Step 1 − Select the test run and click Re-Run tests button present on the right side of the screen.
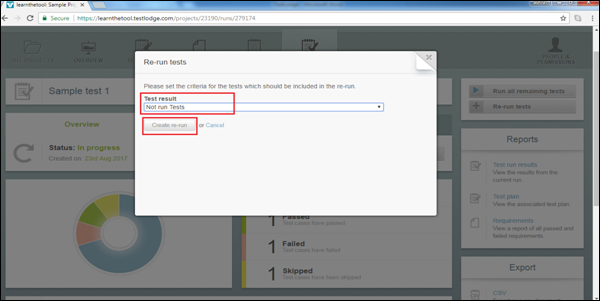
It opens re-run tests screen, where you can select criteria of tests, which should be included in the re-run. The available options are All Tests, Failed Tests, No Run Tests, Passed Tests, and Skipped Tests.
Step 2 − After careful selection, click Create re-run.
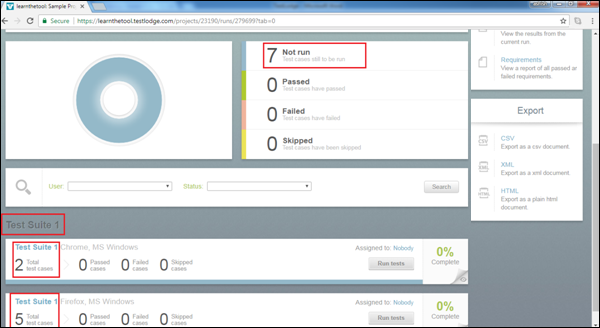
It will create a new test suite with all cases that are in No Run status. It basically groups all No Run test cases at one place from different test suites.
The following screenshot displays the re-run test suite.
Step 3 − Follow the same steps as explained in the execution of test runs section from here on.
