- TestLodge - Home
- TestLodge - Introduction
- TestLodge - Features
- TestLodge - Free Trial Access
- TestLodge - Login
- TestLodge - Dashboard
- TestLodge - Add Users
- TestLodge - Add a Project
- TestLodge - Test Plans
- TestLodge - Copy a Test Plan
- TestLodge - Requirements
- TestLodge - Copy Requirements
- TestLodge - Test Suites
- TestLodge - Copy Test Cases
- TestLodge - Import Test Cases
- TestLodge - Add Test Run
- TestLodge - Execute a Test Run
- TestLodge - Test Run Summary
- TestLodge - Reports
- TestLodge - Export Contents
- Issue Tracker Integration
- TestLodge - Search
- TestLodge - Logout
TestLodge - Add Test Run
To execute a Test Run, you should create a Test Run first. Test Run can be created under a Test Plan, i.e. each test run should be associated with a Test Plan.
Following are the steps to create a Test Run −
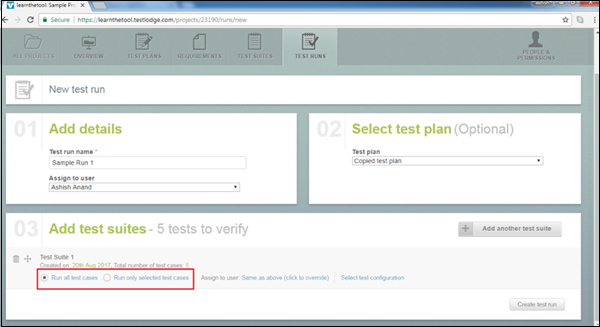
Step 1 − To create a new Test Run, go to the Test Runs section. Scroll down and click the New Test Run button present on the bottom right side as shown in the following screenshot.
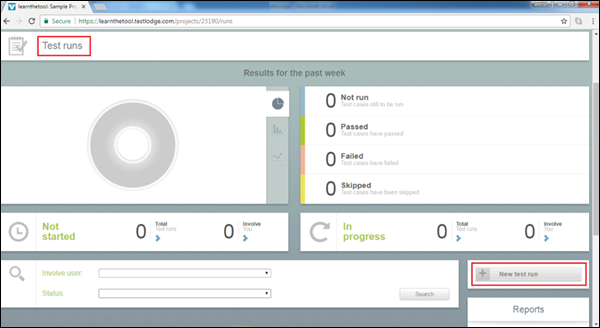
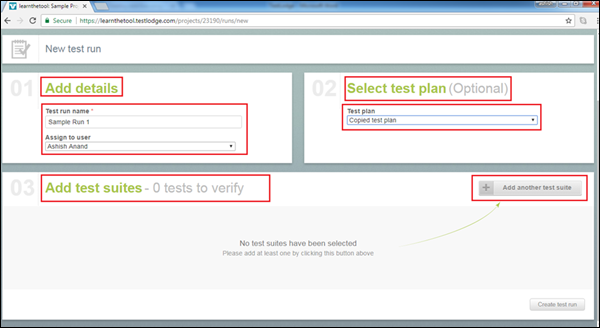
It will open a New Test run page that has 3 sections − Add Details, Select Test Plan, and Add test suites.
Step 2 − In the Add details section, enter the Test Run name and assign it to yourself.
Step 3 − In the Select test plan section, choose a test plan so that these test runs will be associated with the test plan. Once association is made, user can see these test suites in the test plan section as well. And, you can run test cases in the test plan section too.
Step 4 − To add a test suite, click the Add another test suite button present on the right side of the screen.
The following screenshot displays the New Test Run page.
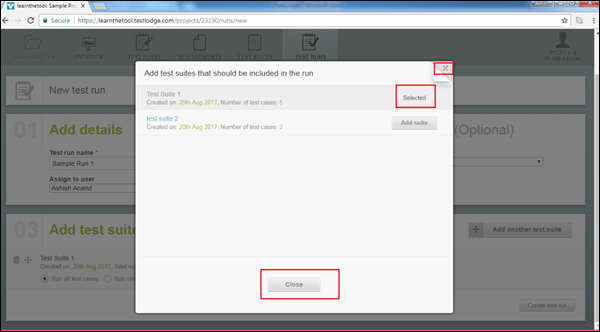
Step 5 − Once you click the button, it will open all test suites having test cases, created in the Test Suites section. Click the Add Suite button to add to test runs as shown in the following screenshot.

Step 6 − After selection, the button will change as Selected. Click Close to go back to the Test Run page. You can choose multiple test suites to add to a test run.
Step 7 − After closing the wizard, the test suite gets added with options as Run all test cases and Run only selected test cases. By default, Run all test cases option is selected as shown in the following screenshot.
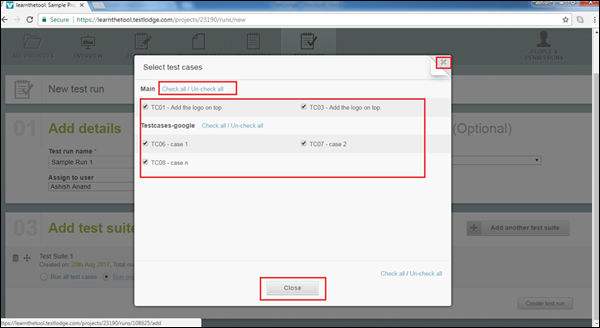
Step 8 − Select the Run only selected test cases option. A pop-up opens where the list of all test cases are present. You can check and un-check according to the requirement. After careful selection, click on Close to go back to the Test Run section.
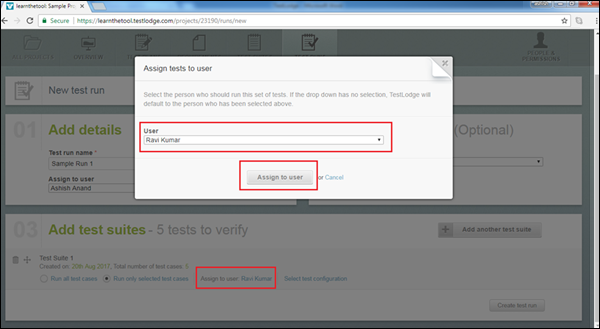
There is another option Assign to user. Using this option, you can assign rights to any of the listed users.
Step 9 − Click the Assign to user link and a pop-up is displayed. Select the user and click the Assign to user button. The user name will be displayed as shown in the following screenshot.
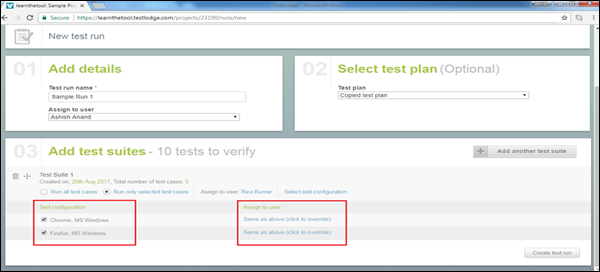
There is one more option Select test configuration to configure a test run.
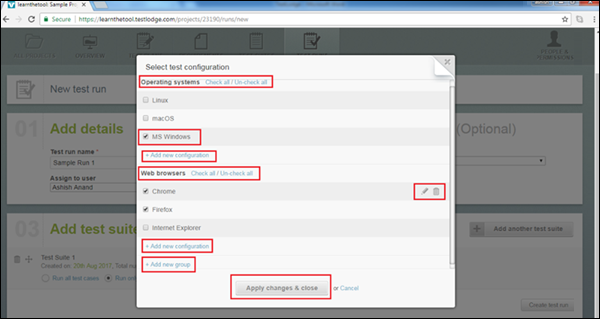
Step 10 − Click on this link and the Select test configuration wizard opens.
By default, operating system and web browsers are the two categories to configure a test run by checking/unchecking the available option.
You can add new configuration in each category as well as edit/delete an available option and category. You can even create a new group.
Step 11 − Configure as required and click the Apply changes & close button.
The following screenshot shows the test configuration wizard.
Now, you can see all the possible combinations of configuration to run test cases. For each combination, there is a Assign User option which can be used to assign rights to other users.
Step 12 − Carefully make all these selections and click the Create test run button present at the bottom right hand corner of the screen.
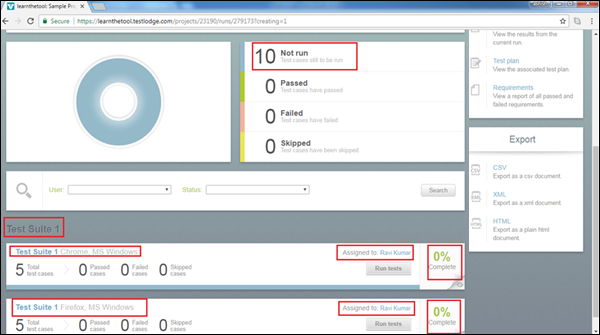
A test suite will be added for each combination of configuration. You can see the total number of test cases to execute in each configuration and the progress percentage as well. It will also display the name of the assigned user.
The following screenshot displays the added test suite for run.