- Spring Boot - Home
- Spring Boot - Introduction
- Spring Boot - Quick Start using CLI
- Spring Boot - Bootstrapping
- Spring Tool Suite
- Spring Boot - Tomcat Deployment
- Spring Boot - Build Systems
- Spring Boot - Code Structure
- Spring Boot - Beans & Dependency Injection
- Spring Boot - Runners
- Spring Boot - Starters
- Spring Boot - Application Properties
- Spring Boot - Configuration
- Spring Boot - Annotations
- Spring Boot - Logging
- Building RESTful Web Services
- Spring Boot - Exception Handling
- Spring Boot - Interceptor
- Spring Boot - Servlet Filter
- Spring Boot - Tomcat Port Number
- Spring Boot - Rest Template
- Spring Boot - File Handling
- Spring Boot - Service Components
- Spring Boot - Thymeleaf
- Consuming RESTful Web Services
- Spring Boot - CORS Support
- Spring Boot - Internationalization
- Spring Boot - Scheduling
- Spring Boot - Enabling HTTPS
- Spring Boot - Eureka Server
- Service Registration with Eureka
- Gateway Proxy Server and Routing
- Spring Cloud Configuration Server
- Spring Cloud Configuration Client
- Spring Boot - Actuator
- Spring Boot - Admin Server
- Spring Boot - Admin Client
- Spring Boot - Enabling Swagger2
- Spring Boot - Using SpringDoc OpenAPI
- Spring Boot - Creating Docker Image
- Tracing Micro Service Logs
- Spring Boot - Flyway Database
- Spring Boot - Sending Email
- Spring Boot - Hystrix
- Spring Boot - Web Socket
- Spring Boot - Batch Service
- Spring Boot - Apache Kafka
- Spring Boot - Twilio
- Spring Boot - Unit Testing
- Rest Controller Unit Testing
- Spring Boot - Database Handling
- Securing Web Applications
- Spring Boot - OAuth2 with JWT
- Spring Boot - Google Cloud Platform
- Spring Boot - Google OAuth2 Sign-In
Spring Boot Resources
Spring Boot - Cloud Configuration Client
Some applications may need configuration properties that may need a change and developers may need to take them down or restart the application to perform this. However, this might be lead to downtime in production and the need of restarting the application. Spring Cloud Configuration Server lets developers to load the new configuration properties without restarting the application and without any downtime.
Example - Working with Spring Cloud Configuration Client
First, download the Spring Boot project from https://start.spring.io/ and choose the Spring Cloud Config Client dependency.
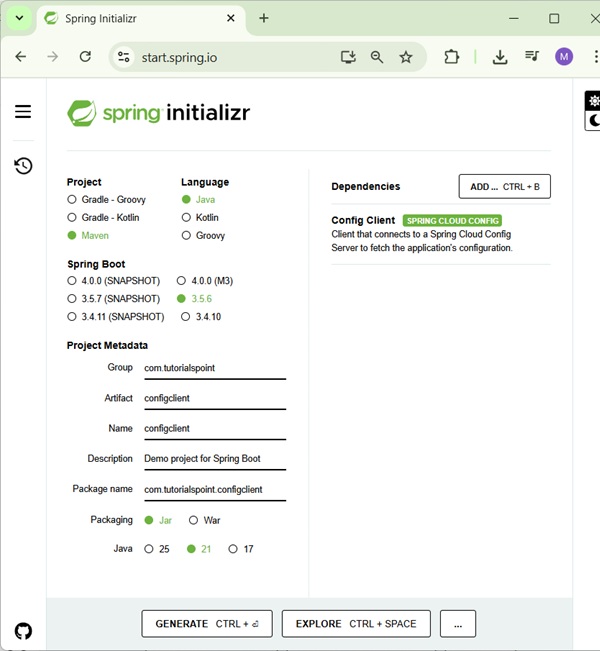
It will add the Spring Cloud Starter Config dependency in your build configuration file.
Maven users can add the following dependency into the pom.xml file.
<dependency>
   <groupId>org.springframework.cloud</groupId>
   <artifactId>spring-cloud-starter-config</artifactId>
</dependency>
Gradle users can add the following dependency into the build.gradle file.
compile('org.springframework.cloud:spring-cloud-starter-config')
Now, you need to add the @RefreshScope annotation to your main Spring Boot application. The @RefreshScope annotation is used to load the configuration properties value from the Config server.
package com.tutorialspoint.configclient;

import org.springframework.boot.SpringApplication;
import org.springframework.boot.autoconfigure.SpringBootApplication;
import org.springframework.cloud.context.config.annotation.RefreshScope;

@SpringBootApplication
@RefreshScope
public class ConfigclientApplication {
   public static void main(String[] args) {
      SpringApplication.run(ConfigclientApplication.class, args);
   }
}
Now, add the config server URL in your application.properties file and provide your application name.
Note − http://localhost:8888 config server should be run before starting the config client application.
application.properties
spring.application.name = config-client
spring.config.import=optional:configserver:http://localhost:8888/
welcome.message=Welcome to Tutorialspoint
The code for writing a simple REST Endpoint to read the welcome message from the configuration server is given below −
ConfigclientApplication.java
package com.tutorialspoint.configclient;

import org.springframework.beans.factory.annotation.Value;
import org.springframework.boot.SpringApplication;
import org.springframework.boot.autoconfigure.SpringBootApplication;
import org.springframework.cloud.context.config.annotation.RefreshScope;
import org.springframework.web.bind.annotation.GetMapping;
import org.springframework.web.bind.annotation.RestController;

@SpringBootApplication
@RefreshScope
@RestController
public class ConfigclientApplication {
   @Value("${welcome.message}")
   String welcomeText;

   public static void main(String[] args) {
      SpringApplication.run(ConfigclientApplication.class, args);
   }
   @GetMapping(value = "/")
   public String welcomeText() {
      return welcomeText;
   }
}
The complete build configuration file is given below −
Maven users can use pom.xml given below −
pom.xml
<?xml version="1.0" encoding="UTF-8"?>
<project xmlns="http://maven.apache.org/POM/4.0.0" xmlns:xsi="http://www.w3.org/2001/XMLSchema-instance"
   xsi:schemaLocation="http://maven.apache.org/POM/4.0.0 https://maven.apache.org/xsd/maven-4.0.0.xsd">
   <modelVersion>4.0.0</modelVersion>
   <parent>
      <groupId>org.springframework.boot</groupId>
      <artifactId>spring-boot-starter-parent</artifactId>
      <version>3.5.6</version>
      <relativePath/> <!-- lookup parent from repository -->
   </parent>
   <groupId>com.tutorialspoint</groupId>
   <artifactId>configclient</artifactId>
   <version>0.0.1-SNAPSHOT</version>
   <name>configserver</name>
   <description>Demo project for Spring Boot</description>
   <url/>
   <licenses>
      <license/>
   </licenses>
   <developers>
      <developer/>
   </developers>
   <scm>
      <connection/>
      <developerConnection/>
      <tag/>
      <url/>
   </scm>
   <properties>
      <java.version>21</java.version>
      <spring-cloud.version>2025.0.0</spring-cloud.version>
   </properties>
   <dependencies>
      <dependency>
         <groupId>org.springframework.cloud</groupId>
         <artifactId>spring-cloud-starter-config</artifactId>
      </dependency>
      <dependency>
         <groupId>org.springframework.boot</groupId>
         <artifactId>spring-boot-starter-test</artifactId>
         <scope>test</scope>
      </dependency>
   </dependencies>
   <dependencyManagement>
      <dependencies>
         <dependency>
            <groupId>org.springframework.cloud</groupId>
            <artifactId>spring-cloud-dependencies</artifactId>
            <version>${spring-cloud.version}</version>
            <type>pom</type>
            <scope>import</scope>
         </dependency>
      </dependencies>
   </dependencyManagement>
   <build>
      <plugins>
         <plugin>
            <groupId>org.springframework.boot</groupId>
            <artifactId>spring-boot-maven-plugin</artifactId>
         </plugin>
      </plugins>
   </build>
</project>
Gradle users can use the build.gradle file given below −
build.gradle
<scope>import</scope>
</dependency>
</dependencies>
buildscript {
   ext {
      springBootVersion = '3.5.6'
   }
   repositories {
      mavenCentral()
   }
   dependencies {
      classpath("org.springframework.boot:spring-boot-gradle-plugin:${springBootVersion}")
   }
}
apply plugin: 'java'
apply plugin: 'eclipse'
apply plugin: 'org.springframework.boot'

group = 'com.tutorialspoint'
version = '0.0.1-SNAPSHOT'
sourceCompatibility = 21

repositories {
   mavenCentral()
}
ext {
   springCloudVersion = '2025.0.0'
}
dependencies {
   compile('org.springframework.cloud:spring-cloud-starter-config')
   testCompile('org.springframework.boot:spring-boot-starter-test')
}
dependencyManagement {
   imports {
      mavenBom "org.springframework.cloud:spring-cloud-dependencies:${springCloudVersion}"
   }
}
Output
You can create an executable JAR file, and run the Spring Boot application by using the following Maven or Gradle commands −
For Maven, you can use the command shown below −
mvn clean install
After "BUILD SUCCESS", you can find the JAR file under the target directory.
For Gradle, you can use the command shown below −
gradle clean build
After "BUILD SUCCESSFUL", you can find the JAR file under the build/libs directory.
Now, run the JAR file by using the command shown here:
java jar <JARFILE>
Now, the application has started on the Tomcat port 8080 as shown here −
. ____ _ __ _ _ /\\ / ___'_ __ _ _(_)_ __ __ _ \ \ \ \ ( ( )\___ | '_ | '_| | '_ \/ _` | \ \ \ \ \\/ ___)| |_)| | | | | || (_| | ) ) ) ) ' |____| .__|_| |_|_| |_\__, | / / / / =========|_|==============|___/=/_/_/_/ :: Spring Boot :: (v3.5.6) 2025-09-29T16:01:00.872+05:30 INFO 10896 --- [config-client] [ main] c.t.c.ConfigclientApplication : Starting ConfigclientApplication using Java 21.0.6 with PID 10896 (D:\Projects\configclient\target\classes started by mahes in D:\Projects\configclient) 2025-09-29T16:01:00.874+05:30 INFO 10896 --- [config-client] [ main] c.t.c.ConfigclientApplication : No active profile set, falling back to 1 default profile: "default" 2025-09-29T16:01:00.943+05:30 INFO 10896 --- [config-client] [ main] o.s.c.c.c.ConfigServerConfigDataLoader : Fetching config from server at : http://localhost:8888/ 2025-09-29T16:01:00.943+05:30 WARN 10896 --- [config-client] [ main] o.s.c.c.c.ConfigServerConfigDataLoader : Could not locate PropertySource ([ConfigServerConfigDataResource@591e58fa uris = array['http://localhost:8888/'], optional = true, profiles = 'default']): 500 on GET request for "http://localhost:8888/config-client/default": "{"timestamp":"2025-09-29T10:31:00.613+00:00","status":500,"error":"Internal Server Error","path":"/config-client/default"}" 2025-09-29T16:01:00.944+05:30 INFO 10896 --- [config-client] [ main] o.s.c.c.c.ConfigServerConfigDataLoader : Fetching config from server at : http://localhost:8888/ 2025-09-29T16:01:00.944+05:30 WARN 10896 --- [config-client] [ main] o.s.c.c.c.ConfigServerConfigDataLoader : Could not locate PropertySource ([ConfigServerConfigDataResource@7876d598 uris = array ['http://localhost:8888/'], optional = true, profiles = 'default']): 500 on GET request for "http://localhost:8888/config-client/default": "{"timestamp":"2025-09-29T10:31:00.667+00:00","status":500,"error":"Internal Server Error","path":"/config-client/default"}" 2025-09-29T16:01:00.944+05:30 INFO 10896 --- [config-client] [ main] o.s.c.c.c.ConfigServerConfigDataLoader : Fetching config from server at : http://localhost:8888/ 2025-09-29T16:01:01.500+05:30 INFO 10896 --- [config-client] [ main] o.s.cloud.context.scope.GenericScope : BeanFactory id=a9bf52a2-341f-30e7-9b8c-8726bab3c6f3 2025-09-29T16:01:01.961+05:30 INFO 10896 --- [config-client] [ main] c.t.c.ConfigclientApplication : Started ConfigclientApplication in 2.058 seconds (process running for 2.722)
You can see the log in console window; config-client application is fetching the configuration from the https://localhost:8888
2025-09-29T16:01:00.944+05:30 INFO 10896 --- [config-client] [ main] o.s.c.c.c.ConfigServerConfigDataLoader : Fetching config from server at : http://localhost:8888/
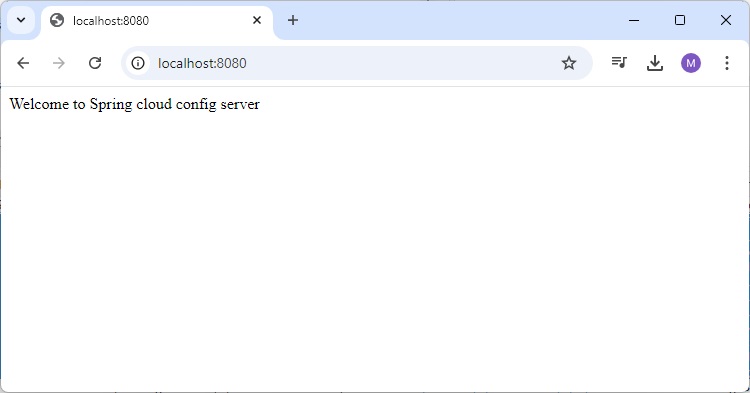
Now hit the URL, http://localhost:8080/ welcome message is loaded from the Configuration server.
Now, go and change the property value on the Configuration server and hit the actuator Endpoint POST URL http://localhost:8080/refresh and see the new configuration property value in the URL http://localhost:8080/
