- Spring Boot - Home
- Spring Boot - Introduction
- Spring Boot - Quick Start using CLI
- Spring Boot - Bootstrapping
- Spring Tool Suite
- Spring Boot - Tomcat Deployment
- Spring Boot - Build Systems
- Spring Boot - Code Structure
- Spring Boot - Beans & Dependency Injection
- Spring Boot - Runners
- Spring Boot - Starters
- Spring Boot - Application Properties
- Spring Boot - Configuration
- Spring Boot - Annotations
- Spring Boot - Logging
- Building RESTful Web Services
- Spring Boot - Exception Handling
- Spring Boot - Interceptor
- Spring Boot - Servlet Filter
- Spring Boot - Tomcat Port Number
- Spring Boot - Rest Template
- Spring Boot - File Handling
- Spring Boot - Service Components
- Spring Boot - Thymeleaf
- Consuming RESTful Web Services
- Spring Boot - CORS Support
- Spring Boot - Internationalization
- Spring Boot - Scheduling
- Spring Boot - Enabling HTTPS
- Spring Boot - Eureka Server
- Service Registration with Eureka
- Gateway Proxy Server and Routing
- Spring Cloud Configuration Server
- Spring Cloud Configuration Client
- Spring Boot - Actuator
- Spring Boot - Admin Server
- Spring Boot - Admin Client
- Spring Boot - Enabling Swagger2
- Spring Boot - Using SpringDoc OpenAPI
- Spring Boot - Creating Docker Image
- Tracing Micro Service Logs
- Spring Boot - Flyway Database
- Spring Boot - Sending Email
- Spring Boot - Hystrix
- Spring Boot - Web Socket
- Spring Boot - Batch Service
- Spring Boot - Apache Kafka
- Spring Boot - Twilio
- Spring Boot - Unit Testing
- Rest Controller Unit Testing
- Spring Boot - Database Handling
- Securing Web Applications
- Spring Boot - OAuth2 with JWT
- Spring Boot - Google Cloud Platform
- Spring Boot - Google OAuth2 Sign-In
Spring Boot Resources
Spring Boot - Securing Web Applications
If a Spring Boot Security dependency is added on the classpath, Spring Boot application automatically requires the Basic Authentication for all HTTP Endpoints. The Endpoint / and /home does not require any authentication. All other Endpoints require authentication.
For adding a Spring Boot Security to your Spring Boot application, we need to add the Spring Boot Starter Security dependency in our build configuration file.
Maven users can add the following dependency in the pom.xml file.
<dependency>
   <groupId>org.springframework.boot</groupId>
   <artifactId>spring-boot-starter-security</artifactId>
</dependency>
Gradle users can add the following dependency in the build.gradle file.
compile("org.springframework.boot:spring-boot-starter-security")
Example - Securing a Web application
First, create an unsecure web application by using Thymeleaf templates.
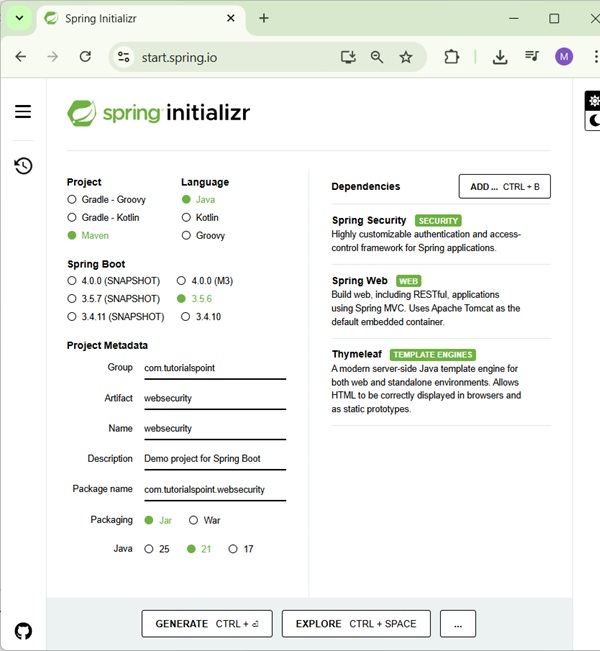
Download the Spring Boot project from Spring Initializer page www.start.spring.io and choose the following dependencies −
Spring Web
Spring Security
Thymeleaf
Then, create a home.html file under src/main/resources/templates directory.
home.html
<!DOCTYPE html>
<html xmlns = "http://www.w3.org/1999/xhtml"
   xmlns:th = "http://www.thymeleaf.org"
   xmlns:sec = "http://www.thymeleaf.org/thymeleaf-extras-springsecurity6">

   <head>
      <title>Spring Security Example</title>
   </head>
   <body>
      <h1>Welcome!</h1>
      <p>Click <a th:href = "@{/hello}">here</a> to see a greeting.</p>
   </body>

</html>
The simple view /hello defined in the HTML file by using Thymeleaf templates.
Now, create a hello.html under src/main/resources/templates directory.
hello.html
<!DOCTYPE html>
<html xmlns = "http://www.w3.org/1999/xhtml"
   xmlns:th = "http://www.thymeleaf.org"
   xmlns:sec = "http://www.thymeleaf.org/thymeleaf-extras-springsecurity6">

   <head>
      <title>Hello World!</title>
   </head>
   <body>
      <h1>Hello world!</h1>
   </body>

</html>
Now, we need to setup the Spring MVC View controller for home and hello views.
For this, create a ViewsController class.
ViewsController.java
package com.tutorialspoint.websecurity;

import org.springframework.stereotype.Controller;
import org.springframework.web.bind.annotation.GetMapping;

@Controller
public class ViewsController {

   @GetMapping("/hello")
   public String hello() {
      return "hello";
   }
   @GetMapping("/home")
   public String home() {
      return "home";
   }
   @GetMapping("/")
   public String index() {
      return "hello";
   }
   @GetMapping("/login")
   public String login() {
      return "login";
   }
}
Now, create a Web Security Configuration file, that is used to secure your application to access the HTTP Endpoints by using basic authentication.
WebSecurityConfig.java
package com.tutorialspoint.websecurity;

import org.springframework.context.annotation.Bean;
import org.springframework.context.annotation.Configuration;
import org.springframework.security.config.annotation.web.builders.HttpSecurity;
import org.springframework.security.config.annotation.web.configuration.EnableWebSecurity;
import org.springframework.security.config.annotation.web.configurers.AbstractHttpConfigurer;
import org.springframework.security.core.userdetails.User;
import org.springframework.security.core.userdetails.UserDetails;
import org.springframework.security.core.userdetails.UserDetailsService;
import org.springframework.security.crypto.bcrypt.BCryptPasswordEncoder;
import org.springframework.security.crypto.password.PasswordEncoder;
import org.springframework.security.provisioning.InMemoryUserDetailsManager;
import org.springframework.security.web.SecurityFilterChain;

@Configuration
@EnableWebSecurity
public class WebSecurityConfig {

   @Bean
   protected UserDetailsService userDetailsService() {
      UserDetails user = User.builder()
         .username("user")
         .password(passwordEncoder().encode("password"))
         .roles("USER")
         .build();
      return new InMemoryUserDetailsManager(user);
   }
   @Bean
   protected PasswordEncoder passwordEncoder() {
      return new BCryptPasswordEncoder();
   }

   @Bean
   protected SecurityFilterChain filterChain(HttpSecurity http) throws Exception {
      return http
         .csrf(AbstractHttpConfigurer::disable)
         .authorizeHttpRequests(
            request -> request
               .requestMatchers("/").permitAll()
               .requestMatchers("/home").permitAll()
               .anyRequest().authenticated()
         )
         .formLogin(form -> form
            .loginPage("/login")
            .permitAll())
         .logout(config -> config
            .logoutSuccessUrl("/login"))
         .build();
   }
}
Now, create a login.html file under the src/main/resources/templates directory to allow the user to access the HTTP Endpoint via login screen.
login.html
<!DOCTYPE html>
<html xmlns = "http://www.w3.org/1999/xhtml" xmlns:th = "http://www.thymeleaf.org"
   xmlns:sec = "http://www.thymeleaf.org/thymeleaf-extras-springsecurity6">

   <head>
      <title>Spring Security Example </title>
   </head>
   <body>
      <div th:if = "${param.error}">
         Invalid username and password.
      </div>
      <div th:if = "${param.logout}">
         You have been logged out.
      </div>

      <form th:action = "@{/login}" method = "post">
         <div>
            <label> User Name : <input type = "text" name = "username"/> </label>
         </div>
         <div>
            <label> Password: <input type = "password" name = "password"/> </label>
         </div>
         <div>
            <input type = "submit" value = "Sign In"/>
         </div>
      </form>

   </body>
</html>
Finally, update the hello.html file to allow the user to Sign-out from the application and display the current username as shown below −
hello.html
<!DOCTYPE html>
<html xmlns = "http://www.w3.org/1999/xhtml" xmlns:th = "http://www.thymeleaf.org"
   xmlns:sec = "http://www.thymeleaf.org/thymeleaf-extras-springsecurity6">

   <head>
      <title>Hello World!</title>
   </head>
   <body>
      <h1 th:inline="text">Hello <span sec:authentication="name"></span>!</h1>
      <form th:action = "@{/logout}" method = "post">
         <input type = "submit" value = "Sign Out"/>
      </form>
   </body>

</html>
The code for main Spring Boot application is given below −
WebsecurityApplication.java
package com.tutorialspoint.websecurity;

import org.springframework.boot.SpringApplication;
import org.springframework.boot.autoconfigure.SpringBootApplication;

@SpringBootApplication
public class WebsecurityApplication {
   public static void main(String[] args) {
      SpringApplication.run(WebsecurityDemoApplication.class, args);
   }
}
The complete code for build configuration file is given below.
Maven - pom.xml
<?xml version="1.0" encoding="UTF-8"?>
<project xmlns="http://maven.apache.org/POM/4.0.0" xmlns:xsi="http://www.w3.org/2001/XMLSchema-instance"
   xsi:schemaLocation="http://maven.apache.org/POM/4.0.0 https://maven.apache.org/xsd/maven-4.0.0.xsd">
   <modelVersion>4.0.0</modelVersion>
   <parent>
      <groupId>org.springframework.boot</groupId>
      <artifactId>spring-boot-starter-parent</artifactId>
      <version>3.5.6</version>
      <relativePath/> <!-- lookup parent from repository -->
   </parent>
   <groupId>com.tutorialspoint</groupId>
   <artifactId>websecurity</artifactId>
   <version>0.0.1-SNAPSHOT</version>
   <name>websecurity</name>
   <description>Demo project for Spring Boot</description>
   <url/>
   <licenses>
      <license/>
   </licenses>
   <developers>
      <developer/>
   </developers>
   <scm>
      <connection/>
      <developerConnection/>
      <tag/>
      <url/>
   </scm>
   <properties>
      <java.version>21</java.version>
   </properties>
   <dependencies>
      <dependency>
         <groupId>org.springframework.boot</groupId>
         <artifactId>spring-boot-starter-security</artifactId>
      </dependency>
      <dependency>
         <groupId>org.springframework.boot</groupId>
         <artifactId>spring-boot-starter-thymeleaf</artifactId>
      </dependency>
      <dependency>
         <groupId>org.springframework.boot</groupId>
         <artifactId>spring-boot-starter-web</artifactId>
      </dependency>
      <dependency>
         <groupId>org.thymeleaf.extras</groupId>
         <artifactId>thymeleaf-extras-springsecurity6</artifactId>
      </dependency>
      <dependency>
         <groupId>org.springframework.boot</groupId>
         <artifactId>spring-boot-starter-test</artifactId>
         <scope>test</scope>
      </dependency>
      <dependency>
         <groupId>org.springframework.security</groupId>
         <artifactId>spring-security-test</artifactId>
         <scope>test</scope>
      </dependency>
   </dependencies>
   <build>
      <plugins>
         <plugin>
            <groupId>org.springframework.boot</groupId>
            <artifactId>spring-boot-maven-plugin</artifactId>
         </plugin>
      </plugins>
   </build>
</project>
Gradle build.gradle
buildscript {
   ext {
      springBootVersion = '3.5.6'
   }
   repositories {
      mavenCentral()
   }
   dependencies {
      classpath("org.springframework.boot:spring-boot-gradle-plugin:${springBootVersion}")
   }
}

apply plugin: 'java'
apply plugin: 'eclipse'
apply plugin: 'org.springframework.boot'

group = 'com.tutorialspoint'
version = '0.0.1-SNAPSHOT'
sourceCompatibility = 21

repositories {
   mavenCentral()
}
dependencies {
   compile('org.springframework.boot:spring-boot-starter-security')
   compile('org.springframework.boot:spring-boot-starter-thymeleaf')
   compile('org.springframework.boot:spring-boot-starter-web')

   testCompile('org.springframework.boot:spring-boot-starter-test')
   testCompile('org.springframework.security:spring-security-test')
}
Compilation and Execution
Now, create an executable JAR file, and run the Spring Boot application by using the following Maven or Gradle commands.
Maven users can use the command as given below −
mvn clean install
After BUILD SUCCESS, you can find the JAR file under target directory.
Gradle users can use the command as shown −
gradle clean build
After BUILD SUCCESSFUL, you can find the JAR file under the build/libs directory.
Now, run the JAR file by using the command shown below −
java jar <JARFILE>
You can see that the application has started on the Tomcat port 8080.
  .   ____          _            __ _ _
 /\\ / ___'_ __ _ _(_)_ __  __ _ \ \ \ \
( ( )\___ | '_ | '_| | '_ \/ _` | \ \ \ \
 \\/  ___)| |_)| | | | | || (_| |  ) ) ) )
  '  |____| .__|_| |_|_| |_\__, | / / / /
 =========|_|==============|___/=/_/_/_/

 :: Spring Boot ::                (v3.5.6)

2025-09-30T12:37:55.632+05:30  INFO 39760 --- [websecurity] [           main] c.t.websecurity.WebsecurityApplication   : Starting WebsecurityApplication using Java 21.0.6 with PID 39760 (D:\Projects\websecurity\target\classes started by mahes in D:\Projects\websecurity)
2025-09-30T12:37:55.637+05:30  INFO 39760 --- [websecurity] [           main] c.t.websecurity.WebsecurityApplication   : No active profile set, falling back to 1 default profile: "default"
2025-09-30T12:37:56.969+05:30  INFO 39760 --- [websecurity] [           main] o.s.b.w.embedded.tomcat.TomcatWebServer  : Tomcat initialized with port 8080 (http)
2025-09-30T12:37:56.985+05:30  INFO 39760 --- [websecurity] [           main] o.apache.catalina.core.StandardService   : Starting service [Tomcat]
2025-09-30T12:37:56.986+05:30  INFO 39760 --- [websecurity] [           main] o.apache.catalina.core.StandardEngine    : Starting Servlet engine: [Apache Tomcat/10.1.46]
2025-09-30T12:37:57.043+05:30  INFO 39760 --- [websecurity] [           main] o.a.c.c.C.[Tomcat].[localhost].[/]       : Initializing Spring embedded WebApplicationContext
2025-09-30T12:37:57.045+05:30  INFO 39760 --- [websecurity] [           main] w.s.c.ServletWebServerApplicationContext : Root WebApplicationContext: initialization completed in 1325 ms
2025-09-30T12:37:57.472+05:30  INFO 39760 --- [websecurity] [           main] r$InitializeUserDetailsManagerConfigurer : Global AuthenticationManager configured with UserDetailsService bean with name userDetailsService
2025-09-30T12:37:57.761+05:30  INFO 39760 --- [websecurity] [           main] o.s.b.w.embedded.tomcat.TomcatWebServer  : Tomcat started on port 8080 (http) with context path '/'
2025-09-30T12:37:57.778+05:30  INFO 39760 --- [websecurity] [           main] c.t.websecurity.WebsecurityApplication   : Started WebsecurityApplication in 2.638 seconds (process running for 2.99)
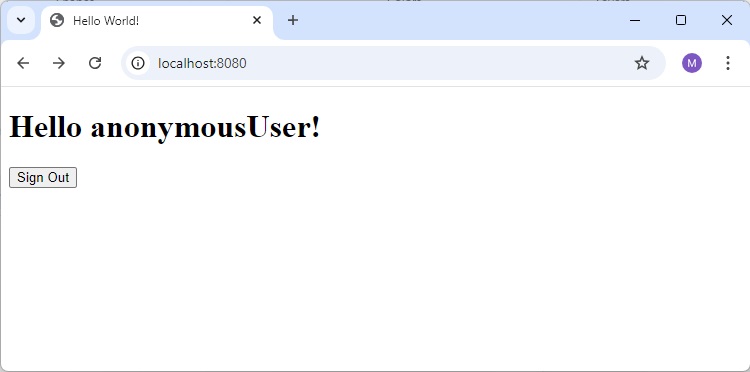
Hit the URL http://localhost:8080/ in your web browser. You can see the output as shown.
Login Page
Click on Signout button
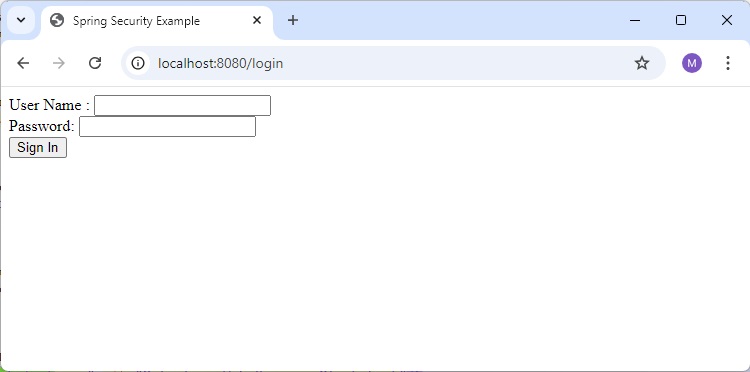
Login
Login using user/password and see the home page.
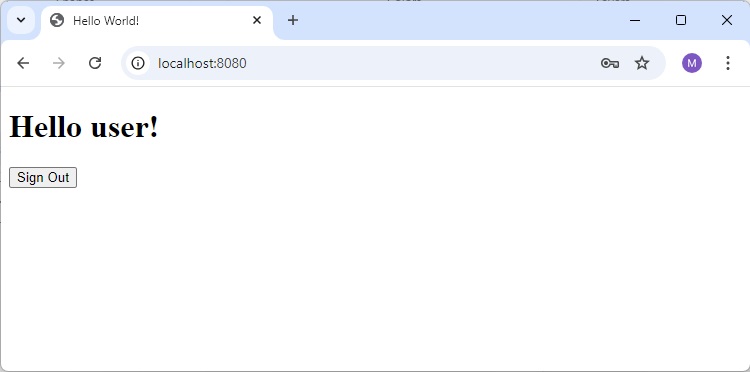
Logged Out
Click on signout button.
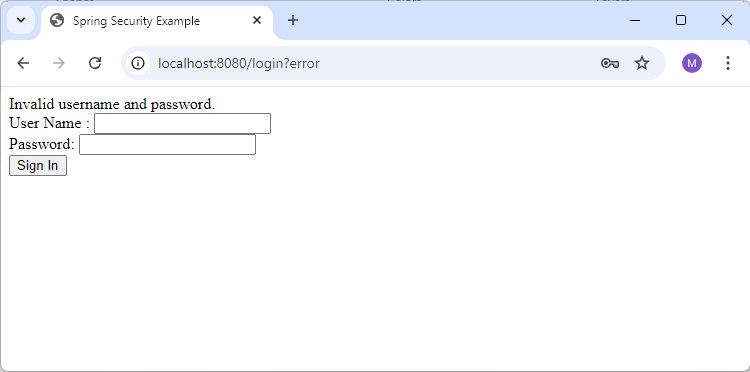
Invalid Username Password
Try login with invalid username/password.