- Spring Boot - Home
- Spring Boot - Introduction
- Spring Boot - Quick Start using CLI
- Spring Boot - Bootstrapping
- Spring Tool Suite
- Spring Boot - Tomcat Deployment
- Spring Boot - Build Systems
- Spring Boot - Code Structure
- Spring Boot - Beans & Dependency Injection
- Spring Boot - Runners
- Spring Boot - Starters
- Spring Boot - Application Properties
- Spring Boot - Configuration
- Spring Boot - Annotations
- Spring Boot - Logging
- Building RESTful Web Services
- Spring Boot - Exception Handling
- Spring Boot - Interceptor
- Spring Boot - Servlet Filter
- Spring Boot - Tomcat Port Number
- Spring Boot - Rest Template
- Spring Boot - File Handling
- Spring Boot - Service Components
- Spring Boot - Thymeleaf
- Consuming RESTful Web Services
- Spring Boot - CORS Support
- Spring Boot - Internationalization
- Spring Boot - Scheduling
- Spring Boot - Enabling HTTPS
- Spring Boot - Eureka Server
- Service Registration with Eureka
- Gateway Proxy Server and Routing
- Spring Cloud Configuration Server
- Spring Cloud Configuration Client
- Spring Boot - Actuator
- Spring Boot - Admin Server
- Spring Boot - Admin Client
- Spring Boot - Enabling Swagger2
- Spring Boot - Using SpringDoc OpenAPI
- Spring Boot - Creating Docker Image
- Tracing Micro Service Logs
- Spring Boot - Flyway Database
- Spring Boot - Sending Email
- Spring Boot - Hystrix
- Spring Boot - Web Socket
- Spring Boot - Batch Service
- Spring Boot - Apache Kafka
- Spring Boot - Twilio
- Spring Boot - Unit Testing
- Rest Controller Unit Testing
- Spring Boot - Database Handling
- Securing Web Applications
- Spring Boot - OAuth2 with JWT
- Spring Boot - Google Cloud Platform
- Spring Boot - Google OAuth2 Sign-In
Spring Boot Resources
Spring Boot - Batch Service
Batch Service is a process to execute more than one command in a single task. In this chapter, you are going to learn how to create batch service in a Spring Boot application.
Let us consider an example where we are going to save the CSV file content into MySql.
To create a Batch Service program, we need to add the Spring Boot Starter Batch, MySQL and Spring Data JPA dependency in our build configuration file.
Maven users can add the following dependencies in pom.xml file.
<dependency>
   <groupId>org.springframework.boot</groupId>
   <artifactId>spring-boot-starter-batch</artifactId>
</dependency>
<dependency>
   <groupId>com.mysql</groupId>
   <artifactId>mysql-connector-j</artifactId>
</dependency>
<dependency>
   <groupId>org.springframework.boot</groupId>
   <artifactId>spring-boot-starter-data-jpa</artifactId>
</dependency>
Gradle users can add the following dependencies in build.gradle file.
compile("org.springframework.boot:spring-boot-starter-batch")
compile("org.springframework.boot:spring-boot-starter-data-jpa")
compile("com.mysql:mysql-connector-j")
Example - Usage of Batch Service in Spring Boot
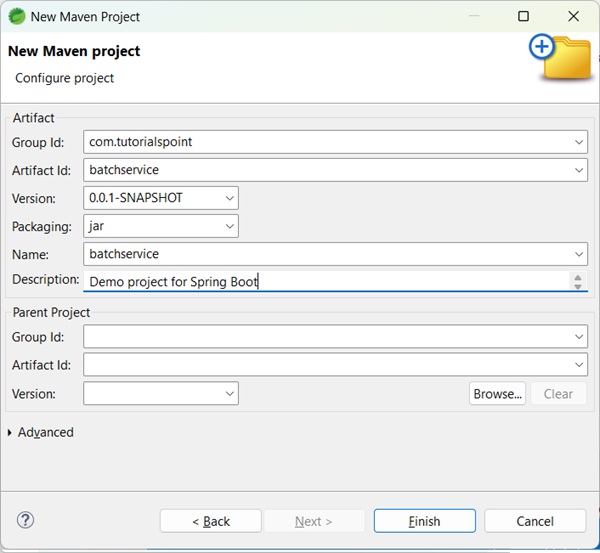
Create a Maven based project with groupid as com.tutorialspoint, artifactid as batchservice.
Update the pom.xml as shown below −
pom.xml
<?xml version="1.0" encoding="UTF-8"?>
<project xmlns="http://maven.apache.org/POM/4.0.0" xmlns:xsi="http://www.w3.org/2001/XMLSchema-instance"
   xsi:schemaLocation="http://maven.apache.org/POM/4.0.0 https://maven.apache.org/xsd/maven-4.0.0.xsd">
   <modelVersion>4.0.0</modelVersion>
   <parent>
      <groupId>org.springframework.boot</groupId>
      <artifactId>spring-boot-starter-parent</artifactId>
      <version>3.5.6</version>
      <relativePath/> <!-- lookup parent from repository -->
   </parent>
   <groupId>com.tutorialspoint</groupId>
   <artifactId>batchservice</artifactId>
   <version>0.0.1-SNAPSHOT</version>
   <name>batchservice</name>
   <description>Demo project for Spring Boot</description>
   <url/>
   <licenses>
      <license/>
   </licenses>
   <developers>
      <developer/>
   </developers>
   <scm>
      <connection/>
      <developerConnection/>
      <tag/>
      <url/>
   </scm>
   <properties>
      <java.version>21</java.version>
   </properties>
   <dependencies>
      <dependency>
         <groupId>org.springframework.boot</groupId>
         <artifactId>spring-boot-starter-batch</artifactId>
      </dependency>
      <dependency>
         <groupId>org.springframework.boot</groupId>
         <artifactId>spring-boot-starter-data-jpa</artifactId>
      </dependency>
      <dependency>
         <groupId>com.mysql</groupId>
         <artifactId>mysql-connector-j</artifactId>
         <scope>runtime</scope>
      </dependency>
      <dependency>
         <groupId>org.springframework.boot</groupId>
         <artifactId>spring-boot-starter-test</artifactId>
         <scope>test</scope>
      </dependency>
      <dependency>
         <groupId>org.springframework.batch</groupId>
         <artifactId>spring-batch-test</artifactId>
         <scope>test</scope>
      </dependency>
   </dependencies>
   <build>
      <plugins>
         <plugin>
            <groupId>org.springframework.boot</groupId>
            <artifactId>spring-boot-maven-plugin</artifactId>
         </plugin>
      </plugins>
   </build>
</project>
Now, add the simple CSV data file under classpath resources src/main/resources and name the file as report.csv as shown −
report.csv
William,John
Mike, Sebastian
Lawarance, Lime
Kumar, Mahesh
Goswami, Saikat
Khan, Jaid
Kaur, Manpreet
Create a POJO class for USERS model as shown −
User.java
package com.tutorialspoint.batchservice.model;

import jakarta.persistence.Entity;
import jakarta.persistence.GeneratedValue;
import jakarta.persistence.Id;

@Entity
public class User {

   @Id
   @GeneratedValue
   private Long id;

   private String lastName;
   private String firstName;

   public User() {
   }
   public User(String firstName, String lastName) {
      this.firstName = firstName;
      this.lastName = lastName;
   }
   public void setFirstName(String firstName) {
      this.firstName = firstName;
   }
   public String getFirstName() {
      return firstName;
   }
   public String getLastName() {
      return lastName;
   }
   public void setLastName(String lastName) {
      this.lastName = lastName;
   }

   @Override
   public String toString() {
      return "firstName: " + firstName + ", lastName: " + lastName;
   }
}
Now, create an intermediate processor to do the operations after the reading the data from the CSV file and before writing the data into SQL.
UserItemProcessor.java
package com.tutorialspoint.batchservice.processor;

import org.slf4j.Logger;
import org.slf4j.LoggerFactory;
import org.springframework.batch.item.ItemProcessor;

import com.tutorialspoint.batchservice.model.User;

public class UserItemProcessor implements ItemProcessor<User, User> {
   private static final Logger log = LoggerFactory.getLogger(UserItemProcessor.class);

   @Override
   public User process(final User user) throws Exception {
      final String firstName = user.getFirstName().toUpperCase();
      final String lastName = user.getLastName().toUpperCase();
      final User transformedPerson = new User(firstName, lastName);

      log.info("Converting (" + user + ") into (" + transformedPerson + ")");
      return transformedPerson;
   }
}
Let us create a Batch configuration file, to read the data from CSV and write into the Database as shown below.
BatchConfiguration.java
package com.tutorialspoint.batchservice.configuration;

import org.springframework.batch.core.Job;
import org.springframework.batch.core.JobExecutionListener;
import org.springframework.batch.core.Step;
import org.springframework.batch.core.configuration.annotation.StepScope;
import org.springframework.batch.core.job.builder.JobBuilder;
import org.springframework.batch.core.launch.support.RunIdIncrementer;
import org.springframework.batch.core.repository.JobRepository;
import org.springframework.batch.core.step.builder.StepBuilder;
import org.springframework.batch.item.ItemWriter;
import org.springframework.batch.item.file.FlatFileItemReader;
import org.springframework.batch.item.file.mapping.BeanWrapperFieldSetMapper;
import org.springframework.batch.item.file.mapping.DefaultLineMapper;
import org.springframework.batch.item.file.transform.DelimitedLineTokenizer;
import org.springframework.beans.factory.annotation.Autowired;
import org.springframework.context.annotation.Bean;
import org.springframework.context.annotation.Configuration;
import org.springframework.core.io.ClassPathResource;
import org.springframework.transaction.PlatformTransactionManager;

import com.tutorialspoint.batchservice.listener.UserListener;
import com.tutorialspoint.batchservice.model.User;
import com.tutorialspoint.batchservice.processor.UserItemProcessor;
import com.tutorialspoint.batchservice.repository.UserRepository;

@Configuration
public class BatchConfiguration {

   @Bean
   FlatFileItemReader<User> reader() {

      FlatFileItemReader<User> reader= new FlatFileItemReader<>();
      reader.setResource(new ClassPathResource("/report.csv"));

      reader.setLineMapper(new DefaultLineMapper<>() {{
         setLineTokenizer(new DelimitedLineTokenizer() {{
            setDelimiter(DELIMITER_COMMA);
            setNames("lastName","firstName");
         }});

         setFieldSetMapper(new BeanWrapperFieldSetMapper<>() {{
            setTargetType(User.class);
         }});
      }});
      return reader;
   }

   @Autowired
   UserRepository repository;

   @Bean
   ItemWriter<User> writer(){
      return users -> {
         System.out.println("Saving User: " +users);
         repository.saveAll(users);
      };
   }

   @Bean
   public JobExecutionListener listener() {
      return new UserListener();
   }

   @Bean
   Job importUserJob(JobRepository jobRepository, Step step1) {
      return new JobBuilder("importUserJob", jobRepository)
         .incrementer(new RunIdIncrementer())
         .listener(listener())
         .start(step1)
         .build();
   }

   @Bean
   Step step1(JobRepository jobRepository, PlatformTransactionManager transactionManager) {
      return new StepBuilder("step1", jobRepository)
         .<User, User>chunk(100, transactionManager)
         .reader(reader())
         .processor(userProcessor())
         .writer(writer())
         .build();
   }

   @Bean
   @StepScope
   UserItemProcessor userProcessor() {
      return new UserItemProcessor();
   }
}
The reader() method is used to read the data from the CSV file and writer() method is used to write a data into the Database.
Next, we will have to write a Job Completion Notification Listener class used to notify after the Job completion.
UserListener.java
package com.tutorialspoint.batchservice.listener;

import org.springframework.batch.core.JobExecution;
import org.springframework.batch.core.JobExecutionListener;

public class UserListener implements JobExecutionListener{

   @Override
   public void beforeJob(JobExecution jobExecution) {
      System.out.println("Job Started: "+ jobExecution.getStartTime()
         + ", Status: " + jobExecution.getStatus());
   }

   @Override
   public void afterJob(JobExecution jobExecution) {
      System.out.println("Job Started: "+ jobExecution.getStartTime()
         + ", Status: " + jobExecution.getStatus());
   }
}
We will have to write a Repository which will save users to the database.
UserRepository.java
package com.tutorialspoint.batchservice.repository;

import org.springframework.data.jpa.repository.JpaRepository;
import com.tutorialspoint.batchservice.model.User;

public interface UserRepository extends JpaRepository<User, Long> {
}
Main Spring Boot Application class.
BatchserviceApplication.java
package com.tutorialspoint.batchservice;

import org.springframework.boot.SpringApplication;
import org.springframework.boot.autoconfigure.SpringBootApplication;

@SpringBootApplication()
public class BatchserviceApplication {

   public static void main(String[] args) {
      SpringApplication.run(BatchserviceApplication.class, args);
   }
}
application.properties
spring.application.name=batchservice
#Database Connection
spring.datasource.driver-class-name=com.mysql.cj.jdbc.Driver
spring.datasource.url=jdbc:mysql://localhost:3306/details
spring.datasource.username=guest
spring.datasource.password=guest123

spring.jpa.show-sql=true
spring.jpa.hibernate.ddl-auto=create

spring.batch.jdbc.initialize-schema=always
Output
Now, create an executable JAR file, and run the Spring Boot application by using the following Maven or Gradle commands.
For Maven, use the command as shown −
mvn clean install
After BUILD SUCCESS, you can find the JAR file under the target directory.
For Gradle, you can use the command as shown −
gradle clean build
After BUILD SUCCESSFUL, you can find the JAR file under the build/libs directory.
Run the JAR file by using the command given here −
java jar <JARFILE>
You can see the output in console window as shown −
  .   ____          _            __ _ _
 /\\ / ___'_ __ _ _(_)_ __  __ _ \ \ \ \
( ( )\___ | '_ | '_| | '_ \/ _` | \ \ \ \
 \\/  ___)| |_)| | | | | || (_| |  ) ) ) )
  '  |____| .__|_| |_|_| |_\__, | / / / /
 =========|_|==============|___/=/_/_/_/

 :: Spring Boot ::                (v3.5.6)

2025-09-30T10:42:52.295+05:30  INFO 2232 --- [batchservice] [           main] c.t.b.BatchserviceApplication            : Starting BatchserviceApplication using Java 21.0.6 with PID 2232 (D:\workspace\batchservice\target\classes started by mahes in D:\workspace\batchservice)
2025-09-30T10:42:52.297+05:30  INFO 2232 --- [batchservice] [           main] c.t.b.BatchserviceApplication            : No active profile set, falling back to 1 default profile: "default"
2025-09-30T10:42:53.216+05:30  INFO 2232 --- [batchservice] [           main] .s.d.r.c.RepositoryConfigurationDelegate : Bootstrapping Spring Data JPA repositories in DEFAULT mode.
2025-09-30T10:42:53.353+05:30  INFO 2232 --- [batchservice] [           main] .s.d.r.c.RepositoryConfigurationDelegate : Finished Spring Data repository scanning in 117 ms. Found 1 JPA repository interface.
2025-09-30T10:42:53.789+05:30  INFO 2232 --- [batchservice] [           main] com.zaxxer.hikari.HikariDataSource       : HikariPool-1 - Starting...
2025-09-30T10:42:54.404+05:30  INFO 2232 --- [batchservice] [           main] com.zaxxer.hikari.pool.HikariPool        : HikariPool-1 - Added connection com.mysql.cj.jdbc.ConnectionImpl@4afbb6c2
2025-09-30T10:42:54.405+05:30  INFO 2232 --- [batchservice] [           main] com.zaxxer.hikari.HikariDataSource       : HikariPool-1 - Start completed.
2025-09-30T10:42:55.074+05:30  INFO 2232 --- [batchservice] [           main] o.hibernate.jpa.internal.util.LogHelper  : HHH000204: Processing PersistenceUnitInfo [name: default]
2025-09-30T10:42:55.151+05:30  INFO 2232 --- [batchservice] [           main] org.hibernate.Version                    : HHH000412: Hibernate ORM core version 6.6.29.Final
2025-09-30T10:42:55.197+05:30  INFO 2232 --- [batchservice] [           main] o.h.c.internal.RegionFactoryInitiator    : HHH000026: Second-level cache disabled
2025-09-30T10:42:55.543+05:30  INFO 2232 --- [batchservice] [           main] o.s.o.j.p.SpringPersistenceUnitInfo      : No LoadTimeWeaver setup: ignoring JPA class transformer
2025-09-30T10:42:55.693+05:30  INFO 2232 --- [batchservice] [           main] org.hibernate.orm.connections.pooling    : HHH10001005: Database info:
	Database JDBC URL [Connecting through datasource 'HikariDataSource (HikariPool-1)']
	Database driver: undefined/unknown
	Database version: 8.0.43
	Autocommit mode: undefined/unknown
	Isolation level: undefined/unknown
	Minimum pool size: undefined/unknown
	Maximum pool size: undefined/unknown
2025-09-30T10:42:56.539+05:30  INFO 2232 --- [batchservice] [           main] o.h.e.t.j.p.i.JtaPlatformInitiator       : HHH000489: No JTA platform available (set 'hibernate.transaction.jta.platform' to enable JTA platform integration)
Hibernate: drop table if exists user
Hibernate: drop table if exists user_seq
Hibernate: create table user (id bigint not null, first_name varchar(255), last_name varchar(255), primary key (id)) engine=InnoDB
Hibernate: create table user_seq (next_val bigint) engine=InnoDB
Hibernate: insert into user_seq values ( 1 )
2025-09-30T10:42:56.673+05:30  INFO 2232 --- [batchservice] [           main] j.LocalContainerEntityManagerFactoryBean : Initialized JPA EntityManagerFactory for persistence unit 'default'
2025-09-30T10:42:57.332+05:30  INFO 2232 --- [batchservice] [           main] c.t.b.BatchserviceApplication            : Started BatchserviceApplication in 5.702 seconds (process running for 6.189)
2025-09-30T10:42:57.339+05:30  INFO 2232 --- [batchservice] [           main] o.s.b.a.b.JobLauncherApplicationRunner   : Running default command line with: []
2025-09-30T10:42:57.507+05:30  INFO 2232 --- [batchservice] [           main] o.s.b.c.l.s.TaskExecutorJobLauncher      : Job: [SimpleJob: [name=importUserJob]] launched with the following parameters: [{'run.id':'{value=1, type=class java.lang.Long, identifying=true}'}]
Job Started: 2025-09-30T10:42:57.514874100, Status: STARTED
2025-09-30T10:42:57.552+05:30  INFO 2232 --- [batchservice] [           main] o.s.batch.core.job.SimpleStepHandler     : Executing step: [step1]
2025-09-30T10:42:57.592+05:30  INFO 2232 --- [batchservice] [           main] c.t.b.processor.UserItemProcessor        : Converting (firstName: John, lastName: William) into (firstName: JOHN, lastName: WILLIAM)
2025-09-30T10:42:57.593+05:30  INFO 2232 --- [batchservice] [           main] c.t.b.processor.UserItemProcessor        : Converting (firstName: Sebastian, lastName: Mike) into (firstName: SEBASTIAN, lastName: MIKE)
2025-09-30T10:42:57.593+05:30  INFO 2232 --- [batchservice] [           main] c.t.b.processor.UserItemProcessor        : Converting (firstName: Lime, lastName: Lawarance) into (firstName: LIME, lastName: LAWARANCE)
2025-09-30T10:42:57.593+05:30  INFO 2232 --- [batchservice] [           main] c.t.b.processor.UserItemProcessor        : Converting (firstName: Mahesh, lastName: Kumar) into (firstName: MAHESH, lastName: KUMAR)
2025-09-30T10:42:57.593+05:30  INFO 2232 --- [batchservice] [           main] c.t.b.processor.UserItemProcessor        : Converting (firstName: Saikat, lastName: Goswami) into (firstName: SAIKAT, lastName: GOSWAMI)
2025-09-30T10:42:57.593+05:30  INFO 2232 --- [batchservice] [           main] c.t.b.processor.UserItemProcessor        : Converting (firstName: Jaid, lastName: Khan) into (firstName: JAID, lastName: KHAN)
2025-09-30T10:42:57.593+05:30  INFO 2232 --- [batchservice] [           main] c.t.b.processor.UserItemProcessor        : Converting (firstName: Manpreet, lastName: Kaur) into (firstName: MANPREET, lastName: KAUR)
Saving User: [items=[firstName: JOHN, lastName: WILLIAM, firstName: SEBASTIAN, lastName: MIKE, firstName: LIME, lastName: LAWARANCE, firstName: MAHESH, lastName: KUMAR, firstName: SAIKAT, lastName: GOSWAMI, firstName: JAID, lastName: KHAN, firstName: MANPREET, lastName: KAUR], skips=[]]
Hibernate: select next_val as id_val from user_seq for update
Hibernate: update user_seq set next_val= ? where next_val=?
Hibernate: select next_val as id_val from user_seq for update
Hibernate: update user_seq set next_val= ? where next_val=?
Hibernate: insert into user (first_name,last_name,id) values (?,?,?)
Hibernate: insert into user (first_name,last_name,id) values (?,?,?)
Hibernate: insert into user (first_name,last_name,id) values (?,?,?)
Hibernate: insert into user (first_name,last_name,id) values (?,?,?)
Hibernate: insert into user (first_name,last_name,id) values (?,?,?)
Hibernate: insert into user (first_name,last_name,id) values (?,?,?)
Hibernate: insert into user (first_name,last_name,id) values (?,?,?)
2025-09-30T10:42:57.673+05:30  INFO 2232 --- [batchservice] [           main] o.s.batch.core.step.AbstractStep         : Step: [step1] executed in 121ms
Job Started: 2025-09-30T10:42:57.514874100, Status: COMPLETED
2025-09-30T10:42:57.699+05:30  INFO 2232 --- [batchservice] [           main] o.s.b.c.l.s.TaskExecutorJobLauncher      : Job: [SimpleJob: [name=importUserJob]] completed with the following parameters: [{'run.id':'{value=1, type=class java.lang.Long, identifying=true}'}] and the following status: [COMPLETED] in 175ms
2025-09-30T10:42:57.705+05:30  INFO 2232 --- [batchservice] [ionShutdownHook] j.LocalContainerEntityManagerFactoryBean : Closing JPA EntityManagerFactory for persistence unit 'default'
2025-09-30T10:42:57.706+05:30  INFO 2232 --- [batchservice] [ionShutdownHook] com.zaxxer.hikari.HikariDataSource       : HikariPool-1 - Shutdown initiated...
2025-09-30T10:42:57.714+05:30  INFO 2232 --- [batchservice] [ionShutdownHook] com.zaxxer.hikari.HikariDataSource       : HikariPool-1 - Shutdown completed.
You can check the users table in database as well for the entries.
