- SAP Web Dynpro - Home
- SAP Web Dynpro - Overview
- Configuration & Integration
- Architecture
- Navigation
- Component
- Mapping & Data Binding
- Event & Actions
- Application
- URL of an Application
- Creating an Application
- Component Interfaces
- Faceless Components
- Assistance Class
- Service Call In an Application
- Using a Service Call
- Debugging an Application
- Version Management
- Messages
- Integration Messages
- Personalization & Configuration
- Portal Integration
- Integrate WDA in Portal
- Interactive Forms
- SAP List Viewer(ALV)
- Administration
- Monitoring an Application
- Web Dynpro - Questions Answers
- SAP Web Dynpro - Quick Guide
- SAP Web Dynpro - Useful Resources
- SAP Web Dynpro - Discussion
SAP Web Dynpro - Component Interfaces
When you create a Web Dynpro component, the creation procedure creates a component interface. Each component interface contains exactly one interface controller and one interface view. The interface view has no direct connection with the interface controller and are created automatically.
Using the component interface, you can define the interface structure and you can use in different application components.
The interface controller of a component interface definition and the interface controller of a component are different.
You can add multiple number of interface views to a component interface definition.
Creating a Web Dynpro Component Interface Definition
Consider the same screenshot as in the previous chapter.
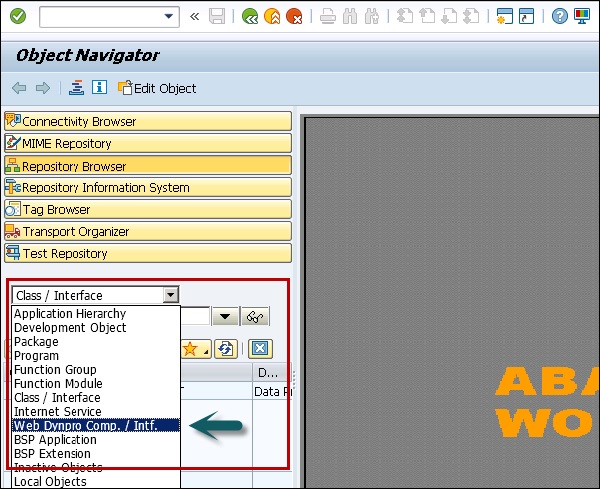
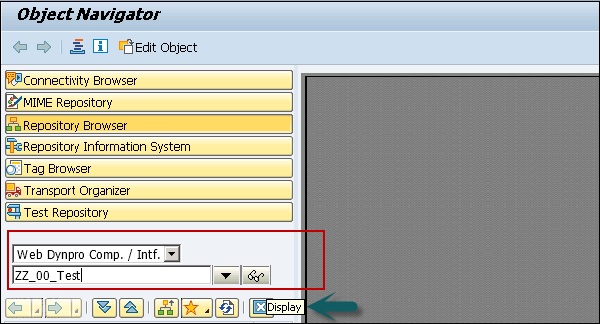
Step 1 − Enter the name of the new component and click display.
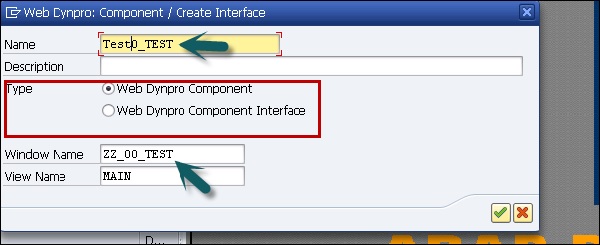
Step 2 − In the next window, enter the following details −
- You can enter a description of this component.
- In type, select a Web Dynpro component.
- You can also maintain the name of default window.
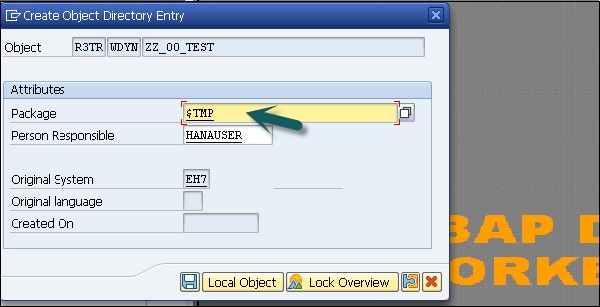
Step 3 − Assign this component to Package $TMP and click the Save button.
When you click on save, you can see this new component under the object tree and it contains −
- Component Controller
- Component Interface
- View
- Windows
