- Next.js - Home
- Next.js - Overview
- Next.js - Project Setup
- Next.js - Folder Structure
- Next.js - App Router
- Next.js - Page Router
- Next.js Features
- Next.js - Pages
- Next.js - Data Fetching
- Next.js - ISR
- Next.js - Static File Serving
- Next.js - Pre-Rendering
- Next.js - Partial Pre Rendering
- Next.js - Server Side Rendering
- Next.js - Client Side Rendering
- Next.js Routing
- Next.js - Routing
- Next.js - Nested Routing
- Next.js - Dynamic Routing
- Next.js - Parallel Routing
- Next.js - Imperative Routing
- Next.js - Shallow Routing
- Next.js - Intercepting Routes
- Next.js - Redirecting Routes
- Next.js - Navigation and Linking
- Next.js Configuration
- Next.js - TypeScript
- Next.js - Environment Variables
- Next.js - File Conventions
- Next.js - ESLint
- Next.js API & Backend
- Next.js - API Routes
- Next.js - Dynamic API Routes
- Next.js - Route Handlers
- Next.js - API MiddleWares
- Next.js - Response Helpers
- Next.js API Reference
- Next.js - CLI Commands
- Next.js - Functions
- Next.js - Directives
- Next.js - Components
- Next.js - Image Component
- Next.js - Font Component
- Next.js - Head Component
- Next.js - Form Component
- Next.js - Link Component
- Next.js - Script Component
- Next.js Styling & SEO
- Next.js - CSS Support
- Next.js - Global CSS Support
- Next.js - Meta Data
- Next.js Advanced Topics
- Next.js - Error Handling
- Next.js - Server Actions
- Next.js - Fast Refresh
- Next.js - Internationalization
- Next.js - Authentication
- Next.js - Session Management
- Next.js - Authorization
- Next.js - Caching
- Next.js - Data Caching
- Next.js - Router Caching
- Next.js - Full Route Caching
- Next.js - Request Memoization
- Next.js Performance Optimization
- Next.js - Optimizations
- Next.js - Image Optimization
- Next.js - Lazy Loading
- Next.js - Font Optimization
- Next.js - Video Optimization
- Next.js - Script Optimization
- Next.js - Memory Optimization
- Next.js - Using OpenTelemetry
- Next.js - Package Bundling Optimization
- Next.js Testing
- Next.js - Testing
- Next.js - Testing with Jest
- Next.js - Testing with Cypress
- Next.js - Testing with Vitest
- Next.js - Testing with Playwright
- Next.js Debugging & Deployment
- Next.js - Debugging
- Next.js - Deployment
- Next.js Useful Resources
- Next.js - Interview Questions
- Next.js - Quick Guide
- Next.js - Useful Resources
- Next.js - Discussion
Next.js - Link Component
The <Link> component in Next.js extends the functionality of the standard HTML <a> element. It supports all the attributes of the <a> tag, along with additional props introduced by Next.js. In this chapter we will explore Link component, it's syntax, features, props and examples.
Link Component in Next.js
The <Link> is a React component that extends the HTML <a> element to provide extra features such as prefetching and client-side navigation between routes. The component is commonly used to create navigation bar and implement navigation at client-side. The <a> tag attributes such as className or target="_blank" can be added to <Link> as props and will be passed to the underlying <a> element
Syntax
Following code shows syntax for basic usage of <Link> component in Next.js.
import Link from 'next/link' // import library

export default function Home() {
    return <Link href="/about">About</Link>
}
Props of Link Component
The following props can be passed to the <Link> component:
| Props | Description | Example |
|---|---|---|
| href | The href prop is same as href attribute of <a> tag. It provide route or URL to navigate to. | href="/about" |
| replace | The replace prop is used to replace the current history state instead of adding a new URL into the browser's history stack. | replace={true} |
| scroll | The scroll prop is used to prevent scrolling to top of the page when linked a page is opened. | scroll={false} |
| prefetch | The prefetch prop is used to prefetch linked data when user hover on <Link> tag. | prefetch={false} |
The href Prop of Link Component
As mentioned above the href prop is same a href attribute of <a> tag. It provide URL/route to navigate, when user clicked on the link. Following is code shows usage of href prop in <Link> tag.
// Import the library
import Link from 'next/link'

// Navigate to /about
export default function Page() {
    return (
        // Navigate to /about
        <Link href="/about">
            About
        </Link>
    )
}
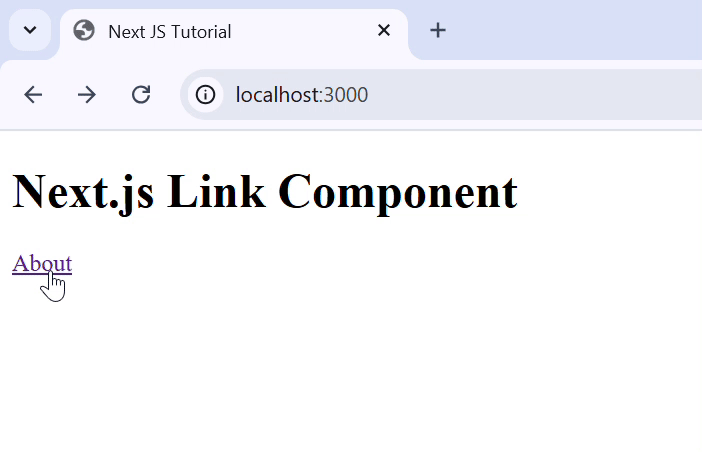
Output
The image below shows output of above code. Here you can see that link component work same as <a> tag in HTML.
The replace Prop of Link Component
The replace prop is used to clear current browser history stack. When the replace prop is set to true, the new URL replaces the current entry in the history stack instead of adding a new one. This prevents users from going back to the previous page, as it effectively overwrites the current history entry.
import Link from 'next/link'

export default function Page() {
  return (
    <Link href="/dashboard" replace>
      Dashboard
    </Link>
  )
}
Output
The image below shows output of above code. Here you can see that after navigating to About page, we can't go back to home page.

The scroll Prop of Link Component
The scroll prop in the <Link> component of Next.js determines whether the page will scroll to the top when the user navigates to a new route. By default, Next.js automatically scrolls to the top of the page when a <Link> navigation occurs. Setting the scroll prop to false disables this behavior, keeping the current scroll position unchanged.
Example
In the code below, we used scroll prop to prevent the page from scrolling to top when the user navigates to the About page.
import Link from 'next/link'

export default function Page() {
  return (
    <div style={{ marginTop: '700px' }}>
        <Link href="/about" scroll={false} >
            About Page
        </Link>
    </div>
  )
}
Output
In the output, after clicking the link to About page, the page will not scroll to top.

The prefetch Prop of Link Component
The prefetch prop in the <Link> component of Next.js controls whether the target route's resources are preloaded in the background. By default, Next.js prefetches routes when they appear in the users's viewport, so that the subsequent navigation become instantaneous. Setting the prefetch prop to false disables this behavior.
Example
In the code below, we used prefetch prop to prefetch the About page and Contacts page in the background.
import Link from 'next/link'

export default function Page() {
  return (
    <div>
        <h1>Home Page</h1>
        <Link href="/about" prefetch={true} >About Page</Link>
        <div style={{marginTop: '400px'}}>
            <Link href="/contacts" scroll={false} >Contacts Page</Link>
        </div>
    </div>
  )
}
Output
In the output, before clicking the link to About page and Contacts page, the pages are already prefetched in the background, which is visible in chrome dev tools.

Create a Navigation Bar Using Link Component
In the code below, we used Nextjs layout component to create navigation bar to the application. This navigation bar will contain links to components we made in earlier chapters. The layout component in next.js is a special component that will be visible in every routes.
// app/layout.tsx file

import Link from 'next/link'
import { ReactNode } from 'react';

interface RootLayoutProps {
    children: ReactNode;
}

export default function RootLayout({ children }: RootLayoutProps) {
    return (
    <html lang="en">
        <body>
        {/* Define Header Element of App Layout */}
        <header>
            <h1>Header Element</h1>

            {/* Define Navigation bar inside header */}
            <ul>
                <li><Link href="/">Home</Link></li>
                <li><Link href="/products/">Products</Link></li>
                <li><Link href="/contacts/">Contacts</Link></li>
                <li><Link href="/about">About Us</Link></li>
            </ul>
        </header>

        {/* Section to call rest of components */ }
        <main>{children}</main>
        </body>
    </html>
    );
}
Output
In the output, a navigation bar visible in every routes is created.

