- Next.js - Home
- Next.js - Overview
- Next.js - Project Setup
- Next.js - Folder Structure
- Next.js - App Router
- Next.js - Page Router
- Next.js Features
- Next.js - Pages
- Next.js - Data Fetching
- Next.js - ISR
- Next.js - Static File Serving
- Next.js - Pre-Rendering
- Next.js - Partial Pre Rendering
- Next.js - Server Side Rendering
- Next.js - Client Side Rendering
- Next.js Routing
- Next.js - Routing
- Next.js - Nested Routing
- Next.js - Dynamic Routing
- Next.js - Parallel Routing
- Next.js - Imperative Routing
- Next.js - Shallow Routing
- Next.js - Intercepting Routes
- Next.js - Redirecting Routes
- Next.js - Navigation and Linking
- Next.js Configuration
- Next.js - TypeScript
- Next.js - Environment Variables
- Next.js - File Conventions
- Next.js - ESLint
- Next.js API & Backend
- Next.js - API Routes
- Next.js - Dynamic API Routes
- Next.js - Route Handlers
- Next.js - API MiddleWares
- Next.js - Response Helpers
- Next.js API Reference
- Next.js - CLI Commands
- Next.js - Functions
- Next.js - Directives
- Next.js - Components
- Next.js - Image Component
- Next.js - Font Component
- Next.js - Head Component
- Next.js - Form Component
- Next.js - Link Component
- Next.js - Script Component
- Next.js Styling & SEO
- Next.js - CSS Support
- Next.js - Global CSS Support
- Next.js - Meta Data
- Next.js Advanced Topics
- Next.js - Error Handling
- Next.js - Server Actions
- Next.js - Fast Refresh
- Next.js - Internationalization
- Next.js - Authentication
- Next.js - Session Management
- Next.js - Authorization
- Next.js - Caching
- Next.js - Data Caching
- Next.js - Router Caching
- Next.js - Full Route Caching
- Next.js - Request Memoization
- Next.js Performance Optimization
- Next.js - Optimizations
- Next.js - Image Optimization
- Next.js - Lazy Loading
- Next.js - Font Optimization
- Next.js - Video Optimization
- Next.js - Script Optimization
- Next.js - Memory Optimization
- Next.js - Using OpenTelemetry
- Next.js - Package Bundling Optimization
- Next.js Testing
- Next.js - Testing
- Next.js - Testing with Jest
- Next.js - Testing with Cypress
- Next.js - Testing with Vitest
- Next.js - Testing with Playwright
- Next.js Debugging & Deployment
- Next.js - Debugging
- Next.js - Deployment
- Next.js Useful Resources
- Next.js - Interview Questions
- Next.js - Quick Guide
- Next.js - Useful Resources
- Next.js - Discussion
Next.js - API Routes
In this chapter, we will learn about API Routes in Next.js, how to create an API route, handle different HTTP methods, and proxy an API request.
API Routes in Next.js
API Routes in Next.js are used to create serverless functions for handling API requests. These routes enable you to define server-side logic that can be called from the frontend or any external client. The API routes are mostly used for handling requests like fetching data, submitting forms, or implementing server-side operations.
How it Works?
- API Routes in Next.js are created by adding a typescript file inside the 'pages/api' directory.
- The file name becomes the endpoint of the API.
- Any file inside the folder 'pages/api' is mapped to /api/* and will be treated as an API endpoint instead of a page.
- For example, if you create a file named 'hello.js' inside the 'pages/api' directory, the endpoint will be '/api/hello'.
Note: API Routes is a concept used inside Next.js Page router, If you are using the App Router, you can implement API routes using Route Handlers.
Setting Up an API Route
Let's create an API route that returns a JSON response. Create a file named 'hello.js' inside the 'pages/api' directory with the following code:
// File: pages/api/hello.js
export default function handler(req, res) {
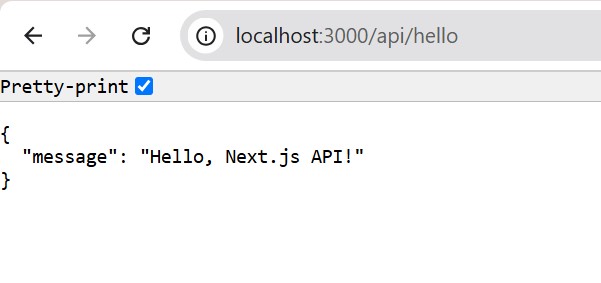
res.status(200).json({ message: 'Hello, Next.js API!' });
}
Output
Now, if you visit the URL '/api/hello', you will see the following JSON response:
Handling HTTP Methods
API Routes in Next.js can handle different HTTP methods like GET, POST, PUT, DELETE, etc. Any Next.js component can call the API route using different methods. The API route can return different responses based on the method used.
Example
In the following code below, we have created an API route (pages/api/user.js) that handles different HTTP methods. The route returns a different message based on the method used. Then we defined a Next.js component (pages/test-api/index.tsx) that calls the API route using different methods.
// File: pages/api/user.js

export default function handler(req, res) {
    const { method } = req;

    switch (method) {
        case 'GET':
        res.status(200).json({ message: 'Fetching user data' });
        break;
        case 'POST':
        res.status(201).json({ message: 'Creating a new user' });
        break;
        case 'PUT':
        res.status(200).json({ message: 'Updating user data' });
        break;
        case 'DELETE':
        res.status(200).json({ message: 'Deleting user data' });
        break;
        default:
        res.setHeader('Allow', ['GET', 'POST', 'PUT', 'DELETE']);
        res.status(405).end(`Method ${method} Not Allowed`);
    }
}

//File : pages/test-api/index.tsx

import { useState } from 'react';

export default function TestAPI() {
  const [response, setResponse] = useState(null);

  const callApi = async (method) => {
    try {
      const res = await fetch('/api/user', {
        method,
        headers: {
          'Content-Type': 'application/json',
        },
        ...(method === 'POST' || method === 'PUT' ?
        { body: JSON.stringify({ name: 'John Doe' }) } : {}),
      });

      const data = await res.json();
      setResponse(data);
    } catch (error) {
      setResponse({ error: error.message });
    }
  };

  return (
    <div>
        <h1>Test API Routes</h1>
        <div>
            <button onClick={() => callApi('GET')}>
                GET
            </button>
            <button onClick={() => callApi('POST')}>
                POST
            </button>
            <button onClick={() => callApi('PUT')}>
                PUT
            </button>
            <button onClick={() => callApi('DELETE')}>
                DELETE
            </button>
        </div>
        <div>
            <h2>Response:</h2>
            <pre>
                {response ? JSON.stringify(response, null, 2) :
                    'No response yet'}
            </pre>
        </div>
    </div>
  );
}
Output
When you run the above code, you will see a page with four buttons (GET, POST, PUT, DELETE). When you click on any button, the API route will be called with the respective method and the response will be displayed on the page.
Proxying a API Request
API routes can serve as a proxy between the client and external APIs. This allows you to ensure security, add authentication, or modify the request before sending it to the client side.
Example
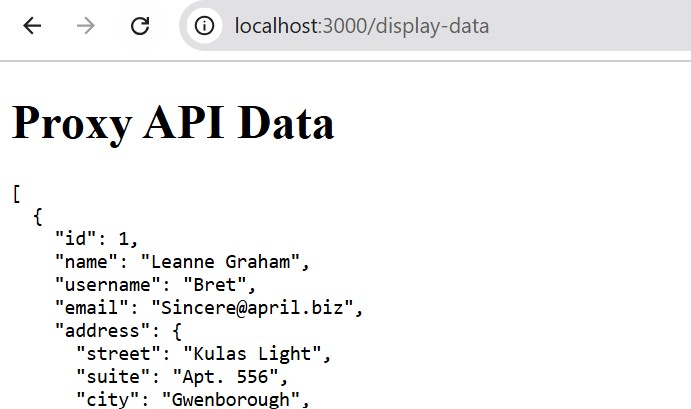
In the following example, we have created an API route (pages/api/proxy/route.js) that fetches data from an external API and sends it to the client. Then we have a Next.js component (pages/display-data/index.tsx) that fetches data from the API route and displays to the client.
// File: pages/api/proxy/route.js

import fetch from 'node-fetch'; // Package for HTTP requests.

export default async function handler(req, res) {
  try {
    // Fetch data from an external API.
    const response = await fetch('https://jsonplaceholder.typicode.com/users');

    // Convert the response into JSON format.
    const data = await response.json();

    // Send the JSON data to the client as the response.
    res.status(200).json(data);
  } catch (error) {
    // Handle any errors that may occur during the process.
    res.status(500).json({ error: 'Failed to fetch data from external API.' });
  }
}

// File: pages/display-data/index.tsx
import { useEffect, useState } from 'react';

export default function DisplayData() {
  const [data, setData] = useState(null);

  useEffect(() => {
    // Fetch data from the API route
    const fetchData = async () => {
      const response = await fetch('/api/proxy/route');
      const result = await response.json();
      setData(result); // Update state with fetched data
    };

    fetchData();
  }, []); // Run only once on component mount

  return (
    <div>
      <h1>Proxy API Data</h1>
      <pre>{data && JSON.stringify(data, null, 2)}</pre>
    </div>
  );
}
Output
When you run the above code, you will see a page that fetches data from an external API.