
Article Categories
- All Categories
-
 Data Structure
-
 Networking
-
 RDBMS
RDBMS
-
 Operating System
-
 Java
Java
-
 MS Excel
-
 iOS
iOS
-
 HTML
HTML
-
 CSS
CSS
-
 Android
-
 Python
-
 C Programming
-
 C++
C++
-
 C#
C#
-
 MongoDB
-
 MySQL
MySQL
-
 Javascript
-
 PHP
PHP
-
 Economics & Finance
How to program a board using Arduino IDE
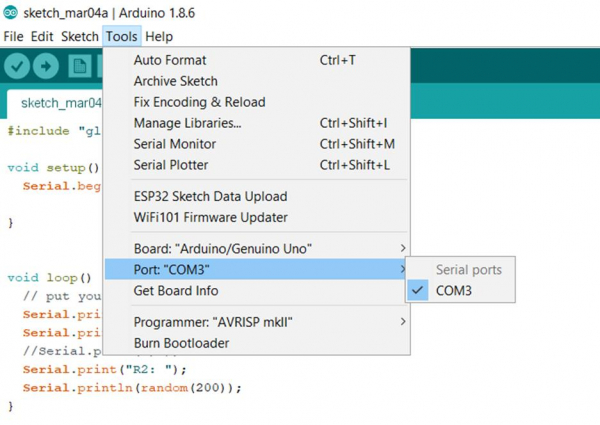
In order to program a board using Arduino IDE, first make sure that the correct board is selected in Tools -> Board, and also make sure that the board is connected to your machine and the correct COM Port is selected.
Once you've done the basic verifications, you can click on the Upload button on the top left.
Alternatively, you can click on Sketch -> Upload.
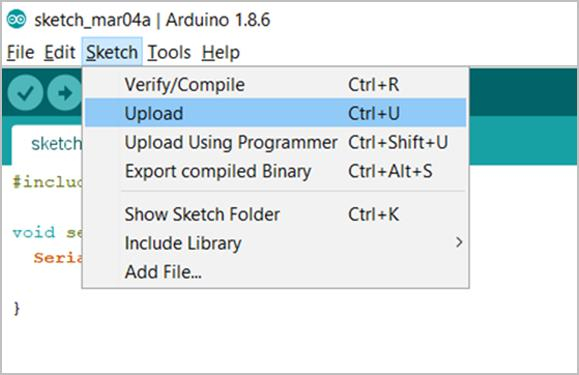
Make sure that you don't select the Upload using Programmer option if you are trying to upload the sketch using the USB. Upload Using Programmer option has to be used when you use an external programmer to upload the sketch to your board.
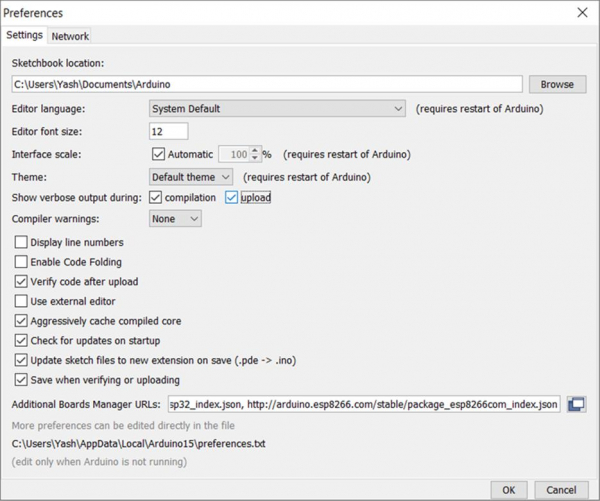
In case you want detailed printed output during upload, you can click on File -> Preferences and check the Show Verbose Output during Upload option.

453 Views
