
Article Categories
- All Categories
-
 Data Structure
-
 Networking
-
 RDBMS
RDBMS
-
 Operating System
-
 Java
Java
-
 MS Excel
-
 iOS
iOS
-
 HTML
HTML
-
 CSS
CSS
-
 Android
-
 Python
-
 C Programming
-
 C++
C++
-
 C#
C#
-
 MongoDB
-
 MySQL
MySQL
-
 Javascript
-
 PHP
PHP
-
 Economics & Finance
Selected Reading
Change board selection in Arduino IDE
Changing the board is quite straightforward in Arduino IDE. You need to go to Tools -> Board.
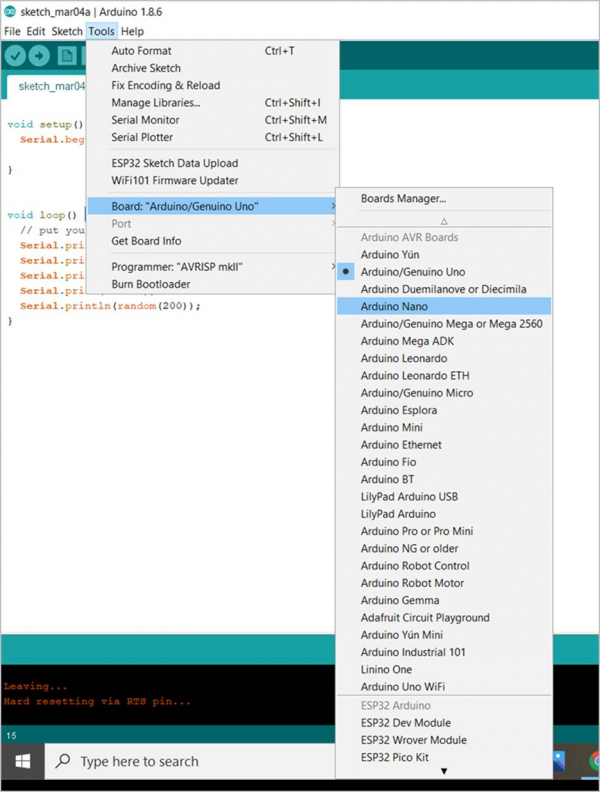
The list of available boards opens up. You can select the board of your choice. Once selected, you can verify that the Board name has changed in Tools -> Board.
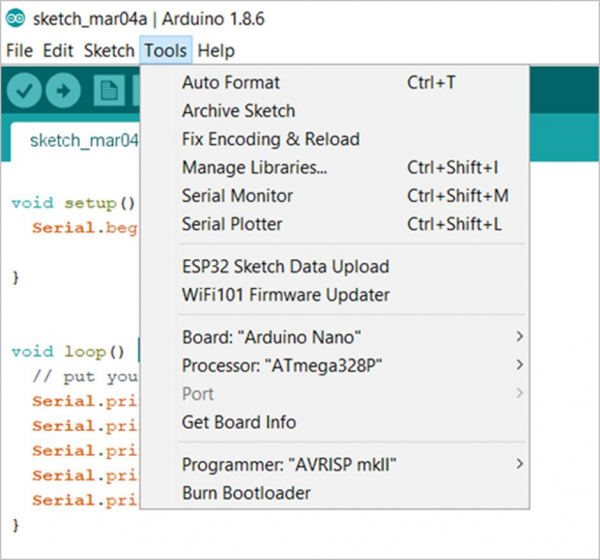
Please note that each board comes with its own set of settings. For instance, when selecting the Arduino Nano board, you can also configure the processor. Please read the datasheet of your board to figure out the correct settings for your board. In most cases, the default cases work well.

Updated on: 2021-03-23T11:17:34+05:30
1K+ Views

Advertisements