
Article Categories
- All Categories
-
 Data Structure
-
 Networking
-
 RDBMS
RDBMS
-
 Operating System
-
 Java
Java
-
 MS Excel
-
 iOS
iOS
-
 HTML
HTML
-
 CSS
CSS
-
 Android
-
 Python
-
 C Programming
-
 C++
C++
-
 C#
C#
-
 MongoDB
-
 MySQL
MySQL
-
 Javascript
-
 PHP
PHP
-
 Economics & Finance
How to install CamStudio on Windows?
In this tutorial, we will learn how to install CamStudio on Windows. Before beginning with the installation, let us first understand what is CamStudio.
Using its built-in SWF Producer, CamStudio, a desktop programme for Windows computers, can convert industry-standard AVI video files into lean, mean, bandwidth-friendly Streaming Flash films (SWFs). It can record all on-screen video and audio action. The following are the characteristics of CamStudio ?
It can be used to produce software application demonstration videos.
Or how about making a series of films that respond to your most common queries?
For classes in high school or college, you can make videos.
You can use it to document a persistent computer issue so you can show technical help personnel.
You can utilise it to produce sellable video-based information products.
You may even use it to keep track of new tips and tricks you learn for your preferred software before you forget them.
With CamStudio, you can quickly add high-quality, anti-aliased screen captions to your recordings. With the innovative Video Annotation tool, you can even put a webcam movie of yourself "picture-in-picture" over your desktop to personalise your films.
CamStudio also includes a Lossless Codec that, when compared to other, more widely used codecs, provides images that are incredibly clear while having a lot reduced filesize.
You have complete control over the video that is produced; you may use custom cursors, record the entire screen or just a portion of it, and alter the recording's quality depending on whether you want to create smaller films or ones that are "best quality" for burning to a CD or DVD.
Let us now see how to install the CamStudio on Windows ?
Step 1
To install CamStudio on Windows, go to a web browser and open the official website https://camstudio.org/ as shown in the below screenshot ?
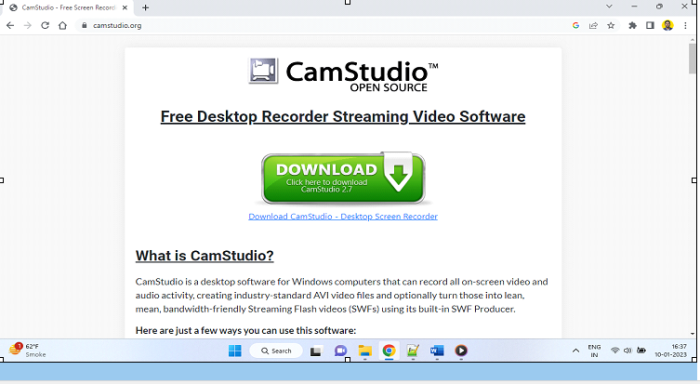
Click the DOWNLOAD button ?
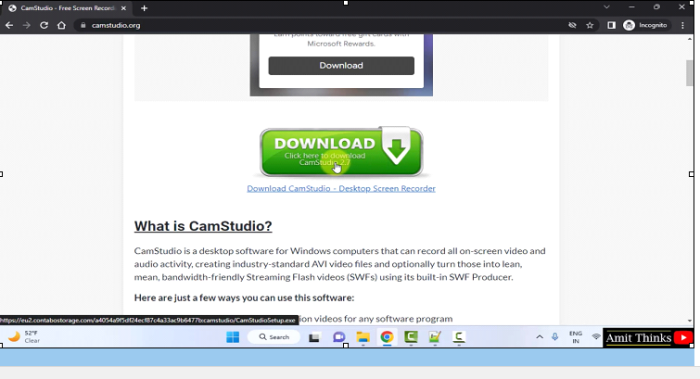
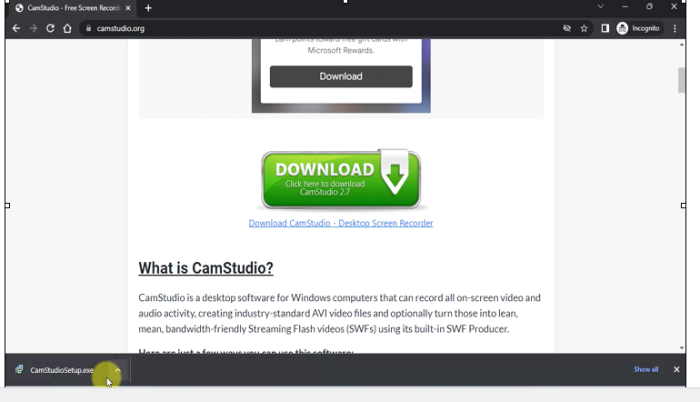
The download completes. Double-click on the exe file ?
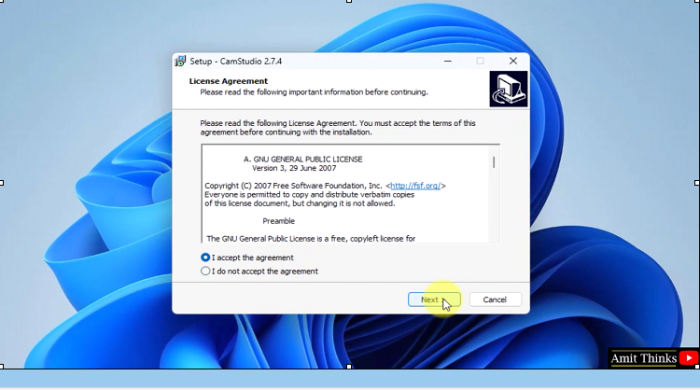
Step 2
The installation begins. You will directly reach the License Agreement section. Select I accept the agreement. After selecting, click Next ?
Step 3
Now, for the Start Menu folder, keep it as it is. This will create the CamStudio shortcut in the below mentioned Start Menu folder. Click Next ?

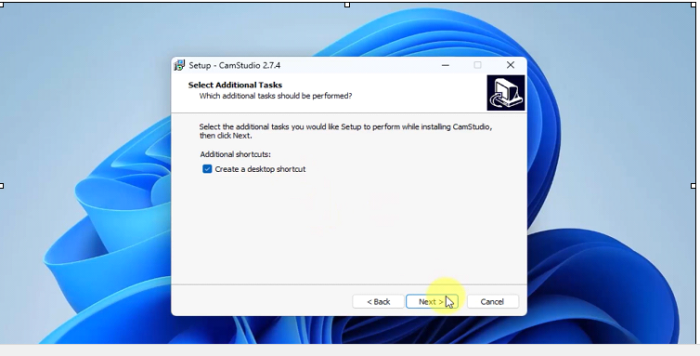
Step 4
After clicking Next, you will reach the Select Additional Tasks section, wherein the user is allowed to set the Desktop Shortcut. Select the option Create a desktop shortcut and click Next ?
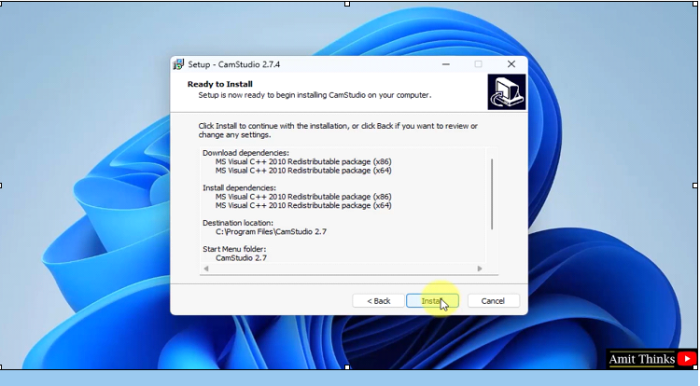
Step 5
The Ready to Install section is now visible. Herein, a user is informed about the installation details. This installation will automatically download and install
MS Visual C++ 2010 Redistributable package (x86)
Click Install ?
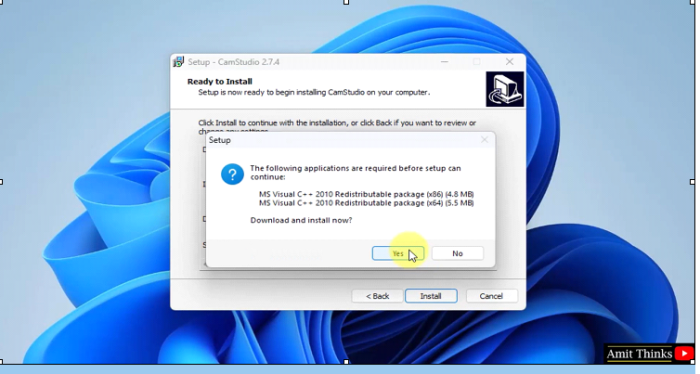
Step 6
After clicking Install above, you are required to click Yes to permit the download and installation of the dependencies ?
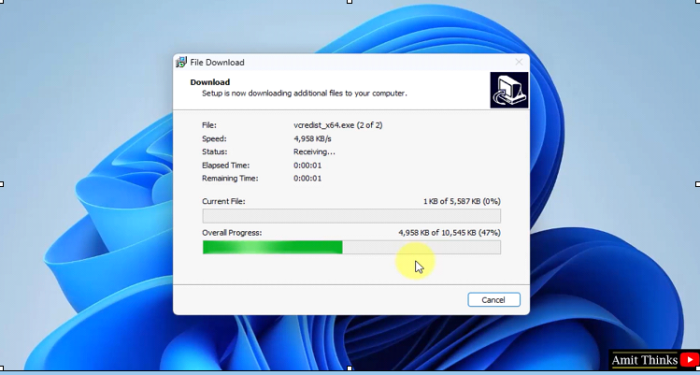
Step 7
The download begins ?
Step 8
After downloading and installing the dependencies, the CamStudio installation begins ?
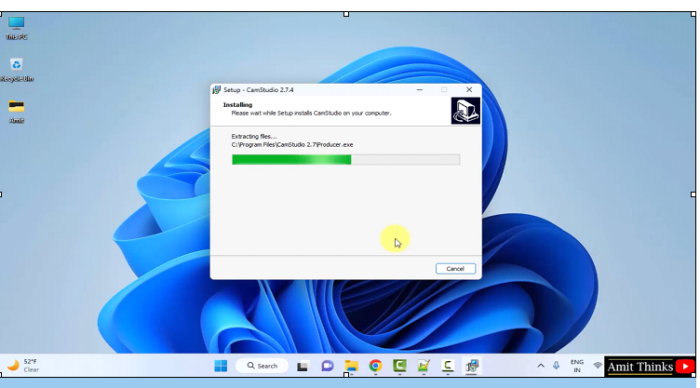
Step 9
The installation setup completes. A shortcut for CamStudio generated. On clicking Finish, the CamStudio will launch since the Launch CamStudio checkbox is already checked ?

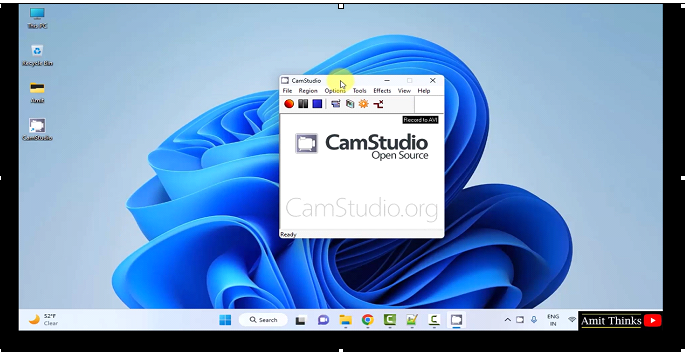
Step 10
CamStudio open for the first time as shown below ?
In this lesson, we saw what is CamStudio, its characteristics and usage. We also saw how to install CamStudio on Windows.

886 Views
