
Article Categories
- All Categories
-
 Data Structure
-
 Networking
-
 RDBMS
RDBMS
-
 Operating System
-
 Java
Java
-
 MS Excel
-
 iOS
iOS
-
 HTML
HTML
-
 CSS
CSS
-
 Android
-
 Python
-
 C Programming
-
 C++
C++
-
 C#
C#
-
 MongoDB
-
 MySQL
MySQL
-
 Javascript
-
 PHP
PHP
-
 Economics & Finance
How to Install OpenShot Video Editor on Windows?
In this tutorial, we will learn how to install OpenShot Video Editor on Windows. Before beginning with the installation, let us first understand what is OpenShot Video Editor.
The OpenShot Video Editor is an easy to use and powerful video editor. The following are the characteristics of the OpenShot Video Editor.
You may create a fantastic video project with the help of our sophisticated video editing timeline, which has a tonne of wonderful features. Drag-and-drop operations, zooming in and out, alignment, pre-set animations, and settings, as well as slicing and snapping are available.
OpenShot, which is based on the robust FFmpeg library, can read and write the majority of video and image formats. Visit the FFmpeg project for a complete list of formats that are supported. The export dialogue for OpenShot uses some of the more popular formats by default, but you can use any FFmpeg file by selecting the advanced option.
A robust key frame animation framework that supports an infinite number of key frames and animation possibilities is included with OpenShot. The animation values are calculated based on the key frames interpolation mode, which can be quadratic bezier curves, linear, or constant.
One of the main features of OpenShot is its integration with the user's desktop. Window borders, native file system support for drag & drop, and native file browsers.
OpenShot supports the following operating systems: Windows, Linux and Mac. Project files are also cross-platform i.e. save a video project in an OS and open it on another.
In a project, tracks are used to layer images, videos, and music. Layers can include watermarks, background music tracks, background videos, and other elements as necessary.
Numerous changes can be made to clips on the timeline, such as scaling, cropping, rotation, alpha, snapping, and modifying X, Y location. With a few clicks, these attributes can also be animated over time! Our transform tool also allows you to interactively resize clips.
OpenShot has more than 400 transitions that enable you to smoothly move from one clip to another. Keyframes can also be used to modify the transitions' speed and sharpness (if needed). Two clips that overlap will immediately start a new transition.
OpenShot comes with more than 40 vector title templates, which makes adding titles to your project enjoyable and simple. As an alternative, you can design your own SVG vector titles and use those as templates. With our built-in title editor, you can easily change the font, colour, and text of your titles.
Amazing 3D animations may be rendered inside of OpenShot using the fantastic, open-source Blender programme. More than 20 animations are included with OpenShot, and you may modify various render characteristics such as colours, sizes, text, and length.
Let us now see how to install OpenShot Video Editor on Windows ?
Step 1
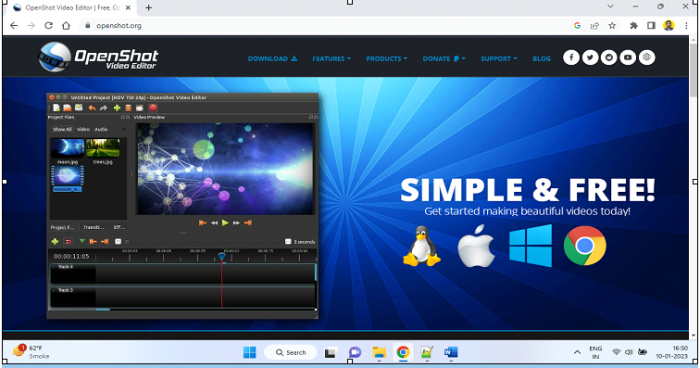
To install the OpenShot Video Editor on Windows, go to a web browser and open the official website https://www.openshot.org/ as shown in the below screenshot ?
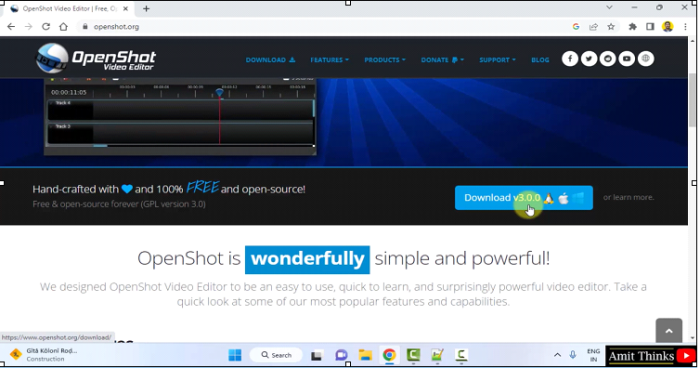
Step 2
Go below and you will be able to reach the Download v3.0.0 button. Click on it ?
The download begins and completes as shown below. Double-click the exe file to begin the installation ?
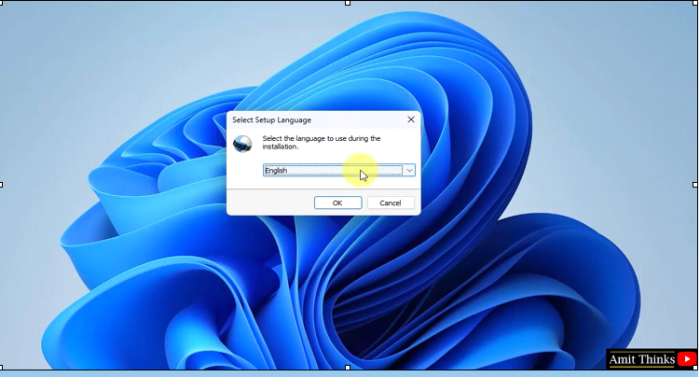
Step 3
The setup begins after double-click. Herein, select the installation language. We will keep the default English and click OK ?
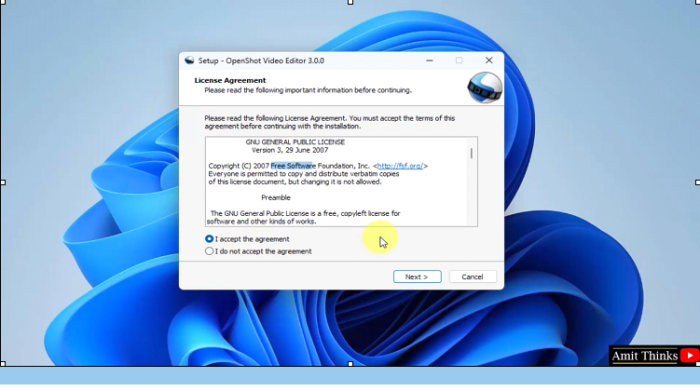
Step 4
Now, the License Agreement section is visible. Read and select I accept the agreement and click Next ?
Step 5
The Select Destination Location is now visible. Here, set the path for the installation. We will install the OpenShot Video Editor at the default location i.e.
C:\Program Files\OpenShot Video Editor
If you want to change the location, click Browse. Click Next to proceed the installation ?

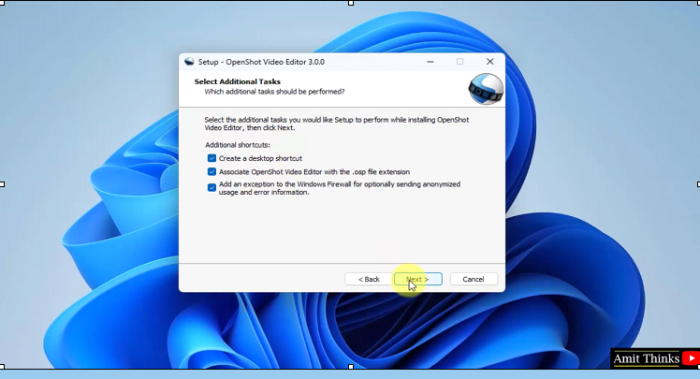
Step 6
Now, you will reach the Select Additional Tasks section. Here, the option for creating a desktop shortcut is visible. Keep it as it is and click Next ?
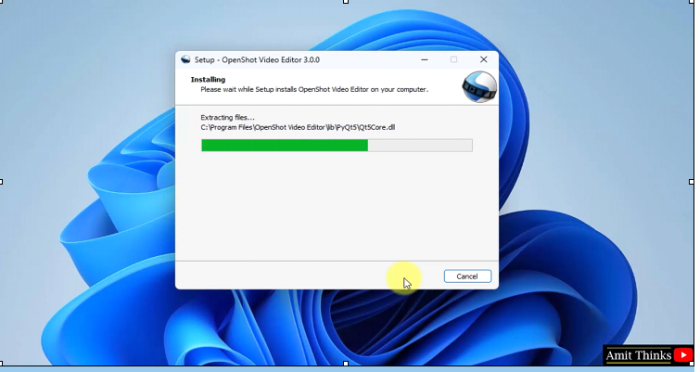
Step 7
On clicking Next, the installation begins ?
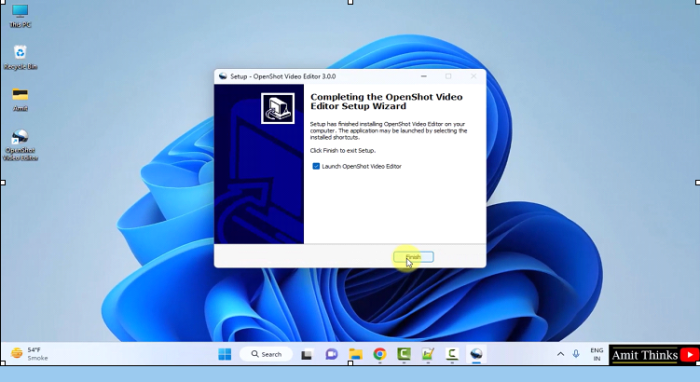
Step 8
The setup completes the installation and the OpenShot Video Editor shortcut generates. On clicking Finish, the OpenShot Video Editor will launch since the Launch OpenShot Video Editor is by default selected ?
Step 9
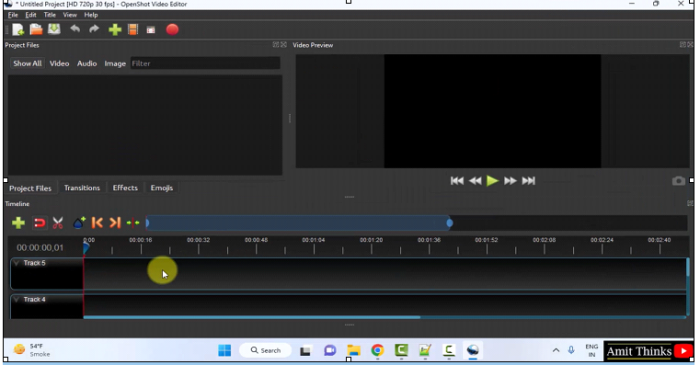
The OpenShot Video Editor opens for the first time ?
In this lesson, we saw what is OpenShot Video Editor, its characteristics and usage. We also saw how to install OpenShot on Windows.

944 Views
