
Article Categories
- All Categories
-
 Data Structure
-
 Networking
-
 RDBMS
RDBMS
-
 Operating System
-
 Java
Java
-
 MS Excel
-
 iOS
iOS
-
 HTML
HTML
-
 CSS
CSS
-
 Android
-
 Python
-
 C Programming
-
 C++
C++
-
 C#
C#
-
 MongoDB
-
 MySQL
MySQL
-
 Javascript
-
 PHP
PHP
-
 Economics & Finance
How to Implement TextSwitcher in Android?
The Android TextSwitcher component is a flexible tool that enables seamless text transitions within a single view. It's perfect for showcasing dynamic content or providing visual feedback in real-time. By animating the switch between different text values, this component adds inte-ractivity and enhances the user experience.
To implement TextSwitcher, developers need to define the object in their XML layout and assign suitable animations. They can then easily update text content programmatically, improving engagement by seamlessly switching between various representations of text.
TextSwitcher
A TextSwitcher in Android refers to a type of ViewSwitcher that deals with text content updates for one view. Its specialty lies in the smooth transition effect while updating displayed text, contributing to an improved user experience via visual feedback. In other words, it holds two TextView objects and transfers between them seamlessly through automatic animation. The implementation of TextSwitcher simplifies developers' work when they need to update or change various text types in their apps dynamically, thereby offering real-time updates on the interface.
Approaches
To implement a TextSwitcher in Android, you can use different methods. Here are three commonly used approaches::
Programmatically create and configure the TextSwitcher
Use XML layout for TextSwitcher
Extend TextSwitcher in a custom class
Programmatically create and configure the TextSwitcher
In this approach, you programmatically create a TextSwitcher instance, set the desired animation for text transitions, and provide a ViewFactory to create TextView objects. Finally, you add the TextSwitcher to your layout dynamically.
Algorithm
Create a TextSwitcher instance programmatically.
Set the animation for text transitions using setInAnimation() and setOutAnimation() methods.
Implement a ViewFactory that creates TextView objects.
Add the TextSwitcher to the desired layout dynamically.
Example
import android.content.Context;
import android.view.View;
import android.view.ViewGroup;
import android.widget.TextSwitcher;
import android.widget.TextView;
import android.widget.ViewSwitcher;

public class MainActivity extends AppCompatActivity {
   private TextSwitcher textSwitcher;

   @Override
   protected void onCreate(Bundle savedInstanceState) {
      super.onCreate(savedInstanceState);
      setContentView(R.layout.activity_main);

      textSwitcher = new TextSwitcher(this);
      textSwitcher.setInAnimation(this, android.R.anim.slide_in_left);
      textSwitcher.setOutAnimation(this, android.R.anim.slide_out_right);

      textSwitcher.setFactory(new ViewSwitcher.ViewFactory() {
         @Override
         public View makeView() {
            return new TextView(MainActivity.this);
         }
      });

      ViewGroup parentView = findViewById(R.id.parent_layout);
      parentView.addView(textSwitcher);

      // Update the text in the TextSwitcher
      textSwitcher.setText("click on next button to switch text");
      textSwitcher.setText("Text Switcher 1");
   }
}
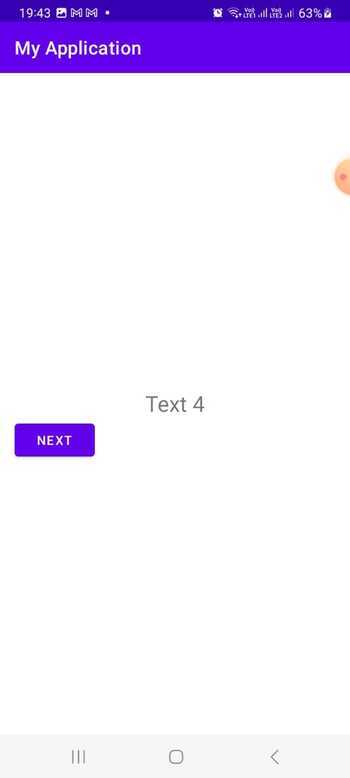
Output
Use XML layout for TextSwitcher
This approach involves defining the TextSwitcher in your XML layout file, specifying the desired animation properties. In your Java code, you find the TextSwitcher by its ID, set the ViewFactory to create TextView objects, and access it for further usage.
Algorithm
Define the TextSwitcher in XML layout, specifying animation properties.
Find the TextSwitcher in Java code using findViewById().
Set a ViewFactory implementation that creates TextView objects.
Access the TextSwitcher for further usage.
activity_main.xml
<LinearLayout
   xmlns:android="http://schemas.android.com/apk/res/android"
   xmlns:tools="http://schemas.android.com/tools"
   android:id="@+id/parent_layout"
   android:layout_width="match_parent"
   android:layout_height="match_parent"
   android:orientation="vertical"
   android:gravity="center">

   <TextSwitcher
      android:id="@+id/textSwitcher"
      android:layout_width="wrap_content"
      android:layout_height="wrap_content"
      android:inAnimation="@android:anim/slide_in_left"
      android:outAnimation="@android:anim/slide_out_right" />
</LinearLayout>
Example
import android.os.Bundle;
import android.widget.TextSwitcher;
import android.widget.TextView;
import android.widget.ViewSwitcher;

public class MainActivity extends AppCompatActivity {
   private TextSwitcher textSwitcher;

   @Override
   protected void onCreate(Bundle savedInstanceState) {
      super.onCreate(savedInstanceState);
      setContentView(R.layout.activity_main);

      textSwitcher = findViewById(R.id.textSwitcher);
      textSwitcher.setFactory(new ViewSwitcher.ViewFactory() {
         @Override
         public View makeView() {
            return new TextView(MainActivity.this);
         }
      });

      // Update the text in the TextSwitcher
      textSwitcher.setText("click on next button to switch text ");
      textSwitcher.setText("Text Switcher 1");
   }
}
Output

Extend TextSwitcher in a custom class
With this approach, you create a custom class that extends TextSwitcher, allowing you to define additional configuration if needed. You use this custom TextSwitcher class in your XML layout file, providing the desired animation properties. In your Java code, you find the custom TextSwitcher by its ID and utilize it in your application.
Algorithm
Create a custom class that extends TextSwitcher.
Implement necessary configuration and customization in the custom TextSwitcher class.
Declare the custom TextSwitcher in XML layout, specifying animation properties.
Find the custom TextSwitcher in Java code using findViewById().
Utilize the custom TextSwitcher as needed in your application.
CustomTextSwitcher.java
import android.content.Context;
import android.util.AttributeSet;
import android.view.View;
import android.widget.TextSwitcher;
import android.widget.TextView;
import android.widget.ViewSwitcher;

public class CustomTextSwitcher extends TextSwitcher {
   public CustomTextSwitcher(Context context) {
      super(context);
      init();
   }

   public CustomTextSwitcher(Context context, AttributeSet attrs) {
      super(context, attrs);
      init();
   }

   private void init() {
      setInAnimation(getContext(), android.R.anim.slide_in_left);
      setOutAnimation(getContext(), android.R.anim.slide_out_right);

      setFactory(new ViewSwitcher.ViewFactory() {
         @Override
         public View makeView() {
            return new TextView(getContext());
         }
      });
   }
}
Example
import android.os.Bundle;
import androidx.appcompat.app.AppCompatActivity;
import com.example.app.CustomTextSwitcher;

public class MainActivity extends AppCompatActivity {
   private CustomTextSwitcher textSwitcher;

   @Override
   protected void onCreate(Bundle savedInstanceState) {
      super.onCreate(savedInstanceState);
      setContentView(R.layout.activity_main);

      textSwitcher = findViewById(R.id.textSwitcher);

      // Update the text in the TextSwitcher
      textSwitcher.setText("click on next button to switch text");
      textSwitcher.setText("Text Switcher 1");
   }
}
activity_main.xml
<LinearLayout
   xmlns:android="http://schemas.android.com/apk/res/android"
   xmlns:tools="http://schemas.android.com/tools"
   android:id="@+id/parent_layout"
   android:layout_width="match_parent"
   android:layout_height="match_parent"
   android:orientation="vertical"
   android:gravity="center">

   <com.example.app.CustomTextSwitcher
      android:id="@+id/textSwitcher"
      android:layout_width="wrap_content"
      android:layout_height="wrap_content" />
</LinearLayout>
Output

Conclusion
The TextSwitcher in Android is a robust component that can facilitate the seamless transition and animation of various text values within a single view. This tutorial highlights how to use this powerful feature effectively. By implementing TextSwitcher using various approaches, such as programmatically configuring it, utilizing XML layout, or extending a custom class, developers can enhance the user experience by dynamically displaying and transitioning text content with ease.

580 Views
