
Article Categories
- All Categories
-
 Data Structure
-
 Networking
-
 RDBMS
RDBMS
-
 Operating System
-
 Java
Java
-
 MS Excel
-
 iOS
iOS
-
 HTML
HTML
-
 CSS
CSS
-
 Android
-
 Python
-
 C Programming
-
 C++
C++
-
 C#
C#
-
 MongoDB
-
 MySQL
MySQL
-
 Javascript
-
 PHP
PHP
-
 Economics & Finance
How to Create a Pop Up Window for Multiple Data Entry in Excel
This tutorial will walk you through the process of constructing a user-friendly pop-up window to simplify your data entry jobs if you've ever needed to enter many pieces of data into an Excel spreadsheet and found yourself browsing through different cells. Excel is a strong tool for data organisation and analysis, but it can be challenging to work with huge datasets or many entries. You can make data entering simpler, more efficient, and error-free by designing a pop-up window.
We'll walk you through each step needed to create and use a pop-up window in Excel throughout this article. You don't need sophisticated Excel abilities or prior coding experience to follow along because we'll be using Excel's built-in features and formulae to achieve our objective. By the end of this tutorial, you will clearly understand how to make an Excel pop-up window that enables you to quickly enter various sets of data. Let's get started by streamlining your data entering routine!
Create a Pop Up Window for Multiple Data Entry
Here we will first customise the ribbon, then use the form to complete the task. So let us see a simple process to see how you can create a pop-up window for multiple data entries in Excel.
Step 1
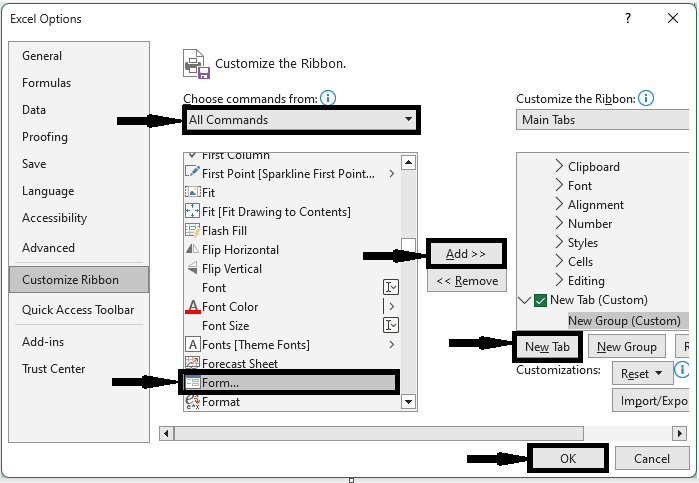
Consider any Excel sheet. First, right-click on the ribbon and select Customise Ribbon.
Right Click > Customize Ribbon.
Step 2
Then click on New Tab. Then select all commands, click on Form, click Add, and click Ok.
New Tab > All Commands > Form > Add > Ok.
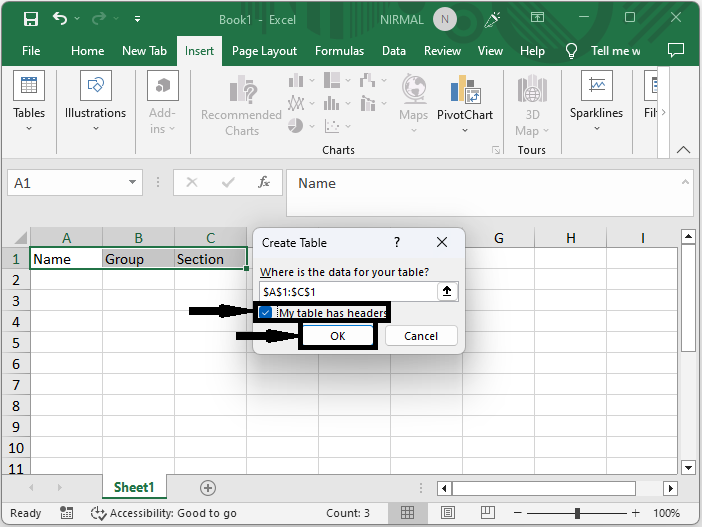
Step 3
Then select the range of cells, click on insert, select table, check box name "My table has header" and click OK.
Select cells > Insert > Table > Check Box > Ok.
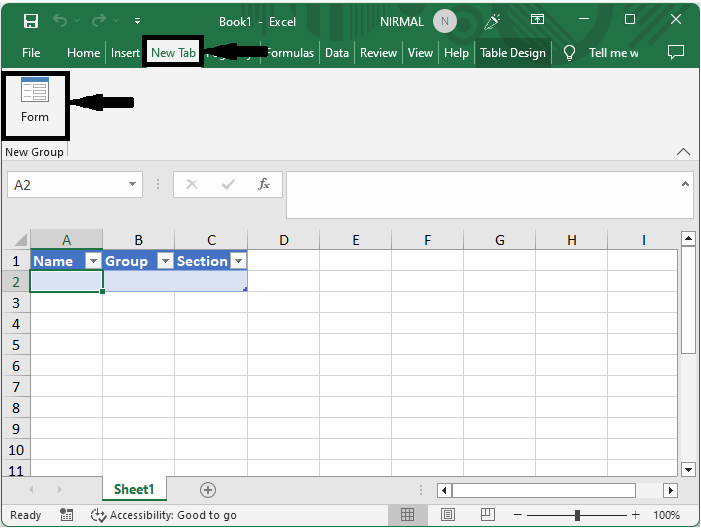
Step 4
Then click on any cell and click on Form under the New tab.
Any cell > New tab > Form.
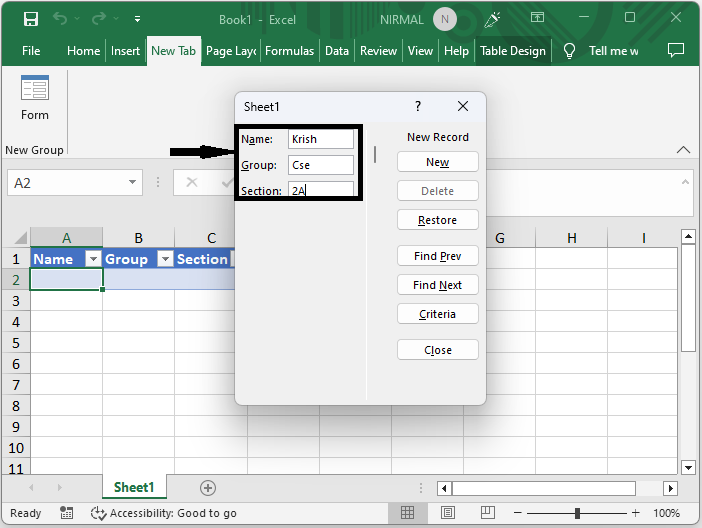
Step 5
Then enter the values in the form and click enter to complete the task.
Value > Enter.
Conclusion
In this tutorial, we have used a simple example to demonstrate how you can create a pop-up window for multiple data entries in Excel to highlight a particular set of data.

11K+ Views
