
Article Categories
- All Categories
-
 Data Structure
-
 Networking
-
 RDBMS
RDBMS
-
 Operating System
-
 Java
Java
-
 MS Excel
-
 iOS
iOS
-
 HTML
HTML
-
 CSS
CSS
-
 Android
-
 Python
-
 C Programming
-
 C++
C++
-
 C#
C#
-
 MongoDB
-
 MySQL
MySQL
-
 Javascript
-
 PHP
PHP
-
 Economics & Finance
How to Create Multiple Names from Selection in Excel
Have you ever wanted to name a big number of cells in Excel but didn't want to enter each name manually one at a time? You're in luck, then! Using a selection, a handy tool in Excel lets you easily generate several names. When dealing with enormous datasets or intricate spreadsheets, this can save you a tonne of time and effort.
In this tutorial, we'll show you step-by-step how to use Excel to generate several names from a selection. You'll find this course helpful and practical whether you're a new or seasoned Excel user. We'll go over everything you need to know, from choosing the cell range to automatically creating names based on the chosen data. You'll have the knowledge and abilities necessary to effectively name multiple cells in Excel at the end of this course, which will streamline your workflow and increase your productivity. So let's dive in and learn more about Excel's ability to generate many names from a single pick!
Creating Multiple Names from Selection in Excel
Here we will first select the range of cells, then use the name manager to complete the task. So let us see a simple process to learn how you can create multiple names from a selection in Excel.
Step 1
Consider an Excel sheet where you have data in table format as similar to below image.

First, select the range of cells, then click on Create From Selection under Formulas.
Select cells > Formulas > Create From Selection.
Step 2
Then, in the pop-up, check only the top row and Left column and click OK.
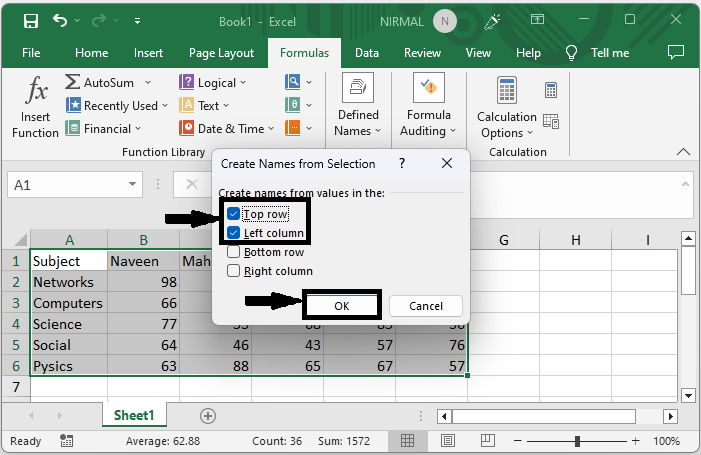
This is how you can create multiple names from a selection in Excel.
Conclusion
In this tutorial, we have used a simple example to demonstrate how you can create multiple names from a selection in Excel to highlight a particular set of data.

829 Views
