
Article Categories
- All Categories
-
 Data Structure
-
 Networking
-
 RDBMS
RDBMS
-
 Operating System
-
 Java
Java
-
 MS Excel
-
 iOS
iOS
-
 HTML
HTML
-
 CSS
CSS
-
 Android
-
 Python
-
 C Programming
-
 C++
C++
-
 C#
C#
-
 MongoDB
-
 MySQL
MySQL
-
 Javascript
-
 PHP
PHP
-
 Economics & Finance
How to Create and Insert an Auto Text Entry in Excel
Auto Text is a terrific function that can save you time and effort if you frequently find yourself typing the same text or phrases repeatedly in your Excel spreadsheets. With Auto Text, you can quickly and easily create customised entries for frequently used text, formulas, or even complex data sets.
This tutorial will walk you through the process of making your own Auto Text entries in Excel. We'll go over every step of the procedure, including creating the entry, assigning a shortcut key, and adding the record to your spreadsheet. By the end of this session, you will be able to easily enter commonly used language and data into your Excel workflow, increasing productivity right away. So let's get started and discover Excel's Auto Text's full potential!
Create and Insert an Auto Text Entry
Here we will modify the Excel options to complete the task. So let us see a simple process to know how you can create and insert an auto-text entry in Excel.
Step 1
Consider any Excel sheet. First, click on File and then Options.
File > Options.
Step 2
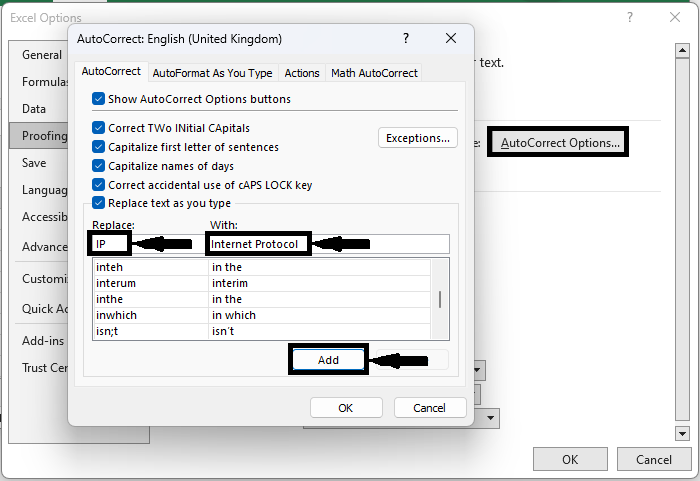
Then click on Proofing, then click on Auto Correct options. Then in the Replace box enter the simple text, and in the Contents box enter the contents to display, then click on Add and click Ok to complete the task.
Proofing > Replace > With > Add > Ok.
Step 3
From now on, when you enter a simple text in a cell and click enter, it will be converted to another text.
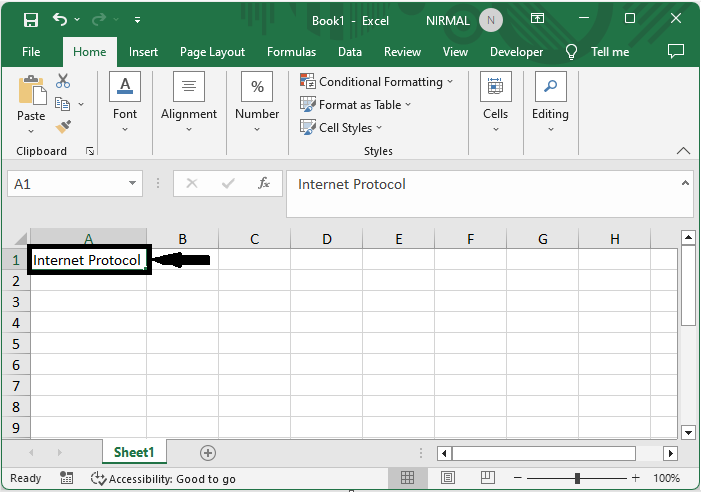
This is how you can create and insert an auto-text entry in Excel.
Conclusion
In this tutorial, we have used a simple example to demonstrate how you can create and insert an auto-text entry in Excel to highlight a particular set of data.

5K+ Views
