
Article Categories
- All Categories
-
 Data Structure
-
 Networking
-
 RDBMS
RDBMS
-
 Operating System
-
 Java
Java
-
 MS Excel
-
 iOS
iOS
-
 HTML
HTML
-
 CSS
CSS
-
 Android
-
 Python
-
 C Programming
-
 C++
C++
-
 C#
C#
-
 MongoDB
-
 MySQL
MySQL
-
 Javascript
-
 PHP
PHP
-
 Economics & Finance
How to Automatically Merge Blank Cells Above/Left in Excel?
Merging is one of the most complicated processes in Excel. If we merge the cells incorrectly, data may be lost and cannot be recovered. We can use the process mentioned in this article to do it more carefully, which only considers empty cells. This tutorial will help you understand how we can automatically merge blank cells above or left in Excel. Combining multiple cells together is known as merging.
Automatically Merge Blank Cells Above
Here we will insert a VBA module and then run it to complete our task. Let us see a straightforward process to understand how we can automatically merge blank cells above in Excel using the vba code.
Step 1
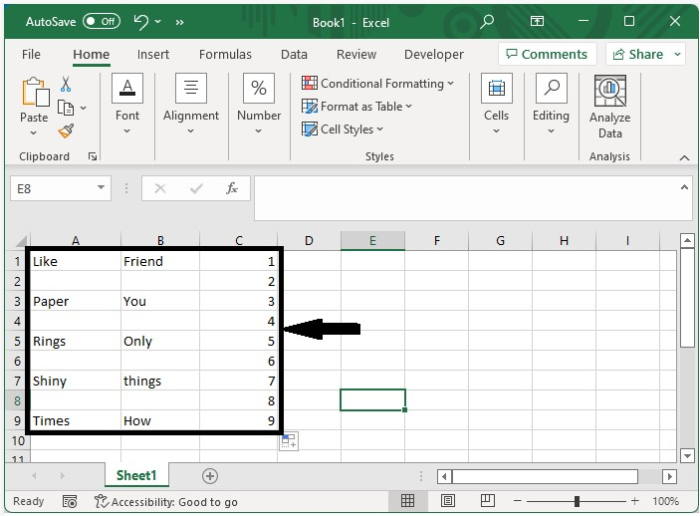
Consider an Excel sheet with data similar to the one shown in the image below.
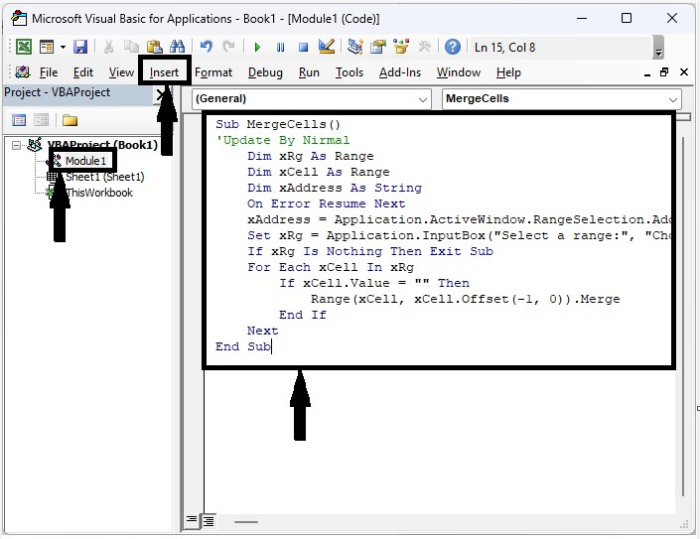
To open the VBA application, right-click on the sheet name and select View Code, then click on the inset and select Module, and type Program 1 into the text box as shown in the below image.
Example 1
<div class="code-mirror  language-javascript" contenteditable="plaintext-only" spellcheck="false" style="outline: none; overflow-wrap: break-word; overflow-y: auto; white-space: pre-wrap;">Sub <span class="token function">MergeCells</span><span class="token punctuation">(</span><span class="token punctuation">)</span>
'Update By Nirmal
   Dim xRg As Range
   Dim xCell As Range
   Dim xAddress As String
   On Error Resume Next
   xAddress <span class="token operator">=</span> Application<span class="token punctuation">.</span>ActiveWindow<span class="token punctuation">.</span>RangeSelection<span class="token punctuation">.</span>Address
   Set xRg <span class="token operator">=</span> Application<span class="token punctuation">.</span><span class="token function">InputBox</span><span class="token punctuation">(</span><span class="token string">"Select a range:"</span><span class="token punctuation">,</span> <span class="token string">"Choose the Range"</span><span class="token punctuation">,</span> xAddress<span class="token punctuation">,</span> <span class="token punctuation">,</span> <span class="token punctuation">,</span> <span class="token punctuation">,</span> <span class="token punctuation">,</span> <span class="token number">8</span><span class="token punctuation">)</span>
   If xRg Is Nothing Then Exit Sub
   For Each xCell In xRg
      If xCell<span class="token punctuation">.</span>Value <span class="token operator">=</span> <span class="token string">""</span> Then
         <span class="token function">Range</span><span class="token punctuation">(</span>xCell<span class="token punctuation">,</span> xCell<span class="token punctuation">.</span><span class="token function">Offset</span><span class="token punctuation">(</span><span class="token operator">-</span><span class="token number">1</span><span class="token punctuation">,</span> <span class="token number">0</span><span class="token punctuation">)</span><span class="token punctuation">)</span><span class="token punctuation">.</span>Merge
      End If
   Next
End Sub
</div>
Step 2
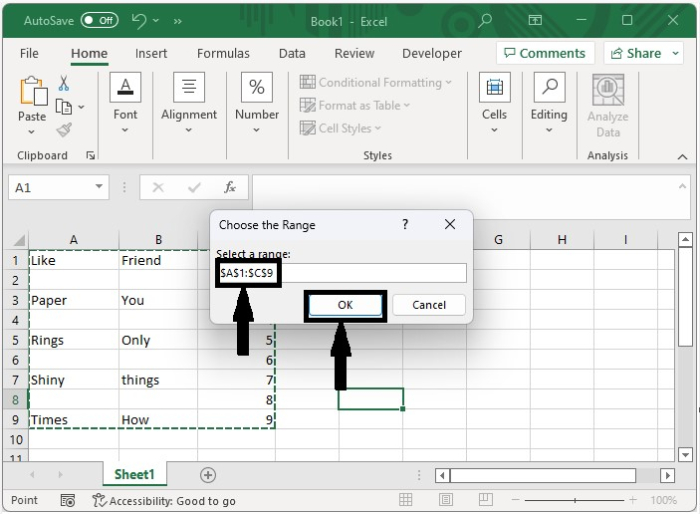
Now click on F5 to run the VBA code, then in the pop-up, select the range you want to merge, and click on OK.
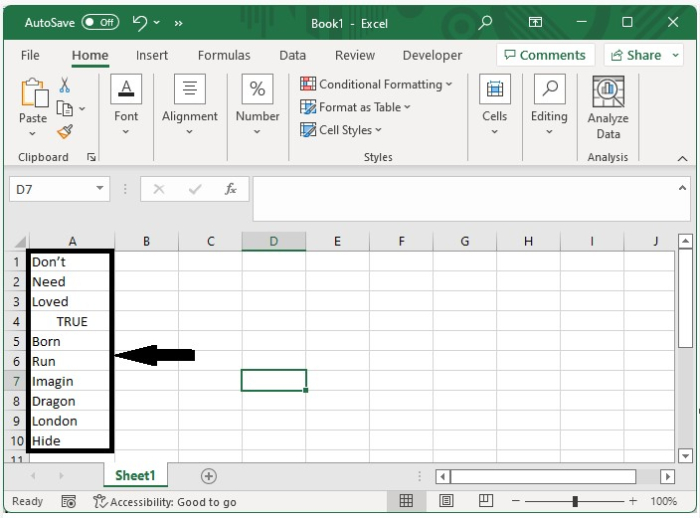
Our final output will look like the below image.

If you only want to allow mering for one of the cells above, use Program 2 in the VBA application.
Example 2
<div class="code-mirror  language-javascript" contenteditable="plaintext-only" spellcheck="false" style="outline: none; overflow-wrap: break-word; overflow-y: auto; white-space: pre-wrap;">Sub <span class="token function">mergeblankswithabove</span><span class="token punctuation">(</span><span class="token punctuation">)</span>
'Updated By Nirmal
   Dim <span class="token constant">I</span> As Long
   Dim xRow As Long
   Dim xRg As Range
   Dim xCell As Range
   Dim xAddress As String
   On Error Resume Next
   xAddress <span class="token operator">=</span> Application<span class="token punctuation">.</span>ActiveWindow<span class="token punctuation">.</span>RangeSelection<span class="token punctuation">.</span>Address
   Set xRg <span class="token operator">=</span> Application<span class="token punctuation">.</span><span class="token function">InputBox</span><span class="token punctuation">(</span><span class="token string">"Select a range (single column):"</span><span class="token punctuation">,</span> <span class="token string">"Choose the Range"</span><span class="token punctuation">,</span> xAddress<span class="token punctuation">,</span> <span class="token punctuation">,</span> <span class="token punctuation">,</span> <span class="token punctuation">,</span> <span class="token punctuation">,</span> <span class="token number">8</span><span class="token punctuation">)</span>
   If xRg Is Nothing Then Exit Sub
   If xRg<span class="token punctuation">.</span>Columns<span class="token punctuation">.</span>Count <span class="token operator">></span> <span class="token number">1</span> Then
      MsgBox <span class="token string">"Only work for single column"</span><span class="token punctuation">,</span> <span class="token punctuation">,</span> <span class="token string">"Range selected"</span>
      Exit Sub
   End If
   xRow <span class="token operator">=</span> xRg<span class="token punctuation">.</span>Rows<span class="token punctuation">.</span>Count
   Set xRg <span class="token operator">=</span> <span class="token function">xRg</span><span class="token punctuation">(</span>xRow<span class="token punctuation">)</span>
   For <span class="token constant">I</span> <span class="token operator">=</span> xRow To <span class="token number">1</span> Step <span class="token operator">-</span><span class="token number">1</span>
      Set xCell <span class="token operator">=</span> xRg<span class="token punctuation">.</span><span class="token function">Offset</span><span class="token punctuation">(</span><span class="token constant">I</span> <span class="token operator">-</span> xRow<span class="token punctuation">,</span> <span class="token number">0</span><span class="token punctuation">)</span>
      Debug<span class="token punctuation">.</span>Print xCell<span class="token punctuation">.</span>Address
      If xCell<span class="token punctuation">.</span>Value <span class="token operator">=</span> <span class="token string">""</span> Then <span class="token function">Range</span><span class="token punctuation">(</span>xCell<span class="token punctuation">,</span> xCell<span class="token punctuation">.</span><span class="token function">Offset</span><span class="token punctuation">(</span><span class="token operator">-</span><span class="token number">1</span><span class="token punctuation">,</span> <span class="token number">0</span><span class="token punctuation">)</span><span class="token punctuation">)</span><span class="token punctuation">.</span>Merge
   Next
End Sub
</div>
Automatically Merge Blank Cells Left
Here we will insert the VBA module and then run it to complete our task. Let us see a straightforward process to understand how we can automatically merge blank cells. left in Excel using the VBA code.
Step 1
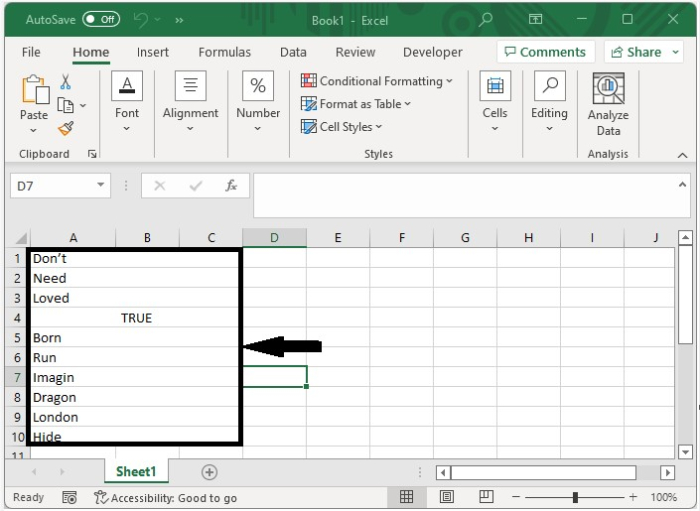
Consider an Excel sheet with data similar to the one shown in the image below.
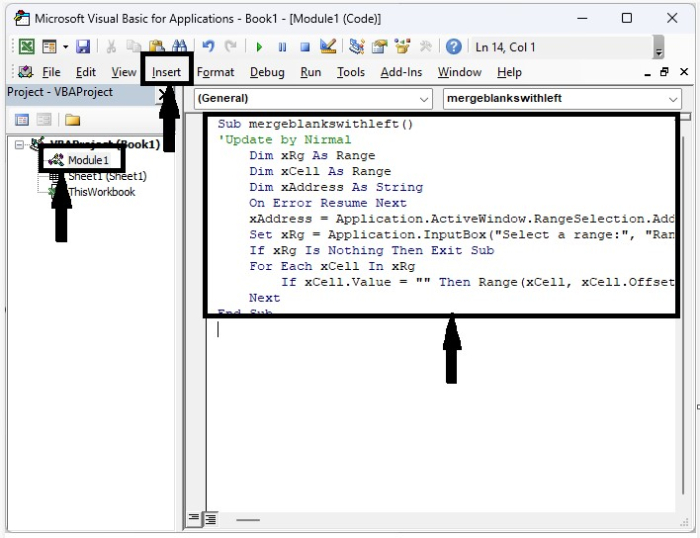
To open the VBA application, right-click on the sheet name and select View Code, then click on the inset and select Module, and type Program 3 into the text box as shown in the below image.
Example 3
<div class="code-mirror  language-javascript" contenteditable="plaintext-only" spellcheck="false" style="outline: none; overflow-wrap: break-word; overflow-y: auto; white-space: pre-wrap;">Sub <span class="token function">mergeblankswithleft</span><span class="token punctuation">(</span><span class="token punctuation">)</span>
'Update by Nirmal
   Dim xRg As Range
   Dim xCell As Range
   Dim xAddress As String
   On Error Resume Next
   xAddress <span class="token operator">=</span> Application<span class="token punctuation">.</span>ActiveWindow<span class="token punctuation">.</span>RangeSelection<span class="token punctuation">.</span>Address
   Set xRg <span class="token operator">=</span> Application<span class="token punctuation">.</span><span class="token function">InputBox</span><span class="token punctuation">(</span><span class="token string">"Select a range:"</span><span class="token punctuation">,</span> <span class="token string">"Range to merge"</span><span class="token punctuation">,</span> xAddress<span class="token punctuation">,</span> <span class="token punctuation">,</span> <span class="token punctuation">,</span> <span class="token punctuation">,</span> <span class="token punctuation">,</span> <span class="token number">8</span><span class="token punctuation">)</span>
   If xRg Is Nothing Then Exit Sub
   For Each xCell In xRg
      If xCell<span class="token punctuation">.</span>Value <span class="token operator">=</span> <span class="token string">""</span> Then <span class="token function">Range</span><span class="token punctuation">(</span>xCell<span class="token punctuation">,</span> xCell<span class="token punctuation">.</span><span class="token function">Offset</span><span class="token punctuation">(</span><span class="token number">0</span><span class="token punctuation">,</span> <span class="token operator">-</span><span class="token number">1</span><span class="token punctuation">)</span><span class="token punctuation">)</span><span class="token punctuation">.</span>Merge
   Next
End Sub
</div>
Step 2
Now click on F5 to run the vba code, then in the pop-up, select the range you want to merge, and click on "OK." Our final output will look like the below image.
Conclusion
In this tutorial, we used a simple example to demonstrate how we can automatically merge blank cells in Excel.

3K+ Views
