
Article Categories
- All Categories
-
 Data Structure
-
 Networking
-
 RDBMS
RDBMS
-
 Operating System
-
 Java
Java
-
 MS Excel
-
 iOS
iOS
-
 HTML
HTML
-
 CSS
CSS
-
 Android
-
 Python
-
 C Programming
-
 C++
C++
-
 C#
C#
-
 MongoDB
-
 MySQL
MySQL
-
 Javascript
-
 PHP
PHP
-
 Economics & Finance
Selected Reading
Auto-format code in Arduino IDE
Formatting the code is quite important to make it readable. It is recommended that you properly format the code regularly, and especially before sharing it with someone else.
Follow these steps to auto-format code in Arduino IDE −
- Go to Tools
- Click on Auto Format
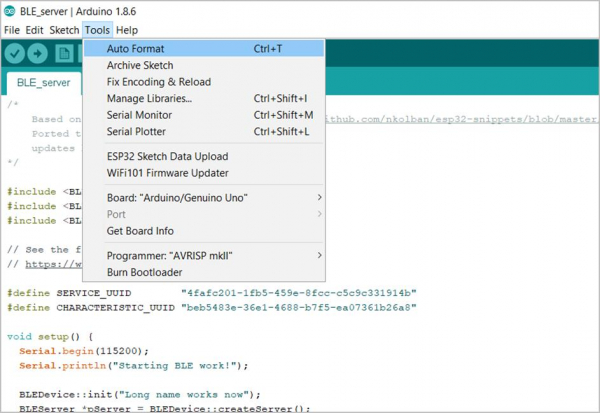
Alternatively, you can press Ctrl+T on your keyboard. This will format the code and add the correct indentations wherever required.
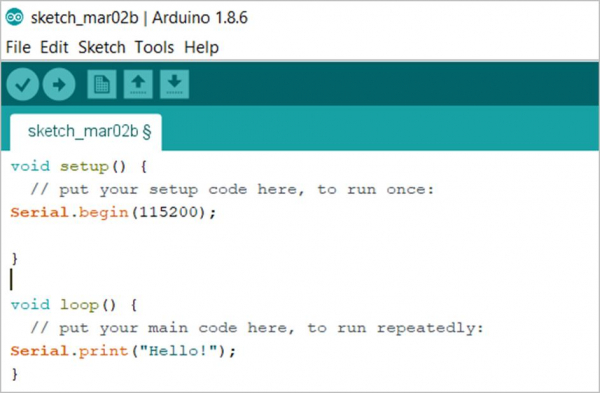
Before Auto-Format
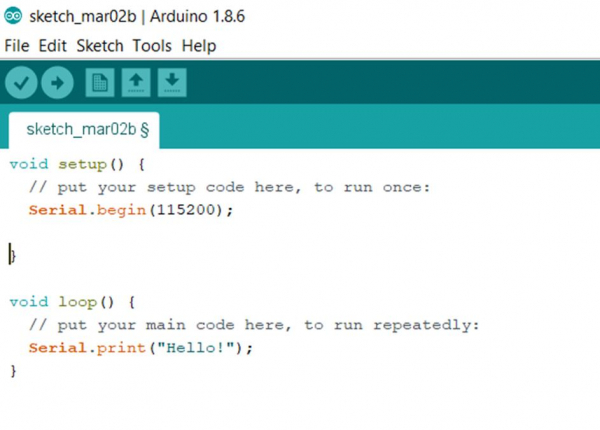
After Auto-Format

Updated on: 2021-03-23T11:01:59+05:30
5K+ Views

Advertisements