- Struts 2 Tutorial
- Struts2 - Home
- Struts2 - Basic MVC Architecture
- Struts2 - Overview
- Struts2 - Environment Setup
- Struts2 - Architecture
- Struts2 - Examples
- Struts2 - Configuration
- Struts2 - Actions
- Struts2 - Interceptors
- Struts2 - Result Types
- Struts2 - Value Stack/OGNL
- Struts2 - File Uploads
- Struts2 - Database Access
- Struts2 - Sending Email
- Struts2 - Validations
- Struts2 - Localization
- Struts2 - Type Conversion
- Struts2 - Themes/Templates
- Struts2 - Exception Handling
- Struts2 - Annotations
- Struts 2 Integrations
- Struts2 - Spring
- Struts2 - Tiles
- Struts2 - Hibernate
- Struts 2 Useful Resources
- Struts2 - Questions and Answers
- Struts2 - Quick Guide
- Struts2 - Useful Resources
- Struts2 - Discussion
Struts 2 - Quick Guide
Basic MVC Architecture
Model View Controller or MVC as it is popularly called, is a software design pattern for developing web applications. A Model View Controller pattern is made up of the following three parts −
Model − The lowest level of the pattern which is responsible for maintaining data.
View − This is responsible for displaying all or a portion of the data to the user.
Controller − Software Code that controls the interactions between the Model and View.
MVC is popular as it isolates the application logic from the user interface layer and supports separation of concerns. Here the Controller receives all requests for the application and then works with the Model to prepare any data needed by the View. The View then uses the data prepared by the Controller to generate a final presentable response. The MVC abstraction can be graphically represented as follows.

The Model
The model is responsible for managing the data of the application. It responds to the request from the view and it also responds to instructions from the controller to update itself.
The View
It means presentation of data in a particular format, triggered by a controller's decision to present the data. They are script-based templating systems like JSP, ASP, PHP and very easy to integrate with AJAX technology.
The Controller
The controller is responsible for responding to the user input and perform interactions on the data model objects. The controller receives the input, it validates the input and then performs the business operation that modifies the state of the data model.
Struts2 is a MVC based framework. In the coming chapters, let us see how we can use the MVC methodology within Struts2.
Struts 2 - Overview
Struts2 is a popular and mature web application framework based on the MVC design pattern. Struts2 is not just a new version of Struts 1, but it is a complete rewrite of the Struts architecture.
The Webwork framework initially started with Struts framework as the basis and its goal was to offer an enhanced and improved framework built on Struts to make web development easier for the developers.
After a while, the Webwork framework and the Struts community joined hands to create the famous Struts2 framework.
Struts 2 Framework Features
Here are some of the great features that may force you to consider Struts2 −
POJO Forms and POJO Actions − Struts2 has done away with the Action Forms that were an integral part of the Struts framework. With Struts2, you can use any POJO to receive the form input. Similarly, you can now see any POJO as an Action class.
Tag Support − Struts2 has improved the form tags and the new tags which allow the developers to write less code.
AJAX Support − Struts2 has recognized the take over by Web2.0 technologies, and has integrated AJAX support into the product by creating AJAX tags, this function is very similar to the standard Struts2 tags.
Easy Integration − Integration with other frameworks like Spring, Tiles and SiteMesh is now easier with a variety of integration available with Struts2.
Template Support − Support for generating views using templates.
Plugin Support − The core Struts2 behavior can be enhanced and augmented by the use of plugins. A number of plugins are available for Struts2.
Profiling − Struts2 offers integrated profiling to debug and profile the application. In addition to this, Struts also offers integrated debugging with the help of built in debugging tools.
Easy to Modify Tags − Tag markups in Struts2 can be tweaked using Freemarker templates. This does not require JSP or java knowledge. Basic HTML, XML and CSS knowledge is enough to modify the tags.
Promote Less configuration − Struts2 promotes less configuration with the help of using default values for various settings. You don't have to configure something unless it deviates from the default settings set by Struts2.
View Technologies − Struts2 has a great support for multiple view options (JSP, Freemarker, Velocity and XSLT)
Listed above are the Top 10 features of Struts 2 which makes it as an Enterprise ready framework.
Struts 2 Disadvantages
Though Struts 2 comes with a list of great features, there are some limitations of the current version - Struts 2 which needs further improvement. Listed are some of the main points −
Bigger Learning Curve − To use MVC with Struts, you have to be comfortable with the standard JSP, Servlet APIs and a large & elaborate framework.
Poor Documentation − Compared to the standard servlet and JSP APIs, Struts has fewer online resources, and many first-time users find the online Apache documentation confusing and poorly organized.
Less Transparent − With Struts applications, there is a lot more going on behind the scenes than with normal Java-based Web applications which makes it difficult to understand the framework.
Final note, a good framework should provide generic behavior that many different types of applications can make use of it.
Struts 2 is one of the best web frameworks and being highly used for the development of Rich Internet Applications (RIA).
Struts 2 - Environment Setup
Our first task is to get a minimal Struts 2 application running. This chapter will guide you on how to prepare a development environment to start your work with Struts 2.
I assume that you already have JDK (5+), Tomcat and Eclipse installed on your machine. If you do not have these components installed, then follow the given steps on fast track −
Step 1 - Setup Java Development Kit (JDK)
You can download the latest version of SDK from Oracle's Java site − Java SE Downloads. You will find instructions for installing JDK in downloaded files, follow the given instructions to install and configure the setup. Finally, set PATH and JAVA_HOME environment variables to refer to the directory that contains java and javac, typically java_install_dir/bin and java_install_dir respectively.
If you are running Windows and installed the SDK in C:\jdk1.5.0_20, you should be inputting the following line in your C:\autoexec.bat file.
set PATH = C:\jdk1.5.0_20\bin;%PATH%
set JAVA_HOME = C:\jdk1.5.0_20
Alternatively, on Windows NT/2000/XP −
You can right-click on My Computer, Select Properties, then Advanced, then Environment Variables. Then, you would update the PATH value and press the OK button.
On Unix (Solaris, Linux, etc.), if the SDK is installed in /usr/local/jdk1.5.0_20 and you use the C shell, you would put the following into your .cshrc file.
On Unix (Solaris, Linux, etc.), if the SDK is installed in /usr/local/jdk1.5.0_20 and you use the C shell, you would put the following into your .cshrc file.
setenv PATH /usr/local/jdk1.5.0_20/bin:$PATH
setenv JAVA_HOME /usr/local/jdk1.5.0_20
Alternatively, if you use an Integrated Development Environment (IDE) like Borland JBuilder, Eclipse, IntelliJ IDEA, or Sun ONE Studio, compile and run a simple program to confirm that the IDE knows where you installed Java, otherwise do proper setup as per the given document of IDE.
Step 2 - Setup Apache Tomcat
You can download the latest version of Tomcat from https://tomcat.apache.org/. Once you downloaded the installation, unpack the binary distribution into a convenient location.
For example in C:\apache-tomcat-6.0.33 on windows, or /usr/local/apachetomcat-6.0.33 on Linux/Unix and create CATALINA_HOME environment variable pointing to these locations.
You can start Tomcat by executing the following commands on windows machine, or you can simply double click on startup.bat
%CATALINA_HOME%\bin\startup.bat

or

C:\apache-tomcat-6.0.33\bin\startup.bat
Tomcat can be started by executing the following commands on Unix (Solaris, Linux, etc.) machine −
$CATALINA_HOME/bin/startup.sh

or

/usr/local/apache-tomcat-6.0.33/bin/startup.sh
After a successful startup, the default web applications included with Tomcat will be available by visiting http://localhost:8080/. If everything is fine, then it should display the following result −
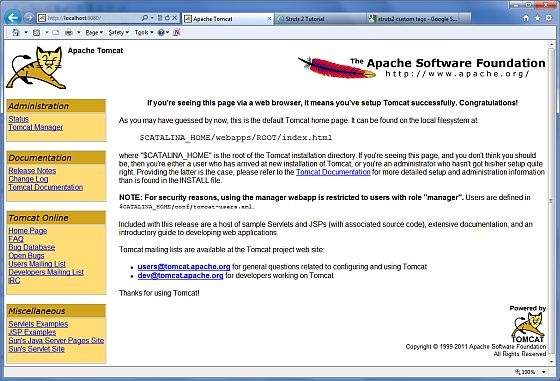
Further information about configuring and running Tomcat can be found in the documentation included here, as well as on the Tomcat website: https://tomcat.apache.org/
Tomcat can be stopped by executing the following commands on windows machine −
%CATALINA_HOME%\bin\shutdown

or

C:\apache-tomcat-5.5.29\bin\shutdown
Tomcat can be stopped by executing the following commands on Unix (Solaris, Linux, etc.) machine −
$CATALINA_HOME/bin/shutdown.sh

or

/usr/local/apache-tomcat-5.5.29/bin/shutdown.sh
Step 3 - Setup Eclipse (IDE)
All the examples in this tutorial are written using Eclipse IDE. I suggest that, you have the latest version of Eclipse installed in your machine.
To install Eclipse Download the latest Eclipse binaries from https://www.eclipse.org/downloads/. Once you download the installation, unpack the binary distribution into a convenient location.
For example in C:\eclipse on windows, or /usr/local/eclipse on Linux/Unix and finally set PATH variable appropriately. Eclipse can be started by executing the following commands on windows machine, or you can simply double click on eclipse.exe
%C:\eclipse\eclipse.exe
Eclipse can be started by executing the following commands on Unix (Solaris, Linux, etc.) machine −
$/usr/local/eclipse/eclipse
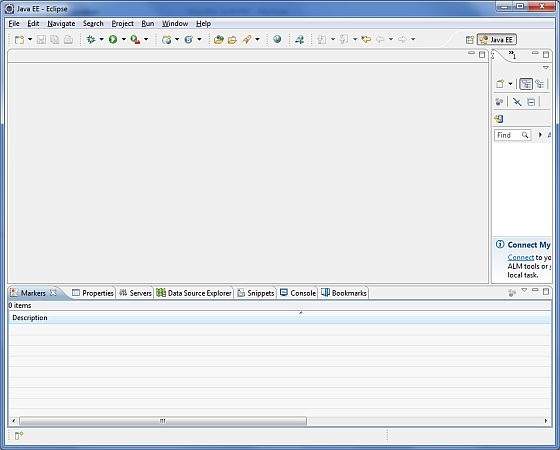
After a successful startup, if everything is fine, it should display the following result −
Step 4 - Setup Struts2 Libraries
Now if everything is fine, then you can proceed to setup your Struts2 framemwork. Following are the simple steps to download and install Struts2 on your machine.
Make a choice whether you want to install Struts2 on Windows, or Unix and then proceed to the next step to download .zip file for windows and .tz file for Unix.
Download the latest version of Struts2 binaries from https://struts.apache.org/download.cgi.
At the time of writing this tutorial, I downloaded struts-2.0.14-all.zip and when you unzip the downloaded file it will give you directory structure inside C:\struts-2.2.3 as follows.
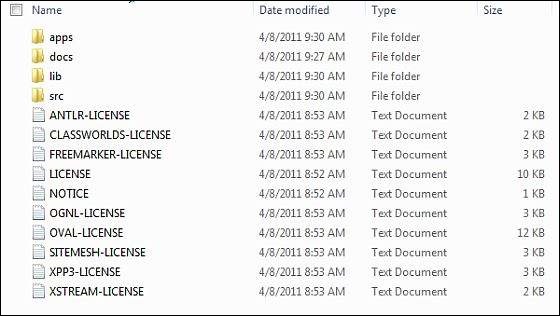
Second step is to extract the zip file in any location, I downloaded & extracted struts-2.2.3-all.zip in c:\ folder on my Windows 7 machine so that I have all the jar files into C:\struts-2.2.3\lib. Make sure you set your CLASSPATH variable properly otherwise you will face problem while running your application.
Struts 2 - Architecture
From a high level, Struts2 is a pull-MVC (or MVC2) framework. The Model-ViewController pattern in Struts2 is implemented with the following five core components −
- Actions
- Interceptors
- Value Stack / OGNL
- Results / Result types
- View technologies
Struts 2 is slightly different from a traditional MVC framework, where the action takes the role of the model rather than the controller, although there is some overlap.
The above diagram depicts the Model, View and Controller to the Struts2 high level architecture. The controller is implemented with a Struts2 dispatch servlet filter as well as interceptors, this model is implemented with actions, and the view is a combination of result types and results. The value stack and OGNL provides common thread, linking and enabling integration between the other components.
Apart from the above components, there will be a lot of information that relates to configuration. Configuration for the web application, as well as configuration for actions, interceptors, results, etc.
This is the architectural overview of the Struts 2 MVC pattern. We will go through each component in more detail in the subsequent chapters.
Request Life Cycle
Based on the above diagram, you can understand the work flow through user's request life cycle in Struts 2 as follows −
User sends a request to the server for requesting for some resource (i.e. pages).
The Filter Dispatcher looks at the request and then determines the appropriate Action.
Configured interceptor functionalities applies such as validation, file upload etc.
Selected action is performed based on the requested operation.
Again, configured interceptors are applied to do any post-processing if required.
Finally, the result is prepared by the view and returns the result to the user.
Struts 2 - Hello World Example
As you have already learnt from the Struts 2 architecture, when you click on a hyperlink or submit an HTML form in a Struts 2 web-application, the input is collected by the Controller which is sent to a Java class called Actions. After the Action is executed, a result selects a resource to render the response. The resource is generally a JSP, but it can also be a PDF file, an Excel spreadsheet, or a Java applet window.
Assuming that you already have built your development environment. Now, let us proceed for building our first Hello World Struts2 project. The aim of this project is to build a web application that collects the user's name and displays "Hello World" followed by the user name.
We would have to create following four components for any Struts 2 project −
| Sr.No | Components & Description |
|---|---|
| 1 | Action Create an action class which will contain complete business logic and control the interaction between the user, the model, and the view. |
| 2 | Interceptors Create interceptors if required, or use existing interceptors. This is part of Controller. |
| 3 | View Create a JSPs to interact with the user to take input and to present the final messages. |
| 4 | Configuration Files Create configuration files to couple the Action, View and Controllers. These files are struts.xml, web.xml, struts.properties. |
I am going to use Eclipse IDE, so that all the required components will be created under a Dynamic Web Project. Let us now start with creating Dynamic Web Project.
Create a Dynamic Web Project
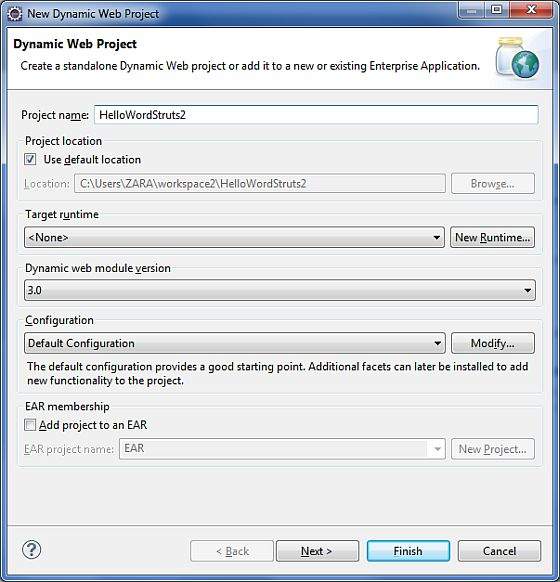
Start your Eclipse and then go with File > New > Dynamic Web Project and enter project name as HelloWorldStruts2 and set rest of the options as given in the following screen −
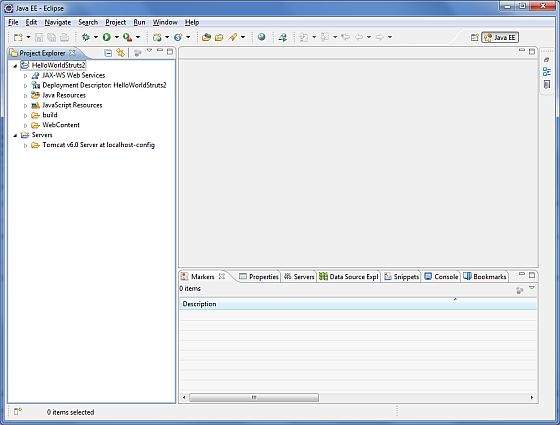
Select all the default options in the next screens and finally check Generate Web.xml deployment descriptor option. This will create a dynamic web project for you in Eclipse. Now go with Windows > Show View > Project Explorer, and you will see your project window something as below −
Now copy following files from struts 2 lib folder C:\struts-2.2.3\lib to our project's WEB-INF\lib folder. To do this, you can simply drag and drop all the following files into WEB-INF\lib folder.
- commons-fileupload-x.y.z.jar
- commons-io-x.y.z.jar
- commons-lang-x.y.jar
- commons-logging-x.y.z.jar
- commons-logging-api-x.y.jar
- freemarker-x.y.z.jar
- javassist-.xy.z.GA
- ognl-x.y.z.jar
- struts2-core-x.y.z.jar
- xwork-core.x.y.z.jar
Create Action Class
Action class is the key to Struts 2 application and we implement most of the business logic in action class. So let us create a java file HelloWorldAction.java under Java Resources > src with a package name com.tutorialspoint.struts2 with the contents given below.
The Action class responds to a user action when user clicks a URL. One or more of the Action class's methods are executed and a String result is returned. Based on the value of the result, a specific JSP page is rendered.
package com.tutorialspoint.struts2;

public class HelloWorldAction {
   private String name;

   public String execute() throws Exception {
      return "success";
   }

   public String getName() {
      return name;
   }

   public void setName(String name) {
      this.name = name;
   }
}
This is a very simple class with one property called "name". We have standard getters and setter methods for the "name" property and an execute method that returns the string "success".
The Struts 2 framework will create an object of the HelloWorldAction class and call the executed method in response to a user's action. You put your business logic inside this method which finally returns the String constant. In other words, for each URL, you would have to implement one action class and either you can use that class name directly as your action name or you can map to some other name using struts.xml file as shown below.
Create a View
We need a JSP to present the final message, this page will be called by Struts 2 framework when a predefined action will happen and this mapping will be defined in struts.xml file. So let us create the below jsp file HelloWorld.jsp in the WebContent folder in your eclipse project. To do this, right click on the WebContent folder in the project explorer and select New >JSP File.
<%@ page contentType = "text/html; charset = UTF-8" %>
<%@ taglib prefix = "s" uri = "/struts-tags" %>

<html>
   <head>
      <title>Hello World</title>
   </head>

   <body>
      Hello World, <s:property value = "name"/>
   </body>
</html>
The taglib directive tells the Servlet container that this page will be using the Struts 2 tags and that these tags will be preceded by s.
The s:property tag displays the value of action class property "name> which is returned by the method getName() of the HelloWorldAction class.
Create Main Page
We also need to create index.jsp in the WebContent folder. This file will serve as the initial action URL where a user can click to tell the Struts 2 framework to call a defined method of the HelloWorldAction class and render the HelloWorld.jsp view.
<%@ page language = "java" contentType = "text/html; charset = ISO-8859-1"
   pageEncoding = "ISO-8859-1"%>
<%@ taglib prefix = "s" uri = "/struts-tags"%>
   <!DOCTYPE html PUBLIC "-//W3C//DTD HTML 4.01 Transitional//EN"
"http://www.w3.org/TR/html4/loose.dtd">

<html>
   <head>
      <title>Hello World</title>
   </head>

   <body>
      <h1>Hello World From Struts2</h1>
      <form action = "hello">
         <label for = "name">Please enter your name</label><br/>
         <input type = "text" name = "name"/>
         <input type = "submit" value = "Say Hello"/>
      </form>
   </body>
</html>
The hello action defined in the above view file will be mapped to the HelloWorldAction class and its execute method using struts.xml file. When a user clicks on the Submit button it will cause the Struts 2 framework to run the execute method defined in the HelloWorldAction class and based on the returned value of the method, an appropriate view will be selected and rendered as a response.
Configuration Files
We need a mapping to tie the URL, the HelloWorldAction class (Model), and the HelloWorld.jsp (the view) together. The mapping tells the Struts 2 framework which class will respond to the user's action (the URL), which method of that class will be executed, and what view to render based on the String result that method returns.
So let us create a file called struts.xml. Since Struts 2 requires struts.xml to be present in the classes folder. Hence, create struts.xml file under the WebContent/WEB-INF/classes folder. Eclipse does not create the "classes" folder by default, so you need to do this yourself. To do this, right click on the WEB-INF folder in the project explorer and select New > Folder. Your struts.xml should look like −
<?xml version = "1.0" Encoding = "UTF-8"?>
<!DOCTYPE struts PUBLIC
   "-//Apache Software Foundation//DTD Struts Configuration 2.0//EN"
   "http://struts.apache.org/dtds/struts-2.0.dtd">

<struts>
   <constant name = "struts.devMode" value = "true" />

   <package name = "helloworld" extends = "struts-default">
     <action name = "hello"
         class = "com.tutorialspoint.struts2.HelloWorldAction"
         method = "execute">
         <result name = "success">/HelloWorld.jsp</result>
      </action>
   </package>
</struts>
Few words which need to be understood regarding the above configuration file. Here, we set the constant struts.devMode to true, because we are working in development environment and we need to see some useful log messages. Then, we define a package called helloworld.
Creating a package is useful when you want to group your actions together. In our example, we named our action as "hello" which is corresponding to the URL /hello.action and is backed up by theHelloWorldAction.class. The execute method of HelloWorldAction.class is the method that is run when the URL /hello.action is invoked. If the outcome of the execute method returns "success", then we take the user to HelloWorld.jsp.
Next step is to create a web.xml file which is an entry point for any request to Struts 2. The entry point of Struts2 application will be a filter defined in deployment descriptor (web.xml). Hence, we will define an entry of org.apache.struts2.dispatcher.FilterDispatcher class in web.xml. The web.xml file needs to be created under the WEB-INF folder under WebContent. Eclipse had already created a skeleton web.xml file for you when you created the project. So, lets just modify it as follows −
<?xml version = "1.0" Encoding = "UTF-8"?>
<web-app xmlns:xsi = "http://www.w3.org/2001/XMLSchema-instance"
   xmlns = "http://java.sun.com/xml/ns/javaee"
   xmlns:web = "http://java.sun.com/xml/ns/javaee/web-app_2_5.xsd"
   xsi:schemaLocation = "http://java.sun.com/xml/ns/javaee
   http://java.sun.com/xml/ns/javaee/web-app_3_0.xsd"
   id = "WebApp_ID" version = "3.0">

   <display-name>Struts 2</display-name>

   <welcome-file-list>
      <welcome-file>index.jsp</welcome-file>
   </welcome-file-list>

   <filter>
      <filter-name>struts2</filter-name>
      <filter-class>
         org.apache.struts2.dispatcher.FilterDispatcher
      </filter-class>
   </filter>

   <filter-mapping>
      <filter-name>struts2</filter-name>
      <url-pattern>/*</url-pattern>
   </filter-mapping>
</web-app>
We have specified index.jsp to be our welcome file. Then we have configured the Struts2 filter to run on all urls (i.e, any url that match the pattern /*)
To Enable Detailed Log
You can enable complete logging functionality while working with Struts 2 by creating logging.properties file under WEB-INF/classes folder. Keep the following two lines in your property file −
org.apache.catalina.core.ContainerBase.[Catalina].level = INFO
org.apache.catalina.core.ContainerBase.[Catalina].handlers = \
   java.util.logging.ConsoleHandler
The default logging.properties specifies a ConsoleHandler for routing logging to stdout and also a FileHandler. A handler's log level threshold can be set using SEVERE, WARNING, INFO, CONFIG, FINE, FINER, FINEST or ALL.
That's it. We are ready to run our Hello World application using Struts 2 framework.
Procedure for Executing the Application
Right click on the project name and click Export > WAR File to create a War file.
Then deploy this WAR in the Tomcat's webapps directory.
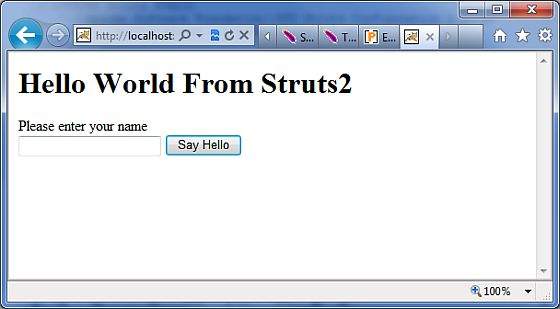
Finally, start Tomcat server and try to access URL http://localhost:8080/HelloWorldStruts2/index.jsp. This will give you following screen −
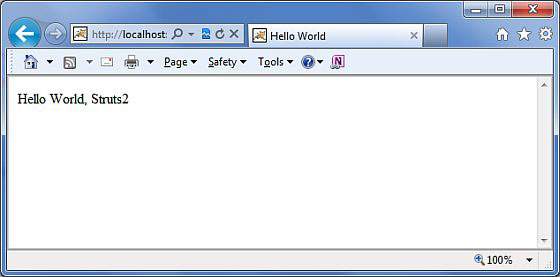
Enter a value "Struts2" and submit the page. You should see the next page
Note that you can define index as an action in struts.xml file and in that case you can call index page as http://localhost:8080/HelloWorldStruts2/index.action. Check below how you can define index as an action −
<?xml version = "1.0" Encoding = "UTF-8"?>
<!DOCTYPE struts PUBLIC
   "-//Apache Software Foundation//DTD Struts Configuration 2.0//EN"
   "http://struts.apache.org/dtds/struts-2.0.dtd">
<struts>
   <constant name = "struts.devMode" value = "true" />
   <package name = "helloworld" extends = "struts-default">

      <action name = "index">
         <result >/index.jsp</result>
      </action>

      <action name = "hello"
         class = "com.tutorialspoint.struts2.HelloWorldAction"
         method = "execute">
         <result name = "success">/HelloWorld.jsp</result>
      </action>

   </package>
</struts>
Struts 2 - Configuration Files
This chapter will take you through basic configuration which is required for a Struts 2 application. Here we will see what can be configured with the help of few important configuration files like web.xml, struts.xml, strutsconfig.xml and struts.properties
Honestly speaking, you can start working by just using web.xml and struts.xml configuration files (as you have already witnessed in our previous chapter where our example worked using these two files). However, for your knowledge we will explain regarding other files also.
The web.xml File
The web.xml configuration file is a J2EE configuration file that determines how elements of the HTTP request are processed by the servlet container. It is not strictly a Struts2 configuration file, but it is a file that needs to be configured for Struts2 to work.
As discussed earlier, this file provides an entry point for any web application. The entry point of Struts2 application will be a filter defined in deployment descriptor (web.xml). Hence we will define an entry of FilterDispatcher class in web.xml. The web.xml file needs to be created under the folder WebContent/WEB-INF.
This is the first configuration file you will need to configure if you are starting without the aid of a template or tool that generates it (such as Eclipse or Maven2).
Following is the content of web.xml file which we used in our last example.
<?xml version = "1.0" Encoding = "UTF-8"?>
<web-app xmlns:xsi = "http://www.w3.org/2001/XMLSchema-instance"
   xmlns = "http://java.sun.com/xml/ns/javaee"
   xmlns:web = "http://java.sun.com/xml/ns/javaee/web-app_2_5.xsd"
   xsi:schemaLocation = "http://java.sun.com/xml/ns/javaee
   http://java.sun.com/xml/ns/javaee/web-app_3_0.xsd"
   id = "WebApp_ID" version = "3.0">

   <display-name>Struts 2</display-name>
   <welcome-file-list>
      <welcome-file>index.jsp</welcome-file>
   </welcome-file-list>

   <filter>
      <filter-name>struts2</filter-name>
      <filter-class>
         org.apache.struts2.dispatcher.FilterDispatcher
      </filter-class>
   </filter>

   <filter-mapping>
      <filter-name>struts2</filter-name>
      <url-pattern>/*</url-pattern>
   </filter-mapping>

</web-app>
Note that we map the Struts 2 filter to /*, and not to /*.action which means that all urls will be parsed by the struts filter. We will cover this when we will go through the Annotations chapter.
The Struts.xml File
The struts.xml file contains the configuration information that you will be modifying as actions are developed. This file can be used to override default settings for an application, for example struts.devMode = false and other settings which are defined in property file. This file can be created under the folder WEB-INF/classes.
Let us have a look at the struts.xml file we created in the Hello World example explained in previous chapter.
<?xml version = "1.0" Encoding = "UTF-8"?>
<!DOCTYPE struts PUBLIC
   "-//Apache Software Foundation//DTD Struts Configuration 2.0//EN"
   "http://struts.apache.org/dtds/struts-2.0.dtd">
<struts>
   <constant name = "struts.devMode" value = "true" />
   <package name = "helloworld" extends = "struts-default">

      <action name = "hello"
         class = "com.tutorialspoint.struts2.HelloWorldAction"
         method = "execute">
         <result name = "success">/HelloWorld.jsp</result>
      </action>

      <-- more actions can be listed here -->

   </package>
   <-- more packages can be listed here -->

</struts>
The first thing to note is the DOCTYPE. All struts configuration file needs to have the correct doctype as shown in our little example. <struts> is the root tag element, under which we declare different packages using <package> tags. Here <package> allows separation and modularization of the configuration. This is very useful when you have a large project and project is divided into different modules.
For example, if your project has three domains - business_application, customer_application and staff_application, then you could create three packages and store associated actions in the appropriate package.
The package tag has the following attributes −
| Sr.No | Attribute & Description |
|---|---|
| 1 | name (required) The unique identifier for the package |
| 2 | extends Which package does this package extend from? By default, we use struts-default as the base package. |
| 3 | abstract If marked true, the package is not available for end user consumption. |
| 4 | namespace Unique namespace for the actions |
The constant tag along with name and value attributes should be used to override any of the following properties defined in default.properties, like we just set struts.devMode property. Setting struts.devMode property allows us to see more debug messages in the log file.
We define action tags corresponds to every URL we want to access and we define a class with execute() method which will be accessed whenever we will access corresponding URL.
Results determine what gets returned to the browser after an action is executed. The string returned from the action should be the name of a result. Results are configured per-action as above, or as a "global" result, available to every action in a package. Results have optional name and type attributes. The default name value is "success".
Struts.xml file can grow big over time and so breaking it by packages is one way of modularizing it, but Struts offers another way to modularize the struts.xml file. You could split the file into multiple xml files and import them in the following fashion.
<?xml version = "1.0" Encoding = "UTF-8"?>
<!DOCTYPE struts PUBLIC
   "-//Apache Software Foundation//DTD Struts Configuration 2.0//EN"
   "http://struts.apache.org/dtds/struts-2.0.dtd">

<struts>
   <include file="my-struts1.xml"/>
   <include file="my-struts2.xml"/>
</struts>
The other configuration file that we haven't covered is the struts-default.xml. This file contains the standard configuration settings for Struts and you would not have to touch these settings for 99.99% of your projects. For this reason, we are not going into too much detail on this file. If you are interested, take a look into the at the default.properties file available in struts2-core-2.2.3.jar file.
The Struts-config.xml File
The struts-config.xml configuration file is a link between the View and Model components in the Web Client but you would not have to touch these settings for 99.99% of your projects.
The configuration file basically contains following main elements −
| Sr.No | Interceptor & Description |
|---|---|
| 1 | struts-config This is the root node of the configuration file. |
| 2 | form-beans This is where you map your ActionForm subclass to a name. You use this name as an alias for your ActionForm throughout the rest of the strutsconfig.xml file, and even on your JSP pages. |
| 3 | global forwards This section maps a page on your webapp to a name. You can use this name to refer to the actual page. This avoids hardcoding URLs on your web pages. |
| 4 | action-mappings This is where you declare form handlers and they are also known as action mappings. |
| 5 | controller This section configures Struts internals and rarely used in practical situations. |
| 6 | plug-in This section tells Struts where to find your properties files, which contain prompts and error messages |
Following is the sample struts-config.xml file −
<?xml version = "1.0" Encoding = "ISO-8859-1" ?>
<!DOCTYPE struts-config PUBLIC
   "-//Apache Software Foundation//DTD Struts Configuration 1.0//EN"
   "http://jakarta.apache.org/struts/dtds/struts-config_1_0.dtd">

<struts-config>

   <!-- ========== Form Bean Definitions ============ -->
   <form-beans>
      <form-bean name = "login" type = "test.struts.LoginForm" />
   </form-beans>

   <!-- ========== Global Forward Definitions ========= -->
   <global-forwards>
   </global-forwards>

   <!-- ========== Action Mapping Definitions ======== -->
   <action-mappings>
      <action
         path = "/login"
         type = "test.struts.LoginAction" >

         <forward name = "valid" path = "/jsp/MainMenu.jsp" />
         <forward name = "invalid" path = "/jsp/LoginView.jsp" />
      </action>
   </action-mappings>

   <!-- ========== Controller Definitions ======== -->
   <controller contentType = "text/html;charset = UTF-8"
      debug = "3" maxFileSize = "1.618M" locale = "true" nocache = "true"/>

</struts-config>
For more detail on struts-config.xml file, kindly check your struts documentation.
The Struts.properties File
This configuration file provides a mechanism to change the default behavior of the framework. Actually, all the properties contained within the struts.properties configuration file can also be configured in the web.xml using the init-param, as well using the constant tag in the struts.xml configuration file. But, if you like to keep the things separate and more struts specific, then you can create this file under the folder WEB-INF/classes.
The values configured in this file will override the default values configured in default.properties which is contained in the struts2-core-x.y.z.jar distribution. There are a couple of properties that you might consider changing using the struts.properties file −
### When set to true, Struts will act much more friendly for developers
struts.devMode = true

### Enables reloading of internationalization files
struts.i18n.reload = true

### Enables reloading of XML configuration files
struts.configuration.xml.reload = true

### Sets the port that the server is run on
struts.url.http.port = 8080
Here any line starting with hash (#) will be assumed as a comment and it will be ignored by Struts 2.
Struts 2 - Actions
Actions are the core of the Struts2 framework, as they are for any MVC (Model View Controller) framework. Each URL is mapped to a specific action, which provides the processing logic which is necessary to service the request from the user.
But the action also serves in two other important capacities. Firstly, the action plays an important role in the transfer of data from the request through to the view, whether its a JSP or other type of result. Secondly, the action must assist the framework in determining which result should render the view that will be returned in the response to the request.
Create Action
The only requirement for actions in Struts2 is that there must be one noargument method that returns either a String or Result object and must be a POJO. If the no-argument method is not specified, the default behavior is to use the execute() method.
Optionally you can extend the ActionSupport class which implements six interfaces including Action interface. The Action interface is as follows −
public interface Action {
   public static final String SUCCESS = "success";
   public static final String NONE = "none";
   public static final String ERROR = "error";
   public static final String INPUT = "input";
   public static final String LOGIN = "login";
   public String execute() throws Exception;
}
Let us take a look at the action method in the Hello World example −
package com.tutorialspoint.struts2;

public class HelloWorldAction {
   private String name;

   public String execute() throws Exception {
      return "success";
   }

   public String getName() {
      return name;
   }

   public void setName(String name) {
      this.name = name;
   }
}
To illustrate the point that the action method controls the view, let us make the following change to the execute method and extend the class ActionSupport as follows −
package com.tutorialspoint.struts2;

import com.opensymphony.xwork2.ActionSupport;

public class HelloWorldAction extends ActionSupport {
   private String name;

   public String execute() throws Exception {
      if ("SECRET".equals(name)) {
         return SUCCESS;
      } else {
         return ERROR;
      }
   }

   public String getName() {
      return name;
   }

   public void setName(String name) {
      this.name = name;
   }
}
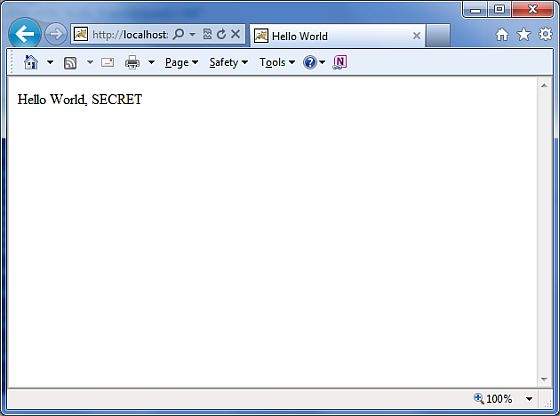
In this example, we have some logic in the execute method to look at the name attribute. If the attribute equals to the string "SECRET", we return SUCCESS as the result otherwise we return ERROR as the result. Because we have extended ActionSupport, so we can use String constants SUCCESS and ERROR. Now, let us modify our struts.xml file as follows −
<?xml version = "1.0" Encoding = "UTF-8"?>
<!DOCTYPE struts PUBLIC
   "-//Apache Software Foundation//DTD Struts Configuration 2.0//EN"
   "http://struts.apache.org/dtds/struts-2.0.dtd">

<struts>
   <constant name = "struts.devMode" value = "true" />
   <package name = "helloworld" extends = "struts-default">
      <action name = "hello"
         class = "com.tutorialspoint.struts2.HelloWorldAction"
         method = "execute">
         <result name = "success">/HelloWorld.jsp</result>
         <result name = "error">/AccessDenied.jsp</result>
      </action>
   </package>
</struts>
Create a View
Let us create the below jsp file HelloWorld.jsp in the WebContent folder in your eclipse project. To do this, right click on the WebContent folder in the project explorer and select New >JSP File. This file will be called in case return result is SUCCESS which is a String constant "success" as defined in Action interface −
<%@ page contentType = "text/html; charset = UTF-8" %>
<%@ taglib prefix = "s" uri = "/struts-tags" %>

<html>
   <head>
      <title>Hello World</title>
   </head>

   <body>
      Hello World, <s:property value = "name"/>
   </body>
</html>
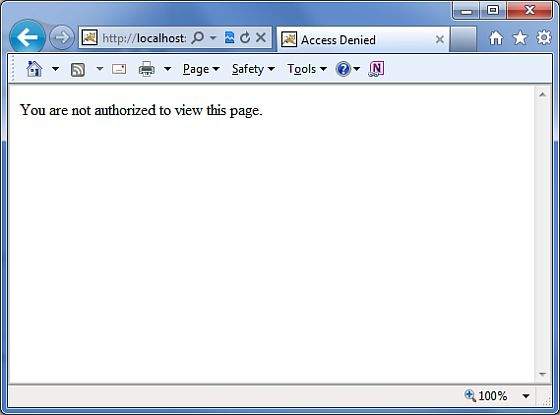
Following is the file which will be invoked by the framework in case action result is ERROR which is equal to String constant "error". Following is the content of AccessDenied.jsp
<%@ page contentType = "text/html; charset = UTF-8" %>
<%@ taglib prefix = "s" uri = "/struts-tags" %>

<html>
   <head>
      <title>Access Denied</title>
   </head>

   <body>
      You are not authorized to view this page.
   </body>
</html>
We also need to create index.jsp in the WebContent folder. This file will serve as the initial action URL where the user can click to tell the Struts 2 framework to call the executemethod of the HelloWorldAction class and render the HelloWorld.jsp view.
<%@ page language = "java" contentType = "text/html; charset = ISO-8859-1"
   pageEncoding = "ISO-8859-1"%>
<%@ taglib prefix = "s" uri = "/struts-tags"%>
   <!DOCTYPE html PUBLIC "-//W3C//DTD HTML 4.01 Transitional//EN"
   "http://www.w3.org/TR/html4/loose.dtd">

<html>
   <head>
      <title>Hello World</title>
   </head>

   <body>
      <h1>Hello World From Struts2</h1>
      <form action = "hello">
         <label for = "name">Please enter your name</label><br/>
         <input type = "text" name = "name"/>
         <input type = "submit" value = "Say Hello"/>
      </form>
   </body>
</html>
That's it, there is no change required for web.xml file, so let us use the same web.xml which we had created in Examples chapter. Now, we are ready to run our Hello World application using Struts 2 framework.
Execute the Application
Right click on the project name and click Export > WAR File to create a War file. Then deploy this WAR in the Tomcat's webapps directory. Finally, start Tomcat server and try to access URL http://localhost:8080/HelloWorldStruts2/index.jsp. This will give you following screen −
Let us enter a word as "SECRET" and you should see the following page −
Now enter any word other than "SECRET" and you should see the following page −
Create Multiple Actions
You will frequently define more than one actions to handle different requests and to provide different URLs to the users, accordingly you will define different classes as defined below −
package com.tutorialspoint.struts2;
import com.opensymphony.xwork2.ActionSupport;

class MyAction extends ActionSupport {
   public static String GOOD = SUCCESS;
   public static String BAD = ERROR;
}

public class HelloWorld extends ActionSupport {
   ...
   public String execute() {
      if ("SECRET".equals(name)) return MyAction.GOOD;
      return MyAction.BAD;
   }
   ...
}

public class SomeOtherClass extends ActionSupport {
   ...
   public String execute() {
      return MyAction.GOOD;
   }
   ...
}
You will configure these actions in struts.xml file as follows −
<?xml version = "1.0" Encoding = "UTF-8"?>
<!DOCTYPE struts PUBLIC
   "-//Apache Software Foundation//DTD Struts Configuration 2.0//EN"
   "http://struts.apache.org/dtds/struts-2.0.dtd">

<struts>
   <constant name = "struts.devMode" value = "true" />

   <package name = "helloworld" extends = "struts-default">
      <action name = "hello"
         class = "com.tutorialspoint.struts2.HelloWorld"
         method = "execute">
         <result name = "success">/HelloWorld.jsp</result>
         <result name = "error">/AccessDenied.jsp</result>
      </action>

      <action name = "something"
         class = "com.tutorialspoint.struts2.SomeOtherClass"
         method = "execute">
         <result name = "success">/Something.jsp</result>
         <result name = "error">/AccessDenied.jsp</result>
      </action>
   </package>
</struts>
As you can see in the above hypothetical example, the action results SUCCESS and ERROR’s are duplicated.
To get around this issue, it is suggested that you create a class which contains the result outcomes.
Struts 2 - Interceptors
Interceptors are conceptually the same as servlet filters or the JDKs Proxy class. Interceptors allow for crosscutting functionality to be implemented separately from the action as well as the framework. You can achieve the following using interceptors −
Providing preprocessing logic before the action is called.
Providing postprocessing logic after the action is called.
Catching exceptions so that alternate processing can be performed.
Many of the features provided in the Struts2 framework are implemented using interceptors;
Examples include exception handling, file uploading, lifecycle callbacks, etc. In fact, as Struts2 emphasizes much of its functionality on interceptors, it is not likely to have 7 or 8 interceptors assigned per action.
Struts2 Framework Interceptors
Struts 2 framework provides a good list of out-of-the-box interceptors that come preconfigured and ready to use. Few of the important interceptors are listed below −
| Sr.No | Interceptor & Description |
|---|---|
| 1 | alias Allows parameters to have different name aliases across requests. |
| 2 | checkbox Assists in managing check boxes by adding a parameter value of false for check boxes that are not checked. |
| 3 | conversionError Places error information from converting strings to parameter types into the action's field errors. |
| 4 | createSession Automatically creates an HTTP session if one does not already exist. |
| 5 | debugging Provides several different debugging screens to the developer. |
| 6 | execAndWait Sends the user to an intermediary waiting page while the action executes in the background. |
| 7 | exception Maps exceptions that are thrown from an action to a result, allowing automatic exception handling via redirection. |
| 8 | fileUpload Facilitates easy file uploading. |
| 9 | i18n Keeps track of the selected locale during a user's session. |
| 10 | logger Provides simple logging by outputting the name of the action being executed. |
| 11 | params Sets the request parameters on the action. |
| 12 | prepare This is typically used to do pre-processing work, such as setup database connections. |
| 13 | profile Allows simple profiling information to be logged for actions. |
| 14 | scope Stores and retrieves the action's state in the session or application scope. |
| 15 | ServletConfig Provides the action with access to various servlet-based information. |
| 16 | timer Provides simple profiling information in the form of how long the action takes to execute. |
| 17 | token Checks the action for a valid token to prevent duplicate formsubmission. |
| 18 | validation Provides validation support for actions |
Please look into Struts 2 documentation for complete detail on the abovementioned interceptors. But I will show you how to use an interceptor in general in your Struts application.
How to Use Interceptors?
Let us see how to use an already existing interceptor to our "Hello World" program. We will use the timer interceptor whose purpose is to measure how long it took to execute an action method. At the same time, I'm using params interceptor whose purpose is to send the request parameters to the action. You can try your example without using this interceptor and you will find that name property is not being set because parameter is not able to reach to the action.
We will keep HelloWorldAction.java, web.xml, HelloWorld.jsp and index.jsp files as they have been created in Examples chapter but let us modify the struts.xml file to add an interceptor as follows −
<?xml version = "1.0" Encoding = "UTF-8"?>
<!DOCTYPE struts PUBLIC
   "-//Apache Software Foundation//DTD Struts Configuration 2.0//EN"
   "http://struts.apache.org/dtds/struts-2.0.dtd">
<struts>
   <constant name = "struts.devMode" value = "true" />

   <package name = "helloworld" extends = "struts-default">
      <action name = "hello"
         class = "com.tutorialspoint.struts2.HelloWorldAction"
         method = "execute">
         <interceptor-ref name = "params"/>
         <interceptor-ref name = "timer" />
         <result name = "success">/HelloWorld.jsp</result>
      </action>
   </package>
</struts>
Right click on the project name and click Export > WAR File to create a War file. Then deploy this WAR in the Tomcat's webapps directory. Finally, start Tomcat server and try to access URL http://localhost:8080/HelloWorldStruts2/index.jsp. This will produce the following screen −
Now enter any word in the given text box and click Say Hello button to execute the defined action. Now if you will check the log generated, you will find the following text −
INFO: Server startup in 3539 ms
27/08/2011 8:40:53 PM
com.opensymphony.xwork2.util.logging.commons.CommonsLogger info
INFO: Executed action [//hello!execute] took 109 ms.
Here bottom line is being generated because of timer interceptor which is telling that action took total 109ms to be executed.
Create Custom Interceptors
Using custom interceptors in your application is an elegant way to provide crosscutting application features. Creating a custom interceptor is easy; the interface that needs to be extended is the following Interceptor interface −
public interface Interceptor extends Serializable {
   void destroy();
   void init();
   String intercept(ActionInvocation invocation)
   throws Exception;
}
As the names suggest, the init() method provides a way to initialize the interceptor, and the destroy() method provides a facility for interceptor cleanup. Unlike actions, interceptors are reused across requests and need to be threadsafe, especially the intercept() method.
The ActionInvocation object provides access to the runtime environment. It allows access to the action itself and methods to invoke the action and determine whether the action has already been invoked.
If you have no need for initialization or cleanup code, the AbstractInterceptor class can be extended. This provides a default nooperation implementation of the init() and destroy() methods.
Create Interceptor Class
Let us create the following MyInterceptor.java in Java Resources > src folder −
package com.tutorialspoint.struts2;

import java.util.*;
import com.opensymphony.xwork2.ActionInvocation;
import com.opensymphony.xwork2.interceptor.AbstractInterceptor;

public class MyInterceptor extends AbstractInterceptor {

   public String intercept(ActionInvocation invocation)throws Exception {

      /* let us do some pre-processing */
      String output = "Pre-Processing";
      System.out.println(output);

      /* let us call action or next interceptor */
      String result = invocation.invoke();

      /* let us do some post-processing */
      output = "Post-Processing";
      System.out.println(output);

      return result;
   }
}
As you notice, actual action will be executed using the interceptor by invocation.invoke()call. So you can do some pre-processing and some postprocessing based on your requirement.
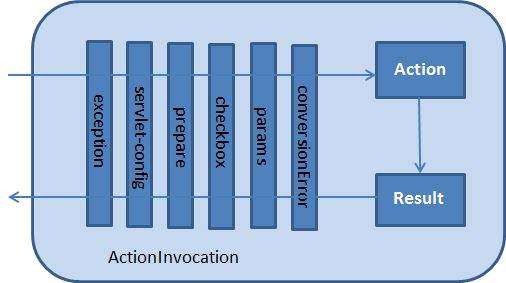
The framework itself starts the process by making the first call to the ActionInvocation object's invoke(). Each time invoke() is called, ActionInvocation consults its state and executes whichever interceptor comes next. When all of the configured interceptors have been invoked, the invoke() method will cause the action itself to be executed.
The following diagram shows the same concept through a request flow −
Create Action Class
Let us create a java file HelloWorldAction.java under Java Resources > src with a package name com.tutorialspoint.struts2 with the contents given below.
package com.tutorialspoint.struts2;

import com.opensymphony.xwork2.ActionSupport;

public class HelloWorldAction extends ActionSupport {
   private String name;

   public String execute() throws Exception {
      System.out.println("Inside action....");
      return "success";
   }

   public String getName() {
      return name;
   }

   public void setName(String name) {
      this.name = name;
   }
}
This is a same class which we have seen in previous examples. We have standard getters and setter methods for the "name" property and an execute method that returns the string "success".
Create a View
Let us create the below jsp file HelloWorld.jsp in the WebContent folder in your eclipse project.
<%@ page contentType = "text/html; charset = UTF-8" %>
<%@ taglib prefix = "s" uri = "/struts-tags" %>

<html>
   <head>
      <title>Hello World</title>
   </head>

   <body>
      Hello World, <s:property value = "name"/>
   </body>
</html>
Create Main Page
We also need to create index.jsp in the WebContent folder. This file will serve as the initial action URL where a user can click to tell the Struts 2 framework to call the a defined method of the HelloWorldAction class and render the HelloWorld.jsp view.
<%@ page language = "java" contentType = "text/html; charset = ISO-8859-1"
   pageEncoding = "ISO-8859-1"%>
<%@ taglib prefix = "s" uri = "/struts-tags"%>
   <!DOCTYPE html PUBLIC "-//W3C//DTD HTML 4.01 Transitional//EN"
   "http://www.w3.org/TR/html4/loose.dtd">

<html>
   <head>
      <title>Hello World</title>
   </head>

   <body>
      <h1>Hello World From Struts2</h1>
      <form action = "hello">
         <label for = "name">Please enter your name</label><br/>
         <input type = "text" name = "name"/>
         <input type = "submit" value = "Say Hello"/>
      </form>
   </body>
</html>
The hello action defined in the above view file will be mapped to the HelloWorldAction class and its execute method using struts.xml file.
Configuration Files
Now, we need to register our interceptor and then call it as we had called default interceptor in previous example. To register a newly defined interceptor, the <interceptors>...</interceptors> tags are placed directly under the <package> tag insstruts.xml file. You can skip this step for a default interceptors as we did in our previous example. But here let us register and use it as follows −
<?xml version = "1.0" Encoding = "UTF-8"?>
<!DOCTYPE struts PUBLIC
   "-//Apache Software Foundation//DTD Struts Configuration 2.0//EN"
   "http://struts.apache.org/dtds/struts-2.0.dtd">

<struts>
   <constant name = "struts.devMode" value = "true" />
   <package name = "helloworld" extends = "struts-default">

      <interceptors>
         <interceptor name = "myinterceptor"
            class = "com.tutorialspoint.struts2.MyInterceptor" />
      </interceptors>

      <action name = "hello"
         class = "com.tutorialspoint.struts2.HelloWorldAction"
         method = "execute">
         <interceptor-ref name = "params"/>
         <interceptor-ref name = "myinterceptor" />
         <result name = "success">/HelloWorld.jsp</result>
      </action>

   </package>
</struts>
It should be noted that you can register more than one interceptors inside <package> tag and same time you can call more than one interceptors inside the <action> tag. You can call same interceptor with the different actions.
The web.xml file needs to be created under the WEB-INF folder under WebContent as follows −
<?xml version = "1.0" Encoding = "UTF-8"?>
<web-app xmlns:xsi = "http://www.w3.org/2001/XMLSchema-instance"
   xmlns = "http://java.sun.com/xml/ns/javaee"
   xmlns:web = "http://java.sun.com/xml/ns/javaee/web-app_2_5.xsd"
   xsi:schemaLocation = "http://java.sun.com/xml/ns/javaee
   http://java.sun.com/xml/ns/javaee/web-app_3_0.xsd"
   id = "WebApp_ID" version = "3.0">

   <display-name>Struts 2</display-name>

   <welcome-file-list>
      <welcome-file>index.jsp</welcome-file>
   </welcome-file-list>

   <filter>
      <filter-name>struts2</filter-name>
      <filter-class>
         org.apache.struts2.dispatcher.FilterDispatcher
      </filter-class>
   </filter>

   <filter-mapping>
      <filter-name>struts2</filter-name>
      <url-pattern>/*</url-pattern>
   </filter-mapping>
</web-app>
Right click on the project name and click Export > WAR File to create a War file. Then deploy this WAR in the Tomcat's webapps directory. Finally, start Tomcat server and try to access URL http://localhost:8080/HelloWorldStruts2/index.jsp. This will produce the following screen −
Now enter any word in the given text box and click Say Hello button to execute the defined action. Now if you will check the log generated, you will find the following text at the bottom −
Pre-Processing
Inside action....
Post-Processing
Stacking Multiple Interceptors
As you can imagine, having to configure multiple interceptor for each action would quickly become extremely unmanageable. For this reason, interceptors are managed with interceptor stacks. Here is an example, directly from the strutsdefault.xml file −
<interceptor-stack name = "basicStack">
   <interceptor-ref name = "exception"/>
   <interceptor-ref name = "servlet-config"/>
   <interceptor-ref name = "prepare"/>
   <interceptor-ref name = "checkbox"/>
   <interceptor-ref name = "params"/>
   <interceptor-ref name = "conversionError"/>
</interceptor-stack>
The above stake is called basicStack and can be used in your configuration as shown below. This configuration node is placed under the <package .../> node. Each <interceptor-ref .../> tag references either an interceptor or an interceptor stack that has been configured before the current interceptor stack. It is therefore very important to ensure that the name is unique across all interceptor and interceptor stack configurations when configuring the initial interceptors and interceptor stacks.
We have already seen how to apply interceptor to the action, applying interceptor stacks is no different. In fact, we use exactly the same tag −
<action name = "hello" class = "com.tutorialspoint.struts2.MyAction">
   <interceptor-ref name = "basicStack"/>
   <result>view.jsp</result>
</action
The above registration of "basicStack" will register complete stake of all the six interceptors with hello action. This should be noted that interceptors are executed in the order, in which they have been configured. For example, in the above case, exception will be executed first, second would be servlet-config and so on.
Struts 2 - Results & Result Types
As mentioned previously, the <results> tag plays the role of a view in the Struts2 MVC framework. The action is responsible for executing the business logic. The next step after executing the business logic is to display the view using the <results> tag.
Often there is some navigation rules attached with the results. For example, if the action method is to authenticate a user, there are three possible outcomes.
- Successful Login
- Unsuccessful Login - Incorrect username or password
- Account Locked
In this scenario, the action method will be configured with three possible outcome strings and three different views to render the outcome. We have already seen this in the previous examples.
But, Struts2 does not tie you up with using JSP as the view technology. Afterall the whole purpose of the MVC paradigm is to keep the layers separate and highly configurable. For example, for a Web2.0 client, you may want to return XML or JSON as the output. In this case, you could create a new result type for XML or JSON and achieve this.
Struts comes with a number of predefined result types and whatever we've already seen that was the default result type dispatcher, which is used to dispatch to JSP pages. Struts allow you to use other markup languages for the view technology to present the results and popular choices include Velocity, Freemaker, XSLT and Tiles.
The Dispatcher Result Type
The dispatcher result type is the default type, and is used if no other result type is specified. It's used to forward to a servlet, JSP, HTML page, and so on, on the server. It uses the RequestDispatcher.forward() method.
We saw the "shorthand" version in our earlier examples, where we provided a JSP path as the body of the result tag.
<result name = "success">
   /HelloWorld.jsp
</result>
We can also specify the JSP file using a <param name = "location"> tag within the <result...> element as follows −
<result name = "success" type = "dispatcher">
   <param name = "location">
      /HelloWorld.jsp
   </param >
</result>
We can also supply a parse parameter, which is true by default. The parse parameter determines whether or not the location parameter will be parsed for OGNL expressions.
The FreeMaker Result Type
In this example, we are going to see how we can use FreeMaker as the view technology. Freemaker is a popular templating engine that is used to generate output using predefined templates. Let us now create a Freemaker template file called hello.fm with the following contents −
Hello World ${name}
The above file is a template where name is a parameter which will be passed from outside using the defined action. You will keep this file in your CLASSPATH.
Next, let us modify the struts.xml to specify the result as follows −
<?xml version = "1.0" Encoding = "UTF-8"?>
<!DOCTYPE struts PUBLIC
"-//Apache Software Foundation//DTD Struts Configuration 2.0//EN"
"http://struts.apache.org/dtds/struts-2.0.dtd">

<struts>
   <constant name = "struts.devMode" value = "true" />
   <package name = "helloworld" extends = "struts-default">

      <action name = "hello"
         class = "com.tutorialspoint.struts2.HelloWorldAction"
         method = "execute">
         <result name = "success" type = "freemarker">
            <param name = "location">/hello.fm</param>
         </result>
      </action>

   </package>

</struts>
Let us keep our HelloWorldAction.java, HelloWorldAction.jsp and index.jsp files as we have created them in examples chapter.
Now Right click on the project name and click Export > WAR File to create a War file.
Then deploy this WAR in the Tomcat's webapps directory. Finally, start Tomcat server and try to access URL http://localhost:8080/HelloWorldStruts2/index.jsp. This will produce the following screen .
Enter a value "Struts2" and submit the page. You should see the next page.
As you can see, this is exactly same as the JSP view except that we are not tied to using JSP as the view technology. We have used Freemaker in this example.
The Redirect Result Type
The redirect result type calls the standard response.sendRedirect() method, causing the browser to create a new request to the given location.
We can provide the location either in the body of the <result...> element or as a <param name = "location"> element. Redirect also supports the parse parameter. Here's an example configured using XML −
<action name = "hello"
   class = "com.tutorialspoint.struts2.HelloWorldAction"
   method = "execute">
   <result name = "success" type = "redirect">
      <param name = "location">
         /NewWorld.jsp
      </param >
   </result>
</action>
So just modify your struts.xml file to define redirect type as mentioned above and create a new file NewWorld.jpg where you will be redirected whenever hello action will return success. You can check Struts 2 Redirect Action example for better understanding.
Struts 2 - Value Stack/OGNL
The Value Stack
The value stack is a set of several objects which keeps the following objects in the provided order −
| Sr.No | Objects & Description |
|---|---|
| 1 | Temporary Objects There are various temporary objects which are created during execution of a page. For example the current iteration value for a collection being looped over in a JSP tag. |
| 2 | The Model Object If you are using model objects in your struts application, the current model object is placed before the action on the value stack. |
| 3 | The Action Object This will be the current action object which is being executed. |
| 4 | Named Objects These objects include #application, #session, #request, #attr and #parameters and refer to the corresponding servlet scopes. |
The value stack can be accessed via the tags provided for JSP, Velocity or Freemarker. There are various tags which we will study in separate chapters, are used to get and set struts 2.0 value stack. You can get valueStack object inside your action as follows −
ActionContext.getContext().getValueStack()
Once you have a ValueStack object, you can use the following methods to manipulate that object −
| Sr.No | ValueStack Methods & Description |
|---|---|
| 1 | Object findValue(String expr) Find a value by evaluating the given expression against the stack in the default search order. |
| 2 | CompoundRoot getRoot() Get the CompoundRoot which holds the objects pushed onto the stack. |
| 3 | Object peek() Get the object on the top of the stack without changing the stack. |
| 4 | Object pop() Get the object on the top of the stack and remove it from the stack. |
| 5 | void push(Object o)
Put this object onto the top of the stack. |
| 6 | void set(String key, Object o) Sets an object on the stack with the given key so it is retrievable by findValue(key,...) |
| 7 | void setDefaultType(Class defaultType) Sets the default type to convert to if no type is provided when getting a value. |
| 8 | void setValue(String expr, Object value) Attempts to set a property on a bean in the stack with the given expression using the default search order. |
| 9 | int size() Get the number of objects in the stack. |
The OGNL
The Object-Graph Navigation Language (OGNL) is a powerful expression language that is used to reference and manipulate data on the ValueStack. OGNL also helps in data transfer and type conversion.
The OGNL is very similar to the JSP Expression Language. OGNL is based on the idea of having a root or default object within the context. The properties of the default or root object can be referenced using the markup notation, which is the pound symbol.
As mentioned earlier, OGNL is based on a context and Struts builds an ActionContext map for use with OGNL. The ActionContext map consists of the following −
Application − Application scoped variables
Session − Session scoped variables
Root / value stack − All your action variables are stored here
Request − Request scoped variables
Parameters − Request parameters
Atributes − The attributes stored in page, request, session and application scope
It is important to understand that the Action object is always available in the value stack. So, therefore if your Action object has properties “x” and “y” there are readily available for you to use.
Objects in the ActionContext are referred using the pound symbol, however, the objects in the value stack can be directly referenced.
For example, if employee is a property of an action class, then it can be referenced as follows −
<s:property value = "name"/>
instead of
<s:property value = "#name"/>
If you have an attribute in session called "login" you can retrieve it as follows −
<s:property value = "#session.login"/>
OGNL also supports dealing with collections - namely Map, List and Set. For example to display a dropdown list of colors, you could do −
<s:select name = "color" list = "{'red','yellow','green'}" />
The OGNL expression is clever to interpret the "red","yellow","green" as colours and build a list based on that.
The OGNL expressions will be used extensively in the next chapters when we will study different tags. So rather than looking at them in isolation, let us look at it using some examples in the Form Tags / Control Tags / Data Tags and Ajax Tags section.
ValueStack/OGNL Example
Create Action
Let us consider the following action class where we are accessing valueStack and then setting few keys which we will access using OGNL in our view, i.e., JSP page.
package com.tutorialspoint.struts2;

import java.util.*;

import com.opensymphony.xwork2.util.ValueStack;
import com.opensymphony.xwork2.ActionContext;
import com.opensymphony.xwork2.ActionSupport;

public class HelloWorldAction extends ActionSupport {
   private String name;

   public String execute() throws Exception {
      ValueStack stack = ActionContext.getContext().getValueStack();
      Map<String, Object> context = new HashMap<String, Object>();

      context.put("key1", new String("This is key1"));
      context.put("key2", new String("This is key2"));
      stack.push(context);

      System.out.println("Size of the valueStack: " + stack.size());
      return "success";
   }

   public String getName() {
      return name;
   }

   public void setName(String name) {
      this.name = name;
   }
}
Actually, Struts 2 adds your action to the top of the valueStack when executed. So, the usual way to put stuff on the Value Stack is to add getters/setters for the values to your Action class and then use <s:property> tag to access the values. But I'm showing you how exactly ActionContext and ValueStack work in struts.
Create Views
Let us create the below jsp file HelloWorld.jsp in the WebContent folder in your eclipse project. This view will be displayed in case action returns success −
<%@ page contentType = "text/html; charset = UTF-8" %>
<%@ taglib prefix = "s" uri = "/struts-tags" %>

<html>
   <head>
      <title>Hello World</title>
   </head>

   <body>
      Entered value : <s:property value = "name"/><br/>
      Value of key 1 : <s:property value = "key1" /><br/>
      Value of key 2 : <s:property value = "key2" /> <br/>
   </body>
</html>
We also need to create index.jsp in the WebContent folder whose content is as follows −
<%@ page language = "java" contentType = "text/html; charset = ISO-8859-1"
   pageEncoding = "ISO-8859-1"%>
<%@ taglib prefix = "s" uri = "/struts-tags"%>
   <!DOCTYPE html PUBLIC "-//W3C//DTD HTML 4.01 Transitional//EN"
   "http://www.w3.org/TR/html4/loose.dtd">

<html>
   <head>
      <title>Hello World</title>
   </head>

   <body>
      <h1>Hello World From Struts2</h1>
      <form action = "hello">
         <label for = "name">Please enter your name</label><br/>
         <input type = "text" name = "name"/>
         <input type = "submit" value = "Say Hello"/>
      </form>
   </body>
</html>
Configuration Files
Following is the content of struts.xml file −
<?xml version = "1.0" Encoding = "UTF-8"?>
<!DOCTYPE struts PUBLIC
   "-//Apache Software Foundation//DTD Struts Configuration 2.0//EN"
   "http://struts.apache.org/dtds/struts-2.0.dtd">

<struts>
   <constant name = "struts.devMode" value = "true" />
   <package name = "helloworld" extends = "struts-default">

      <action name = "hello"
         class = "com.tutorialspoint.struts2.HelloWorldAction"
         method = "execute">
         <result name = "success">/HelloWorld.jsp</result>
      </action>

   </package>
</struts>
Following is the content of web.xml file −
<?xml version = "1.0" Encoding = "UTF-8"?>
<web-app xmlns:xsi = "http://www.w3.org/2001/XMLSchema-instance"
   xmlns = "http://java.sun.com/xml/ns/javaee"
   xmlns:web = "http://java.sun.com/xml/ns/javaee/web-app_2_5.xsd"
   xsi:schemaLocation = "http://java.sun.com/xml/ns/javaee
   http://java.sun.com/xml/ns/javaee/web-app_3_0.xsd"
   id = "WebApp_ID" version = "3.0">

   <display-name>Struts 2</display-name>

   <welcome-file-list>
      <welcome-file>index.jsp</welcome-file>
   </welcome-file-list>

   <filter>
      <filter-name>struts2</filter-name>
      <filter-class>
         org.apache.struts2.dispatcher.FilterDispatcher
      </filter-class>
   </filter>

   <filter-mapping>
      <filter-name>struts2</filter-name>
      <url-pattern>/*</url-pattern>
   </filter-mapping>
</web-app>
Right click on the project name and click Export > WAR File to create a War file. Then deploy this WAR in the Tomcat's webapps directory.
Finally, start Tomcat server and try to access URL http://localhost:8080/HelloWorldStruts2/index.jsp. This will produce the following screen
Now enter any word in the given text box and click "Say Hello" button to execute the defined action. Now, if you will check the log generated, you will find the following text at the bottom −
Size of the valueStack: 3
This will display the following screen, which will display whatever value you will enter and value of key1 and key2 which we had put on ValueStack.
Struts 2 - File Uploads
The Struts 2 framework provides built-in support for processing file upload using "Form-based File Upload in HTML". When a file is uploaded, it will typically be stored in a temporary directory and they should be processed or moved by your Action class to a permanent directory to ensure the data is not lost.
Note − Servers may have a security policy in place that prohibits you from writing to directories other than the temporary directory and the directories that belong to your web application.
File uploading in Struts is possible through a pre-defined interceptor called FileUpload interceptor which is available through the org.apache.struts2.interceptor.FileUploadInterceptor class and included as part of thedefaultStack. Still you can use that in your struts.xml to set various paramters as we will see below.
Create View Files
Let us start with creating our view which will be required to browse and upload a selected file. So let us create an index.jsp with plain HTML upload form that allows the user to upload a file −
<%@ page language = "java" contentType = "text/html; charset = ISO-8859-1"
   pageEncoding = "ISO-8859-1"%>
<%@ taglib prefix = "s" uri = "/struts-tags"%>
<!DOCTYPE html PUBLIC "-//W3C//DTD HTML 4.01 Transitional//EN"
   "http://www.w3.org/TR/html4/loose.dtd">

<html>
   <head>
      <title>File Upload</title>
   </head>

   <body>
      <form action = "upload" method = "post" enctype = "multipart/form-data">
         <label for = "myFile">Upload your file</label>
         <input type = "file" name = "myFile" />
         <input type = "submit" value = "Upload"/>
      </form>
   </body>
</html>
There is couple of points worth noting in the above example. First, the form's enctype is set to multipart/form-data. This should be set so that file uploads are handled successfully by the file upload interceptor. The next point noting is the form's action method upload and the name of the file upload field - which is myFile. We need this information to create the action method and the struts configuration.
Next, let us create a simple jsp file success.jsp to display the outcome of our file upload in case it becomes success.
<%@ page contentType = "text/html; charset = UTF-8" %>
<%@ taglib prefix = "s" uri = "/struts-tags" %>

<html>
   <head>
      <title>File Upload Success</title>
   </head>

   <body>
      You have successfully uploaded <s:property value = "myFileFileName"/>
   </body>
</html>
Following will be the result file error.jsp in case there is some error in uploading the file −
<%@ page contentType = "text/html; charset = UTF-8" %>
<%@ taglib prefix = "s" uri = "/struts-tags" %>

<html>
   <head>
      <title>File Upload Error</title>
   </head>

   <body>
      There has been an error in uploading the file.
   </body>
</html>
Create Action Class
Next, let us create a Java class called uploadFile.java which will take care of uploading file and storing that file at a secure location −
package com.tutorialspoint.struts2;

import java.io.File;
import org.apache.commons.io.FileUtils;
import java.io.IOException;

import com.opensymphony.xwork2.ActionSupport;

public class uploadFile extends ActionSupport {
   private File myFile;
   private String myFileContentType;
   private String myFileFileName;
   private String destPath;

   public String execute() {
      /* Copy file to a safe location */
      destPath = "C:/apache-tomcat-6.0.33/work/";

      try {
         System.out.println("Src File name: " + myFile);
         System.out.println("Dst File name: " + myFileFileName);

         File destFile  = new File(destPath, myFileFileName);
         FileUtils.copyFile(myFile, destFile);

      } catch(IOException e) {
         e.printStackTrace();
         return ERROR;
      }

      return SUCCESS;
   }

   public File getMyFile() {
      return myFile;
   }

   public void setMyFile(File myFile) {
      this.myFile = myFile;
   }

   public String getMyFileContentType() {
      return myFileContentType;
   }

   public void setMyFileContentType(String myFileContentType) {
      this.myFileContentType = myFileContentType;
   }

   public String getMyFileFileName() {
      return myFileFileName;
   }

   public void setMyFileFileName(String myFileFileName) {
      this.myFileFileName = myFileFileName;
   }
}
The uploadFile.java is a very simple class. The important thing to note is that the FileUpload interceptor along with the Parameters Interceptor does all the heavy lifting for us.
The FileUpload interceptor makes three parameters available for you by default. They are named in the following pattern −
[your file name parameter] − This is the actual file that the user has uploaded. In this example it will be "myFile"
[your file name parameter]ContentType − This is the content type of the file that was uploaded. In this example it will be "myFileContentType"
[your file name parameter]FileName − This is the name of the file that was uploaded. In this example it will be "myFileFileName"
The three parameters are available for us, thanks to the Struts Interceptors. All we have to do is to create three parameters with the correct names in our Action class and automatically these variables are auto wired for us. So, in the above example, we have three parameters and an action method that simply returns "success" if everything goes fine otherwise it returns "error".
Configuration Files
Following are the Struts2 configuration properties that control file uploading process −
| Sr.No | Properties & Description |
|---|---|
| 1 | struts.multipart.maxSize The maximum size (in bytes) of a file to be accepted as a file upload. Default is 250M. |
| 2 | struts.multipart.parser The library used to upload the multipart form. By default is jakarta |
| 3 | struts.multipart.saveDir The location to store the temporary file. By default is javax.servlet.context.tempdir. |
In order to change any of these settings, you can use constant tag in your applications struts.xml file, as I did to change the maximum size of a file to be uploaded.
Let us have our struts.xml as follows −
<?xml version = "1.0" Encoding = "UTF-8"?>
<!DOCTYPE struts PUBLIC
   "-//Apache Software Foundation//DTD Struts Configuration 2.0//EN"
   "http://struts.apache.org/dtds/struts-2.0.dtd">

<struts>
   <constant name = "struts.devMode" value = "true" />
   <constant name = "struts.multipart.maxSize" value = "1000000" />
   <package name = "helloworld" extends = "struts-default">
      <action name = "upload" class = "com.tutorialspoint.struts2.uploadFile">
         <result name = "success">/success.jsp</result>
         <result name = "error">/error.jsp</result>
      </action>
   </package>
</struts>
Since, FileUpload interceptor is a part of the default Stack of interceptors, we do not need to configure it explicity. But, you can add <interceptor-ref> tag inside <action>. The fileUpload interceptor takes two parameters (a) maximumSize and (b) allowedTypes.
The maximumSize parameter sets the maximum file size allowed (the default is approximately 2MB). The allowedTypes parameter is a comma-separated list of accepted content (MIME) types as shown below −
<action name = "upload" class = "com.tutorialspoint.struts2.uploadFile">
   <interceptor-ref name = "basicStack">
   <interceptor-ref name = "fileUpload">
      <param name = "allowedTypes">image/jpeg,image/gif</param>
   </interceptor-ref>
   <result name = "success">/success.jsp</result>
   <result name = "error">/error.jsp</result>
</action>
Following is the content of web.xml file −
<?xml version = "1.0" Encoding = "UTF-8"?>
<web-app xmlns:xsi = "http://www.w3.org/2001/XMLSchema-instance"
   xmlns = "http://java.sun.com/xml/ns/javaee"
   xmlns:web = "http://java.sun.com/xml/ns/javaee/web-app_2_5.xsd"
   xsi:schemaLocation = "http://java.sun.com/xml/ns/javaee
   http://java.sun.com/xml/ns/javaee/web-app_3_0.xsd"
   id = "WebApp_ID" version = "3.0">

   <display-name>Struts 2</display-name>

   <welcome-file-list>
      <welcome-file>index.jsp</welcome-file>
   </welcome-file-list>

   <filter>
      <filter-name>struts2</filter-name>
      <filter-class>
         org.apache.struts2.dispatcher.FilterDispatcher
      </filter-class>
   </filter>

   <filter-mapping>
      <filter-name>struts2</filter-name>
      <url-pattern>/*</url-pattern>
   </filter-mapping>
</web-app>
Now Right click on the project name and click Export > WAR File to create a War file. Then deploy this WAR in the Tomcat's webapps directory. Finally, start Tomcat server and try to access URL http://localhost:8080/HelloWorldStruts2/upload.jsp. This will produce the following screen −
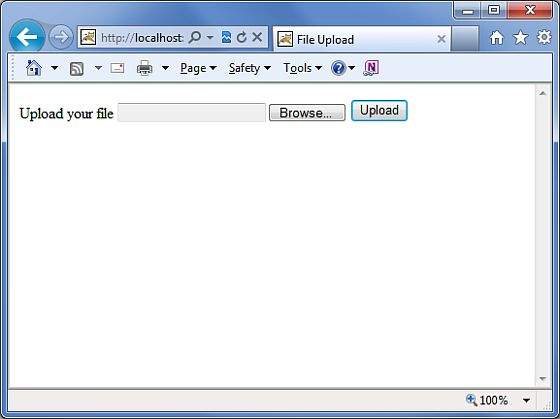
Now select a file "Contacts.txt" using Browse button and click upload button which will upload the file on your serve and you should see the next page. You can check the uploaded file should be saved in C:\apache-tomcat-6.0.33\work.
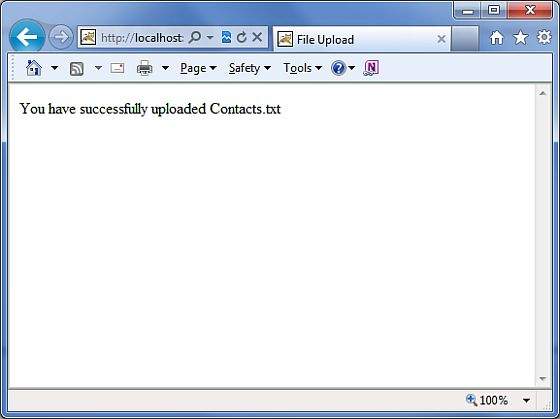
Note that the FileUpload Interceptor deletes the uploaded file automatically so you would have to save uploaded file programmatically at some location before it gets deleted.
Error Messages
The fileUplaod interceptor uses several default error message keys −
| Sr.No | Error Message Key & Description |
|---|---|
| 1 | struts.messages.error.uploading A general error that occurs when the file could not be uploaded. |
| 2 | struts.messages.error.file.too.large Occurs when the uploaded file is too large as specified by maximumSize. |
| 3 | struts.messages.error.content.type.not.allowed Occurs when the uploaded file does not match the expected content types specified. |
You can override the text of these messages in WebContent/WEB-INF/classes/messages.properties resource files.
Struts 2 - Database Access
This chapter will teach you how to access a database using Struts 2 in simple steps. Struts is a MVC framework and not a database framework but it provides excellent support for JPA/Hibernate integration. We shall look at the hibernate integration in a later chapter, but in this chapter we shall use plain old JDBC to access the database.
The first step in this chapter is to setup and prime our database. I am using MySQL as my database for this example. I have MySQL installed on my machine and I have created a new database called "struts_tutorial". I have created a table called login and populated it with some values. Below is the script I used to create and populate the table.
My MYSQL database has the default username "root" and "root123" password
CREATE TABLE `struts_tutorial`.`login` (
   `user` VARCHAR( 10 ) NOT NULL ,
   `password` VARCHAR( 10 ) NOT NULL ,
   `name` VARCHAR( 20 ) NOT NULL ,
   PRIMARY KEY ( `user` )
) ENGINE = InnoDB;

INSERT INTO `struts_tutorial`.`login` (`user`, `password`, `name`)
VALUES ('scott', 'navy', 'Scott Burgemott');
Next step is to download the MySQL Connector jar file and placing this file in the WEB-INF\lib folder of your project. After we have done this, we are now ready to create the action class.
Create Action
The action class has the properties corresponding to the columns in the database table. We have user, password and name as String attributes. In the action method, we use the user and password parameters to check if the user exists, if so, we display the user name in the next screen.
If the user has entered wrong information, we send them to the login screen again.
Following is the content of LoginAction.java file −
package com.tutorialspoint.struts2;

import java.sql.Connection;
import java.sql.DriverManager;
import java.sql.PreparedStatement;
import java.sql.ResultSet;

import com.opensymphony.xwork2.ActionSupport;

public class LoginAction extends ActionSupport {

   private String user;
   private String password;
   private String name;

   public String execute() {
      String ret = ERROR;
      Connection conn = null;

      try {
         String URL = "jdbc:mysql://localhost/struts_tutorial";
         Class.forName("com.mysql.jdbc.Driver");
         conn = DriverManager.getConnection(URL, "root", "root123");
         String sql = "SELECT name FROM login WHERE";
         sql+=" user = ? AND password = ?";
         PreparedStatement ps = conn.prepareStatement(sql);
         ps.setString(1, user);
         ps.setString(2, password);
         ResultSet rs = ps.executeQuery();

         while (rs.next()) {
            name = rs.getString(1);
            ret = SUCCESS;
         }
      } catch (Exception e) {
         ret = ERROR;
      } finally {
         if (conn != null) {
            try {
               conn.close();
            } catch (Exception e) {
            }
         }
      }
      return ret;
   }

   public String getUser() {
      return user;
   }

   public void setUser(String user) {
      this.user = user;
   }

   public String getPassword() {
      return password;
   }

   public void setPassword(String password) {
      this.password = password;
   }

   public String getName() {
      return name;
   }

   public void setName(String name) {
      this.name = name;
   }
}
Create Main Page
Now, let us create a JSP file index.jsp to collect the username and password. This username and password will be checked against the database.
<%@ page language = "java" contentType = "text/html; charset = ISO-8859-1"
   pageEncoding = "ISO-8859-1"%>
<%@ taglib prefix = "s" uri = "/struts-tags"%>
<!DOCTYPE html PUBLIC "-//W3C//DTD HTML 4.01 Transitional//EN"
   "http://www.w3.org/TR/html4/loose.dtd">

<html>
   <head>
      <title>Login</title>
   </head>

   <body>
      <form action = "loginaction" method = "post">
         User:<br/><input type = "text" name = "user"/><br/>
         Password:<br/><input type = "password" name = "password"/><br/>
         <input type = "submit" value = "Login"/>
      </form>
   </body>
</html>
Create Views
Now let us create success.jsp file which will be invoked in case action returns SUCCESS, but we will have another view file in case of an ERROR is returned from the action.
<%@ page contentType = "text/html; charset = UTF-8" %>
<%@ taglib prefix = "s" uri = "/struts-tags" %>

<html>
   <head>
      <title>Successful Login</title>
   </head>

   <body>
      Hello World, <s:property value = "name"/>
   </body>
</html>
Following will be the view file error.jsp in case of an ERROR is returned from the action.
<%@ page contentType = "text/html; charset = UTF-8" %>
<%@ taglib prefix = "s" uri = "/struts-tags" %>

<html>
   <head>
      <title>Invalid User Name or Password</title>
   </head>

   <body>
      Wrong user name or password provided.
   </body>
</html>
Configuration Files
Finally, let us put everything together using the struts.xml configuration file as follows −
<?xml version = "1.0" Encoding = "UTF-8"?>
<!DOCTYPE struts PUBLIC
   "-//Apache Software Foundation//DTD Struts Configuration 2.0//EN"
   "http://struts.apache.org/dtds/struts-2.0.dtd">

<struts>
   <constant name = "struts.devMode" value = "true" />
   <package name = "helloworld" extends = "struts-default">

      <action name = "loginaction"
         class = "com.tutorialspoint.struts2.LoginAction"
         method = "execute">
         <result name = "success">/success.jsp</result>
         <result name = "error">/error.jsp</result>
      </action>

   </package>
</struts>
Following is the content of web.xml file −
<?xml version = "1.0" Encoding = "UTF-8"?>
<web-app xmlns:xsi = "http://www.w3.org/2001/XMLSchema-instance"
   xmlns = "http://java.sun.com/xml/ns/javaee"
   xmlns:web = "http://java.sun.com/xml/ns/javaee/web-app_2_5.xsd"
   xsi:schemaLocation = "http://java.sun.com/xml/ns/javaee
   http://java.sun.com/xml/ns/javaee/web-app_3_0.xsd"
   id = "WebApp_ID" version = "3.0">

   <display-name>Struts 2</display-name>

   <welcome-file-list>
      <welcome-file>index.jsp</welcome-file>
   </welcome-file-list>

   <filter>
      <filter-name>struts2</filter-name>
      <filter-class>
         org.apache.struts2.dispatcher.FilterDispatcher
      </filter-class>
   </filter>

   <filter-mapping>
      <filter-name>struts2</filter-name>
      <url-pattern>/*</url-pattern>
   </filter-mapping>
</web-app>
Now, right click on the project name and click Export > WAR File to create a War file. Then deploy this WAR in the Tomcat's webapps directory. Finally, start Tomcat server and try to access URL http://localhost:8080/HelloWorldStruts2/index.jsp. This will produce the following screen −
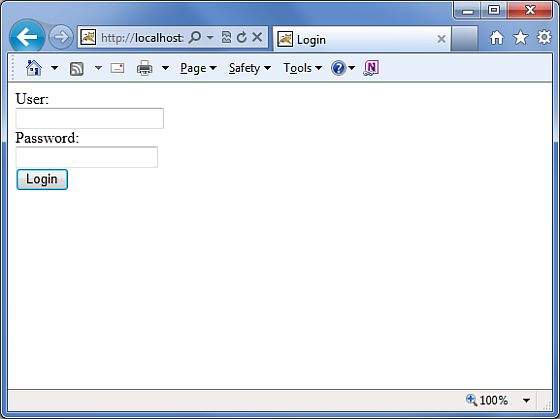
Enter a wrong user name and password. You should see the next page.
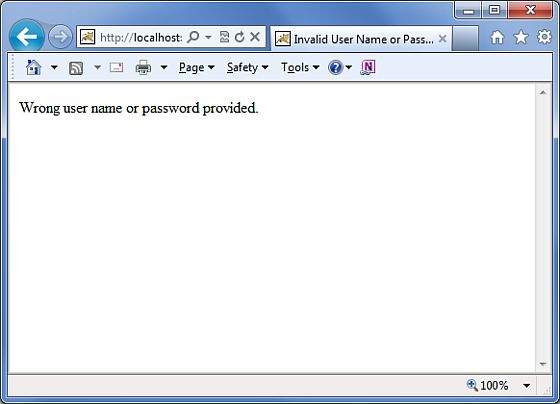
Now enter scott as user name and navy as password. You should see the next page.
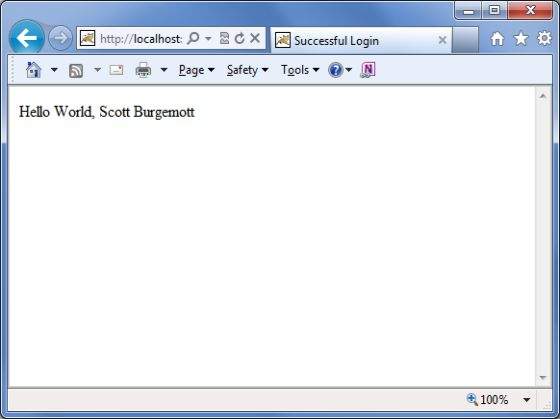
Struts 2 - Sending Email
This chapter explains how you can send an email using your Struts 2 application.
For this exercise, you need to download and install the mail.jar from JavaMail API 1.4.4 and place the mail.jar file in your WEB-INF\lib folder and then proceed to follow the standard steps of creating action, view and configuration files.
Create Action
The next step is to create an Action method that takes care of sending the email. Let us create a new class called Emailer.java with the following contents.
package com.tutorialspoint.struts2;

import java.util.Properties;
import javax.mail.Message;
import javax.mail.PasswordAuthentication;
import javax.mail.Session;
import javax.mail.Transport;
import javax.mail.internet.InternetAddress;
import javax.mail.internet.MimeMessage;

import com.opensymphony.xwork2.ActionSupport;

public class Emailer extends ActionSupport {

   private String from;
   private String password;
   private String to;
   private String subject;
   private String body;

   static Properties properties = new Properties();
   static {
      properties.put("mail.smtp.host", "smtp.gmail.com");
      properties.put("mail.smtp.socketFactory.port", "465");
      properties.put("mail.smtp.socketFactory.class",
         "javax.net.ssl.SSLSocketFactory");
      properties.put("mail.smtp.auth", "true");
      properties.put("mail.smtp.port", "465");
   }

   public String execute() {
      String ret = SUCCESS;
      try {
         Session session = Session.getDefaultInstance(properties,
            new javax.mail.Authenticator() {
               protected PasswordAuthentication
               getPasswordAuthentication() {
                  return new
                  PasswordAuthentication(from, password);
               }
            }
         );

         Message message = new MimeMessage(session);
         message.setFrom(new InternetAddress(from));
         message.setRecipients(Message.RecipientType.TO,
            InternetAddress.parse(to));
         message.setSubject(subject);
         message.setText(body);
         Transport.send(message);
      } catch(Exception e) {
         ret = ERROR;
         e.printStackTrace();
      }
      return ret;
   }

   public String getFrom() {
      return from;
   }

   public void setFrom(String from) {
      this.from = from;
   }

   public String getPassword() {
      return password;
   }

   public void setPassword(String password) {
      this.password = password;
   }

   public String getTo() {
      return to;
   }

   public void setTo(String to) {
      this.to = to;
   }

   public String getSubject() {
      return subject;
   }

   public void setSubject(String subject) {
      this.subject = subject;
   }

   public String getBody() {
      return body;
   }

   public void setBody(String body) {
      this.body = body;
   }

   public static Properties getProperties() {
      return properties;
   }

   public static void setProperties(Properties properties) {
      Emailer.properties = properties;
   }
}
As seen in the source code above, the Emailer.java has properties that correspond to the form attributes in the email.jsp page given below. These attributes are −
From − The email address of the sender. As we are using Google's SMTP, we need a valid gtalk id
Password − The password of the above account
To − Who to send the email to?
Subject − subject of the email
Body − The actual email message
We have not considered any validations on the above fields, validations will be added in the next chapter. Let us now look at the execute() method. The execute() method uses the javax Mail library to send an email using the supplied parameters. If the mail is sent successfully, action returns SUCCESS, otherwise it returns ERROR.
Create Main Page
Let us write main page JSP file index.jsp, which will be used to collect email related information mentioned above −
<%@ page language = "java" contentType = "text/html; charset = ISO-8859-1"
   pageEncoding = "ISO-8859-1"%>
<%@ taglib prefix = "s" uri = "/struts-tags"%>
<!DOCTYPE html PUBLIC "-//W3C//DTD HTML 4.01 Transitional//EN"
   "http://www.w3.org/TR/html4/loose.dtd">

<html>
   <head>
   <title>Email Form</title>
   </head>

   <body>
      <em>The form below uses Google's SMTP server.
         So you need to enter a gmail username and password
      </em>

      <form action = "emailer" method = "post">
         <label for = "from">From</label><br/>
         <input type = "text" name = "from"/><br/>
         <label for = "password">Password</label><br/>
         <input type = "password" name = "password"/><br/>
         <label for = "to">To</label><br/>
         <input type = "text" name = "to"/><br/>
         <label for = "subject">Subject</label><br/>
         <input type = "text" name = "subject"/><br/>
         <label for = "body">Body</label><br/>
         <input type = "text" name = "body"/><br/>
         <input type = "submit" value = "Send Email"/>
      </form>
   </body>
</html>
Create Views
We will use JSP file success.jsp which will be invoked in case action returns SUCCESS, but we will have another view file in case of an ERROR is returned from the action.
<%@ page language = "java" contentType = "text/html; charset = ISO-8859-1"
   pageEncoding = "ISO-8859-1"%>
<%@ taglib prefix = "s" uri = "/struts-tags"%>
<!DOCTYPE html PUBLIC "-//W3C//DTD HTML 4.01 Transitional//EN"
   "http://www.w3.org/TR/html4/loose.dtd">

<html>
   <head>
      <title>Email Success</title>
   </head>

   <body>
      Your email to <s:property value = "to"/> was sent successfully.
   </body>
</html>
Following will be the view file error.jsp in case of an ERROR is returned from the action.
<%@ page language = "java" contentType = "text/html; charset = ISO-8859-1"
   pageEncoding = "ISO-8859-1"%>
<%@ taglib prefix = "s" uri = "/struts-tags"%>
<!DOCTYPE html PUBLIC "-//W3C//DTD HTML 4.01 Transitional//EN"
   "http://www.w3.org/TR/html4/loose.dtd">

<html>
   <head>
      <title>Email Error</title>
   </head>

   <body>
      There is a problem sending your email to <s:property value = "to"/>.
   </body>
</html>
Configuration Files
Now let us put everything together using the struts.xml configuration file as follows −
<?xml version = "1.0" Encoding = "UTF-8"?>
<!DOCTYPE struts PUBLIC
   "-//Apache Software Foundation//DTD Struts Configuration 2.0//EN"
   "http://struts.apache.org/dtds/struts-2.0.dtd">

<struts>
   <constant name = "struts.devMode" value = "true" />
   <package name = "helloworld" extends = "struts-default">

      <action name = "emailer"
         class = "com.tutorialspoint.struts2.Emailer"
         method = "execute">
         <result name = "success">/success.jsp</result>
         <result name = "error">/error.jsp</result>
      </action>

   </package>
</struts>
Following is the content of web.xml file −
<?xml version = "1.0" Encoding = "UTF-8"?>
<web-app xmlns:xsi = "http://www.w3.org/2001/XMLSchema-instance"
   xmlns = "http://java.sun.com/xml/ns/javaee"
   xmlns:web = "http://java.sun.com/xml/ns/javaee/web-app_2_5.xsd"
   xsi:schemaLocation = "http://java.sun.com/xml/ns/javaee
   http://java.sun.com/xml/ns/javaee/web-app_3_0.xsd"
   id = "WebApp_ID" version = "3.0">

   <display-name>Struts 2</display-name>

   <welcome-file-list>
      <welcome-file>index.jsp</welcome-file>
   </welcome-file-list>

   <filter>
      <filter-name>struts2</filter-name>
      <filter-class>
         org.apache.struts2.dispatcher.FilterDispatcher
      </filter-class>
   </filter>

   <filter-mapping>
      <filter-name>struts2</filter-name>
      <url-pattern>/*</url-pattern>
   </filter-mapping>
</web-app>
Now, right click on the project name and click Export > WAR File to create a War file. Then deploy this WAR in the Tomcat's webapps directory. Finally, start Tomcat server and try to access URL http://localhost:8080/HelloWorldStruts2/index.jsp. This will produce the following screen −
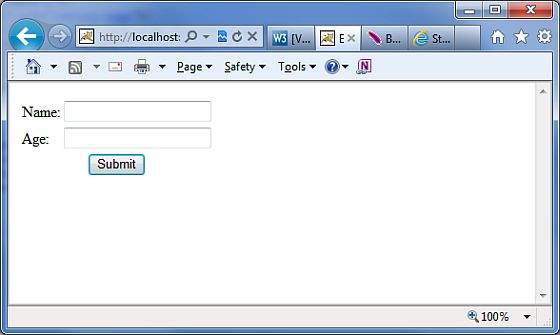
Enter the required information and click Send Email button. If everything goes fine, then you should see the following page.
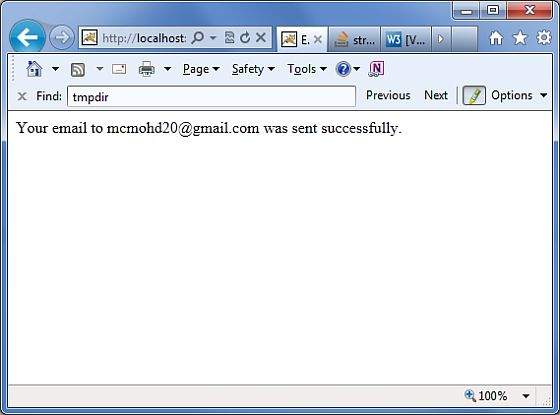
Struts 2 - Validations Framework
In this chapter, we shall look deeper into Struts validation framework. At the Struts core, we have the validation framework that assists the application to run the rules to perform validation before the action method is executed.
Client side validation is usually achieved using Javascript. However, one should not rely upon client side validation alone. The best practices suggest that the validation should be introduced at all levels of your application framework. Now let us look at two ways of adding validation to our Struts project.
Here, we will take an example of an Employee whose name and age should be captured using a simple page, and we will put these two validations to make sure that the user always enters a name and age which should be in a range between 28 and 65.
Let us start with the main JSP page of the example.
Create Main Page
Let us write main page JSP file index.jsp, which will be used to collect Employee related information mentioned above.
<%@ page language = "java" contentType = "text/html; charset = ISO-8859-1"
   pageEncoding = "ISO-8859-1"%>
<%@ taglib prefix = "s" uri = "/struts-tags"%>
<!DOCTYPE html PUBLIC "-//W3C//DTD HTML 4.01 Transitional//EN"
   "http://www.w3.org/TR/html4/loose.dtd">

<html>
   <head>
      <title>Employee Form</title>
   </head>

   <body>
      <s:form action = "empinfo" method = "post">
         <s:textfield name = "name" label = "Name" size = "20" />
         <s:textfield name = "age" label = "Age" size = "20" />
         <s:submit name = "submit" label = "Submit" align="center" />
      </s:form>
   </body>
</html>
The index.jsp makes use of Struts tag, which we have not covered yet, but we will study them in tags related chapters. But for now, just assume that the s:textfield tag prints a input field, and the s:submit prints a submit button. We have used label property for each tag which creates label for each tag.
Create Views
We will use JSP file success.jsp which will be invoked in case defined action returns SUCCESS.
<%@ page language = "java" contentType = "text/html; charset = ISO-8859-1"
   pageEncoding = "ISO-8859-1"%>
<%@ taglib prefix = "s" uri = "/struts-tags"%>
<!DOCTYPE html PUBLIC "-//W3C//DTD HTML 4.01 Transitional//EN"
   "http://www.w3.org/TR/html4/loose.dtd">

<html>
   <head>
      <title>Success</title>
   </head>

   <body>
      Employee Information is captured successfully.
   </body>
</html>
Create Action
So let us define a small action class Employee, and then add a method called validate() as shown below in Employee.java file. Make sure that your action class extends the ActionSupport class, otherwise your validate method will not be executed.
package com.tutorialspoint.struts2;

import com.opensymphony.xwork2.ActionSupport;

public class Employee extends ActionSupport {
   private String name;
   private int age;

   public String execute() {
       return SUCCESS;
   }

   public String getName() {
       return name;
   }

   public void setName(String name) {
       this.name = name;
   }

   public int getAge() {
       return age;
   }

   public void setAge(int age) {
       this.age = age;
   }

   public void validate() {
      if (name == null || name.trim().equals("")) {
         addFieldError("name","The name is required");
      }

      if (age < 28 || age > 65) {
         addFieldError("age","Age must be in between 28 and 65");
      }
   }
}
As shown in the above example, the validation method checks whether the 'Name' field has a value or not. If no value has been supplied, we add a field error for the 'Name' field with a custom error message. Secondly, we check if entered value for 'Age' field is in between 28 and 65 or not, if this condition does not meet we add an error above the validated field.
Configuration Files
Finally, let us put everything together using the struts.xml configuration file as follows −
<?xml version = "1.0" Encoding = "UTF-8"?>
<!DOCTYPE struts PUBLIC
   "-//Apache Software Foundation//DTD Struts Configuration 2.0//EN"
   "http://struts.apache.org/dtds/struts-2.0.dtd">

<struts>
   <constant name = "struts.devMode" value = "true" />
   <package name = "helloworld" extends = "struts-default">

      <action name = "empinfo"
         class = "com.tutorialspoint.struts2.Employee"
         method = "execute">
         <result name = "input">/index.jsp</result>
         <result name = "success">/success.jsp</result>
      </action>

   </package>
</struts>
Following is the content of web.xml file −
<?xml version = "1.0" Encoding = "UTF-8"?>
<web-app xmlns:xsi = "http://www.w3.org/2001/XMLSchema-instance"
   xmlns = "http://java.sun.com/xml/ns/javaee"
   xmlns:web = "http://java.sun.com/xml/ns/javaee/web-app_2_5.xsd"
   xsi:schemaLocation = "http://java.sun.com/xml/ns/javaee
   http://java.sun.com/xml/ns/javaee/web-app_3_0.xsd"
   id = "WebApp_ID" version = "3.0">

   <display-name>Struts 2</display-name>

   <welcome-file-list>
      <welcome-file>index.jsp</welcome-file>
   </welcome-file-list>

   <filter>
      <filter-name>struts2</filter-name>
      <filter-class>
         org.apache.struts2.dispatcher.FilterDispatcher
      </filter-class>
   </filter>

   <filter-mapping>
      <filter-name>struts2</filter-name>
      <url-pattern>/*</url-pattern>
   </filter-mapping>
</web-app>
Now, right click on the project name and click Export > WAR File to create a War file. Then deploy this WAR in the Tomcat's webapps directory. Finally, start Tomcat server and try to access URL http://localhost:8080/HelloWorldStruts2/index.jsp. This will produce the following screen −
Now do not enter any required information, just click on Submit button. You will see the following result −
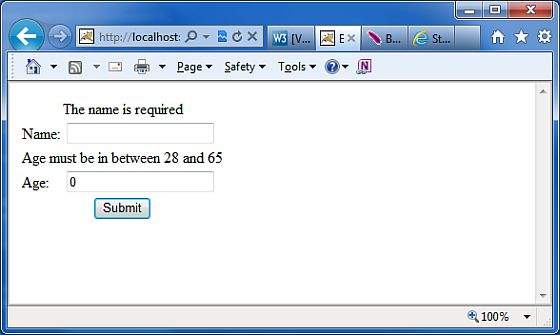
Enter the required information but enter a wrong From field, let us say name as "test" and age as 30, and finally click on Submit button. You will see the following result −
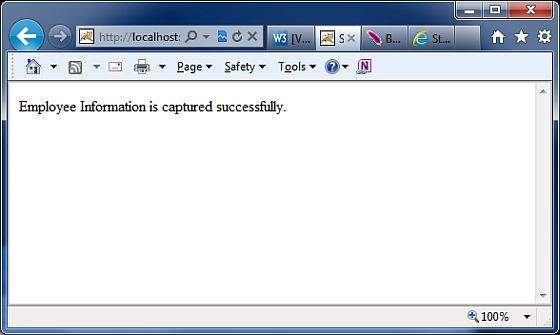
How this Validation Works?
When the user presses the submit button, Struts 2 will automatically execute the validate method and if any of the “if” statements listed inside the method are true, Struts 2 will call its addFieldError method. If any errors have been added, then Struts 2 will not proceed to call the execute method. Rather the Struts 2 framework will return input as the result of calling the action.
Hence, when validation fails and Struts 2 returns input, the Struts 2 framework will redisplay the index.jsp file. Since, we used Struts 2 form tags, Struts 2 will automatically add the error messages just above the form filed.
These error messages are the ones we specified in the addFieldError method call. The addFieldError method takes two arguments. The first, is the form field name to which the error applies and the second, is the error message to display above that form field.
addFieldError("name","The name is required");
To handle the return value of input we need to add the following result to our action node in struts.xml.
<result name = "input">/index.jsp</result>
XML Based Validation
The second method of doing validation is by placing an xml file next to the action class. Struts2 XML based validation provides more options of validation like email validation, integer range validation, form validation field, expression validation, regex validation, required validation, requiredstring validation, stringlength validation and etc.
The xml file needs to be named '[action-class]'-validation.xml. So, in our case we create a file called Employee-validation.xml with the following contents −
<!DOCTYPE validators PUBLIC
   "-//OpenSymphony Group//XWork Validator 1.0.2//EN"
   "http://www.opensymphony.com/xwork/xwork-validator-1.0.2.dtd">

<validators>
   <field name = "name">
      <field-validator type = "required">
         <message>
            The name is required.
         </message>
      </field-validator>
   </field>

   <field name = "age">
     <field-validator type = "int">
         <param name = "min">29</param>
         <param name = "max">64</param>
         <message>
            Age must be in between 28 and 65
         </message>
      </field-validator>
   </field>
</validators>
Above XML file would be kept in your CLASSPATH ideally along with class file. Let us have our Employee action class as follows without having validate() method −
package com.tutorialspoint.struts2;

import com.opensymphony.xwork2.ActionSupport;

public class Employee extends ActionSupport{
   private String name;
   private int age;

   public String execute() {
       return SUCCESS;
   }

   public String getName() {
       return name;
   }

   public void setName(String name) {
       this.name = name;
   }

   public int getAge() {
       return age;
   }

   public void setAge(int age) {
       this.age = age;
   }
}
Rest of the setup will remain as it is i the previous example, now if you will run the application, it will produce same result what we received in previous example.
The advantage of having an xml file to store the configuration allows the separation of the validation from the application code. You could get a developer to write the code and a business analyst to create the validation xml files. Another thing to note is the validator types that are available by default.
There are plenty more validators that come by default with Struts. Common validators include Date Validator, Regex validator and String Length validator. Check the following link for more detail Struts - XML Based Validators.
Struts2 - Localization, internationalization (i18n)
Internationalization (i18n) is the process of planning and implementing products and services so that they can easily be adapted to specific local languages and cultures, a process called localization. The internationalization process is called translation or localization enablement.
Internationalization is abbreviated i18n because the word starts with the letter “i” and ends with “n”, and there are 18 characters between the first i and the last n.
Struts2 provides localization, i.e., internationalization (i18n) support through resource bundles, interceptors and tag libraries in the following places −
The UI Tags
Messages and Errors.
Within action classes.
Resource Bundles
Struts2 uses resource bundles to provide multiple language and locale options to the users of the web application. You don't need to worry about writing pages in different languages. All you have to do is to create a resource bundle for each language that you want. The resource bundles will contain titles, messages, and other text in the language of your user. Resource bundles are the file that contains the key/value pairs for the default language of your application.
The simplest naming format for a resource file is −
bundlename_language_country.properties
Here, bundlename could be ActionClass, Interface, SuperClass, Model, Package, Global resource properties. Next part language_country represents the country locale for example, Spanish (Spain) locale is represented by es_ES, and English (United States) locale is represented by en_US etc. where you can skip country part which is optional.
When you reference a message element by its key, Struts framework searches for a corresponding message bundle in the following order −
- ActionClass.properties
- Interface.properties
- SuperClass.properties
- model.properties
- package.properties
- struts.properties
- global.properties
To develop your application in multiple languages, you should maintain multiple property files corresponding to those languages/locale and define all the content in terms of key/value pairs.
For example, if you are going to develop your application for US English (Default), Spanish, and French, then you would have to create three properties files. Here I will use global.properties file only, you can also make use of different property files to segregate different type of messages.
global.properties − By default English (United States) will be applied
global_fr.properties − This will be used for Franch locale.
global_es.properties − This will be used for Spanish locale.
Access the messages
There are several ways to access the message resources, including getText, the text tag, key attribute of UI tags, and the i18n tag. Let us see them in brief −
To display i18n text, use a call to getText in the property tag, or any other tag, such as the UI tags as follows −
<s:property value = "getText('some.key')" />
The text tag retrieves a message from the default resource bundle, i.e., struts.properties
<s:text name = "some.key" />
The i18n tag pushes an arbitrary resource bundle on to the value stack. Other tags within the scope of the i18n tag can display messages from that resource bundle−
<s:i18n name = "some.package.bundle">
   <s:text name = "some.key" />
</s:i18n>
The key attribute of most UI tags can be used to generate a message from a resource bundle −
<s:textfield key = "some.key" name = "textfieldName"/>
Localization Example
Let us target to create index.jsp from the previous chapter in multiple languages. Same file would be written as follows −
<%@ page language = "java" contentType = "text/html; charset = ISO-8859-1"
   pageEncoding = "ISO-8859-1"%>
<%@ taglib prefix = "s" uri = "/struts-tags"%>
<!DOCTYPE html PUBLIC "-//W3C//DTD HTML 4.01 Transitional//EN"
"http://www.w3.org/TR/html4/loose.dtd">

<html>
   <head>
      <title>Employee Form with Multilingual Support</title>
   </head>

   <body>
      <h1><s:text name = "global.heading"/></h1>

      <s:url id = "indexEN" namespace="/" action = "locale" >
         <s:param name = "request_locale" >en</s:param>
      </s:url>

      <s:url id = "indexES" namespace="/" action = "locale" >
         <s:param name = "request_locale" >es</s:param>
      </s:url>

      <s:url id = "indexFR" namespace="/" action = "locale" >
         <s:param name = "request_locale" >fr</s:param>
      </s:url>

      <s:a href="%{indexEN}" >English</s:a>
      <s:a href="%{indexES}" >Spanish</s:a>
      <s:a href="%{indexFR}" >France</s:a>

      <s:form action = "empinfo" method = "post" namespace = "/">
         <s:textfield name = "name" key = "global.name" size = "20" />
         <s:textfield name = "age" key = "global.age" size = "20" />
         <s:submit name = "submit" key = "global.submit" />
      </s:form>

   </body>
</html>
We will create success.jsp file which will be invoked in case defined action returns SUCCESS.
<%@ page language = "java" contentType = "text/html; charset = ISO-8859-1"
	pageEncoding = "ISO-8859-1"%>
<%@ taglib prefix = "s" uri = "/struts-tags"%>
<!DOCTYPE html PUBLIC "-//W3C//DTD HTML 4.01 Transitional//EN"
   "http://www.w3.org/TR/html4/loose.dtd">

<html>
   <head>
      <title>Success</title>
   </head>

   <body>
      <s:property value = "getText('global.success')" />
   </body>
</html>
Here we would need to create the following two actions. (a) First action a to take care of Locale and display same index.jsp file with different language (b) Another action is to take care of submitting form itself. Both the actions will return SUCCESS, but we will take different actions based on return values because our purpose is different for both the actions
Action to take care of Locale
package com.tutorialspoint.struts2;

import com.opensymphony.xwork2.ActionSupport;

public class Locale extends ActionSupport {
   public String execute() {
       return SUCCESS;
   }
}
Action To Submit The Form
package com.tutorialspoint.struts2;

import com.opensymphony.xwork2.ActionSupport;

public class Employee extends ActionSupport{
   private String name;
   private int age;

   public String execute() {
      return SUCCESS;
   }

   public String getName() {
      return name;
   }

   public void setName(String name) {
      this.name = name;
   }

   public int getAge() {
      return age;
   }

   public void setAge(int age) {
      this.age = age;
   }
}
Now let us create the following three global.properties files and put the in CLASSPATH −
global.properties
global.name = Name
global.age = Age
global.submit = Submit
global.heading = Select Locale
global.success = Successfully authenticated
global_fr.properties
global.name = Nom d'utilisateur
global.age = l'âge
global.submit = Soumettre des
global.heading = Sé lectionnez Local
global.success = Authentifi	é  avec succès
global_es.properties
global.name = Nombre de usuario
global.age = Edad
global.submit = Presentar
global.heading = seleccionar la configuracion regional
global.success = Autenticado correctamente
We will create our struts.xml with two actions as follows −
<?xml version = "1.0" Encoding = "UTF-8"?>
<!DOCTYPE struts PUBLIC
   "-//Apache Software Foundation//DTD Struts Configuration 2.0//EN"
   "http://struts.apache.org/dtds/struts-2.0.dtd">

<struts>
   <constant name = "struts.devMode" value = "true" />
   <constant name = "struts.custom.i18n.resources" value = "global" />
   <package name = "helloworld" extends = "struts-default" namespace="/">
      <action name = "empinfo"
         class = "com.tutorialspoint.struts2.Employee"
         method = "execute">
         <result name = "input">/index.jsp</result>
         <result name = "success">/success.jsp</result>
      </action>

      <action name = "locale"
         class = "com.tutorialspoint.struts2.Locale"
         method = "execute">
         <result name = "success">/index.jsp</result>
      </action>
   </package>

</struts>
Following is the content of web.xml file −
<?xml version = "1.0" Encoding = "UTF-8"?>
<web-app xmlns:xsi = "http://www.w3.org/2001/XMLSchema-instance"
   xmlns = "http://java.sun.com/xml/ns/javaee"
   xmlns:web = "http://java.sun.com/xml/ns/javaee/web-app_2_5.xsd"
   xsi:schemaLocation = "http://java.sun.com/xml/ns/javaee
   http://java.sun.com/xml/ns/javaee/web-app_3_0.xsd"
   id = "WebApp_ID" version = "3.0">

   <display-name>Struts 2</display-name>
   <welcome-file-list>
      <welcome-file>index.jsp</welcome-file>
   </welcome-file-list>

   <filter>
      <filter-name>struts2</filter-name>
      <filter-class>
         org.apache.struts2.dispatcher.FilterDispatcher
      </filter-class>
   </filter>

   <filter-mapping>
      <filter-name>struts2</filter-name>
      <url-pattern>/*</url-pattern>
   </filter-mapping>
</web-app>
Now, right click on the project name and click Export > WAR File to create a War file. Then deploy this WAR in the Tomcat's webapps directory. Finally, start Tomcat server and try to access URL http://localhost:8080/HelloWorldStruts2/index.jsp. This will produce the following screen −
Now select any of the languages, let us say we select Spanish, it would display the following result −
You can try with French language as well. Finally, let us try to click Submit button when we are in Spanish Locale, it would display the following screen −
Congratulations, now you have a multi-lingual webpage, you can launch your website globally.
Struts 2 - Type Conversion
Everything on a HTTP request is treated as a String by the protocol. This includes numbers, booleans, integers, dates, decimals and everything else. However, in the Struts class, you could have properties of any data types.
How does Struts autowire the properties for you?
Struts uses a variety of type converters under the covers to do the heavy lifting.
For example, if you have an integer attribute in your Action class, Struts automatically converts the request parameter to the integer attribute without you doing anything. By default, Struts comes with a number of type converters
If you are using any of the below listed converters, then you have nothing to worry about −
- Integer, Float, Double, Decimal
- Date and Datetime
- Arrays and Collections
- Enumerations
- Boolean
- BigDecimal
At times when you are using your own data type, it is necessary to add your own converters to make Struts aware how to convert those values before displaying. Consider the following POJO class Environment.java.
package com.tutorialspoint.struts2;

public class Environment {
   private String name;

   public  Environment(String name) {
      this.name = name;
   }

   public String getName() {
      return name;
   }

   public void setName(String name) {
      this.name = name;
   }
}
This is a very simple class that has an attribute called name, so nothing special about this class. Let us create another class that contains information about the system -SystemDetails.java.
For the purpose of this exercise, I have hardcoded the Environment to "Development" and the Operating System to "Windows XP SP3".
In a real-time project, you would get this information from the system configuration.
Let us have the following action class −
package com.tutorialspoint.struts2;
import com.opensymphony.xwork2.ActionSupport;

public class SystemDetails extends ActionSupport {
   private Environment environment = new Environment("Development");
   private String operatingSystem = "Windows XP SP3";

   public String execute() {
      return SUCCESS;
   }

   public Environment getEnvironment() {
      return environment;
   }

   public void setEnvironment(Environment environment) {
      this.environment = environment;
   }

   public String getOperatingSystem() {
      return operatingSystem;
   }

   public void setOperatingSystem(String operatingSystem) {
      this.operatingSystem = operatingSystem;
   }
}
Next, let us create a simple JSP file System.jsp to display the Environment and the Operating System information.
<%@ page language = "java" contentType = "text/html; charset = ISO-8859-1"
pageEncoding = "ISO-8859-1"%>
<%@ taglib prefix = "s" uri = "/struts-tags"%>
<!DOCTYPE html PUBLIC "-//W3C//DTD HTML 4.01 Transitional//EN"
   "http://www.w3.org/TR/html4/loose.dtd">

<html>
   <head>
      <title>System Details</title>
   </head>

   <body>
      Environment: <s:property value = "environment"/><br/>
      Operating System:<s:property value = "operatingSystem"/>
   </body>
</html>
Let us wire the system.jsp and the SystemDetails.java class together using struts.xml.
The SystemDetails class has a simple execute () method that returns the string "SUCCESS".
<?xml version = "1.0" Encoding = "UTF-8"?>
<!DOCTYPE struts PUBLIC
   "-//Apache Software Foundation//DTD Struts Configuration 2.0//EN"
   "http://struts.apache.org/dtds/struts-2.0.dtd">

<struts>
   <constant name = "struts.devMode" value = "true" />
   <package name = "helloworld" extends = "struts-default">

      <action name = "system"
            class = "com.tutorialspoint.struts2.SystemDetails"
            method = "execute">
         <result name = "success">/System.jsp</result>
      </action>
   </package>
</struts>
Right click on the project name and click Export > WAR File to create a War file.
Then deploy this WAR in the Tomcat's webapps directory.
Finally, start Tomcat server and try to access URL http://localhost:8080/HelloWorldStruts2/system.action. This will produce the following screen −
What is wrong with the above output? Struts knows how to display and convert the string "Windows XP SP3" and other built-in data types, but it does not know what to do with the property of Environment type. It is simply called toString() method on the class
To resolve this problem, let us now create and register a simple TypeConverter for the Environment class.
Create a class called EnvironmentConverter.java with the following.
package com.tutorialspoint.struts2;

import java.util.Map;
import org.apache.struts2.util.StrutsTypeConverter;

public class EnvironmentConverter extends StrutsTypeConverter {
   @Override
   public Object convertFromString(Map context, String[] values, Class clazz) {
      Environment env = new Environment(values[0]);
      return env;
   }

   @Override
   public String convertToString(Map context, Object value) {
      Environment env  = (Environment) value;
      return env == null ? null : env.getName();
   }
}
The EnvironmentConverter extends the StrutsTypeConverter class and tells Struts how to convert Environment to a String and vice versa by overriding two methods which are convertFromString() and convertToString().
Let us now register this converter before we use it in our application. There are two ways to register a converter.
If the converter will be used only in a particular action, then you would have to create a property file which needs to be named as '[action-class]'converstion.properties.
In our case, we create a file called SystemDetails-converstion.properties with the following registration entry −
environment = com.tutorialspoint.struts2.EnvironmentConverter
In the above example, "environment" is the name of the property in the SystemDetails.java class and we are telling Struts to use the EnvironmentConverter for converting to and from this property.
However, we are not going to do this, Instead we are going to register this converter globally, so that it can be used throughout the application. To do this, create a property file called xwork-conversion.properties in the WEBINF/classes folder with the following line
com.tutorialspoint.struts2.Environment = \
   com.tutorialspoint.struts2.EnvironmentConverter
This simply registers the converter globally, so that Struts can automatically do the conversion every time when it encounters an object of the type Environment. Now, if you re-compiling and re-running the program, then you will get a better output as follows −
Obviously, now the result will be better which means our Struts convertor is working fine.
This is how you can create multiple convertors and register them to use as per your requirements.
Struts 2 - Themes & Templates
Before starting actual tutorial for this chapter, let us look into few definition as given by https://struts.apache.org−
| Sr.No | Term & Description |
|---|---|
| 1 | TAG A small piece of code executed from within JSP, FreeMarker, or Velocity. |
| 2 | TEMPLATE A bit of code, usually written in FreeMarker, that can be rendered by certain tags (HTML tags). |
| 3 | THEME A collection of templates packaged together to provide common functionality. |
I would also suggest going through the Struts2 Localization chapter because we will take same example once again to perform our excercise.
When you use a Struts 2 tag such as <s:submit...>, <s:textfield...> etc in your web page, the Struts 2 framework generates HTML code with a preconfigured style and layout. Struts 2 comes with three built-in themes −
| Sr.No | Theme & Description |
|---|---|
| 1 | SIMPLE theme A minimal theme with no "bells and whistles". For example, the textfield tag renders the HTML <input/> tag without a label, validation, error reporting, or any other formatting or functionality. |
| 2 | XHTML theme This is the default theme used by Struts 2 and provides all the basics that the simple theme provides and adds several features like standard two-column table layout for the HTML, Labels for each of the HTML, Validation and error reporting etc. |
| 3 | CSS_XHTML theme This theme provides all the basics that the simple theme provides and adds several features like standard two-column CSS-based layout, using <div> for the HTML Struts Tags, Labels for each of the HTML Struts Tags, placed according to the CSS stylesheet. |
As mentioned above, if you don’t specify a theme, then Struts 2 will use the xhtml theme by default. For example, this Struts 2 select tag −
<s:textfield name = "name" label = "Name" />
generates following HTML markup −
<tr>

   <td class="tdLabel">
      <label for = "empinfo_name" class="label">Name:</label>
   </td>
   <td>
      <input type = "text" name = "name" value = "" id = "empinfo_name"/>
   </td>

</tr>
Here empinfo is the action name defined in struts.xml file.
Selecting Themes
You can specify the theme on as per Struts 2, tag basis or you can use one of the following methods to specify what theme Struts 2 should use −
The theme attribute on the specific tag
The theme attribute on a tag's surrounding form tag
The page-scoped attribute named "theme"
The request-scoped attribute named "theme"
The session-scoped attribute named "theme"
The application-scoped attribute named "theme"
The struts.ui.theme property in struts.properties (defaults to xhtml)
Following is the syntax to specify them at tag level if you are willing to use different themes for different tags −
<s:textfield name = "name" label = "Name" theme="xhtml"/>
Because it is not very much practical to use themes on per tag basis, so simply we can specify the rule in struts.properties file using the following tags −
# Standard UI theme
struts.ui.theme = xhtml
# Directory where theme template resides
struts.ui.templateDir = template
# Sets the default template type. Either ftl, vm, or jsp
struts.ui.templateSuffix = ftl
Following is the result we picked up from localization chapter where we used the default theme with a setting struts.ui.theme = xhtml in struts-default.properties file which comes by default in struts2-core.xy.z.jar file.
How a Theme Works?
For a given theme, every struts tag has an associated template like s:textfield → text.ftl and s:password → password.ftl etc.
These template files come zipped in struts2-core.xy.z.jar file. These template files keep a pre-defined HTML layout for each tag.
In this way, Struts 2 framework generates final HTML markup code using Sturts tags and associated templates.
Struts 2 tags + Associated template file = Final HTML markup code.
Default templates are written in FreeMarker and they have an extension .ftl.
You can also design your templates using velocity or JSP and accordingly set the configuration in struts.properties using struts.ui.templateSuffix and struts.ui.templateDir.
Creating New Themes
The simplest way to create a new theme is to copy any of the existing theme/template files and do required modifications.
Let us start with creating a folder called template in WebContent/WEBINF/classes and a sub-folder with the name of our new theme. For example, WebContent/WEB-INF/classes/template/mytheme.
From here, you can start building templates from scratch, or you can also copy the templates from the Struts2 distribution where you can modify them as required in future.
We are going to modify existing default template xhtml for learning purpose. Now, let us copy the content from struts2-core-x.y.z.jar/template/xhtml to our theme directory and modify only WebContent/WEBINF/classes/template/mytheme/control.ftl file. When we open control.ftl which will have the following lines −
<table class="${parameters.cssClass?default('wwFormTable')?html}"<#rt/>
<#if parameters.cssStyle??> style="${parameters.cssStyle?html}"<#rt/>
</#if>
>
Let us change above file control.ftl to have the following content −
<table style = "border:1px solid black;">
If you will check form.ftl then you will find that control.ftl is used in this file, but form.ftl is referring this file from xhtml theme. So let us change it as follows −
<#include "/${parameters.templateDir}/xhtml/form-validate.ftl" />
<#include "/${parameters.templateDir}/simple/form-common.ftl" />
<#if (parameters.validate?default(false))>
   onreset = "${parameters.onreset?default('clearErrorMessages(this);\
   clearErrorLabels(this);')}"

<#else>
   <#if parameters.onreset??>
      onreset="${parameters.onreset?html}"
   </#if>
</#if>
#include "/${parameters.templateDir}/mytheme/control.ftl" />
I assume that, you would not have much understanding of the FreeMarker template language, still you can get a good idea of what is to be done by looking at the .ftl files.
However, let us save above changes, and go back to our localization example and create the WebContent/WEB-INF/classes/struts.properties file with the following content
# Customized them
struts.ui.theme = mytheme
# Directory where theme template resides
struts.ui.templateDir = template
# Sets the template type to ftl.
struts.ui.templateSuffix = ftl
Now after this change, right click on the project name and click Export > WAR File to create a War file. Then deploy this WAR in the Tomcat's webapps directory. Finally, start Tomcat server and try to access URL http://localhost:8080/HelloWorldStruts2. This will produce the following screen −
You can see a border around the form component which is a result of the change we did in out theme after copying it from xhtml theme. If you put little effort in learning FreeMarker, then you will be able to create or modify your themes very easily.
I hope that now you have a basic understanding on Sturts 2 themes and templates, isn't it?
Struts 2 - Exception Handling
Struts provides an easier way to handle uncaught exception and redirect users to a dedicated error page. You can easily configure Struts to have different error pages for different exceptions.
Struts makes the exception handling easy by the use of the "exception" interceptor. The "exception" interceptor is included as part of the default stack, so you don't have to do anything extra to configure it. It is available out-of-the-box ready for you to use.
Let us see a simple Hello World example with some modification in HelloWorldAction.java file. Here, we deliberately introduced a NullPointer Exception in our HelloWorldAction action code.
package com.tutorialspoint.struts2;

import com.opensymphony.xwork2.ActionSupport;

public class HelloWorldAction extends ActionSupport{
   private String name;

   public String execute(){
      String x = null;
      x = x.substring(0);
      return SUCCESS;
   }

   public String getName() {
      return name;
   }

   public void setName(String name) {
      this.name = name;
   }
}
Let us keep the content of HelloWorld.jsp as follows −
<%@ page contentType = "text/html; charset = UTF-8" %>
<%@ taglib prefix = "s" uri = "/struts-tags" %>

<html>
   <head>
      <title>Hello World</title>
   </head>

   <body>
      Hello World, <s:property value = "name"/>
   </body>
</html>
Following is the content of index.jsp −
<%@ page language = "java" contentType = "text/html; charset = ISO-8859-1"
   pageEncoding = "ISO-8859-1"%>
<%@ taglib prefix = "s" uri = "/struts-tags"%>
<!DOCTYPE html PUBLIC "-//W3C//DTD HTML 4.01 Transitional//EN"
   "http://www.w3.org/TR/html4/loose.dtd">

<html>
   <head>
      <title>Hello World</title>
   </head>

   <body>
      <h1>Hello World From Struts2</h1>
      <form action = "hello">
         <label for = "name">Please enter your name</label><br/>
         <input type = "text" name = "name"/>
         <input type = "submit" value = "Say Hello"/>
      </form>
   </body>
</html>
Your struts.xml should look like −
<?xml version = "1.0" Encoding = "UTF-8"?>
<!DOCTYPE struts PUBLIC
   "-//Apache Software Foundation//DTD Struts Configuration 2.0//EN"
   "http://struts.apache.org/dtds/struts-2.0.dtd">
<struts>
   <constant name = "struts.devMode" value = "true" />
   <package name = "helloworld" extends = "struts-default">

      <action name = "hello"
         class = "com.tutorialspoint.struts2.HelloWorldAction"
         method = "execute">
         <result name = "success">/HelloWorld.jsp</result>
      </action>

   </package>
</struts>
Now right click on the project name and click Export > WAR File to create a War file. Then deploy this WAR in the Tomcat's webapps directory. Finally, start Tomcat server and try to access URL http://localhost:8080/HelloWorldStruts2/index.jsp. This will produce the following screen −
Enter a value "Struts2" and submit the page. You should see the following page −
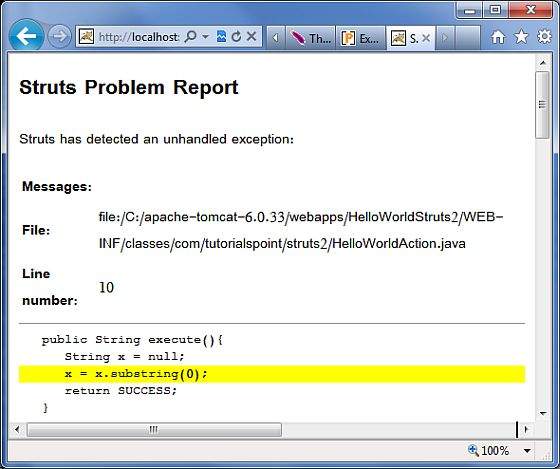
As shown in the above example, the default exception interceptor does a great job of handling the exception.
Let us now create a dedicated error page for our Exception. Create a file called Error.jsp with the following contents −
<%@ page language = "java" contentType = "text/html; charset = ISO-8859-1"
	pageEncoding = "ISO-8859-1"%>
<%@ taglib prefix = "s" uri = "/struts-tags"%>
<!DOCTYPE html PUBLIC "-//W3C//DTD HTML 4.01 Transitional//EN"
   "http://www.w3.org/TR/html4/loose.dtd">

<html>
   <head>
      <title></title>
   </head>

   <body>
      This is my custom error page
   </body>
</html>
Let us now configure Struts to use this this error page in case of an exception. Let us modify the struts.xml as follows −
<?xml version = "1.0" Encoding = "UTF-8"?>
<!DOCTYPE struts PUBLIC
   "-//Apache Software Foundation//DTD Struts Configuration 2.0//EN"
   "http://struts.apache.org/dtds/struts-2.0.dtd">
<struts>
   <constant name = "struts.devMode" value = "true" />
   <package name = "helloworld" extends = "struts-default">

      <action name = "hello"
         class = "com.tutorialspoint.struts2.HelloWorldAction"
         method = "execute">
         <exception-mapping exception = "java.lang.NullPointerException"
         result = "error" />
         <result name = "success">/HelloWorld.jsp</result>
         <result name = "error">/Error.jsp</result>
      </action>

   </package>
</struts>
As shown in the example above, now we have configured Struts to use the dedicated Error.jsp for the NullPointerException. If you rerun the program now, you shall now see the following output −
In addition to this, Struts2 framework comes with a "logging" interceptor to log the exceptions. By enabling the logger to log the uncaught exceptions, we can easily look at the stack trace and work out what went wrong
Global Exception Mappings
We have seen how we can handle action specific exception. We can set an exception globally which will apply to all the actions. For example, to catch the same NullPointerException exceptions, we could add <global-exception-mappings...> tag inside <package...> tag and its <result...> tag should be added inside the <action...> tag in struts.xml file as follows −
<?xml version = "1.0" Encoding = "UTF-8"?>
<!DOCTYPE struts PUBLIC
   "-//Apache Software Foundation//DTD Struts Configuration 2.0//EN"
   "http://struts.apache.org/dtds/struts-2.0.dtd">
<struts>
   <constant name = "struts.devMode" value = "true" />
   <package name = "helloworld" extends = "struts-default">
      <global-exception-mappings>
         <exception-mapping exception = "java.lang.NullPointerException"
         result = "error" />
      </global-exception-mappings>

      <action name = "hello"
         class = "com.tutorialspoint.struts2.HelloWorldAction"
         method = "execute">
         <result name = "success">/HelloWorld.jsp</result>
         <result name = "error">/Error.jsp</result>
      </action>

   </package>
</struts>
Struts 2 - Annotations
As mentioned previously, Struts provides two forms of configuration. The traditional way is to use the struts.xml file for all the configurations. We have seen so many examples of that in the tutorial so far. The other way of configuring Struts is by using the Java 5 Annotations feature. Using the struts annotations, we can achieve Zero Configuration.
To start using annotations in your project, make sure you have included the following jar files in your WebContent/WEB-INF/lib folder −
- struts2-convention-plugin-x.y.z.jar
- asm-x.y.jar
- antlr-x.y.z.jar
- commons-fileupload-x.y.z.jar
- commons-io-x.y.z.jar
- commons-lang-x.y.jar
- commons-logging-x.y.z.jar
- commons-logging-api-x.y.jar
- freemarker-x.y.z.jar
- javassist-.xy.z.GA
- ognl-x.y.z.jar
- struts2-core-x.y.z.jar
- xwork-core.x.y.z.jar
Now, let us see how you can do away with the configuration available in the struts.xml file and replace it with annotaions.
To explain the concept of Annotation in Struts2, we would have to reconsider our validation example explained in Struts2 Validations chapter.
Here, we shall take an example of an Employee whose name, age would be captured using a simple page, and we will put two validations to make sure that ÜSER always enters a name and age should be in between 28 and 65.
Let us start with the main JSP page of the example.
Create Main Page
Let us write main page JSP file index.jsp, which is used to collect Employee related information mentioned above.
<%@ page language = "java" contentType = "text/html; charset = ISO-8859-1"
   pageEncoding = "ISO-8859-1"%>
<%@ taglib prefix = "s" uri = "/struts-tags"%>
<!DOCTYPE html PUBLIC "-//W3C//DTD HTML 4.01 Transitional//EN"
   "http://www.w3.org/TR/html4/loose.dtd">

<html>
   <head>
      <title>Employee Form</title>
   </head>

   <body>

      <s:form action = "empinfo" method = "post">
         <s:textfield name = "name" label = "Name" size = "20" />
         <s:textfield name = "age" label = "Age" size = "20" />
         <s:submit name = "submit" label = "Submit" align="center" />
      </s:form>

   </body>
</html>
The index.jsp makes use of Struts tag, which we have not covered yet but we will study them in tags related chapters. But for now, just assume that the s:textfield tag prints a input field, and the s:submit prints a submit button. We have used label property for each tag which creates label for each tag.
Create Views
We will use JSP file success.jsp which will be invoked in case the defined action returns SUCCESS.
<%@ page language = "java" contentType = "text/html; charset = ISO-8859-1"
	pageEncoding = "ISO-8859-1"%>
<%@ taglib prefix = "s" uri = "/struts-tags"%>
<!DOCTYPE html PUBLIC "-//W3C//DTD HTML 4.01 Transitional//EN"
   "http://www.w3.org/TR/html4/loose.dtd">

<html>
   <head>
      <title>Success</title>
   </head>

   <body>
      Employee Information is captured successfully.
   </body>
</html>
Create Action
This is the place where annotation is used. Let us re-define action class Employee with annotation, and then add a method called validate () as shown below in Employee.java file. Make sure that your action class extends the ActionSupport class, otherwise your validate method will not be executed.
package com.tutorialspoint.struts2;

import com.opensymphony.xwork2.ActionSupport;
import org.apache.struts2.convention.annotation.Action;
import org.apache.struts2.convention.annotation.Result;
import org.apache.struts2.convention.annotation.Results;
import com.opensymphony.xwork2.validator.annotations.*;

@Results({
   @Result(name = "success", Location = "/success.jsp"),
   @Result(name = "input", Location = "/index.jsp")
})
public class Employee extends ActionSupport {
   private String name;
   private int age;

   @Action(value = "/empinfo")

   public String execute() {
      return SUCCESS;
   }

   @RequiredFieldValidator( message = "The name is required" )

   public String getName() {
      return name;
   }

   public void setName(String name) {
      this.name = name;
   }

   @IntRangeFieldValidator(message = "Age must be in between 28 and 65", min = "29", max = "65")

   public int getAge() {
      return age;
   }

   public void setAge(int age) {
      this.age = age;
   }
}
We have used few annotations in this example. Let me go through them one by one −
First, we have included the Results annotation. A Results annotation is a collection of results.
Under the results annotation, we have two result annotations. The result annotations have the name that correspond to the outcome of the execute method. They also contain a location as to which view should be served corresponding to return value from execute()
The next annotation is the Action annotation. This is used to decorate the execute() method. The Action method also takes in a value which is the URL on which the action is invoked.
Finally, I have used two validation annotations. I have configured the required field validator on name field and the integer range validator on the age field. I have also specified a custom message for the validations.
Configuration Files
We really do not need struts.xml configuration file, so let us remove this file and let us check the content of web.xml file −
<?xml version = "1.0" Encoding = "UTF-8"?>
<web-app xmlns:xsi = "http://www.w3.org/2001/XMLSchema-instance"
   xmlns = "http://java.sun.com/xml/ns/javaee"
   xmlns:web = "http://java.sun.com/xml/ns/javaee/web-app_2_5.xsd"
   xsi:schemaLocation = "http://java.sun.com/xml/ns/javaee
   http://java.sun.com/xml/ns/javaee/web-app_3_0.xsd"
   id = "WebApp_ID" version = "3.0">

   <display-name>Struts 2</display-name>

   <welcome-file-list>
      <welcome-file>index.jsp</welcome-file>
   </welcome-file-list>

   <filter>
      <filter-name>struts2</filter-name>

      <filter-class>
         org.apache.struts2.dispatcher.FilterDispatcher
      </filter-class>

      <init-param>
         <param-name>struts.devMode</param-name>
         <param-value>true</param-value>
      </init-param>
   </filter>

   <filter-mapping>
      <filter-name>struts2</filter-name>
      <url-pattern>/*</url-pattern>
   </filter-mapping>
</web-app>
Now, right click on the project name and click Export > WAR File to create a War file. Then deploy this WAR in the Tomcat's webapps directory. Finally, start Tomcat server and try to access URL http://localhost:8080/HelloWorldStruts2/index.jsp. This will produce the following screen −
Now do not enter any required information, just click on Submit button. You will see the following result −
Enter the required information but enter a wrong From field, let us say name as "test" and age as 30, and finally click on Submit button. You will see the following result −
Struts 2 Annotations Types
Struts 2 applications can use Java 5 annotations as an alternative to XML and Java properties configuration. You can check the list of most important annotations related to different categories −
Struts 2 - Control Tags
The Struts 2 tags has a set of tags that makes it easy to control the flow of page execution.
Following is the list of important Struts 2 Control Tags −
The If and Else Tags
These tags perform basic condition flow found in every language.
'If' tag is used by itself or with 'Else If' Tag and/or single/multiple 'Else' Tag as shown below −
<s:if test = "%{false}">
   <div>Will Not Be Executed</div>
</s:if>

<s:elseif test = "%{true}">
   <div>Will Be Executed</div>
</s:elseif>

<s:else>
   <div>Will Not Be Executed</div>
</s:else>
The Iterator Tags
This iterator will iterate over a value. An iterable value can be either itherjava.util.Collection or java.util.Iterator file. While iterating over an iterator, you can use Sort tag to sort the result or SubSet tag to get a sub set of the list or array.
The following example retrieves the value of the getDays() method of the current object on the value stack and uses it to iterate over.
The <s:property/> tag prints out the current value of the iterator.
<s:iterator value = "days">
   <p>day is: <s:property/></p>
</s:iterator>
The Merge Tag
These merge tag takes two or more lists as parameters and merge them all together as shown below −
<s:merge var = "myMergedIterator">
   <s:param value = "%{myList1}" />
   <s:param value = "%{myList2}" />
   <s:param value = "%{myList3}" />
</s:merge>

<s:iterator value = "%{#myMergedIterator}">
   <s:property />
</s:iterator>
The Append Tag
These append tag take two or more lists as parameters and append them all together as shown below −
<s:append var = "myAppendIterator">
   <s:param value = "%{myList1}" />
   <s:param value = "%{myList2}" />
   <s:param value = "%{myList3}" />
</s:append>

<s:iterator value = "%{#myAppendIterator}">
   <s:property />
</s:iterator>
The Generator Tag
These generator tag generates an iterator based on the val attribute supplied. The following generator tag generates an iterator and prints it out using the iterator tag.
<s:generator val = "%{'aaa,bbb,ccc,ddd,eee'}">
   <s:iterator>
      <s:property /><br/>
   </s:iterator>
</s:generator>
Struts 2 - Data Tags
The Struts 2 data tags are primarily used to manipulate the data displayed on a page. Listed below are the important data tags: <Start here>
The Action Tag
This tag enables developers to call actions directly from a JSP page by specifying the action name and an optional namespace. The body content of the tag is used to render the results from the Action. Any result processor defined for this action in struts.xml will be ignored, unless the executeResult parameter is specified.
<div>Tag to execute the action</div>
<br />
<s:action name = "actionTagAction" executeresult = "true" />
<br />
<div>To invokes special method  in action class</div>
<br />
<s:action name = "actionTagAction!specialMethod" executeresult = "true" />
The Include Tag
These include will be used to include a JSP file in another JSP page.
<-- First Syntax -->
<s:include value = "myJsp.jsp" />

<-- Second Syntax -->
<s:include value = "myJsp.jsp">
   <s:param name = "param1" value = "value2" />
   <s:param name = "param2" value = "value2" />
</s:include>

<-- Third Syntax -->
<s:include value = "myJsp.jsp">
   <s:param name = "param1">value1</s:param>
   <s:param name = "param2">value2</s:param>
</s:include>
The Bean Tag
These bean tag instantiates a class that conforms to the JavaBeans specification. This tag has a body which can contain a number of Param elements to set any mutator methods on that class. If the var attribute is set on the BeanTag, it will place the instantiated bean into the stack's Context.
<s:bean name = "org.apache.struts2.util.Counter" var = "counter">
   <s:param name = "first" value = "20"/>
   <s:param name = "last" value = "25" />
</s:bean>
The Date Tag
These date tag will allow you to format a Date in a quick and easy way. You can specify a custom format (eg. "dd/MM/yyyy hh:mm"), you can generate easy readable notations (like "in 2 hours, 14 minutes"), or you can just fall back on a predefined format with key 'struts.date.format' in your properties file.
<s:date name = "person.birthday" format = "dd/MM/yyyy" />
<s:date name = "person.birthday" format = "%{getText('some.i18n.key')}" />
<s:date name = "person.birthday" nice="true" />
<s:date name = "person.birthday" />
The Param Tag
These param tag can be used to parameterize other tags. This tag has the following two parameters.
name (String) − the name of the parameter
value (Object) − the value of the parameter
<pre>
   <ui:component>
      <ui:param name = "key"     value = "[0]"/>
      <ui:param name = "value"   value = "[1]"/>
      <ui:param name = "context" value = "[2]"/>
   </ui:component>
</pre>
The Property Tag
These property tag is used to get the property of a value, which will default to the top of the stack if none is specified.
<s:push value = "myBean">
   <!-- Example 1: -->
   <s:property value = "myBeanProperty" />

   <!-- Example 2: -->TextUtils
   <s:property value = "myBeanProperty" default = "a default value" />
</s:push>
The Push Tag
These push tag is used to push value on stack for simplified usage.
<s:push value = "user">
   <s:propery value = "firstName" />
   <s:propery value = "lastName" />
</s:push>
The Set Tag
These set tag assigns a value to a variable in a specified scope. It is useful when you wish to assign a variable to a complex expression and then simply reference that variable each time rather than the complex expression. The scopes available are application, session, request, page and action.
<s:set name = "myenv" value = "environment.name"/>
<s:property value = "myenv"/>
The Text Tag
These text tag is used to render a I18n text message.
<!-- First Example -->
<s:i18n name = "struts.action.test.i18n.Shop">
   <s:text name = "main.title"/>
</s:i18n>

<!-- Second Example -->
<s:text name = "main.title" />

<!-- Third Examlpe -->
<s:text name = "i18n.label.greetings">
   <s:param >Mr Smith</s:param>
</s:text>
The URL Tag
These url tag is used to create a URL.
<-- Example 1 -->
<s:url value = "editGadget.action">
   <s:param name = "id" value = "%{selected}" />
</s:url>

<-- Example 2 -->
<s:url action = "editGadget">
   <s:param name = "id" value = "%{selected}" />
</s:url>

<-- Example 3-->
<s:url includeParams="get">
   <s:param name = "id" value = "%{'22'}" />
</s:url>
Struts 2 - The Form Tags
The list of form tags is a subset of Struts UI Tags. These tags help in the rendering of the user interface required for the Struts web applications and can be categorised into three categories. This chapter will take you thorugh all the three types of UI tags −
Simple UI Tags
We have used these tags in our examples already, we will brush them in this chapter. Let us look a simple view page email.jsp with several simple UI tags −
<%@ page language = "java" contentType = "text/html; charset = ISO-8859-1"
   pageEncoding = "ISO-8859-1"%>
<%@ taglib prefix = "s" uri = "/struts-tags"%>
<!DOCTYPE html PUBLIC "-//W3C//DTD HTML 4.01 Transitional//EN"
   "http://www.w3.org/TR/html4/loose.dtd">

<html>
   <head>
      <s:head/>
      <title>Hello World</title>
   </head>

   <body>
      <s:div>Email Form</s:div>
      <s:text name = "Please fill in the form below:" />

      <s:form action = "hello" method = "post" enctype = "multipart/form-data">
         <s:hidden name = "secret" value = "abracadabra"/>
         <s:textfield key = "email.from" name = "from" />
         <s:password key = "email.password" name = "password" />
         <s:textfield key = "email.to" name = "to" />
         <s:textfield key = "email.subject" name = "subject" />
         <s:textarea key = "email.body" name = "email.body" />
         <s:label for = "attachment" value = "Attachment"/>
         <s:file name = "attachment" accept = "text/html,text/plain" />
         <s:token />
         <s:submit key = "submit" />
      </s:form>

   </body>
</html>
If you are aware of HTML, then all the tags used are very common HTML tags with an additional prefix s: along with each tag and different attributes. When we execute the above program, we get the following user interface provided you have setup proper mapping for all the keys used.
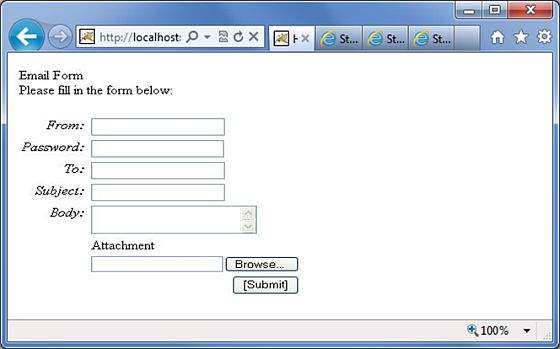
As shown, the s:head generates the javascript and stylesheet elements required for the Struts2 application.
Next, we have the s:div and s:text elements. The s:div is used to render a HTML Div element. This is useful for people who do not like to mix HTML and Struts tags together. For those people, they have the choice to use s:div to render a div.
The s:text as shown is used to render a text on the screen.
Next we have the famiilar s:form tag. The s:form tag has an action attribute that determines where to submit the form. Because we have a file upload element in the form, we have to set the enctype to multipart. Otherwise, we can leave this blank.
At the end of the form tag, we have the s:submit tag. This is used to submit the form. When the form is submitted, all the form values are submitted to the the action specified in the s:form tag.
Inside the s:form, we have a hidden attribute called secret. This renders a hidden element in the HTML. In our case, the "secret" element has the value "abracadabra". This element is not visible to the end user and is used to carry the state from one view to another.
Next we have the s:label, s:textfield, s:password and s:textarea tags. These are used to render the label, input field, password and the text area respectively. We have seen these in action in the "Struts - Sending Email" example.
The important thing to note here is the use of "key" attribute. The "key" attribute is used to fetch the label for these controls from the property file. We have already covered this feature in the Struts2 Localization, internationalization chapter.
Then, we have the s:file tag which renders a input file upload component. This component allows the user to upload files. In this example, we have used the "accept" parameter of the s:file tag to specify which file types are allowed to be uploaded.
Finally we have the s:token tag. The token tag generates an unique token which is used to find out whether a form has been double submitted
When the form is rendered, a hidden variable is placed as the token value. Let us say, for example that the token is "ABC". When this form is submitted, the Struts Fitler checks the token against the token stored in the session. If it matches, it removes the token from the session. Now, if the form is accidentally resubmitted (either by refreshing or by hitting the browser back button), the form will be resubmitted with "ABC" as the token. In this case, the filter checks the token against the token stored in the session again. But because the token "ABC" has been removed from the session, it will not match and the Struts filter will reject the request.
Group UI Tags
The group UI tags are used to create radio button and the checkbox. Let us look a simple view page HelloWorld.jsp with check box and radio button tags −
<%@ page contentType = "text/html; charset = UTF-8"%>
<%@ taglib prefix = "s" uri = "/struts-tags"%>

<html>
   <head>
      <title>Hello World</title>
      <s:head />
   </head>

   <body>
      <s:form action = "hello.action">
         <s:radio label = "Gender" name = "gender" list="{'male','female'}" />
         <s:checkboxlist label = "Hobbies" name = "hobbies"
         list = "{'sports','tv','shopping'}" />
      </s:form>

   </body>
</html>
When we execute the above program, our output will look similar to the following −
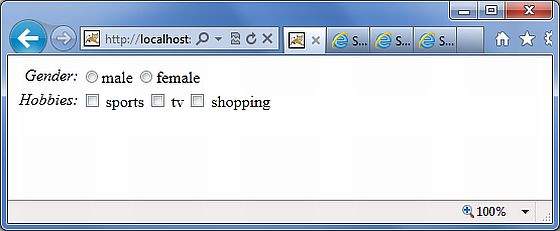
Let us look at the example now. In the first example, we are creating a simple radio button with the label "Gender". The name attribute is mandatory for the radio button tag, so we specify a name which is "gender". We then supply a list to the gender. The list is populated with the values "male" and "female". Therefore, in the output we get a radio button with two values in it.
In the second example, we are creating a checkbox list. This is to gather the user's hobbies. The user can have more than one hobby and therefore we are using the checkbox instead of the radiobutton. The checkbox is populated with the list "sports", "TV" and "Shopping". This presents the hobbies as a checkbox list.
Select UI Tags
Let us explore the different variations of the Select Tag offered by Struts. Let us look a simple view page HelloWorld.jsp with select tags −
<%@ page contentType = "text/html; charset = UTF-8"%>
<%@ taglib prefix = "s" uri = "/struts-tags"%>

<html>
   <head>
      <title>Hello World</title>
      <s:head />
   </head>

   <body>
      <s:form action = "login.action">
         <s:select name = "username" label = "Username"
            list = "{'Mike','John','Smith'}" />

         <s:select label = "Company Office" name = "mySelection"
            value = "%{'America'}" list="%{#{'America':'America'}}">
            <s:optgroup label = "Asia"
               list = "%{#{'India':'India','China':'China'}}" />
            <s:optgroup label = "Europe"
               list="%{#{'UK':'UK','Sweden':'Sweden','Italy':'Italy'}}" />
         </s:select>

         <s:combobox label = "My Sign" name = "mySign"
            list = "#{'aries':'aries','capricorn':'capricorn'}" headerkey = "-1"
            headervalue = "--- Please Select ---" emptyOption = "true" value = "capricorn" />
         <s:doubleselect label = "Occupation" name = "occupation"
            list = "{'Technical','Other'}" doublename = "occupations2"
            doubleList="top == 'Technical' ?
            {'I.T', 'Hardware'} : {'Accounting', 'H.R'}" />
      </s:form>
   </body>
</html>
When we execute the above program our output will look similar to the following −
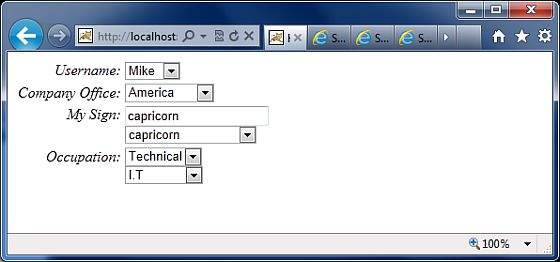
Let us now go through the individual cases, one by one.
First, the select tag renders the HTML select box. In the first example, we are creating a simple select box with name "username" and the label "username". The select box will be populated with a list that contains the names Mike, John and Smith.
In the second example, our company has head offices in America. It also has global offices in Asia and Europe. We want to display the offices in a select box but we want to group the global offices by the name of the continent. This is where the optgroup comes in handy. We use the s:optgroup tag to create a new group. We give the group a label and a separate list.
In the third example, the combobox is used. A combo box is a combination of an input field and a select box. The user can either select a value from the select box in which case the input field is automatically filled in with the value the user has selected. Should the user to enter a value directly, no values from the select box will be selected.
In our example we have the combobox listing the sun signs. The selectbox lists only four entries allowing the user to type in his sun sign if it is not in the list. We also add a header entry to the select box. The headerentry is the one that is displayed at the top of the select box. In our case we want to display "Please Select". If the user does not select anything, then we assume -1 as the value. In some cases, we do not want the user to select an empty value. In those conditions, one would set the "emptyOption" property to false. Finally, in our example we supply "capricorn" as the default value for the combobox.
In the fourth example, we have a double select. A double select is used when you want to display two select boxes. The value selected in the first select box determines what appears in the second select box. In our example the first select box displays "Technical" and "Other". If the user selects Technical, we will display IT and Hardware in the second select box. Otherwise we will display Accounting and HR. This is possible using the "list" and "doubleList" atrributes as shown in the example.
In the above example, we did a comparison to see if the top select box equals Technical. If it does, then we display IT and Hardware.
We also need to give a name for the top box ("name = 'Occupations') and the bottom box (doubleName = 'occupations2')
Struts 2 - The Ajax Tags
Struts uses the DOJO framework for the AJAX tag implementation. First of all, to proceed with this example, you need to add struts2-dojo-plugin-2.2.3.jar to your classpath.
You can get this file from the lib folder of your struts2 download (C:\struts-2.2.3all\struts-2.2.3\lib\struts2-dojo-plugin-2.2.3.jar)
For this exercies, let us modify HelloWorld.jsp as follows −
<%@ page contentType = "text/html; charset = UTF-8"%>
<%@ taglib prefix = "s" uri = "/struts-tags"%>
<%@ taglib prefix = "sx" uri = "/struts-dojo-tags"%>

<html>
   <head>
      <title>Hello World</title>
      <s:head />
      <sx:head />
   </head>

   <body>
      <s:form>
         <sx:autocompleter label = "Favourite Colour"
            list = "{'red','green','blue'}" />
         <br />
         <sx:datetimepicker name = "deliverydate" label = "Delivery Date"
            displayformat = "dd/MM/yyyy" />
         <br />
         <s:url id = "url" value = "/hello.action" />
         <sx:div href="%{#url}" delay="2000">
            Initial Content
         </sx:div>
         <br/>
         <sx:tabbedpanel id = "tabContainer">
            <sx:div label = "Tab 1">Tab 1</sx:div>
            <sx:div label = "Tab 2">Tab 2</sx:div>
         </sx:tabbedpanel>
      </s:form>
   </body>
</html>
When we run the above example, we get the following output −
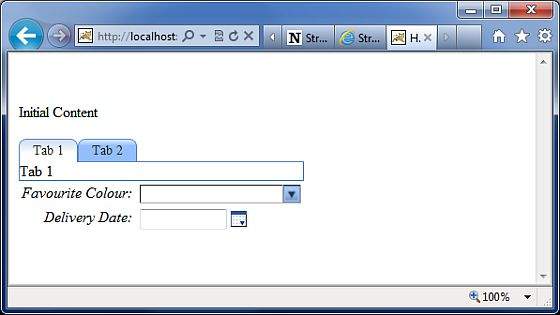
Let us now go through this example one step at a time.
First thing to notice is the addition of a new tag library with the prefix sx. This (struts-dojo-tags) is the tag library specifically created for the ajax integration.
Then inside the HTML head we call the sx:head. This initializes the dojo framework and makes it ready for all AJAX invocations within the page. This step is important - your ajax calls will not work without the sx:head being initialized.
First we have the autocompleter tag. The autocompleter tag looks pretty much like a select box. It is populated with the values red, green and blue. But the different between a select box and this one is that it auto completes. That is, if you start typing in gr, it will fill it with "green". Other than that this tag is very much similar to the s:select tag which we covered earlier.
Next, we have a date time picker. This tag creates an input field with a button next to it. When the button is pressed, a popup date time picker is displayed. When the user selects a date, the date is filled into the input text in the format that is specified in the tag attribute. In our example, we have specified dd/MM/yyyy as the format for the date.
Next we create a url tag to the system.action file which we created in the earlier exercises. It doesn't have to be the system.action - it could be any action file that you created earlier. Then we have a div with the hyperlink set to the url and delay set to 2 seconds. What happens when you run this is, the "Initial Content" will be displayed for 2 seconds, then the div's content will be replaced with the contents from the hello.action execution.
Finally we have a simple tab panel with two tabs. The tabs are divs themseleves with the labels Tab 1 and Tab2.
It should be worth noting that the AJAX tag integration in Struts is still a work in progress and the maturity of this integration is slowly increasing with every release.
Struts 2 & Spring Integration
Spring is a popular web framework that provides easy integration with lots of common web tasks. So the question is, why do we need Spring when we have Struts2? Well, Spring is more than a MVC framework - it offers many other goodies which are not available in Struts.
For example: dependency injection that can be useful to any framework. In this chapter, we will go through a simple example to see how to integrate Spring and Struts2 together.
First of all, you need to add the following files to the project's build path from Spring installation. You can download and install latest version of Spring Framework from https://www.springsource.org/download
- org.springframework.asm-x.y.z.M(a).jar
- org.springframework.beans-x.y.z.M(a).jar
- org.springframework.context-x.y.z.M(a).jar
- org.springframework.core-x.y.z.M(a).jar
- org.springframework.expression-x.y.z.M(a).jar
- org.springframework.web-x.y.z.M(a).jar
- org.springframework.web.servlet-x.y.z.M(a).jar
Finally add struts2-spring-plugin-x.y.z.jar in your WEB-INF/lib from your struts lib directory. If you are using Eclipse then you may face an exception java.lang.ClassNotFoundException: org.springframework.web.context.ContextLoaderListener.
To fix this problem, you should have to go in Marker tab and righ click on the class dependencies one by one and do Quick fix to publish/export all the dependences. Finally make sure there is no dependency conflict available under the marker tab.
Now let us setup the web.xml for the Struts-Spring integration as follows −
<?xml version = "1.0" Encoding = "UTF-8"?>
<web-app xmlns:xsi = "http://www.w3.org/2001/XMLSchema-instance"
   xmlns = "http://java.sun.com/xml/ns/javaee"
   xmlns:web = "http://java.sun.com/xml/ns/javaee/web-app_2_5.xsd"
   xsi:schemaLocation = "http://java.sun.com/xml/ns/javaee
   http://java.sun.com/xml/ns/javaee/web-app_3_0.xsd"
   id = "WebApp_ID" version = "3.0">

   <display-name>Struts 2</display-name>

   <welcome-file-list>
      <welcome-file>index.jsp</welcome-file>
   </welcome-file-list>

   <listener>
      <listener-class>
         org.springframework.web.context.ContextLoaderListener
      </listener-class>
   </listener>

   <filter>
      <filter-name>struts2</filter-name>
      <filter-class>
         org.apache.struts2.dispatcher.FilterDispatcher
      </filter-class>
   </filter>

   <filter-mapping>
      <filter-name>struts2</filter-name>
      <url-pattern>/*</url-pattern>
   </filter-mapping>
</web-app>
The important thing to note here is the listener that we have configured. The ContextLoaderListener is required to load the spring context file. Spring's configuration file is called applicationContext.xml file and it must be placed at the same level as the web.xml file
Let us create a simple action class called User.java with two properties - firstName and lastName.
package com.tutorialspoint.struts2;

public class User {
   private String firstName;
   private String lastName;

   public String execute() {
      return "success";
   }

   public String getFirstName() {
      return firstName;
   }

   public void setFirstName(String firstName) {
      this.firstName = firstName;
   }

   public String getLastName() {
      return lastName;
   }

   public void setLastName(String lastName) {
      this.lastName = lastName;
   }
}
Now let us create the applicationContext.xml spring configuration file and instantiate the User.java class. As mentioned earlier, this file should be under the WEB-INF folder −
<?xml version = "1.0" Encoding = "UTF-8"?>
<!DOCTYPE beans PUBLIC "-//SPRING//DTD BEAN//EN"
"http://www.springframework.org/dtd/spring-beans.dtd">
<beans>
   <bean id = "userClass" class = "com.tutorialspoint.struts2.User">
      <property name = "firstName" value = "Michael" />
      <property name = "lastName" value = "Jackson" />
   </bean>
</beans>
As seen above, we have configured the user bean and we have injected the values Michael and Jackson into the bean. We have also given this bean a name "userClass", so that we can reuse this elsewhere. Next let us create the User.jsp in the WebContent folder −
<%@ page language = "java" contentType = "text/html; charset = ISO-8859-1"
   pageEncoding = "ISO-8859-1"%>
<%@ taglib prefix = "s" uri = "/struts-tags"%>
<!DOCTYPE html PUBLIC "-//W3C//DTD HTML 4.01 Transitional//EN"
   "http://www.w3.org/TR/html4/loose.dtd">

<html>
   <head>
      <title>Hello World</title>
   </head>

   <body>
      <h1>Hello World From Struts2 - Spring integration</h1>

      <s:form>
         <s:textfield name = "firstName" label = "First Name"/><br/>
         <s:textfield name = "lastName" label = "Last Name"/><br/>
      </s:form>

   </body>
</html>
The User.jsp file is pretty straight forward. It serves only one purpose - to display the values of the firstname and lastname of the user object. Finally, let us put all entities together using the struts.xml file.
<?xml version = "1.0" Encoding = "UTF-8"?>
<!DOCTYPE struts PUBLIC
   "-//Apache Software Foundation//DTD Struts Configuration 2.0//EN"
   "http://struts.apache.org/dtds/struts-2.0.dtd">

<struts>
   <constant name = "struts.devMode" value = "true" />
   <package name = "helloworld" extends = "struts-default">
      <action name = "user" class="userClass"
         method = "execute">
         <result name = "success">/User.jsp</result>
      </action>
   </package>
</struts>
The important thing to note is that we are using the id userClass to refer to the class. This means that we are using spring to do the dependency injection for the User class.
Now right click on the project name and click Export > WAR File to create a War file. Then deploy this WAR in the Tomcat's webapps directory. Finally, start Tomcat server and try to access URL http://localhost:8080/HelloWorldStruts2/User.jsp. This will produce the following screen −
We have now seen how to bring two great frameworks together. This concludes the Struts - Spring integration chapter.
Struts 2 & Tiles Integration
In this chapter, let us go through the steps involved in integrating the Tiles framework with Struts2. Apache Tiles is a templating framework built to simplify the development of web application user interfaces.
First of all we need to download the tiles jar files from the Apache Tiles website. You need to add the following jar files to the project's class path.
- tiles-api-x.y.z.jar
- tiles-compat-x.y.z.jar
- tiles-core-x.y.z.jar
- tiles-jsp-x.y.z.jar
- tiles-servlet-x.y.z.jar
In addition to the above, we have to copy the following jar files from the struts2 download in your WEB-INF/lib.
- commons-beanutils-x.y.zjar
- commons-digester-x.y.jar
- struts2-tiles-plugin-x.y.z.jar
Now let us setup the web.xml for the Struts-Tiles integration as given below. There are two important point to note here. First, we need to tell tiles, where to find tiles configuration file tiles.xml. In our case, it will be under /WEB-INF folder. Next we need to initiliaze the Tiles listener that comes with Struts2 download.
<?xml version = "1.0" Encoding = "UTF-8"?>
<web-app xmlns:xsi = "http://www.w3.org/2001/XMLSchema-instance"
   xmlns = "http://java.sun.com/xml/ns/javaee"
   xmlns:web = "http://java.sun.com/xml/ns/javaee/web-app_2_5.xsd"
   xsi:schemaLocation = "http://java.sun.com/xml/ns/javaee
   http://java.sun.com/xml/ns/javaee/web-app_2_5.xsd"
   id = "WebApp_ID" version = "2.5">
   <display-name>Struts2Example15</display-name>

   <context-param>
      <param-name>
         org.apache.tiles.impl.BasicTilesContainer.DEFINITIONS_CONFIG
      </param-name>

      <param-value>
         /WEB-INF/tiles.xml
      </param-value>
   </context-param>

   <listener>
      <listener-class>
         org.apache.struts2.tiles.StrutsTilesListener
      </listener-class>
   </listener>

   <filter>
      <filter-name>struts2</filter-name>
      <filter-class>
         org.apache.struts2.dispatcher.ng.filter.StrutsPrepareAndExecuteFilter
      </filter-class>
   </filter>

   <filter-mapping>
      <filter-name>struts2</filter-name>
      <url-pattern>/*</url-pattern>
   </filter-mapping>

   <welcome-file-list>
      <welcome-file>index.jsp</welcome-file>
   </welcome-file-list>
</web-app>
Next let us create tiles.xml under /WEB-INF folder with the following contents −
<?xml version = "1.0" Encoding = "UTF-8" ?>

<!DOCTYPE tiles-definitions PUBLIC
   "-//Apache Software Foundation//DTD Tiles Configuration 2.0//EN"
   "http://tiles.apache.org/dtds/tiles-config_2_0.dtd">

<tiles-definitions>

   <definition name = "baseLayout" template="/baseLayout.jsp">
      <put-attribute name = "title"  value = "Template"/>
      <put-attribute name = "banner" value = "/banner.jsp"/>
      <put-attribute name = "menu"   value = "/menu.jsp"/>
      <put-attribute name = "body"   value = "/body.jsp"/>
      <put-attribute name = "footer"   value = "/footer.jsp"/>
   </definition>

   <definition name = "tiger" extends = "baseLayout">
      <put-attribute name = "title"  value = "Tiger"/>
      <put-attribute name = "body"   value = "/tiger.jsp"/>
   </definition>

   <definition name = "lion" extends = "baseLayout">
      <put-attribute name = "title"  value = "Lion"/>
      <put-attribute name = "body"   value = "/lion.jsp"/>
   </definition>

</tiles-definitions>
Next, we define a basic skeleton layout in the baseLayout.jsp. It has five reusable / overridable areas. Namely title, banner, menu, body and footer. We provide the default values for the baseLayout and then we create two customizations that extend from the default layout. The tiger layout is similar to the basic layout, except it uses the tiger.jsp as its body and the text "Tiger" as the title. Similarly, the lion layout is similar to the basic layout, except it uses the lion.jsp as its body and the text "Lion" as the title.
Let us have a look at the individual jsp files. Following is the content of baseLayout.jsp file −
<%@ taglib uri = "http://tiles.apache.org/tags-tiles" prefix = "tiles"%>
<!DOCTYPE HTML PUBLIC "-//W3C//DTD HTML 4.01 Transitional//EN"
   "http://www.w3.org/TR/html4/loose.dtd">

<html>
   <head>
      <meta http-equiv="Content-Type" content="text/html; charset = UTF-8">
      <title>
         <tiles:insertAttribute name = "title" ignore="true" />
      </title>
   </head>

   <body>
      <tiles:insertAttribute name = "banner" /><br/>
      <hr/>
      <tiles:insertAttribute name = "menu" /><br/>
      <hr/>
      <tiles:insertAttribute name = "body" /><br/>
      <hr/>
      <tiles:insertAttribute name = "footer" /><br/>
   </body>
</html>
Here, we just put together a basic HTML page that has the tiles attributes. We insert the tiles attributes in the places where we need them to be. Next, let us create a banner.jsp file with the following content −
<img src="http://www.tutorialspoint.com/images/tp-logo.gif"/>
The menu.jsp file will have the following lines which are the links - to the TigerMenu.action and the LionMenu.action struts actions.
<%@taglib uri = "/struts-tags" prefix = "s"%>

<a href = "<s:url action = "tigerMenu"/>" Tiger</a><br>
<a href = "<s:url action = "lionMenu"/>" Lion</a><br>
The lion.jsp file will have following content −
<img src="http://upload.wikimedia.org/wikipedia/commons/d/d2/Lion.jpg"/>
The lion
The tiger.jsp file will have following content −
<img src="http://www.freewebs.com/tigerofdarts/tiger.jpg"/>
The tiger
Next, let us create the action class file MenuAction.java which contains the following −
package com.tutorialspoint.struts2;

import com.opensymphony.xwork2.ActionSupport;

public class MenuAction extends ActionSupport {
   public String tiger() { return "tiger"; }
   public String lion() { return "lion"; }
}
This is a pretty straight forward class. We declared two methods tiger() and lion() that return tiger and lion as outcomes respectively. Let us put it all together in the struts.xml file −
<!DOCTYPE struts PUBLIC
"-//Apache Software Foundation//DTD Struts Configuration 2.0//EN"
"http://struts.apache.org/dtds/struts-2.0.dtd">

<struts>
   <package name = "default" extends = "struts-default">
      <result-types>
         <result-type name = "tiles"
         class="org.apache.struts2.views.tiles.TilesResult" />
      </result-types>

      <action name = "*Menu" method = "{1}"
         class = "com.tutorialspoint.struts2.MenuAction">
         <result name = "tiger" type = "tiles">tiger</result>
         <result name = "lion" type = "tiles">lion</result>
      </action>

   </package>
</struts>
Let us check what we did in above file. First of all, we declared a new result type called "tiles" as we are now using tiles instead of plain jsp for the view technology. Struts2 has its support for the Tiles View result type, so we create the result type "tiles" to be of the "org.apache.struts2.view.tiles.TilesResult" class.
Next, we want to say if the request is for /tigerMenu.action take the user to the tiger tiles page and if the request is for /lionMenu.action take the user to the lion tiles page.
We achieve this using a bit of regular expression. In our action definition, we say anything that matches the pattern "*Menu" will be handled by this action. The matching method will be invoked in the MenuAction class. That is, tigerMenu.action will invoke tiger() and lionMenu.action will invoke lion(). We then need to map the outcome of the result to the appropriate tiles pages.
Now right click on the project name and click Export > WAR File to create a War file. Then deploy this WAR in the Tomcat's webapps directory. Finally, start Tomcat server and try to access URL http://localhost:8080/HelloWorldStruts2/tigerMenu.jsp. This will produce the following screen −
Similarly, if you goto the lionMenu.action page, you will see the lion page which uses the same tiles layout.
Struts 2 and Hibernate Integration
Hibernate is a high-performance Object/Relational persistence and query service which is licensed under the open source GNU Lesser General Public License (LGPL) and is free to download. In this chapter. we are going to learn how to achieve Struts 2 integration with Hibernate. If you are not familiar with Hibernate, then you can check our Hibernate tutorial.
Database Setup
For this tutorial, I am going to use the "struts2_tutorial" MySQL database. I connect to this database on my machine using the username "root" and no password. First of all, you need to run the following script. This script creates a new table called student and creates few records in this table −
CREATE TABLE IF NOT EXISTS `student` (
   `id` int(11) NOT NULL AUTO_INCREMENT,
   `first_name` varchar(40) NOT NULL,
   `last_name` varchar(40) NOT NULL,
   `marks` int(11) NOT NULL,
   PRIMARY KEY (`id`)
);

--
-- Dumping data for table `student`
--

INSERT INTO `student` (`id`, `first_name`, `last_name`, `marks`)
   VALUES(1, 'George', 'Kane', 20);
INSERT INTO `student` (`id`, `first_name`, `last_name`, `marks`)
   VALUES(2, 'Melissa', 'Michael', 91);
INSERT INTO `student` (`id`, `first_name`, `last_name`, `marks`)
   VALUES(3, 'Jessica', 'Drake', 21);
Hibernate Configuration
Next let us create the hibernate.cfg.xml which is the hibernate's configuration file.
<?xml version = '1.0' encoding = 'utf-8'?>
<!DOCTYPE hibernate-configuration PUBLIC
   "-//Hibernate/Hibernate Configuration DTD//EN"
   "http://hibernate.sourceforge.net/hibernate-configuration-3.0.dtd">

<hibernate-configuration>
   <session-factory>
      <property name = "hibernate.connection.driver_class">c
         om.mysql.jdbc.Driver
      </property>

      <property name = "hibernate.connection.url">
         jdbc:mysql://www.tutorialspoint.com/struts_tutorial
      </property>

      <property name = "hibernate.connection.username">root</property>

      <property name = "hibernate.connection.password"></property>

      <property name = "hibernate.connection.pool_size">10</property>

      <property name = "show_sql">true</property>

      <property name = "dialect">
         org.hibernate.dialect.MySQLDialect
      </property>

      <property name = "hibernate.hbm2ddl.auto">update</property>

      <mapping class = "com.tutorialspoint.hibernate.Student" />
   </session-factory>
</hibernate-configuration>
Let us go through the hibernate config file. First, we declared that we are using MySQL driver. Then we declared the jdbc url for connecting to the database. Then we declared the connection's username, password and pool size. We also indicated that we would like to see the SQL in the log file by turning on "show_sql" to true. Please go through the hibernate tutorial to understand what these properties mean.
Finally, we set the mapping class to com.tutorialspoint.hibernate.Student which we will create in this chapter.
Envrionment Setup
Next you need a whole lot of jars for this project. Attached is a screenshot of the complete list of JAR files required −
Most of the JAR files can be obtained as part of your struts distribution. If you have an application server such as glassfish, websphere or jboss installed, then you can get the majority of the remaining jar files from the appserver's lib folder. If not you can download the files individually −
Hibernate jar files − Hibernate.org
Struts hibernate plugin − Struts hibernate plugin
JTA files − JTA files
Dom4j files − Dom4j
log4j files − log4j
Rest of the files, you should be able to get from your Struts2 distribution.
Hibernate Classes
Let us now create required java classes for the hibernate integration. Following is the content of Student.java −
package com.tutorialspoint.hibernate;

import javax.persistence.Column;
import javax.persistence.Entity;
import javax.persistence.GeneratedValue;
import javax.persistence.Id;
import javax.persistence.Table;

@Entity
@Table(name = "student")
public class Student {

   @Id
   @GeneratedValue
   private int id;
   @Column(name = "last_name")
   private String lastName;
   @Column(name = "first_name")
   private String firstName;
   private int marks;

   public int getId() {
    return id;
   }

   public void setId(int id) {
    this.id = id;
   }

   public String getLastName() {
      return lastName;
   }

   public void setLastName(String lastName) {
      this.lastName = lastName;
   }

   public String getFirstName() {
      return firstName;
   }

   public void setFirstName(String firstName) {
      this.firstName = firstName;
   }

   public int getMarks() {
      return marks;
   }

   public void setMarks(int marks) {
      this.marks = marks;
   }
}
This is a POJO class that represents the student table as per Hibernate specification. It has properties id, firstName and lastName which correspond to the column names of the student table. Next let us create StudentDAO.java file as follows −
package com.tutorialspoint.hibernate;

import java.util.ArrayList;
import java.util.List;

import org.hibernate.Session;
import org.hibernate.Transaction;

import com.googlecode.s2hibernate.struts2.plugin.\
   annotations.SessionTarget;
import com.googlecode.s2hibernate.struts2.plugin.\
   annotations.TransactionTarget;

public class StudentDAO {

   @SessionTarget
   Session session;

   @TransactionTarget
   Transaction transaction;

   @SuppressWarnings("unchecked")
   public List<Student> getStudents() {
      List<Student> students = new ArrayList<Student>();

      try {
         students = session.createQuery("from Student").list();
      } catch(Exception e) {
         e.printStackTrace();
      }
      return students;
   }

   public void addStudent(Student student) {
      session.save(student);
   }
}
The StudentDAO class is the data access layer for the Student class. It has methods to list all students and then to save a new student record.
Action Class
Following file AddStudentAction.java defines our action class. We have two action methods here - execute() and listStudents(). The execute() method is used to add the new student record. We use the dao's save() method to achieve this.
The other method, listStudents() is used to list the students. We use the dao's list method to get the list of all students.
package com.tutorialspoint.struts2;

import java.util.ArrayList;
import java.util.List;

import com.opensymphony.xwork2.ActionSupport;
import com.opensymphony.xwork2.ModelDriven;
import com.tutorialspoint.hibernate.Student;
import com.tutorialspoint.hibernate.StudentDAO;

public class AddStudentAction extends ActionSupport implements ModelDriven<Student> {

   Student student  = new Student();
   List<Student> students = new ArrayList<Student>();
   StudentDAO dao = new StudentDAO();
   @Override

  public Student getModel() {
      return student;
   }

   public String execute() {
      dao.addStudent(student);
      return "success";
   }

   public String listStudents() {
      students = dao.getStudents();
      return "success";
   }

   public Student getStudent() {
      return student;
   }

   public void setStudent(Student student) {
      this.student = student;
   }

   public List<Student> getStudents() {
      return students;
   }

   public void setStudents(List<Student> students) {
      this.students = students;
   }

}
You will notice that we are implementing the ModelDriven interface. This is used when your action class is dealing with a concrete model class (such as Student) as opposed to individual properties (such as firstName, lastName). The ModelAware interface requires you to implement a method to return the model. In our case we are returning the "student" object.
Create View Files
Let us now create the student.jsp view file with the following content −
<%@ page contentType = "text/html; charset = UTF-8"%>
<%@ taglib prefix = "s" uri = "/struts-tags"%>

<html>
   <head>
      <title>Hello World</title>
      <s:head />
   </head>

   <body>
      <s:form action = "addStudent">
         <s:textfield name = "firstName" label = "First Name"/>
         <s:textfield name = "lastName" label = "Last Name"/>
         <s:textfield name = "marks" label = "Marks"/>
         <s:submit/>
         <hr/>

         <table>
            <tr>
               <td>First Name</td>
               <td>Last Name</td>
               <td>Marks</td>
            </tr>

            <s:iterator value = "students">
               <tr>
                  <td><s:property value = "firstName"/></td>
                  <td><s:property value = "lastName"/></td>
                  <td><s:property value = "marks"/></td>
                 </tr>
            </s:iterator>
         </table>
      </s:form>
   </body>
</html>
The student.jsp is pretty straightforward. In the top section, we have a form that submits to "addStudent.action". It takes in firstName, lastName and marks. Because the addStudent action is tied to the ModelAware "AddSudentAction", automatically a student bean will be created with the values for firstName, lastName and marks auto populated.
At the bottom section, we go through the students list (see AddStudentAction.java). We iterate through the list and display the values for first name, last name and marks in a table.
Struts Configuration
Let us put it all together using struts.xml −
<?xml version = "1.0" Encoding = "UTF-8"?>
<!DOCTYPE struts PUBLIC
   "-//Apache Software Foundation//DTD Struts Configuration 2.0//EN"
   "http://struts.apache.org/dtds/struts-2.0.dtd">

<struts>
   <constant name = "struts.devMode" value = "true" />
   <package name = "myhibernate" extends = "hibernate-default">

      <action name = "addStudent" method = "execute"
         class = "com.tutorialspoint.struts2.AddStudentAction">
         <result name = "success" type = "redirect">
            listStudents
         </result>
      </action>

      <action name = "listStudents" method = "listStudents"
         class = "com.tutorialspoint.struts2.AddStudentAction">
         <result name = "success">/students.jsp</result>
      </action>

   </package>
</struts>
The important thing to notice here is that our package "myhibernate" extends the struts2 default package called "hibernate-default". We then declare two actions - addStudent and listStudents. addStudent calls the execute() on the AddStudentAction class and then upon successs, it calls the listStudents action method.
The listStudent action method calls the listStudents() on the AddStudentAction class and uses the student.jsp as the view.
Now, right click on the project name and click Export > WAR File to create a War file. Then deploy this WAR in the Tomcat's webapps directory. Finally, start Tomcat server and try to access URL http://localhost:8080/HelloWorldStruts2/student.jsp. This will produce the following screen −
In the top section, we get a form to enter the values for a new student record and the bottom section lists the students in the database. Go ahead and add a new student record and press submit. The screen will refresh and show you an updated list every time you click Submit.