
- Joomla Basics Tutorial
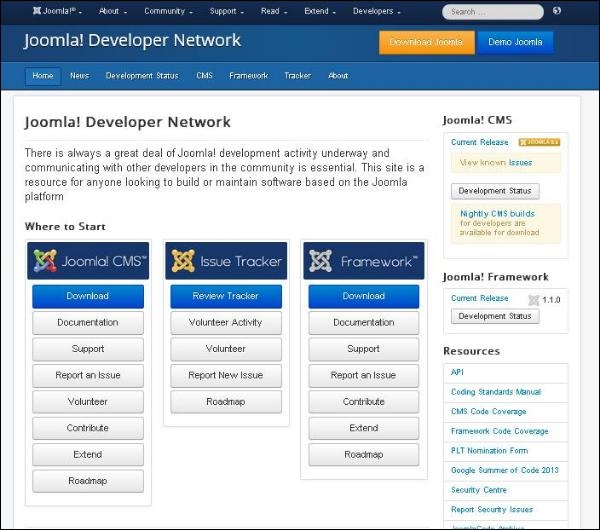
- Joomla - Home
- Joomla - Overview
- Joomla - Installation
- Joomla - Architecture
- Joomla - Control Panel
- Joomla - Toolbar
- Joomla - Menus Menu
- Joomla - Content Menu
- Joomla - Components Menu
- Joomla - Extensions Menu
- Joomla - Help Menu
- Joomla Menus
- Joomla - Create Menus
- Joomla - Adding Menu Items
- Joomla - Modify Menu Items
- Joomla - Creating Submenus
- Joomla Modules
- Joomla - Create Modules
- Joomla - Breadcrumb Module
- Joomla - Feed Display Module
- Joomla - Footer Module
- Joomla - Latest News Module
- Joomla - Search Module
- Joomla - Random Image Module
- Joomla - Who's Online Module
- Joomla - Syndicate Module
- Joomla - Donation Module
- Joomla Global Settings
- Joomla - System Settings
- Joomla - Media Settings
- Joomla - Language Manager
- Joomla - Private Messages
- Joomla - Mass Emailing
- Joomla - Cache Management
- Joomla - Users Setting
- Joomla - Debug
- Joomla Advanced
- Joomla - Template Manager
- Joomla - Customize Template
- Joomla - Adding Template
- Joomla - Creating Template
- Joomla - Customize Logo
- Joomla - Category Management
- Joomla - Adding Content
- Joomla - Formatting Content
- Joomla - Article Metadata
- Joomla - Adding Banners
- Joomla - Adding Contacts
- Joomla - Adding News Feed
- Joomla - Adding Forum
- Joomla - Adding Web Links
- Joomla - Plugin Manager
- Joomla - Extension Manager
- Joomla - Website Backup
- Joomla - Website SEO
- Joomla Useful Resources
- Joomla - Questions and Answers
- Joomla - Quick Guide
- Joomla - Useful Resources
- Joomla - Discussion
Joomla - Quick Guide
Joomla - Overview
Joomla is an open source Content Management System (CMS), which is used to build websites and online applications. It is free and extendable which is separated into front-end and back-end templates (administrator). Joomla is developed using PHP, Object Oriented Programming, software design patterns and MySQL (used for storing the data).
What is Content Management System (CMS)?
The Content Management System (CMS) is a software which keeps track of the entire data (such as text, photos, music, document, etc.) which will be available on your website. It helps in editing, publishing and modifying the content of the website.
History
Joomla is based on Mambo CMS which was developed by an Australian company in 2001 and initially released on August 17, 2005. The official version of Joomla 1.0 was released on September 22, 2005.
Features
Joomla has its own powerful built-in features (core features).
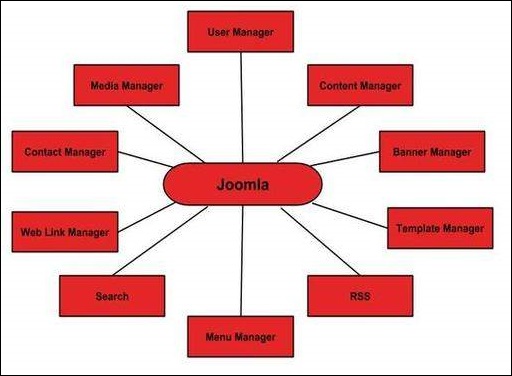
User Manager − It allows managing the user information such as permission to edit, access, publish, create or delete the user, change the password and languages. The main part of the user manager is Authentication.
Content Manager − It allows managing the content using WYSIWYG editor to create or edit the content in a very simple way.
Banner Manager − It is used to add or edit the banners on the website.
Template Manager − It manages the designs that are used on the website. The templates can be implemented without changing the content structure within a few seconds.
Media Manager − It is the tool for managing the media files and folder in which you can easily upload, organize and manage your media files into your article editor tool.
Contact Manager − It allows to add contacts, managing the contact information of the particular users.
Web Link Manager − The link resource is provided for user of the site and can be sorted into categories.
Search − It allows users to search the appropriate information on the site. You can use smart indexing, advanced search options, auto suggest searches to make Joomla search best.
Menu Manager − It allows to create menus and menu items and can be managed subsequently. You can put menu in any style and in multiple places.
RSS − It stands for Really Simple syndication which helps your site contents and RSS files to be automatically updated.
Advantages
It is an open source platform and available for free.
Joomla is designed to be easy to install and set up even if you're not an advanced user.
Since Joomla is so easy to use, as a web designer or developer, you can quickly build sites for your clients. With minimal instructions to the clients, clients can easily manage their sites on their own.
It is very easy to edit the content as it uses WYSIWYG editor (What You See Is What You Get is a user interface that allows the user to directly manipulate the layout of the document without having a layout command).
It ensures the safety of data content and doesn't allow anyone to edit the data.
By default, Joomla is compatible with all browsers.
The templates are very flexible to use.
Media files can be uploaded easily in the article editor tool.
Provides easy menu creation tool.
Disadvantages
It gives compatibility problem while installing several modules, extensions and plugins simultaneously.
Plugins and modules are not free in Joomla.
Development is too difficult to handle when you want to change the layout.
Joomla is not much SEO (Search Engine Optimization) friendly.
It makes website heavy to load and run.
Real World Examples of What Joomla Can Create?
- Corporate web sites or portals
- Corporate intranets and extranets
- Online magazines, newspapers, and publications
- E-commerce and online reservations
- Government applications
- Small business web sites
- Non-profit and organizational web sites
- Community-based portals
- School and religious web sites
- Personal or family homepages
Joomla - Installation
System Requirements for Joomla 3.x
Database − MySQL 5.1 +
Web Server −
- WAMP (Windows)
- LAMP (Linux)
- XAMP (Multi-platform)
- MAMP (Macintosh)
- Nginx
- Microsoft IIS
Operating System − Cross-platform
Browser Support − IE (Internet Explorer 7), Firefox, Google chrome
SSL (Secure Socket Layer) − A valid security certificate is required for HTTPS
PHP Compatibility − PHP 5.4+ or PHP 5.3.10+
Download Joomla
When you open the link https://www.joomla.org/download.html, you will get to see a screen as below −
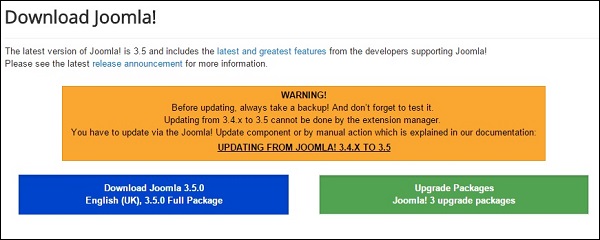
Download the Joomla zip file from the official site or if you want to update the files of your previous version, then click on Upgrade Package option.
Create Store Database
Joomla requires MySQL database. So create a new empty database and user/password (for e.g. User as "root" and password as "root" or else you can set as per your convenience) for Joomla.
After following the above step, you can continue with the installation process.
SetUp Wizard
It's very easy to set up Joomla into your system. The following steps describe how to setup Joomla locally on your system.
Step 1 − Extract the downloaded Joomla folder and upload it on your web server or localhost.
Step 2 − Open your browser and navigate to your Joomla file path, then you will get the first screen of the Joomla installer as shown in the following screen. In our case the path is localhost/< Your_joomla_folder >.
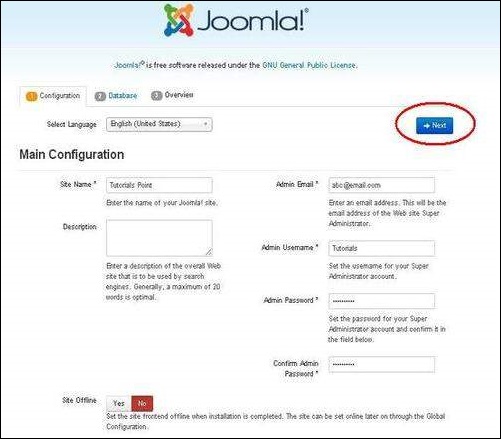
It contains the following fields −
Site Name − Enter the name of the site which you are going to create in Joomla.
Description − Add a small description about your site.
Admin Email − Enter your email address which helps to recover our password or any update.
Admin Username − Enter the username as per your choice while logging into Joomla.
Admin Password − Enter password to protect your site.
Site Offline − It specifies whether your site should be offline or online after completion of installation by clicking on Yes/No.
After filling all the information, click on the Next button.
Step 3 − Here, you have to enter the information about the MYSQL database as seen in the screen below.
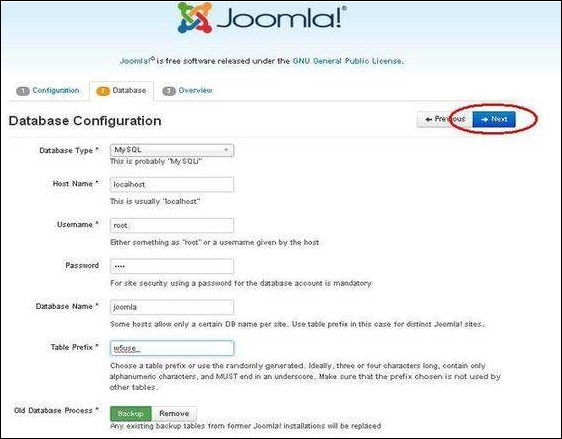
Database Type − Select your database type. By default it will be MySQLi.
Host Name − Write the host name by default it will be localhost.
Username − Enter the user name of your MySQL database.
Password − Enter the password which you had set for MySQL Database.
Database Name − Enter the database name which you have created in MySQL database for Joomla.
Table Prefix − It is used to add prefix in the database tables which helps to run multiple sites on the same database. It takes the default value.
Old Database Process − It gives two options Backup or Remove. If you had already created a database then you can either remove it or select the backup option to create a backup of your whole database information.
After filling all information, click on Next button.
Step 4 − In this step, you will be on last page of the installation process.
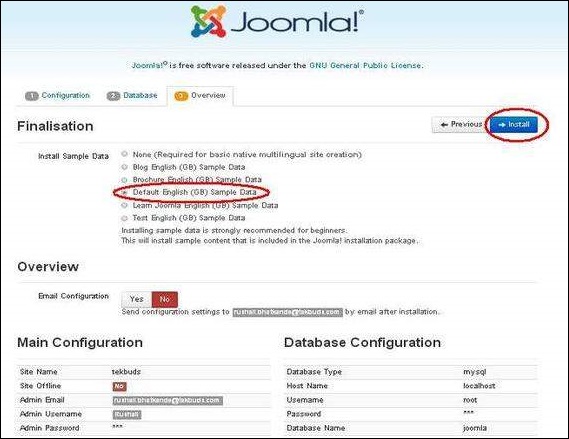
Here you can view all the information added to Joomla.
Choose Default English (GB) Sample Data as an example to build your website and click on Install button.
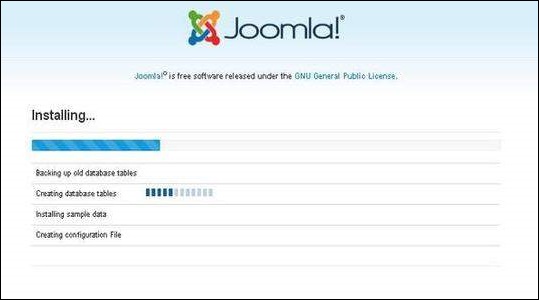
Step 5 − Next, you can see that Joomla starts the installation process on your machine.
Step 6 − After a few minutes, after installation is successful and you will get a screen of the Joomla web installer as shown below.
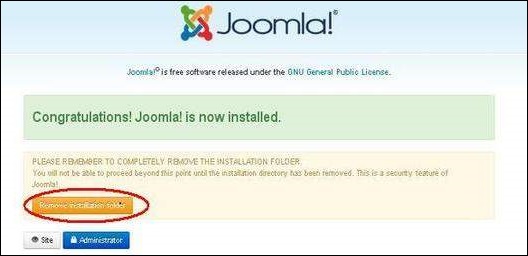
Next, click on the "Remove installation folder" button which will help you to protect your site, so that no other person can re-install your site.
Note − If your installation gets stuck and does not get completed for more than an hour, then do some changes as shown below.
Go to Joomla folder → installation → sql folder → mysql folder Open joomla.sql file and find the following term: "ENGINE=InnoDB". Replace this term with "ENGINE=MyIsam" and save the file.
Before MySQL 5.5.5, MyISAM is the default storage engine. (The default was changed to InnoDB in MySQL 5.5.5.)
Then your installation will begin.
Admin Panel
After installing Joomla you are able to login to your Joomla Admin Panel as described below −
Step 1 − To access Joomla administrative panel, open the browser and type the URL as http://localhost/ < Your_joomla_folder >/administrator/index.php, then you will get the screen as shown below −
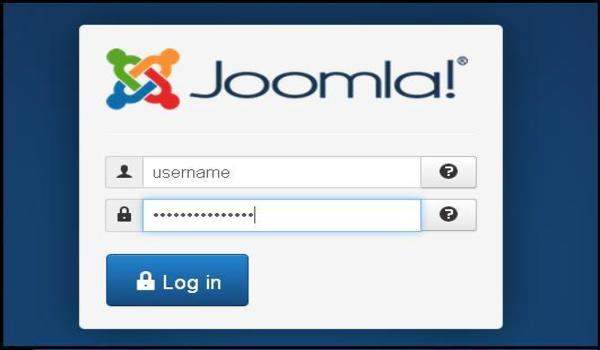
Step 2 − Enter the username and password which you had mentioned during installation as shown in the step 3 of Set Up Wizard section and click on the login button.
Joomla - Architecture
Joomla is a Model-View-Controller web application. In this chapter, we are going to discuss about the architectural style of Joomla. The following diagram shows the architecture of Joomla.
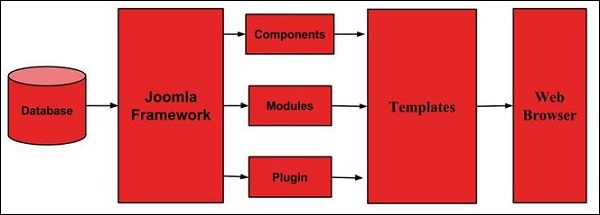
The architecture of Joomla contains following layers −
- Database
- Joomla Framework
- Components
- Modules
- Plugin
- Templates
- Web Server
Database − Database is a collection of data and can be stored, manipulated and organized in a particular manner. The database stores the user information, content and many more required data of the site. It is used to store the administrative information to manage the Joomla site. Using Joomla database layer, it ensures maximum flexibility and compatibility for extension.
Joomla Framework − Framework is a collection of open source software, where the Joomla CMS is built. It is developed for more flexibility and breaks the framework into single modular packages which helps each package to develop more easily.
Components − Components are considered as mini applications. It consists of two parts i.e. Administrator and Site. Whenever a page gets loaded, component is been called to render the body of main page. The Administrator part manages different aspects of the component and the site part helps in rendering the pages when request is made by site visitor. Components are main functional unit of Joomla.
Modules − Modules is an extension which is used to render the pages in Joomla. It is also used to display the new data from the component. It frequently looks like boxes such as login module. In Joomla administrator the modules are managed by the module manager. It displays the new content and images when module is linked to Joomla components.
Plugin − This is also a kind of Joomla extension, it is very flexible and powerful for extending the framework. It contains a bit of codes that is used to execute the particular event trigger. It is commonly used to format the output of a component or module when a page is built. The plugin function which are associated with event are executed in a sequence when a particular event occurs.
Templates − Template determines the look of the Joomla website. There are two types of templates used i.e. Front-end and Back-end. The Back-end template is used to control the functions by the administrator where-as the Front-end template is a way to present the website to users. Templates are easy to build or customize your site. It provides maximum flexibility to style your site.
Web Browser − It is a server where the user interacts. It delivers the web pages to the client. The HTTP (Hyper Text Transfer Protocol) is used to communicate between the client and the server.
Joomla - Control Panel
The Control Panel provides default features and functions of Joomla to access through clickable icons, menu bar etc. When you login to the Joomla administrative panel, you will get the screen as shown below. Important icons of control panel and their functions are marked in the following screen −
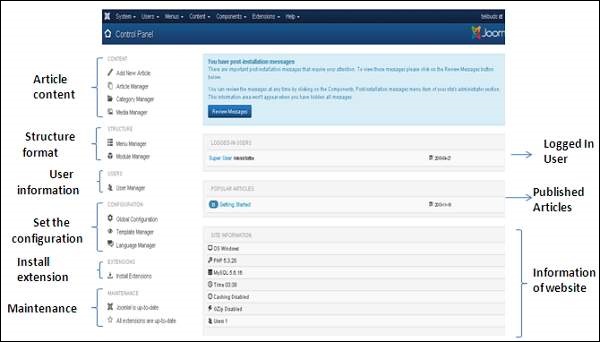
Article Content
There are four icons under the CONTENT section as shown below −
Add New Article − It creates a new article page.
Article Manager − It manages all your present articles.
Category Manager − It creates new categories and helps in publishing/unpublishing the categories.
Media Manager − It manages the files by uploading various new files or deleting the existing ones on your web server.
Structure Format
In STRUCTURE section, there are two groups of icons −
Menu Manager − Menu manager allows creating custom menus for your website and navigating through your website.
Module Manager − It manages the modules such as location and function of modules that are installed on site.
User Information
Under USERS section, there is one icon located −
User Manager − It manages the user information, which allows creating or deleting the user, changing passwords, time and languages. You can also assign the user to User Groups.
Set the configuration
Three icons are located under the CONFIGURATION section as given below −
Global Configuration − This is an important part in the Joomla back-end. Any changes made in this configuration, will affect the entire website.
Template Manager − It manages the templates used in the website.
Language Manager − It manages installed language by setting the default language for your site.
Install Extension
There are many Extensions available in Joomla. You can install different types of extensions to extend the functionality of the site.
Maintenance
In MAINTENANCE section, there are two icons located −
Joomla is up-to-date − It views the current update status of the Joomla installation.
All extensions are up-to-date − It views the current update status of the Joomla extension.
Logged-In User
It shows the administrator name who has logged in to the Joomla site.
Published Articles
It shows the published articles and also shows the present article, that you have published.
Information of Sites
It displays the details of the site such as OS name, version of PHP and MySQL etc and also shows the number of users that are using this site.
Joomla - Toolbar
In this chapter we will study about the various toolbar options in Joomla. Given below is a list of toolbars −
- Article Manager Toolbar
- Category Manager Toolbar
- Media Manager Toolbar
- Menu Manager Toolbar
- Module Manager Toolbar
- User Manager Toolbar
- Global Configuration Toolbar
- Template Manager Toolbar
Article Manager Toolbar
Click on Content → Article Manager in Joomla administrator control panel. In Article Manager, you can create the standard pages that consist of images, text and hyperlinks. The following figure depicts the Article Manager Toolbar.
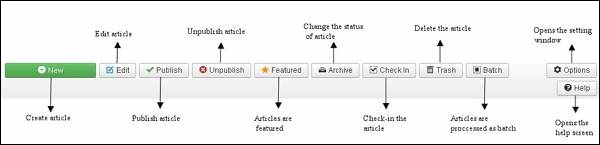
New − Create a new article.
Edit − Edit any specific article.
Publish − Publish the article to the user on the website.
Unpublish − Unpublish the article to the user on the website.
Featured − Selected article is featured. Multiple articles can also be featured.
Archive − It can change the status of the articles to published or unpublished by selecting archived in the select status filter.
Check In − Check-in the selected article. Multiple articles can be checked-in.
Trash − Delete the selected article permanently.
Batch − Selected articles are processed by batch.
Help − Help button is used to open the help screen.
Option − It opens the setting window where you can change the setting of the articles.
Category Manager Toolbar
Click on Content → Category Manager in Joomla administrator control panel. It manages to create categorize the articles which allows to group your content better. The following figure depicts the Category Manager Toolbar.

New − Add a new category.
Edit − Edits an existing category.
Publish − Publish the categories to the user on the website.
Unpublish − Unpublish the categories to the user on the website.
Archive − It can change the status of the categories to published or unpublished by selecting archived in the select status filter.
Check In − Check-in the particular selected category. Multiple categories can be checked-in.
Trash − Delete the selected category permanently.
Batch − Selected categories are processed by batch.
Rebuild − It is used to rebuild the categories tree data.
Help − Help button is used to open the help screen.
Option − It opens the setting window where you can change the setting of the articles.
Media Manager Toolbar
Click on Content → Media Manager in Joomla administrator control panel. It manages the files by uploading a new file or deleting the existing ones on your web server. Given below is a snapshot of the Media Manager Toolbar.
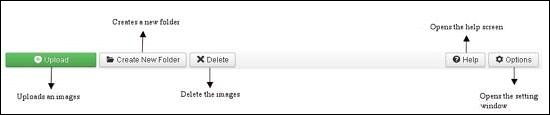
Upload − Upload images from your system.
Create New Folder − Create a new folder on Joomla server.
Delete − Deletes the selected item/images permanently.
Help − This opens the help screen.
Option &minus It opens the setting window where you can change the setting of the articles.
Menu Manager Toolbar
Click on Menus → Menu Manager in Joomla administrator control panel. It manages the menu items. Here new menus are created, deleted or menus are managed subsequently. Given below is a snapshot of the Menu Manager Toolbar.
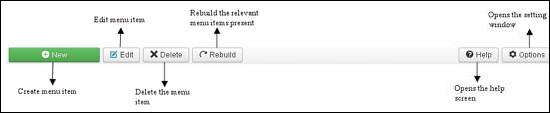
New − It creates a new menu item.
Edit − Edits the selected menu item.
Delete − Deletes the selected menu item permanently.
Rebuild − It rebuilds or refreshes the relevant menu items present.
Help − Help button is used to open the help screen.
Option − It opens the setting window where you can change the setting of the articles.
Module Manager Toolbar
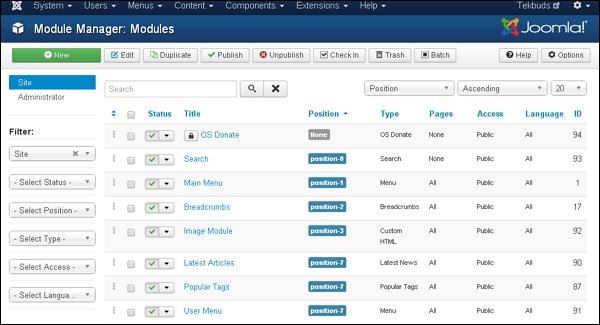
Click on Extension → Module Manager in Joomla administrator control panel. It manages the modules location and functions that are installed. The following figure depicts the Module Manager Toolbar.
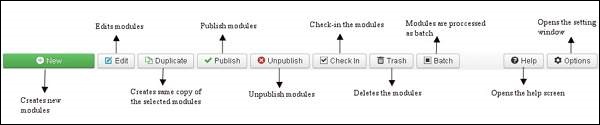
New − It creates new modules.
Edit − It edits the selected modules.
Duplicate − A copy of the selected module can be created using this button.
Publish − Publish the selected modules to the user on the website.
Unpublish − Unpublish the selected modules to the user on the website.
Check In − Check-in the particular selected modules. Multiple modules can be checked-in.
Trash − Delete the selected modules permanently.
Batch − Selected modules are processed by batch.
Help − Help button is used to open the help screen.
Option − It opens the setting window where you can change the setting of the articles.
User Manager Toolbar
Click on Users → User Manager in Joomla administrator control panel. It manages all the user information such as Username, Email, Last Visit Date and Registration Date. Given below is the snapshot of the User Manager Toolbar.

New − It creates a new user.
Edit − It edits the selected user.
Activate − It activates multiple users.
Block − It blocks the selected user.
Unblock − It unblocks the selected users.
Delete − It deletes the particular users.
Batch − Selected users are processed as a batch.
Help − Help button is used to open the help screen.
Option − It opens the setting window where you can change the setting of the articles.
Global Configuration Toolbar
Click on System → Global Configuration in Joomla administrator control panel. It manages the global setting of the Joomla site. Given below is a snapshot of the Global Configuration Toolbar.
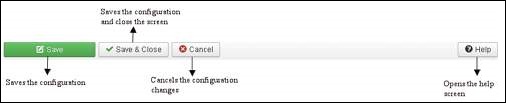
Save − Saves the configuration and stays on the same screen.
Save & Close − Saves the configuration and closes the screen.
Cancel − Cancels the configuration changes and returns to the previous screen without saving.
Help − Help button is used to open the help screen.
Template Manager Toolbar
Click on Extension → Template Manager in Joomla administrator control panel. It manages the templates that you use in the website. The following picture shows the Template Manager Toolbar −
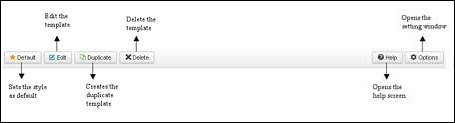
Default − Sets the particular selected style as default.
Edit − Edits the template pages.
Duplicate − Creates a duplicate template.
Delete − Deletes the template.
Help − Help button is used to open the help screen.
Option − It opens the setting window where you can change the setting of the articles.
Language Manager Toolbar
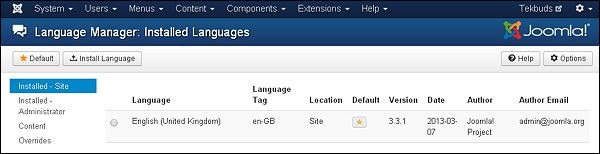
Click on Extension → Language Manager in Joomla administrator control panel. It manages the languages that you use in the website. The following picture shows the Language Manager Toolbar −
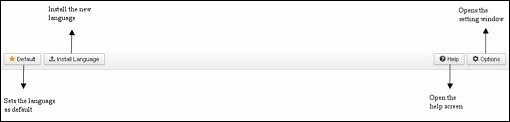
Default − Sets the particular selected language as default.
Install Language − Install the required language.
Help − Help button is used to open the help screen.
Option − It opens the setting window where you can change the setting of the articles.
Joomla - Menus
Menu manager allows creating custom menus for your website and allows navigation through your website.
Step 1 − Click on Menus → Menu Manager in Joomla administrator, you will get the following screen −
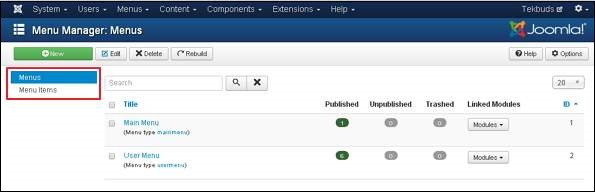
You can see the menu and menu items point to logical page on the website.
Step 2 − To add a new menu to your website, go to Menus → Menu Manager → Add New Menu as shown in the following screen −
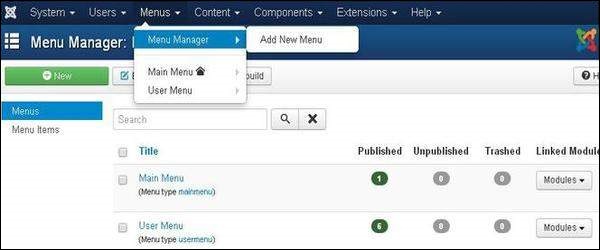
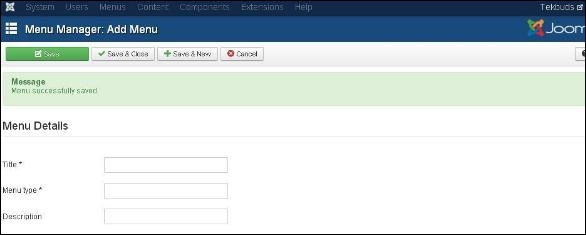
After clicking on Add New Menu, you will get the screen as shown below. Here you can create a new menu.
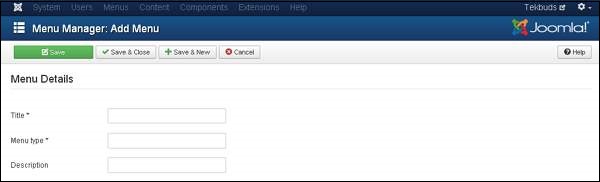
Title − Title of the menu.
Menu Type − Type of menu.
Description − Brief description about the menu.
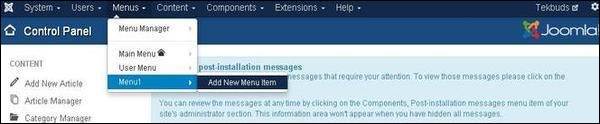
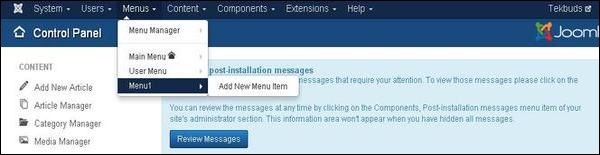
Step 3 − To create a new menu item, go to Menus → Name of the Menu → Add New Menu Item as shown in the following screen −
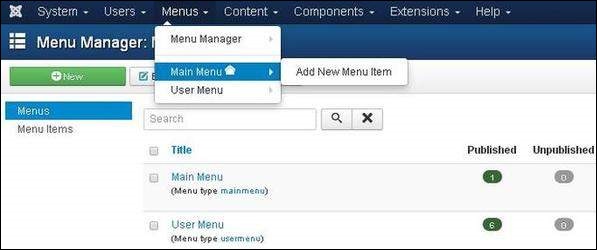
You can also add new menu item via User Menu. All the steps described below applies to menu item creation via this method.
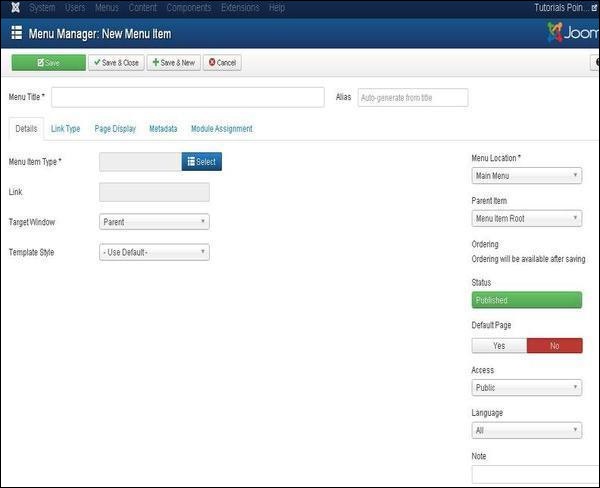
When you open the page of a New Menu Item, you will get the following screen −
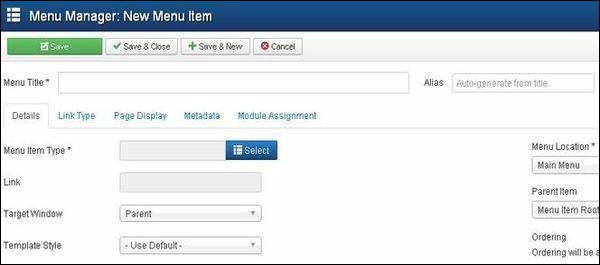
There are two main sections under New Menu Item −
Menu Title − It displays the title of the menu item in the menu.
Alias − It is used as SEF url. Joomla will automatically fill the value of the title. It will produce UTF-8 aliases; it does not allow spaces and underscores.
There are some tabs present while creating menu items as shown in the following screen −
Details
The Details tab in Add New Menu Item, is as shown below −
It contains the following options −
Menu Item Type − It specifies the type of menu item such as articles, tags, web links, system links, contacts etc.
Link − It determines the link in the menu.
Target Window − It provides three options− Parent, New Window with Navigation and New without Navigation which targets the browser window when a menu item is clicked.
Template Style − You can select a template style for your website by clicking dropdown menu which gives Beez3 - Default and protostar - Default styles or provides default templates for your website.
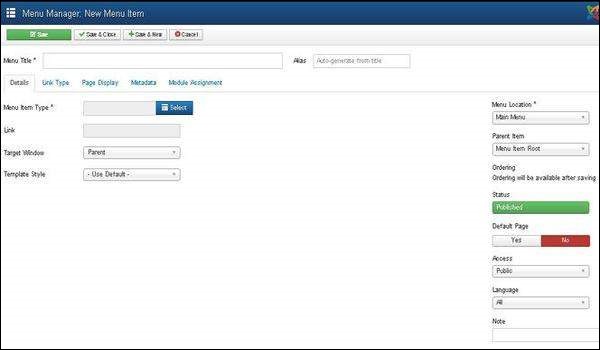
Menu Location − It specifies which menu link will appear; either Main Menu or User Menu.
Parent Item − This helps you select a parent item by selecting either Menu Item Root or Home.
Status − It displays the status of the article. Status such as Published, Unpublished and Trashed.
Default Page − It provides Yes or No options to set the menu item as default or home page of the site.
Access − Only the selected option from this dropdown list such as Guest, Public, Super Users, Registered and Special can view the site.
Language − It specifies the language of the site. It provides either ALL or English (UK) options.
Note − It is used to enter the text information.
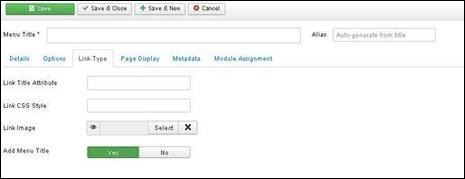
Link Type
The next tab is Link Type in Add New Menu Item, as show below −
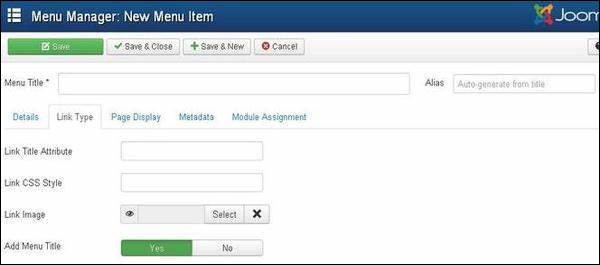
Link Title Attribute − It specifies a description for the title attribute of the given hyperlink.
Link CSS Style − It applies a custom CSS style to the hyperlink.
Link Image − It uses an image to be used with hyperlink.
Add Menu Title − It provides Yes or No options and adds the menu title next to the image. The default is Yes.
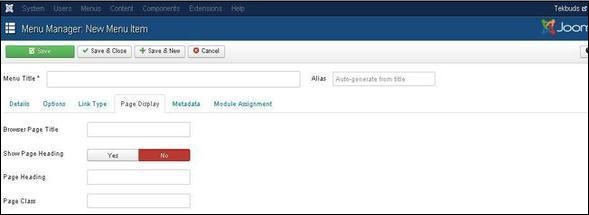
Page Display
The next tab Page Display in Add New Menu Item, is as shown below −

Browser Page Title − It specifies the description of the browser page title.
Show Page Heading − It provides Yes or No option which hides or shows the page title in the page heading.
Page Heading − It specifies the text for the page heading.
Page Class − It defines the optional CSS class to styling the elements in the page.
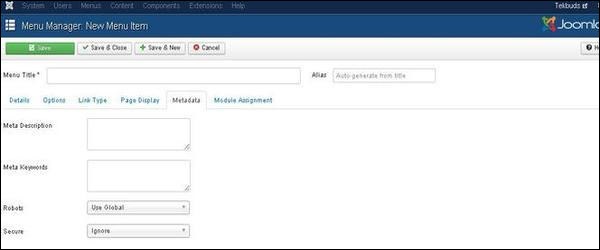
Metadata
The next tab Metadata in Add New Menu Item, is as shown below −

It contains following options as described below −
Meta Description − It is used as an optional paragraph which includes a description of the page and is displayed in the results of the search engines.
Meta Keywords − These are the optional keywords to be used in the html page.
Robots − It specifies robot instructions such as use Global, Index, Follow, No Index,No Index, No follow.
Secure − It defines whether link must use SSL or Secure Site URL. It provides three options such as Off, On and Ignore.
Joomla - Content Menu
In this chapter, we will study about menus present under the Joomla content. A drop-down menu is displayed when you click on Content Menu.
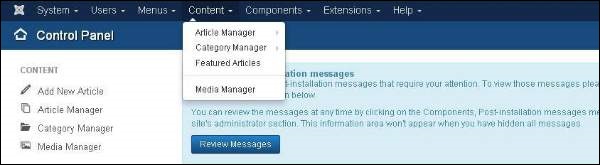
Article Manager
In Article Manager, you can create the standard pages that consist of images, text and hyperlinks. Click on Content → Article Manager menu on Joomla administrative panel, you will get the following screen −
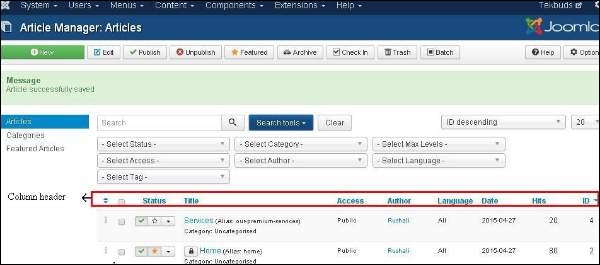
Here, we have mentioned the details about the column header present on the Article Manager page.
Checkbox − It is used to select one or more items.
Status − specifies the status of the page or article, i.e., Publish/Unpublish/Archieve/trashed.
Title − Specifies the name of the title that will be displayed in the menu.
Access − Specifies the access level, i.e. public or private.
Author − This is the author name who has created that particular item.
Language − Specifies the item language used.
Date − Specifies the article creation date.
Hits − Specifies the number of times the item was viewed.
ID − It is the unique identification number assigned to the items automatically.
Let us learn about the Search box in the article manager page which is used to search the items very easily.

Here you can search the item in the article manager page by selecting any of these − Select Status, Select category, Select Max Levels, Select Access, Select Author, Select language or Select Tag.
We will study about Article Manager Toolbar in detail in the chapter Joomla Toolbar.
Add New Article
Click on Content → Article Manager → Add New Article menu on the Joomla administrative panel, then you will get the following screen. The same page can be viewed when you click on Category Manager → Add New Category
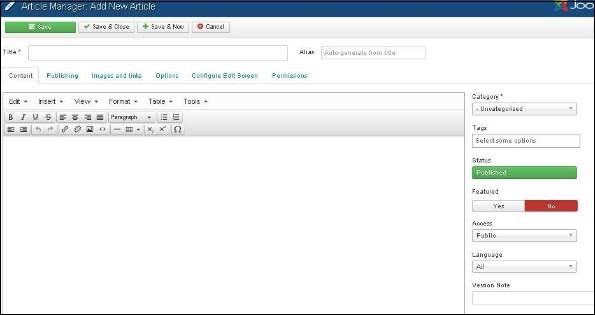
Here you can create your article or web page by specifying the title in Title bar and we can add or write content in the content tab. We will study about this in detail in the chapter Joomla Adding Content.
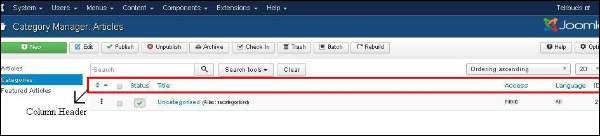
Category Manager
Category Manager is used to create categories for the articles which allows grouping your content better. Click on Content → Category Manager menu on the Joomla administrative panel, then you will get the following screen image −
We will study about Category Manager Toolbar in detail in the chapter Joomla Toolbar.
Here, we have mentioned the details about the column header present on the Category Manager page.
Checkbox − It is used to select one or more category items by clicking on the box.
Status − Specifies the status of the category i.e. Publish/Unpublish.
Title − Specifies the name of the title in the category.
Access − Specifies the access level, i.e. Public or Private.
Language − Specifies the item language used.
ID − It is the unique identification number assigned to the items automatically.
Featured Article
Click on Content → Featured Manager menu on the Joomla administrative panel, then you will get the following screen −
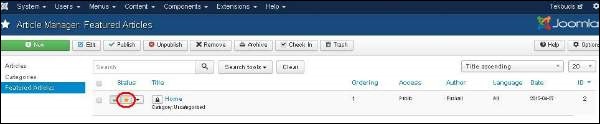
Here the yellow star mark indicates the article is featured. The star mark is present next to each article for featured articles.
Here, we have mentioned the details about the column header present in theFeatured Article page.
Checkbox − It is used to select one or more items by clicking on the box.
Status − Specifies the status of the page or article, i.e. Publish/Unpublish.
Title − Specifies the name of the title that displays in the menu.
Ordering − Specifies the order of item creation.
Access − Specifies the access level, i.e. public or private.
Author − Describes the author name who has created that particular item.
Language − Specifies the item language used.
Date − Specifies the date of the article it was created on.
ID − It is the unique identification number assigned to the items automatically.
Media Manager
You can manage your media files by uploading a new file or deleting the existing ones using media manager. Click on Content→Media Manager menu on the Joomla administrative panel, then you will get the following screen −

We will study about Media Manager Toolbar in detail in the chapter Joomla Toolbar.
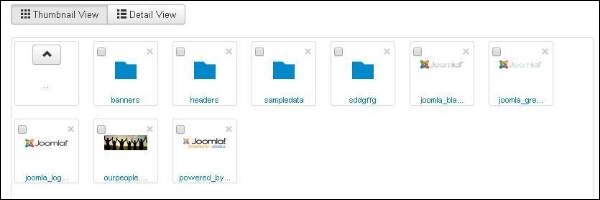
Thumbnail View
Thumbnail view contains previews of images and icons of sub-folder. When we click on Thumbnail View then the media manager will look like as shown below.
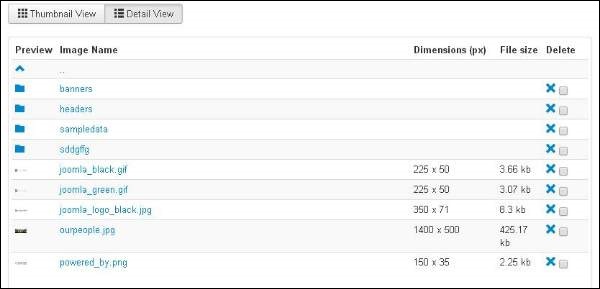
Detail View
Detail view contains the file details. In the detail view, the file information such as dimension and file size are displayed. When we click on the Detail View then the media manager will look like as shown below.
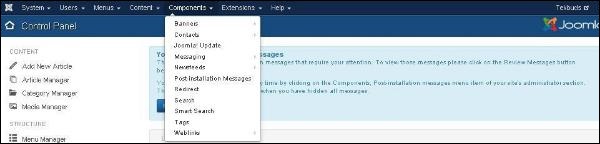
Joomla - Components Menu
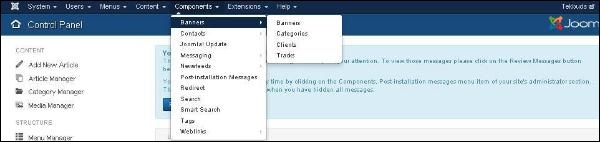
In this chapter, we will study about Components Menu in Joomla. Click on Components Menu, a dropdown menu as shown below will be displayed −
Banners
Components → Banners are used to setup the banners on the website. When you click on Banners, you see a submenu as shown below −
Let us study each of the submenu as follows −
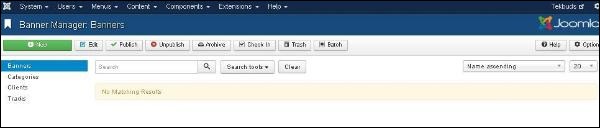
Banners
It is used to edit or add banners in the Joomla website to display.
Click Components → Banners → Banners, a screen as shown below will get displayed.
We will study about Adding Banners in detail in the chapter Joomla - Adding Banners.
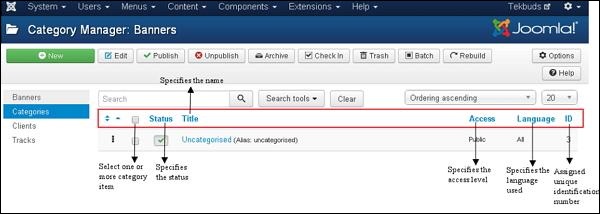
Categories
With Category Manager you can create new banner categories or edit the existing banner categories.
Click Components → Banners → Categories, a screen as shown below will get displayed.
You can study more about Category Manager Toolbar in detail in the chapter Joomla Toolbar.
Below, we have mentioned the details about the column header present under the Category Manager - Banner page.
Checkbox − It is used to select one or more category items by clicking on the box.
Status − Specifies the status of the category i.e. Publish/Unpublish.
Title − Specifies the name of the title in the category.
Access − Specifies the access level, i.e. public or private.
Language − Specifies the item language used.
ID − It is the unique identification number assigned to the items automatically.
The Search box in the Category manager - Banners page is used to search the category items very easily.
You can search the item in the article manager page by selecting any of the following ways i.e. through Select Status, Select Max Levels, Select Access, Select language or Select Tag.
Clients
With Client Manager you can create a new client banner or edit the existing ones.
Click Components → Banners → Clients, a screen as shown below will get displayed.

Below, we have mentioned the details about the column header present in the Banner Manager − Clients page.
Checkbox − It is used to select one or more clients by clicking on the box.
Status − Specifies the status of the category i.e. Publish/Unpublish.
Client − Specifies the name of the Banner clients.
Contact − Specifies Contact information of the client.
Banners − Specifies the number of banners defined for this client.
Purchase Type − It indicates how the clients are purchasing the banners i.e. Yearly or Monthly. By default it is monthly.
ID − It is the unique identification number assigned to the items automatically.
The Search box in the Banner Manager− Clients page is used to search the client items very easily.
You can search the item on the Client Banners page by selecting the Status or Type.
Tracks
In Tracks, you can view the tracking information for a list of existing banners.
Click Components → Banners → Tracks, a screen as shown below will get displayed.
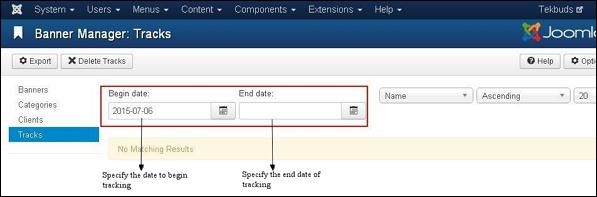
The Begin Date and End date is used to track the information of the banner within a particular period (For instance, consider begin date as 2015-07-06 and end date as 2015-07-10, within this period of time the banner information will get tracked).
Toolbars
Export − It exports the banner tracking information in the CSV file.
Delete Tracks − Deletes the information of the selected tracks.
Contacts
It adds contact information of client on Joomla site such as name, address, telephone number, email etc.
Click Components → Contacts → Contacts, a screen as shown below will get displayed.
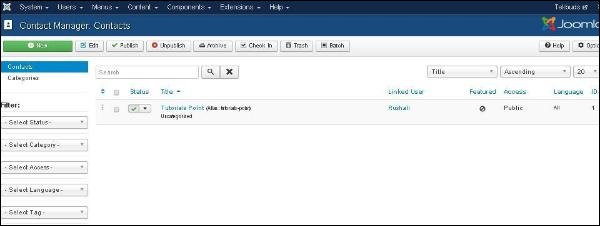
We will study about Adding Contacts in detail in the chapter Joomla - Adding Contacts.
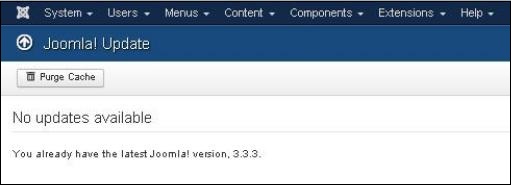
Joomla Update
It specifies the Joomla latest version which is being used.
Click Components → Joomla! Update, a screen as shown below will get displayed.
Messaging
Components → Messaging allows sending and reading messages in Joomla. When you click on Messaging, you see a submenu as shown below.
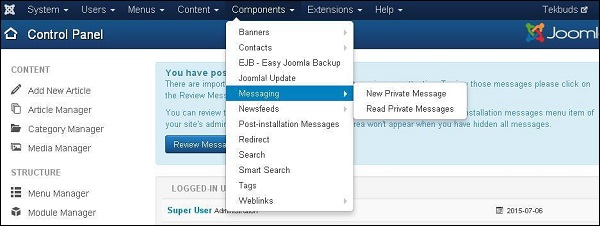
New Private Message
It is used to send messages to the other backend of Joomla site. You can read, write or delete the messages.
Click Components → Messaging → New Private Message, a New Private Message page opens up. We will study about Private Message in detail in the chapter Joomla - Private Messages.
Read Private Messages
In this section, you can read all the private messages.
Click on Components → Messaging → Read Private Message, a screen as shown below will get displayed.

Toolbars
Below, we have mentioned details about the toolbars present in Read Private Message.
New − Creates a new message.
Mark as Read − Marks the messages as read from this section.
Mark as Unread − It marks the messages which have not been read yet.
Trash − It deletes the messages permanently.
My Settings − It is used to set the messages i.e. Lock the inbox, email a new message and auto-purge the message.
Newsfeeds
It allows adding news feed on your Joomla site from other sites.
Click Components → Newsfeeds → Feeds, a Newsfeeds page will open. We will study about Newsfeeds in detail in the chapter Joomla - Adding News Feed.
Post-installation Messages
It allows reviewing actionable messages after installation.
Click Components → Post Installation Messages, a screen as shown below will get displayed.
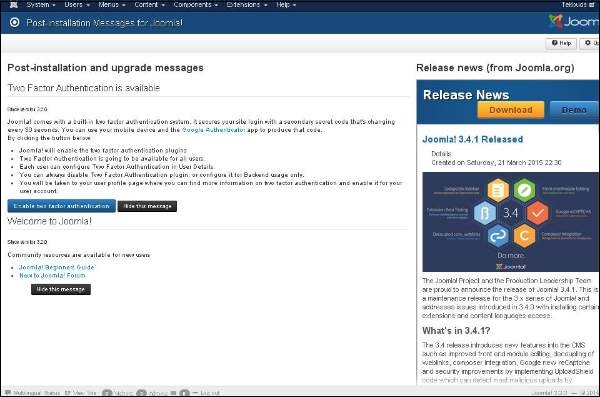
Here it delivers messages after successful installation of Joomla extension or core.
Redirect
Redirect Manager is used to redirect the URL's that do not exist on the website with web pages that are working.
Click Components → Redirect, a screen as shown below will get displayed.
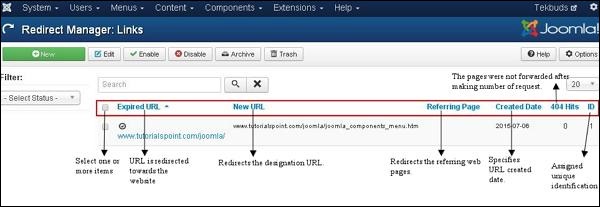
The details about the column header present in the Redirect Manager page are mentioned below.
Checkbox − It is used to select one or more items by clicking on the box.
Expired URL − The URL is redirected towards the website.
New URL − Redirects the designated URL.
Referring Page − Redirects the referring web pages.
Created Date − Specifies the date the URL was created.
404 Hits − The pages were not forwarded after making the number of requests.
ID − It is the unique identification number assigned to the items automatically.
Toolbars
Below, we have mentioned details about the toolbars present on Redirect page.
New − Creates a new Redirect URL.
Edit − Edits the selected redirect.
Enable − It makes available the selected redirect to use.
Disable − It makes unavailable the selected redirect to use.
Archive − It can change the status of the selected redirect to published or unpublished by selecting archived in the select status filter.
Trash − It changes the status of the selected redirect to trash.
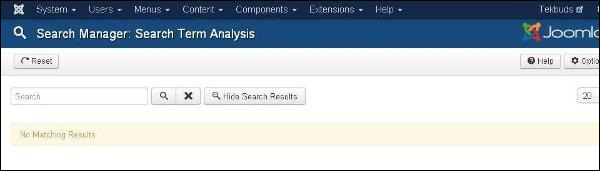
Search
Search Manager allows you to see how many searches were done for each key combination and what was the result for each search.
Click Components → Search, a screen as shown below will get displayed.
Smart Search
It enhances site search.
Click Components → Smart Search, a screen as shown below will get displayed.

Below, we have mentioned the details about the column header present in the Smart Search page.
Checkbox − It is used to select one or more items by clicking on the box.
Status − Specifies the status of the items i.e. Publish/Unpublish.
Title − Specifies the name of the title.
Type − Specifies the type of the page i.e. Article or Tag.
Last Updated − Specifies the date of the last modification.
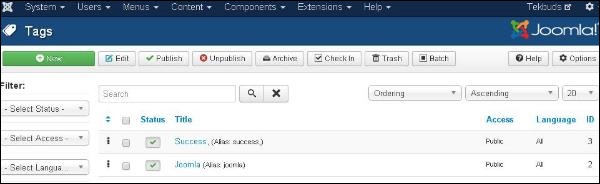
Tags
It is used to display the list of the tagged pages.
Click Components → Tags, a screen as shown below will get displayed.
Weblinks
The link resource is provided very easily for user of the site and can be sorted into categories. It is used to add, edit or delete the links to other website on your Joomla.
Click Components → Weblinks → Links, Weblinks page will get open. We will study about Weblinks in detail in the chapter Joomla - Adding Web Links.
Joomla - Extensions Menu
In this chapter, we will study about Extensions Menu in Joomla. Click on Extensions, a dropdown menu as shown below will be displayed −
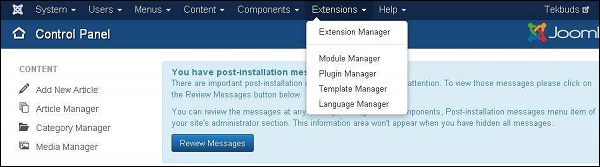
Extension Manager
Extension Manager is used to extend the functionality of Joomla website.
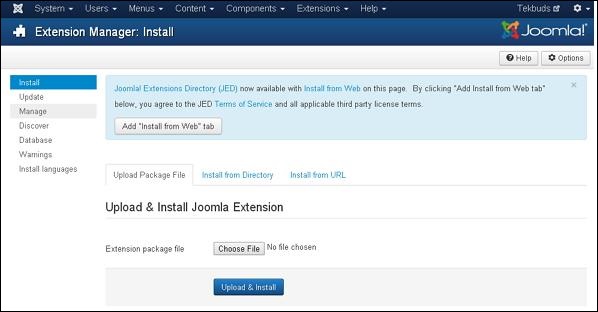
Click Extensions → Extension Manager, a screen as shown below will get displayed.
You can study more about Extension Manager in the chapter Joomla - Extension Manager.
Module Manager
It manages the modules that are installed on the site i.e. the location and function of modules.
Click Extensions → Module Manager, a screen as shown below will get displayed.
You will study more about Module Manager in the chapters under section Joomla Modules.
Plugin Manager
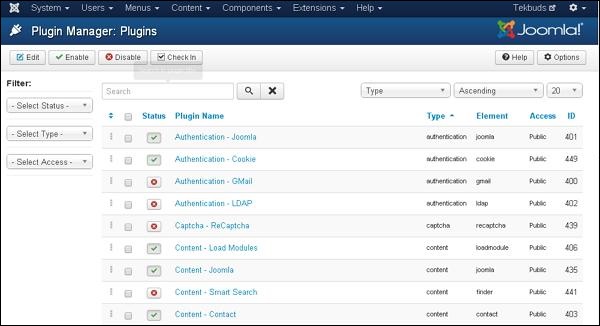
It manages the Joomla plugins and allows to enable/disable or edit the details of plugins.
Click Extensions → Plugin Manager, a screen as shown below will get displayed.
You can study more about Plugin Manager in the chapter Joomla - Plugin Manager.
Template Manager
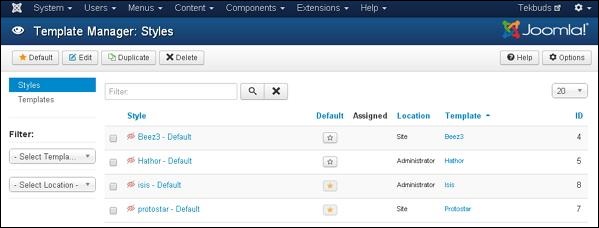
It manages the designs that are used in the website. The templates can be implemented without changing the content structure within a few seconds.
Click Extensions → Template Manager, a screen as shown below will get displayed −
You can study more about Template Manager in the chapter Joomla - Template Manager.
Language Manager
This helps you set a default language for your site.
Click Extensions → Language Manager, a screen as shown below will get displayed.
You can study more about Language Manager in detail in the chapter Joomla - Language Manager.
Joomla - Help Menu
In this chapter, we will study about menus present in the Help Menu in Joomla. Click on Help, a dropdown menu as shown below will be displayed −
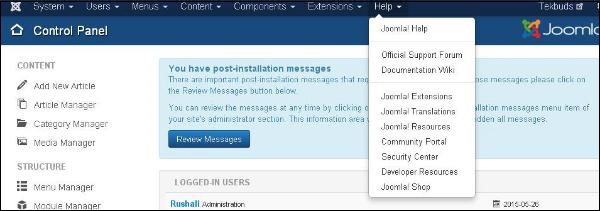
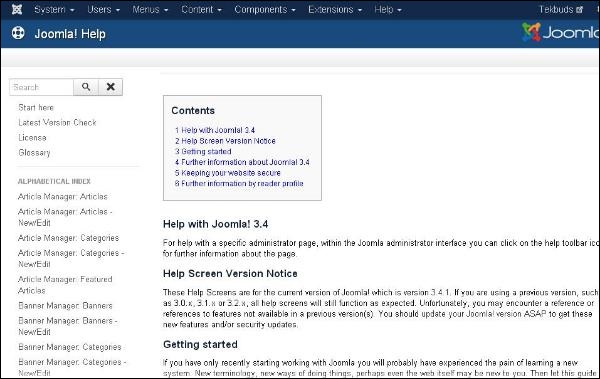
Joomla Help
This Help page guides the user to create Joomla website.
Click Help → Joomla Help, a screen as shown below will get displayed.
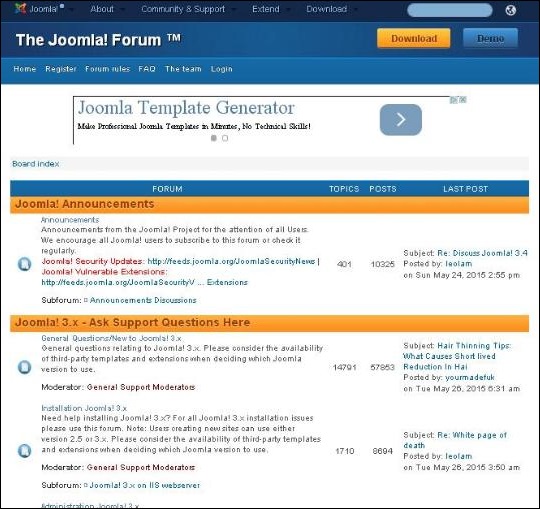
Official Support Forum
Official Support Forum helps in supporting the exchange of ideas and views officially in Joomla.
Click Help → Official Support Forum, a screen as shown below will get displayed.
Documentation Wiki
The Documentation Wiki is used for formatting the content of articles, cross linking pages and creating the documentation of Wiki template by themselves.
Click Help → Documentation Wiki, a screen as shown below will get displayed.
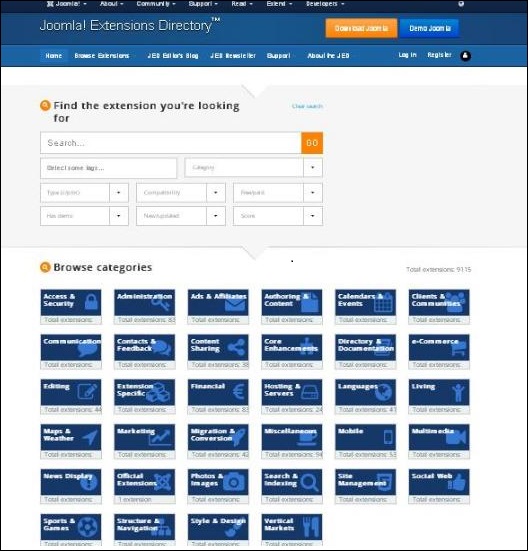
Joomla Extensions
Joomla extension extends the functionality of Joomla websites. In this Joomla extension page there are many extensions available to apply on Joomla websites.
Click Help → Joomla Extensions, a screen as shown below will get displayed.
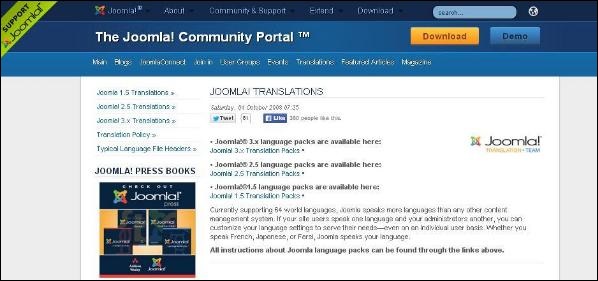
Joomla! Translations
Joomla translations help in translation of language in Joomla core files. It helps in documentation and screens along with other tasks to meet the need of diverse language community.
Click Help → Joomla Translations, a screen as shown below will get displayed.
Joomla Resources
Joomla Resources help in locating the professional service providers. It helps the users to connect and do many more things in the Joomla CMS.
Click Help → Joomla Resources, a screen as shown below will get displayed.

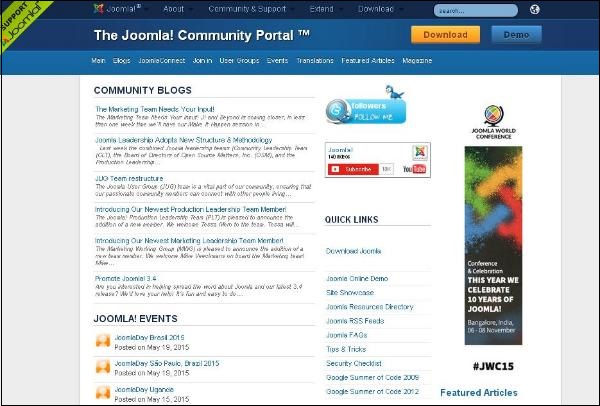
Community Portal
Community Portal helps in bringing Joomla news from all over the world at one place.
Click Help → Community Portal, a screen as shown below will get displayed.
Security Center
Security Center helps in providing a public presence for security issues. It helps to detect a problem or service attack.
Click Help → Security Center, a screen as shown below will get displayed.
Developer Resources
Developer Resources helps in providing resources for the users who are willing to build or maintain software based on the Joomla platform.
Click Help → Developer Resources, a screen as shown below will get displayed.
Joomla Shop
Joomla shop helps the user to shop maximum number of products related to Joomla, when you click on a particular product then you will get the brief description about that product where users can read and buy it.
Click Help → Joomla Shop, a screen as shown below will get displayed.

Joomla - Create Menus
In this chapter, we will study the step-by-step procedure of how to Create Menus in Joomla. Menus are the important part and help to navigate through your website easily.
Create Menus
Here are a few simple steps to create menus in Joomla.
Step 1 − Click Menus → Menu Manager → Add New Menu as shown below.

Step 2 − After clicking on Add New Menu, the Menu Manager − Add Menu page will displayed as shown below. Here, we can add Menu Title (Name), Type and Description as shown.
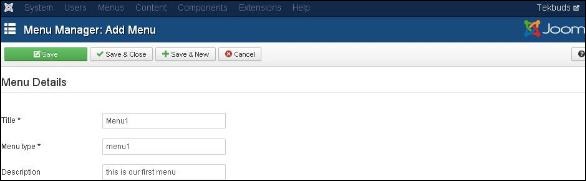
Menu Title(Name) − It should indicate the Title( Name ) of the menu.
Menu Type − The name of the menu type.
Description − Description about the menu.
Step 3 − After filling all the information about menu, click on Save button. It saves the menu bar you created.
Step 4 − We can also click on Save & Close button. It saves the menu bar and then closes the present screen. Finally, you get the following screen as shown below.
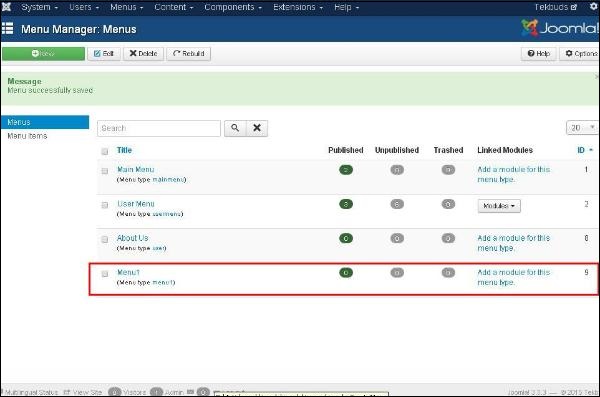
In this page, you can view the name of the menu you had created in previous step.
Step 5 − When we click on Save & New button, your menu is saved and it opens a new create menu screen as shown below.
Step 6 − Using Cancel button, cancels the create menu action.
Joomla - Adding Menu Items
In this chapter, we will study the step-by-step procedure of how to add new menu items in Joomla. Menu items can be created in the main menu (menu1), which we have already created in chapter Joomla - Create Menus.
Adding Menu Items
Following are the simple steps to add a menu item in Joomla.
Step 1 − Click on Menus → Menu1 → Add New Menu Item as shown below.
Step 2 − After clicking on Add New Menu Item, the Menu Manager − New Menu Item page is displayed as shown below.
You can view various tabs present in this page. The Details tab gets active by default.
There are two main sections under New Menu Item −
Menu Title − It displays the title of the menu item.
Alias − It is used as SEF URL. Joomla will automatically fill the value from the title. It will produce UTF-8 aliases, however, it does not allow any spaces and underscores.
Menu Item Type − In Menu item type, it specifies the type of menu item such as articles, tags, web links, system links, contacts etc. Here you can select menu item type by clicking on the Select button. By clicking on this button, a screen appears as shown below.
.jpg)
Click on Articles menu type, you get following screen. Now select Single Article as shown below.
.jpg)
After selecting Single Article you will get the following screen.
.jpg)
Select Article − Selects the article from the list.
Link − Specifies link reference for the menu item.
Template Style − You can select a template style for your website by clicking at the dropdown menu which gives you Beez3 - Default and Protostar - Default styles or provides default template for your website.
Target Window − It targets the window for menu items such as Parent, New Window With Navigation and New Without Navigation.
Menu Location − It specifies which menu link will appear either Main Menu or User Menu.
Parent Item − It selects parent item by selecting either Menu Item Root or Home.
Status − It displays the status of the article such as Published, Unpublished and Trashed.
Default Page − It provides Yes or No options to set the menu item as default or home page of the site.
Access − It allows access only to selected users from the dropdown list such as Guest, Public, Super Users, Registered and Special option to view the items.
Language − It specifies the language of the site. It provides either ALL or English (UK) options.
Note − It is used to enter the text information.
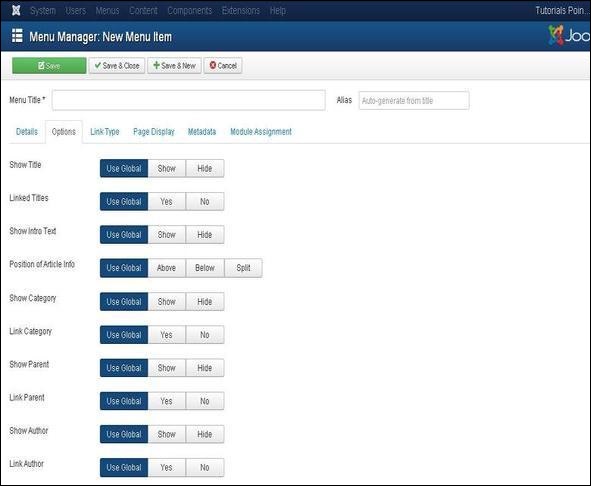
After selecting Menu Item Type it will generate an Options tab automatically.
Step 3 − When we click on Options tab we will get the following screen.
Step 4 − Click on Link Type tab we will get the following screen.
Link Title Attribute − It specifies description for the title attribute of the given hyperlink.
Link CSS Style − It applies custom CSS style to the hyperlink.
Link Image − It uses an image to be used with hyperlink.
Add Menu Title − It provides Yes or No options and adds the menu title next to the image. The default is Yes.
Step 5 − Click on Page Display tab we will get the following screen.
Browser Page Title − It specifies the description for the browser page title.
Show Page Heading − It provides Yes or No option to show the page heading.
Page Heading − It specifies the text for the page heading.
Page Class − It defines the optional CSS class to style the elements in the page.
Step 6 − Click on Metadata tab we get the screen given below.
Meta Description − It is used as optional paragraph which includes description of the page and displays in the results of the search engines.
Meta Keywords − These are the optional keywords to be used in the html page.
Robots − It specifies robotic instructions such as Use Global, Index, Follow, No Index, No follow
Secure − It defines whether link must use SSL or Secure Site URL. It provides three options such as Off, On and Ignore.
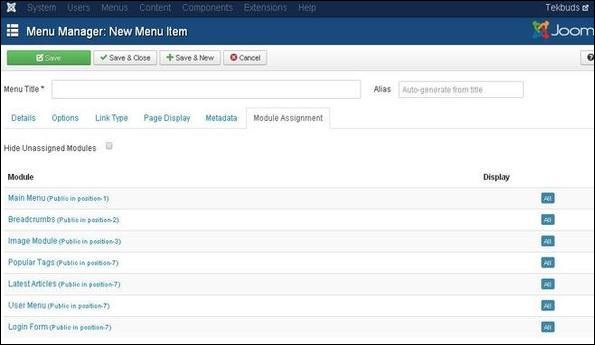
Step 7 − The Module Assignment controls the module display on the page by assigning modules in menu items.
Toolbar
Below, we have mentioned details of the functions of the toolbar buttons present while adding menu items.
Save − Saves your created menu items.
Save & Close − Saves the menu item and closes the current screen.
Save & New − Menu item will get saved and it will open a new adding menu items screen.
Cancel − Cancels the current action.
Joomla - Modify Menu Items
In this chapter we will study the simple steps to modify menu items in Joomla. You can learn how to create menu in the chapter Joomla − Create Menu. You can also learn how to add menu items in a menu bar in the chapter Joomla − Adding Menu Items.
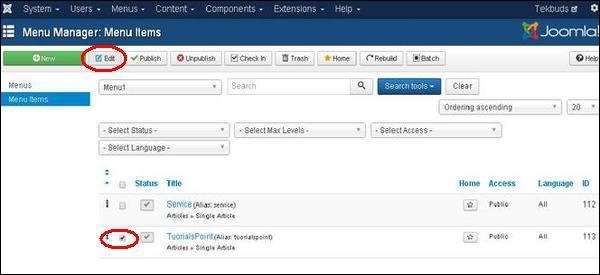
Step 1 − Click on Menus → Menu1 (Menu1 was created in the chapter Joomla - Create Menu) as shown below.
Step 2 − Select a file which you would like to modify by clicking on the checkbox and then click on Edit button to open the selected page for editing as shown below.
Step 3 − After clicking on edit button you get the following screen. Here you can modify the file as per your choice.
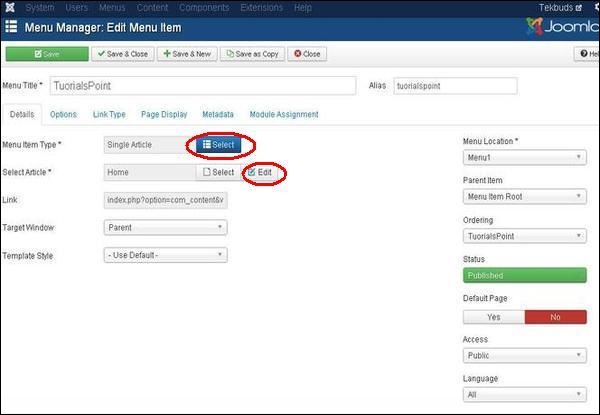
Here you can change the Menu Item Type by clicking on the Select button and selecting the type of menu. And in Select Article by clicking on the Edit button you can edit any particular page or article.
Click on the save button to save the changes of the edited file.
Joomla - Creating Submenus
In this chapter, we will study about Creating Submenus in Joomla step by step. Submenu is a menu accessed from a general menu, it can be either shown as one menu with more than two levels or as separate menu modules.
Creating Submenus
Following are the simple steps to create submenus in Joomla.
Step 1 − Click on Menus → Menu Manager as shown below.
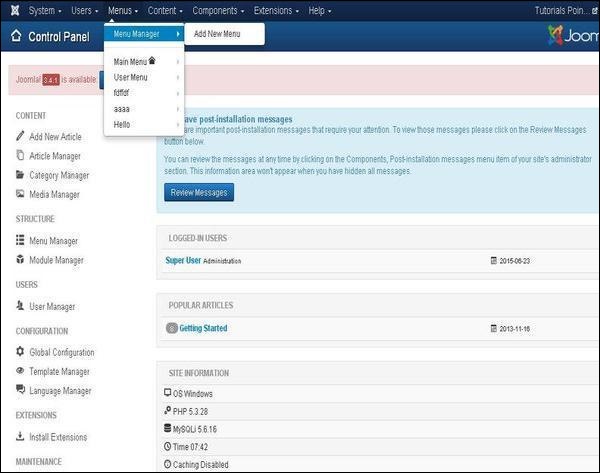
Step 2 − After clicking on Menu Manager you will get the following screen. Here we have already created a menu as Menu1 as shown below.
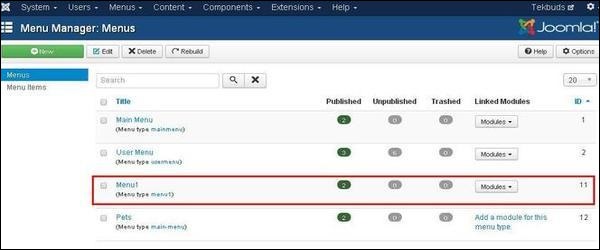
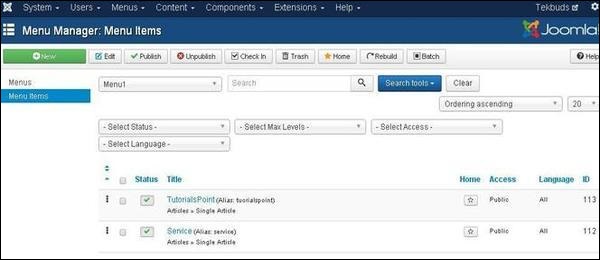
Step 3 − Click directly on Menu1 link, you get the following screen.
Step 4 − Create a new article called as Policy and later create a menu item called Policy as shown below −
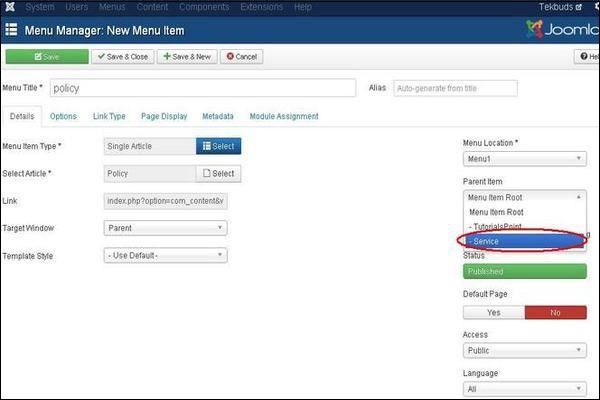
Follow the same steps to create menu from the chapter Joomla - Create Menus. But here we are creating submenus for Service so we have to use Menu Location as Menu1 and Select Parent Item as Service.
Step 5 − Click on the button Save & Close.
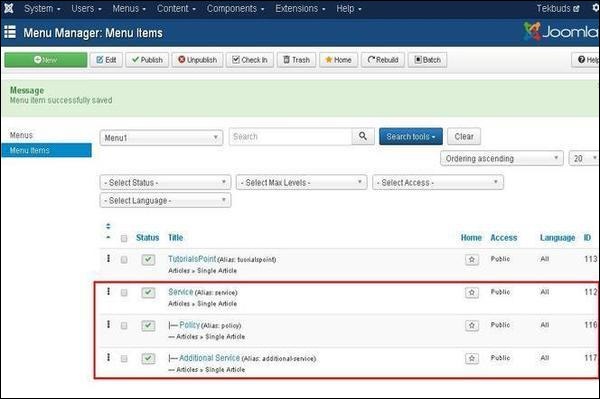
Step 6 − Repeating step (4) and step (5) we have created one more submenu called Additional Service.
Step 7 − After you have finished creating submenus in menu items, the Menu Manager − Menu Items will look like as shown below. We can see that there are two submenus present below the Service Menu.
Step 8 − Repeating the above steps, we can create many similar submenus for other than service menu also.
Joomla - Create Modules
In this chapter, we will study about Creating Modules in Joomla. Modules are the extensions which are flexible and lightweight and useful for page rendering.
Create Modules
Following are the simple steps to create modules in Joomla.
Step 1 − Create a folder called mod_firstmodule in your Joomla → modules folder.

Step 2 − In the mod_firstmodule folder create a file called as "helper.php". This file contains class name as helper, it helps to display the retrieved data in the module output.
helper.php
<?php
   /**
      * Helper class for Hello World! module
      *
      * @package    Joomla.Tutorials
      * @subpackage Modules
      * @link http://docs.joomla.org/J3.x:Creating_a_simple_module/Developing_a_Basic_Module
      * @license        GNU/GPL, see LICENSE.php
      * mod_helloworld is free software. This version may have been modified pursuant
      * to the GNU General Public License, and as distributed it includes or
      * is derivative of works licensed under the GNU General Public License or
      * other free or open source software licenses.
   */

   class ModHelloWorldHelper {
      /**
         * Retrieves the hello message
         *
         * @param   array  $params An object containing the module parameters
         *
        * @access public
      */

      public static function getHello($params) {
         return 'Hello, World!';
      }
   }

?>
Step 3 − Create a file called as mod_helloworld.php. It is an entry point for the module which performs initialization routines, collects necessary data and displays the module output using template.
mod_helloworld.php
<?php
   /**
      * Hello World! Module Entry Point
      *
      * @package    Joomla.Tutorials
      * @subpackage Modules
      * @license    GNU/GPL, see LICENSE.php
      * @link       http://docs.joomla.org/J3.x:Creating_a_simple_module/Developing_a_Basic_Module
      * mod_helloworld is free software. This version may have been modified pursuant
      * to the GNU General Public License, and as distributed it includes or
      * is derivative of works licensed under the GNU General Public License or
      * other free or open source software licenses.
   */

   // No direct access
   defined('_JEXEC') or die;

   // Include the syndicate functions only once
   require_once dirname(__FILE__) . '/helper.php';

   $hello = modHelloWorldHelper::getHello($params);
   require JModuleHelper::getLayoutPath('mod_helloworld');
?>
Step 4 − Create a mod_helloworld.xml file. This file contains the information about module. This xml file contains information of files that are to be installed in Joomla for the module.
mod_helloworld.xml file
<?xml version = "1.0" encoding = "utf-8"?>

<extension type = "module" version = "3.1.0" client = "site" method="upgrade">

   <name>Hello, World!</name>
   <author>Tutorials Point</author>
   <version>1.0.0</version>
   <description>A simple Hello World! module.</description>

   <files>
      <filename>mod_helloworld.xml</filename>
      <filename module = "mod_helloworld">mod_helloworld.php</filename>
      <filename>index.html</filename>
      <filename>helper.php</filename>
      <filename>tmpl/default.php</filename>
      <filename>tmpl/index.html</filename>
   </files>

   <config>
   </config>

</extension>
Step 5 − Create a simple html file called index.html. The purpose of writing this file is that, the created directories should not be browsed. When a user browses into these directories, the index.html file gets displayed. You can even keep this file empty.
index.html
<html>
   <body> Welcome to Tutorials Point!!!!! </body>
</html>
Step 6 − Create a folder called as tmpl. Place default.php file as shown below and index.html (created in step (5)) under tmpl folder. The default.php file is a template that displays the module output.
default.php
<?php
   /**
      * @package Joomla.Site
      * @subpackage mod_firstmodule
      * @copyright Copyright (C) 2005 - 2012 Open Source Matters, Inc. All rights reserved.
      * @license GNU General Public License version 2 or later; see LICENSE.txt
   */

defined('_JEXEC') or die;
>

<p>Hello World!!!!!!</p>
After you have finished creating all these files, compress the complete folder mod_firstmodule.
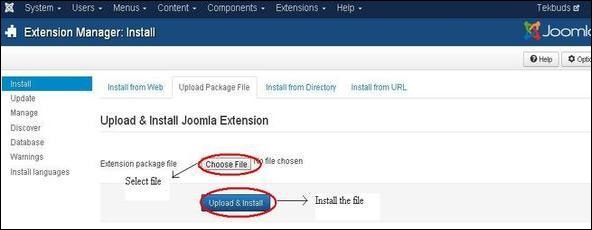
Step 7 − Go to Extension → Extension Manager in Joomla administrator and you will get the following screen. Here you can upload and install your created module files i.e. mod_firstmodule folder. Click on Choose File and select the created module file (compressed one). Click on Upload & Install button to upload the module file.
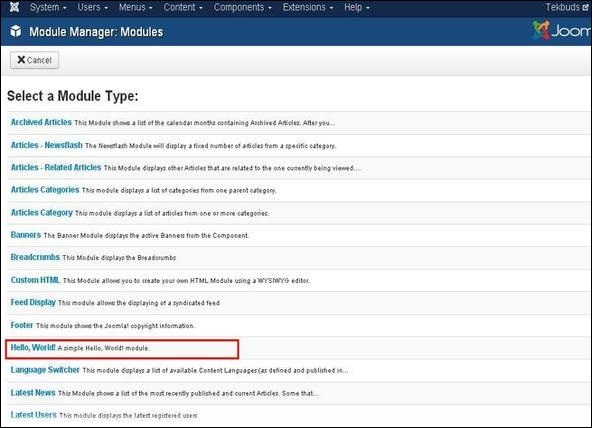
Step 8 − After upload and installation, go to Module Manager and click on New. There you can view your created module file as shown below.
Step 9 − You can assign this module similar to the other modules and then publish it.
Joomla - Breadcrumb Module
In this chapter, we will study about Breadcrumb Module in Joomla. A Breadcrumb is used to display the hierarchical representation of the navigation links so that the users can easily understand where they are in the website and allow them to navigate back.
Breadcrumbs Module
Following are the simple steps to edit an existing Breadcrumb Module in Joomla.
Step 1 − Click Extension → Module Manager in Joomla administrator. After you click on Module Manager you get the following screen.

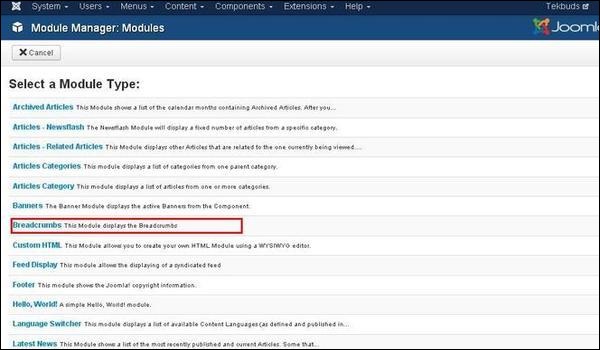
Step (2) −As shown in the above screen, click on New button and the following screen displays. On this page, click on the Breadcrumbs.
Step 3 − Next, you see the existing breadcrumbs module as shown below.
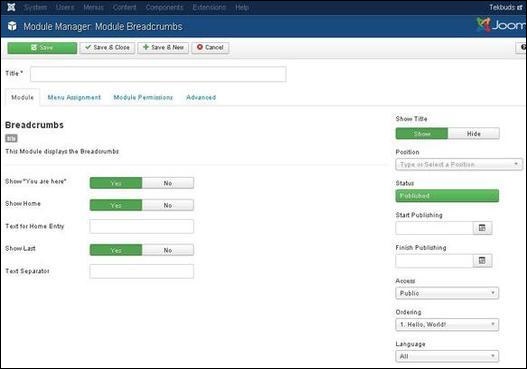
By default, the Module tab is displayed. The Module displays the breadcrumbs.
Details of the fields present in the Module Breadcrumbs page are as follows −
Title− Displays the title of Module
Show "You are here" − It will show or hide the text "You are here" in the pathway.
Show Home − Home element will be shown or hidden in the pathway.
Text for Home Entry − Text will be displayed as home entry. The default value is taken from mod_breadcrumbs.ini language file, when the text field is empty.
Show Last − Last element will be shown or hidden in the pathway.
Text Separator − It separates the text.
Show Title − Displays the title of the module in the front end.
Position − It selects the position of the module to be displayed.
Status − It displays the status of the article such as Published, Unpublished and Trashed.
Start Publishing − It starts publishing on the assigned date and time.
Finish Publishing − It finishes publishing on the assigned date and time
Access − Only selected users from the dropdown list such as Guest, Public, Super Users, Registered and Special options are allowed to view the item.
Ordering − Displays the drop-down of all module present in the position.
Language − It specifies the language of the site. It provides either ALL or English (UK) options.
Note − It is used to enter the text information.
Step 4 − Click on Menu Assignment tab, you will get the screen as shown below.
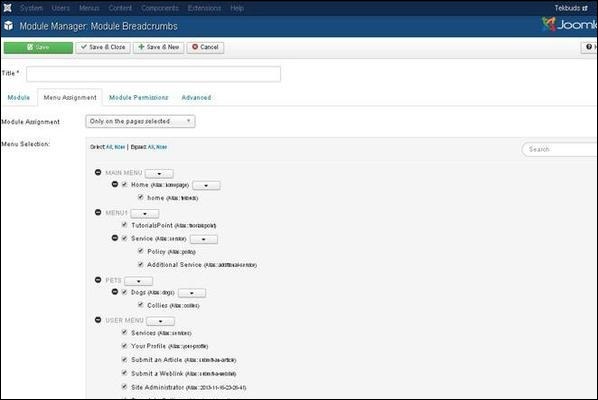
Module Assignment − Select the option to view the item from the dropdown list such as On All Pages, No Pages, Only on the pages selected or On all pages except those selected.
Menu Selection − After you select the option only on the pages selected or on all pages except those selected, it then displays all the menu items present in Joomla. It allows you to assign modules to some and not all pages.
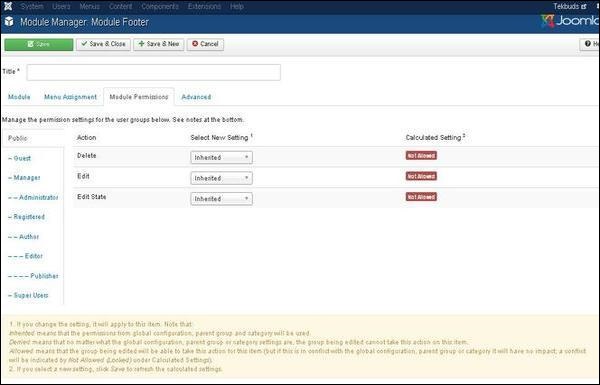
Step 5 − In Module Permissions tab, we can view the three actions. It manages the setting of module permission for the user groups as shown in the following screen.
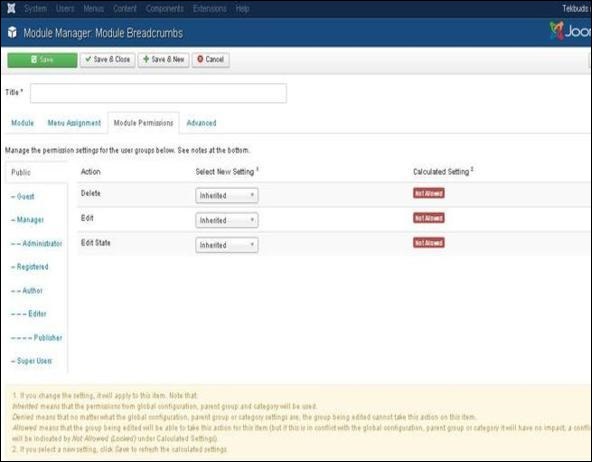
Delete − It allows users in group to delete the content present in the breadcrumb.
Edit − It allows users in group to edit the content present in the breadcrumb.
Edit State − It allows users in group to change the state of content present in the breadcrumb.
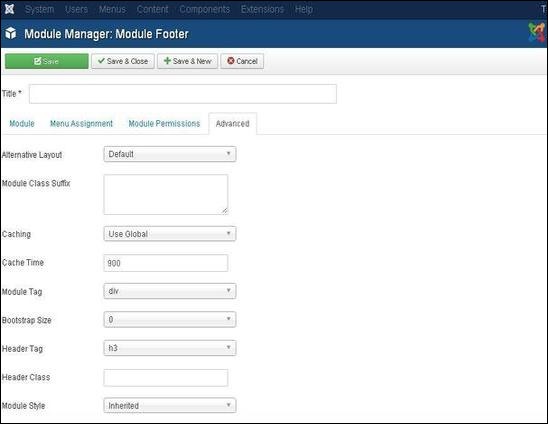
Step 6 − The Advanced tab is used to do the advanced settings of the breadcrumbs. The advanced tab screen is shown below.
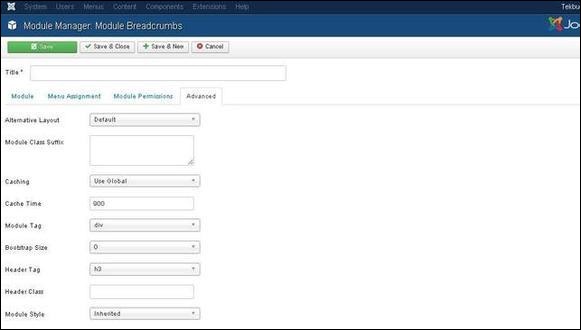
Alternative Layout − Select the layout to be used for this module.
Module Class Suffix − Setting this parameter causes Joomla to either add a new CSS class or modify the existing CSS class for the div element for this specific module.
Caching − Cache the content of the module. Use Global is used to cache settings from global configuration. No Caching does not cache the module content.
Cache Time − Specifies the time in minutes before the module is re-cached.
Module Tag − Specifies the HTML tag for the modules.
Bootstrap Size − Select width of the module built into bootstrap.
Header Tag − Modules use the HTML header tags.
Header Class − Optional CSS classes are added in the modules header.
Module Style − Overrides the template style for its position.
Toolbar
Following are the details about the toolbar function tabs present in breadcrumbs.
Save − Saves your modules.
Save & Close − Saves the modules and will close the current screen.
Save & New − Saves modules and opens a new creating module screen.
Cancel − Cancels the created modules in Joomla.
Joomla - Feed Display Module
In this chapter, we will study about Feed Display Module in Joomla. Feed Display Module is used to show the RSS News Feeds from a website. It is a way to provide user with the updated content from other resources.
Feed Display Module
Following are the simple steps to add/edit Feed Display Module in Joomla.
Step 1 − Click Extension → Module Manager in Joomla administrator. You will get the following screen.

Step 2 − Next, click on New button and the following screen displays, select module type − Feed Display.
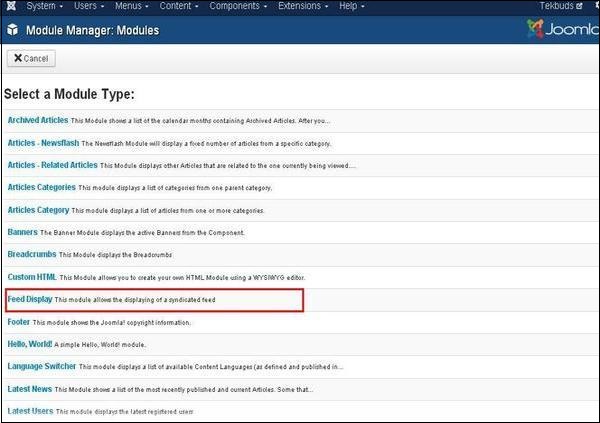
Step 3 − After clicking on Feed Display, Module Feed Display will be displayed as shown below.
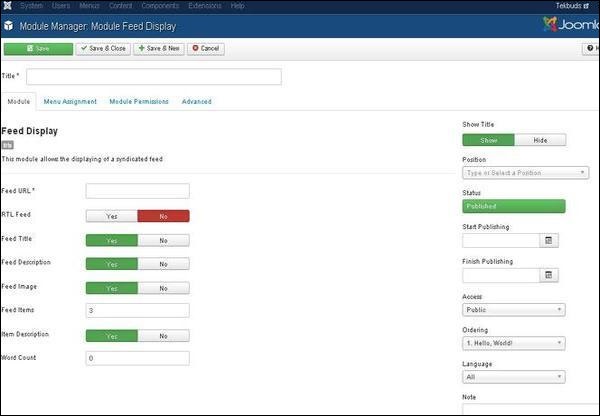
By default, the Module tab is displayed. The Module allows you to display the syndicated feed.
Given below are the details of the fields present on the Module Feed Display screen −
Title − Displays the title of Module.
Feed URL − Specifies the RSS/RDF/ATOM feed URL.
RTL Feed − Feed is displayed in RTL direction.
Feed Title − Displays the title of news feed.
Feed Description − The entire feed text is shown.
Feed Image − It displays the associated image with the entire feed.
Feed Items − Displays the number of RSS items.
Item Description − Individual RSS items description is displayed.
Word Count − Limits the number of words to be displayed in item description text.
Show Title − Display the title of the module in the front-end.
Position − It will select the position of the module to be displayed.
Status − It displays the status of the article such as Published, Unpublished and Trashed.
Start Publishing − It will publish the feed on the assigned date and time.
Finish Publishing − It will finish publishing on the assigned date and time.
Access − It allows access only to selected users from the dropdown list such as Guest, Public, Super Users, Registered and Special options to view the items.
Ordering − Displays the dropdown of all modules present in the position.
Language − It specifies the language of the site. It provides either ALL or English (UK) options.
Note − It is used to enter some information.
Step 4 − Click on Menu Assignment tab, you will get the screen as shown below.
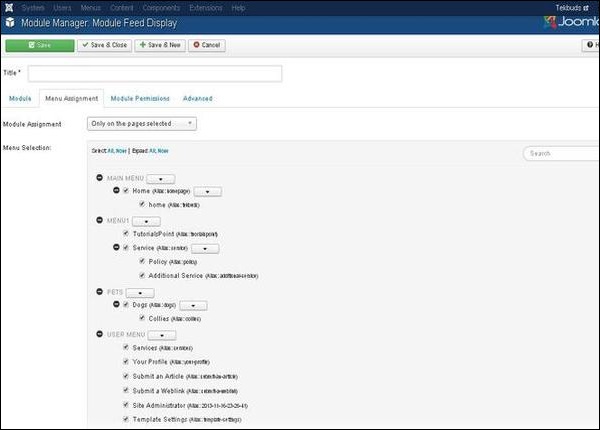
Module Assignment − Select the option to view the item from the dropdown list such as On All Pages, No Pages, Only on the pages selected or On all pages except those selected.
Menu Selection − After selecting the option only on the pages selected or on all pages except those selected, it will display all menu items present in Joomla. It will allow assigning module to some and not all pages.
Step 5 − Module Permissions tab has three actions present. It manages the setting of module permissions for the user groups as shown in the following screen.
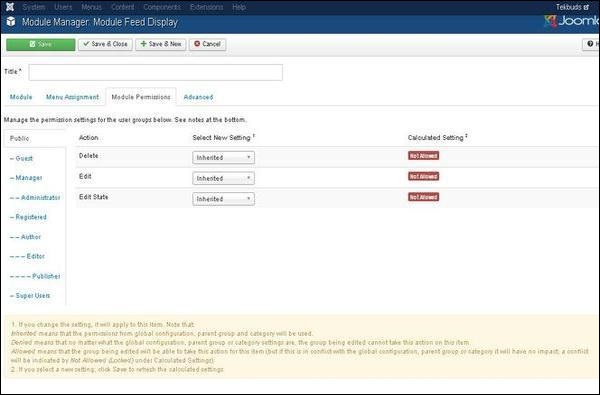
Delete − Allows users in a group to delete the content present in the feed display.
Edit − It allows users in a group to edit the content present in the feed display.
Edit State − It allows users in a group to change the state of content present in the feed display.
Step 6 − The Advanced tab is used to do the advanced settings of the feed display. The advanced tab screen is shown below.
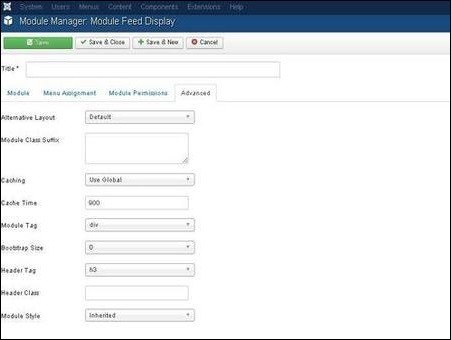
Alternative Layout − Select the layout to be used for this module.
Module Class Suffix − Setting this parameter causes Joomla to either add a new CSS class or modify the existing CSS class for the div element for this specific module.
Caching − Cache the content of the module. Use Global is used to cache settings from global configuration. No Caching is used whether to cache the content of the module or not.
Cache Time − Specify the time in minutes before the module is re-cached.
Module Tag − Specify the HTML tag for the modules.
Bootstrap Size − Select width of the module built into bootstrap.
Header Tag − Modules uses the HTML header tags.
Header Class − Optional CSS classes are added in the modules header.
Module Style − Overrides the templates style for its position.
Toolbar
Following are the details about the toolbar function tabs present in feed display −
Save − Saves your modules.
Save & Close − Saves the modules and closes the current screen.
Save & New − Saves the modules and opens a new creating module screen.
Cancel − Cancels the created modules in Joomla.
Joomla - Footer Module
In this chapter, we will study about Footer Module in Joomla. Footer displays the information of Joomla license and the copyright of the website.
Footer Module
Following are the simple steps to edit an existing Footer Module in Joomla.
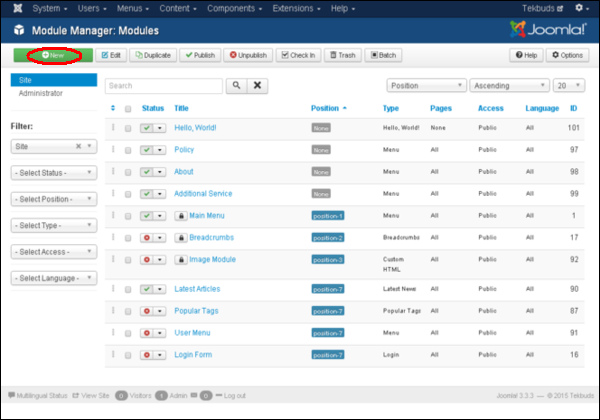
Step 1 − Click Extension → Module Manager in Joomla administrator. After clicking on Module Manager you will get the following screen.
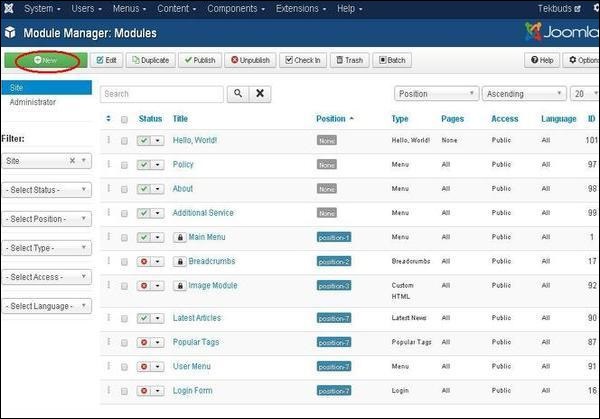
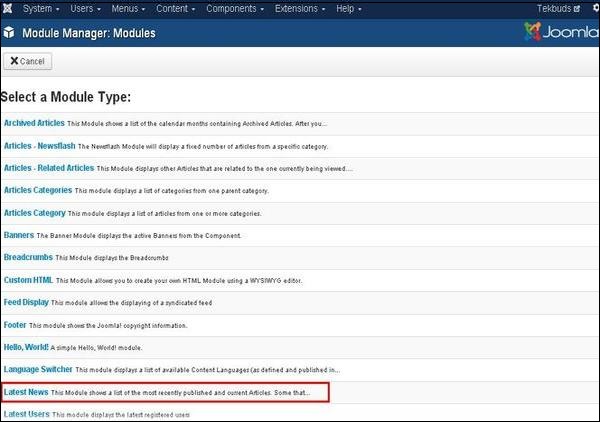
Step 2 − As shown in the screen above, click on New button and the following screen will get displayed. Select Module Type as Footer.
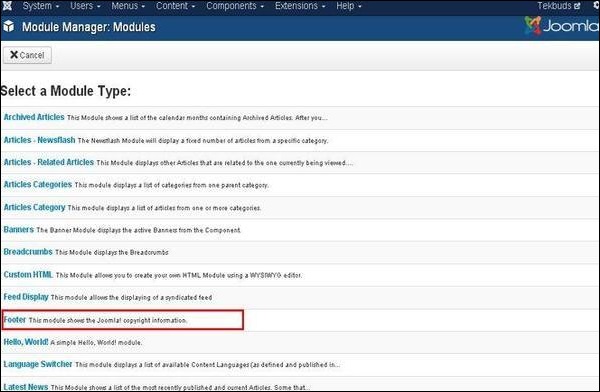
Step 3 − After clicking on Footer, following Footer module screen is displayed.
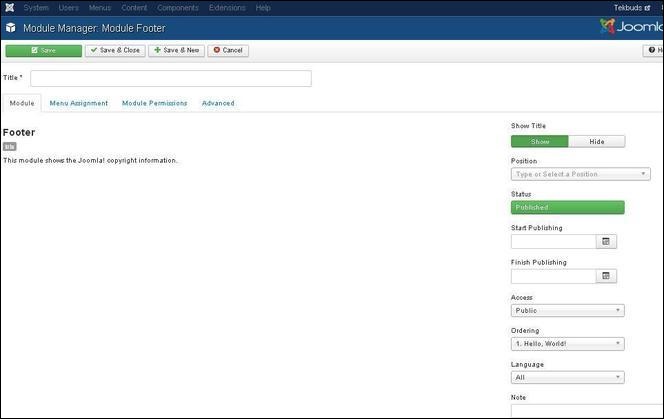
By default, the Module tab is displayed. The Module tab displays the copyright information of Joomla.
Given below is the information about the function tabs displayed on the page.
Title − Displays the title of Module.
Following content is present on the right side of the module tab.
Show Title − Displays the title of the module in the front end.
Position − It selects the position of the module to be displayed.
Status − It displays the status of the article such as Published, Unpublished and Trashed.
Start Publishing − It starts publishing on the assigned date and time.
Finish Publishing − It finishes publishing on the assigned date and time.
Access − It allows only selected users from the dropdown list such as Guest, Public, Super Users, Registered and Special options to view the items.
Ordering − Displays the drop-down of all modules present in the position.
Language − It specifies the language of the site. It provides either ALL or English (UK) options.
Note − It is used to enter the text information.
Step 4 − Click on Menu Assignment tab, you will get the screen as shown below.
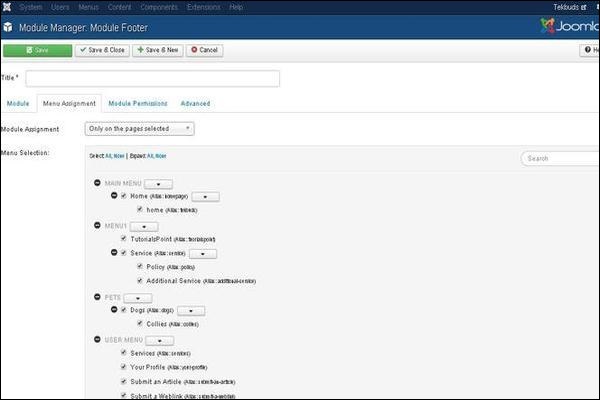
Module Assignment − Select the option to view the item from the dropdown list such as on all Pages, no Pages, only on the pages selected or on all pages except those selected.
Menu Selection − After selecting the option only on the pages selected or on all pages except those selected, it displays all the menu items present in Joomla. It allows you to assign module to some and not all pages.
Step 5 − Module Permissions tab shows three actions to choose from. It manages the setting of module permission for the user groups as shown in the following screen.
Details of the function tabs on the page is given below.
Delete − It allows users in group to delete the content present in the Footer.
Edit − It allows users in group to edit the content present in the Footer.
Edit State − It allows users in group to change the state of content present in the Footer.
Step 6 − The Advanced tab is used to do the advanced settings of the footer. Following screenshot represents the advanced tab.
Alternative Layout − Selects the layout to be used for this module, which you have already defined as one or more layouts for a module in Joomla or template.
Module Class Suffix − Setting this parameter causes Joomla to either add a new CSS class or modify the existing CSS class for the div element for this specific module.
Caching − Cache the content of the module. Use Global is used to cache settings from global configuration. No Caching is used whether to cache the content of the module or not.
Cache Time − Specify the time in minutes before the module is re-cached.
Module Tag − Specify the HTML tag for the modules.
Bootstrap Size − Select width of the module built into bootstrap.
Header Tag − Modules uses the HTML header tags.
Header Class − Optional CSS classes are added in the modules header.
Module Style − Overrides the templates style for its position.
Toolbar
Following are the details about the toolbar funcion tabs present in Footer Module −
Save − Saves your modules.
Save & Close − Saves the modules and will close the current screen.
Save & New − Saves modules and opens a new creating module screen.
Cancel − Cancels the created modules in Joomla.
Joomla - Latest News Module
In this chapter, we will study about Latest News Module in Joomla. Latest News Module is used to display the most recent published article in a list.
Latest News Module
Following are the simple steps to edit an existing Latest News Module in Joomla.
Step 1 − Click Extension → Module Manager in Joomla administrator control panel. Following screen will be displayed −
Step 2 − Click on New button, you get a screen as shown below. Now select Module Type Latest News.
Step 3 − After clicking on Latest News, screen displayed is as shown below.
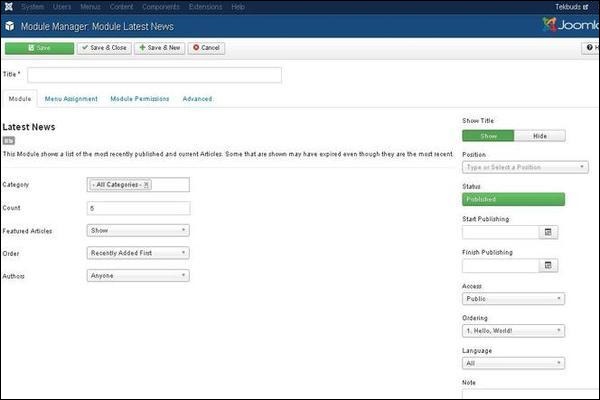
By default, the Module tab is displayed. The Module tab displays the Latest News.
Below, we have mentioned the details of the fields present in the Module Latest News page.
Title − Displays the title of Module.
Category − Selects category for the article to display.
Count − Specifies the number of articles to be displayed.
Featured Articles − (Show/Hide/Only show Featured Articles) The articles can be displayed, hidden or you can only display the featured articles on the front page.
Order − (Recently Added First/Recently Modified First/Recently Published First/Recently Touched First/Random Articles) Sets the order of the articles depending on recent activities done for the article.
Authors − (Anyone/Added or modified by me/Not added or modified by me) Displays the article based on the author who has added or modified it.
Show Title − Displays the title of the module in the front end.
Position − It selects the position of the module to be displayed.
Status − It displays the status of the article such as Published, Unpublished and Trashed.
Start Publishing − It starts publishing on the assigned date and time.
Finish Publishing − It finishes publishing on the assigned date and time.
Access −It allows only the selected users from the dropdown list such as Guest, Public, Super Users, Registered and Special options to view the items.
Ordering − Displays the dropdown of all modules present in the position.
Language − It specifies the language of the site. It provides either ALL or English (UK) options.
Note − It is used to enter the text information.
Step 4 − Click on Menu Assignment tab, you will get the screen as shown below.
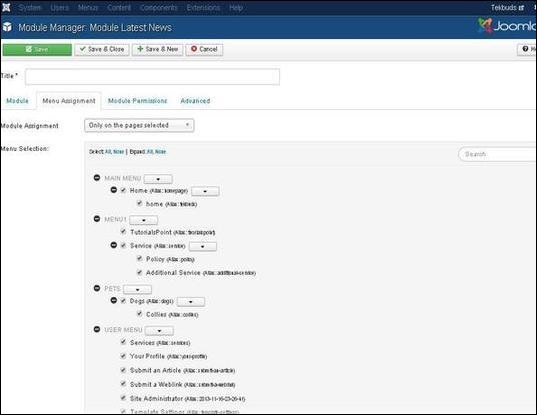
Module Assignment − Select the option to view the item from the dropdown list such as on all pages, no pages, only on the pages selected or on all pages except those selected.
Menu Selection − After selecting the option only on the pages selected or on all pages except those selected, it displays all the menu items present in Joomla. It allows you to assign module to some and not all pages.
Step 5 − Module Permissions tab offers three actions to choose from. It manages the setting of module permission for the user groups as shown in the following screen.
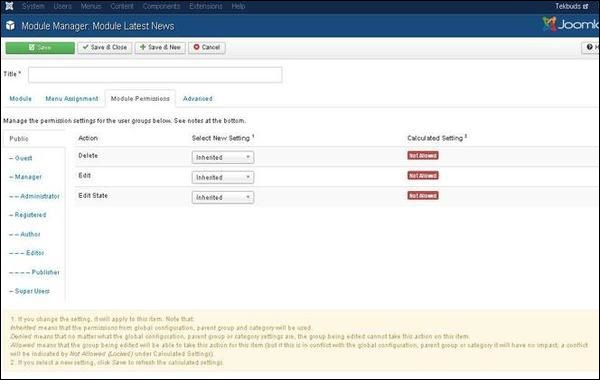
Delete − It allows users in group to delete the content present in the module.
Edit − It allows users in group to edit the content present in the module.
Edit State − It allows users in group to change the state of content present in the module.
Step 6 − The Advanced tab is used to do the advanced settings of the latest news. The advanced tab screen is shown below.
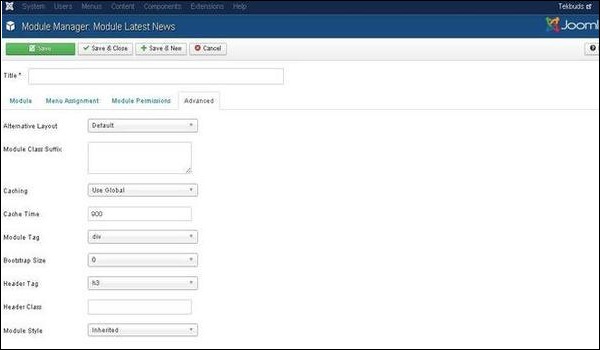
Alternative Layout − Select the layout to be used for this module, which you have already defined as one or more layouts for a module in Joomla or template.
Module Class Suffix − Setting this parameter causes Joomla to either add a new CSS class or modify the existing CSS class for the div element for this specific module.
Caching − Cache the content of the module. Use Global is used to cache settings from global configuration. No Caching is used whether to cache the content of the module or not.
Cache Time − Specify the time in minutes before the module is re-cached.
Module Tag − Specify the HTML tag for the modules.
Bootstrap Size − Select width of the module built into bootstrap.
Header Tag − Modules uses the HTML header tags.
Header Class − Optional CSS classes are added in the modules header.
Module Style − Overrides the templates style for its position.
Toolbar
Following are the details about the toolbar function tabs present in Latest News Module.
Save − Saves your modules.
Save & Close − Saves the modules and will close the current screen.
Save & New − Saves the modules and opens a new creating module screen.
Cancel − Cancels the created modules in Joomla.
Joomla - Search Module
In this chapter, we will study about Search Module in Joomla. Search Module is used to display a search box, where the user types a particular name to search the website.
Search Module
Following are the simple steps to edit an existing Search Module in Joomla.
Step 1 − Click Extension → Module Manager in Joomla administrator control panel, you get the following screen −
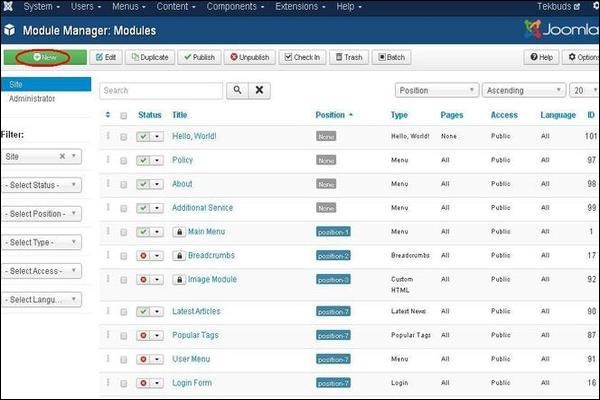
Step 2 − Next, click on New button and the following screen gets displayed. Next, select Module Type as Search on this screen.
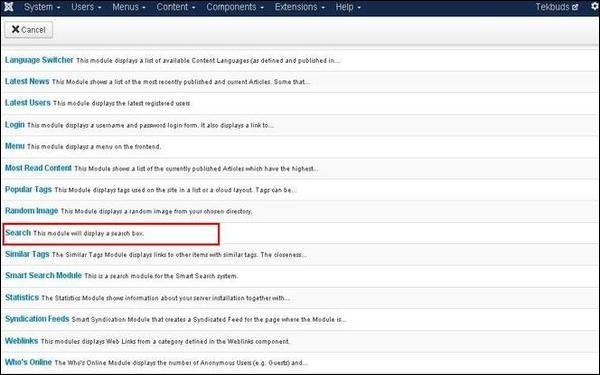
Step 3 − After clicking on Search, the existing Search module displays as shown below.
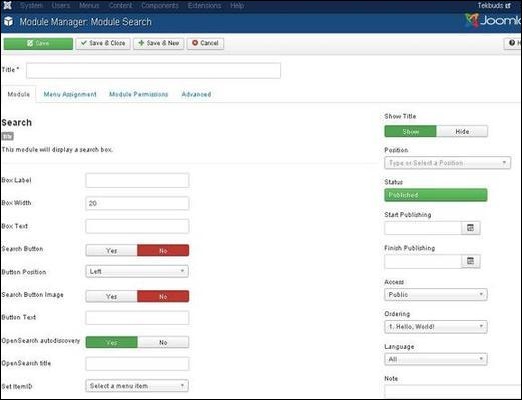
By default, the Module tab is displayed. The module displays a search box. Below, we have mentioned the details of the fields present in the Module tab.
Title − Displays the title of Module.
Box Label − In search box label the text will appear.
Box Width − Sets the width of the search box. By default it is set to 20.
Box Text − Text to view on the search box.
Search Button − Search button is displayed. By default it is set to No.
Button Position − Sets the position of search button such as Left, Right, Bottom, Top.
Search Button Image − Insert image as button. The image must be located in the templates/templates name/images/
Button Text − Text to view on search button.
OpenSearch autodiscovery − For site search it adds browser support. By default it is set to Yes.
OpenSearch title − When a site is added as a search provider, the text gets displayed in the supported browser.
Set ItemID − To display the search result, itemID is assigned by selecting menu item.
Show Title − Displays the title of the module in the front end.
Position − It selects the position of the module to be displayed.
Status − It displays the status of the article such as Published, Unpublished and Trashed.
Start Publishing − It starts publishing on the assigned date and time.
Finish Publishing − It finishes publishing on the assigned date and time.
Access − It allows only selected users from the dropdown list such as Guest, Public, Super Users, Registered and Special options to view the items.
Ordering − Displays the dropdown of all modules present in the position.
Language − It specifies the language of the site. It provides either ALL or English (UK) options.
Note − It is used to enter the text information.
Step 4 − Click on Menu Assignment tab, you will get the screen as shown below.
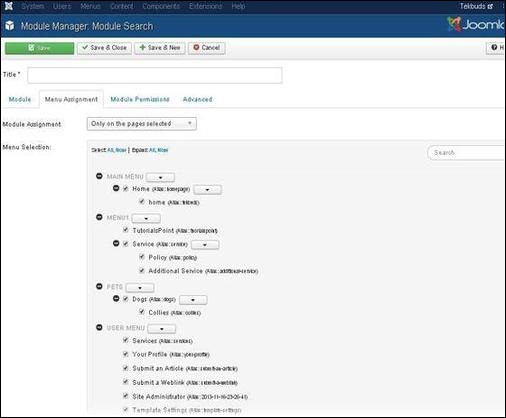
Module Assignment − Select the option to view the item from the dropdown list such as on all pages, no pages,only on the pages selected or on all pages except those selected.
Menu Selection − After selecting the option only on the pages selected or on all pages except those selected, it displays all the menu items present in Joomla. It allows you to assign module to some and not all pages.
Step 5 − Module Permissions tab has three actions to choose from. It manages the setting of module permission for the user groups as shown in the following screen.

Delete − It allows users in group to delete the content present in the module.
Edit − It allows users in group to edit the content present in the module.
Edit State − It allows users in group to change the state of content present in the module.
Step 6 − The Advanced tab is used to do the advanced settings of the Search. The advanced tab screen is shown below.
Alternative Layout − Select the layout to be used for this module, which you have already defined as one or more layouts for a module in Joomla or template.
Module Class Suffix − Setting this parameter causes Joomla to either add a new CSS class or modify the existing CSS class for the div element for this specific module.
Caching − Cache the content of the module. Use Global is used to cache settings from global configuration. No Caching is used whether to cache the content of the module or not.
Cache Time − Specify the time in minutes before the module is re-cached.
Module Tag − Specify the HTML tag for the modules.
Bootstrap Size − Select width of the module built into bootstrap.
Header Tag − Modules use the HTML header tags.
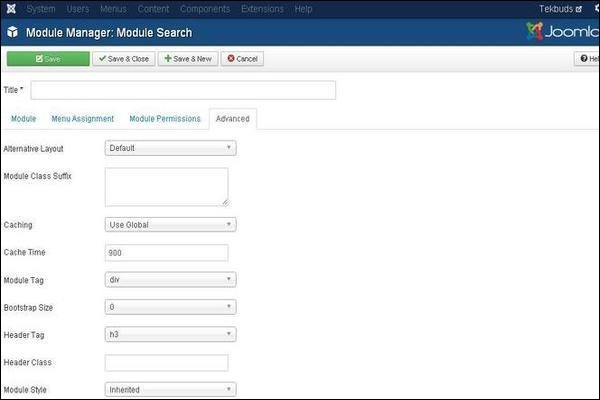
Header Class − Optional CSS classes are added in the modules header.
Module Style − Overrides the templates style for its position.
Toolbar
Following are the details about the toolbar function tabs present in Search Module.
Save − Saves your modules.
Save & Close − Saves the modules and will close the current screen.
Save & New − Saves the modules and opens a new creating module screen.
Cancel − Cancels the created modules in Joomla.
Joomla - Random Image Module
In this chapter, we will study about Random Image Module in Joomla. Random Image Module is used to display the images randomly from the selected directory.
Random Image Module
Following are the simple steps to edit an existing Random Image Module in Joomla.
Step 1 − Click Extension → Module Manager in Joomla administrator, the following screen will be displayed −
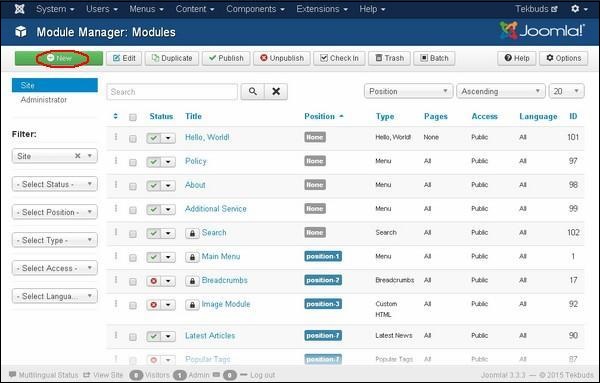
Step 2 − Next, click on New button and the following screen gets displayed. Next, click on the Random Image.
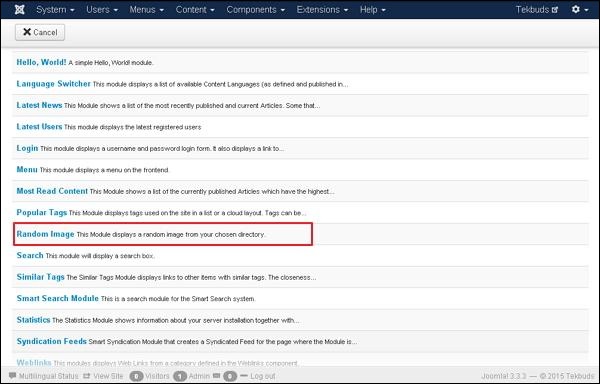
Step 3 − After clicking on Random Image, the existing Random Image module displays as shown below.
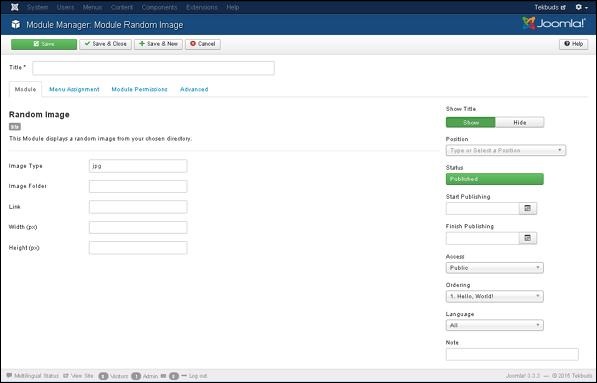
By default, the Module tab is displayed. Below, we have mentioned the details of the fields present in the Module tab.
Title − Displays the title of Module
Image Type − Displays the image type i.e. png, jpg, .gif etc. By default it is set to jpg.
Image Folder − Defines the path of the image folder which is stored on the server.
Link − When images are clicked, the URL is redirected.
Width (px) − Specifies the width of the image in pixels.
Height (px) − Specifies the height of the image in pixels.
Show Title − Displays the title of the module in the front end.
Position − It selects the position of the module to be displayed.
Status − It displays the status of the article such as Published, Unpublished and Trashed.
Start Publishing − It starts publishing on the assigned date and time.
Finish Publishing− It finishes publishing on the assigned date and time
Access − It allows access to only selected users from the dropdown list such as Guest, Public, Super Users, Registered and Special options to view the items.
Ordering − Displays the drop down of all modules present in the position.
Language − It specifies the language of the site. It provides either ALL or English (UK) options.
Note − It is used to enter the text information.
Step 4 − When we click on Menu Assignment tab, you will get the screen as shown below.
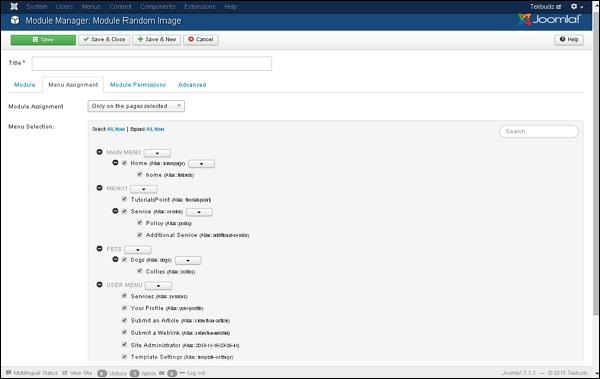
Module Assignment − Select the option to view the item from the dropdown list such as on all pages, no pages, only on the pages selected or on all pages except those selected.
Menu Selection − After selecting the option only on the pages selected or on all pages except those selected, it displays all the menu items present in Joomla. It allows you to assign module to some and not all pages.
Step 5 − Module Permissions tab provides three actions to choose from. It manages the setting of module permission for the user groups as shown in the following screen.
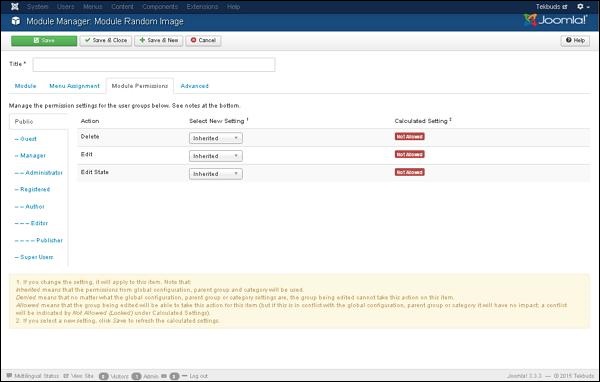
Delete − It allows users in group to delete the content present in the module.
Edit − It allows users in group to edit the content present in the module.
Edit State − It allows users in group to change the state of content present in the module.
Step 6 − The Advanced tab is used to do the advanced settings of the Random Image. The advanced tab screen is shown below.

Alternative Layout − Selects the layout to be used for this module, which you have already defined as one or more layouts for a module in Joomla or template.
Module Class Suffix − Setting this parameter causes Joomla to either add a new CSS class or modify the existing CSS class for the div element for this specific module.
Caching − Caches the content of the module. Use Global is used to cache settings from global configuration. No Caching is used whether to cache the content of the module or not.
Cache Time − Specifies the time in minutes before the module is re-cached.
Module Tag − Specifies the HTML tag for the modules.
Bootstrap Size − Selects width of the module built into bootstrap.
Header Tag − Modules uses the HTML header tags.
Header Class − Optional CSS classes are added in the modules header.
Module Style − Overrides the templates style for its position.
Toolbar
Following are the details about the toolbar function tabs present in Random Image Module.
Save − Saves your modules.
Save & Close − Saves the modules and will close the current screen.
Save & New − Saves the modules and opens a new creating module screen.
Cancel − Cancels the created modules in Joomla.
Joomla - Who's Online Module
In this chapter, we will study about Who's Online Module in Joomla. This module helps to display the user's information who are accessing the website.
Who's Online Module
Following are the simple steps to edit an existing Who's Online Module in Joomla.
Step 1 − Click Extension → Module Manager in Joomla administrator, the following screen will be displayed.
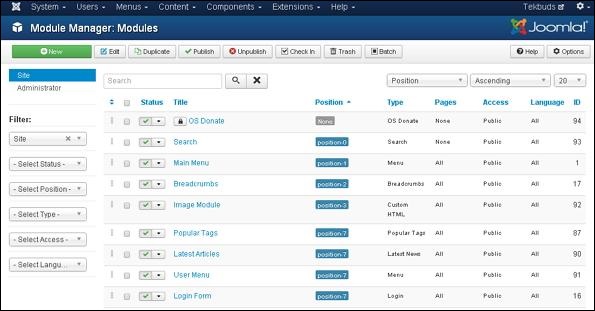
Step 2 − Next, click on New button and the following screen will get displayed. In this page, click on Who's Online.
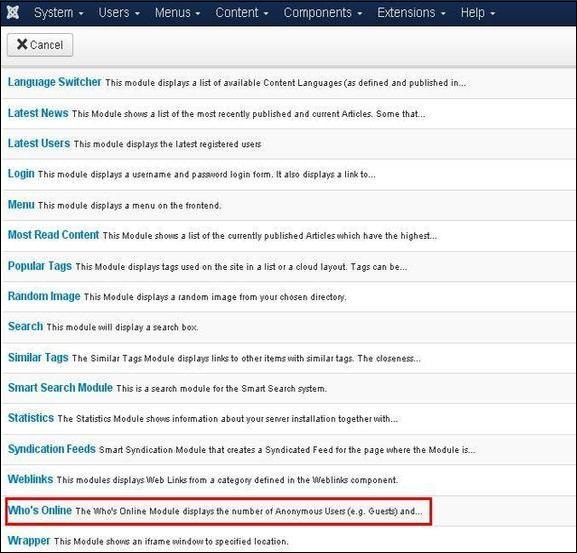
Step 3 − After clicking on Who's Online, the existing Who's Online module will get displayed as shown below.
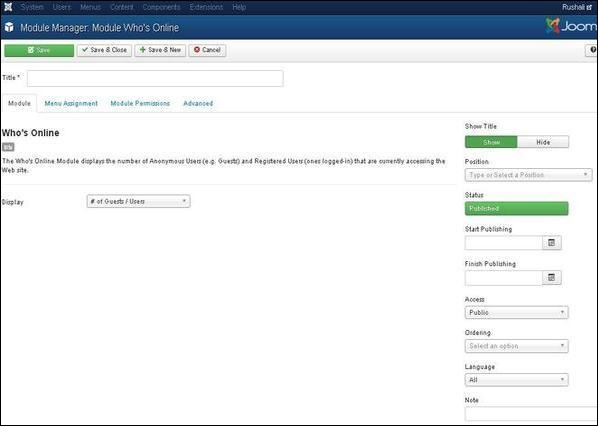
By default, the Module tab is displayed. Below, we have mentioned the details of the fields present in the Module tab.
Title − Displays the title of Module
Display − Select the following option to be displayed i.e. #of Guests/Users, Usernames or Both.
Given below are the details present on the right side of the module tab.
Show Title − Displays the title of the module in the front end.
Position − It will select the position of the module to be displayed.
Status − It displays the status of the article such as Published, Unpublished and Trashed.
Start Publishing − It will start publishing on the assigned date and time.
Finish Publishing − It will finish publishing at the assigned date and time.
Access − It allows access only the selected users from the dropdown list such as Guest, Public, Super Users, Registered and Special options to view the items.
Ordering − Displays the drop-down of all modules present in the position.
Language − It specifies the language of the site. It provides either ALL or English (UK) options.
Note − It is used to enter the text information.
Step 4 − When we click on the Menu Assignment tab, you will get the screen as shown below.
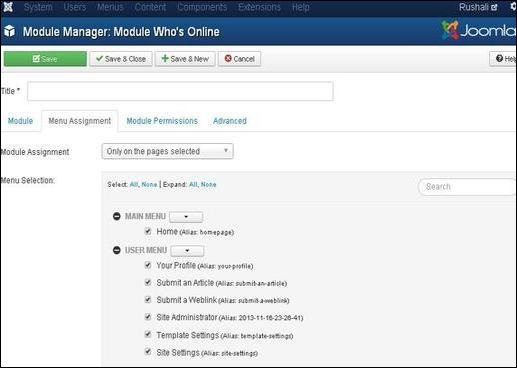
Module Assignment − Selects the option to view the item from the dropdown list such as on all Pages, no pages, only on the pages selected or on all pages except those selected.
Menu Selection − After selecting the option only on the pages selected or on all pages except those selected, it will display all menu items present in the Joomla. It will allow assigning module to some and not all pages.
Step 5 − Module Permissions tab has three actions to choose from. It manages the setting of module permission for the user groups as shown in the following screen.
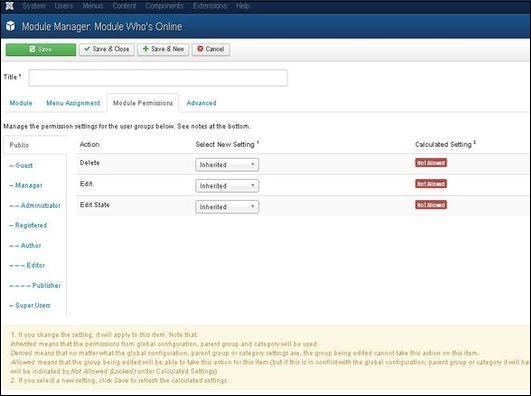
Delete − It allows users in group to delete the content present in the module.
Edit − It allows users in group to edit the content present in the module.
Edit State − It allows users in the group to change the state of content present in the module.
Step 6 − The Advanced tab is used to do the advanced settings of the Who's Online. The advanced tab screen is shown below.

Alternative Layout − Selects the layout to use for this module, which you have already defined as one or more layouts for module in Joomla or template.
Module Class Suffix − Setting this parameter causes Joomla to either add a new CSS class or modify the existing CSS class for the div element for this specific module.
Caching − Caches the content of the module. Use Global is used to cache settings from global configuration. No Caching is used, whether to cache the content of the module or not.
Cache Time − Specifies the time in minutes before the module is re-cached.
Module Tag − Specifies the HTML tag for the modules.
Bootstrap Size − Selects width of the module built in bootstrap.
Header Tag − Modules uses the HTML header tags.
Header Class − Optional CSS classes are added in the module header.
Module Style − Overrides the template style for its position.
Toolbar
Following are the details about the toolbar function tabs present in who's Online.
Save − Saves your modules.
Save & Close − Saves the modules and will close the current screen.
Save & New − Saves the modules and opens a new creating module screen.
Cancel − Cancels the created modules in Joomla.
Joomla - Syndicate Module
In this chapter, we will study about Syndicate Module in Joomla. Syndicate module helps in creating an RSS Feed link for the page. It allows creating a Newsfeed by the user for the current page.
Syndicate Module
Following are the simple steps to edit an existing Syndicate Module in Joomla.
Step 1 − Click Extension → Module Manager in Joomla administrator,the following screen will be displayed.
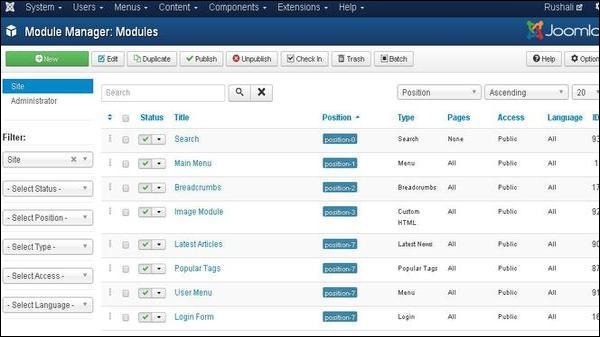
Step 2 − Next, click on New button and the following screen will get displayed. On this page, click on the Syndication Feeds.
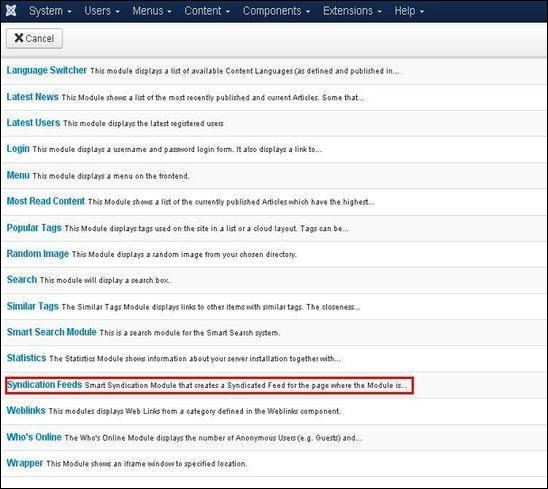
Step 3 − Next, click on Syndication Feeds, the existing Syndicate module will get displayed as shown below.
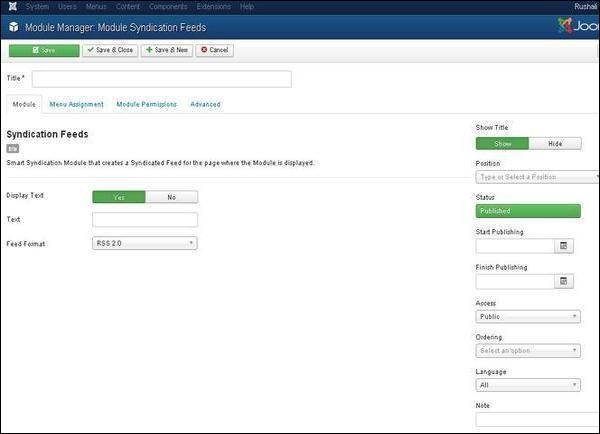
By default, the Module tab is displayed. Below, we have mentioned the details of the fields present in the Module tab.
Title − Displays the title of Module.
Display Text − Text gets displayed by selecting option such as Yes or No.
Text − The entered text will get displayed next to the icon when the Display Text is set as Yes. If the field is left empty then it will display a default text.
Feed Format − The syndication Feed format is selected i.e. RSS 2.0 or Atom 1.0.
Show Title − Displays the title of the module in the front end.
Position − It will select the position of the module to be displayed.
Status − It displays the status of the article such as Published, Unpublished and Trashed.
Start Publishing − It will start publishing at the assigned date and time.
Finish Publishing − It will finish publishing on the assigned date and time.
Access − It allows access only to selected users from the dropdown list such as Guest, Public, Super Users, Registered and Special option to view the items.
Ordering − Displays the dropdown of all modules present in the position.
Language − It specifies the language of the site. It provides either ALL or English (UK) options.
Note − It is used to enter the text information.
Step 4 − Click on the Menu Assignment tab, you will get the screen as shown below.
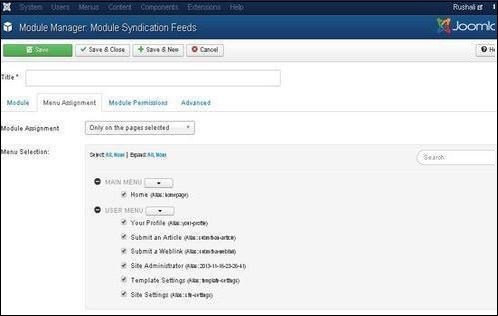
Module Assignment − Select the option to view the item from the dropdown list such as on all pages, no pages, only on the pages selected or on all pages except those selected.
Menu Selection− After selecting the option only on the pages selected or on all pages except those selected, it will display all menu items present in Joomla. It will allow assigning module to some and not all pages.
Step 5 − Module Permissions tab has three action to choose from. It manages the setting of module permission for the user groups as shown in the following screen.
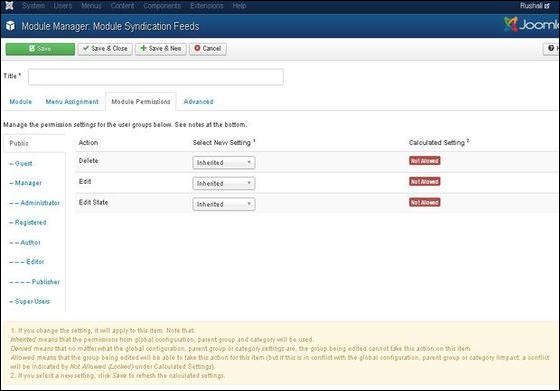
Delete − It allows users in group to delete the content present in the module.
Edit − It allows users in group to edit the content present in the module.
Edit State − It allows users in the group to change the state of content present in the module.
Step 6 − The Advanced tab is used to do the advanced settings of the Syndicate. The advanced tab screen is shown below.
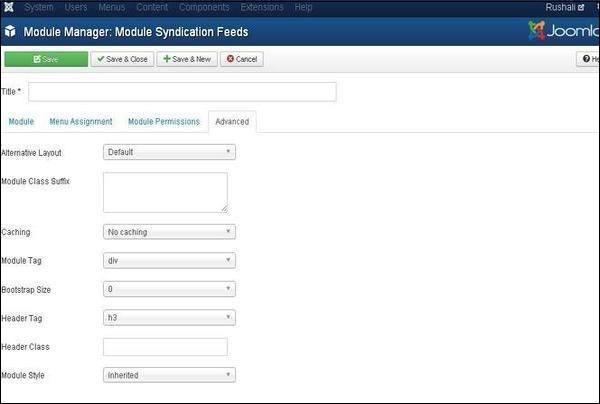
Alternative Layout − Selects the layout to use for this module, which you have already defined as one or more layouts for module in Joomla or template.
Module Class Suffix − Setting this parameter causes Joomla to either add a new CSS class or modify the existing CSS class for the div element for this specific module.
Caching − Caches the content of the module. Use Global is used to cache settings from global configuration. No Caching is used, whether to cache the content of the module or not.
Cache Time − Specifies the time in minutes before the module is re-cached.
Module Tag − Specifies the HTML tag for the modules.
Bootstrap Size − Selects width of the module built in bootstrap.
Header Tag − Modules uses the HTML header tags.
Header Class − Optional CSS classes are added in the module header.
Module Style − Overrides the template style for its position.
Toolbar
Following are the details about the function tabs present on the toolbar of Syndicate module.
Save − Saves your modules.
Save & Close − Saves the modules and will close the current screen.
Save & New − Saves the modules and opens a new creating module screen.
Cancel − Cancels the created modules in Joomla.
Joomla - Donation Module
In this chapter, we will study about Donation Module in Joomla.
Donation Module
Following are the simple steps to edit an existing Donation Module in Joomla.
Step 1 − Click Extension → Module Manager in Joomla administrator, the following screen will be displayed.
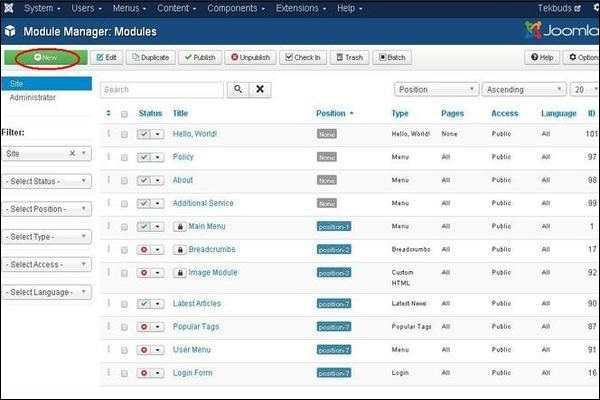
Step 2 − Next, click on New button and the following screen will get displayed. Next, click on the OS Donate.
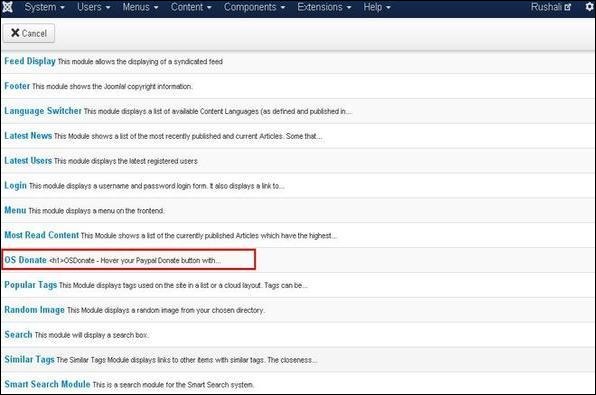
Step 3 − After clicking on OS Donate, the existing Donate module will get displayed as shown below.
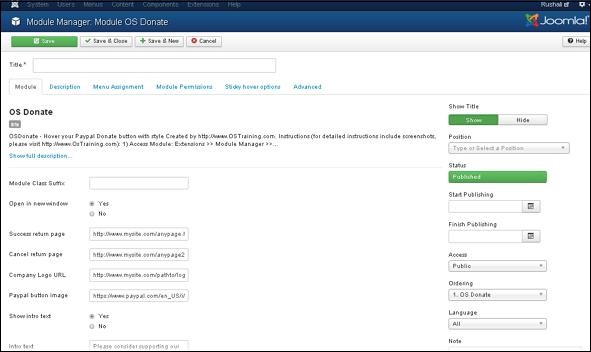
By default, the Module tab is displayed. Below we have mentioned the details of the fields present in the Module tab.
Title − Displays the title of Module.
Module Class Suffix − Customized CSS styles are allowed to create on these modules to apply.
Open in new window − Opens a new window after clicking on the PayPal button.
Success return page − Enter the URL of the page where the user will return after donating at PayPal.
Cancel return page − Enter the URL of the page where the user will return after cancelling the PayPal donate.
Company Logo URL − Enter the image path of the company logo.
PayPal button image − Sets the path of PayPal button.
Show intro text − Intro text is shown in the module.
Intro text − Enter the intro text which is displayed in the module.
E-Mail/PayPal ID − Enter PayPal ID or email address.
PayPal Description − Display the brief description of PayPal donation.
Currencies − Allow users to select currencies.
PayPal Language − Set the language for PayPal.
Show amount field − Editable amount field is shown.
Amount − Donation amount is set.
Show Title − Display the title of the module in the front end.
Position − It will select the position of the module to be displayed.
Status − It displays the status of the article such as Published, Unpublished and Trashed.
Start Publishing − It will start publishing on the assigned date and time.
Finish Publishing − It will finish publishing at the assigned date and time.
Access − It allows access only to selected users from the dropdown list such as Guest, Public, Super Users, Registered and Special option to view the items.
Ordering − Displays the dropdown of all modules present in the position.
Language − It specifies the language of the site. It provides either ALL or English (UK) options.
Note − It is used to enter the text information.
Step 4 − In Description tab, there is a brief description given about the Donation Module.
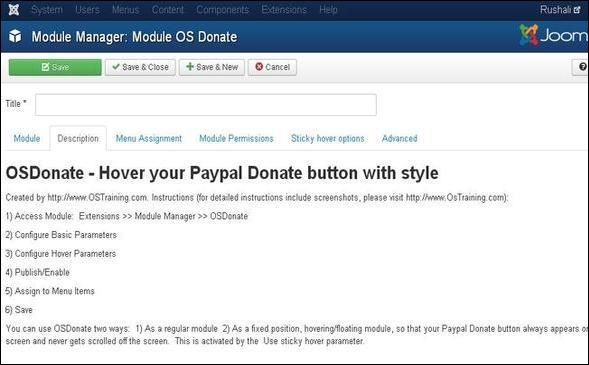
Step 5 − When we click on the Menu Assignment tab, you will get the screen as shown below.
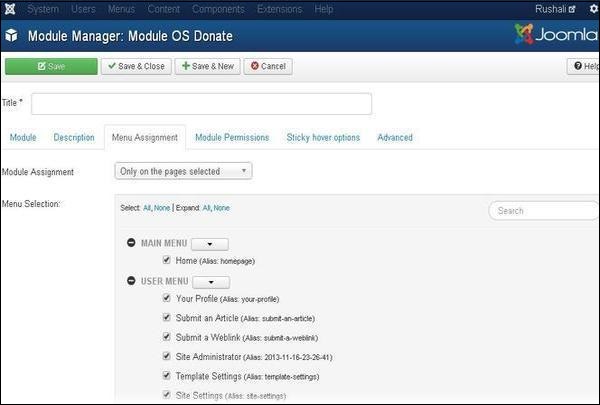
Module Assignment − Select the option to view the item from the dropdown list such as on all Pages, no pages, only on the pages selected or on all pages except those selected.
Menu Selection − After selecting the option only on the pages selected or on all pages except those selected, it will display all menu items present in Joomla. It will allow assigning module to some and not all pages.
Step 6 − Module Permissions tab shows three action to choose from. It manages the setting of module permissions for the user groups as shown in the following screen.
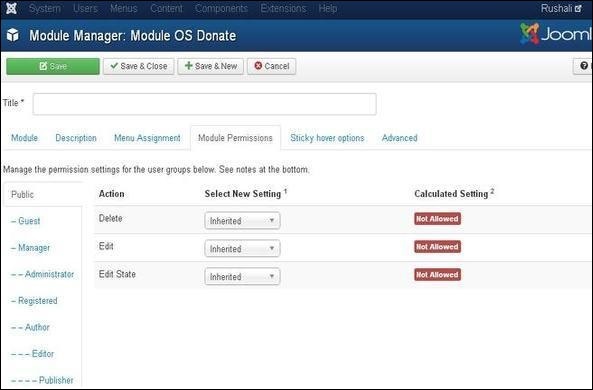
Delete − It allows users in group to delete the content present in the module.
Edit − It allows users in the group to edit the content present in the module.
Edit State − It allows users in group to change the state of content present in the module.
Step 7 − In sticky hover options tab, you can set the options for sticky hover.
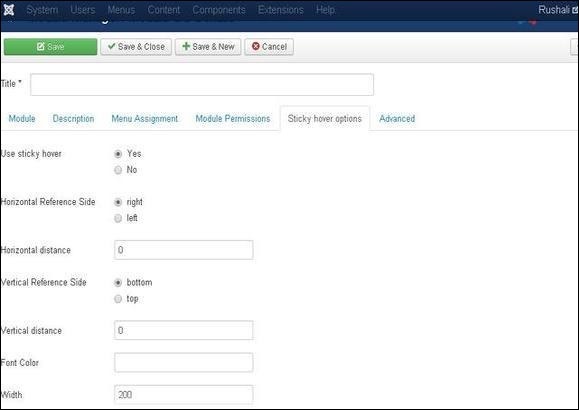
Use sticky hover − Sets the position of the module where PayPal button is set constant after scrolling the page.
Horizontal Reference Side − Sets the reference side horizontally on left or right side.
Horizontal distance − Sets the distance horizontally in pixels.
Vertical Reference Side − Sets the reference side vertically on bottom or top.
Vertical distance − Sets the distance vertically in pixels.
Font Color − Enter the font color in hexa value.
Width − Set the width.
Step (8)−The Advanced tab is used to do the advanced settings of the Donation module. The screenshot of Advanced tab is as shown below.
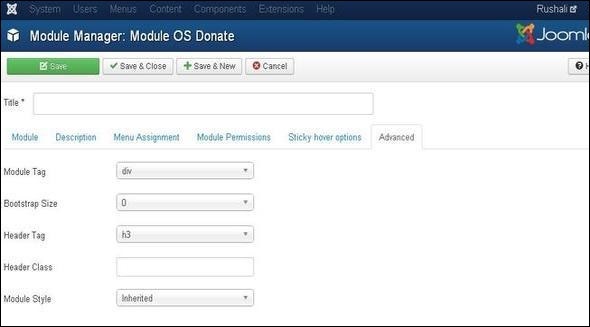
Module Tag − Specifies the HTML tag for the modules.
Bootstrap Size − Selects width of the module built in bootstrap.
Header Tag − Modules uses the HTML header tags.
Header Class − Optional CSS classes are added in the module header.
Module Style − Overrides the template style for its position.
Toolbar
Following are the details about the function tabs present on the toolbar of Donation Module.
Save − Saves your modules.
Save & Close − Saves the modules and will close the current screen.
Save & New − Saves the modules and opens a new creating module screen.
Cancel − Cancels the created modules in Joomla.
Joomla - System Settings
The Global Configuration is used for configuring Joomla site with your personal settings. To access the system settings, just follow the following steps −
Step 1 − Go to System → Global Configuration as shown in the following screen.

Step 2 − Under Global Configuration section, click on the System tab to get System Settings as shown in the following screen.
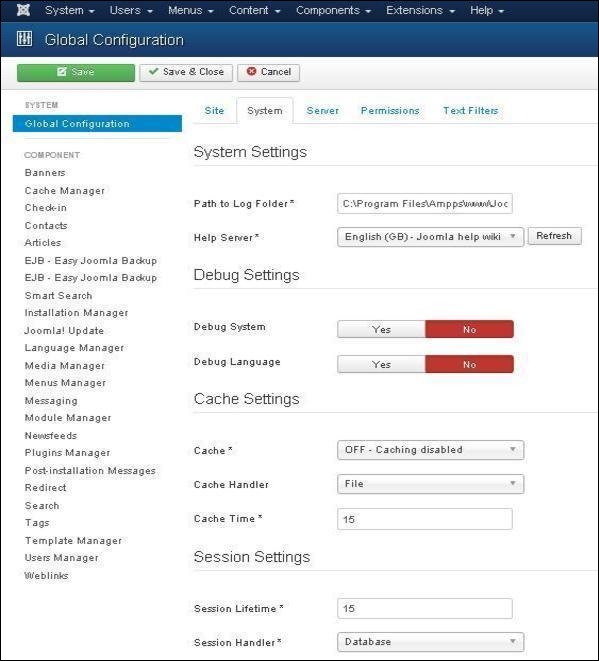
Under System Settings, you can see there are two options −
Path to Log Folder − It gives a path to store the logs by Joomla. This path is automatically set up on Joomla installation and should not be changed.
Help Server − It provides help information when the button is clicked. It uses appropriate language for the help service. It uses Joomla main help site by default.
Debug Settings
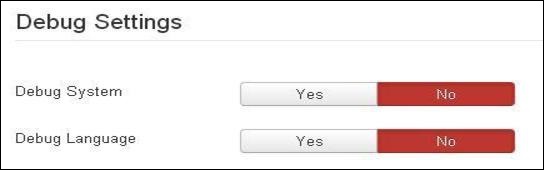
The Debug Settings contain two options −
Debug System − It is a debugging system of Joomla which provides debug information by setting it to "Yes". It provides various forms such as diagnostic information, language translations and SQL errors. The default setting is "No".
Debug Language − It provides debug language translations for Joomla site by setting it to "Yes".
Cache Settings
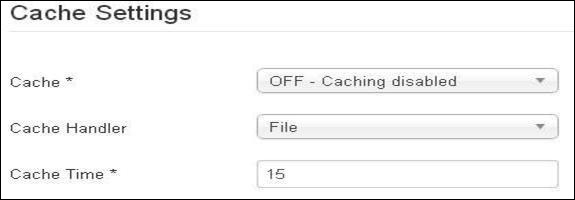
The Cache Settings contain three options −
Cache − It specifies whether the cache is enabled or not. It reduces the load used by the websites to a web server. The default is "OFF - Caching disabled".
Cache Handler − It provides file-based caching mechanism for cache handling.
Cache Time − It specifies the maximum time for a cache file before it is refreshed. The default cache time is 15 minutes.
Session Settings
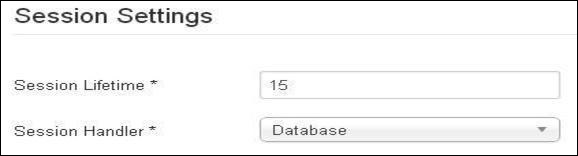
The Session Settings contain two options −
Session Lifetime − It defines the session time for users who remain signed in. The default session is 15 minutes.
Session Handler − It provides session handler which informs how the session should be handled after a user logs into the site. The default setting is "Database".
Toolbar
Following are the details about the toolbar function tabs −
Save − Saves your setting.
Save & Close − Saves the settings and closes the current screen.
Cancel − Cancels the setting in Joomla.
Joomla - Media Settings
In this chapter, we will study about Joomla Media Settings. Joomla Media Settings help to configure the global media files options such like file format, MIME specifications, upload of files, size of files etc.
Joomla Media Settings
Following are the simple steps used to set the Joomla media options −
Step 1 − Go to System → Global Configuration as shown in the following screen.
Click on Media Manager in Joomla Global Configuration. You will get to see the following screen and fill the fields with appropriate values.
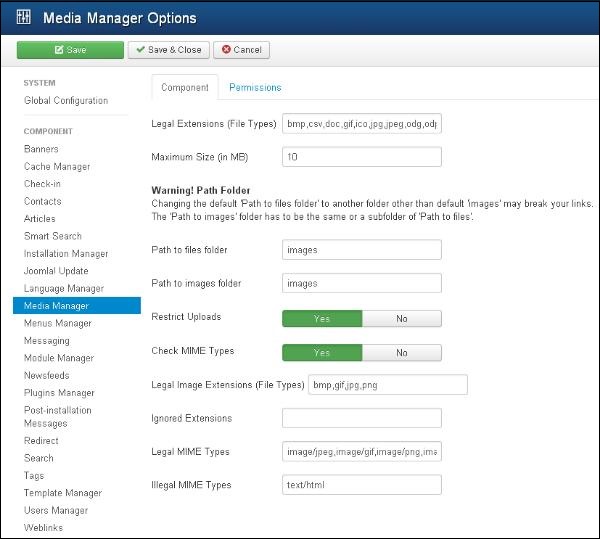
Below we have mentioned the details of the fields present in the Joomla Media Settings page −
Legal Extensions (File Types) − Provide an extension for the user file uploads which are separated by the comma (,). For example − jpg, png, json....
Maximum Size (in MB) − Maximum size of the file in MB i.e. allowed for an uploading.
Path to files folder − Provide the path for the file folder i.e. related to the root of the Joomla installation directory.
Path to images folder − Provide the Path for the image folder i.e. related to the root of the Joomla installation directory.
Restrict Uploads − It restricts a user to upload the image files, if there is no Manager Permission if File info or MIME Magic isn't installed on the server.
Check MIME Types − MIME Magic or File info is used to verify the MIME types.
Legal Image Extensions (File Types) − Check for valid image headers of image files.
Ignored Extensions (File types) − Ignores the file types which are specified in this field with comma separated.
Legal MIME Types − Specifies the legal MIME types separated by comma.
Illegal MIME Types − Specifies the illegal MIME types separated by comma.
Step 2 − Click on Permission and select the required options from the drop-down menu.
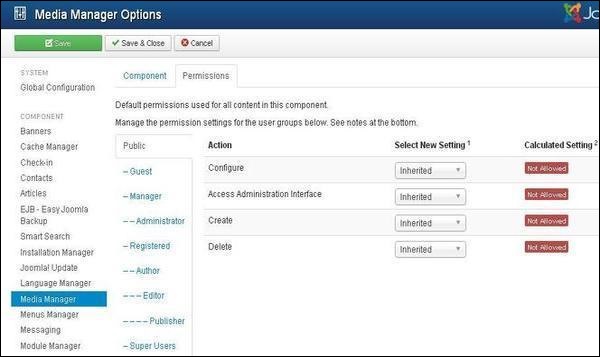
The following steps describe how to change the permissions for the Media Manager component −
Step (2.1) − You can select the Title that is listed in the Group, located on the right.
Step (2.2) − The possible desired Actions are −
Configure − Users can configure this component.
Access Administration Interface − Users are able to access the administration interface.
Create − Users can create the content in this component.
Delete − Users can delete any content that is defined in this component.
Step (2.3) − Select the Permission for an Action that you want to change −
Inherited − The Global Configuration, Component Configuration, Article Manager Options, or Category permissions are used to inherit for users in this Group.
Allowed − This shows the allowed Users for this Group.
Denied − This shows the denied Users for this Group.
Toolbar
Following are the toolbar options in the media.
Save − Saves your media setting.
Save & Close − Saves the media setting and closes the current screen.
Cancel − Cancels the media setting in Joomla.
Joomla - Language Manager
In this chapter, we will study about Joomla Language Manager. The Joomla language manager option is used to set the Native Title, Language Code, SEF Prefix, and Image Prefixes of the installed or to be installed languages.
Joomla Language Manager
Following are the simple steps used to set the Joomla language manager.
Step 1 − Go to System → Global Configuration as shown in the following screen.
Next, click on the Language Manager in Joomla Global Configuration and you will get the screen as shown below.
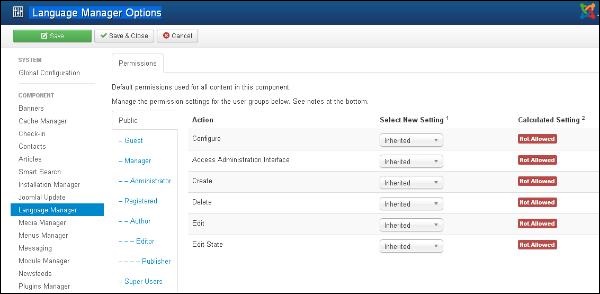
Below we have mentioned the details of the fields present in the Joomla Language Manager page.
Configure − Configure the installed language.
Access Administration Interface − Users are able to access the administration interface.
Create − It creates new languages in the component.
Delete − It deletes the created new languages in the component.
Edit − It edits an existing language.
Edit State − Changes the language state such as Publish, Unpublished, Archive and Trash in the component.
Toolbar
Following are the toolbar options in the Language Manager.
Save − Saves your language setting.
Save & Close − Saves the language setting and closes the current screen.
Cancel − Cancels the language setting in Joomla.
Joomla - Private Messages
The messaging system allows to send messages to the back- end users of Joomla. You can send, read, write and delete messages.
Step 1 − You can create a new private message as shown in the screen below. Go to Components → Messaging → New Private Message to write a new private message.
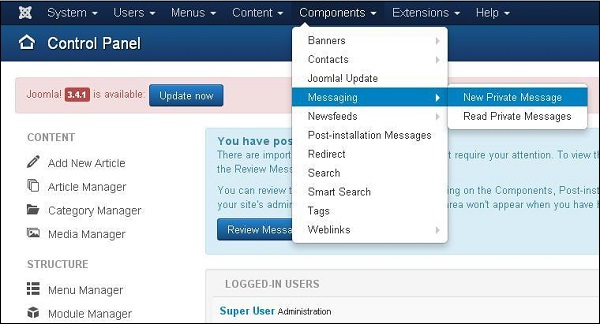
Step 2 − When you open the New Private Message, you will get the following screen.
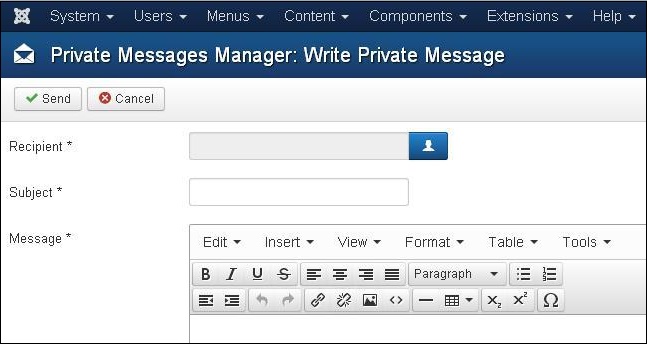
You can select a "Recipient" by clicking on the select user button. Enter a subject in the "Subject" field. Enter your message in the "Message" area. Message area provides an editor kind of interface with options such as bold, italic, heading format, insertion of image, link, table, indentation of text, text alignment, special characters etc.
Step 3 − If you want to read the private messages, then go to Components → Messaging → Read Private Messages as shown in the following screen.
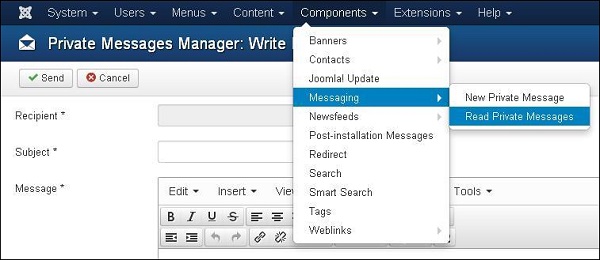
When you open the above link, you will get the following screen.
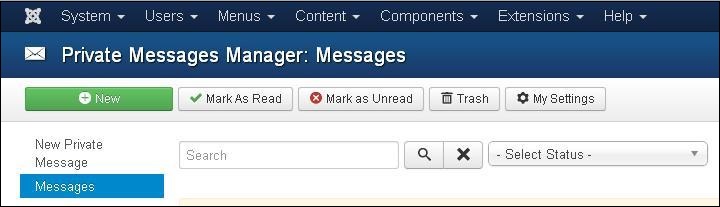
You can filter list of the messages by typing part of the subject in the "Search" box. You can select the status of the message as "Read", "Unread" and "Trash" by using the Select Status dropdown.
Step 4 − At the top left, you will see a toolbar that provides following functions −
New − It is used to create a new message.
Mark as Read − It selects the status of message as Read.
Mark as Unread − It selects the status of the message as Unread.
Trash − It is used to delete the message.
My Settings − It provides the pop-up window to change message settings.
Joomla - Mass Emailing
Mass Mail is used for sending emails to the group of registered users. Users can be selected based on groups.
Step 1 − To use this feature, go to Users → Mass Mail Users as shown in the screen below.
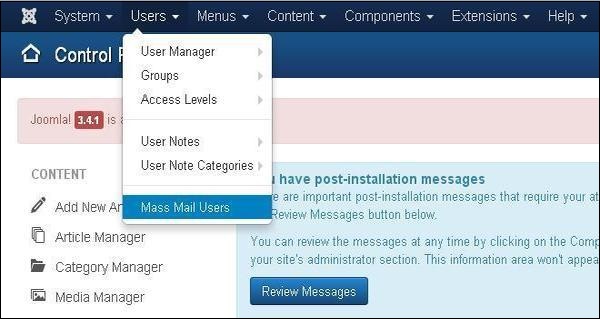
Step 2 − The following screen shows Mass Mail window.
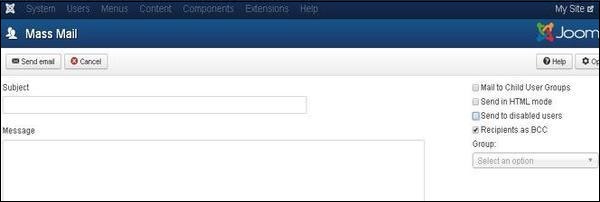
The Mass Mail window provides following options −
Subject − It is used for the Email subject.
Message − It adds the content of the Email.
Mail to Child User Groups − It is used to send Email to all child groups of the parent group.
Send in HTML Mode − It uses HTML code in the mail.
Send to disable users − Disable users will be included when sending mail, if it is checked.
Recipients as Bcc − It hides the recipient list and adds copy to site mail.
Group − It chooses a group to send the mail to.
At the top left, there's a toolbar with following options −
Send Mail − It is used to send an email once finished editing.
Cancel − It cancels the unsaved edits.
Joomla - Cache Management
In this chapter, we will study about Joomla Cache Manager. You can install the cache controller plug-in which helps to improve the performance of Joomla. You can also turn off the cache on the particular pages and component.
Joomla Cache Management
Following are the simple steps used to set up the Joomla cache manager −
Step 1 − Click on Cache Management in Joomla Global Configuration. You will get the screen as shown below.
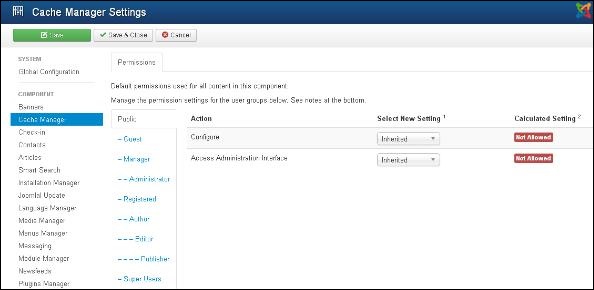
Following are the details of the fields present in the Joomla Cache Management page −
Configure − It is used to select the system for which your site should be used for caching. It also caches your PHP opcode.
Access Administration Interface − It allows users to access the administration interface.
Toolbar
Following are the toolbar options in Cache Management.
Save − Saves your Cache Manager Setting.
Save & Close − Saves the Cache Manager Setting and closes the current screen.
Cancel − Cancels the Cache Manager Setting in Joomla.
Joomla - Users Setting
In this chapter, we will study about Joomla Users Setting. It gives options on how to configure the new users and provides various options that help restrict new users from providing unwanted details.
Joomla Users Setting
Following are the simple steps used for to set the Joomla users setting.
Step 1 − Go to System → Global Configuration as shown in the following screen.
Next, click on Users Manager in Joomla Global Configuration. You will get the screen as shown below and select the fields with appropriate values.
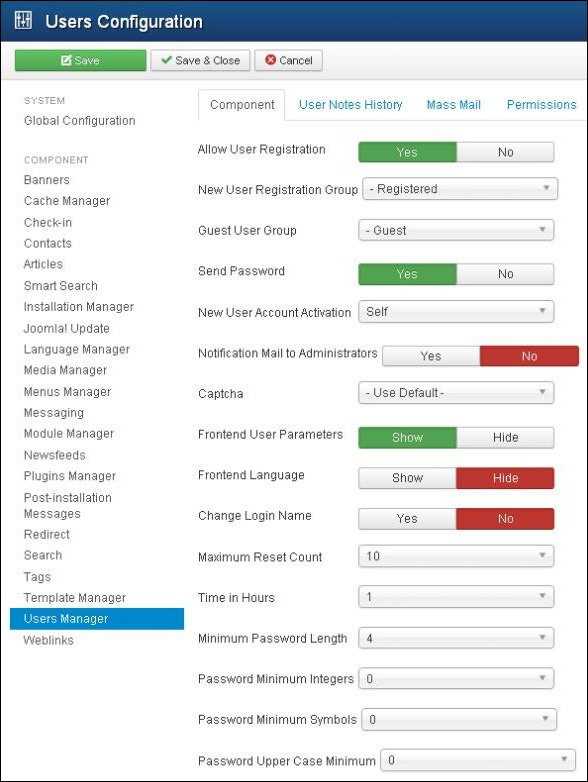
We can view the different tabs present in the screen shown above. By default, the Component tab is displayed.
Below we have mentioned the details of the fields present in the Component tab.
Allow User Registration − It allows the new user registration and set it to Yes.
New User Registration Group − The default group which allows the user to register via front-end.
Guest User Group − Setting up the Guest user.
Send Password − If it is set to Yes, password will be mailed to the registered user as a part of registration mail.
New User Account Activation − If it is set to None the new user will be registered immediately. If it set to Self, The new user gets the activation mail which helps to activate the account themselves.
Notification Mail to Administrators − If it is set No, It sends the new user activation mail to the admin.
Captcha − Provides the captcha options to activate the new user.
Front-end User Parameters − It is set to show, the user will be able to modify their language, editor and help websites.
Front-end Language − It is set to show, the language option will appear during the new user registration.
Change Login Name − If it is set to Yes, it allows the new user to edit the login name.
Maximum Reset Count − It defines the maximum reset of password for the user and 0 indicates no limits.
Time in Hours − Time for the reset counter in hour.
Minimum Password Length − Specifies the length of the password.
Password Minimum Integers − It specifies the minimum number of integers that must be included in the password entry.
Password Minimum Symbols − It specifies the minimum number of symbols that must be included in the password entry.
Password Upper Case Minimum − It specifies the minimum number of upper case characters that must be included in the password entry.
Step 2 − The User Notes History tab is used to save history of the user notes.
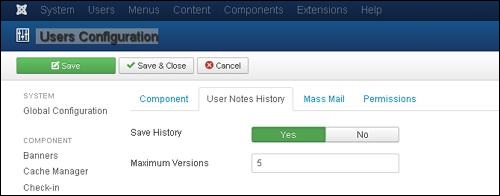
Save History − It saves the version history of the component when selected as Yes. Otherwise no version history is saved.
Maximum Versions − It always saves the maximum number of versions for an item.
Step 3 − The Mass Mail tab is used to save setting for the mass mail.
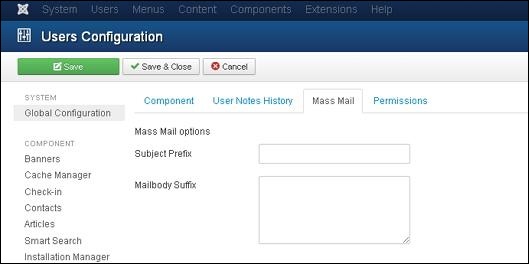
Subject Prefix − Automatically text is inserted before the subject of mass mail.
Mailbody Suffix − Automatically text is inserted after the body of the email.
Step 4 − In Permissions tab,we can view the six actions as can be seen in the screen below. This tab is used to manage the permission settings for the user groups following screen.
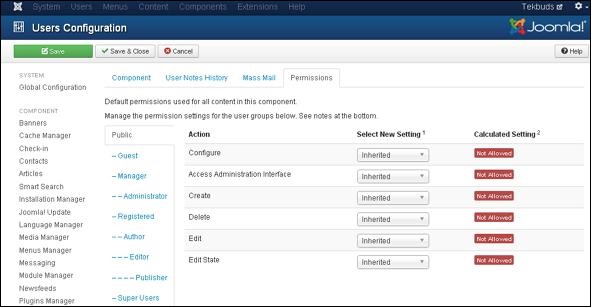
Configure − It allows users to edit the user option.
Access Administration Interface − It allows users to access the administration interface.
Create − It allows users in group to create the content present in the extension.
Delete − It allows users in group to delete the content present in the extension.
Edit − It allows users in group to edit the content present in the extension.
Edit State − It allows users in group to change the state of content present in the extension.
Toolbar
Following are the toolbar options in the Users Setting.
Save − Saves your user settings.
Save & Close − Saves the user settings and closes the current screen.
Cancel − Cancels the user settings in Joomla.
Joomla - Debug
In this chapter, we will study about Debug in Joomla. By enabling the debug mode it helps to troubleshoot the various issues of Joomla. It shows details of how Joomla is rendering Session Data, Profile Information, Memory Usage and Database Queries.
Joomla Debug
Following are the simple steps used to set the Joomla debug.
Step 1 − Go to System → Global Configuration as shown in the following screen.
Next, click on the System tab in Joomla Global Configuration as shown below.
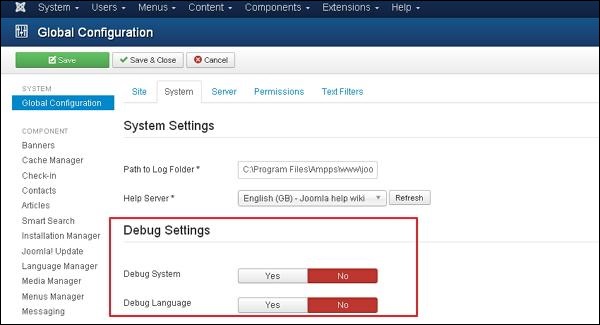
Below we have mentioned the details of the fields present in the Joomla Debug Setting section.
Debug System − It is a debugging system of Joomla which provides debug information by setting it to "Yes". It provides various forms such as diagnostic information, language translations and SQL errors. The default setting is "No".
Debug Language − It provides debug language translations for Joomla site by setting it to "Yes".
Toolbar
Following are the toolbar options in the debug.
Save − Saves your configuration setting.
Save & Close − Saves the configuration setting and closes the current screen.
Cancel − Cancels the configuration setting in Joomla.
Joomla - Template Manager
In this chapter, we will study about Template Manager in Joomla. It manages the various templates that are used in the website. The templates can be used without changing the content structure of the website.
Template Manager
Following are the simple steps to edit the Template Manager in Joomla.
Step 1 − Click Extensions → Template Manager as shown below.
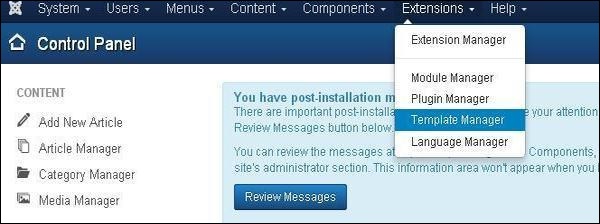
Step 2 − Template Manager:Styles page get displayed as shown below. Here, you can click directly on any of the templates listed in Template column.
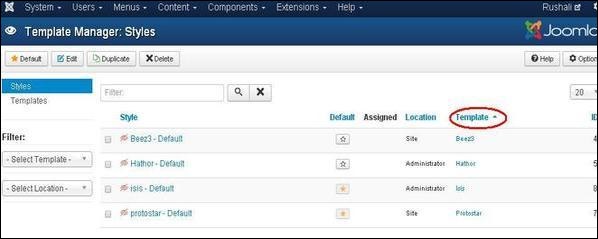
Step 3 − After clicking on any one of the above templates you will get the screen as shown below. In the Editor tab, template files are listed on the left side of the page as seen in the screenshot below −
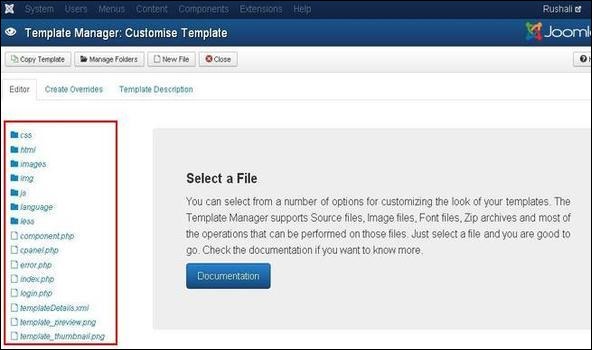
Step 4 − Select any of the files by clicking on it for editing.
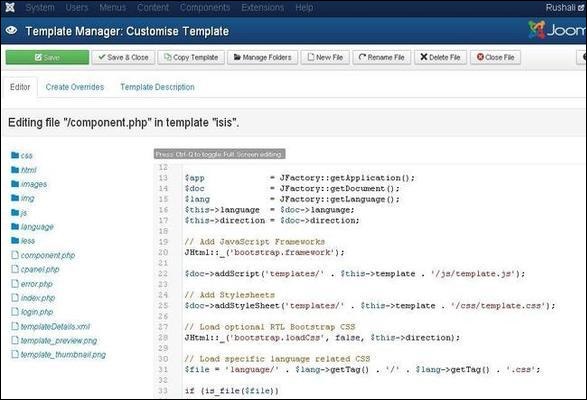
Step 5 − Click on Create Overrides tab, you will see the list of Modules, Components, and Layouts present in the template manager as shown below. Here you can easily override the new templates.
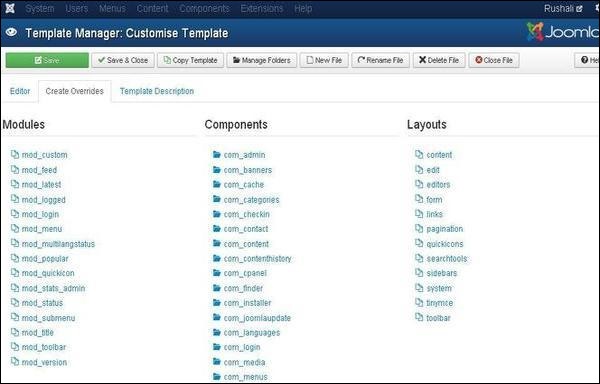
Step 6 − Click on any one component and you will see many sub components present inside it as shown below.
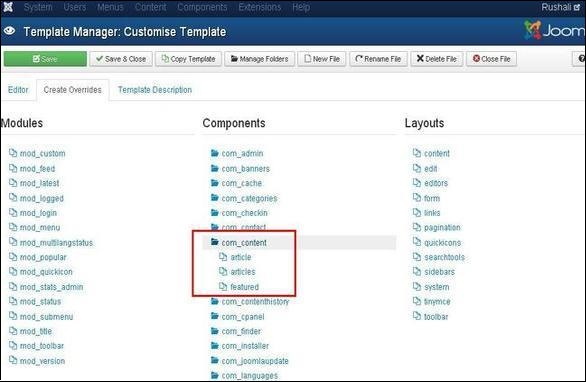
Step 7 − When you click on any one sub component then you will get the following message.

Step 8 − You can go back to Editor tab to check if override file is available for editing or not as shown below.
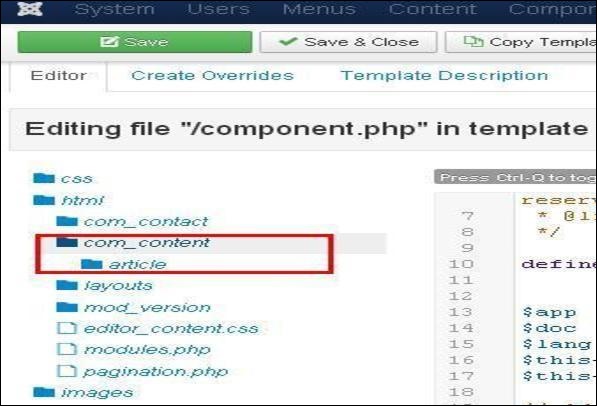
Step 9 − Click on Template Description tab, you will see the detailed description of the selected template as shown below.
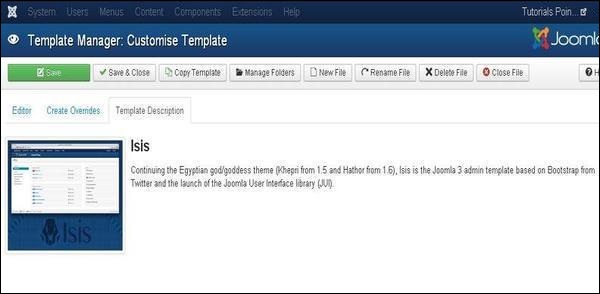
Toolbar
Following are the toolbar options in the Template Manager.
Save − Saves your template manager.
Save & Close − Saves the templates and closes the current screen.
Copy Template − Enter the template name and click on Copy Template button. This will copy the template.
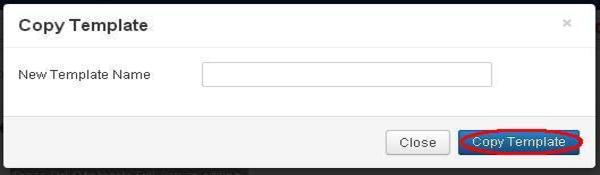
Manage Folders − It creates a new folder inside the template. Enter the folder name in the field and click on Create button.
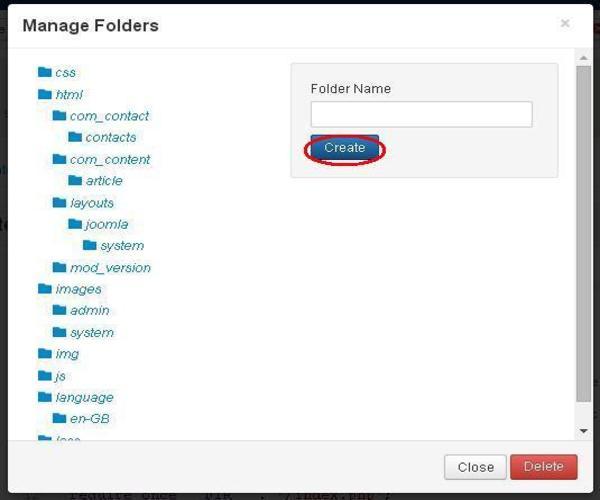
New File − You can select the file type by clicking on the dropdown of File Type and enter the name of the file and click on Create button. This will create a new file. The second block is used to upload a file directly from your system and the last block is used to copy the file.

Rename File − Enter the new name for the file and click on Rename button.
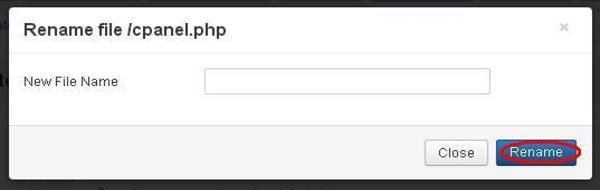
Delete File − Deletes the particular file.
Close File − Closes the current file.
Joomla - Customize Template
In this chapter, we will study about Template Customize Manager in Joomla. The Customize template allows editing or creating new files in the template.
Customize Template
Following are the simple steps to customize the template in Joomla.
Step 1 − Click Extensions → Template Manager as shown below.

Step 2 − After clicking on Template Manager, the Template Manager: Styles page will get displayed.
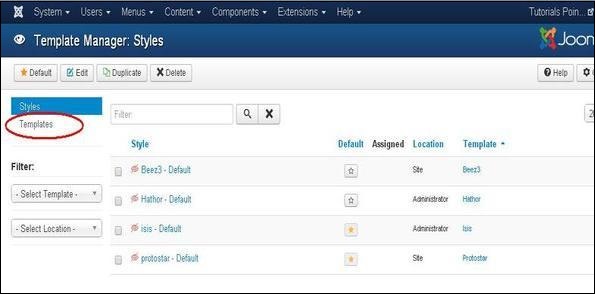
Step 3 − Next, click on Templates as shown above, you will get the following screen. Here select any one of the Templates.

Step 4 − After selecting a template you will get the screen as shown below. In the Editor tab, template files are listed on the left side of the page as seen below.
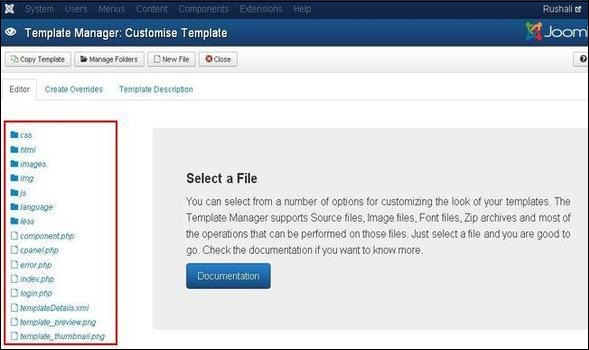
Step 5 − Select any of the files by clicking on it for editing.
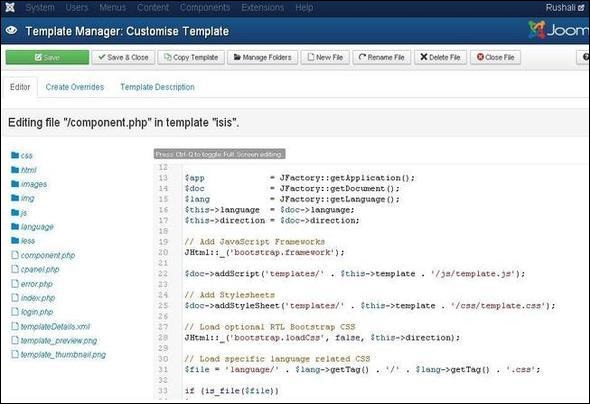
Step 6 − Click on Create Overrides tab, you will see the list of Modules, Components, and Layouts present in the template manager as shown below. Here you can easily override the new templates.
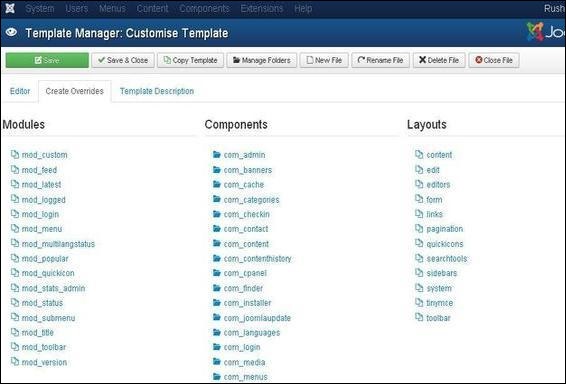
Step 7 − Click on any one component and you will see many sub-components present inside it as shown below.
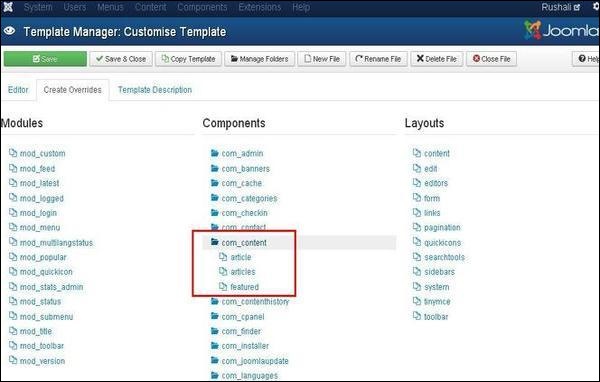
Step 8 − When you click on any one sub-component then you will get the following message.
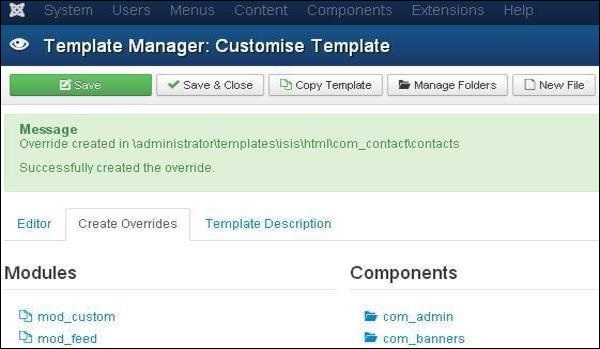
Step 9 − You can see the overrides file is available for editing or not by going back to the Editor tab as shown below.
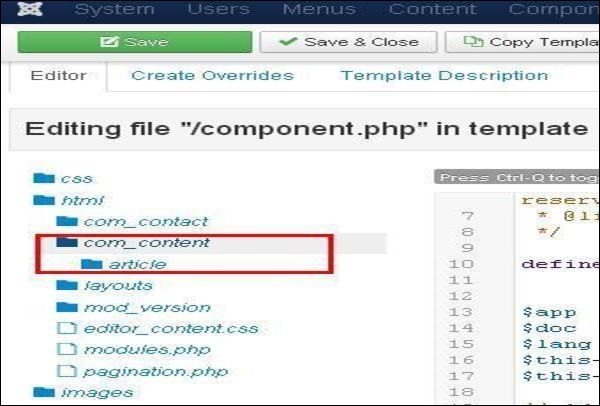
Step 10 − After clicking on Template Description tab, you will see the detail description of the selected template as shown below.
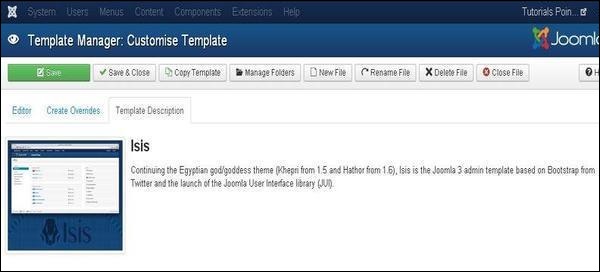
Toolbar
Below we have mentioned details about the fields on toolbar in the Template Manager.
Save − Saves your template manager.
Save & Close − Saves the templates and closes the current screen.
Copy Template − Enter the template name and click on Copy Template button which will help you to copy the template.
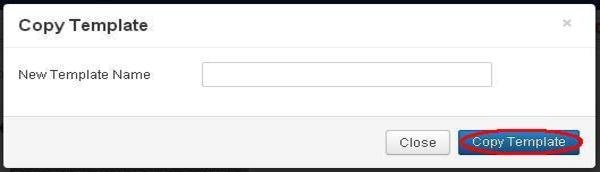
Manage Folders − It creates a new folder inside the template. Write the folder name in the field and click on Create button.

New File − You can select the file type by clicking on the dropdown of File Type and write the name of the file and click on Create button which will create a new file. The second block is used to upload a file directly from your system and the last block is used to copy the file.
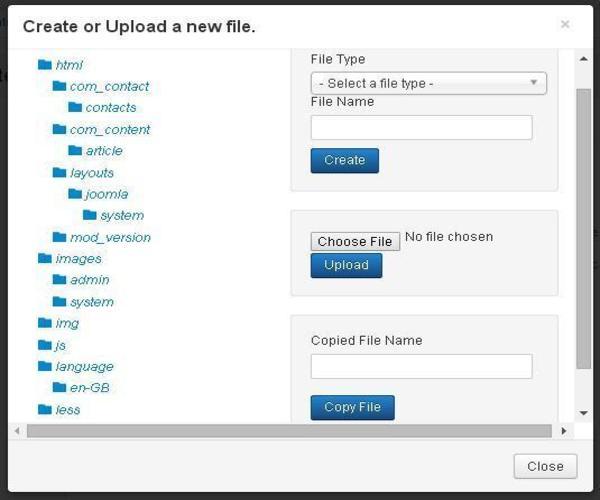
Rename File − Enter the new name for the file and click on Rename button.

Delete File − Deletes the particular file.
Close File − Closes the current file.
Joomla - Adding Template
In this chapter, we will study how to add / install Template in Joomla.
Adding Template
Following are the simple steps to add / install template in Joomla.
Step 1 − Click on Extensions → Extension Manager as shown below.
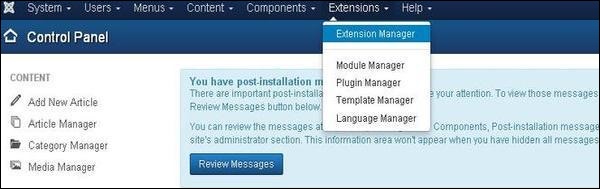
Step 2 − After clicking on Extension Manager, you will get the following screen. Here you can Upload / Install the template file either from the Web, package, Directory or URL. Choose the template file which is available on your system and later click on the Upload &Install button.
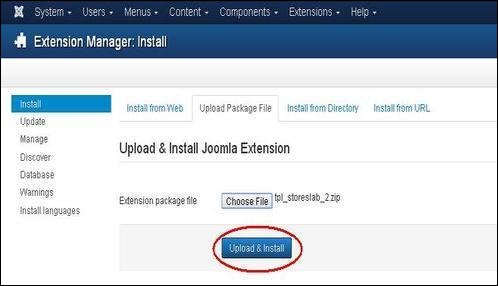
Step 3 − After installing the template successfully, you can go to the template manager and see the new installed template present in the list as shown below.

Toolbar
Following are the options on the toolbar of the Adding Template screen −
Default − Select the default template.
Edit − Select the template for editing.
Duplicate − Duplicate the copy of the selected template.
Delete − Delete the template from Joomla site.
Joomla - Creating Template
In this chapter, we will study how to create a template in Joomla.
Creating Templates
Following are the simple steps to create templates in Joomla −
Step 1 − Create a folder called MyFirstTemplate inside your Joomla → Templates folder. Inside MyFirstTemplate folder, create 2 more folders named as images and CSS to save all the images and CSS files.
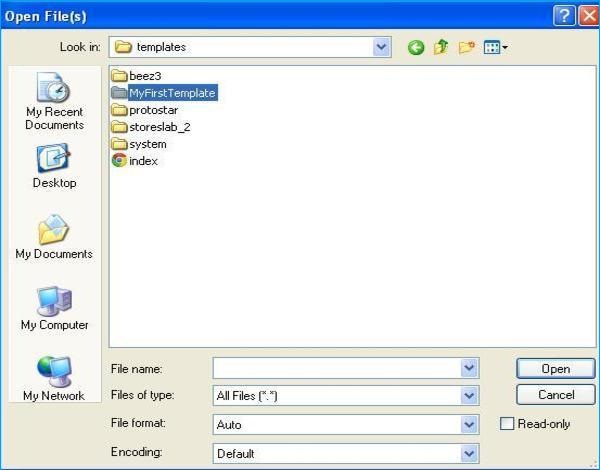
Step 2 − Inside MyFirstTemplate folder, create a file called as templateDetails.xml, without this file the template will not get displayed in Joomla.
templateDetails.xml
<?xml version = "1.0" encoding = "utf-8"?>

<extension version = "3.0" type = "template">
   <name>Tutorials Point</name>
   <creationDate>2015-06-13</creationDate>
   <author>Tutorials Point</author>
   <authorEmail>tutorials@example.com</authorEmail>
   <authorUrl>http://www.example.com </authorUrl>
   <copyright>Jack 2015</copyright>
   <license>GNU/GPL</license>
   <version>1.0.2</version>
   <description>My First Template</description>

   <files>
      <filename>index.php</filename>
      <filename>templateDetails.xml</filename>
      <folder>images</folder>
      <folder>css</folder>
   </files>

   <positions>
      <position>breadcrumb</position>
      <position>left</position>
      <position>right</position>
      <position>top</position>
      <position>user1</position>
      <position>user2</position>
      <position>user3</position>
     <position>user4</position>
     <position>footer</position>
   </positions>

</extension>
Details of the code
<files> − It contains the available files and folders in MyFirstTemplate folder.
<folder> − It takes the entire available folders in MyFirstTemplate folder.
Step 3 − Create a file called as index.php. This helps in executing all the Joomla pages.
index.php
<?php defined( '_JEXEC' ) or die( 'Restricted access' );?>
<!DOCTYPE html>

<html xmlns = "http://www.w3.org/1999/xhtml" xml:lang = "<?php echo $this->language; ?>" lang = "<?php echo $this->language; ?>" >

   <head>                                         //head section
      <jdoc:include type = "head" />
      <link rel = "stylesheet" href = "<?php echo $this->baseurl ?>/templates/system/css/system.css" type = "text/css" />
      <link rel = "stylesheet" href = "<?php echo $this->baseurl ?>/templates/system/css/general.css" type = "text/css" />
      <link rel = "stylesheet" href = "<?php echo $this->baseurl ?>/templates/<?php echo $this->template; ?>/css/template.css" type="text/css" />
   </head>

   <body>                                          //body section
      <jdoc:include type = "modules" name = "top" />
      <jdoc:include type = "component" />
      <jdoc:include type = "modules" name = "bottom" />
   </body>

</html>

?>
Details of the code
<?php defined( '_JEXEC' ) or die( 'Restricted access' );?>
<!DOCTYPE html>
<html xmlns = "http://www.w3.org/1999/xhtml" xml:lang = "<?php echo $this->language; ?>" lang = "<?php echo $this->language; ?>" >
This code is used to tell the browser which type of html page is being used and begins the HTML document by describing the language used in the website.
<head>                                         //head section
   <jdoc:include type = "head" />
   <link rel = "stylesheet" href = "<?php echo $this->baseurl ?>/templates/system/css/system.css" type = "text/css" />
   <link rel = "stylesheet" href = "<?php echo $this->baseurl ?>/templates/system/css/general.css" type = "text/css" />
   <link rel = "stylesheet" href = "<?php echo $this->baseurl ?>/templates/<?php echo $this->template; ?>/css/template.css" type = "text/css" />
</head>
These lines are used to link the various stylesheets for the template in Joomla.
<body>                                          //body section
   <jdoc:include type = "modules" name = "top" />
   <jdoc:include type = "component" />
   <jdoc:include type = "modules" name = "bottom" />
</body>
Here in the body section, the jdoc is used to include the output in Joomla from some parts of Joomla system. The name = "top" is used to set the menu at the top.
Step 4 − After creating these two files, login to Joomla and click on Extension → Extension Manager and the following page will get displayed.
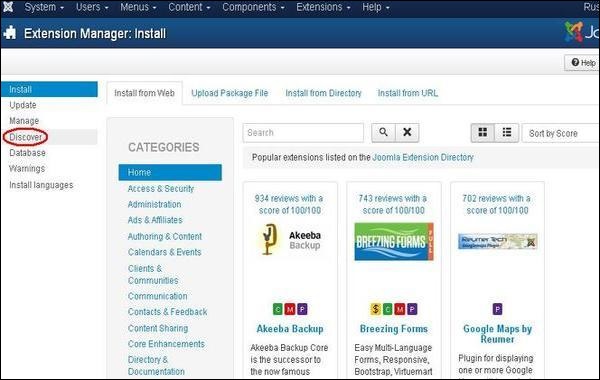
Step 5 − In the above page, click on Discover link, the following page is displayed.
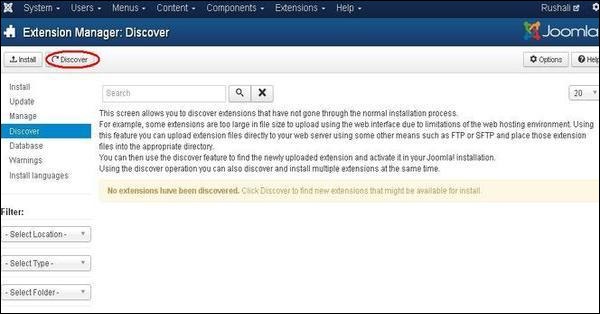
Step 6 − Next, click on the Discover button to discover the new created template as shown below.
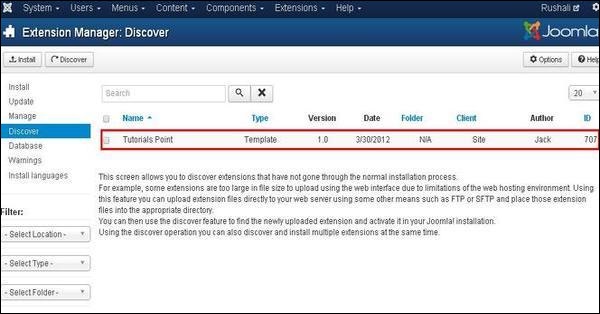
Step 7 − Click on the checkbox to select the template and click on Install button to install the template in Joomla.
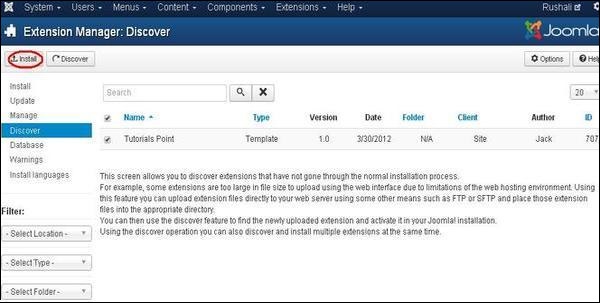
Step 8 − After installing template you can view your new created template by clicking on Extension → Template Manager. You will see your new created template is listed as shown below.
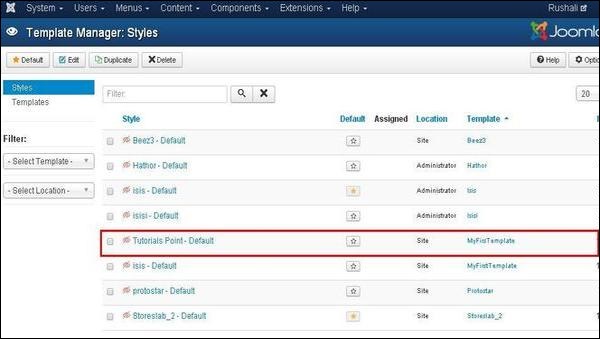
Toolbar
Following are the toolbar options in the Template Manager −
Default − Select the default template.
Edit − Select the template for editing.
Duplicate − Duplicate the copy of the selected template.
Delete − Delete the template for Joomla.
Joomla - Customize Logo
In this chapter, we will study about how to Customize Logo in Joomla. You can add the logo for your web sites and customize it as per your need.
Joomla Customize Logo
Following are the simple steps used to set the customize logo in Joomla −
Step 1 − Click on Extensions → Template Manager.

Step 2 − After clicking on the Template Manager, following screen will get displayed.
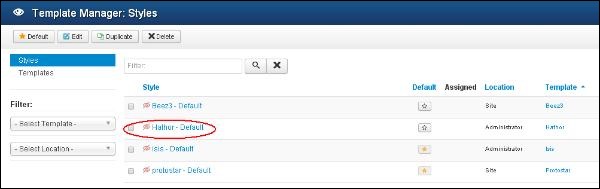
Step 3 − Click on the Hathor Default option, a screen as below will be displayed. You can customize the logo for your web site here.
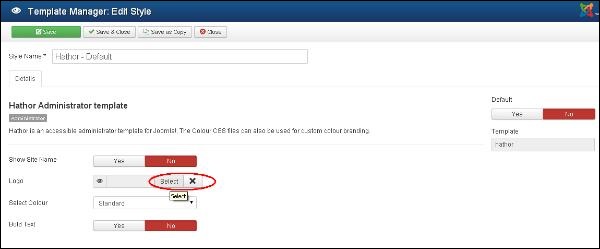
Following are the fields present in the Joomla Customize Logo page −
Show Site Name − Shows the name of the site in the template header.
Logo − Uploading the logo for the site. Click on the Select button to choose an image. You will get the following pop-up window when you click on the select button. Select the image from the following folder and click on Insert.
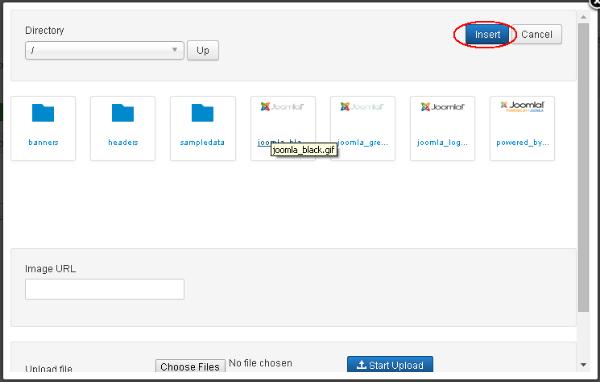
Select Color − Select color for your logo.
Bold Text − Use the bold text.
Toolbar
Following are the toolbar options present −
Save − Saves your customized logo.
Save & Close − Saves the customized logo and closes the current screen.
Save & New − Saves the logo opens a new create customize logo screen.
Cancel − Cancels the customized logo in Joomla.
Joomla - Category Management
In this chapter, we will study about Category Management in Joomla. Category Manager is used to create categories for the article which allow grouping your content better.
Category Management
Following are the simple steps to add new category manager in Joomla.
Step 1 − Click on Category Manager in Control Panel as shown below.
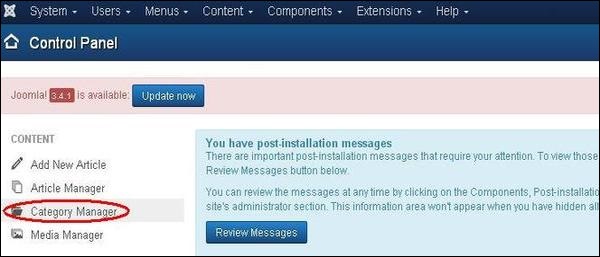
Step 2 − After clicking on a Category Manager, you will get the following screen.
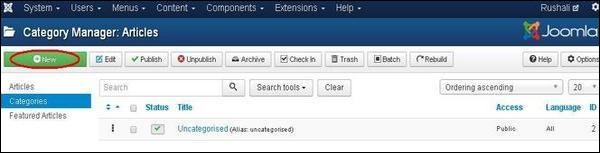
Step 3 − Click on New button in the above screen. Following is the basic editor page we get for category manager. This editor is explained in detail in the article Joomla - Adding Content. Different tabs are present on this page. By default, the Category tab is displayed.
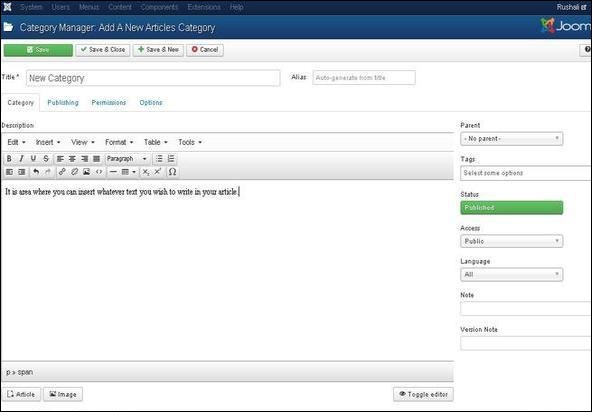
Step 4 − In Publishing tab, it gives the information of Joomla category.
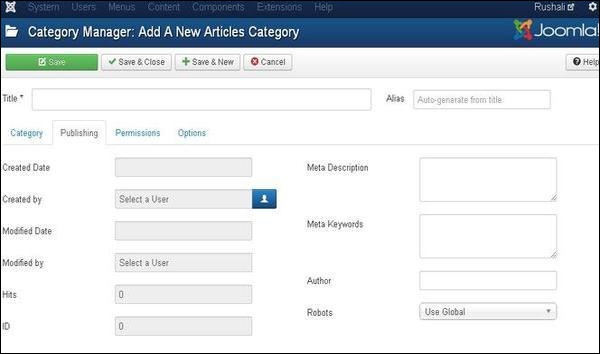
Following are the details of the fields present in the Publishing tab.
Created Date − It is the date the category was created.
Created by − It is the name of the user who has created the category.
Modified Date − It is the date the category was modified.
Modified by − It is the name of the user who has modified the category.
Hits − Specifies the number of times the item was viewed.
ID − It is the unique identification number assigned to the items automatically.
Meta Description − It is used to write an explanation of the contents of web pages.
Meta Keywords − Define keywords for search engines.
Author − Specifies the name of the author within the metadata.
Robots − It is the instruction given to the robots that browse the page using commands such as Use Global, Index, Follow, No index, No follow.
Step 5 − In Permission tab, you can set the permission for different user groups for that category.
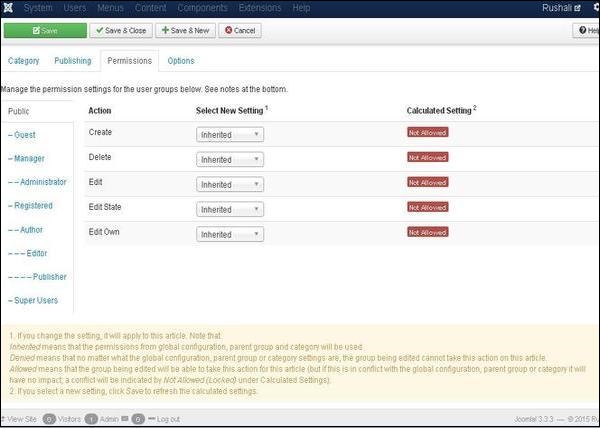
Create − It allows the users in a group to create the categories.
Delete − It allows the users in a group to delete the categories present in the extension.
Edit − It allows the users in a group to edit the categories present in the extension.
Edit State − It allows the users in a group to change the state of categories present in the extension.
Edit Own − It allows editing the categories which is created by own.
Step 6 − In the Options tab, you can choose different layouts for your website.
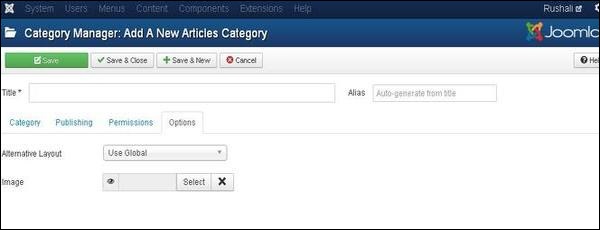
Alternative Layout − It uses an alternative layout from the supplied component view such as Use Global, Blog and List.
Image− It selects the image to be displayed.
Toolbar
Following are the toolbar options in the Category Management.
Save − Saves your category.
Save & Close − Saves the category and closes the current screen.
Save & New − Saves the categories and opens a new create category screen.
Cancel − Cancels the created category in Joomla.
Joomla - Adding Content
In this chapter, we will study how to add content on the Joomla website.
Adding Content
Following are the simple steps to add content in Joomla.
Step 1 − Click on Content → Article Manager → Add New Article as shown below.
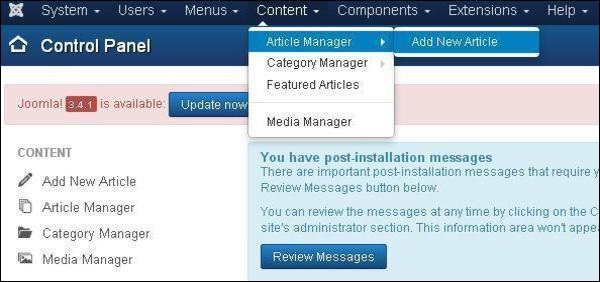
Step 2 − After clicking on Add New Article, you will get the editor page of the Article Manager as shown below.
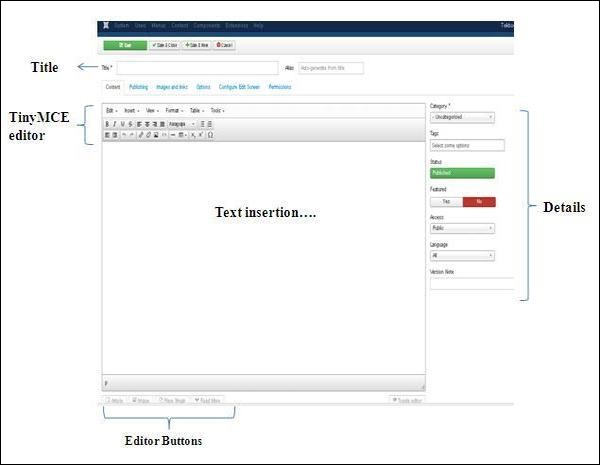
Following are the details of the fields on editor page of the Article Manager.
Title
.jpg)
Title − It is used to write the title of the article. This title gets displayed on the page.
Alias − It is auto generated from the given title name.
TinyMCE editor
It is a WYSIWYG Editor, which is similar to a word processor interface where we can edit the contents of the article.
.jpg)
First Row − They appear on the top of the Editor page and contain a group of related commands.
Edit − Undo, Redo and Cut, Copy, Paste, Select all.
Insert − Insert image, Insert link, Horizontal line, Special Character.
View − Visual Aids.
Format − Bold, italic, underline and various formats are available in this group.
Table − It is used to display the table format in the article by using row and columns.
Tools − It displays the source code of your article in html format and the code will be displayed in a new popup window.
Second Row − In this row, we can see that there are 4 buttons present −
The first button is used to make font bold, italic, underlined and strikethrough.
The second button is used to do the alignment of the content i.e. Left, center, right and full.
The third button is used to select pre-defined format for the text i.e. Paragraph, heading, text or pre.
The fourth button is used to display the list format either by using bullet or numbers.
Third Row −
The first button is used for indentation of paragraphs or text, either indent to the left side or right side.
The second button is used to undo or redo the content.
The third button is used to insert or remove the link, insert images and display the source code of your article in html format.
The fourth button is used to add a horizontal line and add tables by using a dropdown option.
The fifth button is used to superscript and subscript the text.
The sixth button is used to insert the special character in the text.
Details
Category − It is used to select the category for your article.
Tags − It is used to display the tags on the front-end page.
Status − You can select any of the following status for your article −
Published − Items get published on the website.
Unpublished − Items do not get published on the website.
Archived − Items will not get displayed in the menu list as well as on blogs.
Trashed − Items will be deleted from the site.
Featured − It is used, whether to display the article on the home page or not by using the buttons YES/NO.
Access − You can select an access level for your item from the list box.
Language − It selects the language for its item.
Version Note − It is used to note the version of the item. It is optional.
Text Insertion
It is used for writing the content of an article.
Editor Buttons
Five buttons present at the bottom of the text editor as shown below are the editor buttons.
.jpg)
Article Button − Click on Article button a window pops-up as shown below. Here, we can select the required article to view.
.jpg)
Image − Click on the Image button, a window pops-up as shown below. Here, you can add the details of the images. After filling all the fields, click on Insert Button.
.jpg)
Directory − Search the particular directory present in image folder.
Image URL − Insert image URL.
Image Description − Write brief description about particular image.
Image Title − Write the name of the image.
Image Float − Set the image location.
Caption − Write a caption for the image.
Caption Class − It calls Joomla libraries to load the image.
Page Break − Click on Page Break button, a window pop-up will get displayed as shown below.
.jpg)
Page Title − Enter the title of the page.
Table of Contents Alias − Enter the table content alias.
Read More − Click on the Read More button, The red dotted line gets displayed in the editor. The further information part of the article gets displayed after the read dotted lines or sometimes it displays the entire article.
Toggle editor − TinyMCE editor will get displayed or its get invisible.
Toolbar
Following are the toolbar options −
Save − Saves the contents and stays on the same screen.
Save & Close − Saves the content and closes the screen.
Save & New − Saves the content and opens a new content page.
Cancel − Cancels the content changes made into it and returns to the previous screen without saving.
Joomla - Formatting Content
In this chapter, we will study how to format content on the Joomla website.
Formatting Content
Following are the simple steps to format content in Joomla −
Step 1 − Click on Article Manager in Control Panel as shown below.
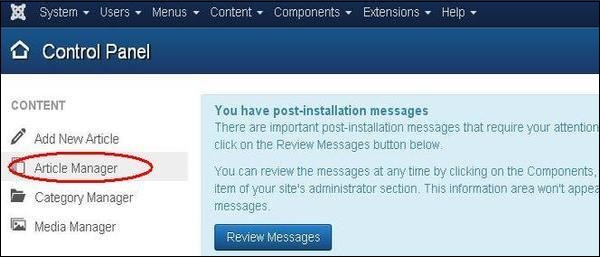
Step 2 − Select the article to be formatted by clicking on the checkbox. Next, click on the Edit button as shown below.
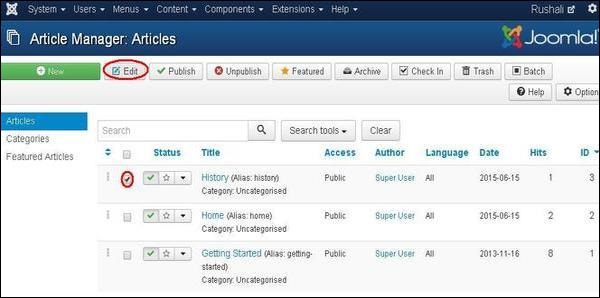
Step 3 − Next, the article opens up for editing as shown below. Here we are aligning the heading Apple in center using center alignment. Similarly, you can edit the image alignment, font size and so on. You can study about the editor in detail in the chapter Joomla - Adding Content.

Toolbar
Following are the toolbar options −
Save − Saves the contents and stays on the same screen.
Save & Close − Saves the content and closes the screen.
Save & New − Saves the content and opens a new content page.
Save as Copy − Saves the formatted content and copies it.
Versions − It is used to select versions of the page.
Close − Closes the article without formatting.
Joomla - Article Metadata
In this chapter, we will study about Article Metadata in Joomla. Metadata describes details of the article in short. It makes it easy to work with a particular data.
Joomla - Article Metadata
Following are the simple steps used to set the Joomla article metadata −
Step 1 − Go to System → Global Configuration as shown in the following screen.
Next, click on Global Configuration, you will get to see the following screen. Fill the fields with appropriate values.
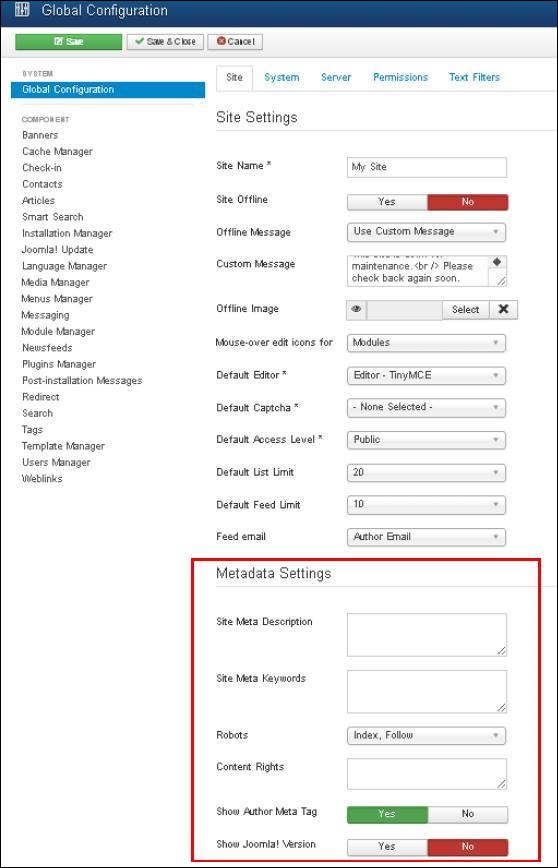
Below we have mentioned the details of the fields present in the Joomla Article Metadata section.
Site Meta Description − Overall description of the website is written here. This will be used by the search engine.
Site Meta Keywords − Keywords and phrases are written to describe your website. Both should be separated by comma.
Robots − Robot instruction.
Content Rights − Writing the rights of the content which is being used by others.
Show Author Meta Tag − The Author Meta tag is shown during viewing the articles.
Show Joomla! Version − It displays the currently used Joomla version.
Toolbar
Following are the toolbar options in the Metadata −
Save − Saves your metadata settings.
Save & Close − Saves the metadata settings and closes the current screen.
Cancel − Cancels the metadata settings in Joomla.
Joomla - Adding Banners
In this chapter, we will study about Adding Banners in Joomla. It displays the active banners and allows you to use different banners for advertising on webpage.
Adding Banners
Following are the simple steps to add Banners in Joomla.
Step 1 − Click Components → Banners → Banners in joomla administrator, you will get the following screen.
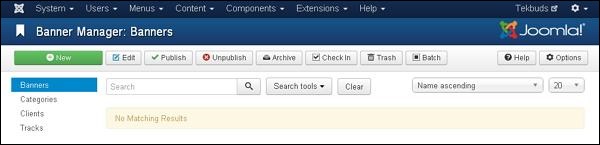
Step 2 − Next, click on New button, you will get the following screen.
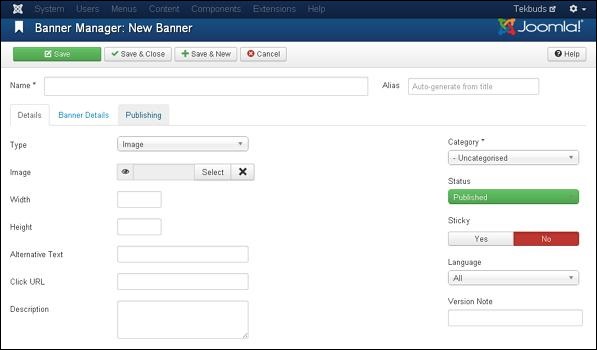
There are different tabs present in above screen. By default, Details tab is active. This tab displays the details of the banner.
Below we have mentioned the details of the fields present on the Details tab.
Name − This block is used to write the name of the item.
Alias − This is auto generated from the given name.
Type − Displays the banner type i.e. image or HTML code.
Image − Displays the image file of the banner.
Width − Set the width of the banner image.
Height − Set the height of the banner image.
Alternative Text − It represents the alternative text to display on banner image.
Click URL − When user clicks on the banner then it will navigate to the specified URL.
Description − Brief description about the banner.
Following fields are present on the right side of the Details tab.
Category − It displays the category of the banner.
Status − It displays the status of the banner such as Published, Unpublished, Archived and Trashed.
Sticky − It displays whether the banner is Sticky or not. For that we have to select either ( Yes/No ) button.
Language − It displays the specified language of the banner.
Version Note − It displays the version of the items on the banner.
Step 4 − After clicking on Banner Details tab, you will get the following screen.
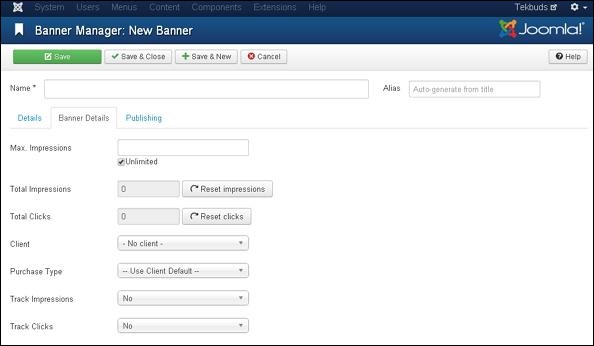
Following fields are present on Banner Details tab.
Max. Impressions − Display the maximum number of impressions purchased for the banner. Unlimited checkbox indicates unlimited number of impressions to be allowed for the banner.
Total Impressions − Shows the total number of banners displayed to a user on a web page. You can reset the Total Impressions to zero.
Total Clicks − Displays the total number of times banners were clicked. You can reset the Total Clicks to zero.
Client − Shows the client for the specified banner.
Purchase Type − It shows the banner purchase type such as Use Client Default, Unlimited, Yearly, Monthly, Weekly and Daily.
Track Impressions − It specifies the number of tracks the banner is displayed on web page.
Track Clicks − It specifies the number of track clicks on the web page.
Step 5 − Click on Publishing tab, you will get the following screen.
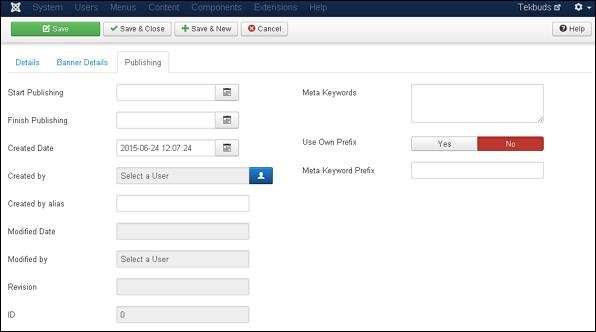
Start Publishing − It indicates the date on which the banner is to be published on the web page.
Finish Publishing − It indicates the date on which the banner is to be stopped from being published on the web page.
Created Date − It indicates the date on which the banner was created.
Created by − It indicates the name of the user who has created the banner.
Created by alias − It indicates the name of the alias who has created the things required in banner.
Modified Date − It indicates the last modified date of the banner.
Modified by − It indicates the name of the user who has last modified the banner.
Revision − It indicates the number of revisions for the banner.
ID − It indicates the number of identity needed for the banner.
Following fields are present on right side of the Publishing tab.
Meta Keywords − It specifies the different meta keywords and it should be represented either by lowercase or uppercase.
Use Own Prefix − It specifies to use your own prefixes by selecting either ( Yes/No ).
Meta Keyword Prefix − It specifies the prefixes of meta keywords and it takes those prefixes which are available in meta keywords tag.
Toolbar
Following are the toolbar options present in Adding Banners.
Save − Saves your Banner.
Save & Close − Saves the Banner and closes the current screen.
Save & New − Saves the Banner and opens a New create banner screen.
Cancel − Cancels the created banner in Joomla.
Joomla - Adding Contacts
In this chapter, we will study about Adding Contacts in Joomla. It stores the contact details of the company.
Joomla Adding Contacts
Following are the simple steps used to set the Joomla contacts.
Step 1 − Go to System → Global Configuration as shown in the following screen.
Next, click on Contacts in Joomla Global Configuration and you will get to see the following screen.
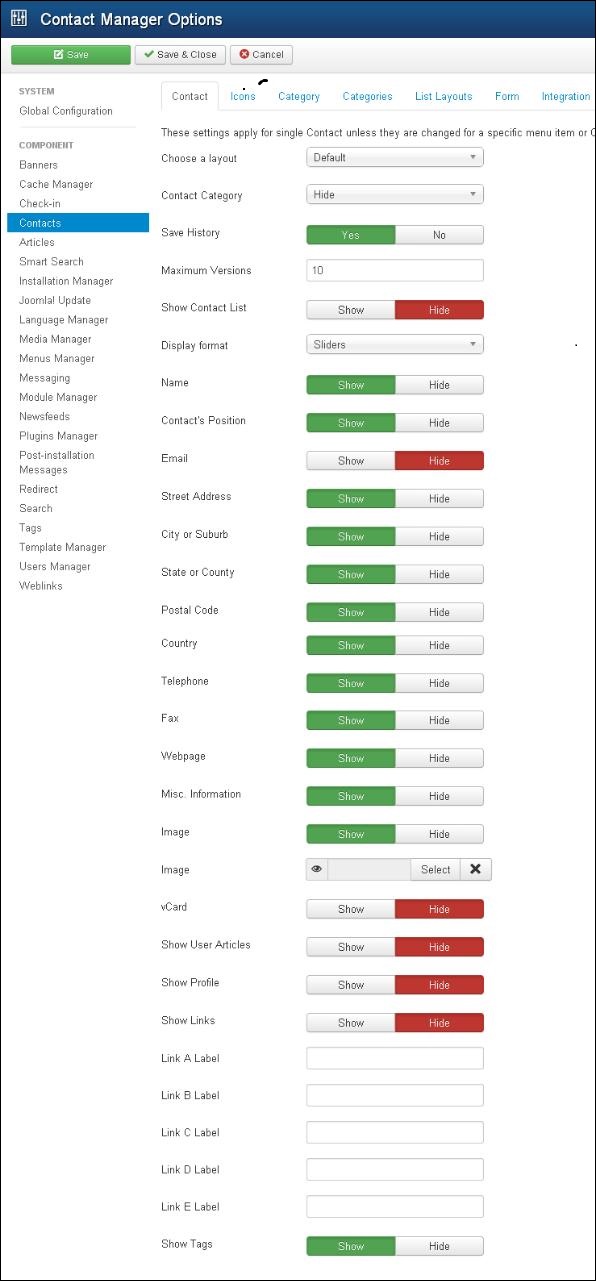
Below we have mentioned the details of the fields present on the Contact tab.
Choose a layout − It selects default layout for items.
Contact Category − In case of Hide, contact category will not display. In case of Show Without Link, it will display plain text and in case of Show With Link it will display as menu items.
Save History − It saves the version history of the component when selected as Yes. Otherwise no version history is saved.
Maximum Version − It always saves the maximum number of versions for an item.
Show Contact List − If Show is selected, the user can edit the contact information by selecting the drop-down menu list of all contact information.
Display Format − Display format for contacts.
Name − Name of contact is shown or hidden.
Contact's Position − The contact's position is shown or hidden.
Email − The email address is shown or hidden.
Street Address − The street address is shown or hidden.
City or Suburb − The city or suburb is shown or hidden.
State or County − The state or county is shown or hidden.
Postal Code − The postal code is shown or hidden.
Country − The country is shown or hidden.
Telephone − The telephone number is shown or hidden.
Mobile Phone − The mobile phone number is shown or hidden.
Fax − The fax number is shown or hidden.
Web Page − The web page is shown or hidden.
Misc. Information − The Misc information is shown or hidden.
Image − The contact image is shown or hidden.
Image − Select the contact image from your local storage and click on Insert button to insert image.
vCard − The contact details in vCard format is shown or hidden.
Show User Articles − If Show, is selected, it displays the list of articles created by the user.
Show Profile − If Show, is selected, it displays the user profile.
Show Links − Show or Hide links.
Link A Label − An addition website links this contact.
Link B Label − An addition website links this contact.
Link C Label − An addition website links this contact.
Link D Label − An addition website links this contact.
Link E Label − An addition website links this contact.
Show Tags − The single category tags is shown or hidden.
Step 2 − In Icons tab, you can apply settings for single contact.

Below we have mentioned the details of the fields present in the Icons tab.
Settings − Displays icon, text or nothing beside the information.
Address Icon − Choose the address icon from the media folder by clicking on select button. Default icon gets displayed when nothing is selected.
Email Icon − Choose the email icon from the media folder by clicking on select button. Default icon gets displayed when nothing is selected.
Telephone Icon − Choose the telephone icon from the media folder by clicking on select button. Default icon gets displayed when nothing is selected.
Mobile Icon − Choose the mobile icon from the media folder by clicking on select button. Default icon gets displayed when nothing is selected.
Fax Icon − Choose the fax icon from the media folder by clicking on select button. Default icon gets displayed when nothing is selected.
Misc Icon − Choose the misc icon from the media folder by clicking on select button. Default icon gets displayed when nothing is selected.
Step 3 − In Category tab, you can apply settings for contact category options.
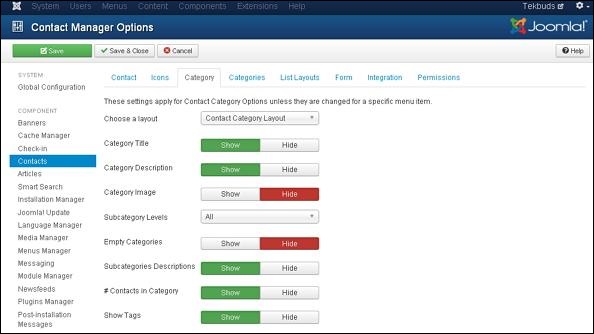
Below we have mentioned the details of the fields present in the Category tab.
Choose a Layout − Selects default layout.
Category Title − The category title is shown or hidden.
Category Description − The category description is shown or hidden.
Category Image − The category image is shown or hidden.
Subcategory Levels − Displays the levels of subcategory.
Empty Categories − The article which does not contain any categories are shown or hidden.
Subcategories Descriptions − The description of subcategories is shown or hidden.
#Contacts in Category − The contacts present in category is shown or hidden.
Show Tags − The single category tags is shown or hidden.
Step 4 − In Categories tab, you can apply settings for contact categories options.
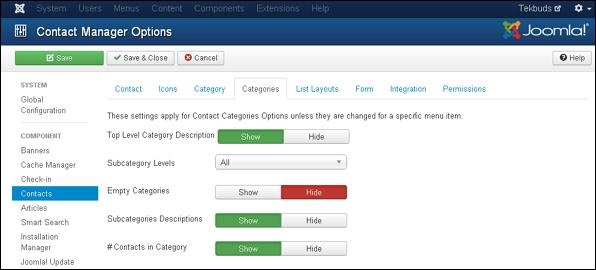
Below we have mentioned the details of the fields present in the Categories tab.
Top Level Category Description − The description of top level category is shown or hidden.
Subcategory Levels − Display the levels of subcategory.
Empty Categories − The article which does not contain any categories are shown or hidden.
Subcategories Descriptions − The description of subcategories is shown or hidden.
#Contacts in Category − The contacts present in category is shown or hidden.
Step 5 − In List Layouts tab, you can apply settings for contact list option.
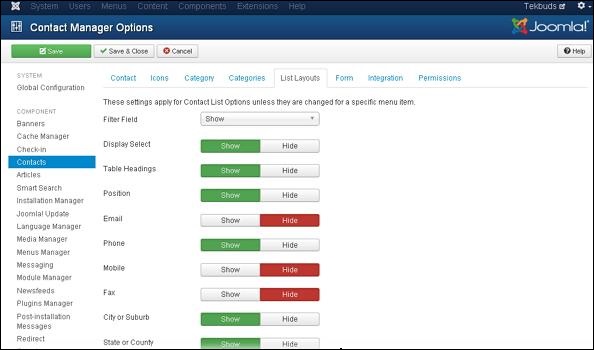
Below we have mentioned the details of the fields present in the List Layout tab.
Filter Field − The filter field for the list is shown or hidden.
Display Select − Number of items selected is shown or hidden.
Table Headings − Heading present in the table is shown or hidden.
Position − In list of contacts, the column position is shown or hidden.
Email − In list of contacts, the column of email is shown or hidden.
Phone − In list of contacts, the column of phone is shown or hidden.
Mobile − In list of contacts, the column of mobile is shown or hidden.
Fax − In list of contacts, the column of fax is shown or hidden.
City or Suburb − In list of contacts, the column of city or suburb is shown or hidden.
State or County − In list of contacts, the column of state or county is shown or hidden.
Country − In list of contacts, the column of country is shown or hidden.
Pagination − Pagination is shown or hidden. The links of pages present at the bottom of the page helps the users to navigate to additional pages.
Pagination Results − The information of pagination result is shown or hidden.
Sort by − Contacts can be sorted in the form of name, ordering or sort name.
Step 6 − In Form tab, you can apply setting for single contact.
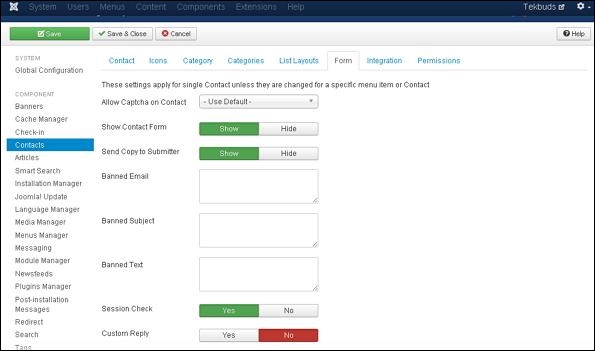
Allow Captcha on Contact − In contact form, the captcha plugin is selected.
Show Contact Form − Contact form is shown or hidden.
Send Copy to Submitter − It allows email copy to be send to submitter.
Banned Email − In contact form, email address is not allowed to submit.
Banned Subject − In contact form, no subject is allowed to submit.
Banned Text − In contact form, text is not allowed to submit in the body.
Session Check − The existing session cookies are checked.
Custom Reply − The plugins are allowed to handle the integration with other system by turning off the automated reply.
Contact Redirect − After user has sent the mail, an alternative URL is redirected.
Step 7 − In Integration tab, as seen in the figure below −
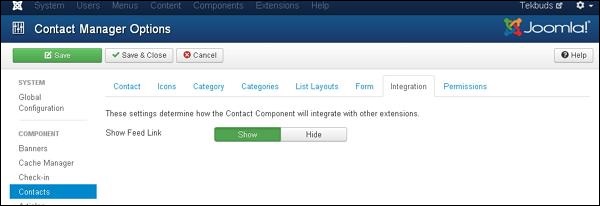
Show Feed Link − URL of feed links is shown or hidden.
Step 8 − In Permissions tab, we can view the six actions as displayed in the screen below. The Permission tab is used to manage the permission settings for the user groups following screen.
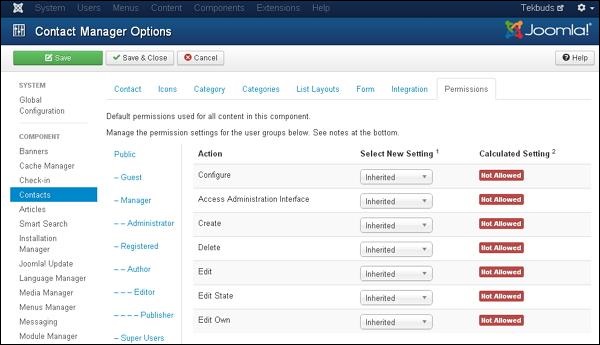
Configure − It allows users to edit the user option.
Access Administration Interface − It allows users to access the administration interface.
Create − It allows users in group to create the content present in the extension.
Delete − It allows users in group to delete the content present in the extension.
Edit − It allows users in group to edit the content present in the extension.
Edit State − It allows users in group to change the state of content present in the extension.
Edit Own − It allows users in group to edit any content they submitted in the extension.
Toolbar
Following are the toolbar options in the contacts.
Save − Saves your contact setting.
Save & Close − Saves the contact setting and closes the current screen.
Cancel − Cancels the contact setting in Joomla.
Joomla - Adding News Feed
In this chapter, we will study about Adding News Feed in Joomla.
Joomla Adding News Feed
Following are the simple steps used to add news feed.
Step 1 − Go to System → Global Configuration as shown in the following screen.
Next, click on Newsfeeds option in Joomla Global Configuration. You will get the screen below and then select appropriate values.
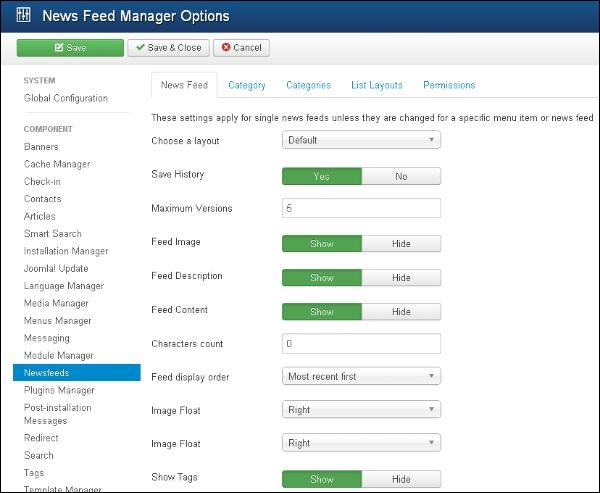
Below we have mentioned the details of the fields present in Joomla adding news feed page.
Choose a Layout − It is default layout for items.
Save History − It saves the version history of the component when selected as Yes. Otherwise no version history is saved.
Maximum Version − It always saves the maximum number of versions for an item.
Feed Image − The Feed image is shown or hidden.
Feed Description − The Feed description is shown or hidden.
Feed Content − The content of feed is shown or hidden.
Characters Count − Displays number of characters per feed.
Feed Display Order − Displays the feed in order.
Image Float − Controls the position of the images.
Show Tags − The single category tags are shown or hidden.
Step 2 − In Category tab, you can apply settings for contact category options.
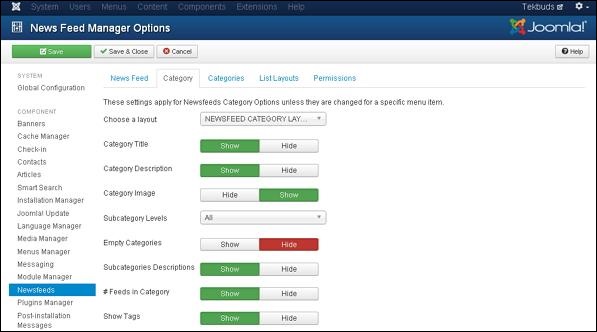
Below we have mentioned the details of the fields present in the Category tab.
Choose a Layout − Selects default layout.
Category Title − The category title is shown or hidden.
Category Description − The category description is shown or hidden.
Category Image − The category image is shown or hidden.
Subcategory Levels − Display the levels of subcategory.
Empty Categories − The article which does not contain any categories are shown or hidden.
Subcategories Descriptions − The description of subcategories is shown or hidden.
#Feeds in Category − The feeds present in category is shown or hidden.
Show Tags − The single category tags are shown or hidden.
Step 3 − In Categories tab, you can apply settings for contact categories options.
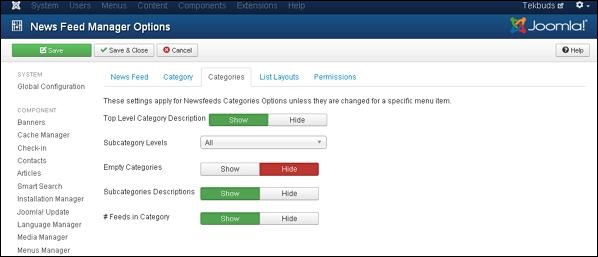
Below we have mentioned the details of the fields present in the Categories tab.
Top Level Category Description − The description of top level category is shown or hidden.
Subcategory Levels − Displays the levels of subcategory.
Empty Categories − The article which does not contain any categories are shown or hidden.
Subcategories Descriptions − The Description of subcategories are shown or hidden.
#Feeds in Category − The feeds present in category is shown or hidden.
Step 4 − In List Layouts tab, you can apply settings for contact list option.
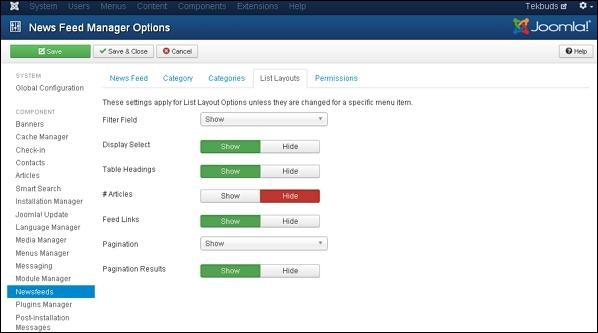
Below we have mentioned the details of the fields present in the List Layout tab.
Filter Field − The filter field for the list is shown or hidden.
Display Select − Number of items selected is shown or hidden.
Table Headings − Heading present in the table is shown or hidden.
# Articles − Articles present in feed is shown or hidden.
Feed Links − URL of feed links is shown or hidden.
Pagination − Pagination is shown or hidden. The links of pages present at the bottom of the page helps the users to navigate to additional pages.
Pagination Results − The information of pagination result is shown or hidden.
Step 5 − In Permissions tab, we can view the actions as displayed in the screen below. The Permission tab is used to manage the permission settings for the user groups.
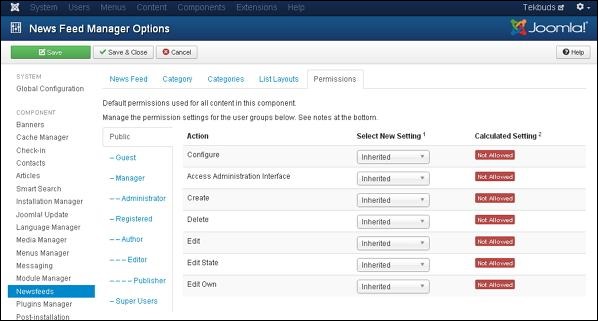
Configure − It allows users to edit the user option.
Access Administration Interface − It allows users to access the administration interface.
Create − It allows users in a group to create the content present in the extension.
Delete − It allows users in a group to delete the content present in the extension.
Edit − It allows users in a group to edit the content present in the extension.
Edit State − It allows users in a group to change the state of content present in the extension.
Edit Own − It allows users in a group to edit any content they submitted in the extension.
Toolbar
Following are the toolbar options in the Newsfeeds.
Save − Saves your news feed setting.
Save & Close − Saves the news feed setting and closes the current screen.
Cancel − Cancels the news feed setting in Joomla.
Joomla - Adding Forum
In this chapter, we will study about Adding Forum in Joomla. We can install the forum extension in Joomla to share or discuss ideas and views on particular issues.
Joomla Adding Forum
Following are the simple steps used to set the Joomla Adding Forum.
Step 1 − Click on Install Extensions option in Joomla.
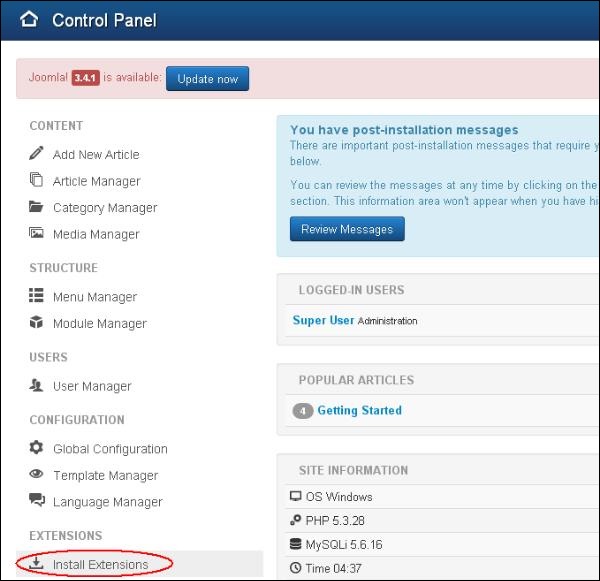
Step 2 − Click on Choose File button and choose the extensions forum you have downloaded to include in your web site. After choosing the file, click on Upload & Install button.
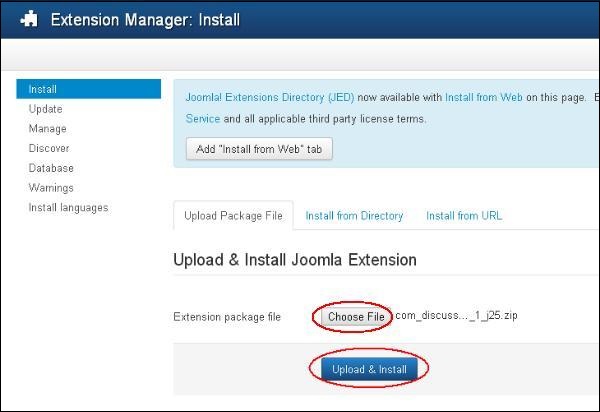
Step 3 − Joomla starts installing the Forum extension for your site. After the installation is complete, you get the screen below showing the success message.
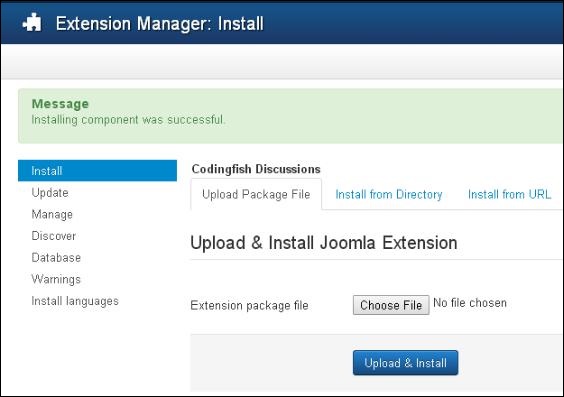
Step 4 − Click on Menus → Main Menu → Add New Menu Item option in Joomla.
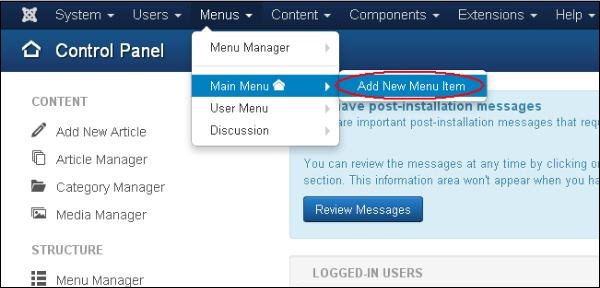
Step 5 − In Add New Menu Item page, specify title in the Menu Title. Click on the Select button to choose the Forum extension for your website.
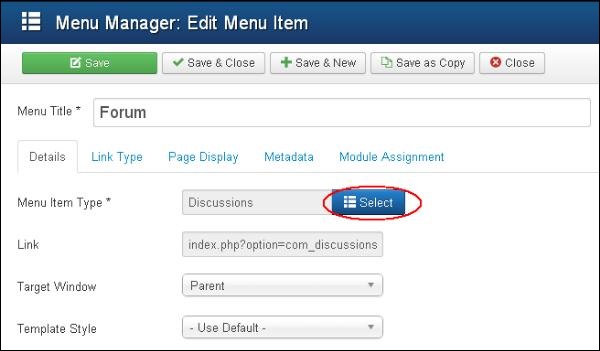
Step 6 − Click on the Discussion and choose the Discussion discussion index views.
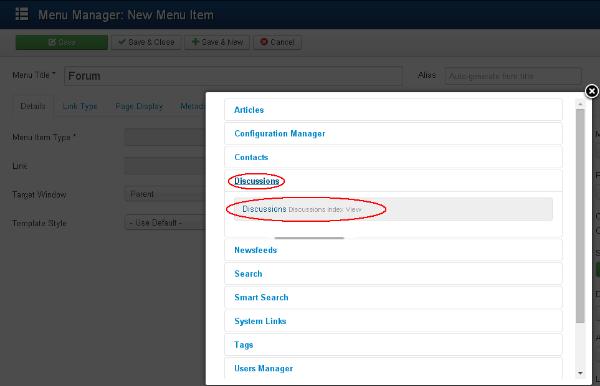
Step 7 − Open your website which contains the Forum menu as shown in the screen below.
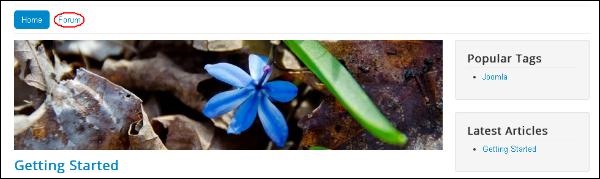
Toolbar
Given below are few details about the toolbars present in Forum.
Save − Saves your forums.
Save & Close − Saves the forums and closes the current screen.
Save & New − Saves the forums and opens a new create forum screen.
Cancel − Cancels the created forums in Joomla.
Joomla - Adding Web Links
In this chapter, we will study about Adding Web Links in Joomla. It allows you to insert, remove and edit the links to another webpage in Joomla.
Adding Weblinks
Following are the simple steps to add Weblinks in Joomla −
Step 1 − Click Components → Weblinks → Links in Joomla administrator. After clicking on Links, you will get the following screen.
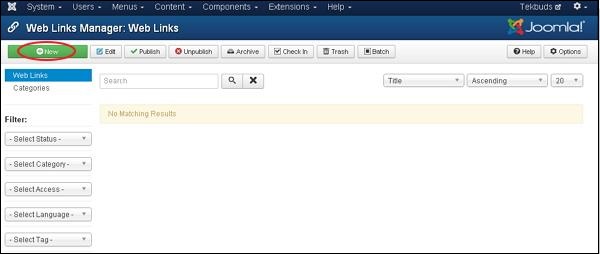
Step 2 − Next, click on New button, you will get the following screen.
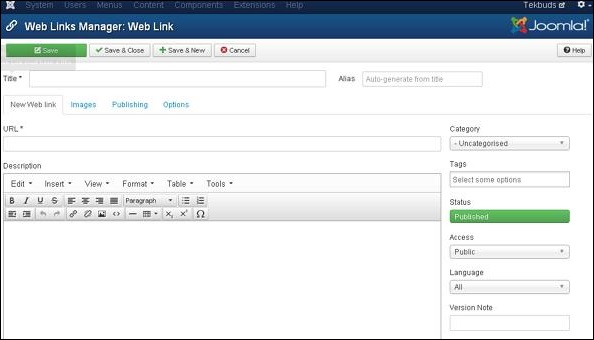
It is the basic editor page for the Web Link Manager. We have already explained about the editor in detail in the chapter Joomla - Adding Content. Here there are different tabs present. By default, the New Web Link tab is displayed.
URL − Enter the URL link, after saving, it gets converted to Punycode.
Step 3 − In Images tab, you will get the following screen.
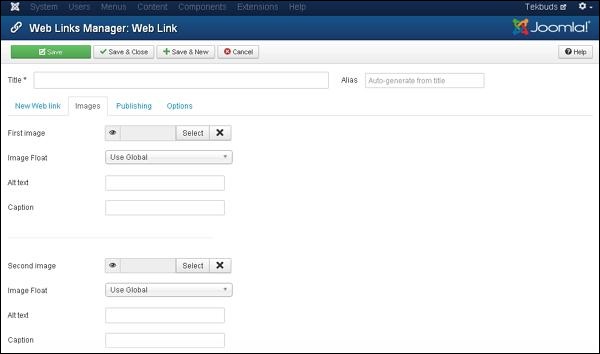
The following fields are present on the Images tab −
First image − Click on the Select button to select an image to display with an item on a web page.
Image Float − Sets place for the image i.e. Use Global, Right, Left and None respectively.
Alt text − Alternative text is present without access to images.
Caption − Entered text will display below the image.
Second image − Click on the Select button to select the second image to display with an item on a web page.
Image Float − Sets place for the image i.e. Use Global, Right, Left and None respectively.
Alt text − Alternative text is present without access to images.
Caption − Entered text will display the below image.
Step 4 − Click on Publishing tab, you will get the following screen.
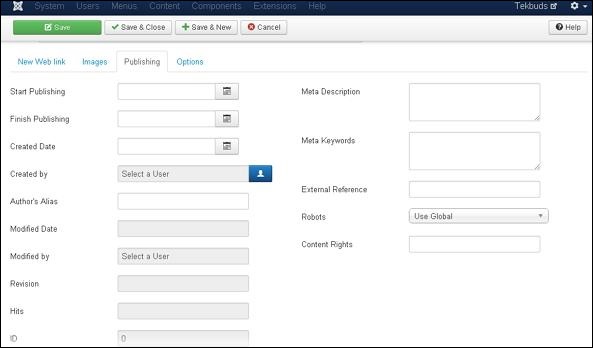
The following details are present on the publishing tab −
Start Publishing − It indicates the date on which the Weblinks are to be published on the web page.
Finish Publishing − It indicates the date on which the Weblinks are to be stopped from being published on the web page.
Created Date − It indicates the created date of the Weblinks.
Created by − It indicates the name of the user who has created the Weblinks.
Author's Alias − It indicates the name of the Author's Alias who has created the things required in Weblinks.
Modified Date − It indicates the last modified date of the Weblinks.
Modified by − It indicates the name of the user who has last modified the Weblinks.
Revision − It indicates the number of revisions for the Weblinks.
Hits − It indicates the number of times the Weblinks have been viewed.
ID − It indicates the unique identification number assigned to the Weblinks automatically.
Meta Description − It specifies the detail description of the page.
Meta Keywords − It specifies the different Meta keywords and it should be represented either by lowercase or uppercase.
External Reference − It specifies to use the external reference.
Robots − It specifies the instructions to the user to browse the web page.
Content Rights − It specifies the rights of the content so that others can use it.
Step 5 − After clicking on the Options tab, you will get the following screen.

The following details are present on the Options tab −
Target − It is used to open a Weblink with either of the commands − Use Global, Open in the parent window, Open in the new window, Open in the popup and Modal.
Width − Sets the width of modal window.
Height − Sets the height of modal window.
Count Clicks − It counts the number of Weblinks that has been opened.
Toolbar
Following are the toolbar options in Adding Weblinks −
Save − Saves your Weblink.
Save & Close − Saves the Weblink and closes the current screen.
Save & New − Saves the Weblink and opens a new create Weblink screen.
Cancel − Cancels the created Weblink in Joomla.
Joomla - Plugin Manager
In this chapter, we will study about Plugin Manager in Joomla. It helps you enable and disable Joomla Plugins. This adds the unique features to an existing web site.
Joomla Plugin Manager
Following are the simple steps to set or edit existing Joomla Plugins −
Step 1 − Click on Extension → Plugin Manager in Joomla administrator as shown below.
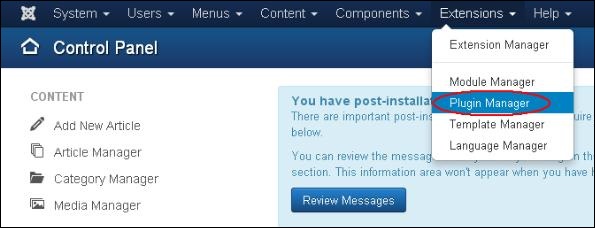
Step 2 − After clicking on the Plugin Manager, an existing Joomla plugins will be displayed as shown below.
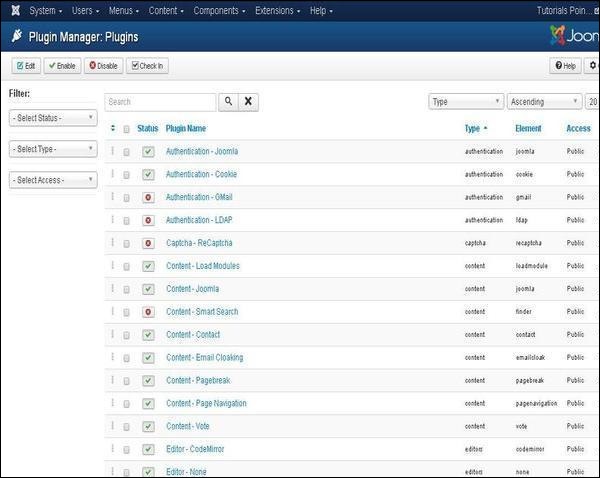
Toolbar
Following are the toolbar options in the Plugin −
Edit − Edit the plug-in.
Enable − Enable the plug-in to use on the website.
Disable − Disable the plug-in which are not necessary on the website.
Check In − Used to check in the plug-in and after completing the process displays the successful message.
Joomla - Extensions Manager
In this chapter, we will study about Extensions Manager in Joomla. We can install different types of extensions to extend the functionality of the site.
Joomla Extensions Manager
Following are the simple steps used to set the Joomla Extensions Manager.
Step 1 − Click on Install Extensions option in Joomla.

Step 2 − Click on Choose File button and choose the extension forum which you have downloaded to include on your web site. Click on Upload & Install button.
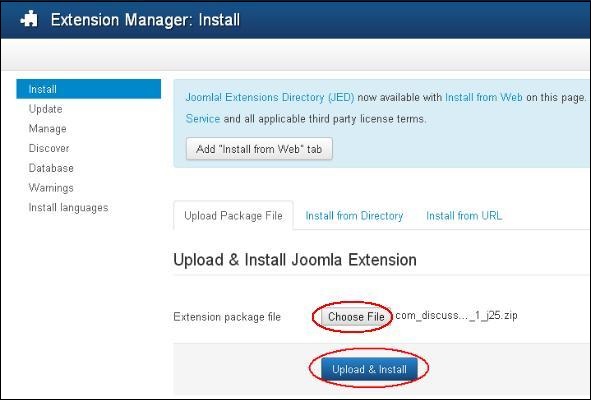
Step 3 − Joomla starts installing the Forum extension for your site. After completing the installation, you will get the successful installation message as shown below.
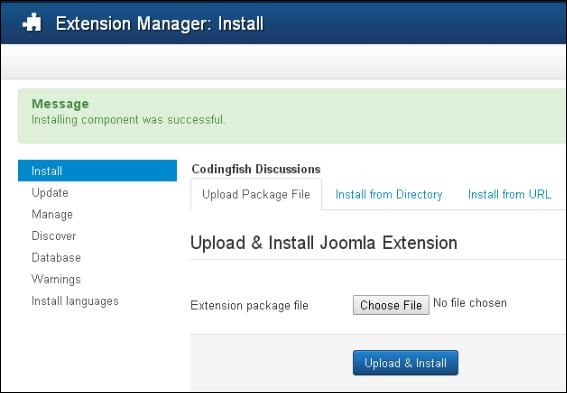
Step 4 − It is also possible to install the extensions directly from the web, select the extension that you want to add on your website and click on Install button.
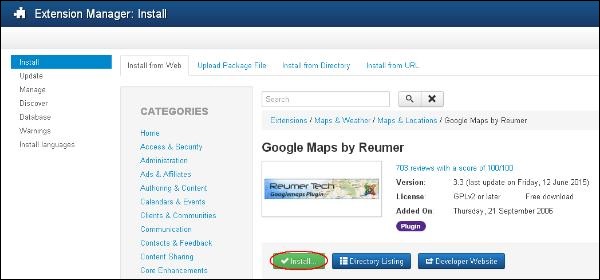
Joomla - Website Backup
In this chapter, we will study about Website backup in Joomla. It allows backup of files, folders and re-opens it in Joomla.
Website Backup
Following are the simple steps used to backup the website in Joomla −
Step 1 − Click on System → Global Configuration in Joomla administrator. You will get the following screen.
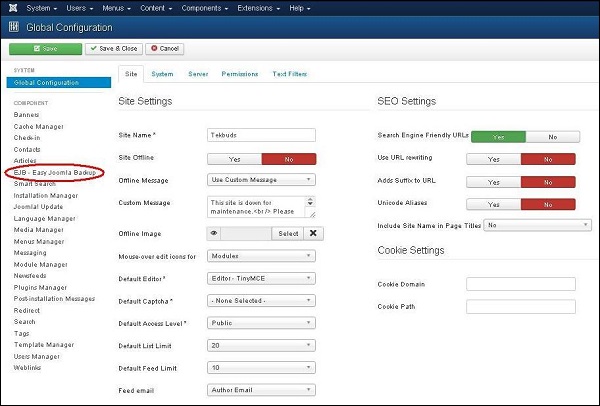
Step 2 − Next, click on EJB - Easy Joomla Backup at the left sidebar. You get a basic editor page for Joomla Backup. Here by default, the Component tab is displayed.
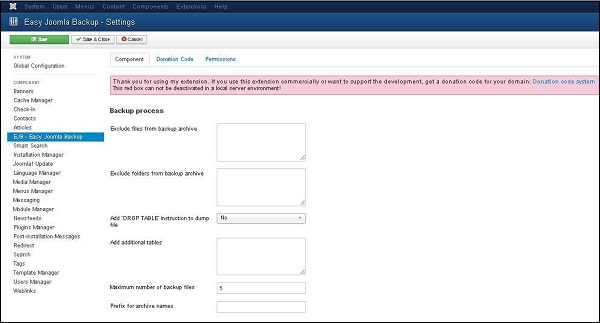
Below we have mentioned the details of the fields present in the Component tab on the page −
Exclude files from backup archive − It indicates the name of the files with the path address to be excluded from a backup archive.
Exclude folders from backup archive − It indicates the name of the folders with the path address to be excluded from a backup archive.
Add 'DROP TABLE' instruction to dump file − It indicates to add drop table instruction to dump files without deleting the tables by selecting either (Yes/No).
Add additional tables − It indicates to add additional tables, but it should not have the same prefix.
Maximum number of backup files − It indicates the maximum number of backup files.
Prefix for archive names − It indicates to use prefixes for archive names of backup file.
Step 3 − After clicking on Permissions tab, you will get the following screen.
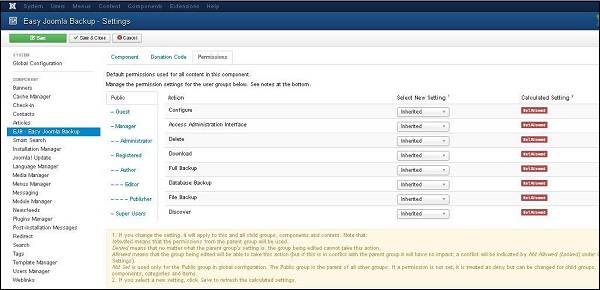
Following are the details that are present on the Permissions tab −
Configure − It allows the user to edit the user option.
Access Administration Interface − It allows the users to access the administration interface.
Delete − It allows the user in group to delete the content present in the extension.
Download − It allows the user to download the backup archive file.
Full Backup − It allows the user to create full backup file permission.
Database Backup − It allows the user to create database backup.
File Backup − It allows the user to permit creation of file backup.
Discover − It allows the user to discover backup files or new entries into the database.
Toolbar
Following are the toolbar options in the Website Backup screen −
Save − Saves your Backup of website.
Save & Close − Saves the Backup of website and closes the current screen.
Cancel − Cancels the created Backup of website in Joomla.
Joomla - Website SEO
In this chapter, we will study about Website SEO in Joomla. SEO (Search Engine Optimization) is about optimizing a website for search engine. It helps search engines find and rank your site higher than the other sites in response to a search query.
Joomla Website SEO
Following are the simple steps used to set the Joomla Website SEO −
Step 1 − Click on System → Global Configuration in Joomla administrator. By default Site tab opens up as shown below.
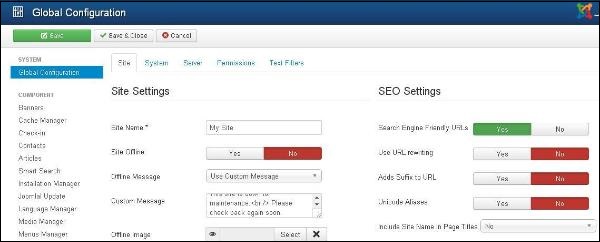
Following are the details of the fields present in the SEO Setting.
Search Engine Friendly URLs − Optimizing the URL's to the search engine.
Use URL rewriting − Selecting the server, which rewrites the URL's to meet a specific condition.
Adds Suffix to URL − Based on the document type the suffix to the URL is added.
Unicode Aliases − It selects between the transliteration and Unicode aliases.
Include Site Name in Page Titles − Provide your site name on all pages at the beginning or end of the page.
Toolbar
Following are the toolbar options in SEO −
Save − Saves your SEO Setting.
Save & Close − Saves the SEO Setting and closes the current screen.
Cancel − Cancels the SEO Setting in Joomla.