- GWT Tutorial
- GWT - Home
- GWT - Overview
- GWT - Environment Setup
- GWT - Applications
- GWT - Create Application
- GWT - Deploy Application
- GWT - Style with CSS
- GWT - Basic Widgets
- GWT - Form Widgets
- GWT - Complex widgets
- GWT - Layout Panels
- GWT - Event Handling
- GWT - Custom Widgets
- GWT - UIBinder
- GWT - RPC Communication
- GWT - JUnit Integration
- GWT - Debugging Application
- GWT - Internationalization
- GWT - History Class
- GWT - Bookmark Support
- GWT - Logging Framework
- GWT Useful Resources
- GWT - Questions and Answers
- GWT - Quick Guide
- GWT - Useful Resources
- GWT - Discussion
GWT - Internationalization
GWT provides three ways to internationalize a GWT application, We'll demonstrate use of Static String Internationalization being most commonly used among projects.
| Sr.No. | Technique & Description |
|---|---|
| 1 |
Static String Internationalization This technique is most prevalent and requires very little overhead at runtime; is a very efficient technique for translating both constant and parameterized strings;simplest to implement. Static string internationalization uses standard Java properties files to store translated strings and parameterized messages, and strongly-typed Java interfaces are created to retrieve their values. |
| 2 |
Dynamic String Internationalization This technique is very flexible but slower than static string internationalization. Host page contains the localized strings therefore, applications are not required to be recompiled when we add a new locale. If GWT application is to be integrated with an existing server-side localization system, then this technique is to be used. |
| 3 |
Localizable Interface This technique is the most powerful among the three techniques. Implementing Localizable allows us to create localized versions of custom types. It's an advanced internationalization technique. |
Workflow of Internationalizing a GWT Application
Step 1 - Create properties files
Create properties file containing the messages to be used in the application. We've created a HelloWorldMessages.properties file in our example.
enterName = Enter your name
clickMe = Click Me
applicationTitle = Application Internationalization Demonstration
greeting = Hello {0}
Create properties files containing translated values specific to locale. We've created a HelloWorldMessages_de.properties file in our example. This file contains translations in german language. _de specifies the german locale and we're going to support german language in our application.
If you are creating properties file using Eclipse then change the encoding of the file to UTF-8.Select the file and then right-click in it to open its properties window.Select Text file encoding as Other UTF-8. Apply and Save the change.
enterName = Geben Sie Ihren Namen
clickMe = Klick mich
applicationTitle = Anwendung Internationalisierung Demonstration
greeting = Hallo {0}
Step 2 - Add i18n module to Module Descriptor XML File
Update module file HelloWorld.gwt.xml to include support for german locale
<?xml version = "1.0" encoding = "UTF-8"?>
<module rename-to = 'helloworld'>
   ...
   <extend-property name = "locale" values="de" />
   ...
</module>
Step 3 - Create Interface equivalent to properties file
Create HelloWorldMessages.java interface by extending Messages interface of GWT to include support for internalization. It should contain same method names as keys in properties file. Place holder would be replaced with String argument.
public interface HelloWorldMessages extends Messages {

   @DefaultMessage("Enter your name")
   String enterName();

   @DefaultMessage("Click Me")
   String clickMe();

   @DefaultMessage("Application Internalization Demonstration")
   String applicationTitle();

   @DefaultMessage("Hello {0}")
   String greeting(String name);
}
Step 4 - Use Message Interface in UI component.
Use the object of HelloWorldMessages in HelloWorld to get the messages.
public class HelloWorld implements EntryPoint {

   /* create an object of HelloWorldMessages interface
      using GWT.create() method */
   private HelloWorldMessages messages =
   GWT.create(HelloWorldMessages.class);

   public void onModuleLoad() {
   ...
      Label titleLabel = new Label(messages.applicationTitle());
      //Add title to the application
      RootPanel.get("gwtAppTitle").add(titleLabel);
   ...
   }
}
Internationalization - Complete Example
This example will take you through simple steps to demonstrate Internationalization capability of a GWT application.
Follow the following steps to update the GWT application we created in GWT - Create Application chapter −
| Step | Description |
|---|---|
| 1 | Create a project with a name HelloWorld under a package com.tutorialspoint as explained in the GWT - Create Application chapter. |
| 2 | Modify HelloWorld.gwt.xml, HelloWorld.css, HelloWorld.html and HelloWorld.java as explained below. Keep rest of the files unchanged. |
| 3 | Compile and run the application to verify the result of the implemented logic. |
Following is the content of the modified module descriptor src/com.tutorialspoint/HelloWorld.gwt.xml.
<?xml version = "1.0" encoding = "UTF-8"?>
<module rename-to = 'helloworld'>
  <!-- Inherit the core Web Toolkit stuff.                        -->
  <inherits name = 'com.google.gwt.user.User'/>

  <!-- Inherit the default GWT style sheet.                       -->
  <inherits name = 'com.google.gwt.user.theme.clean.Clean'/>

  <!-- Specify the app entry point class.                         -->
  <entry-point class = 'com.tutorialspoint.client.HelloWorld'/>
  <extend-property name = "locale" values="de" />
  <!-- Specify the paths for translatable code                    -->
  <source path = 'client'/>
  <source path = 'shared'/>

</module>
Following is the content of the modified Style Sheet file war/HelloWorld.css.
body {
   text-align: center;
   font-family: verdana, sans-serif;
}

h1 {
   font-size: 2em;
   font-weight: bold;
   color: #777777;
   margin: 40px 0px 70px;
   text-align: center;
}
Following is the content of the modified HTML host file war/HelloWorld.html.
<html>
   <head>
      <title>Hello World</title>
      <link rel = "stylesheet" href = "HelloWorld.css"/>
      <script language = "javascript" src = "helloworld/helloworld.nocache.js">
      </script>
   </head>
   <body>

      <h1 id = "gwtAppTitle"></h1>
      <div id = "gwtContainer"></div>

   </body>
</html>
Now create HelloWorldMessages.properties file in the src/com.tutorialspoint/client package and place the following contents in it
enterName = Enter your name
clickMe = Click Me
applicationTitle = Application Internationalization Demonstration
greeting = Hello {0}
Now create HelloWorldMessages_de.properties file in the src/com.tutorialspoint/client package and place the following contents in it
enterName = Geben Sie Ihren Namen
clickMe = Klick mich
applicationTitle = Anwendung Internationalisierung Demonstration
greeting = Hallo {0}
Now create HelloWorldMessages.java class in the src/com.tutorialspoint/client package and place the following contents in it
package com.tutorialspoint.client;
import com.google.gwt.i18n.client.Messages;

public interface HelloWorldMessages extends Messages {
   @DefaultMessage("Enter your name")
   String enterName();

   @DefaultMessage("Click Me")
   String clickMe();

   @DefaultMessage("Application Internationalization Demonstration")
   String applicationTitle();

   @DefaultMessage("Hello {0}")
   String greeting(String name);
}
Let us have following content of Java file src/com.tutorialspoint/HelloWorld.java using which we will demonstrate Internationalization capability of GWT Code.
package com.tutorialspoint.client;

import com.google.gwt.core.client.EntryPoint;
import com.google.gwt.core.client.GWT;

import com.google.gwt.event.dom.client.ClickEvent;
import com.google.gwt.event.dom.client.ClickHandler;
import com.google.gwt.event.dom.client.KeyCodes;
import com.google.gwt.event.dom.client.KeyUpEvent;
import com.google.gwt.event.dom.client.KeyUpHandler;

import com.google.gwt.user.client.Window;
import com.google.gwt.user.client.ui.Button;
import com.google.gwt.user.client.ui.DecoratorPanel;
import com.google.gwt.user.client.ui.HasHorizontalAlignment;
import com.google.gwt.user.client.ui.HorizontalPanel;
import com.google.gwt.user.client.ui.Label;
import com.google.gwt.user.client.ui.RootPanel;
import com.google.gwt.user.client.ui.TextBox;
import com.google.gwt.user.client.ui.VerticalPanel;

public class HelloWorld implements EntryPoint {

   /* create an object of HelloWorldMessages interface
      using GWT.create() method */
   private HelloWorldMessages messages =
   GWT.create(HelloWorldMessages.class);

   public void onModuleLoad() {
      /*create UI */
      final TextBox txtName = new TextBox();
      txtName.setWidth("200");
      txtName.addKeyUpHandler(new KeyUpHandler() {
         @Override
         public void onKeyUp(KeyUpEvent event) {
            if(event.getNativeKeyCode() == KeyCodes.KEY_ENTER){
               Window.alert(getGreeting(txtName.getValue()));
            }
         }
      });
      Label lblName = new Label(messages.enterName() + ": ");

      Button buttonMessage = new Button(messages.clickMe() + "!");

      buttonMessage.addClickHandler(new ClickHandler() {
         @Override
         public void onClick(ClickEvent event) {
            Window.alert(getGreeting(txtName.getValue()));
         }
      });

      HorizontalPanel hPanel = new HorizontalPanel();
      hPanel.add(lblName);
      hPanel.add(txtName);

      VerticalPanel vPanel = new VerticalPanel();
      vPanel.setSpacing(10);
      vPanel.add(hPanel);
      vPanel.add(buttonMessage);
      vPanel.setCellHorizontalAlignment(buttonMessage,
      HasHorizontalAlignment.ALIGN_RIGHT);

      DecoratorPanel panel = new DecoratorPanel();
      panel.add(vPanel);
      Label titleLabel = new Label(messages.applicationTitle());
      //Add title to the application
      RootPanel.get("gwtAppTitle").add(titleLabel);
      // Add widgets to the root panel.
      RootPanel.get("gwtContainer").add(panel);
   }

   public String getGreeting(String name){
      return messages.greeting(name + "!");
   }
}
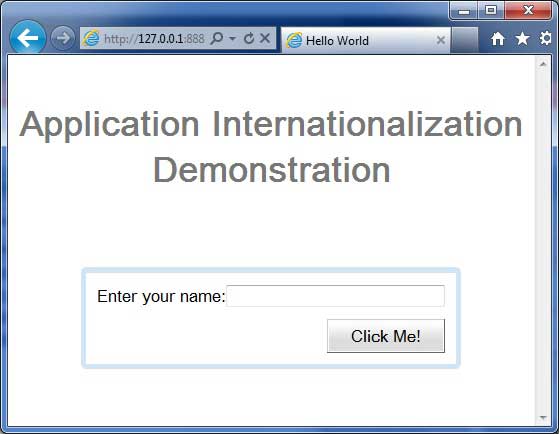
Once you are ready with all the changes done, let us compile and run the application in development mode as we did in GWT - Create Application chapter. If everything is fine with your application, this will produce following result −
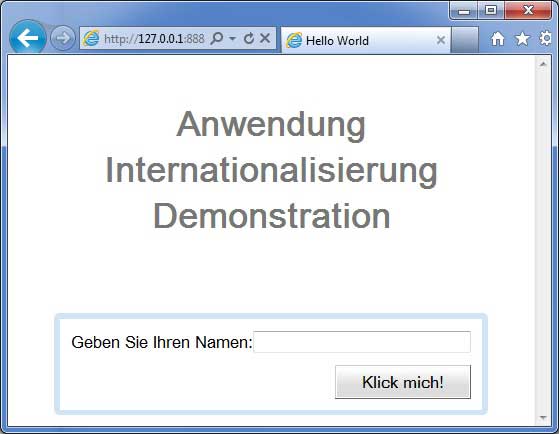
Now update the URL to contain the locale=de.Set URL − http://127.0.0.1:8888/HelloWorld.html?gwt.codesvr=127.0.0.1:9997&locale=de. If everything is fine with your application, this will produce following result −